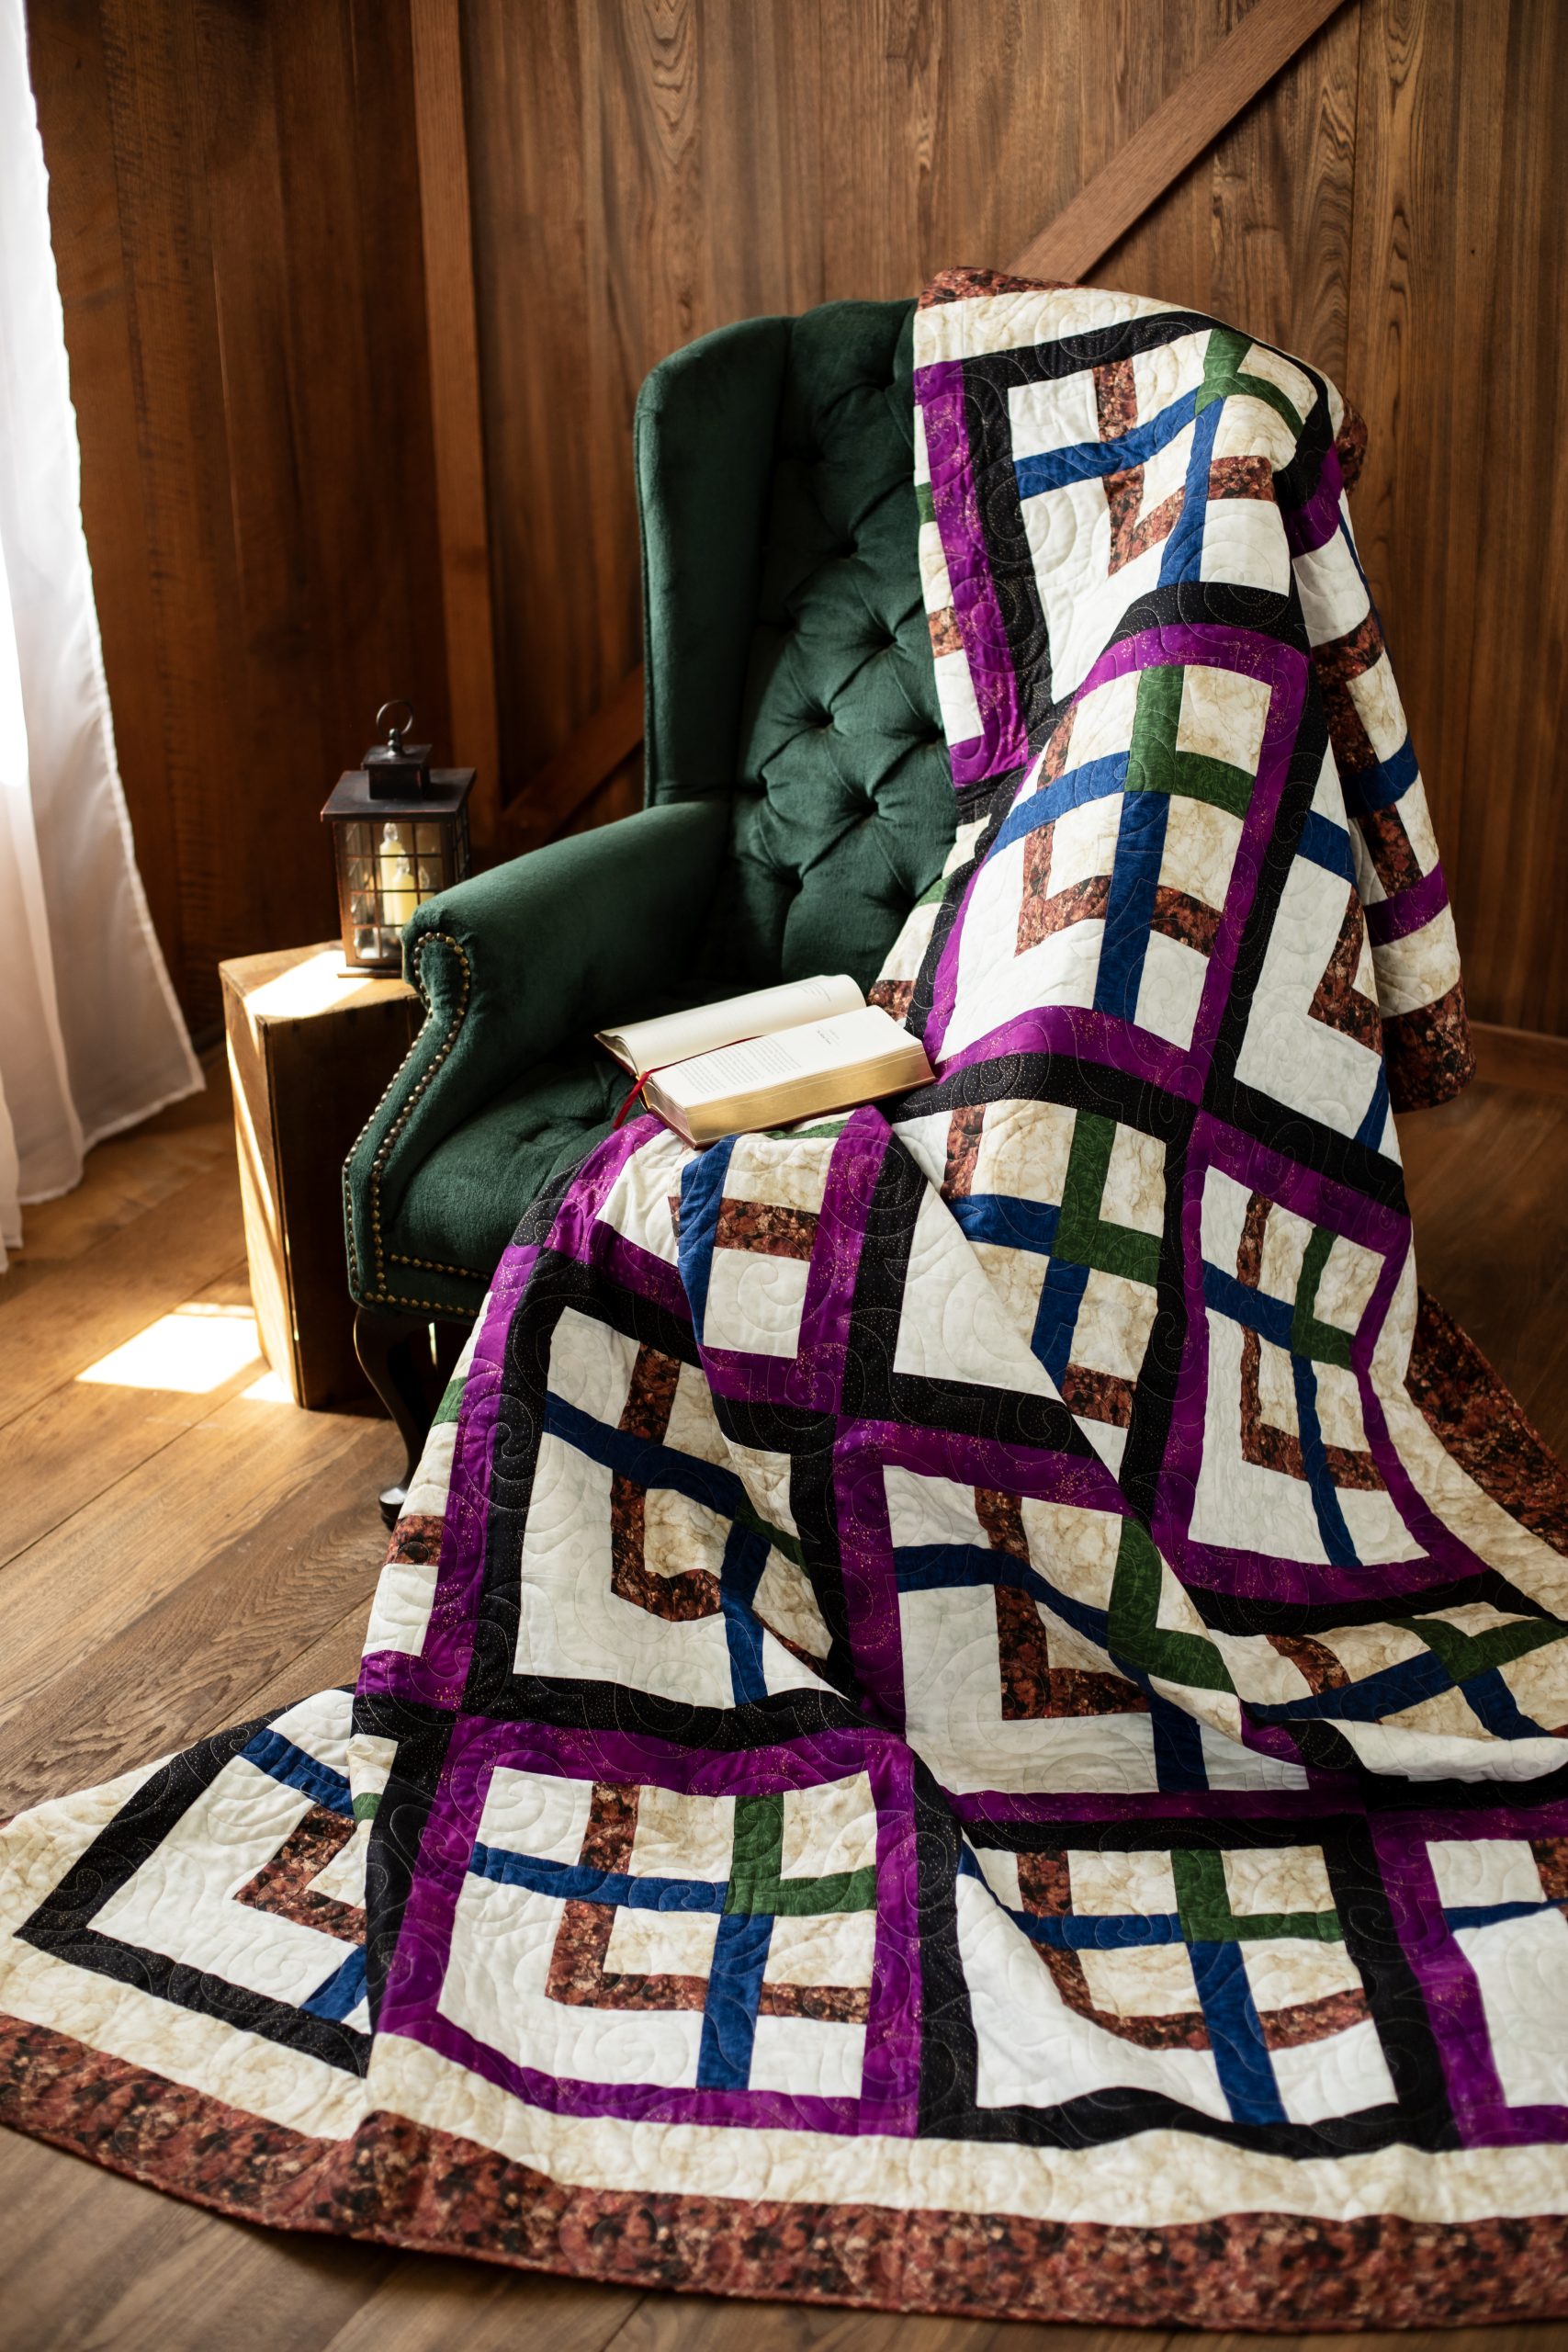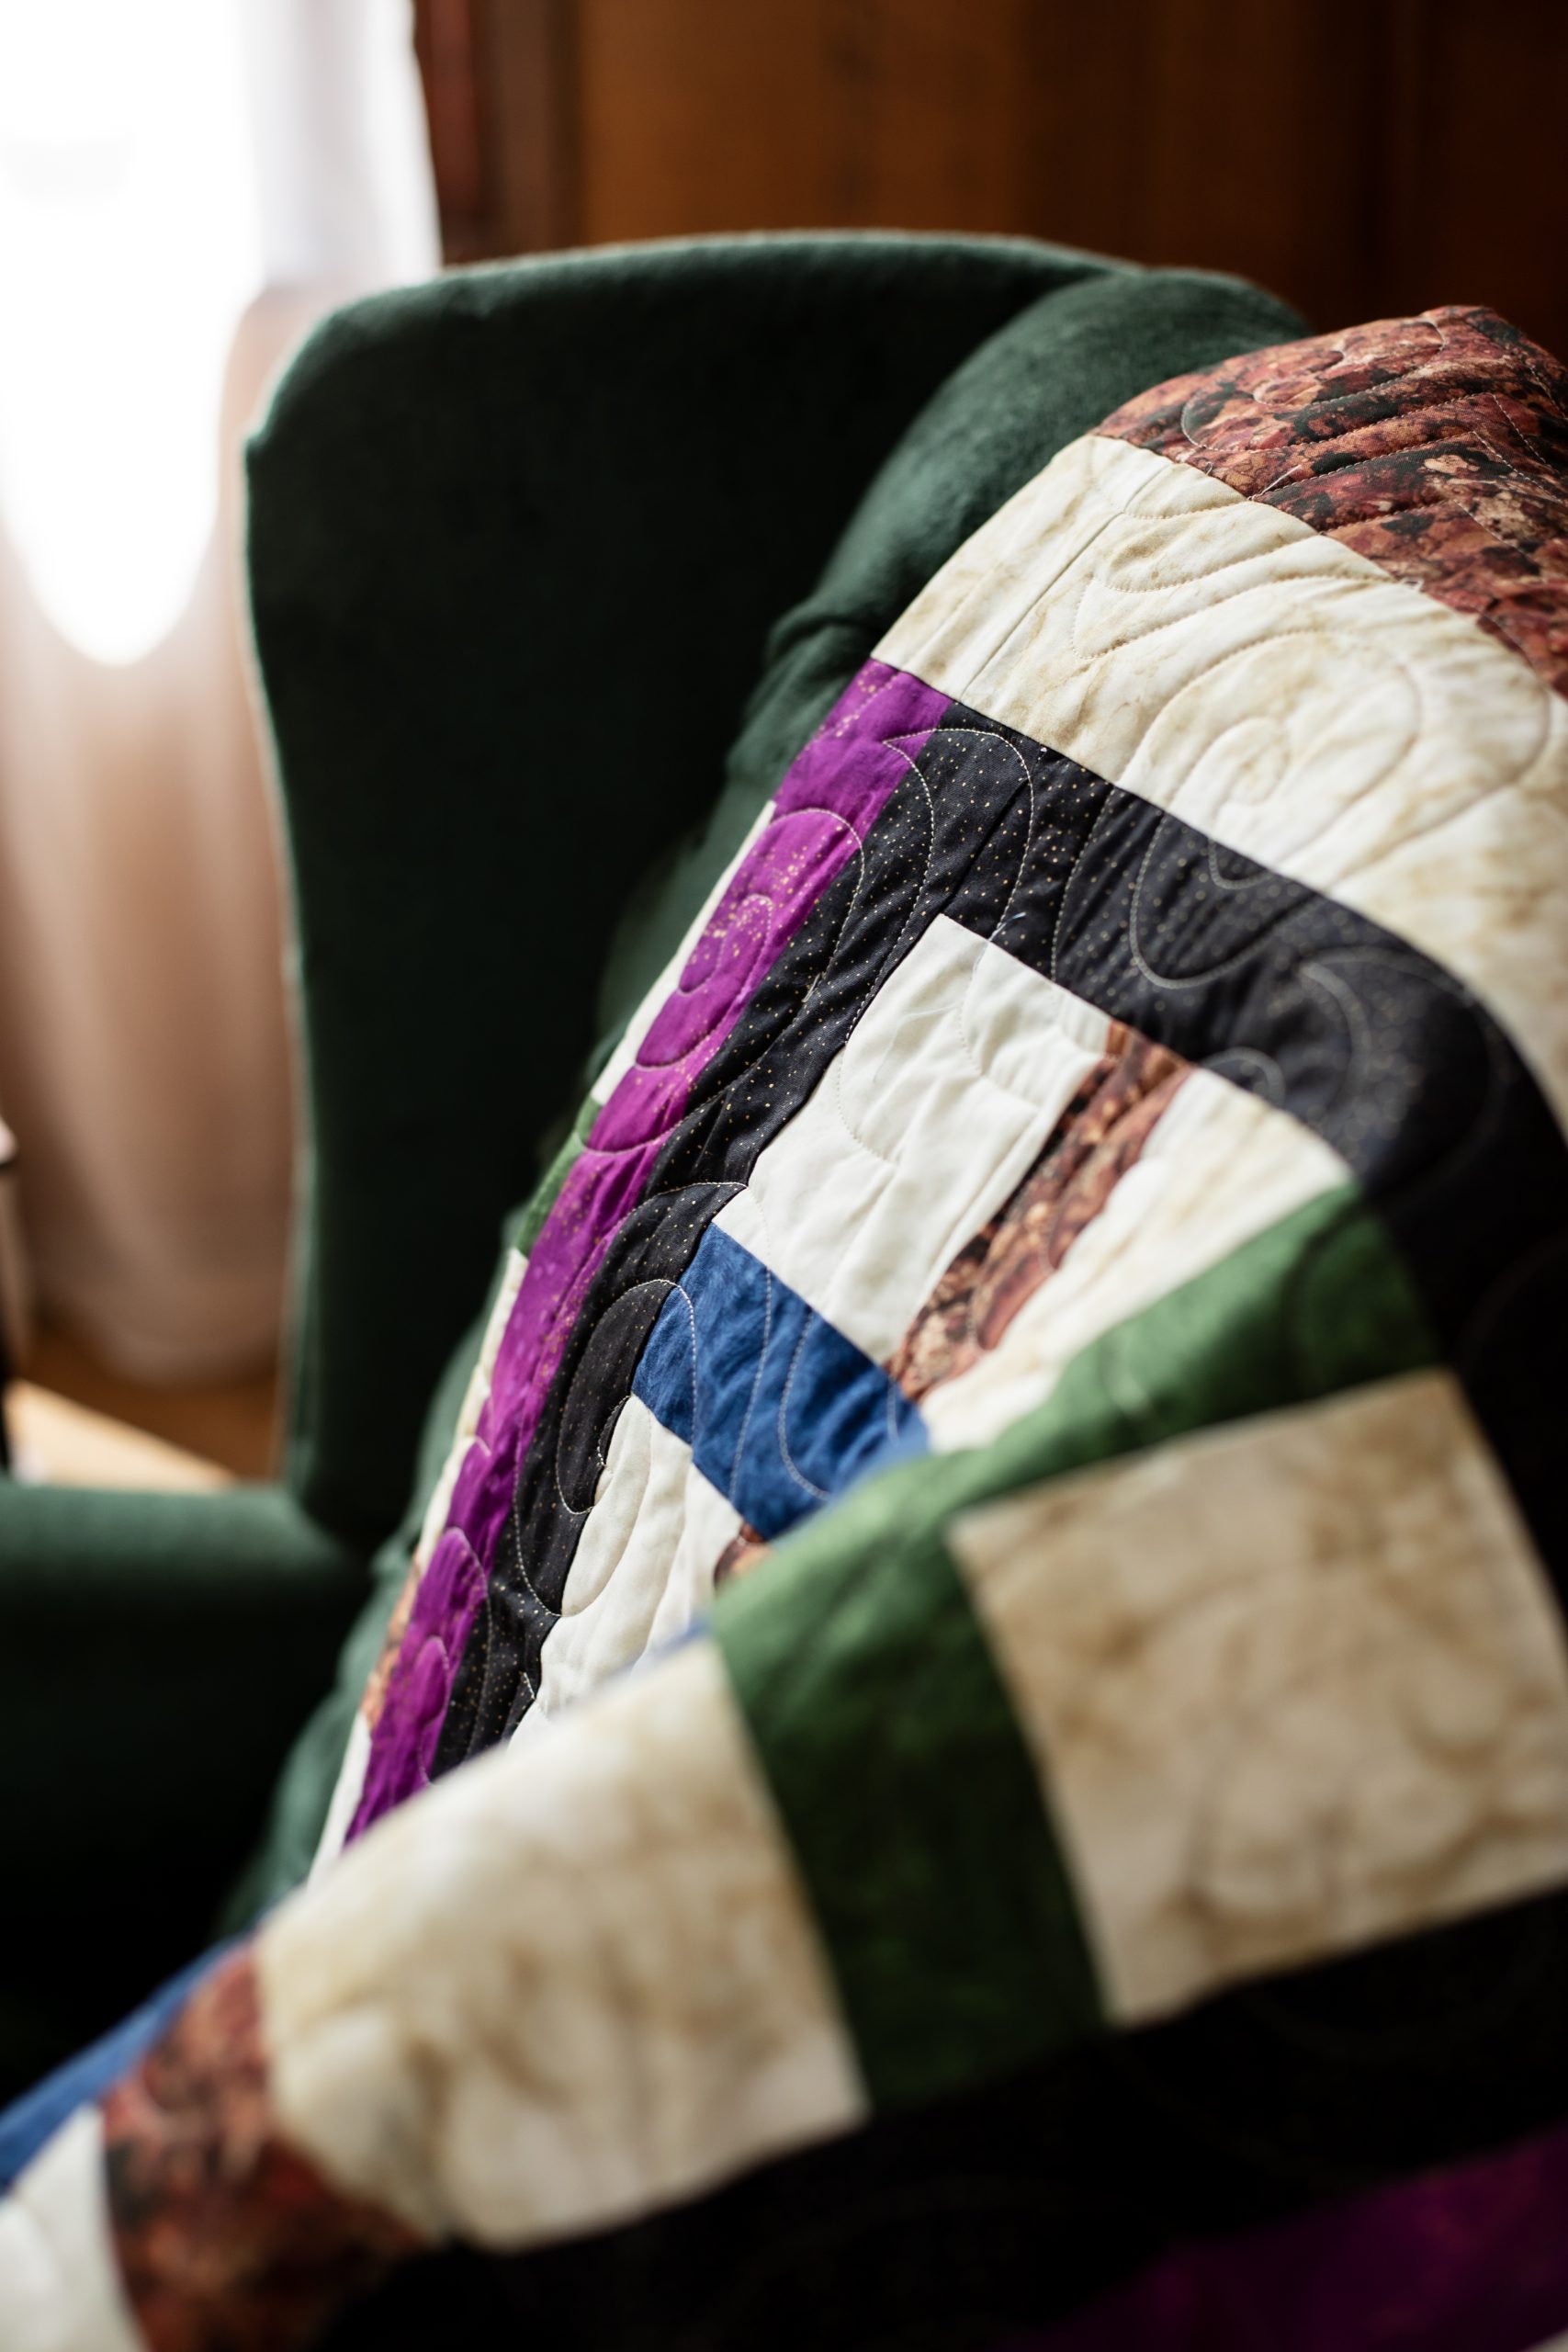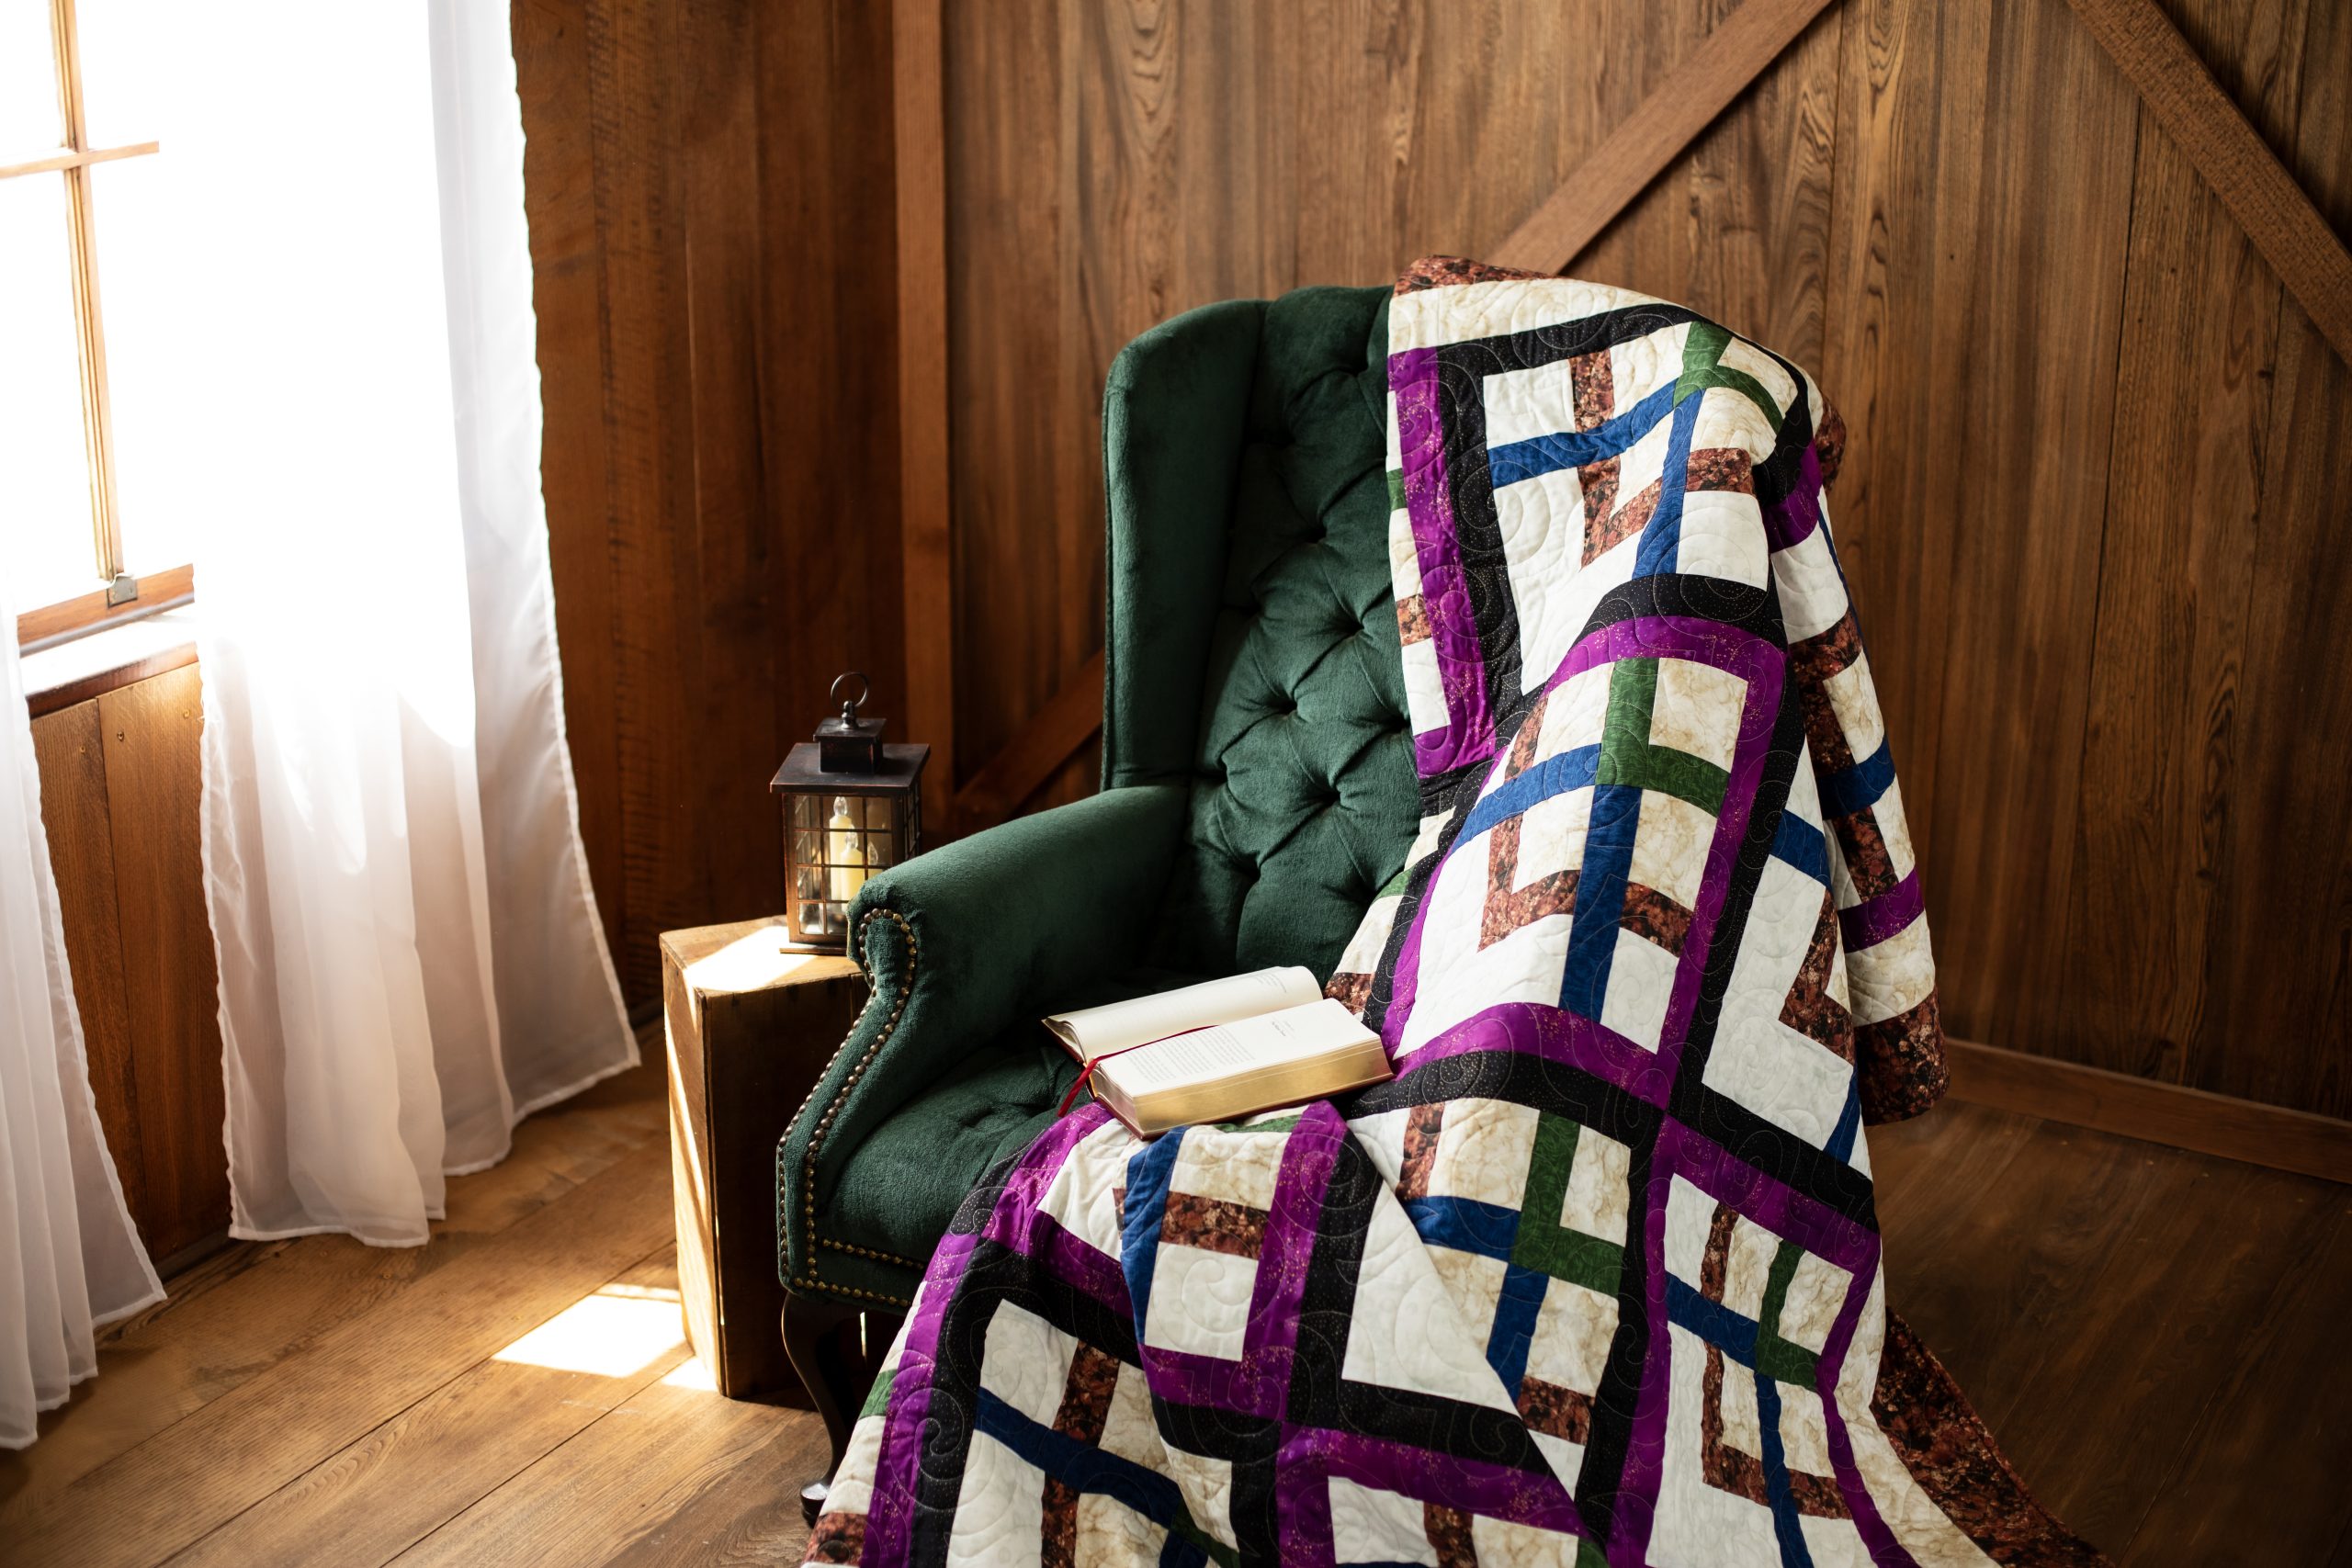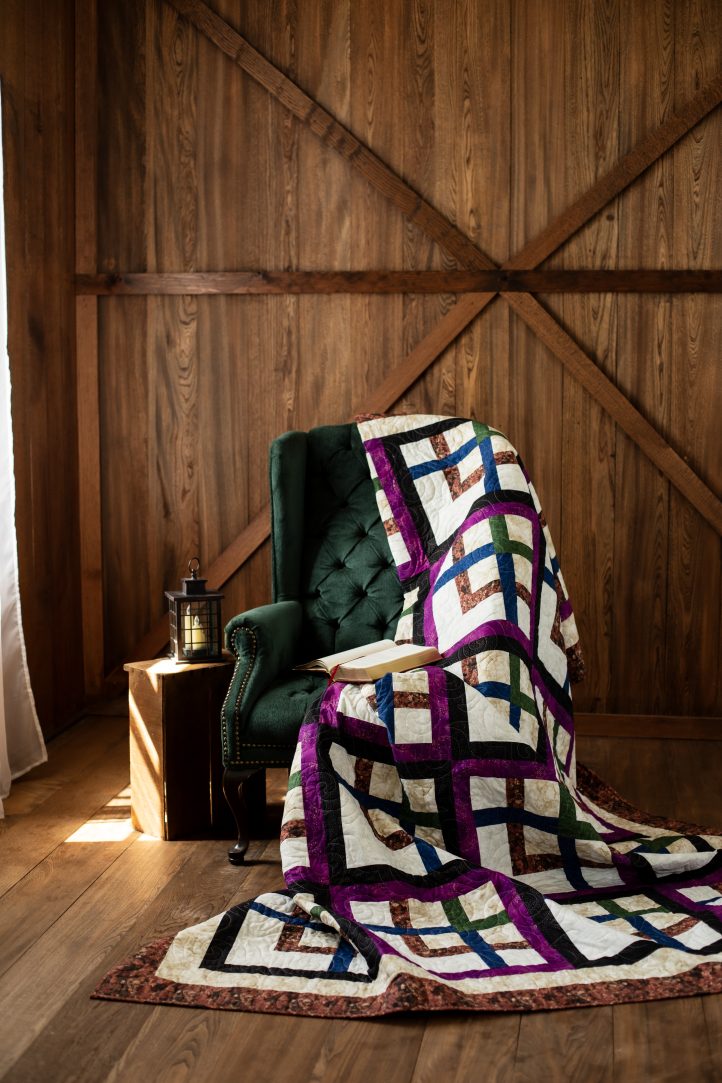
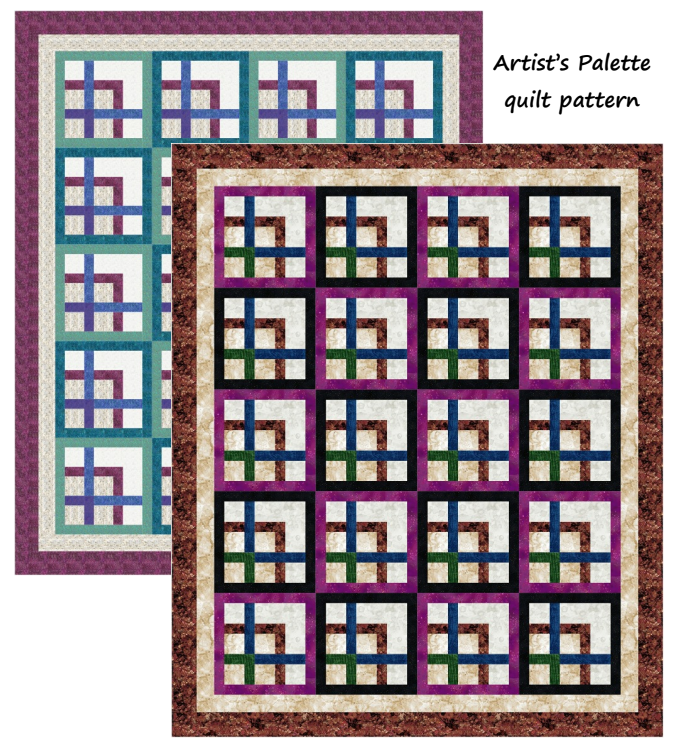
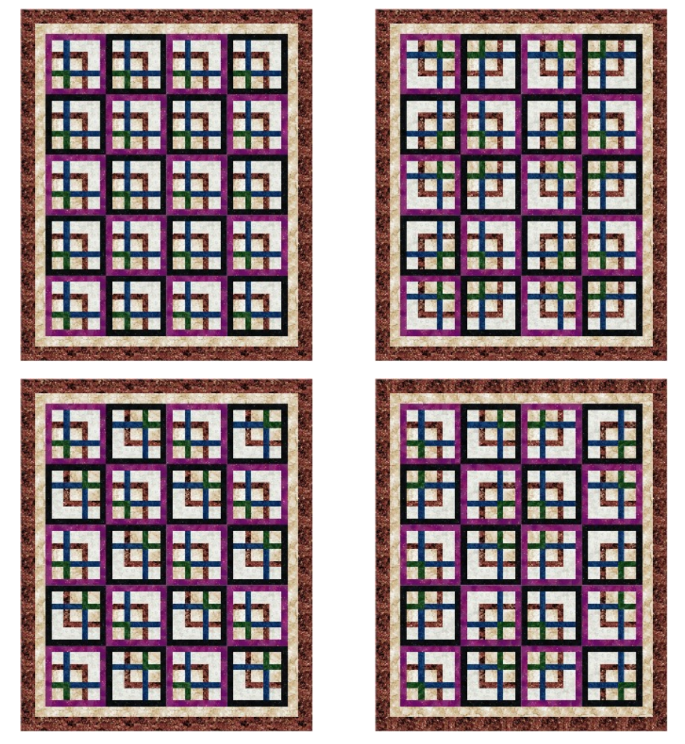
Sew your own elegant, striking quilt in deep jewel tones with this gorgeous pattern from Brenda Plaster. Finishing at 82 1/2” x 102”, this large bed quilt pattern features interlocking squares, and an inner and outer border in sophisticated neutrals. Explore exciting design possibilities by checking out the designer’s suggestions for different block orientations located at the end of the pattern.
Finished Size: 84-1/2” x 102”
Designer Notes:
- Please read pattern before starting your project.
- This pattern was tested and the quilt pieced and quilted by Jacci Schumaker, Sheila Doege, and Carol Sebald.
ADDITIONAL COLORWAYS:
The designer has provided fabric information for the samples shown!
The illustrated quilts use fabric from the Alcohol Inks, Painter’s Joy and Basics collections by Clothworks.
PATCH SUMMARY:
Note: Do not cut from this summary; see Fabric Requirements and Cuts below. Patch descriptions refer to fabric sizes/shapes used to construct patches, not the finished fabric sizes/shapes.
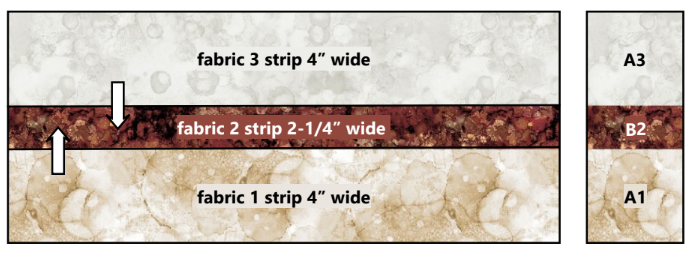
A: 4” square: 80 A1, 40 A3
B: 2-1/4” x 4” rectangle: 60 B2, 20 B5
C: 2-1/4” x 9-1/4” rectangle: 40 C4
D: 2-1/4” x 5-3/4” rectangle: 20 D2, 20 D5
E: 4” x 5-3/4” rectangle: 20 E3
F: 4” x 9-1/4” rectangle: 20 F3
G: 2-1/4” x 14-1/2” rectangle: 20 G6, 20 G7
H: 2-1/4” x 18” rectangle: 20 H6, 20 H7
Fabric estimates are based on useable fabric width (selvage to selvage) of 42”. Add yardage if you prewash your fabrics or are fussy-cutting.
Cuts across the width of fabric are indicated as WOF. Some cuts are lengthwise (parallel to selvage) to enable lengthwise border cuts; fabric does not stretch on the lengthwise grain, preventing distortion.
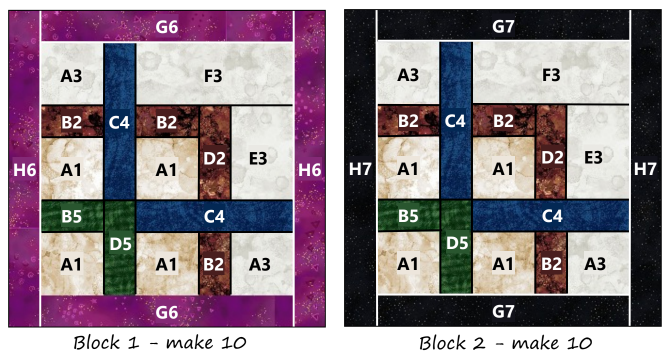
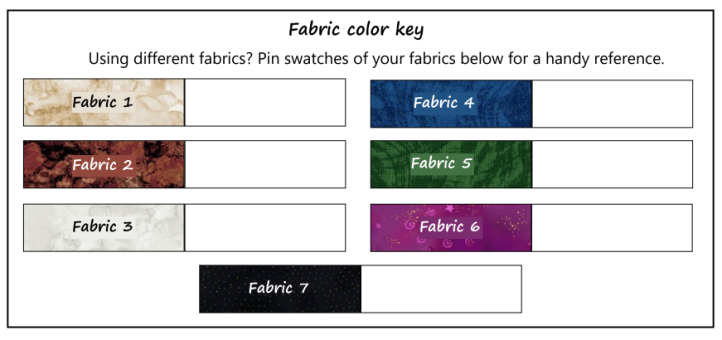
In the patch labels, the letter refers to the patch. The number refers to the fabric from which it is cut. For example, A1 is an A patch cut from Fabric 1.
Fabric Requirements and Cuts:
Fabric 1: 2 yards
- A1: Cut WOF [8] 4” strips.
- From remaining fabric, cut:
- Inner border: Cut lengthwise of fabric [9] 3-1/2” strips if sewing straight border seams, 10 if sewing bias border seams. (Straight seams are preferred for a border this wide.)
Fabric 2: 2-3/4 yards
- Cut fabric into 2 yards and 3/4 yard lengths.
- From 2 yards, cut:
- D2: Cut WOF [3] 2-1/4” strips.
- B2: Cut WOF [6] 2-1/4” strips.
- From remaining fabric, cut:
- Outer border: Cut lengthwise of fabric [8] 4-1/2” strips if sewing straight border seams, 9 if sewing bias border seams. (Straight seams are preferred for a border this wide.)
- From remaining fabric, cut:
- From 3/4 yard, cut:
- Binding: Cut enough 2-1/4” or 2-1/2” wide (your preference) bias or straight of grain strips to join and make about 383” binding.
- From 2 yards, cut:
Fabric 3: 1-1/2 yards
- A3: Cut WOF [4] 4” strips.
- F3: Cut WOF [5] 4” strips.
- From these, cut [20] 4” x 9-1/4” rectangles.
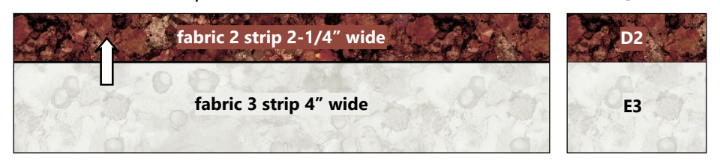
- E3: Cut WOF [3] 4” strips.
Fabric 4: 3/4 yard
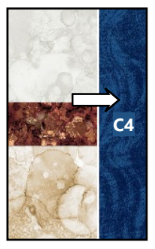
- C4: Cut WOF [10] 2-1/4” strips.
- From these, cut [40] 2-1/4” x 9-1/4” rectangles.
Fabric 5: 1/2 yard
- B5: Cut WOF [2] 2-1/4” strips.
- D5: Cut WOF [3] 2-1/4” strips.
- From these, cut [20] 2-1/4” x 5-3/4” rectangles.
Fabric 6: 1-1/4 yards
- H6: Cut lengthwise of fabric [10] 2-1/4” strips.
- From these, cut [20] 2-1/4” x 18” rectangles.
- G6: Cut lengthwise of fabric [7] 2-1/4” strips.
- From these, cut [20] 2-1/4” x 14-1/2” rectangles.
Fabric 7: 1-1/4 yards
- H7: Cut lengthwise of fabric [10] 2-1/4” strips.
- From these, cut [20] 2-1/4” x 18” rectangles.
- G7: Cut lengthwise of fabric [7] 2-1/4” strips.
- From these, cut [20] 2-1/4” x 14-1/2” rectangles.
Backing: 7 3/4 yards
- Backing 4” larger on all sides than the quilt top is recommended for longarm quilting (92-1/2” x 110”).
- Cut fabric into three equal lengths, join to make backing measuring 93” x 125” (width is more if fabric is more than 42” wide.) Remove selvage from seams to prevent puckering.
Piecing Instructions:
All seams are 1/4”. Press seams in direction of arrows in illustrations or as directed. You may need to re-orient some seams when joining blocks to enable them to nest. Or there’s the option of pressing seams open.
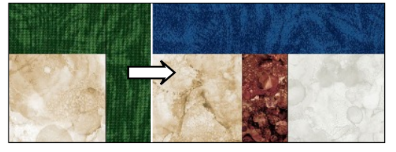
- Join fabric strips as shown. Sew 2 strip sets. Cut across strip sets at 4” intervals. Cut 20.

- Join fabric strips as shown. Sew 3 strip sets. Cut across strip sets at 5-3/4” intervals. Cut 20. Join these units to those made in Step 1 as shown to make [20] 9-1/4” x 5-3/4” rectangles.
- Join these units to those made in Step 1 as shown to make [20] 9-1/4” x 5-3/4” rectangles. Add F3 as shown to make [20] 9-1/4” x 9-1/4” squares.
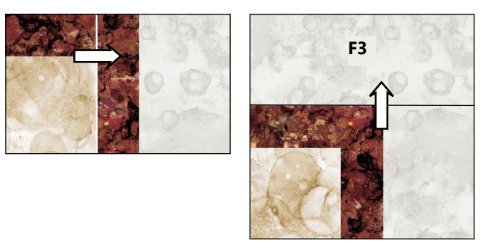
- Join these units to those made in Step 1 as shown to make [20] 9-1/4” x 5-3/4” rectangles. Add F3 as shown to make [20] 9-1/4” x 9-1/4” squares.
- Join fabric strips as shown. Sew 4 strip sets. Cut across strip sets at 4” intervals. Cut 40.
- Sew C4 to half the units made in Step 3 as shown to make [20] 5-3/4” x 9-1/4” rectangles.
- Join these with units made in Step 2 as shown to make [20] 14-1/2” x 9-1/4” rectangles.
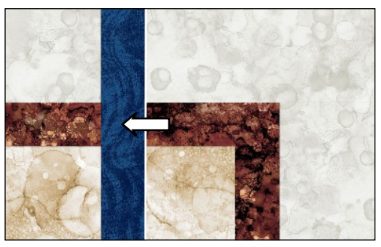
- Join these with units made in Step 2 as shown to make [20] 14-1/2” x 9-1/4” rectangles.
- Join fabric strips as shown. Sew 2 strip sets. Cut across strip sets at 4” intervals. Cut 20. Add D5 as shown to make [20] 5-3/4” x 5-3/4” squares.

- Sew C4 to remaining units made in Step 3 as shown to make [20] 5-3/4” x 9-1/4” rectangles.

- Join these units to those made in Step 5 as shown to make [20] 14-1/2” x 5-3/4” rectangles.
- Join these units to those made in Step 5 as shown to make [20] 14-1/2” x 5-3/4” rectangles.
- Join units made in Steps 4 and 6 as shown to make [20] 14-1/2” x 14-1/2” squares.
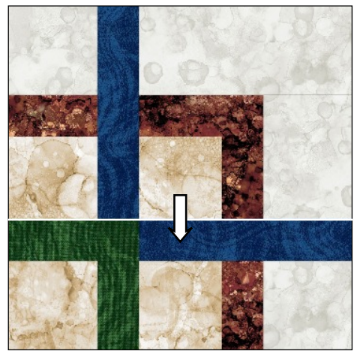
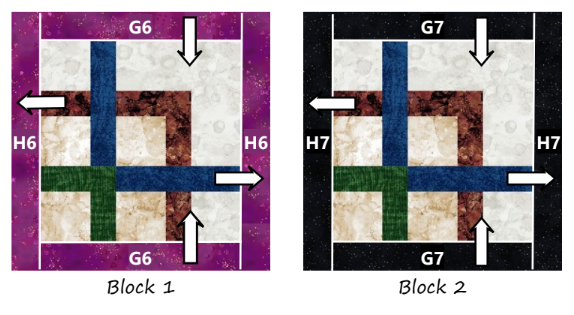
- Add G, then H patches as shown to complete blocks measuring 18” x 18” square.
- Alternating blocks and orienting them to make the preferred design (see below, join blocks in 4 rows of 5 blocks each).
- Join rows to complete quilt center.
- Press seams toward Block 1.
- Joining strips to make lengths needed:
- Measure quilt center lengthwise. Cut 2 inner border strips to this length. Sew to quilt sides.
- Measure quilt center crosswise. Cut 2 inner border strips to this length. Sew to quilt top and bottom.
- Add outer border in the same way.
- Press seams toward borders.
- Layer top, batting and backing. Quilt as desired. Bind quilt with Fabric 2 binding strip.
Design variations are possible by changing the blocks’ orientation:
This pattern was tested and the quilt pieced and quilted by Jacci Schumaker, Sheila Doege and Carol Sebald. Thank you!