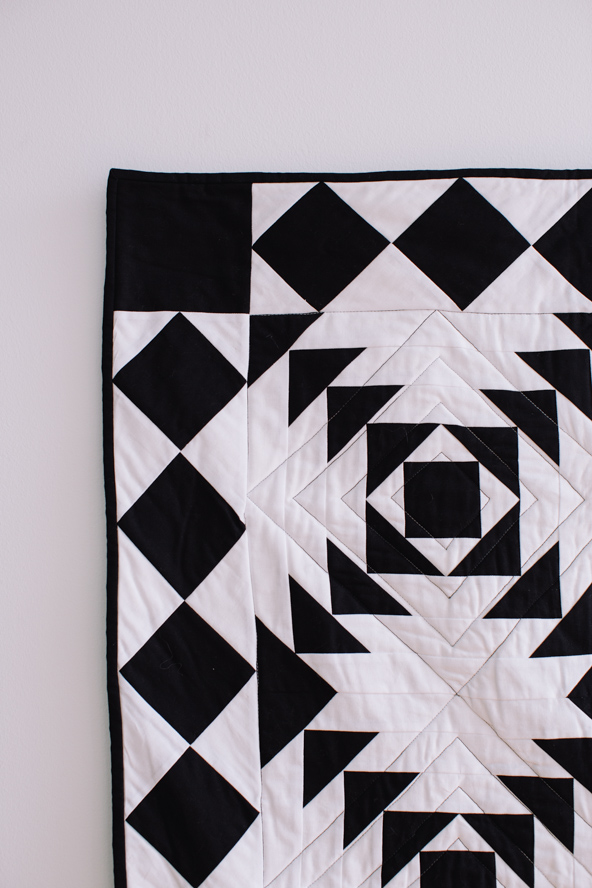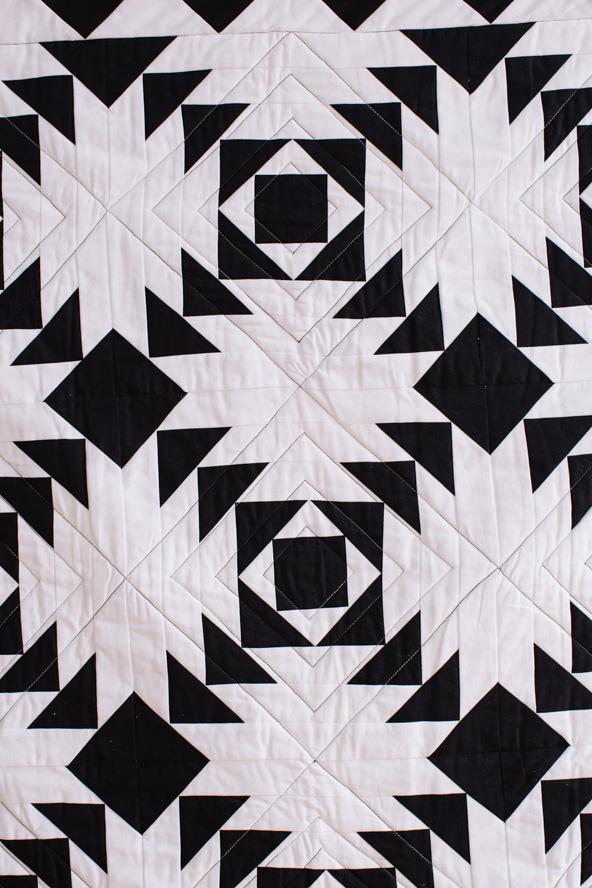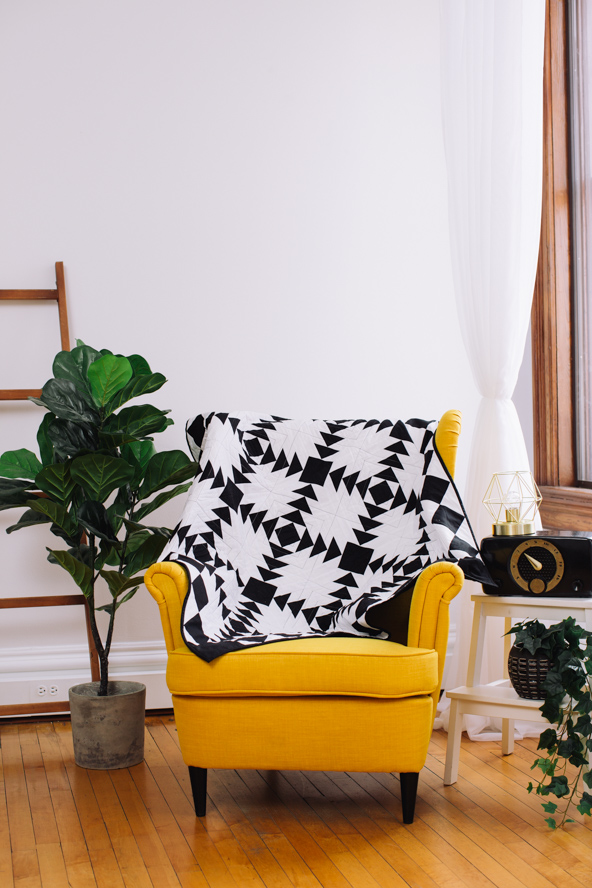
A duo of black and white is the ultimate definition of chic color combinations, which is why our editors are obsessed with this modern lap quilt pattern. Ideal for intermediate quilters, this modern quilt pattern finishes at an approximate 45” square, making it a fabulous throw quilt to dress up your living room. We love the Art Deco-inspired geometry in this quilt pattern, as well as the vintage tile-inspired borders.
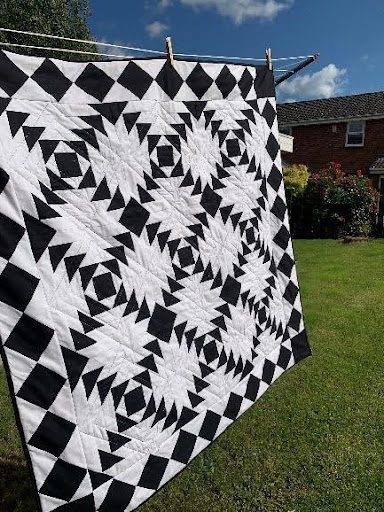
Finished Size: ~45” x ~45”
Skill Level: Intermediate
Designer Notes:
- Scant 1/4” seam allowance used throughout.
- WOF – Width of Fabric
Materials:
- Fabric A (black) – 1 3/4 yards
- Fabric B (white) – 2 yards
- Backing – 53” x 53” square
- Batting – 49” x 49” square
Cutting Instructions:
Fabric A
- Nine 2 7/8“ squares
- Ninety six (96) 3 1/4“ squares (cut on one diagonal) – corner triangles
- Thirty two (32) 3 5/8“ squares – border diamonds
- Four 4 1/2“ squares – border cornerstones
- Binding – Five 2 1/2“ ½” x WOF
Fabric B
- Nine 3 5/8” squares (cut on both diagonals) – round 1
- Forty eight (48) 1 3/4“ x 6” strips – round 3
- Forty eight (48) 1 3/4“ x 8 3/8“ strips – round 5
- Forty eight (48) 1 3/4“ x 10 3/4“ strips – round 7
- Four 4 1/4“ (cut on both diagonals) – border quarter square triangles
- Twenty eight 4” (cut on one diagonal) – border triangles
Sewing Instructions:
MAKING THE QUILT BLOCK:
- Find the middle of the long side of a B round 1 triangle and one side of an A 2 7/8” square. With right sides together, match the middles and stitch together. Press towards the triangle.
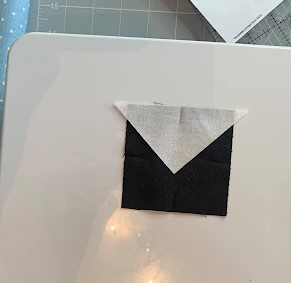
- Repeat Step 1 to stitch a second B round 1 triangle to the opposite side of the A square. Press towards the triangle.
- With right sides together, stitch a third and fourth round 1 triangle to opposite sides of the A square. Press towards the triangles.
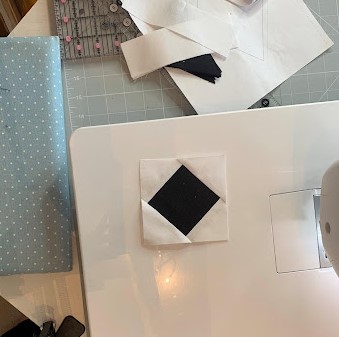
Round 1 square
- Find the middle of an A corner triangle and, with right sides together, stitch it to one side of the round 1 square. Press towards the triangle.
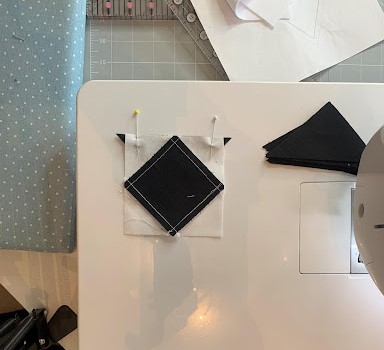
- Repeat Step 4 to stitch a second A corner triangle to the round 1 square. Press towards the triangle.
- With right sides together, stitch a third and fourth A corner triangle to opposite sides of the round one square. Press towards the triangles.
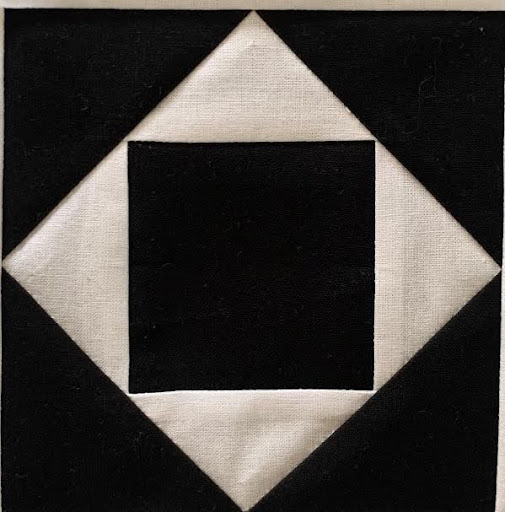
Round 2 square
- Find the middle of the long side of a B round 3 strip and, with right sides together, stitch it to the round 2 square. Press towards the strip.
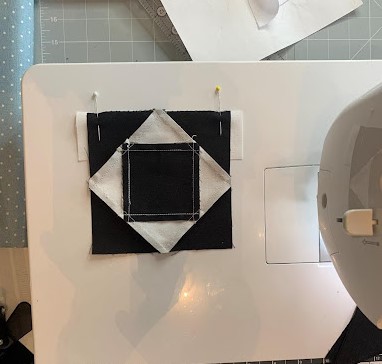
- Repeat Step 7 to stitch a second B round 3 strip to the opposite side of the round 2 square. Press towards the strip.
- With right sides together, stitch a third and fourth B round 3 strip to opposite sides of the round 2 square. Press towards the strips. (round 3 patch)
- On the wrong side of the round 3 patch, line up the 45 degree line of a quilting ruler with the outside edge of the B strip and the 1/4“ line with the stitches at the point of the A corner triangle. Trim to leave 1/4“ seam allowance. Repeat on all sides.
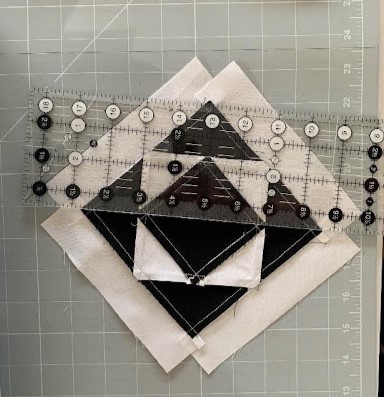
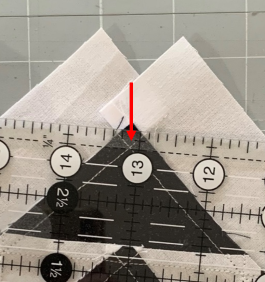
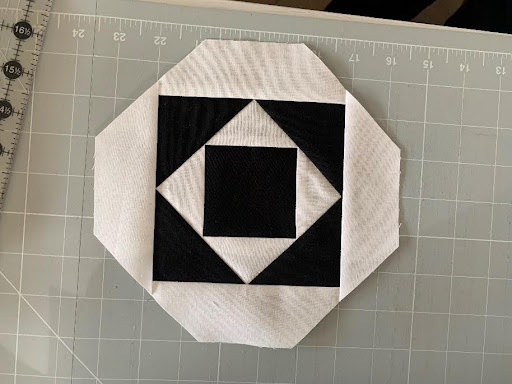
Round 3 patch
- Repeat Steps 4 to 6 and stitch four A corner triangles to the round three patch.
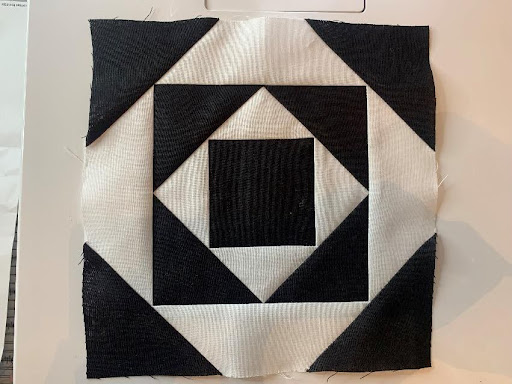
Round 4 square
- Repeat Steps 7 to 10 and stitch the B round 5 strips to the round 4 square.
- Continue to repeat Steps 4 to 6 and 7 to 10 until the block is complete.
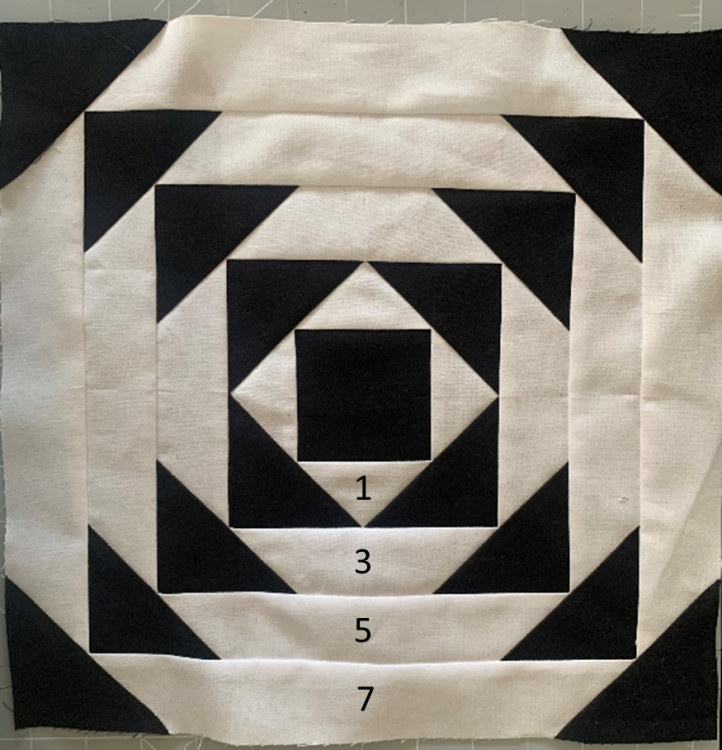
Finished block
- Repeat Steps 1 to 13 to make eight more blocks.
- With right sides together, match the seams and stitch the nine blocks into three rows of three blocks. Press the seams of each row in opposite directions so they nest. Stitch the three rows together along the long edges to make a 3×3 quilt top. Press the seams in one direction.
MAKING THE BORDERS:
- With the diagonal running from top left to bottom right, find the middle of a B border triangle and the middle of an A border diamond. With right sides together, match the middles and stitch together. Press the seam towards the triangle.
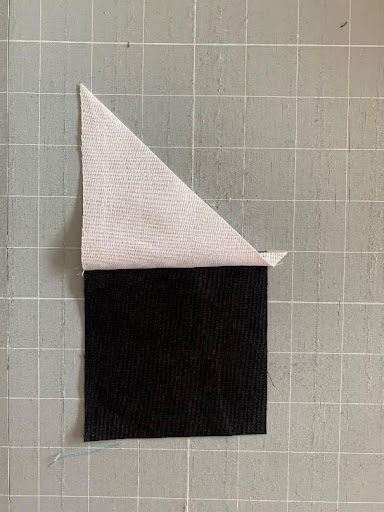
- Turn the patch and repeat Step 1 (in this section) to stitch a second B border triangle to the opposite side of the A border diamond.
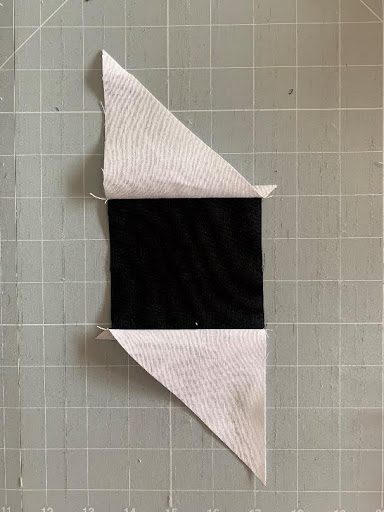
Border unit
- Repeat Steps 1 and 2 (in this section) to make twenty four more border units.
- Turn one border unit so the seams nest and off-set the A border diamonds then stitch into pairs. Stitch three pairs together to make a set of six units. Repeat to make three more sets of six border units.
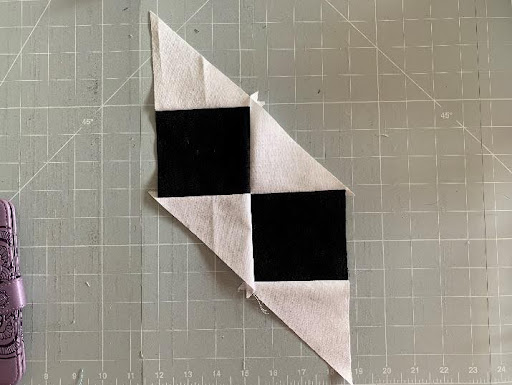
- Repeat Step 1 (in this section) to make one half of a border unit. Find the middle of the long edge of a B border quarter square and the middle of the opposite edge of the A border diamond then with right sides together, match the middles and stitch. Press the seam towards the triangle.
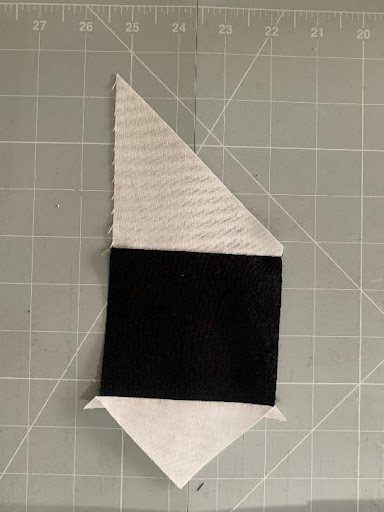
- With the B quarter square on the bottom, find the middle of a second B quarter square and the middle of the right hand side of the A border diamond. With right sides together, match the middles and stitch. Press towards the triangle. Repeat to make seven more border end units.
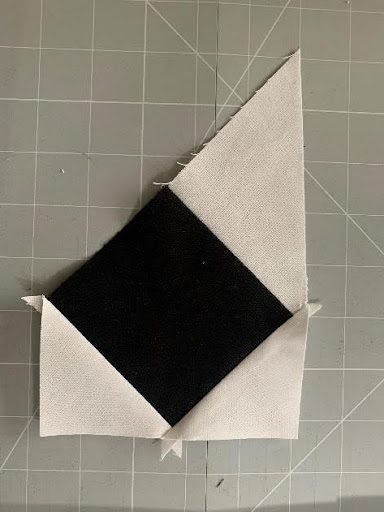
Border end unit
- With right sides together, stitch a border end unit to each end of a set of six border units. Press all the seams in one direction. Repeat to make three more borders.
- With right sides together, stitch an A cornerstone to one short end of one border strip. Press towards the long strip. Stitch a second A cornerstone to the opposite short end and press towards the long strip. Repeat to make a second long border strip.
ADDING THE BORDERS:
- With right sides together, pin and stitch the two short borders to opposite sides of the 3’x3’ quilt top. Press the seams towards the borders.
- With right sides together, pin and stitch the long border strips to opposite sides of the 3’x3’ quilt top nesting the seams at the cornerstones. Press the seams towards the borders.
QUILTING:
- Layer the backing, batting and quilt top, securing well using your preferred method. Quilt as desired. Zoe marked out (with a heat erasable pen) and stitched diamonds on each quilt block using a black and grey variegated thread.
BINDING:
- Join the fabric A binding strips along the short edges, trim the seams to 1/4”, fold and press with wrong sides together to make one long strip. Double bind the quilt to finish.

