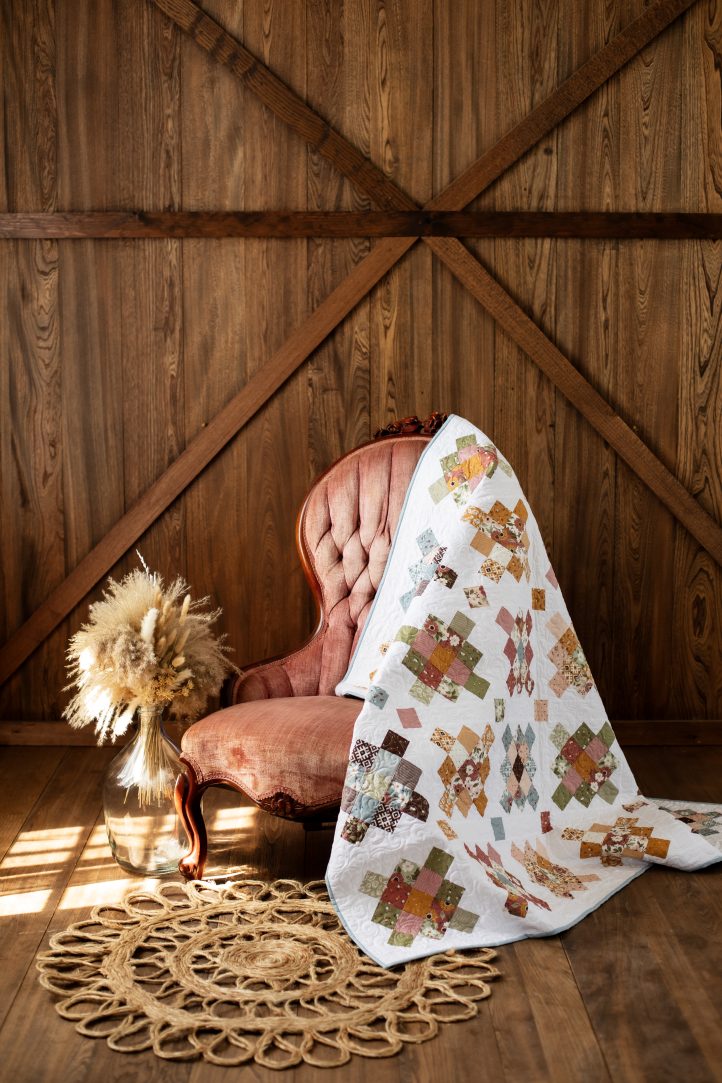
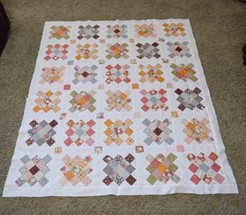
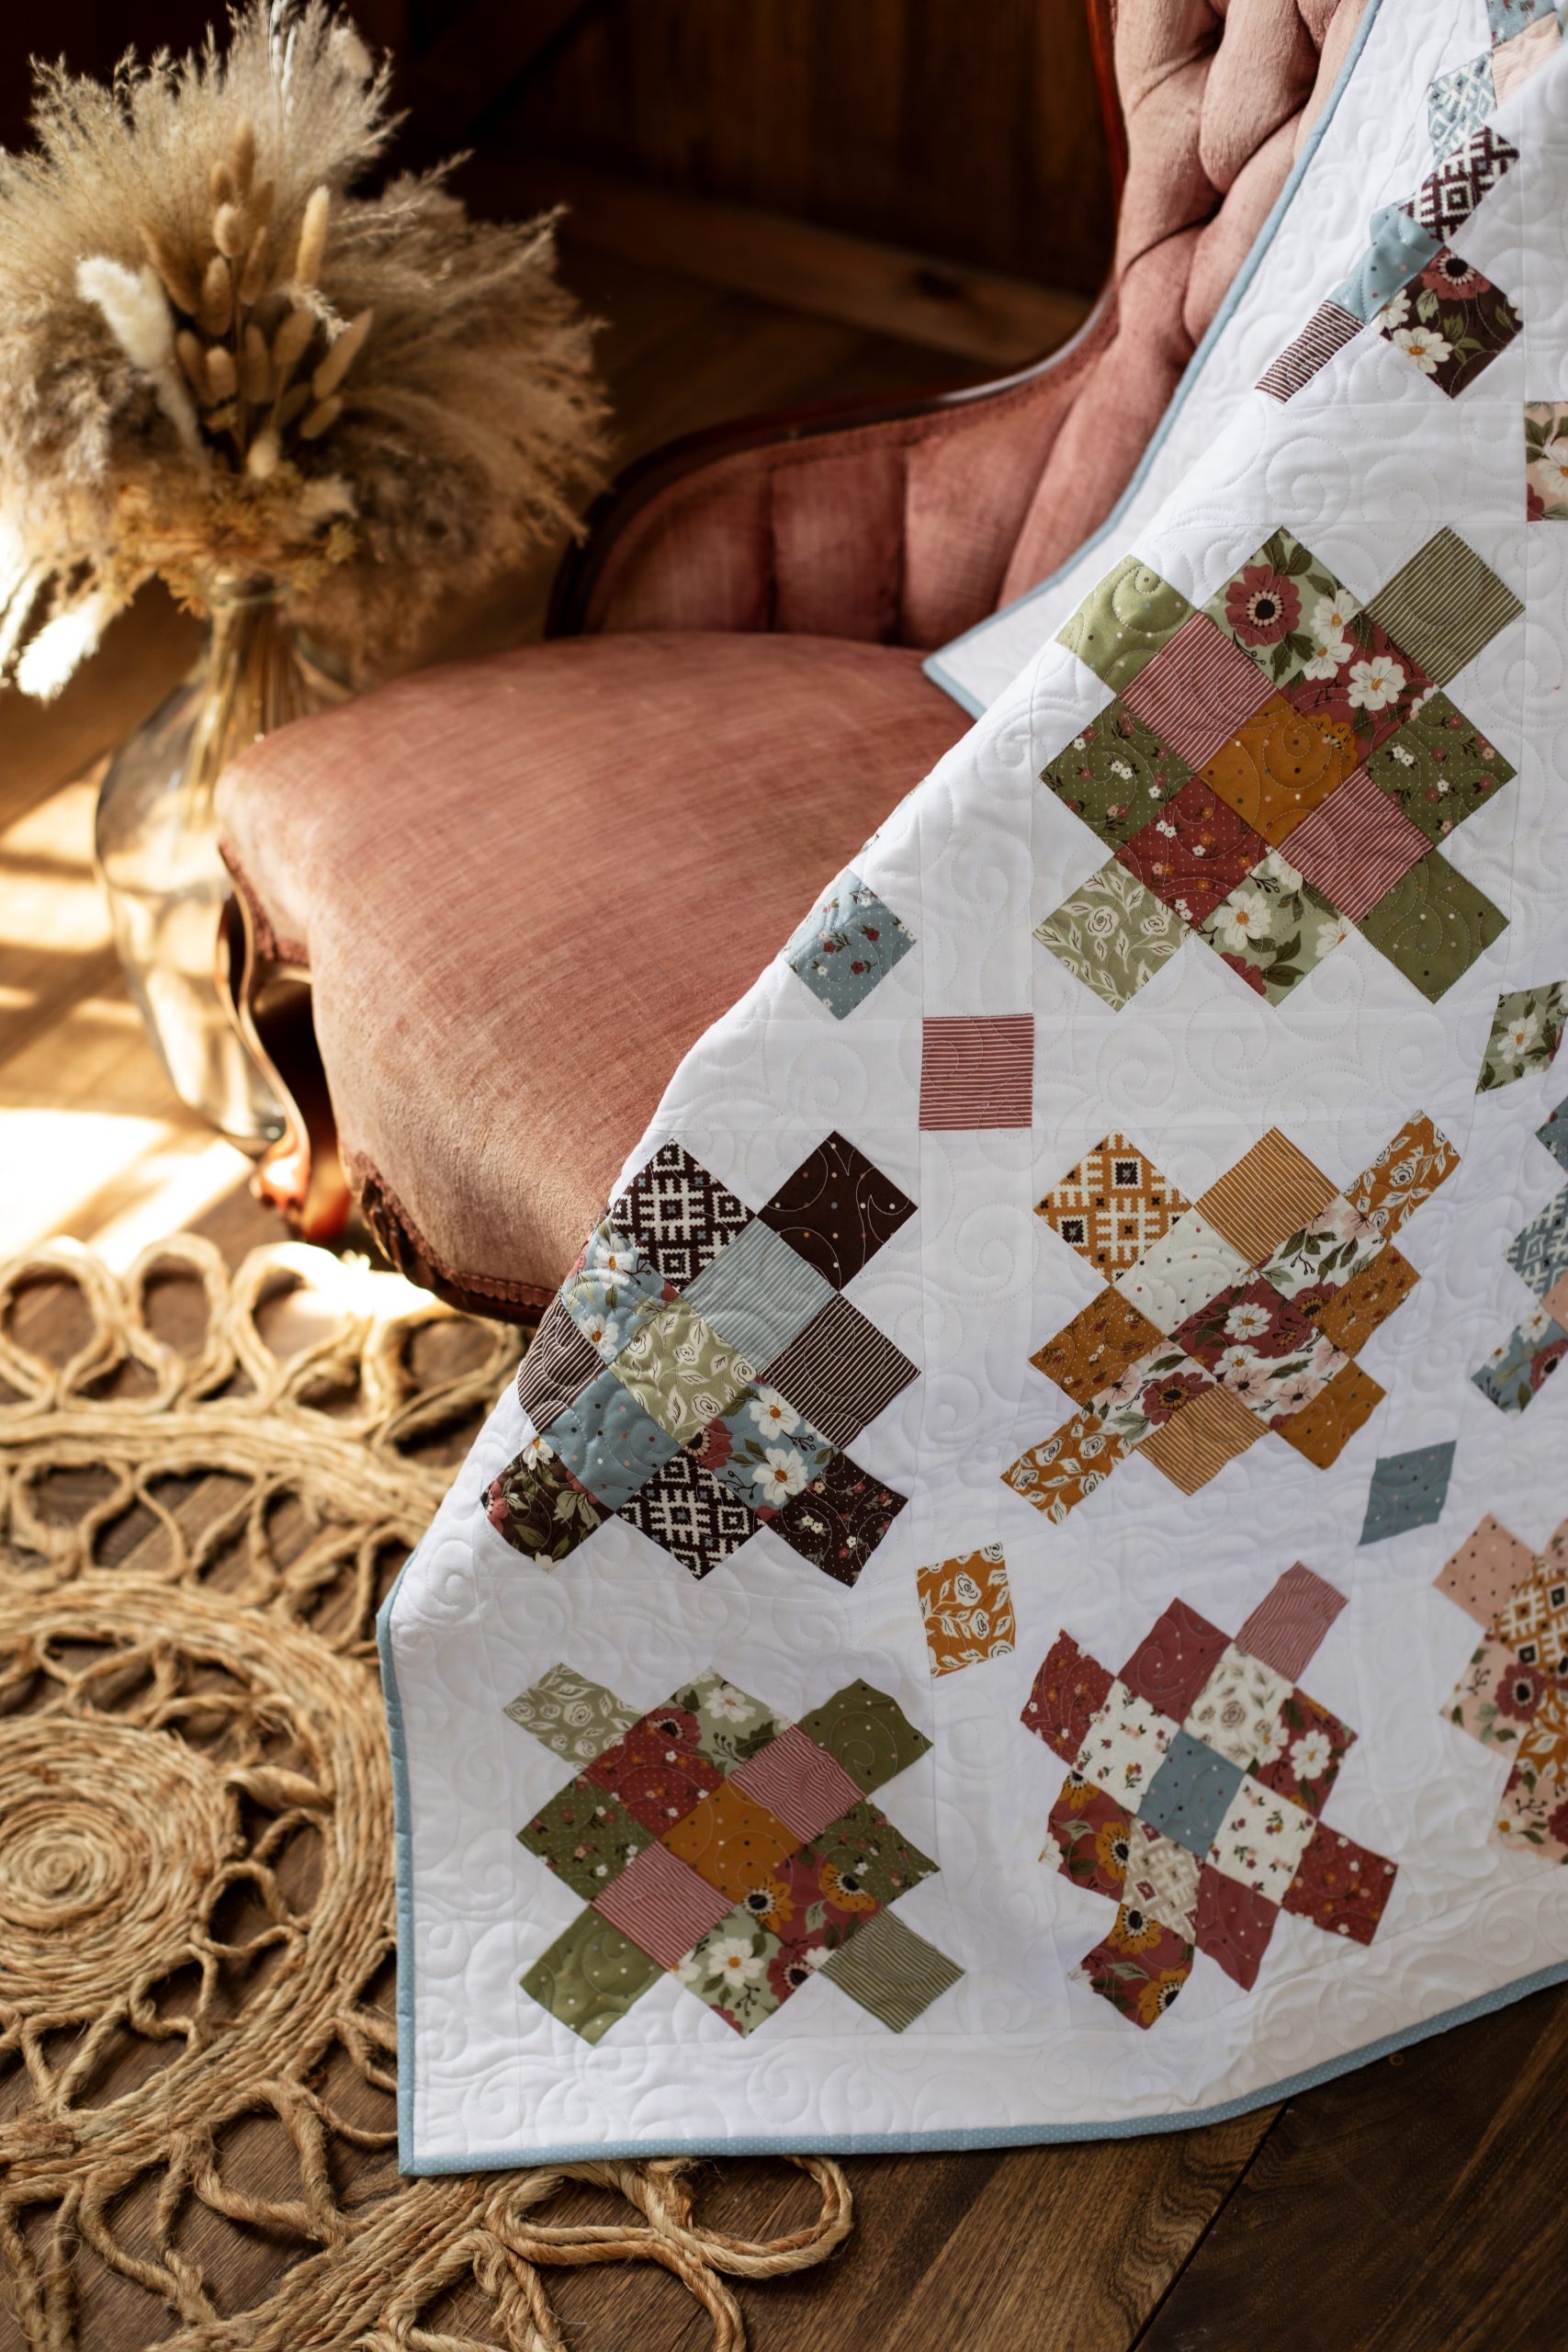
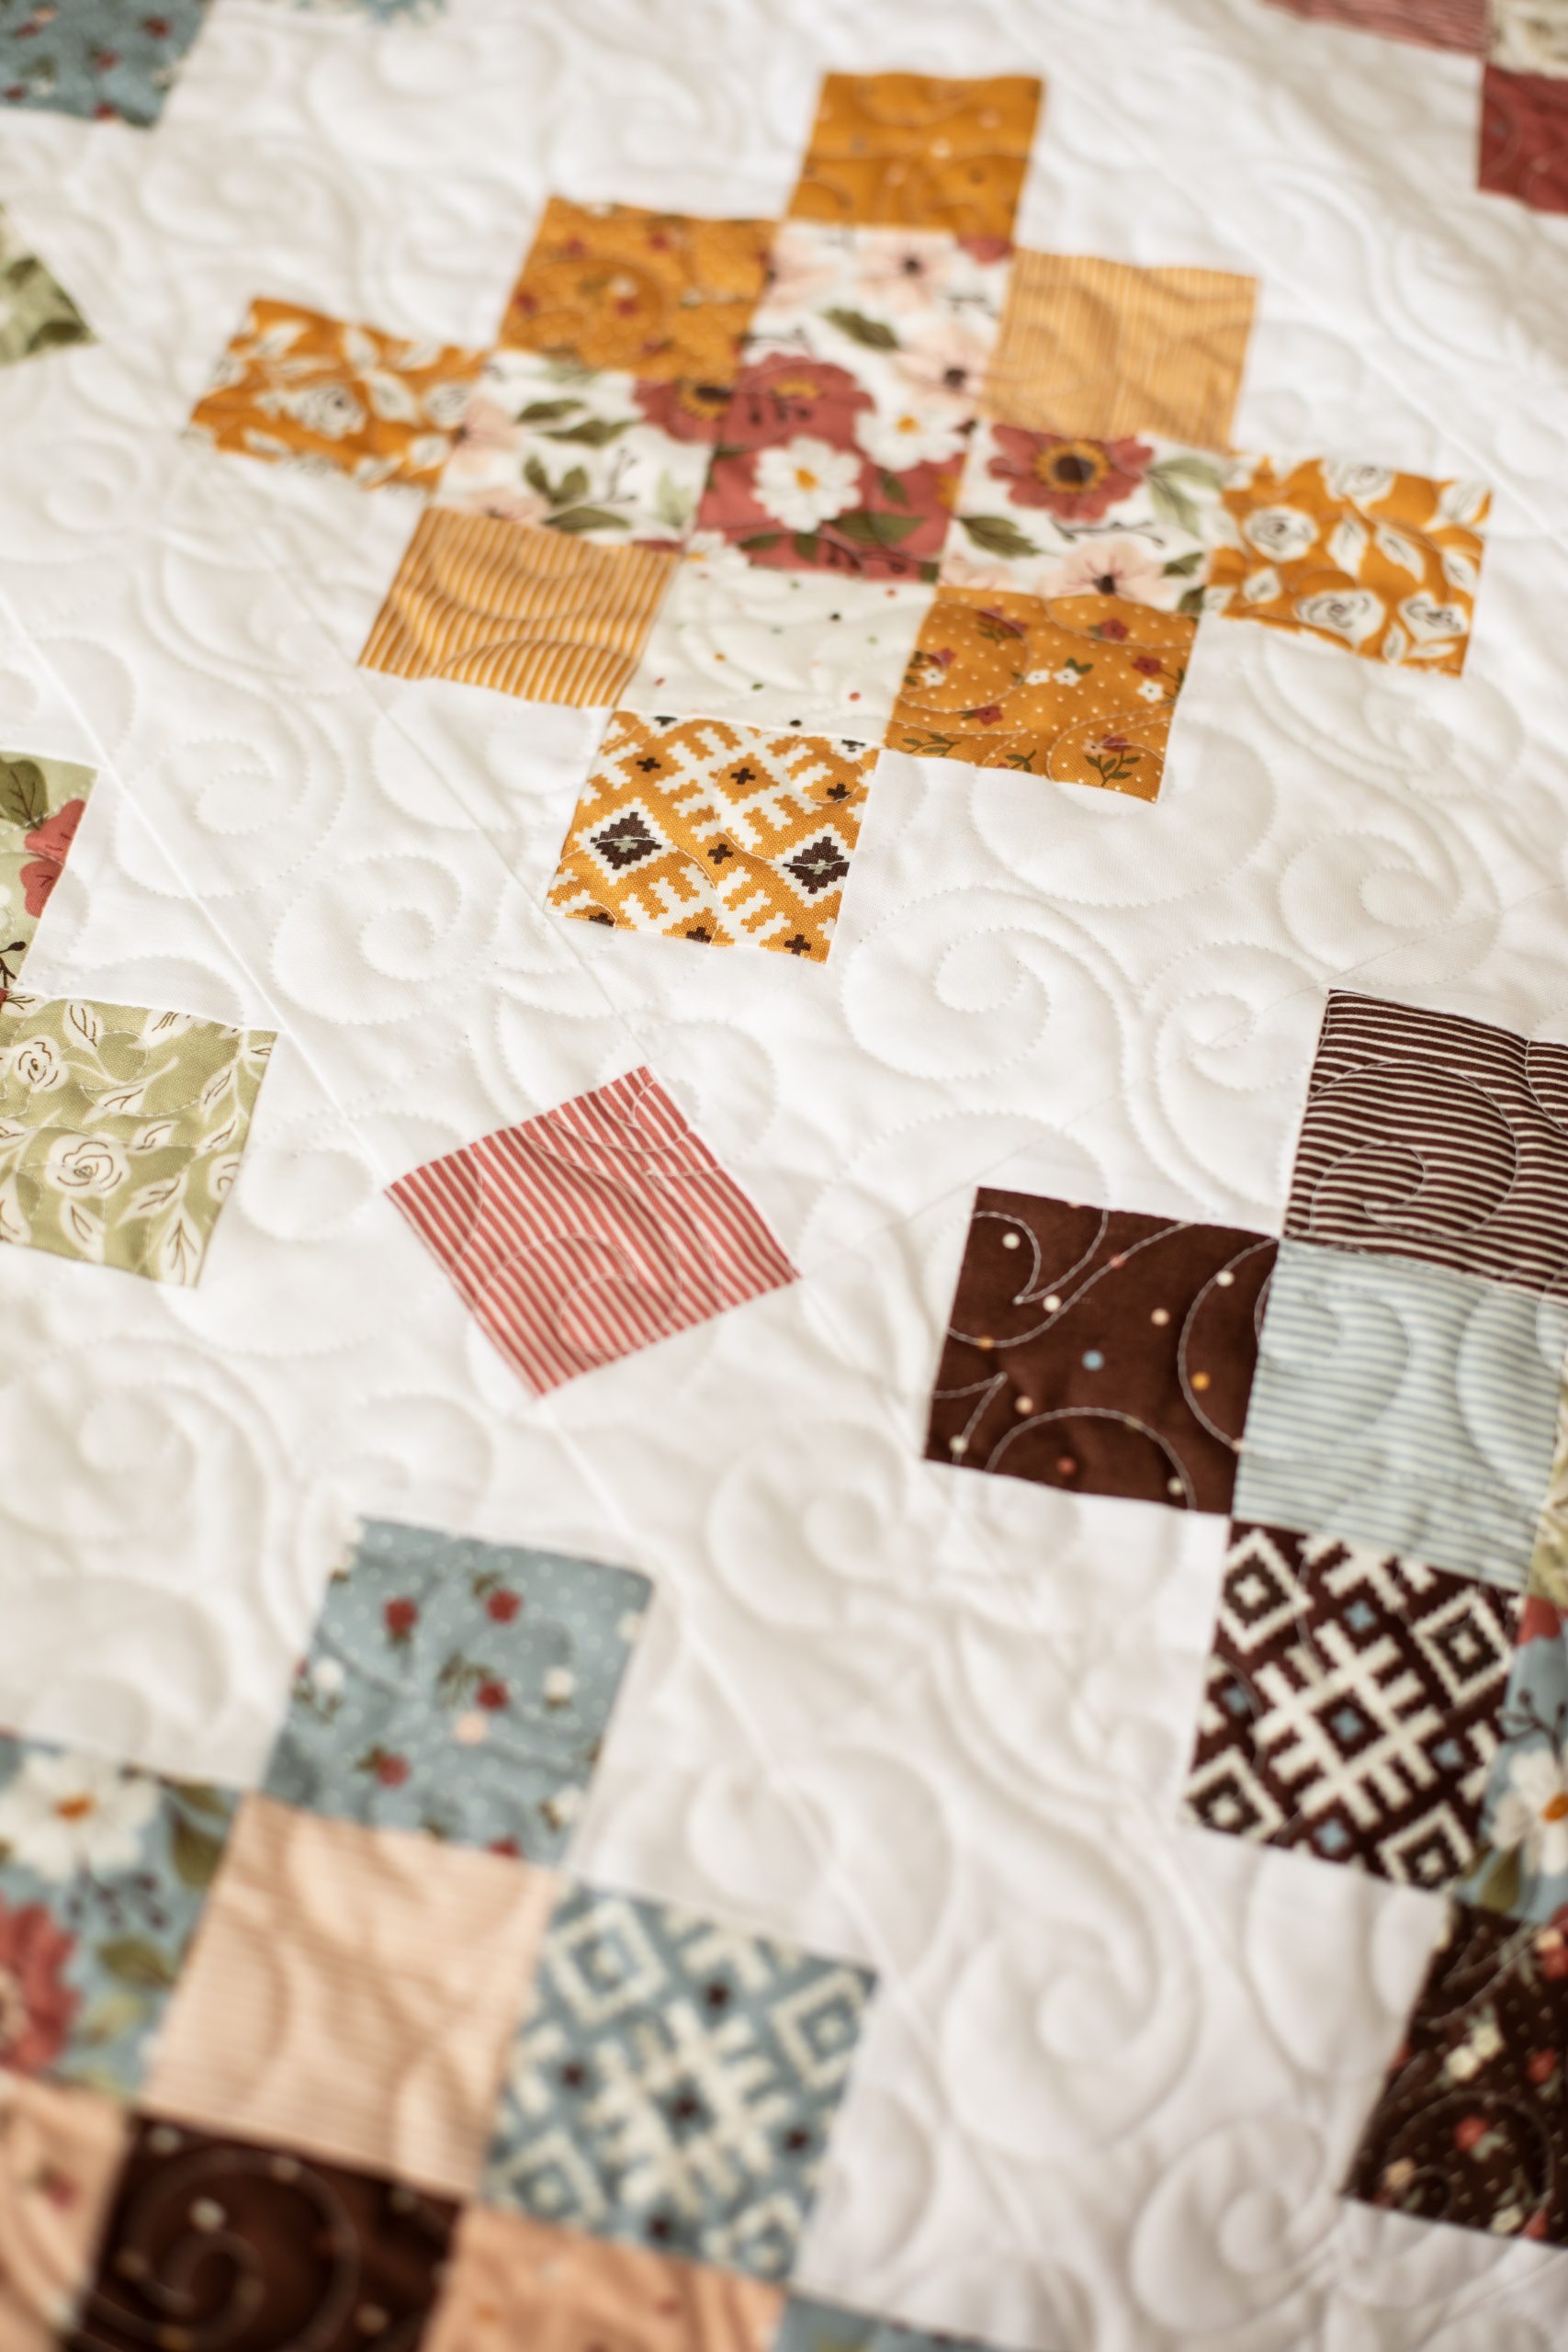
We’ve been loving the reemergence of the granny square over the past few years, and if you also can’t get enough of this classic block, then you’ll love this timeless throw quilt pattern. Designed for jelly rolls, this granny square quilt pattern from Rachel Nielsen allows readers to mix and match fabrics to create an overall scrappy look. The gorgeous colors in our sample echo the transition of warm summer colors like pink and gold to the rich blues, browns and greens of autumn.
Finished Size: 55” x 66”
Designer Note:
- Fabrics used:
- Jelly roll – Folktale by Moda
- White fabric – Kona Bleached White
Materials:
- Fabric:
- 1 jelly roll for granny blocks and cornerstones
- 2 yards white/cream for granny square blocks
- 3/4 yard fabric for sashing (white)
- 1/2 yards border fabric (white)
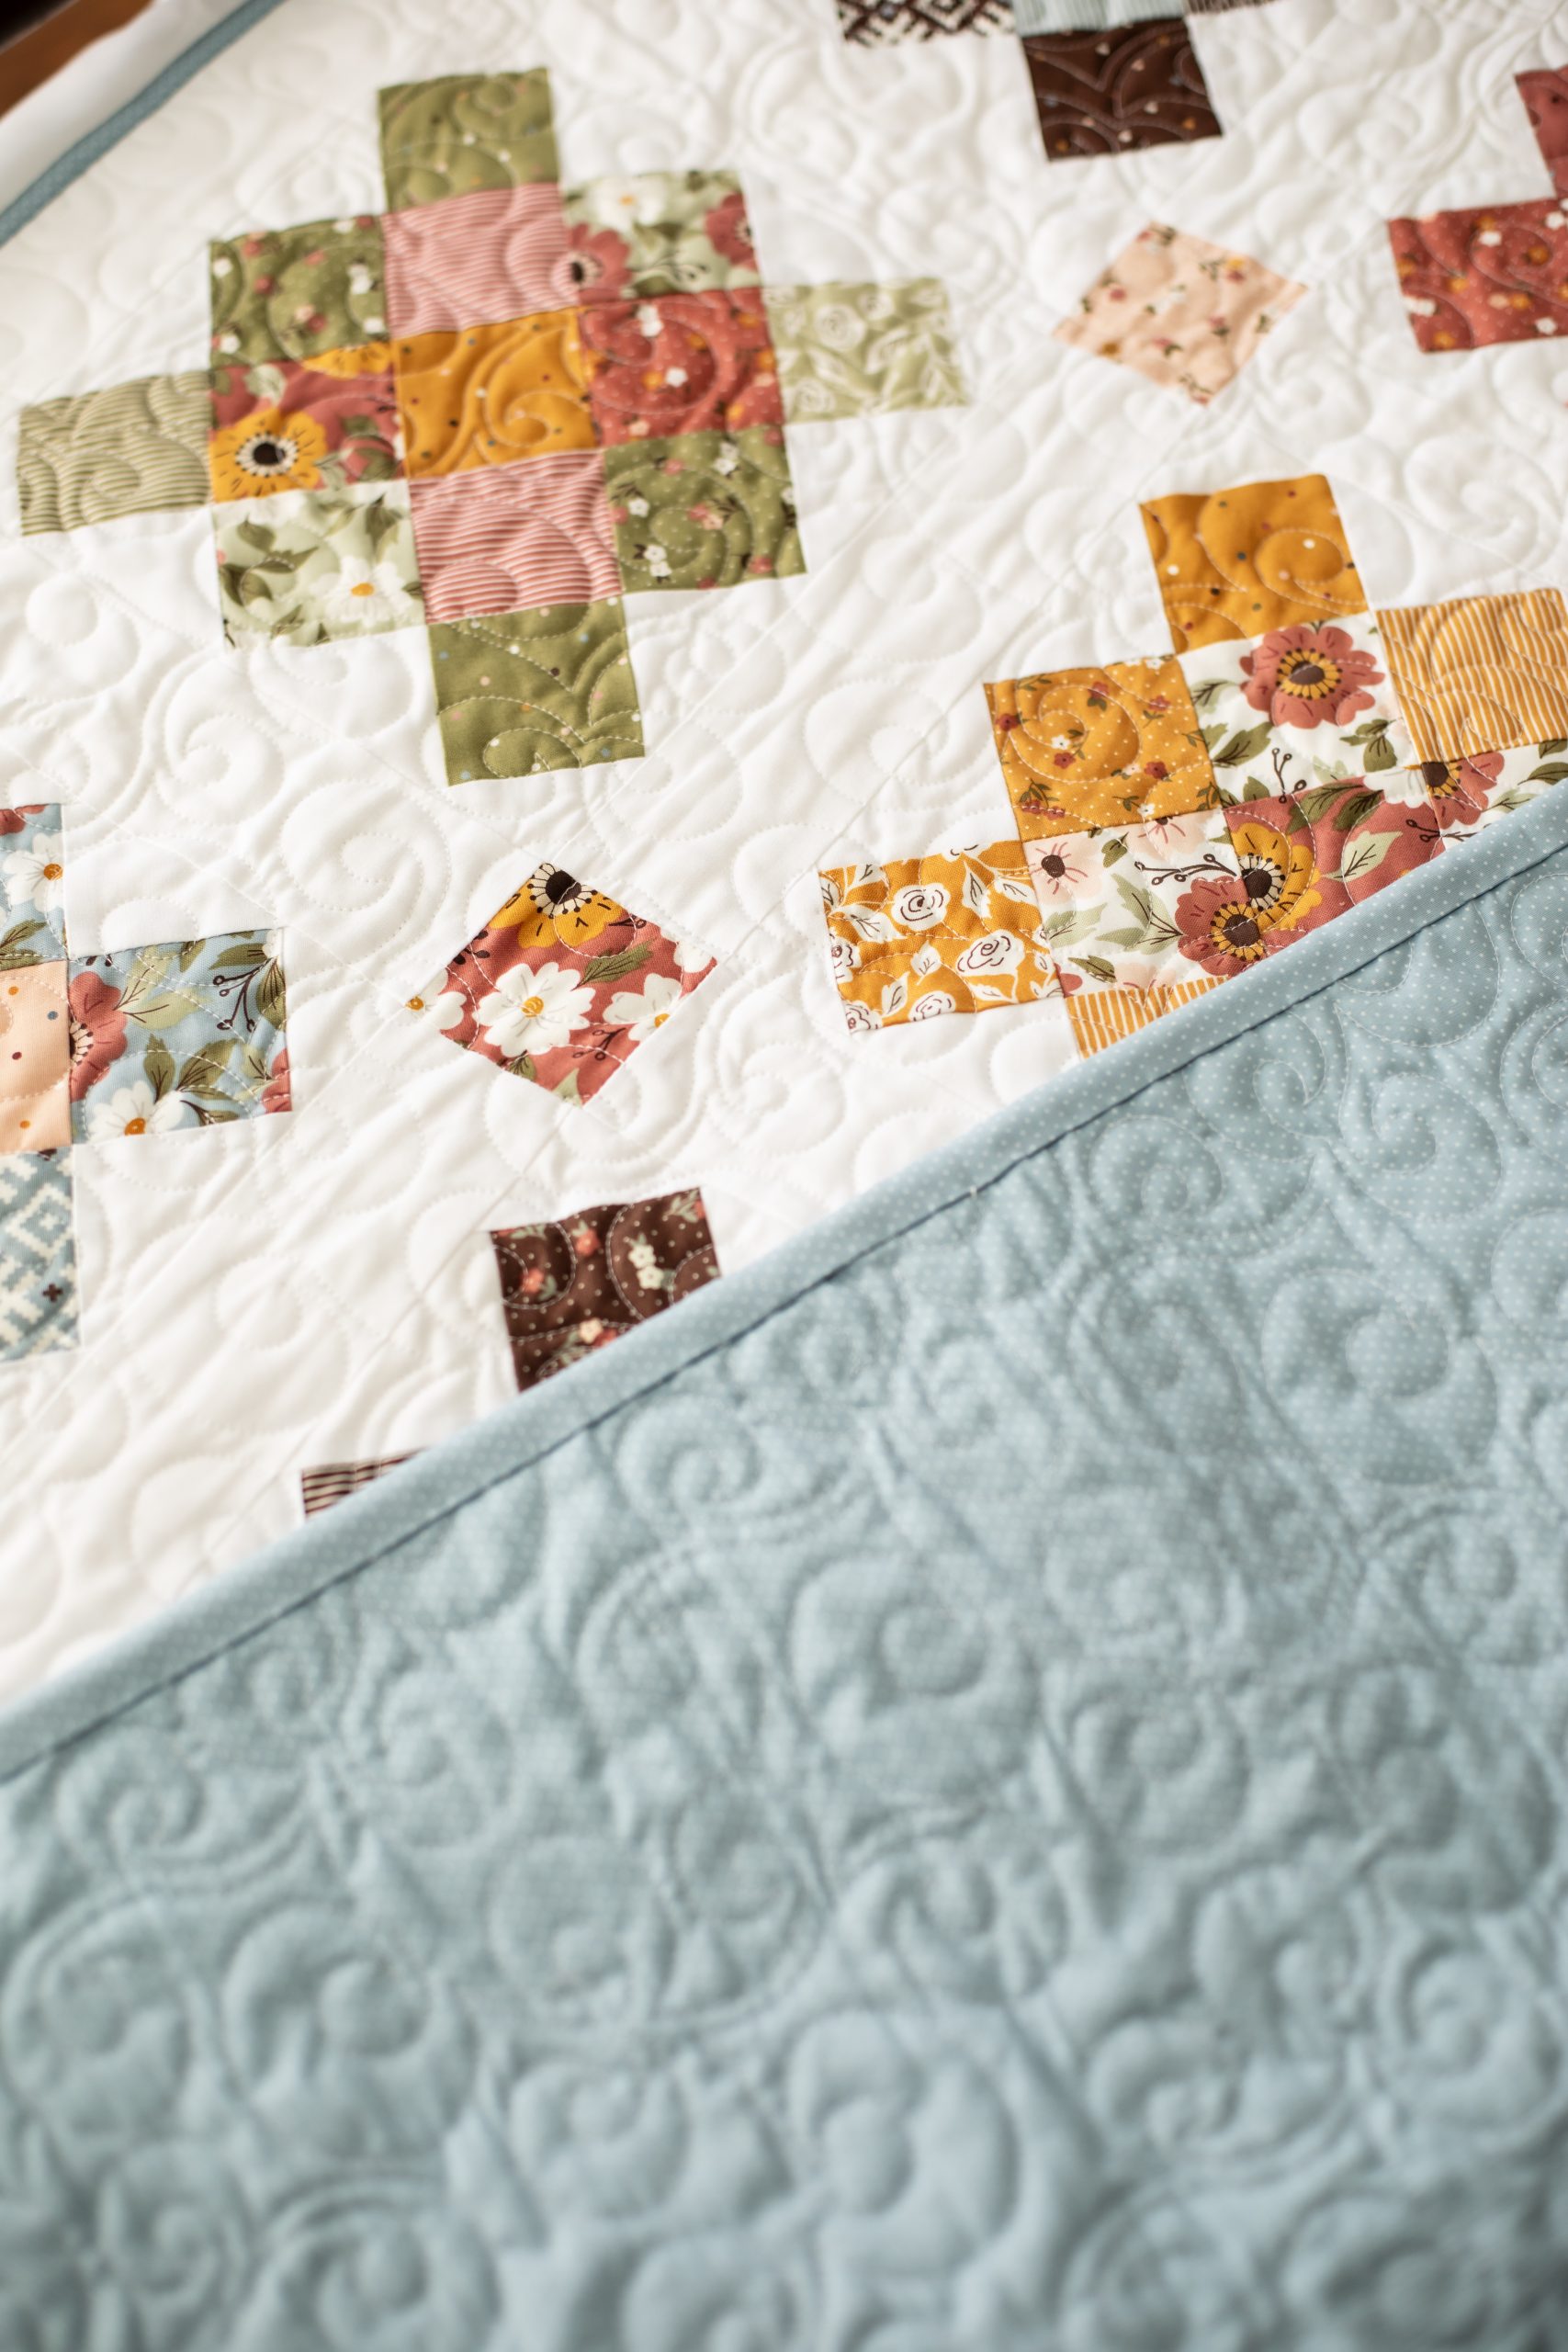
- 5/8 yards binding fabric (blue)
- 4 yards backing fabric (blue)
- 64” X 74” batting
- Coordinating thread
- Note: Typically, a granny square quilt block is made of three main colors and a background color. In order to utilize a jelly roll, this granny square pattern has a scrappy look by using a variety of fabrics in the same color families. Choose a jelly roll that has 5-7 main color families. Then mix and match them as you create your strip sets.
Supplies:
- Iron/ironing board or mat
- Sewing machine
- Scissors
- Quilting rulers (a square ruler to trim the blocks to 9 inches is helpful!)
Cutting Instructions:
CUT LIST FOR GRANNY BLOCK:
From the white/cream fabric:
- Cut 60) – 2 1/2” (inch) squares
- Cut 24) – 2 1/2” X 25 1/2”
- Cut 12) – 2 1/2” X 13”
From the jelly roll fabric (This will make 5 blocks – repeat 6 times with different fabric choices for A, B and C to make 6 different sets of blocks for a total of 30 blocks. Totals in parenthesis for all strip sets):
Color A:
- Cut 3) – 25 1/2”: (18 strips total)
- Cut 2) – 13”: (12 strips total)
Color B:
- Cut 1) – 25 1/2”: (6 strips total)
- Cut 2) – 13”: (12 strips total)
Color C:
- Cut 1) – 13”: (6 strips total)
CUT LIST FOR SASHING AND BORDERS:
From white/cream fabric:
Sashing:
- Cut 49) – 2 1/2” X 9”
Borders:
- Cut 2) – 2 1/2” X 62 1/2”
- Cut 2) – 2 1/2” X 55 1/4”
From Jelly Roll:
Cornerstones:
- Cut 24) 2 1/2” X 2 1/2”
Piecing Instructions:
MAKING THE STRIP SETS:
Sew all seams with 1/4 inch seam allowance.
Note: These instructions are to make a set of 5 blocks that are all the same. Repeat this process 6 times with different fabrics to create the 30 blocks total.
- Select fabric and arrange them into three groups.
- 1st strip set (25 1/2”): two white and one Color A
- 2nd strip set (25 1/2”): two white, two Color A, and one Color B
- 3rd strip set (13”): two white, two Color A, two Color B, one Color C
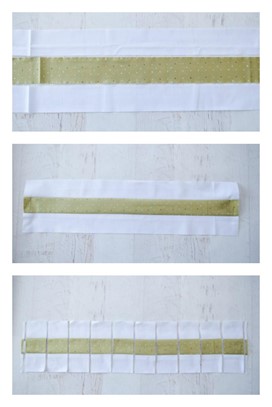
Instructions for First Strip Set:
- Use 25 1/2” strips for this set.
- Select two white strips and one color A strip.
- Arrange the strips so that color A is in the middle and the white strips are on the edges.
- Sew the strips together on the long edge with right sides together. Important Note: Press each seam toward the center fabric.
- Trim one end off.
- Then cut the strip into 2 1/2 inch pieces.
- There should be 10 pieces with about 1/4 inch on each end to trim to square.
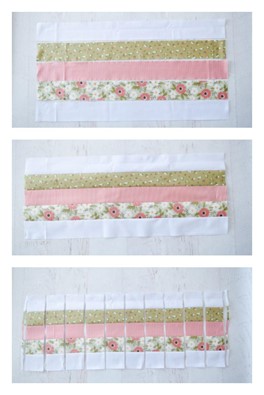
Instructions for Second Strip Set:
- Use 25 1/2” strips for this set.
- Select two white strips and two color A strips and one color B strip.
- Arrange the strips so that color B is in the middle. Place a color A strip on each side of color B. Then place the white strips on the outer edges.
- Sew the strips together on the long edge with right sides together. Important Note: Press each seam away from the center fabric.
- Trim one end off.
- Then cut the strip into 2 1/2 inch pieces.
- There should be 10 pieces with about 1/4 inch on each end to trim to square.
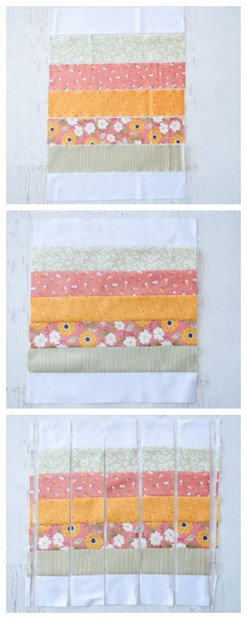
Instructions for Third Strip Set:
- Use 13” strips for this set.
- Select two white strips and two color A strips and two color B strips and one color C strip.
- Arrange the strips so color C is in the middle. Place a color B strip on each side of color C. Then place a color A strip on each side of color B. Lastly, place the white strips on the outer edges.
- Sew the strips together on the long edge with right sides together. Important Note: Press each seam toward the center fabric.
- Trim one end off.
- Then cut the strip into 2 1/2 inch pieces.
- There should be 5 pieces with about 1/4 inch on each end to trim to square.
Note: Pressing the seams as indicated in the steps above allows you to nest your seams as you create the block. This is very helpful to create perfect points when sewing together the block.
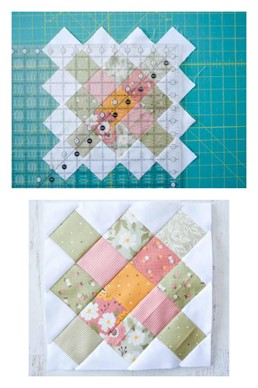
MAKING THE GRANNY BLOCK:
- Select 2 (2 1/2”) squares, two of the first strip set, two of the second strip set and one of the third strip set.
- Arrange the block with the longest strip in the middle, then the next longest on either side. The small strips come next and the squares at each end. Note: With the five block strips, flip one of them so that the same fabrics aren’t on the same side of the block.
- Sew together row by row.
- Center the square on the small strip with right sides together.
- Sew and press to one side.
- Center the other side of the small strip to the middle sized strip with right sides together. As you sew, line up the seams, nesting them as you go.
- Press to one side.
- Repeat with the remaining strips until you have finished the block.

- Carefully trim the block to nine inches.
- There should be 1/4 inch of white fabric from the colored points to the edge of the block. This will be the seam allowance when we sew the quilt together.
- Repeat 4 more times to make 5 blocks that are identical.
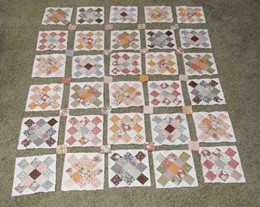
- Repeat the process of making strip sets and blocks 6 times for a total of 30 blocks.
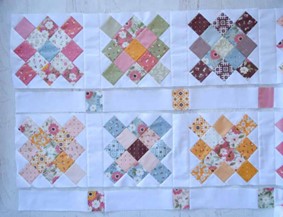
ASSEMBLING THE QUILT TOP:
- Begin by laying out your blocks to arrange them in a pleasing way.
- There should be five squares across and six squares down.
- Arrange the cornerstones between the blocks.
Sew Together the Horizontal Rows of Quilt Blocks:
(Remember 1/4 inch seam allowance and right sides together.)
- Gather the five quilt blocks from the top row and 4 sashing strips.
- Sew the block row together with a sashing strip between each block. The block rows should begin and end with a block. Press all seams toward the sashing.
- Next, gather the 5 sashing strips and 4 cornerstone blocks.
- Sew together the sashing row, with cornerstones between each sashing strip. Again, press toward the sashing.
- Sew together the block rows and the sashing rows. Use pins to line up the cornerstones with the sashing of the block rows. Press towards the sashing.
BORDERS:
- Cut strips of the border fabric 2 1/2 inches wide. Sew together strips to create two long pieces that are a bit longer than the sides of the quilt.
- Sew the border strips to each long side. Trim to the length of the quilt. Press.
- Sew together more 2 1/2 inch strips to create two additional borders just longer than the top and bottom of the quilt.
- Sew these strips to the remaining sides of the quilt. Trim and press.
BACKING:
- Cut the backing piece into two 2 yard pieces. Sew with right sides together along the selvedge edges to join.
FINISHING THE QUILT:
- Find a floor space large enough to lay out the quilt.
- Lay the backing down with the right side down.
- Place the batting on the backing.
- Next, add the top with the right side up.
- Trim the back and batting to 4” bigger on all sides.
- Pin the layers together.
- Quilt as desired, then trim the batting and back to match up with the top.
BINDING THE QUILT:
- Cut the fabric you’ve chosen for the binding into 2 1/2 inch strips. Sew the strips together, end to end, to make one very long strip of fabric for the binding.
- Press the strip in half lengthwise, with right sides out to create the binding.
- Bind the quilt to your preferred method.

What is the finished size?
Hi Lisa! The finished size of this quilt is 55” x 66”. We’ll update the pattern page to include this info as well. Have a great day! – Ashley, We Like Quilting