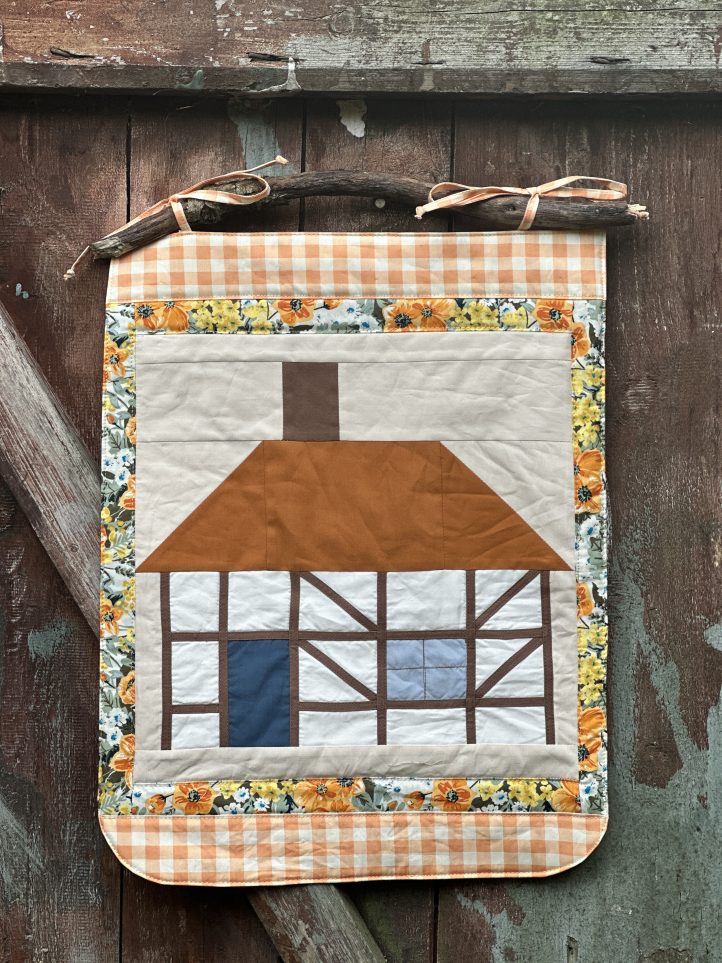
Sew a miniature quilted version of your home with this delightful wall hanging pattern from Debbie von Grabler-Crozier. Made using fat quarters and fat eighths, this wall hanging uses a house block pattern for the focus of its design, with floral and gingham fabric as its borders. We love the idea of customizing this pattern to your own home or sewing a Christmas version in snowy prints for charming holiday décor. This quilted wall hanging is also a thoughtful gift idea for the newlywed couple in your family or friend circle!
Designer Note: Seam allowances are all 1/4” and have already been added.
Editor Note: The designer has provided two sets of instructions: one for the house block and one to make the block into a wall hanging.
For the House Block:
Materials:
- Fabric: (Note: All fabrics are by Art Gallery Fabrics.)
- Solid fabrics from the Pure Solids collection in the following colors:
- Fat eighth Teak (brown)
- 4” square Atmospheric (steel blue)
- 4” square Mediterraneo (dark steel blue)
- Fat eighth Gingerbread (ginger)
- Fat eighth Porcelain (off white)
- Fat eighth Sandstone (light beige)
- Solid fabrics from the Pure Solids collection in the following colors:
- 1/4” bias tape maker by Clover. You need the green one #6.
- Scissors
- Fabric marking tools
- PDF Diagram – This is located at the bottom of this page. See printing instructions below.
PRINTING INSTRUCTIONS:
To download the PDF diagram, click on the download button at the bottom of the page. We recommend opening your download using Adobe Acrobat.
Cutting Instructions:
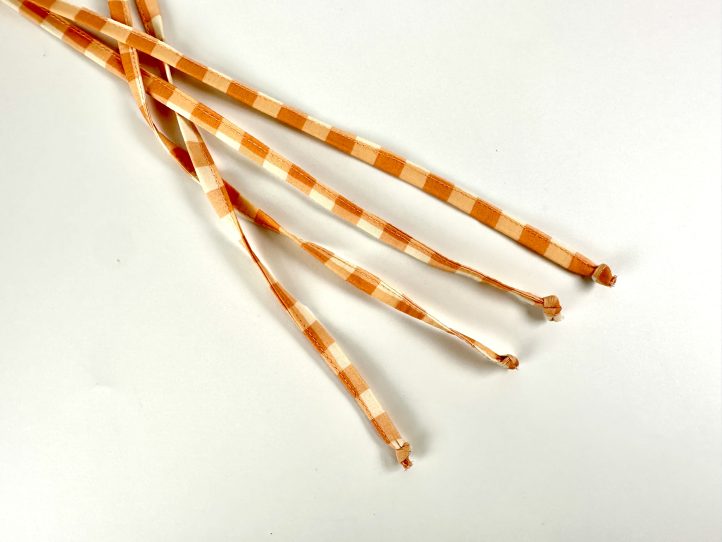
From the Teak (brown):
- 63” of strips cut 1/2” wide on the straight grain
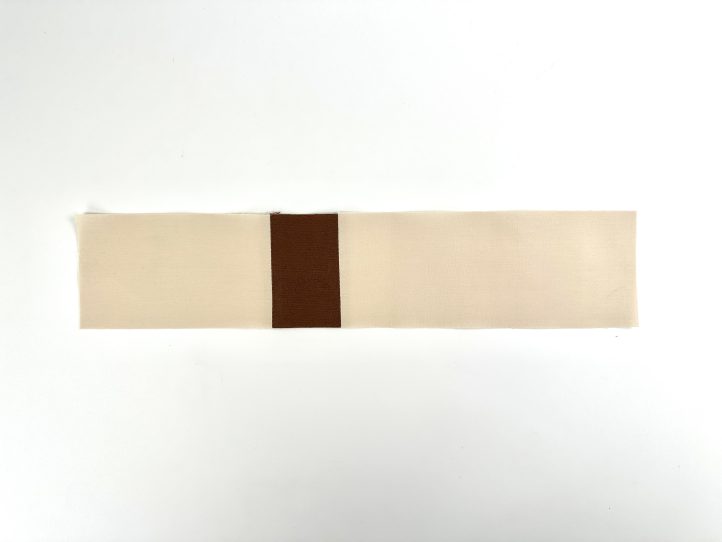
- 1 piece 2” wide x 2 3/4” tall for the chimney
- TIP: Don’t join the tape as you normally would to make a long length. The joins add too much bulk to the small width of tape like this and you don’t need it in one long piece.
From the Atmospheric (steel blue):
- 1 piece 2 1/2” wide x 2” tall for the window
From the Mediterraneo (dark steel blue):
- 1 piece 2” wide x 3 1/2” tall for the door
From the Gingerbread (ginger):
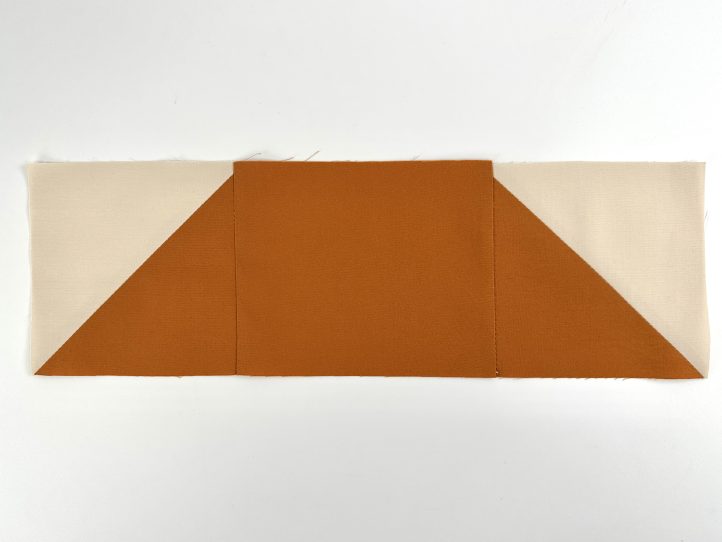
- 1 piece 5 1/2” wide x 4 1/4” tall for the middle of the roof
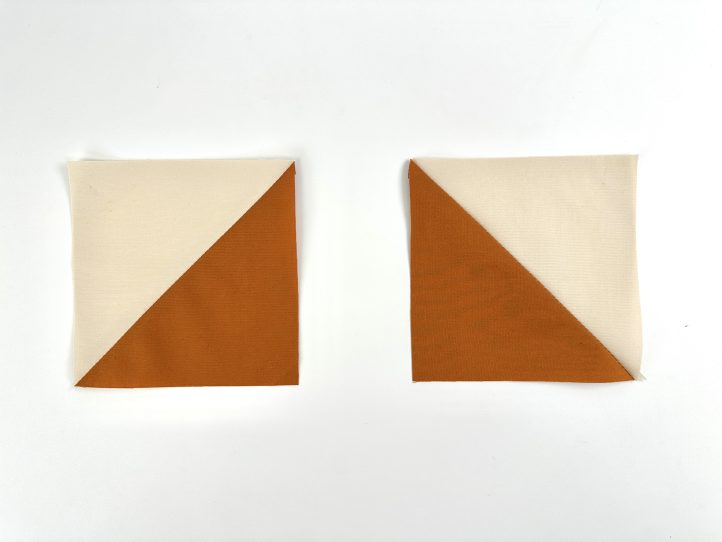
- 1 piece 4 3/4” square for the half square triangle blocks which form the ends of the roof
From the Porcelain (off white):
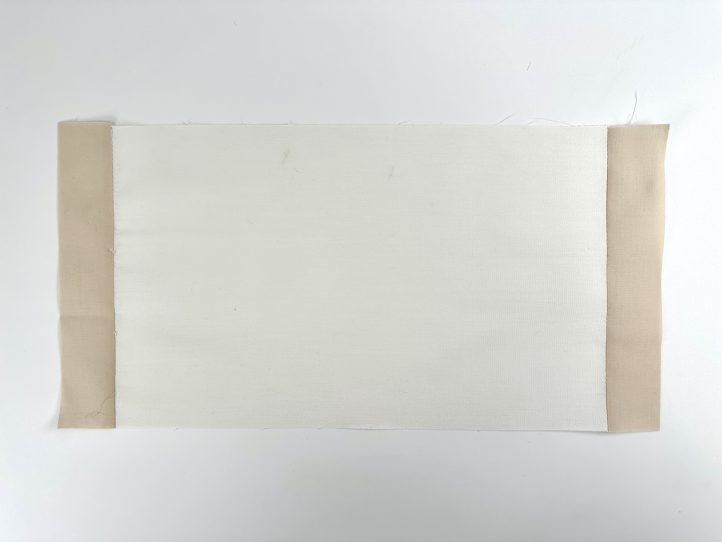
- 1 piece 11 1/4” wide x 5 1/2” tall for the house body
From the Sandstone (light beige):
- 1 piece 4 3/4” square for the half square triangle blocks which form the ends of the roof
- 1 strip 1 1/4” wide x 13 1/4” long for the top strip (Piece A)
- 1 piece 2 3/4” wide x 4 3/4” long for the part to the left of the chimney (Piece B)
- 1 piece 2 3/4” wide x 7” long for the strip to the right of the chimney (Piece C)
- 1 piece 1 1/2” wide x 5 1/2” long and cut in half for the two pieces to the left and right of the house (Pieces D and E)
- 1 piece 1 1/2” wide x 13 1/4” long for the bottom strip (Piece F)
Piecing Instructions:
MAKING:
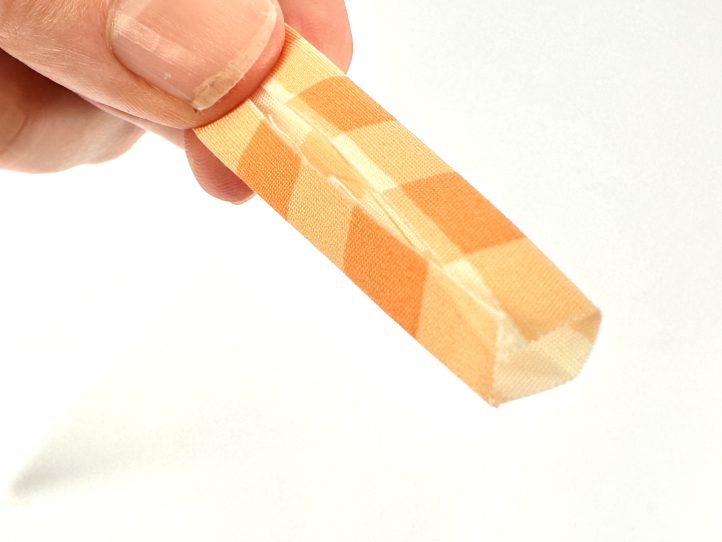
Make the Straight Binding:
TIP: Although the tool that we are using is a bias tape maker, the strips do not need to be cut on the bias because they do not need to negotiate curves or stretch in any way. Straight strips are more stable in this setting.
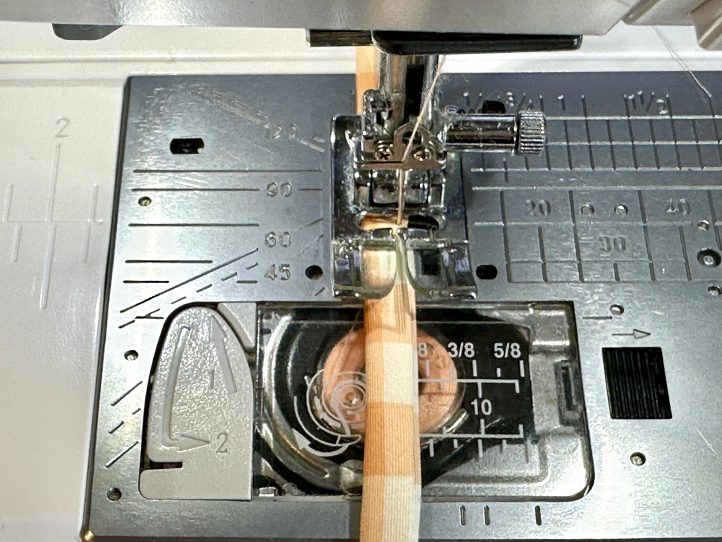
- Press your strips if needed and feed them into the bias tape maker so that the strip emerges from the end.
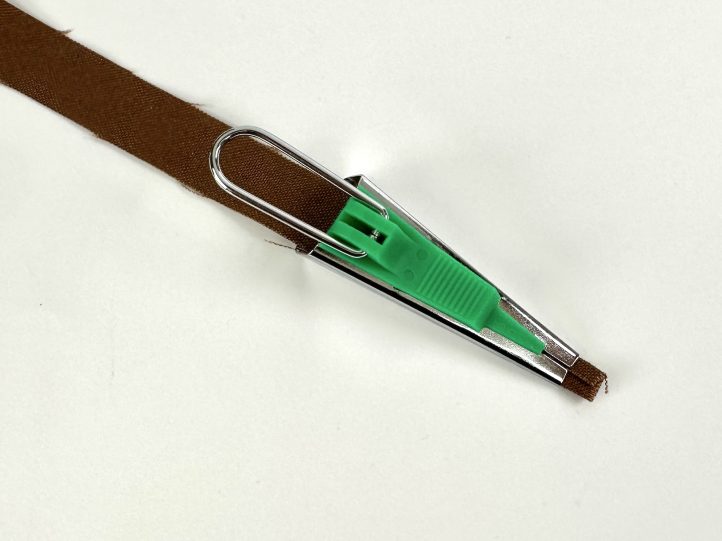
- Pull on the bias tape maker and press the strip as it comes out.
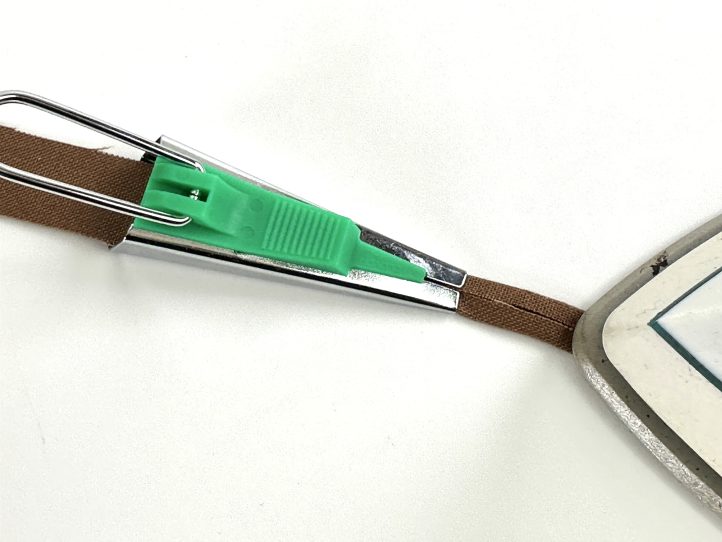
- Repeat for the other strips.
Making the Half Square Triangle Blocks:
- Lay the two square pieces cut for the end of the roof right sides together and pin. Draw a diagonal line from one corner to the opposite.
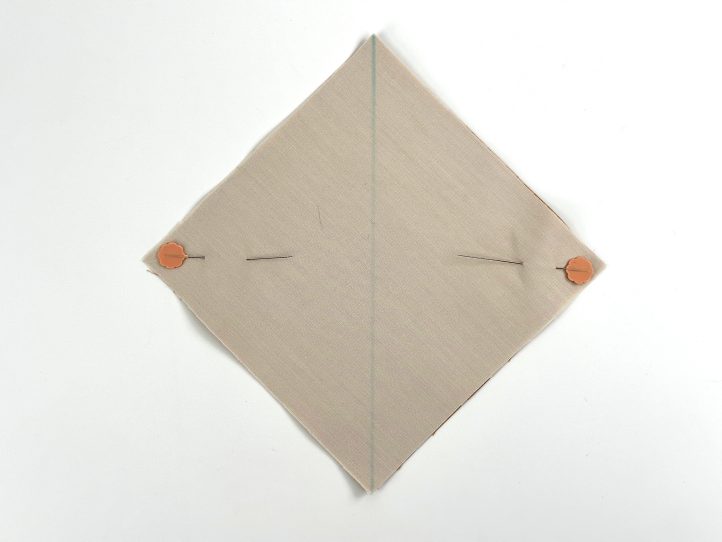
- Sew a normal (1/4”) seam allowance each side of this line.
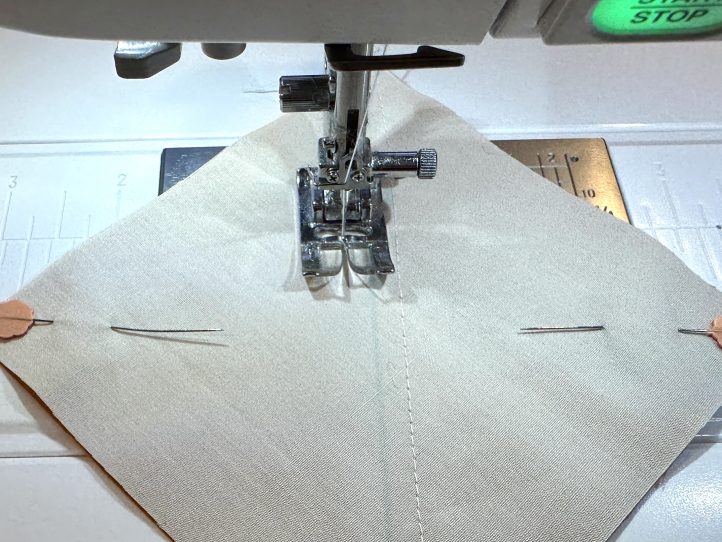
- Cut along the line that you drew and open out the two halves. Trim to 4 1/4”.
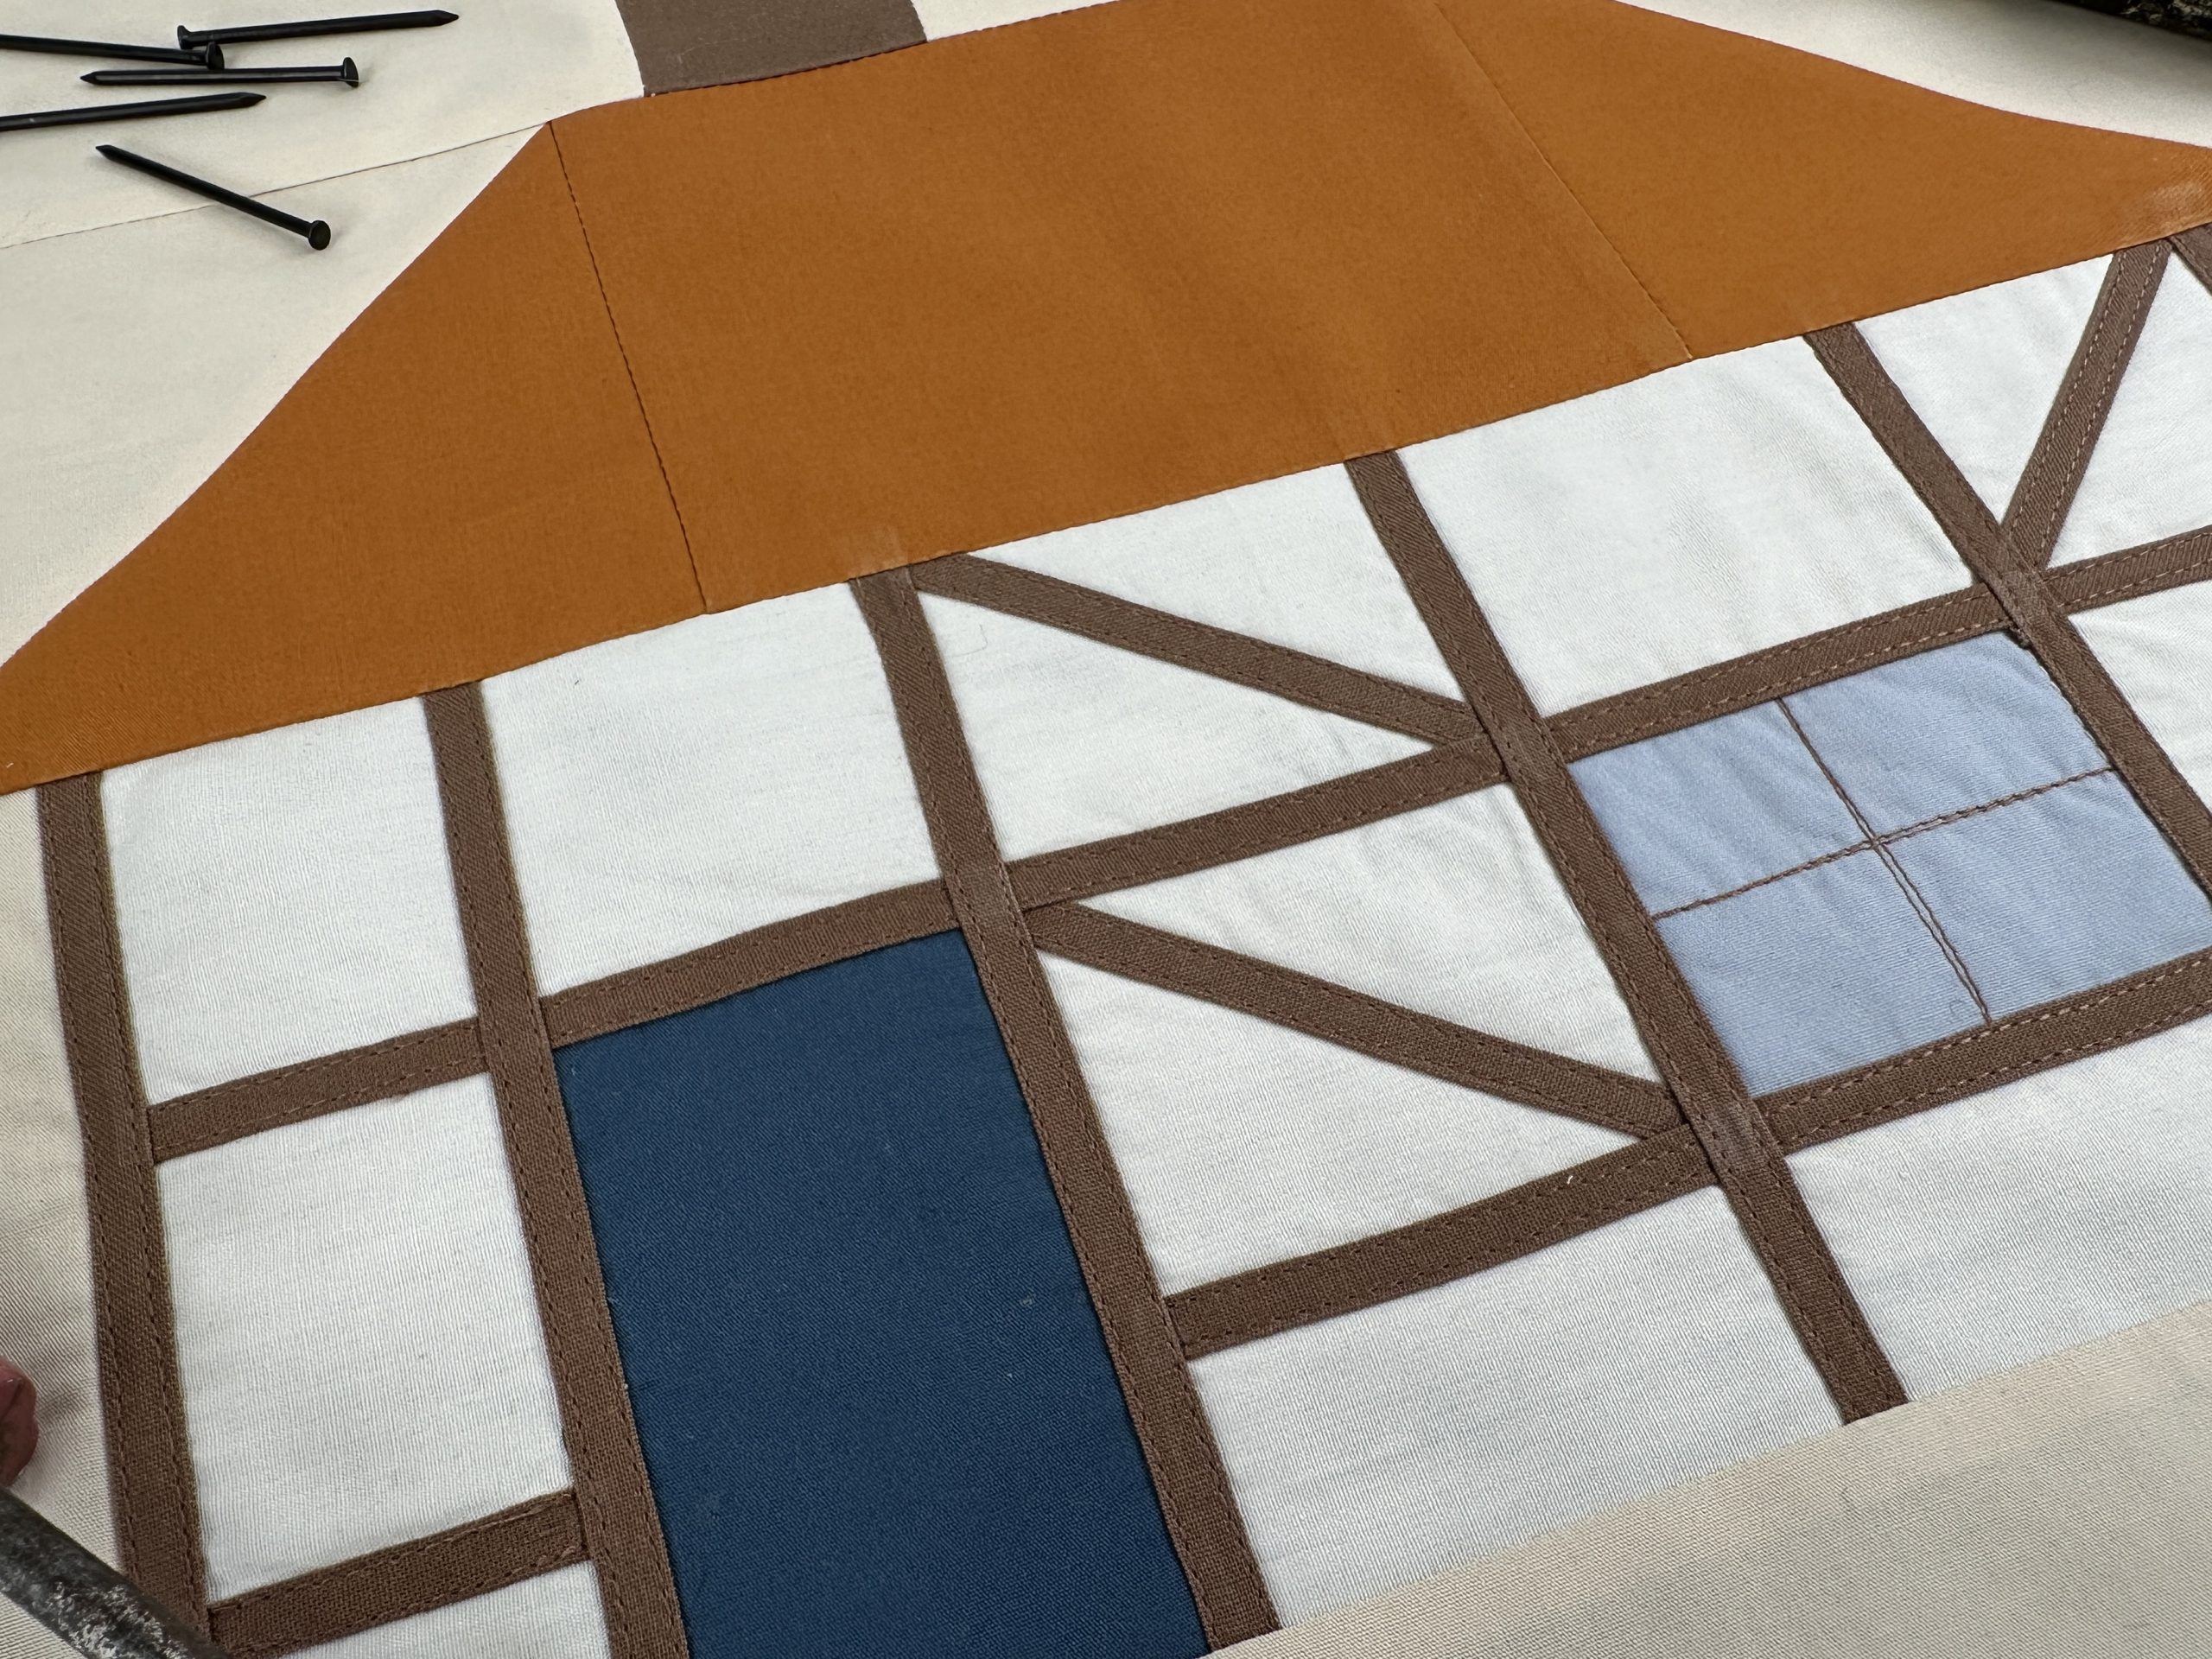
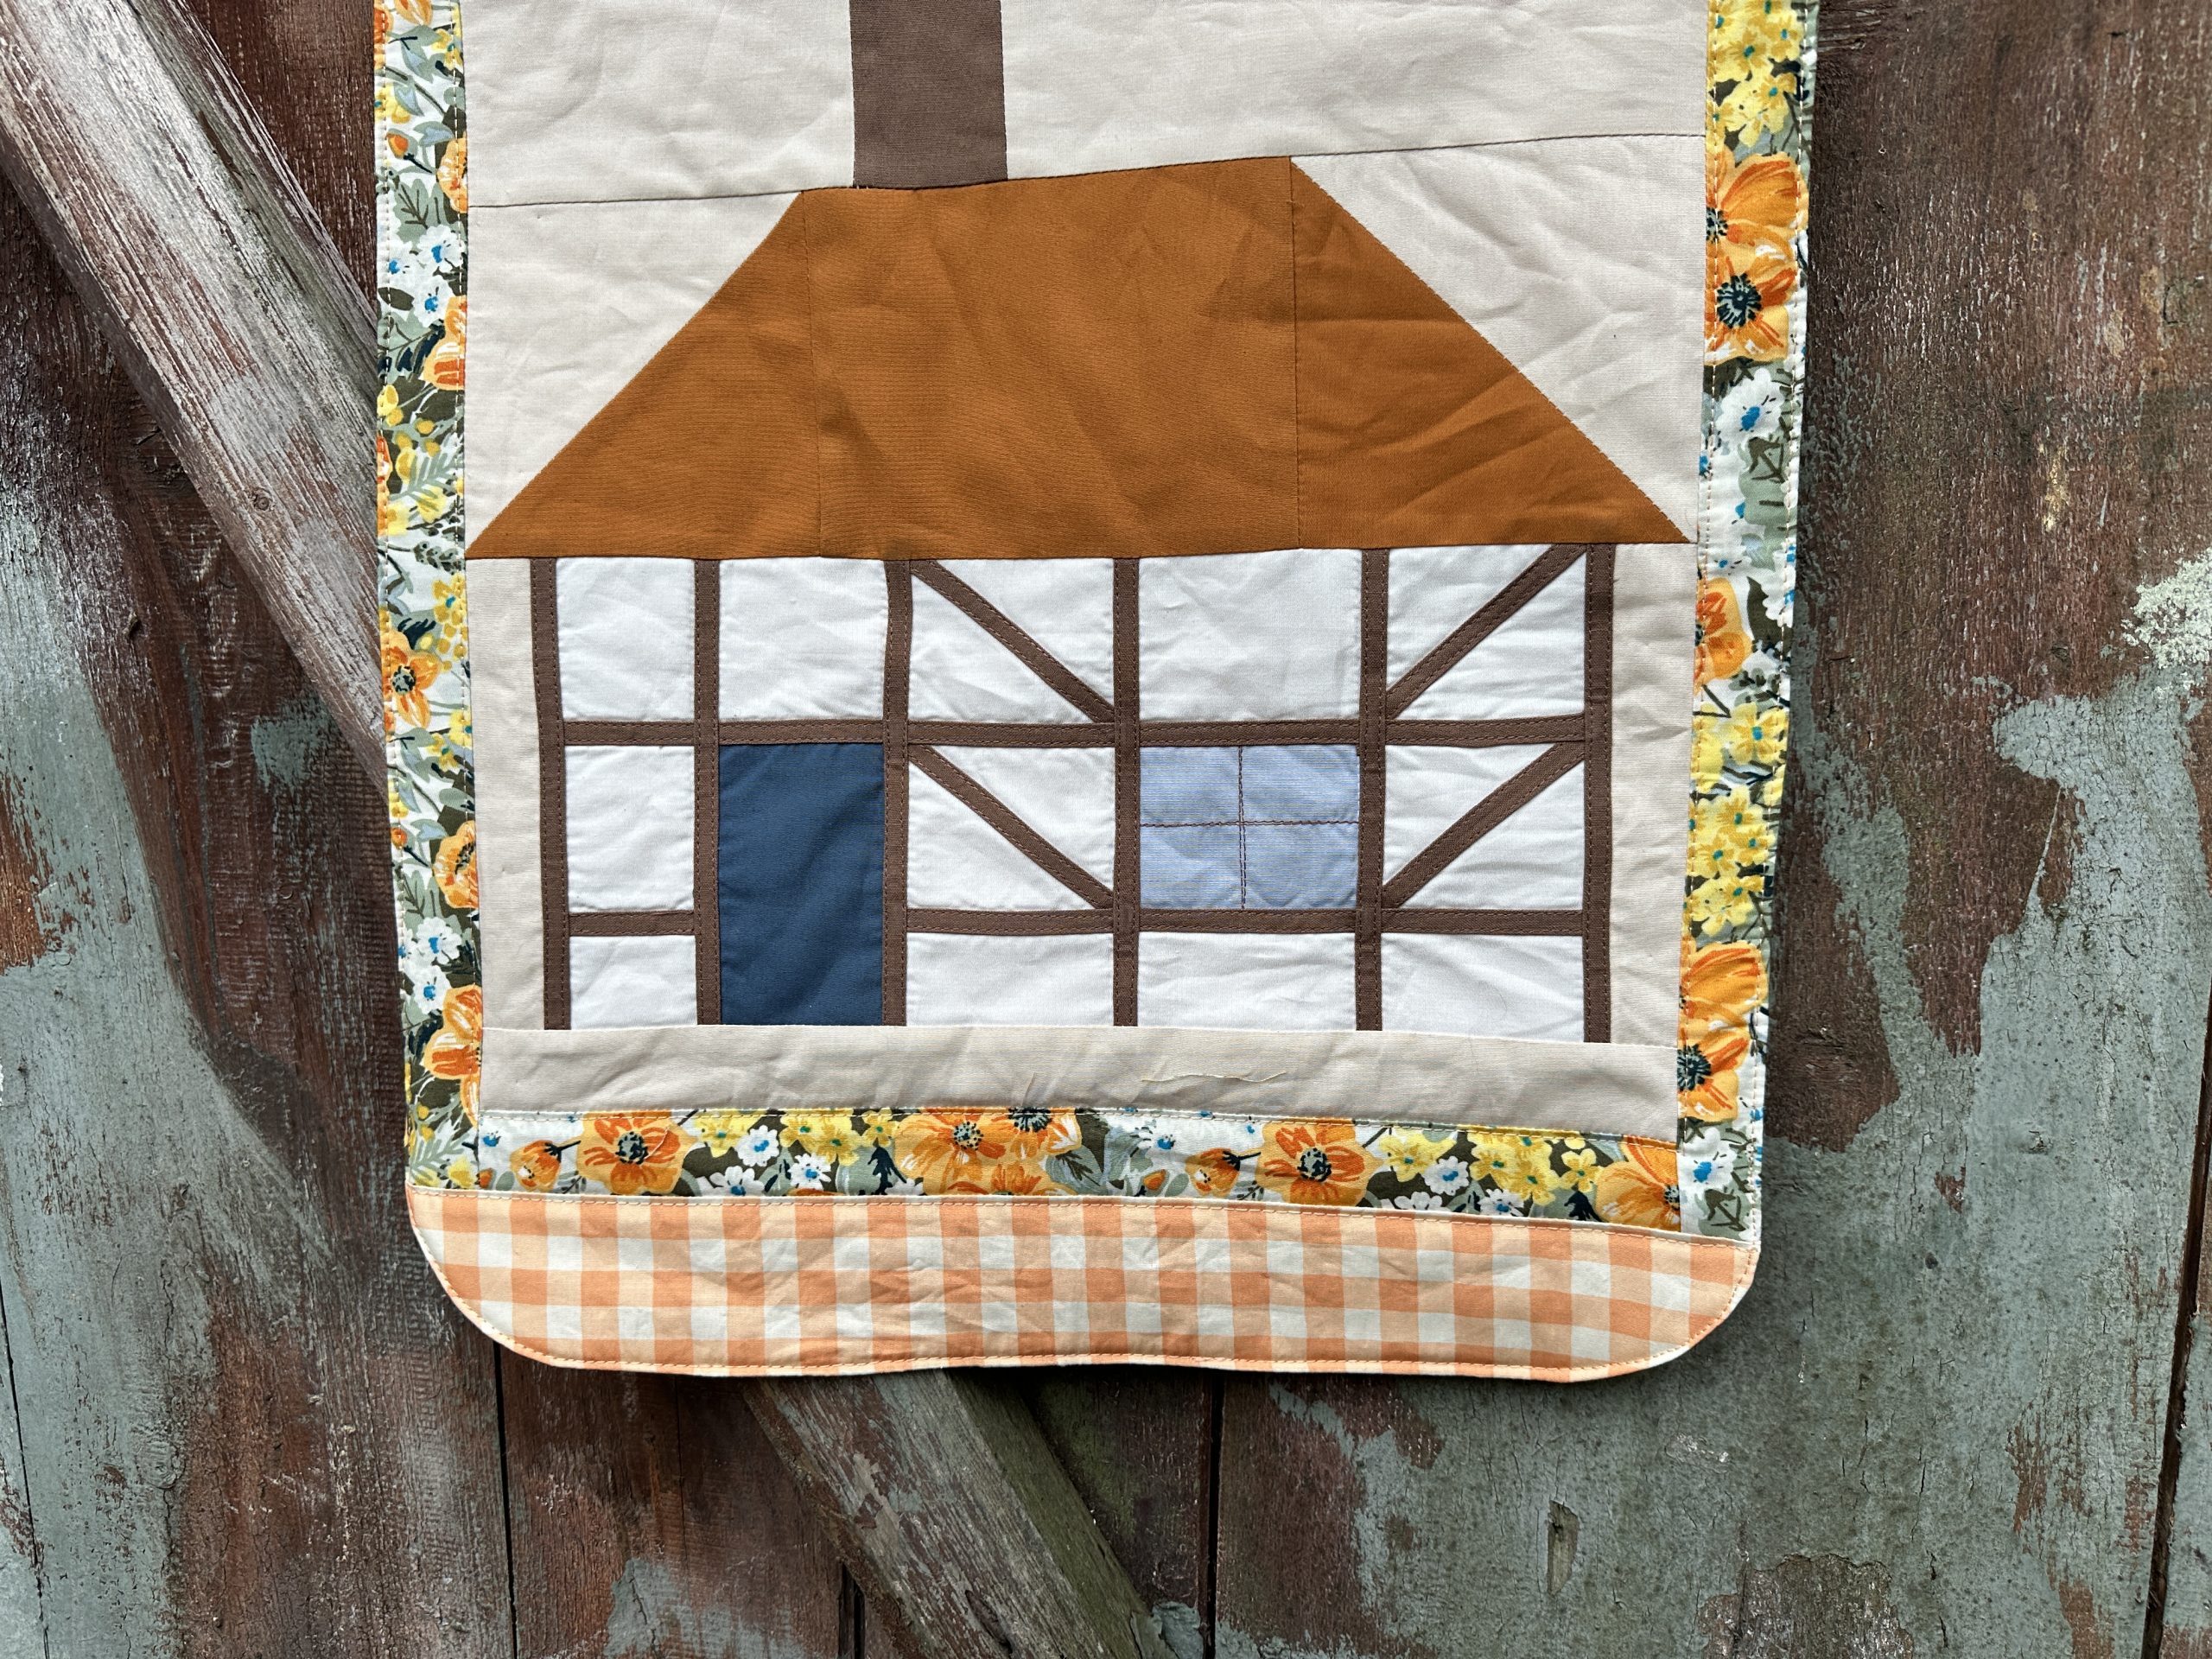
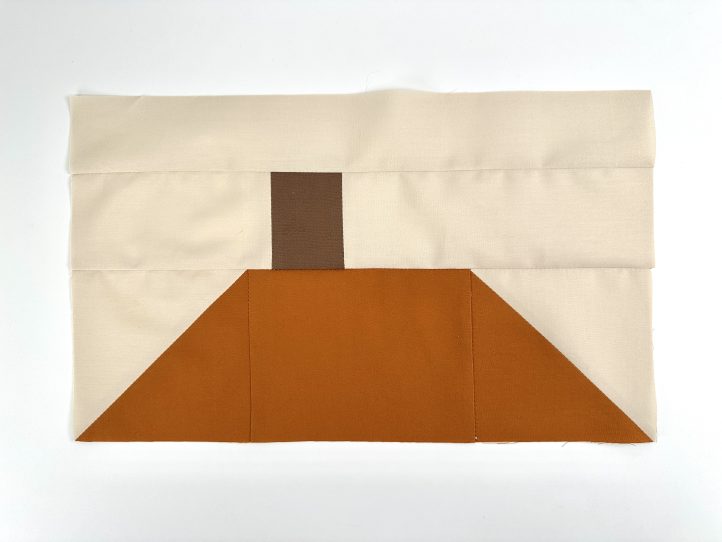
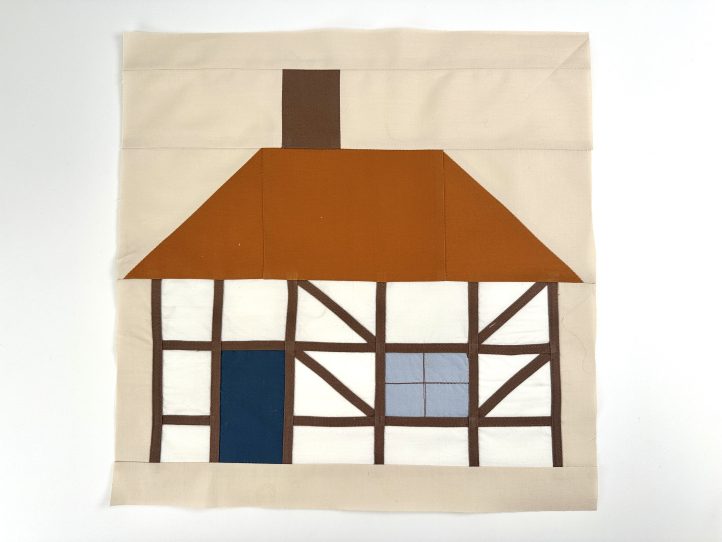
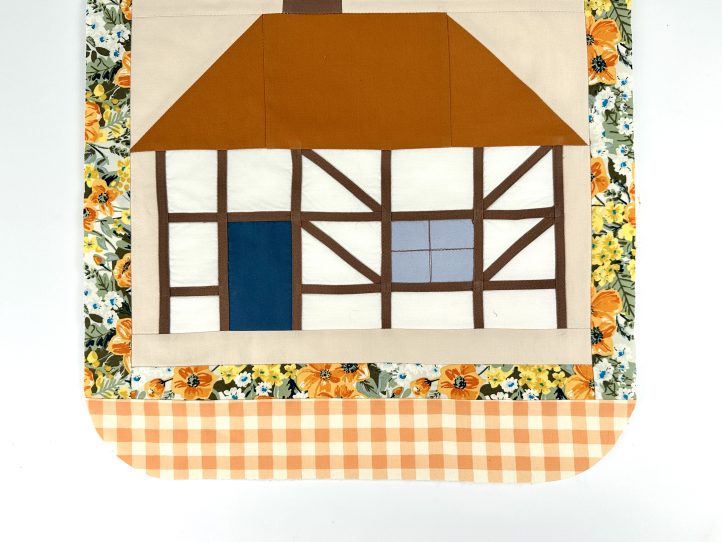
Assembling the Top Half of the House:
- Press Piece A and put it aside. Insert the chimney in between Pieces B and C and trim any overhang.
- Join Strip A to the top and press. Join a half square triangle unit to each end of the roof taking care that everything is aligned the right way. Press and then join the sky and chimney strip to the roof.
Assembling the Bottom Part of the House:
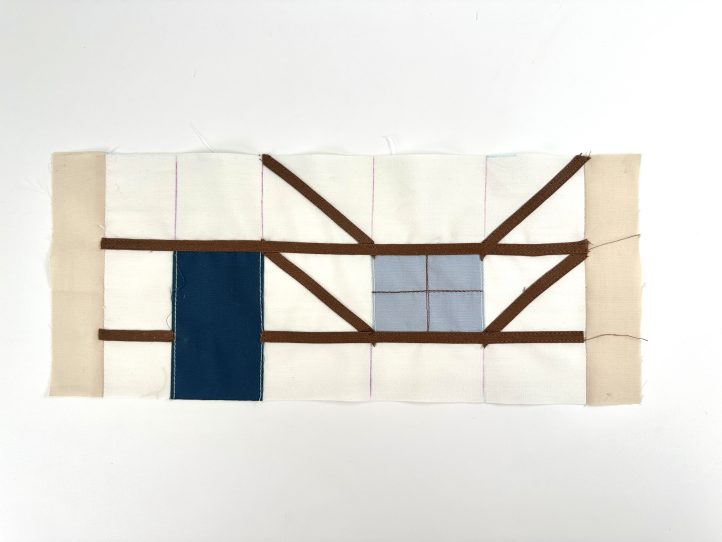
TIP: The bottom half of the house has some half timbering (made from those brown strips that you made back at the start), plus a door and window. All of these pieces are appliqued top a whole piece of ‘house fabric’.
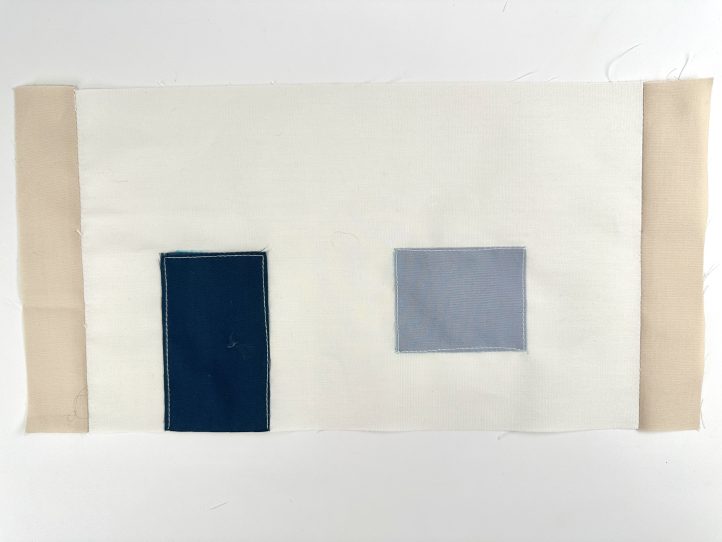
- Begin by attaching the light beige side panels (D and E) to the left and right sides of the house.
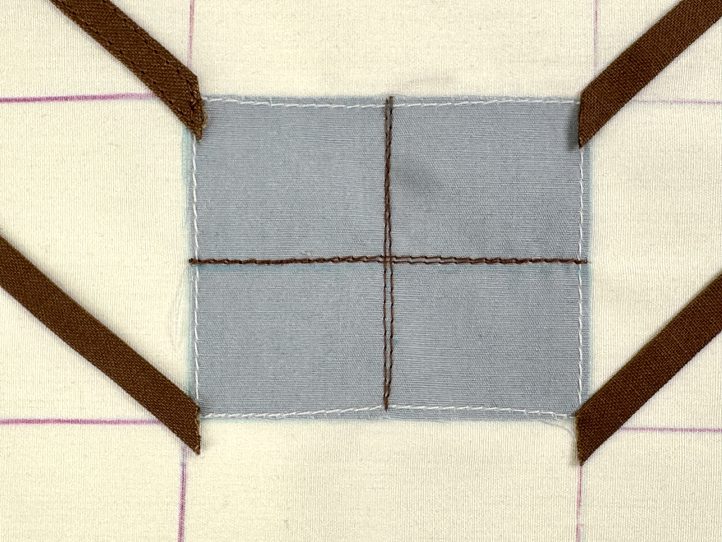
- Measure 1 1/2” along the bottom edge of the off white fabric from the left hand side and make a mark. Pin the door on here and attach with a narrow topstitch. Measure along 2 1/2” from the top of the door and attach the window the same way.
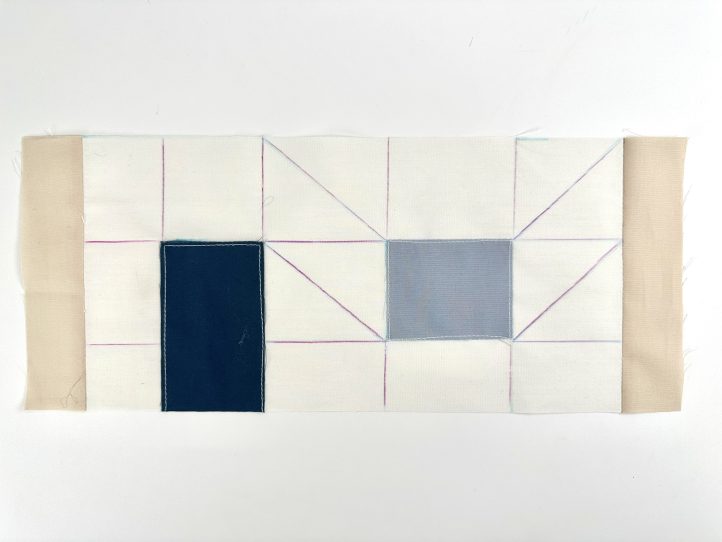
- TIP: To help get the timbers right, draw some guidelines (they will be covered in the following steps so you don’t need to worry if they are visible). These lines show you where to put the strips. Use the diagram to show you where to draw the lines.
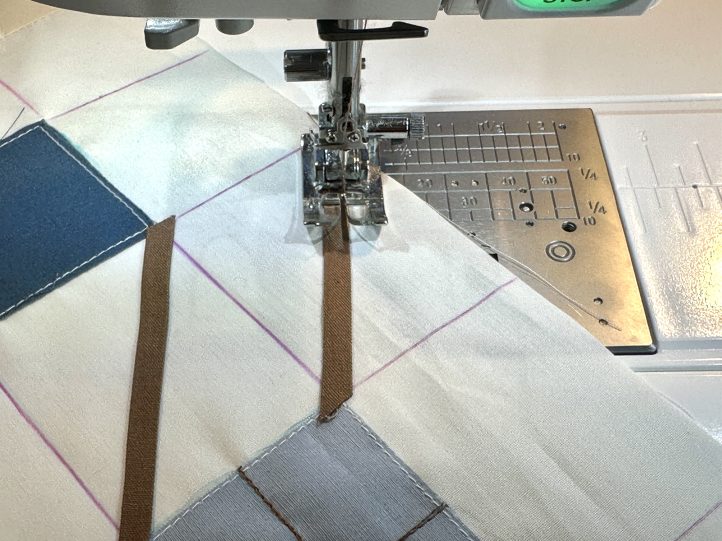
- Begin with the diagonal strips and lightly glue them over your guidelines.
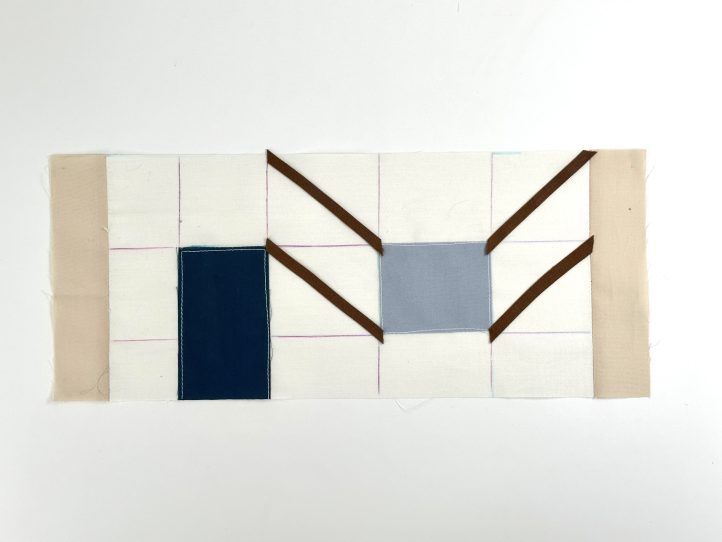
- Sew these in place with matching thread, sewing as close to the edge of the tape on both sides as possible.
- TIP: An optional idea for a more European look is to sew some mullions into the windows. Draw some guidelines in and then sew with brown thread. The designer has gone over hers twice.
- Next, come the horizontal timbers. One goes on top of the door right across to the right hand side wall and the second is cut so that a small amount goes to the left of the door and the remainder, across the right. Sew them on.
- TIP: Lightly glue these pieces on and make sure they pass the door and the window so that they cover the raw edge of both.
- Vertical timber panels, working from the left, there is one on the very edge of the house plus one to straddle the left hand side of the door and another on the right, each side of the window and one on the end of the house. Glue first and then sew.

Putting It All Together:
- Press the house and attach the bottom strip (F) and the roof section.
For the Wall Hanging:
Designer Note: Seam allowances are all 1/4” and have already been added.
Materials:
- Fabric:
- Fat eighth floral print. The designer loves Golden Days from the Heirloom collection by Sharon Holland for AGF.
- FQ gingham. Debbie’s is Apricot from the Small, Plaid of my Dreams collection by Maureen Cracknell for AGF.
- 1/2 yd. fabric for the backing. The designer has used Spiced from the Pure Elements collection by AGF.
- Interfacing:
- 1/2 yd. H630 fusible batting (Vlieseline)
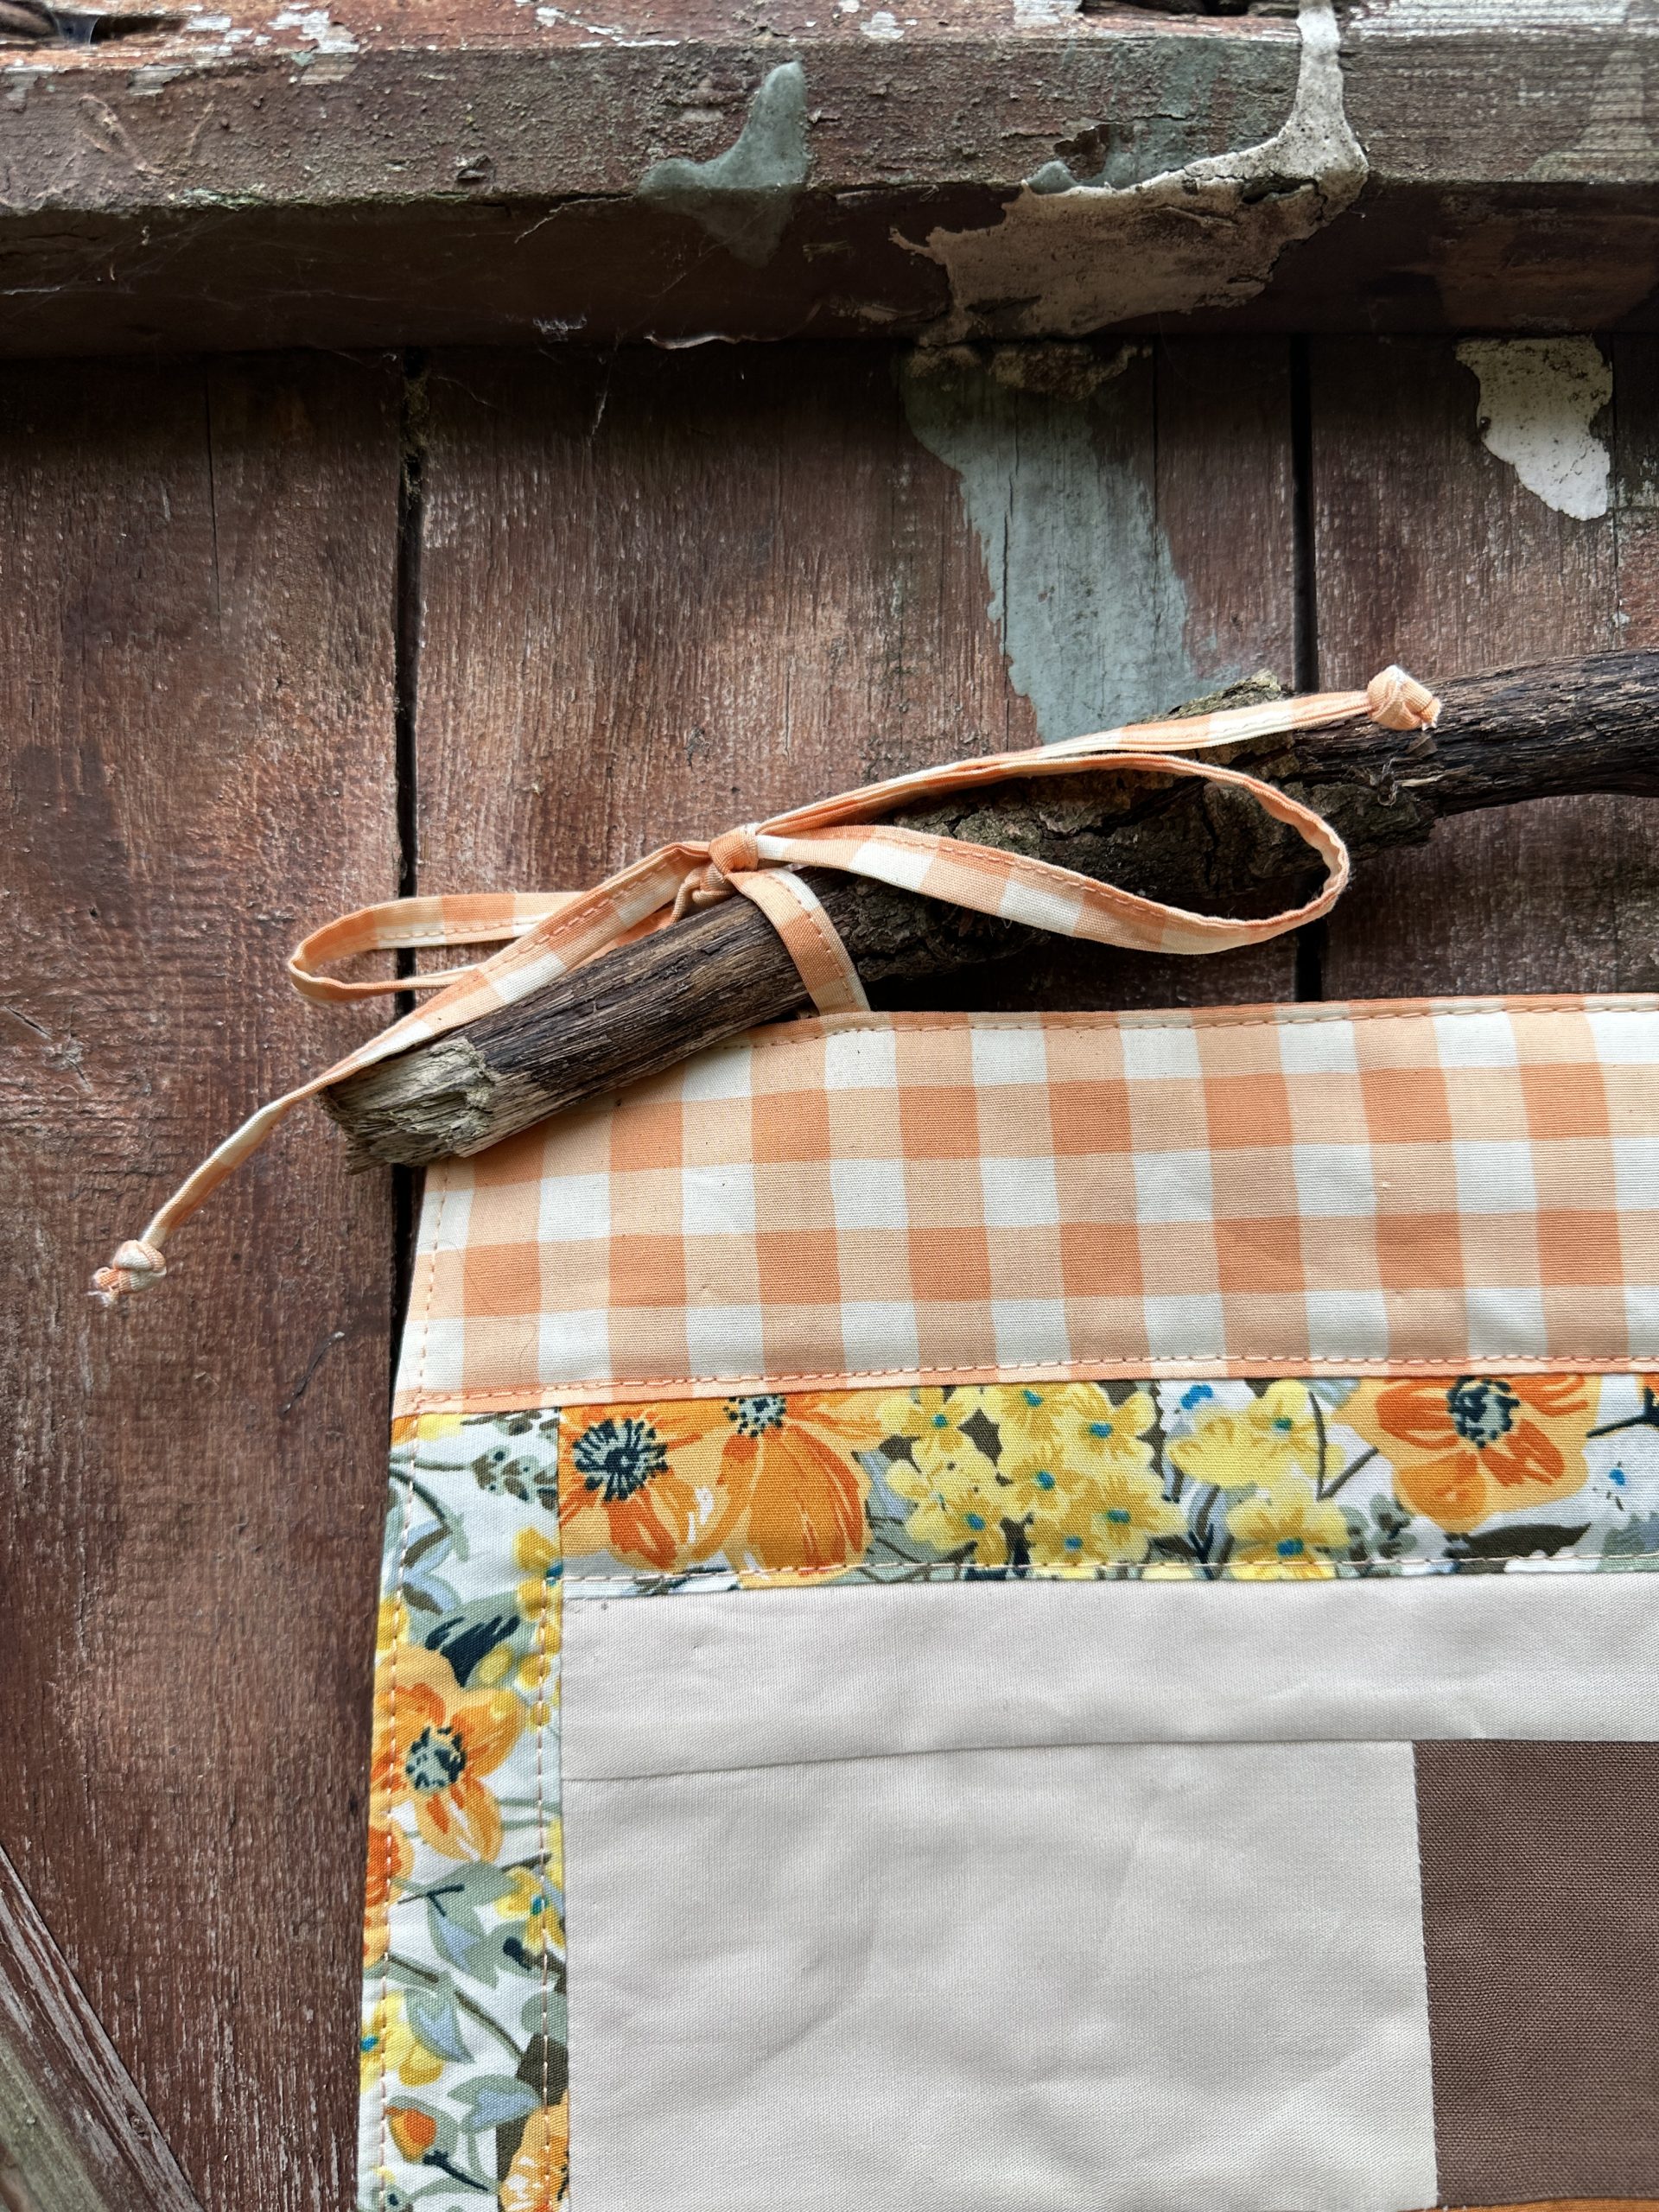
- Stick or rod about the size of your thumb and 16” long
- Coordinating threads for all fabrics and trims
- TIP: Always coordinate all of your threads with your fabrics. Sometimes this means a different color thread at the top of the machine to the bobbin’s colored thread. It is a bit of extra work but well worth it in terms of style.
- Scissors
- Fabric marking tools
Cutting Instructions:
From the floral fabric:
- 2 pieces 1 1/2” wide x 13” long for the top and bottom sashes
- 2 pieces 1 1/2” wide x 15” long for the left and right hand side sashes
From the gingham fabric:
- 2 pieces 2 1/2” wide x 15” long for the top and bottom sashes
- 4 pieces 1” wide x 13 1/2” long for the ties
From the backing fabric:
- 1 piece 14 3/4” wide x 18 3/4” tall for the backing (lining)
From the H630 interfacing:
- 1 piece 14 3/4” wide x 18 3/4” tall for the interfacing
Piecing Instructions:
MAKING:
Make the Ties:
- Fold a tie in half with the wrong sides facing and press a crease along the length. Open the strip out and fold the two long raw edges to the center crease and press again.
- Re-fold along the creases to the wrong side so that the raw edges are enclosed and topstitch down one long end to keep closed.
- Make a knot in one end of the tie.
- Repeat for the other ties.
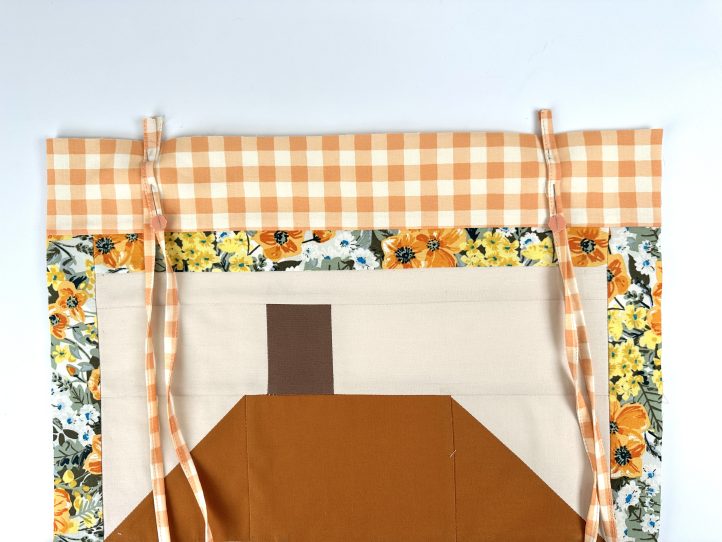
Construct the Front Panel:
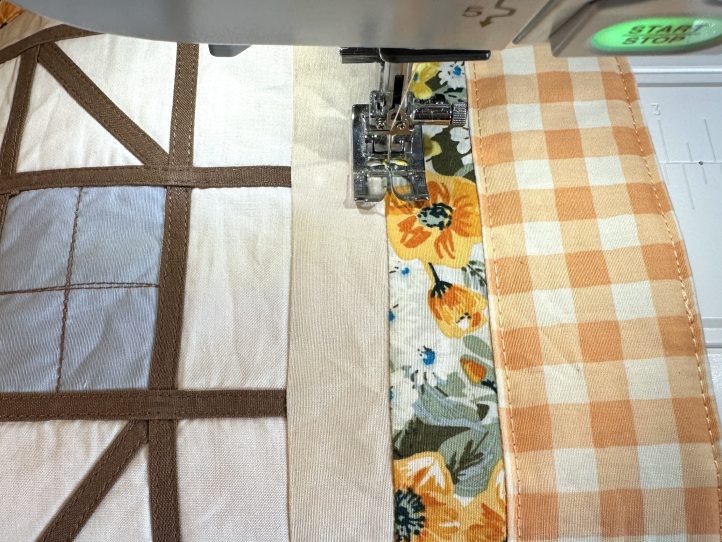
- Attach a floral strip to the top and bottom of the house block, press and add another to the left and right hand sides.

- Finish with a gingham panel at the top and bottom and then press the whole panel.
Interface the Front Panel:
- Attach the batting to the wrong side of the front panel with a hot iron to fuse the batting to the panel and trim if needed.
- Round the two bottom corners.
- TIP: You do not need a special ruler to round the corners on the bottom. Simply trace around a saucer with your favorite marker and cut out.
Add the Ties:
- Measure in 2 1/2” from each side and make a mark. Attach two ties to the mark with about 1/2” overhang.
- Repeat for the other ties.
Line the Wall Hanging:
- Place the front panel onto the lining with the right sides together and pin all around.
- Sew all around the outer edge leaving a 4” turning gap on the bottom edge.
- TIP: This is a bagged out design, which means it is turned out through a gap, and then the panel is topstitched as desired.
- Clip across the top corners and notch the curved corners.
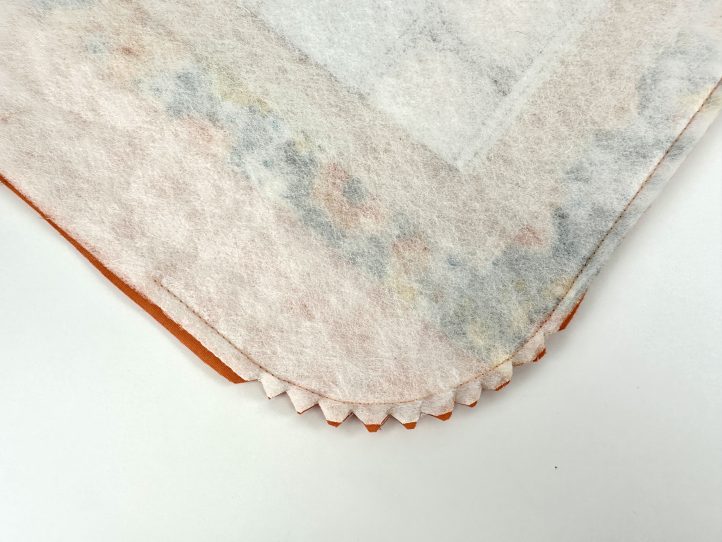
- Turn out through the gap and gently shape the corners and curves. Close the gap.
FINISHING:
- Topstitch around the outer edge about 1/4” in from the edge. Also, topstitch across the top of the gingham panels and around the edge of the floral one.
- Trim any loose threads. Tie to the chosen hanger.