
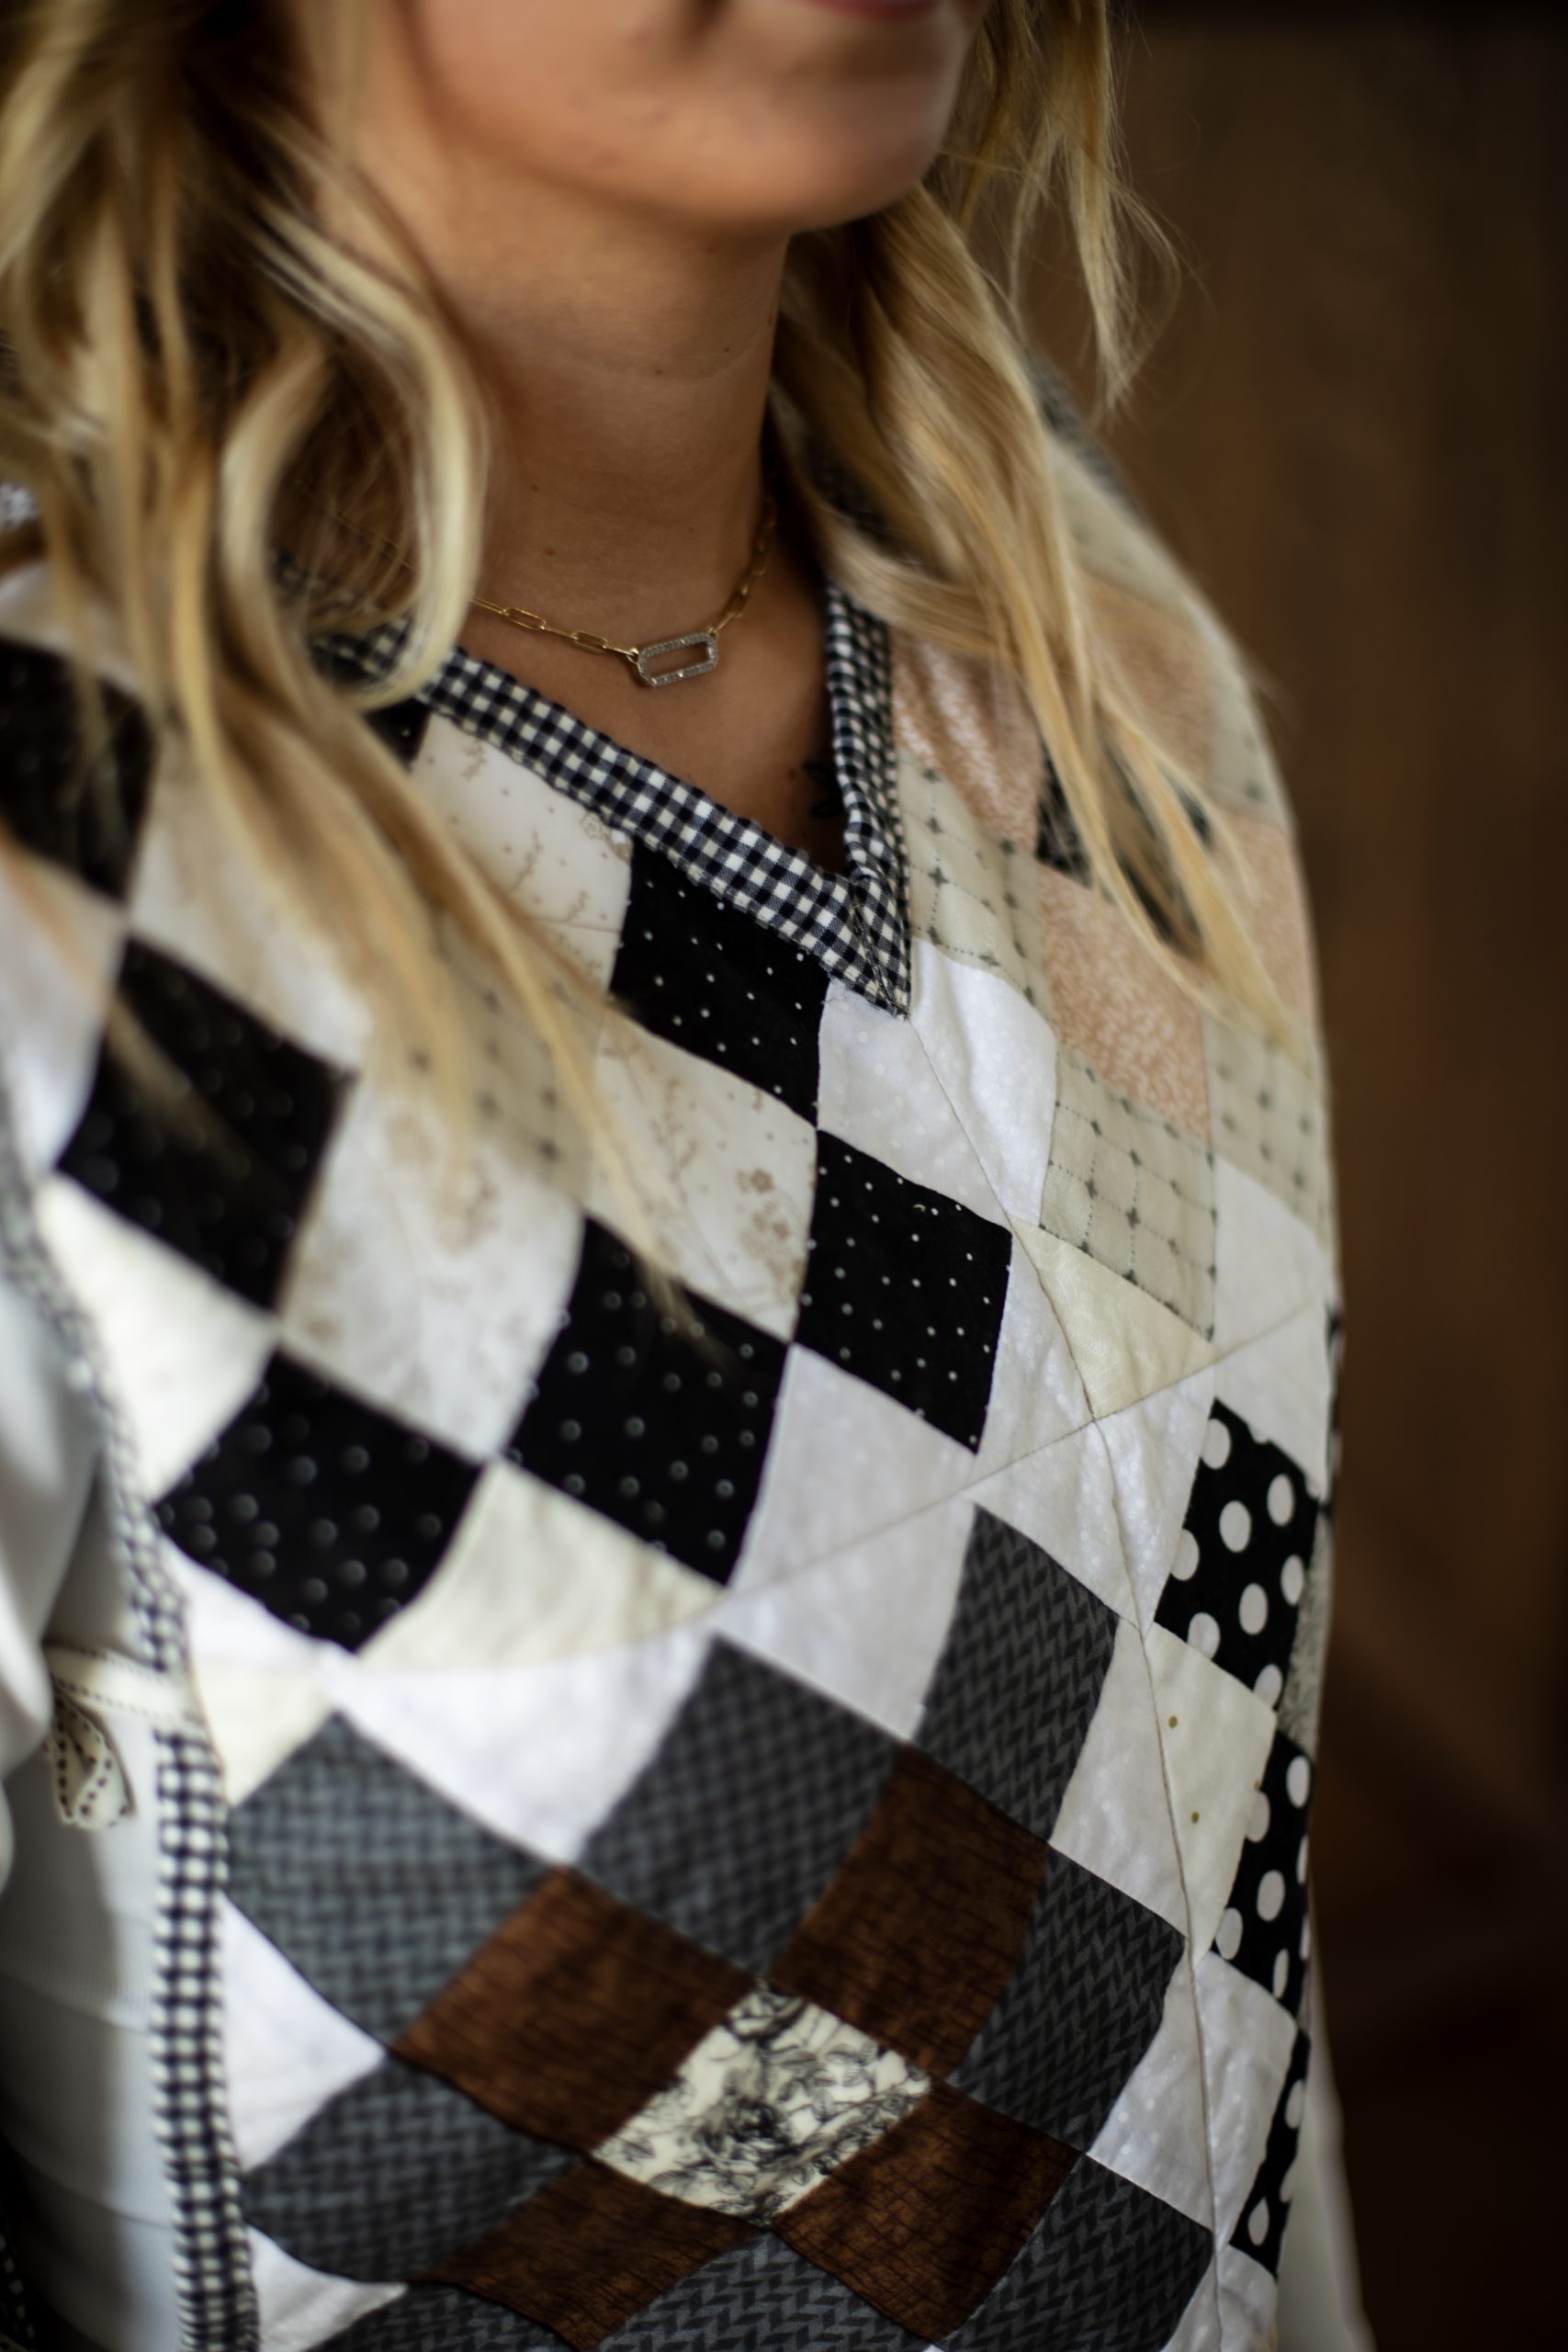
A quilting favorite meets modern design with this stylish granny square vest pattern from Janice Bailor. Made using trendy granny square blocks, this quilted vest pattern is a dreamy layering piece for fall weather and is perfect for pairing with a simple long-sleeve tee and your go-to pair of jeans. We love the combination of this traditional quilt block with a chic black, white, and gray color palette, and its side ties ensure an ultra-comfortable fit.
Skill Level: Advanced beginner
Finished Size: S/M (the size of the sewn sample) is 18 inches wide by 21 inches long
Seam Allowances: 1/4 inch for all patchwork
Designer Note: “RST” means Right Sides of fabric together
Materials:
- 10-15 – 1/8 yard or fat quarter cuts coordinating cottons or 128 2 1/2 inch squares
- 1 yard background cotton or 104 2 1/2 inch squares
- 1/2 yard coordinating cotton or flannel fabric for backing
- 1/2 yard cotton for binding
- 1- cut batting 36 inches by 45 inches or one crib-sized batting package
- 2 yards grosgrain ribbon or similar for side ties
Special Notions:
- Walking foot
- Rotary cutter, mat and acrylic ruler
- Iron and ironing board
- Grosgrain ribbon or similar
Piecing Instructions:
SIZING:
- The pattern is adjustable and very forgiving because of the side ties. The pattern was written for a Small/Medium size (the size of the sewn sample) and finishes at approximately 18 inches wide by 21 inches long.
- To adjust the pattern larger, measure around the broadest part of the chest to help determine the desired width, and from the base of the neck to the top of the pant rise to determine the desired length.
- Add extra width by adding strips of 2 1/2 inch blocks along the exterior Granny Square panels to maintain the integrity of the pattern design.
- Add extra length by creating additional bottom border rows from 2 1/2 inch squares to reach the desired length. Additional fabric may be required.
- Add extra width around the neck by cutting into the block surrounding the hole or removing an additional row of piecing from the Granny Square Variation blocks.
CUTTING:
- Line up selvages and press all fabrics to remove any creasing or wrinkles.
- Neaten and trim up the cut edges along the WOF (Width of Fabric) with a rotary cutter, ruler, and cutting mat as required to create an even edge.
- From the newly trimmed edge, use the cutting mat grid and acrylic ruler to cut:
- 104- 2 1/2 inch square of background fabric
- 128- 2 1/2 inch squares of coordinating cotton prints
- 4- 2 1/2 inch by WOF of binding fabric
- 8- 9-9 1/2 inch pieces of grosgrain ribbon
CREATING THE GRANNY SQUARE BLOCKS:
- Using the 2 1/2 inch squares, arrange your fabrics in rows. It is recommended that you use contrasting colors or prints in the ring layers of the Granny Square. Refer to Block View below.

- Place the right sides (patterned sides) of the fabrics together in pairs for each row, lining up the raw edges of the squares. Sew squares together using a 1/4 inch seam along the right edge for all pairs until the row has been completed.
- Open each sewn pair and press the sewn seams open or toward the dark sides with a hot iron.

- Use the little ridge created by the seams to line up the center point of the squares of all rows and pin in place. Sew each row right sides together using a 1/4 inch seam, refer to Block View.
- Repeat Steps 1-4 to create six (6) Granny Square blocks.
- Trim the block square by lining up an acrylic ruler along one edge of the block and trimming 1/4 inch from the final point ring points on each side. Set aside.
CREATING THE GRANNY SQUARE VARIATION BLOCKS:
- Refer to Fig. 1 and create two (2) Granny Square Variation Blocks using the same 2 1/2 inch piecing method as outlined in Steps 1-3 above.
- Omit the top 1 and 2 rows in two blocks to create a “V” shape when lined up opposite one another.

- Trim the blocks as outlined in Step 6 above.
ASSEMBLING THE PIECED VEST TOP AND BORDER EDGES:
- Join 6 Granny Square Blocks RST in rows of 2 as shown in the Layout View below.
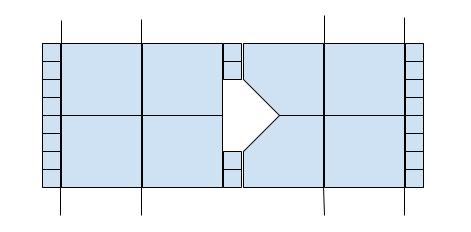
- Combine the remaining Granny Square Variation Blocks along the center seam to create a “V” shape with the omitted rows.
- Place the Granny Square variation row RST with a Granny Square Block row and join together along the longest seam side with a 1/4 inch seam.
- Join the two remaining Granny Square Block rows.
- Use the square piecing method to sew together 2 rows of 8 2 1/2 squares each to create a bottom border row for the front and back panels.
- Join 4 2 1/2 inch squares into two pairs to create the top shoulder pieces for the front panel.
- Line up the center of the square border row with the center seams of both the front and back Granny Square vest panels, and sew together with 1/4 inch seam. Trim off the excess on both ends.
- Attach the 2 1/2 inch square shoulder piece pairs to the left and front top of the Granny Square Variation blocks with a 1/4 inch seam.
- Line up the Granny Square Variation with shoulder pairs RST to the top of the back Granny Square vest panel and sew together.
- Open and press flat to complete the pieced vest.
QUILTING AND BINDING:
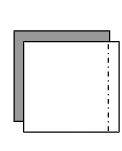
- Cut a strip of batting and backing approximately 2-3” wider and longer on all sides than your finished vest top.
- Assemble the quilt sandwich for the quilted vest by laying out the backing (right side down), batting in the center, and the quilted vest on top, right side up. Use pins or basting spray as desired.
- Sew a 1/8 inch stitch around the entire neck opening before continuing to quilt the vest as desired. The cover quilted vest has been quilted in a wide grid pattern following the seam lines of the piecing.
- Use a grid cutting mat and acrylic ruler to trim off the excess batting and backing materials around the entire vest perimeter, as well as the interior of the neck opening.
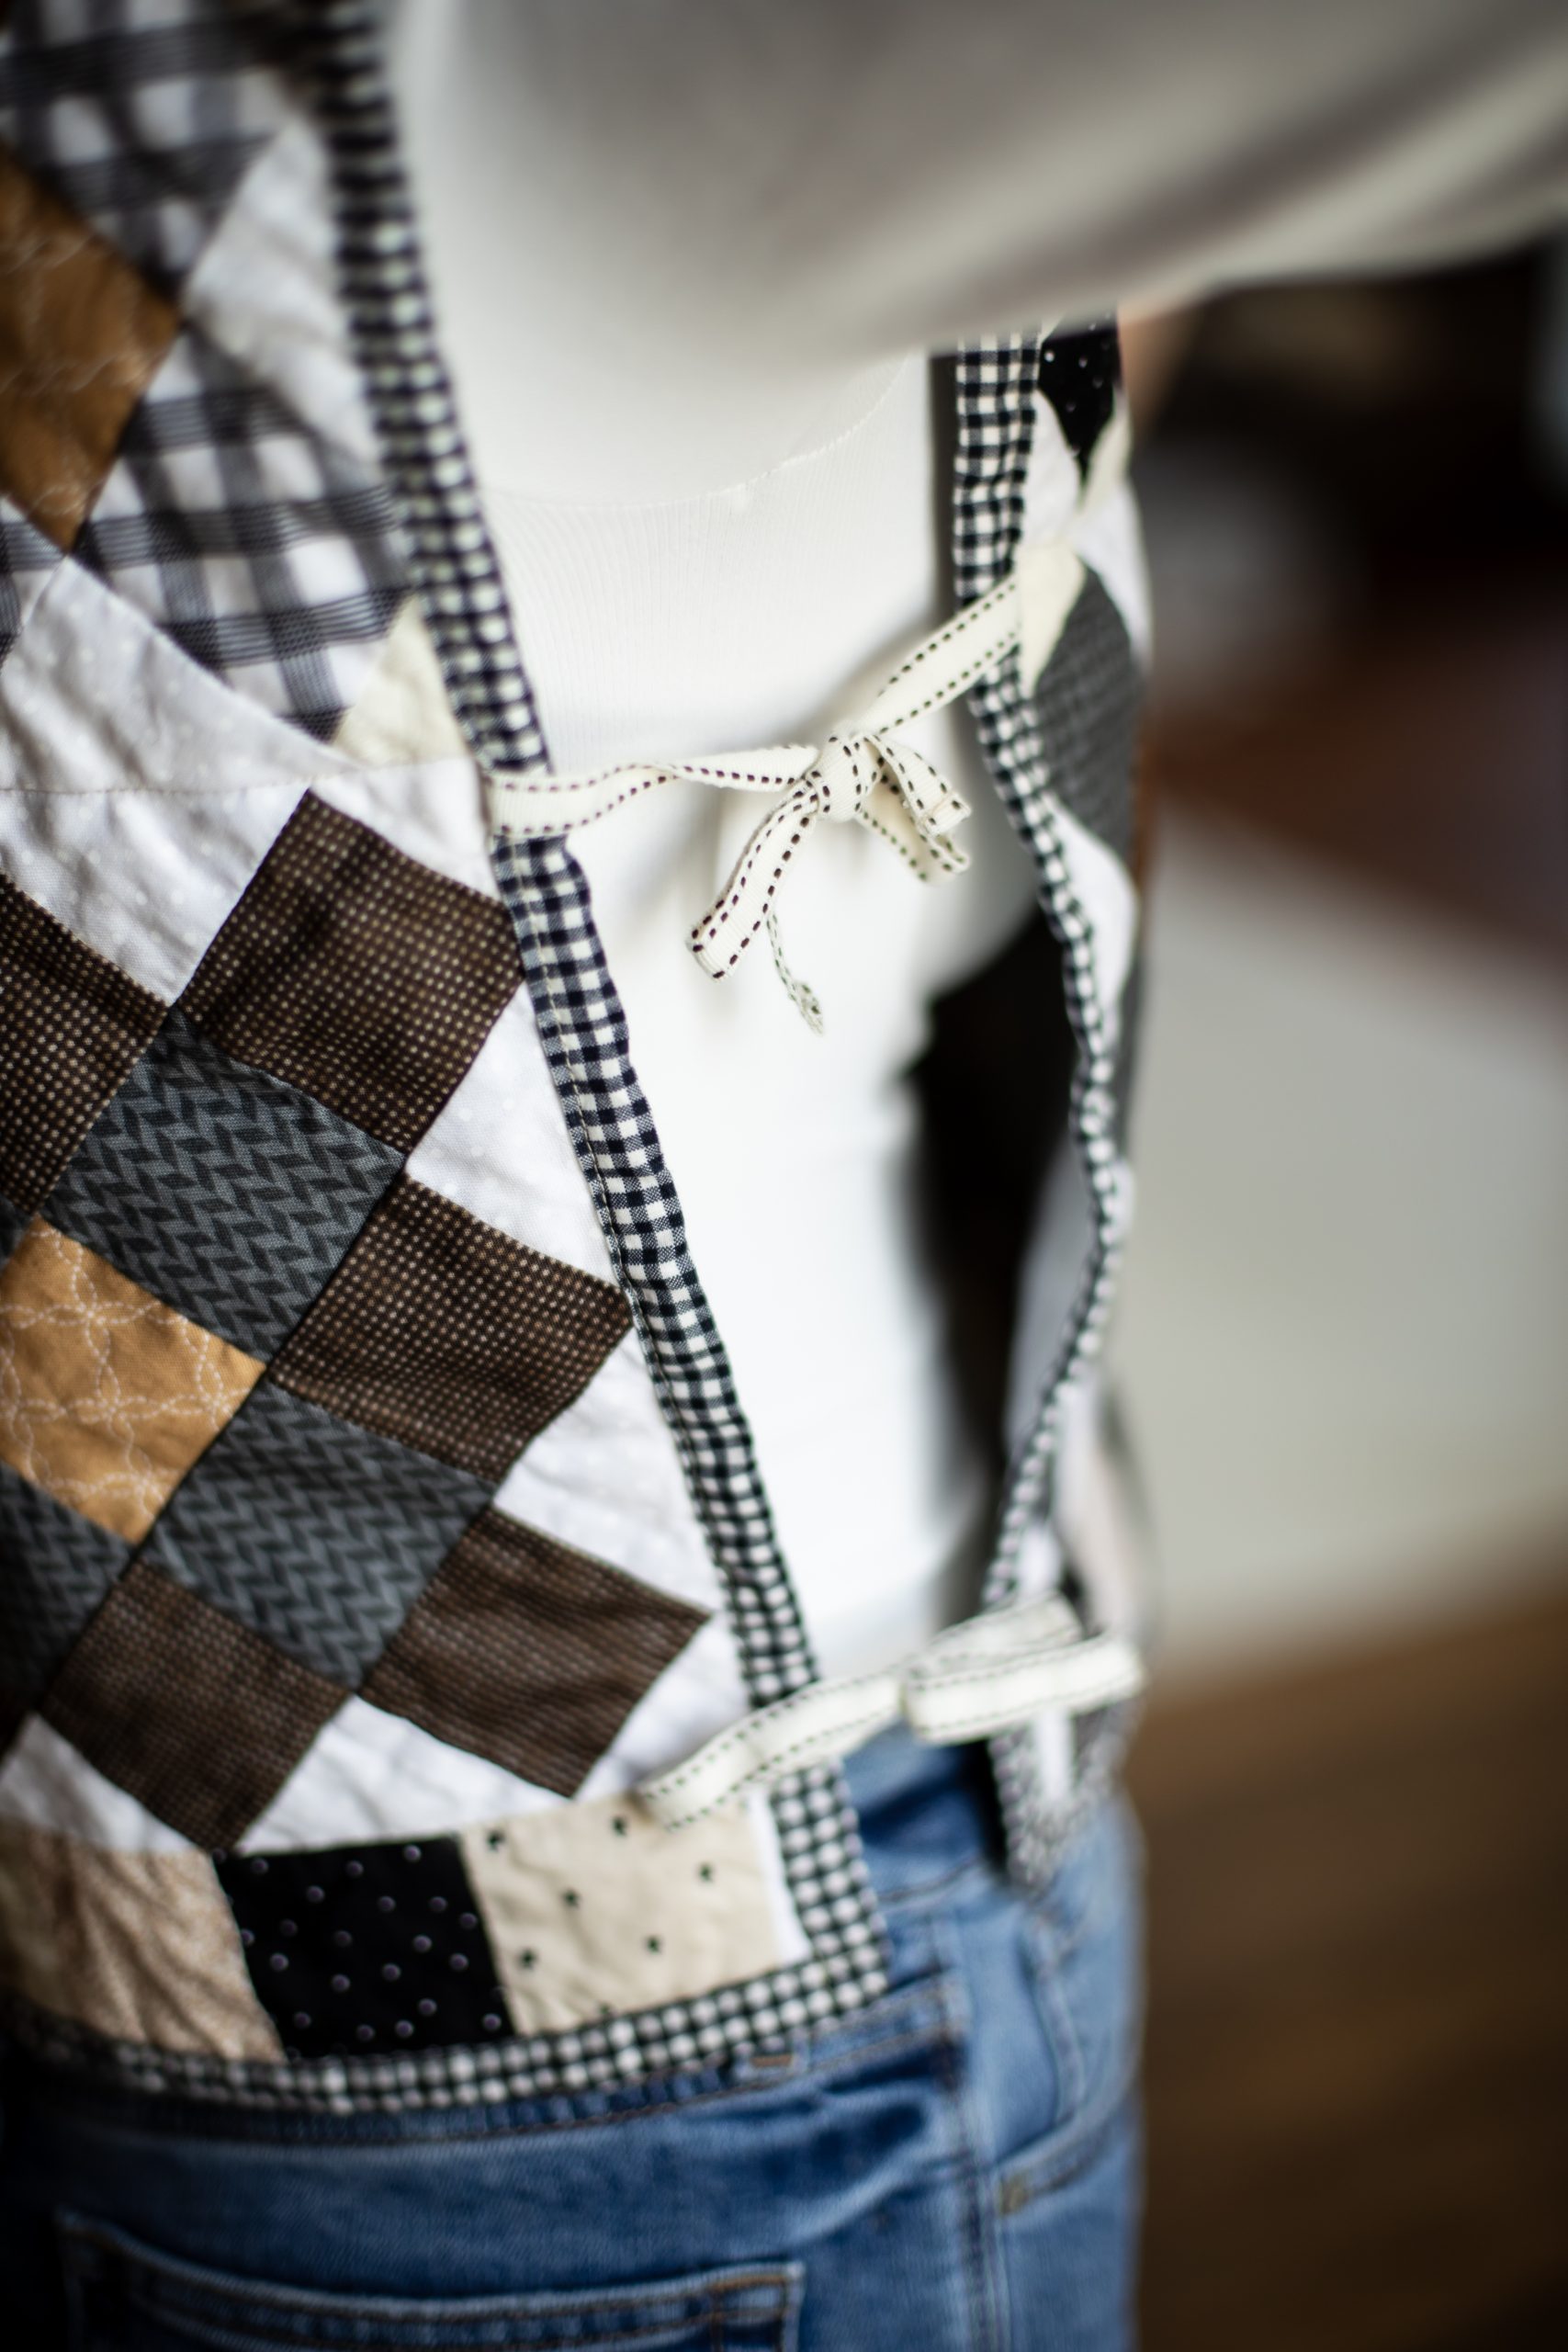
- Add the grosgrain ribbon ties on all four sides at the top of the pieced bottom band and center block seams as shown in Layout View above.
- Pin the ribbons with the tail ends laying inward, the raw edge of the ribbon lined up with the raw edge of the vest body, and sew a basting stitch 1/8 inch to hold on to the raw edges together.
- Prepare the binding by cutting 2 1/2” by WOF strips of fabric and attaching all strips together on the diagonal. Press the strips wrong sides together in half lengthwise along the entire length of the binding to complete.
- Attach binding to the quilted vest sandwich by lining up all raw edges, tuck and pin the ribbon ties out of the way, and miter the binding corners as you go.
- To miter corners, sew into the corner, stopping 1/4 inch in from the end, backstitch, and remove the quilt from the sewing machine.
- With the quilt laying flat, fold the binding up and away from the quilt, making the binding straight with the unsewn side.
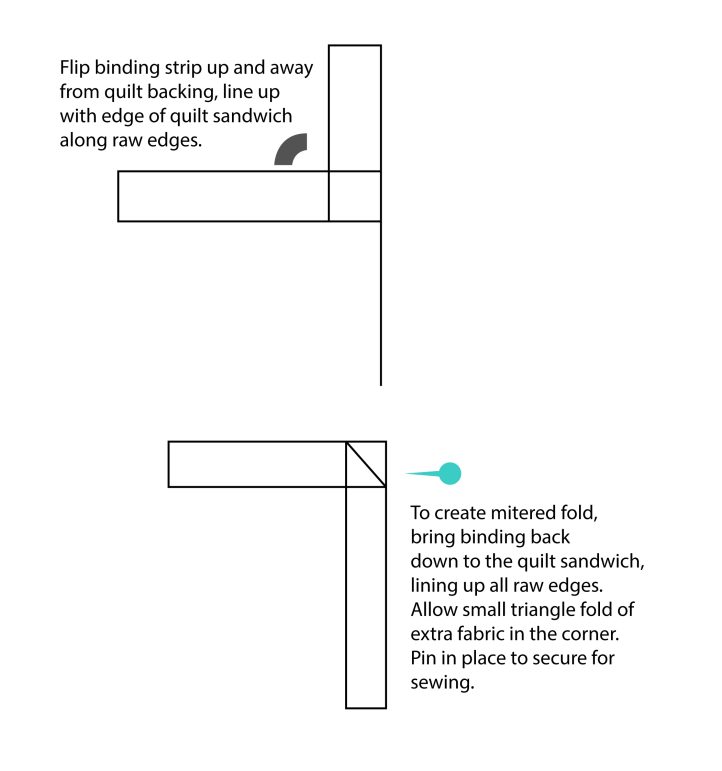
- Fold the binding down to the sewn side, leaving a diagonal fold on the underside of the binding, and pin the fold in place.
- Place the quilt back into the sewing machine and sew down the fold, and continue sewing on the binding.
- Make a miter at each corner, adjusting the amount of fold as necessary.
- Join the ends of the binding together where they meet and attach to the quilt sandwich.
- Press and fold the binding over to the opposite side of the quilted vest to finish. Tuck the mitered corners flat, pinning them into place as necessary.
- For the neck binding, begin at the point of the neck opening and leave a tail of binding approximately 1 1/2 inches beyond the point.
- Finish the binding with your preferred method, either by hand stitching in place or by machine stitching.
- Stitch the neck opening as outlined above, then fold the tail ends into points, tucking the raw edges under, and sew in place to finish the neck binding.


This vest is so cute, can’t wait to try this pattern out, looks like a great gift idea too:)
Thanks so much for your kind comment! Have a great day 🙂 – Ashley, We Like Quilting