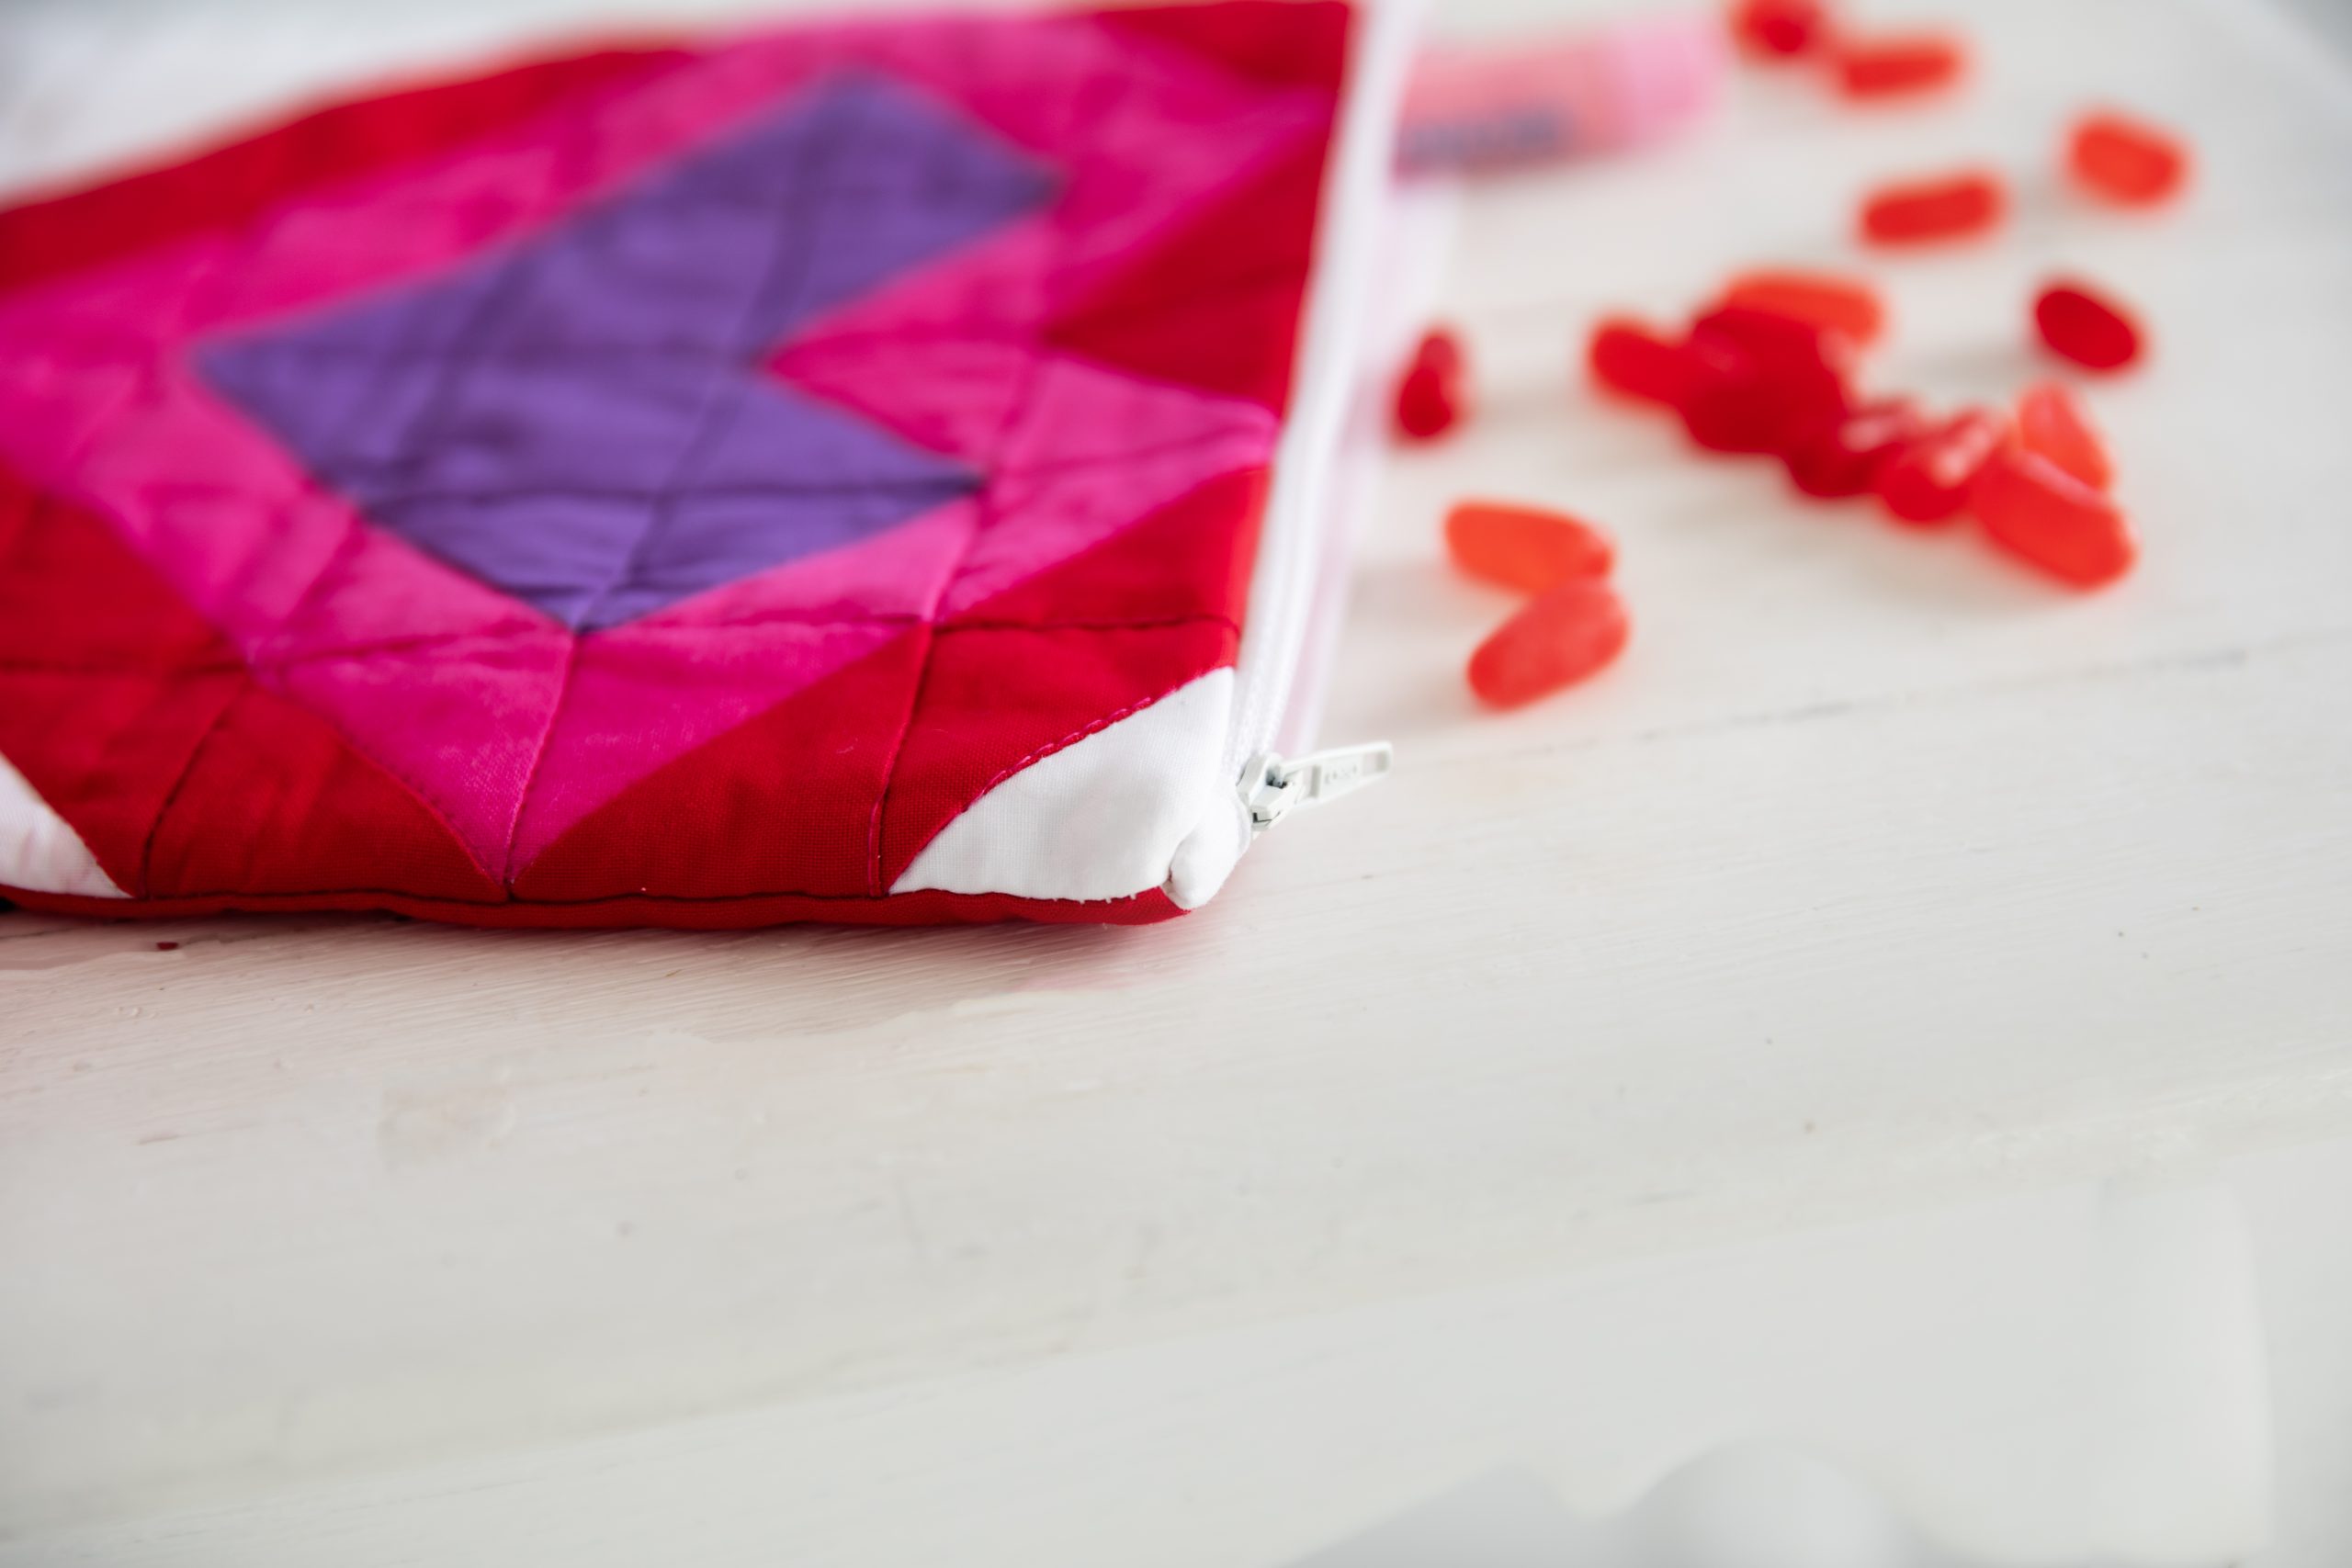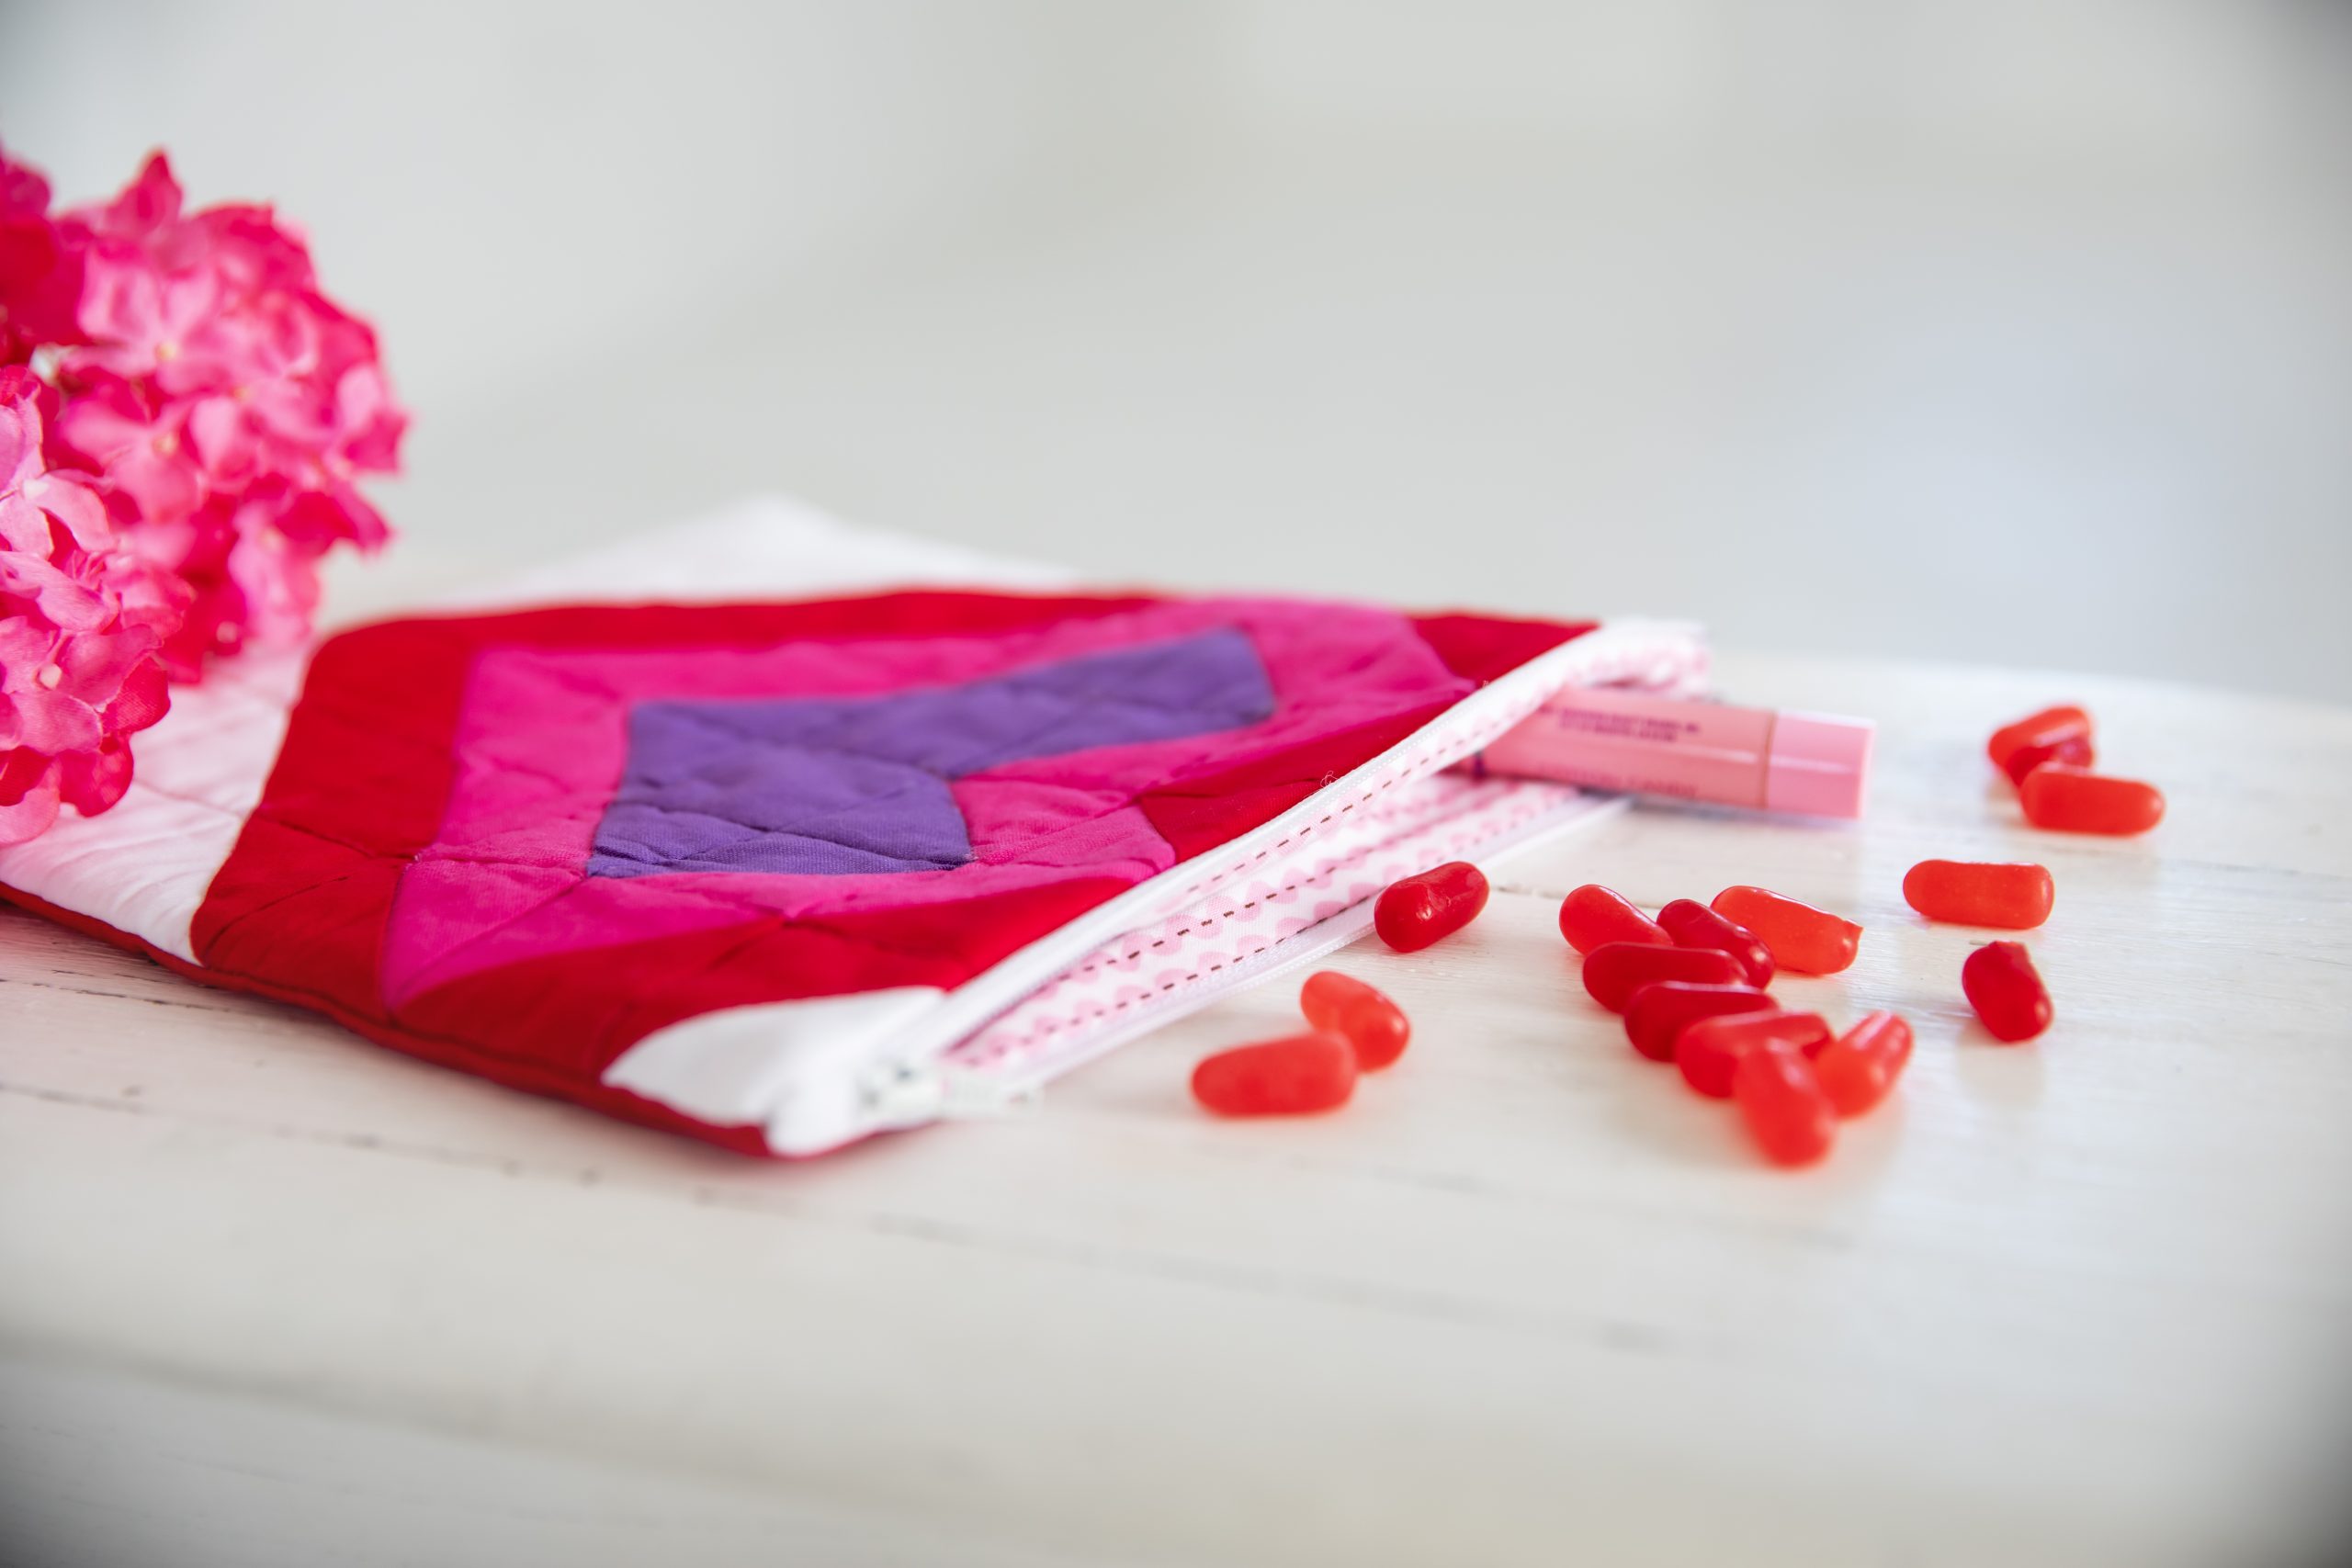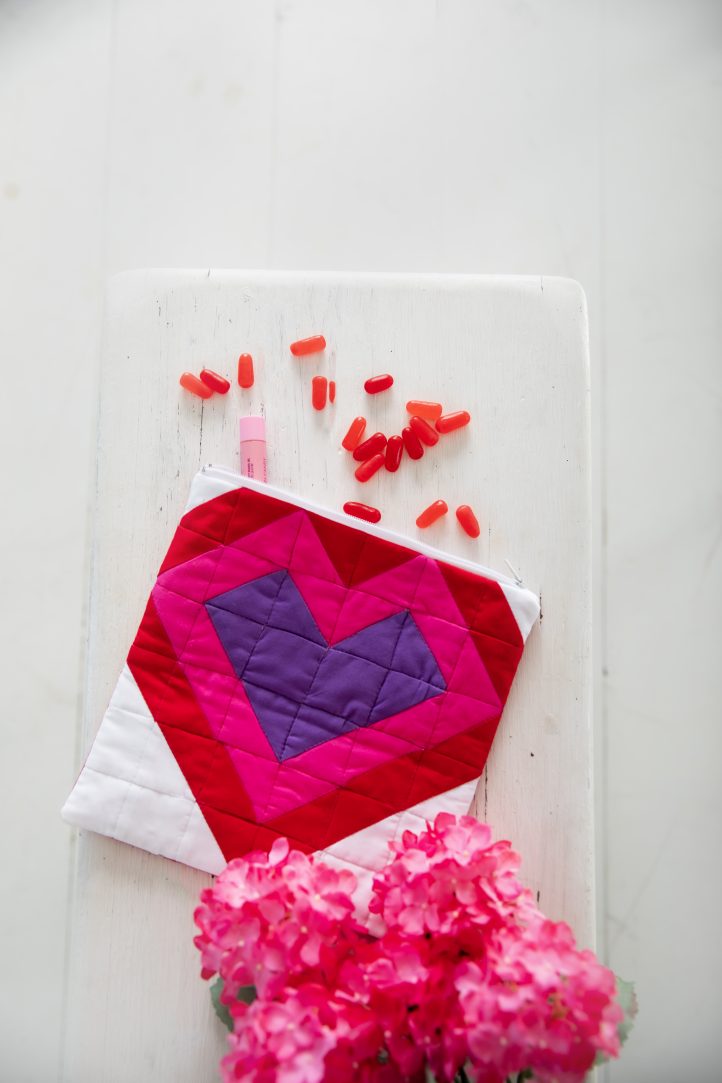
We can’t get enough of whimsical holiday projects, which is why we’re so excited for our readers to see this charming Valentine’s Day pattern. A new pattern from Mallory Hill, this quilted zipper pouch features a colorful heart made from HSTs in purple, pink, and red. This sweet, quilted pouch can also double as a cute date night clutch, making it a fun option for your Valentine’s Day ensemble!
Finished Size: Approximately 9 inches x 9 inches
Abbreviations:
- RST = Right Sides Together
- RS = Right Side
Materials:
- 1/4 yard each – Purple, pink, red, and white quilting cotton fabric
- 1/2 yard – Interior fabric
- 1/2 yard interfacing – Pellon SF 101 or similar
- 10 inch zipper
- 1 spool coordinating thread
- Piece of batting – 12 inches x 12 inches
- Scrap of fabric – 12 inches x 12 inches
Tools:
- Rotary cutter/Cutting mat
- Iron/Ironing board
- Gridded quilting ruler
- Pins/Clips
Cutting Instructions:
- Exterior Back – 1 – 10 inch x 10 inch
- Interior – 2 – 10 inch x 10 inch
- Zipper Tab – 1 – 2 inch x 2 inch
Cut the following 2 1/2 inch squares:
- Red – 10
- Pink – 10
- Purple – 6
- White – 10
Piecing Instructions:
- Make your half square triangles:
- White / Red – 8, Red / Pink – 12, Pink / Purple – 8 (Note: You will have 2 additional purple squares and 6 additional white squares that will not be used in your half square triangles.)
- Lay two squares RST, draw a line diagonally down the center of one square. Draw a line 1/4 inch on each side of the center line. You should have three lines going diagonally across your set of squares.
- Sew down both outside lines.
- Cut along the center line.
- Press squares open, or to the dark side.
- After creating all of your squares, trim all squares to 2 inches.
- Piece all squares together according to the diagram, and press well.
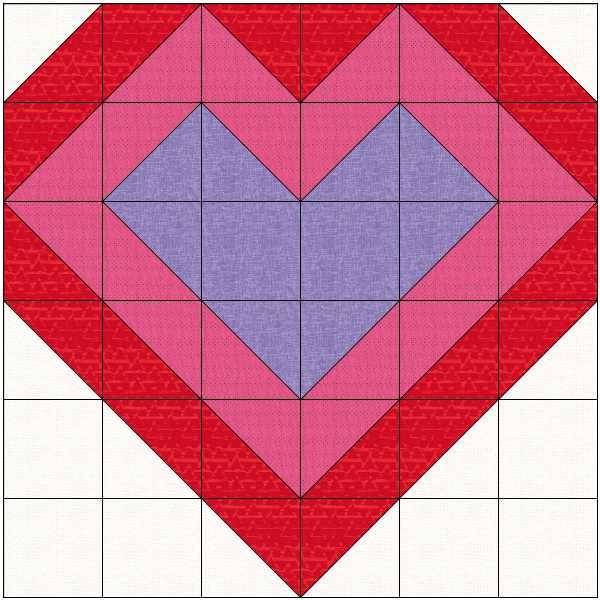
Pattern diagram
- Layer your heart panel with a layer of batting and a piece of scrap fabric on the bottom. Baste or pin together.
- Stitch in the ditch along all seams to quilt the front panel. Trim front panel to 9 1/2 inches x 9 1/2 inches.
- Apply interfacing to your exterior back panel and both interior pieces, trim all pieces to match the front panel.
- Prepare your zipper.
- Trim your zipper so the length is 9 inches, not including any extra tabs past the metal stops.
- Fold zipper tab in half, wrong sides together, and press. Open up and fold raw edges in towards the creased edge. Fold again along middle crease, enclosing raw edges, and press.
- Slip the tab over the right end of the zipper (when zipper is face up, closed, and zipper pull is to the left), edge stitching in place.
- Fold the fabric tabs on the left side of the zipper away from the zipper, towards the wrong side, at a 45 degree angle and tack into place.
- Attach zipper.
- Lay your front exterior heart panel RS up on your work surface. Lay the zipper RS facing down, centered on top of the exterior panel with the zipper pull on the left side. Baste zipper to fabric with a 1/8 inch seam allowance.
- Lay one interior panel RS down on top of the basted zipper, match edges and pin or clip in place.
- Using your zipper foot, stitch along the top edge, back stitching at the beginning and end. Move zipper pull as needed.
- Fold both pieces of fabric away from the zipper, wrong sides together, and press.
- Repeat the process with the other exterior/interior pieces and the other side of the zipper.
- Unzip your zipper at least half way.
- Place your exterior panels RST and your interior panels RST. Make sure seams and edges meet, and zipper teeth are folded towards the interior of the zipper pouch. Pin or clip around all four edges.
- Sew around the edges using a 1/4 inch seam allowance. Leave a 4 inch to 6 inch gap along the bottom of the interior panels. Do not stitch over the zipper or zipper tab. Backstitch at both ends.
- Turn the pouch right side out through the hole along the interior panels.
- Sew the hole in the interior panel closed by hand or with a tight edge stitch.
- Push the interior inside the exterior and push out corners, press as needed.