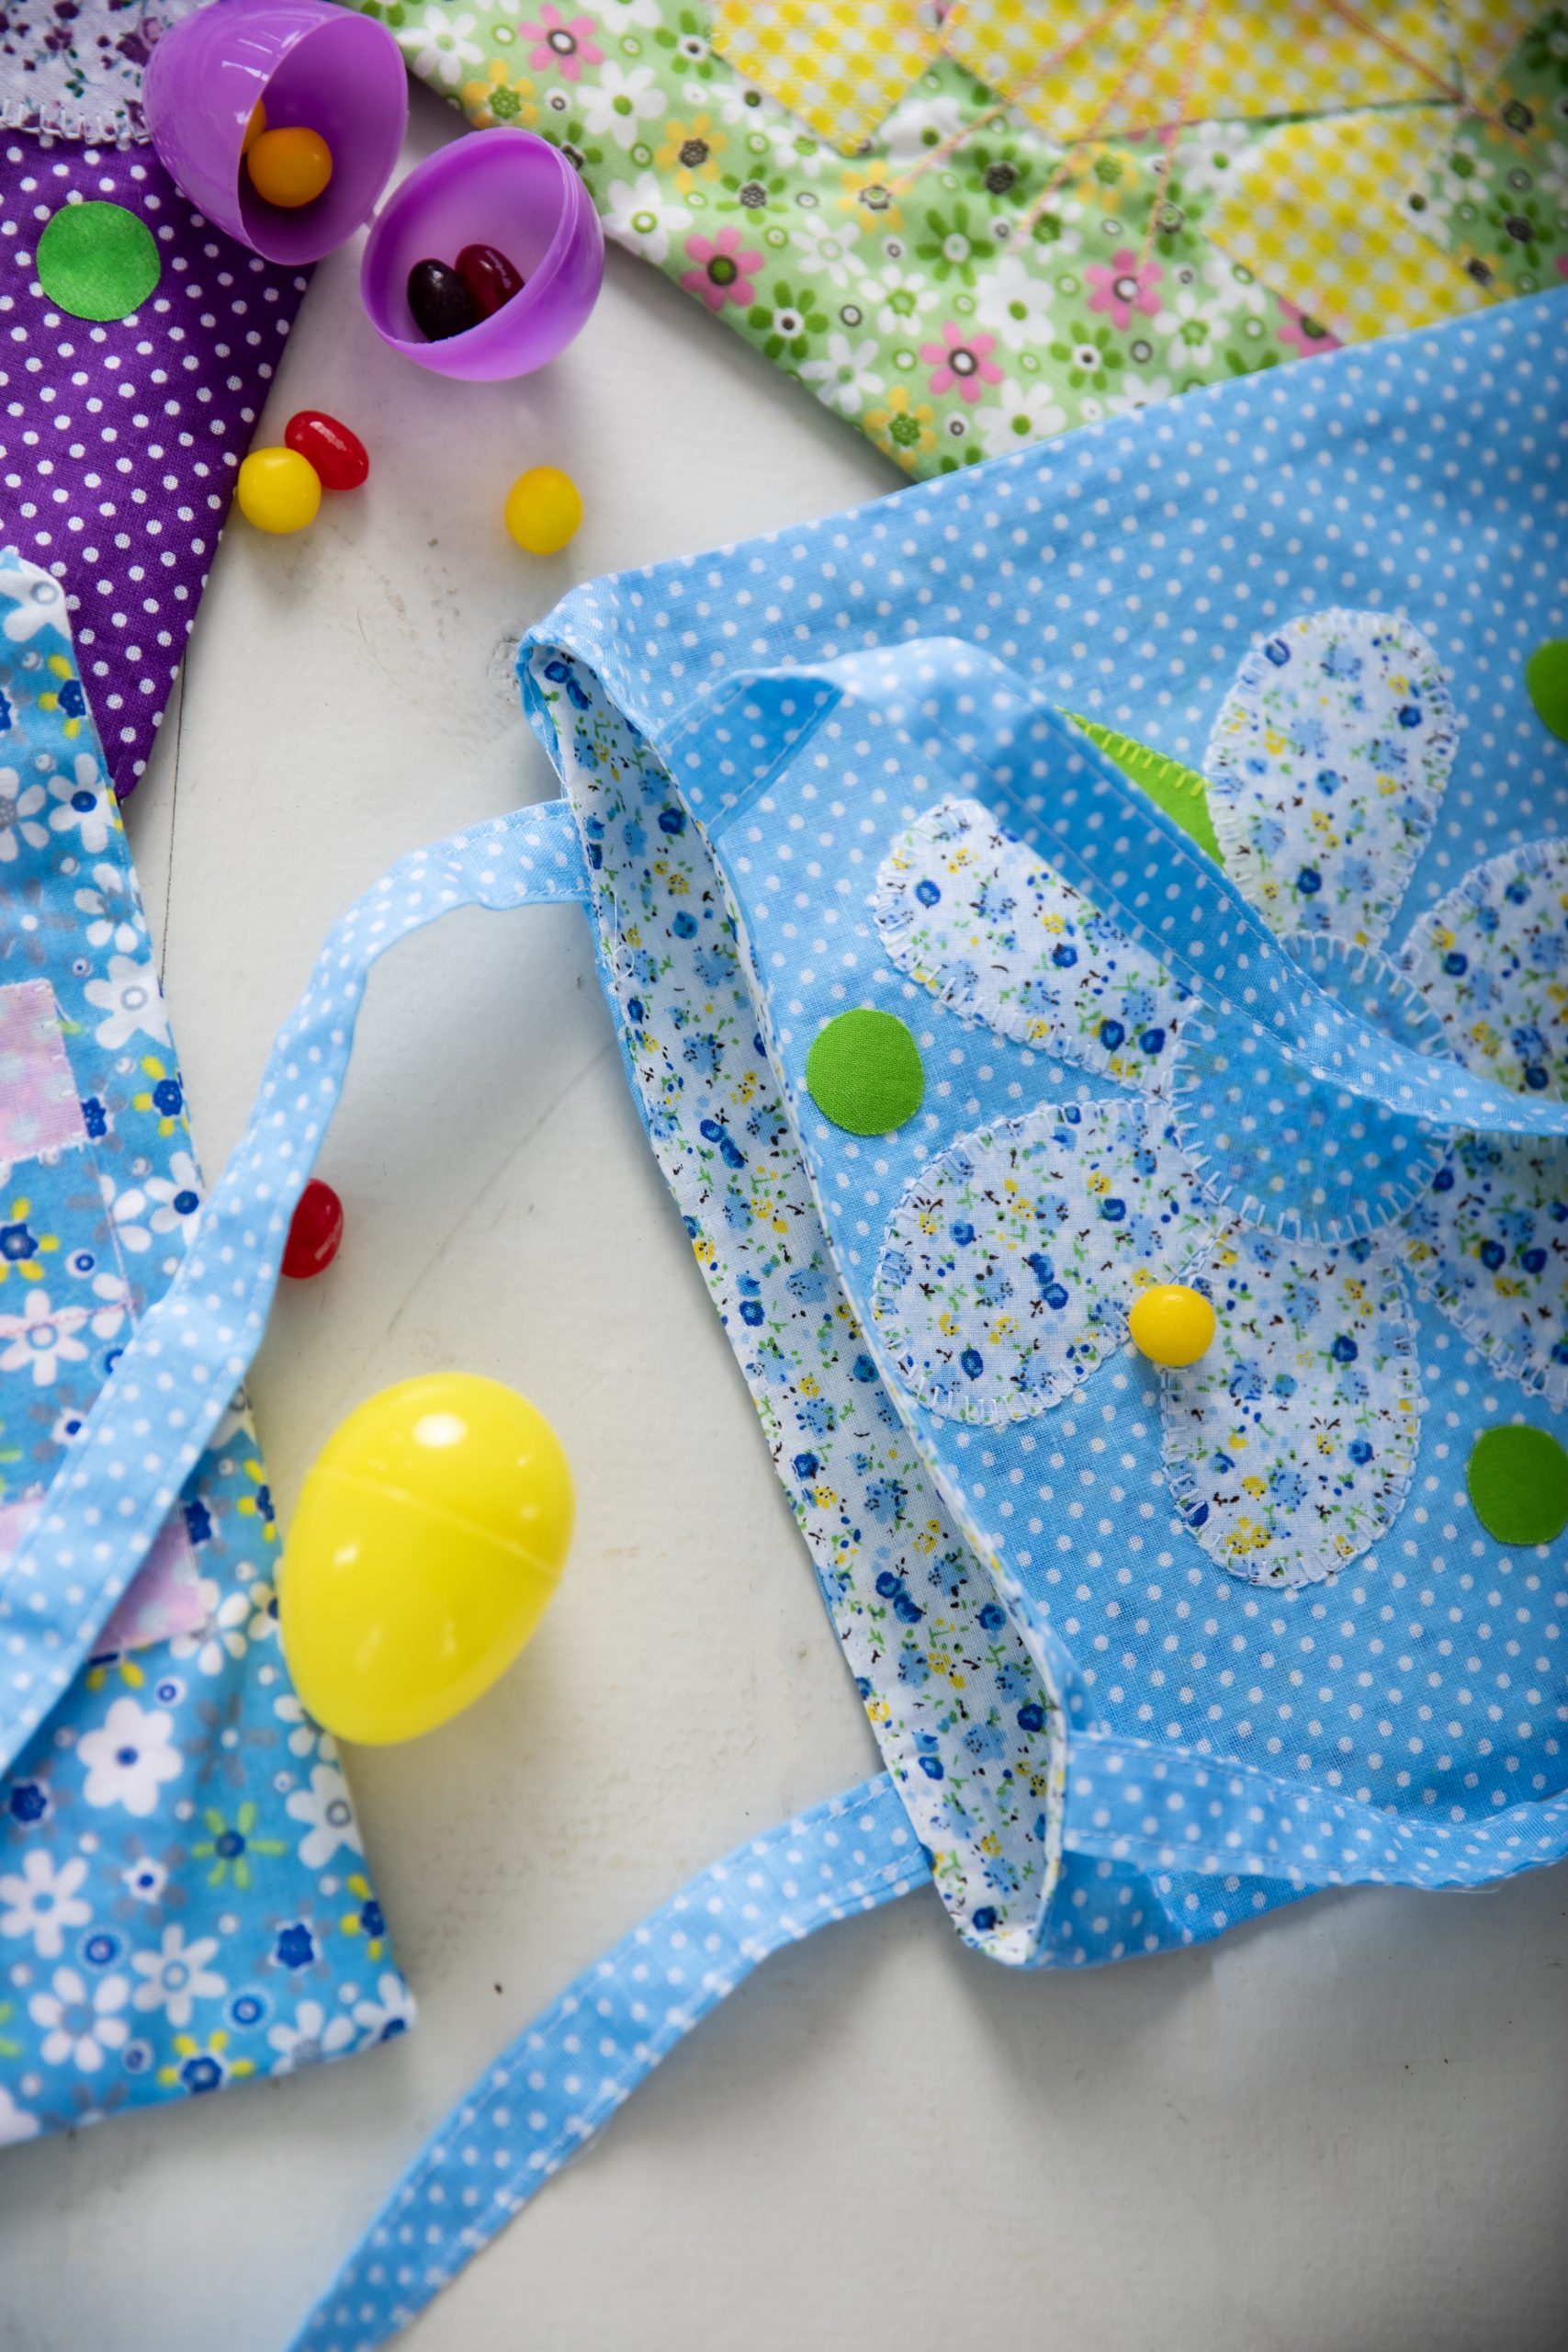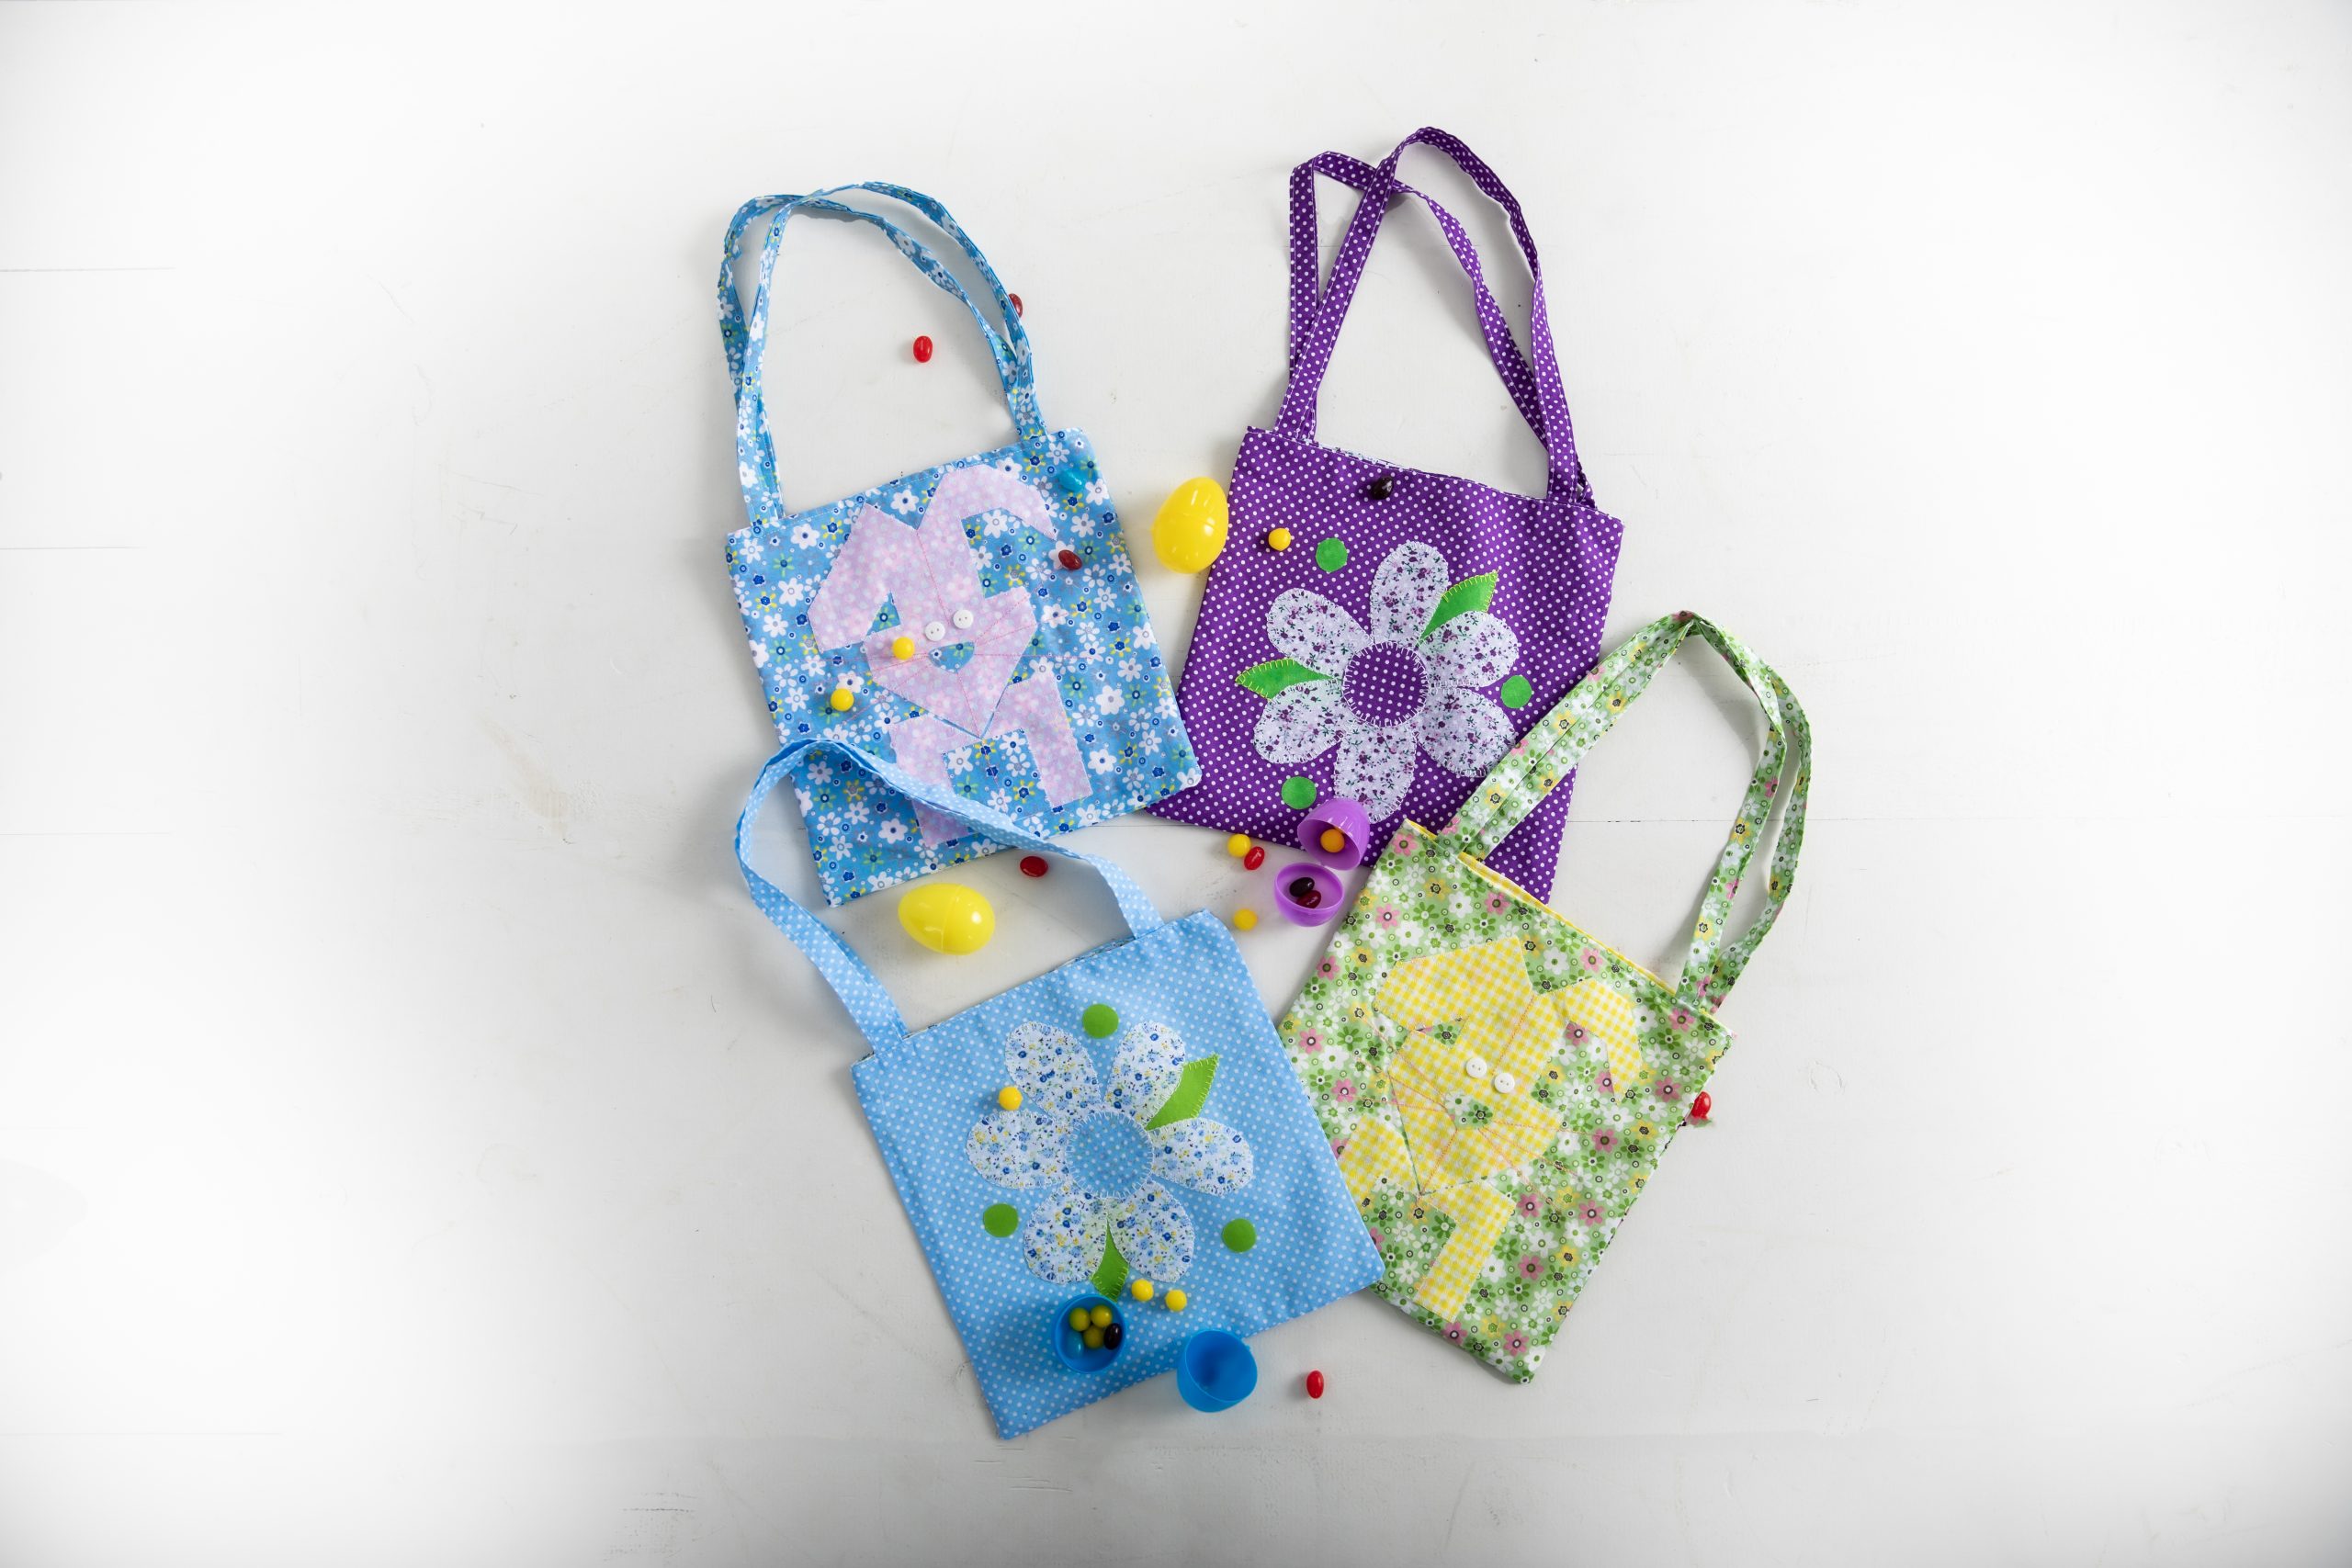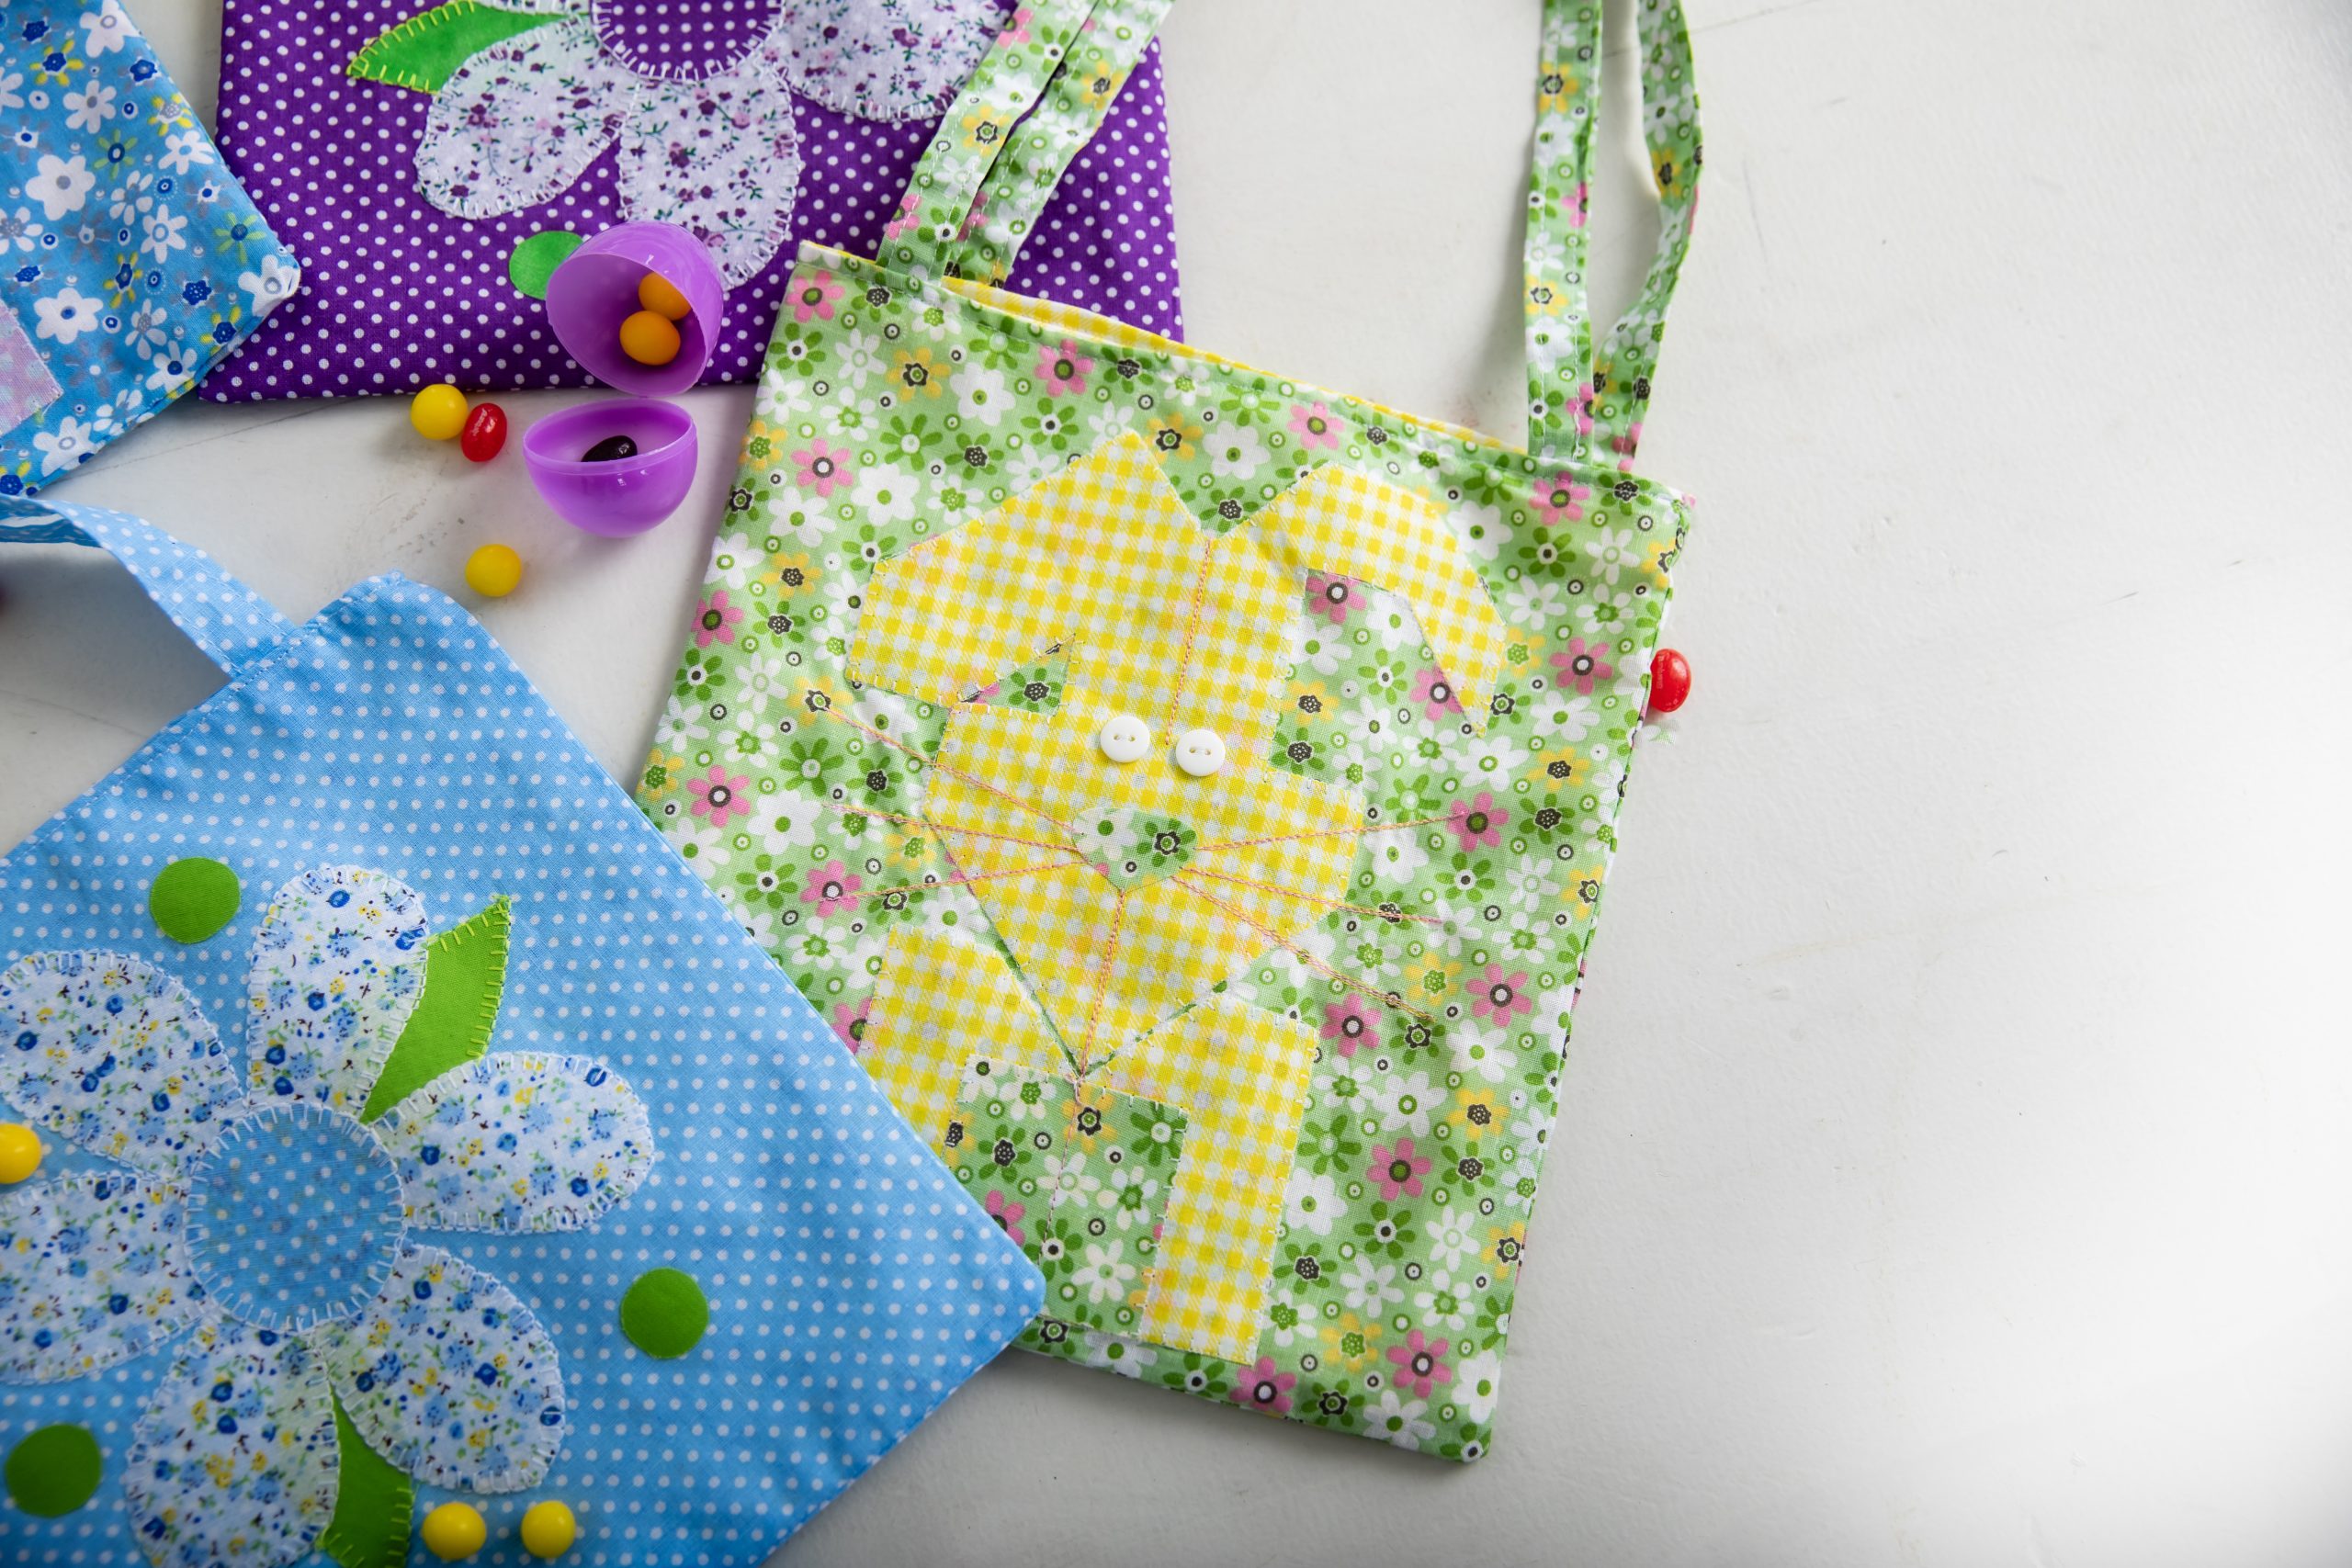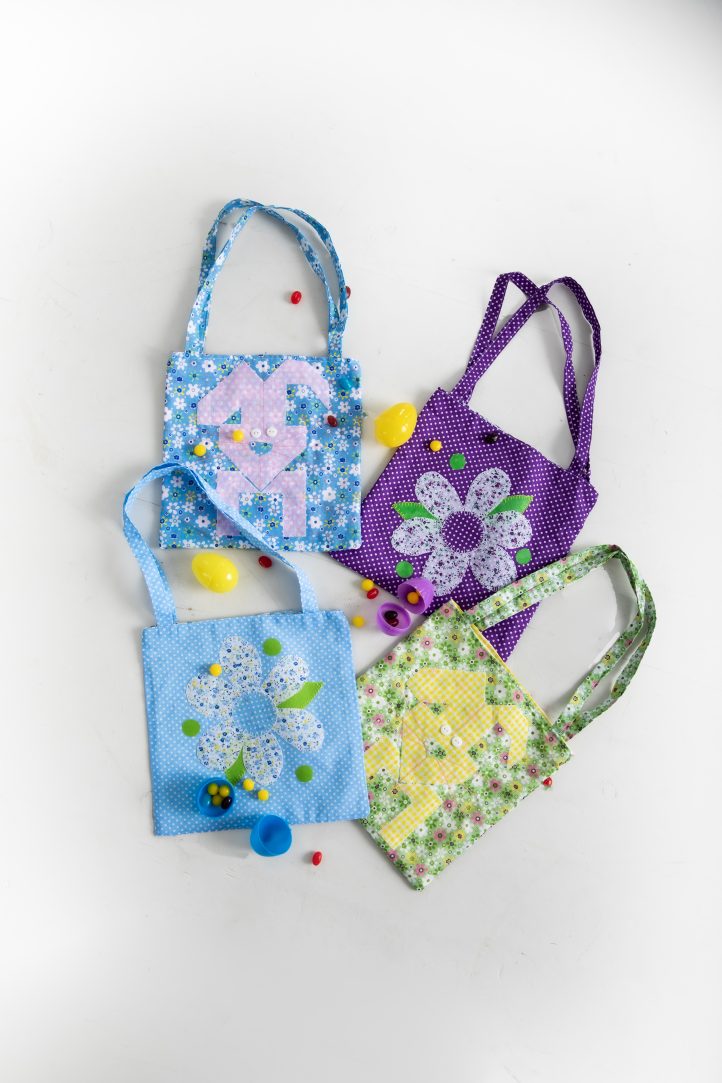
Easter will be here soon, so start on these adorable treat bags today! These colorful Easter treat bags from Debi Schmitz are the perfect size for little ones to stash their eggs and candy during your annual egg hunt. Make your own treat bag patterns in the bunny and flower designs shown, using fat quarters in spring colors and prints, then finish them with sweet hand-sewn details. We love this project as a sustainable alternative to plastic bags or cheap Easter baskets that easily break, allowing you to use these treat bags for years to come.
Abbreviation: RST = Right Sides Together
Designer Note: Sew bag with about 1/4” to 3/8” seam allowance.
Materials:
- Purple Flower Bag:
- (1) Purple polka dot fat quarter
- (1) White floral fat quarter to coordinate
- Small scraps of green for leaves and dots
- White pearl cotton #8 embroidery thread
- Lime green pearl cotton #8 embroidery thread
- Hand-sewing needle
- White thread
- Iron-on adhesive (I/O) that can be stitched – Heat’n Bond Lite by Thermoweb
- Blue Flower Bag:
- (1) Light blue polka dot fat quarter
- (1) White floral fat quarter to coordinate
- Small scraps of green for leaves and dots
- White pearl cotton #8 embroidery thread
- Lime green pearl cotton #8 embroidery thread
- Hand-sewing needle
- White thread
- Iron-on adhesive (I/O) that can be stitched – Heat’n Bond Lite by Thermoweb
- Green Bunny Bag:
- (1) Green floral fat quarter
- (1) Yellow polka dot fat quarter to coordinate
- (2) White 1/2″ buttons
- Pink thread
- White thread
- Iron-on adhesive (I/O) that can be stitched – Heat’n Bond Lite by Thermoweb
- Optional: Hand-sewing needle
- Blue Bunny Bag:
- (1) Blue floral fat quarter
- (1) Pink polka dot fat quarter to coordinate
- Pink thread
- White thread
- Iron-on adhesive (I/O) that can be stitched – Heat’n Bond Lite by Thermoweb
- Optional: Hand-sewing needle
- Scissors
- Pins
- Rotary cutter
- Cutting mat
- Acrylic ruler
- Iron and ironing surface
- Sewing Machine
- PDF Templates – These are located at the bottom of this page. See printing instructions below.
PRINTING INSTRUCTIONS:
To download the PDF templates, click on the download button at the bottom of the page. We recommend opening your download using Adobe Acrobat.
Piecing Instructions:
PURPLE POLKA DOT FLOWER BAG:
- Cut (2) 10” x 10” pieces of purple polka dot fabric for the outside of the bag.
- Cut (2) 10” x 10” pieces of white floral fabric for the inside of the bag.
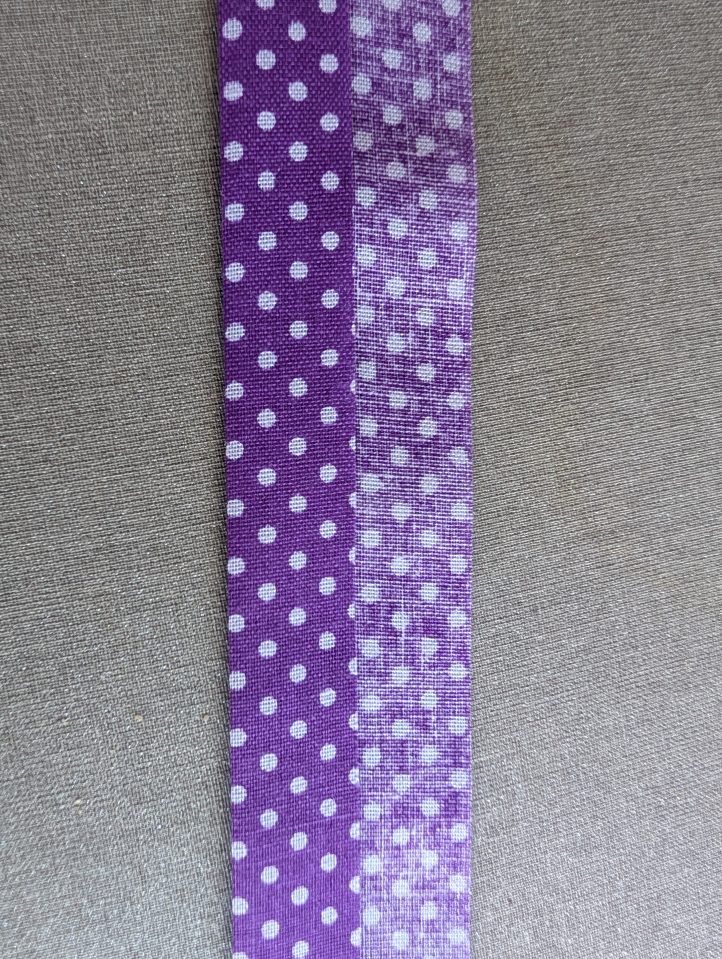
- Cut (2) 2” x 20” strips of purple polka dot fabric for handles.
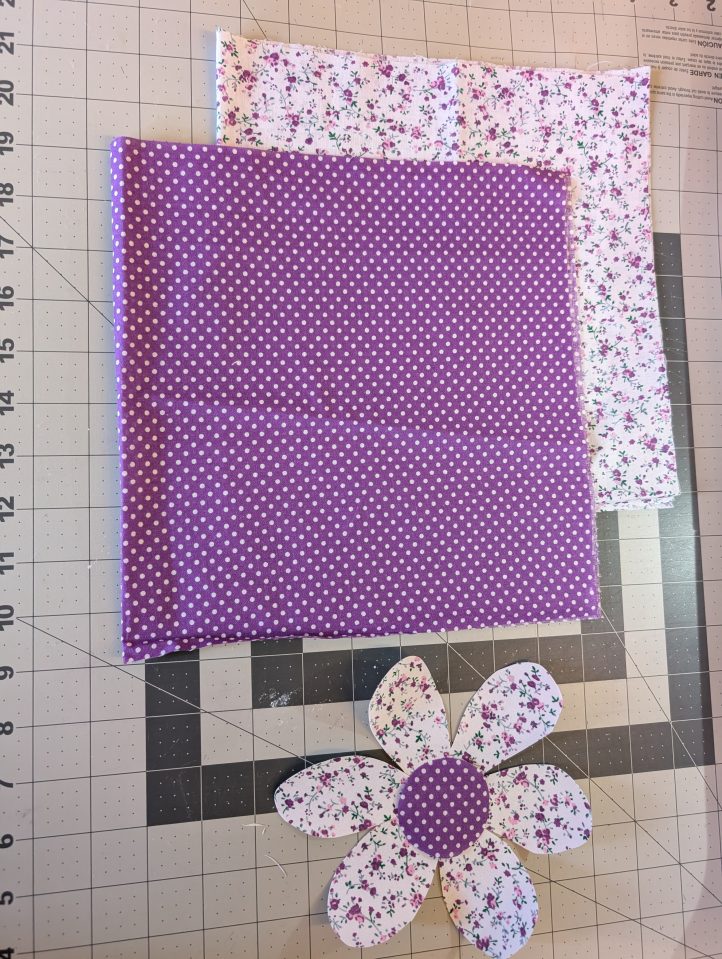
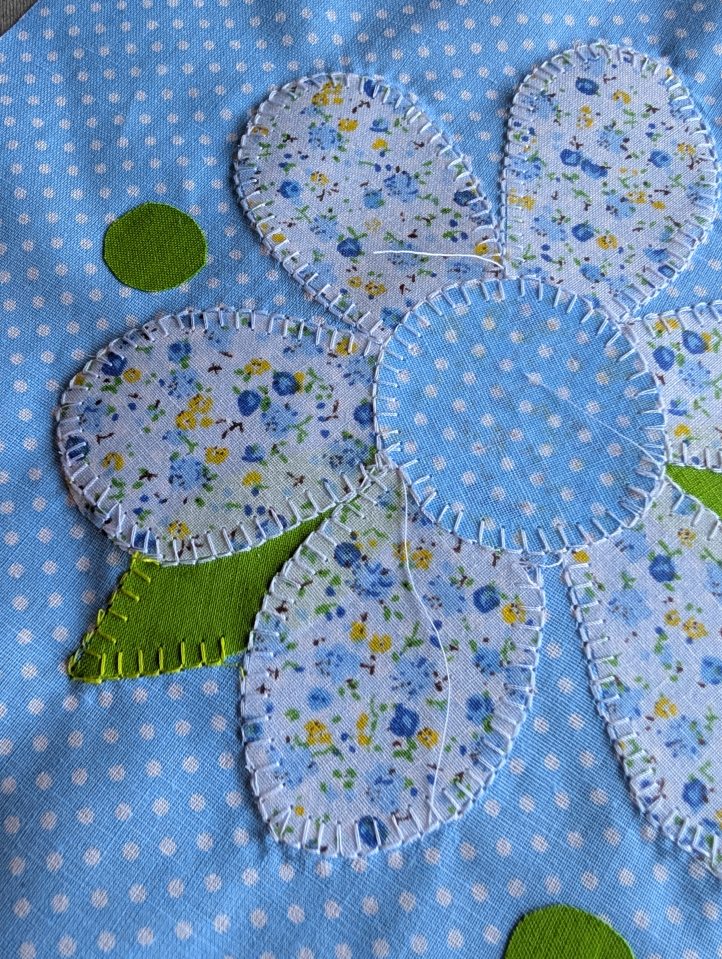
- Cut (1) white floral Pattern A– flower pattern with I/O on the back.
- Cut (1) purple polka dot Pattern B for the flower center with I/O on the back.
- Cut (2) green Pattern C leaves with I/O on the back.
- Cut (3) green Pattern D dots with I/O on the back.
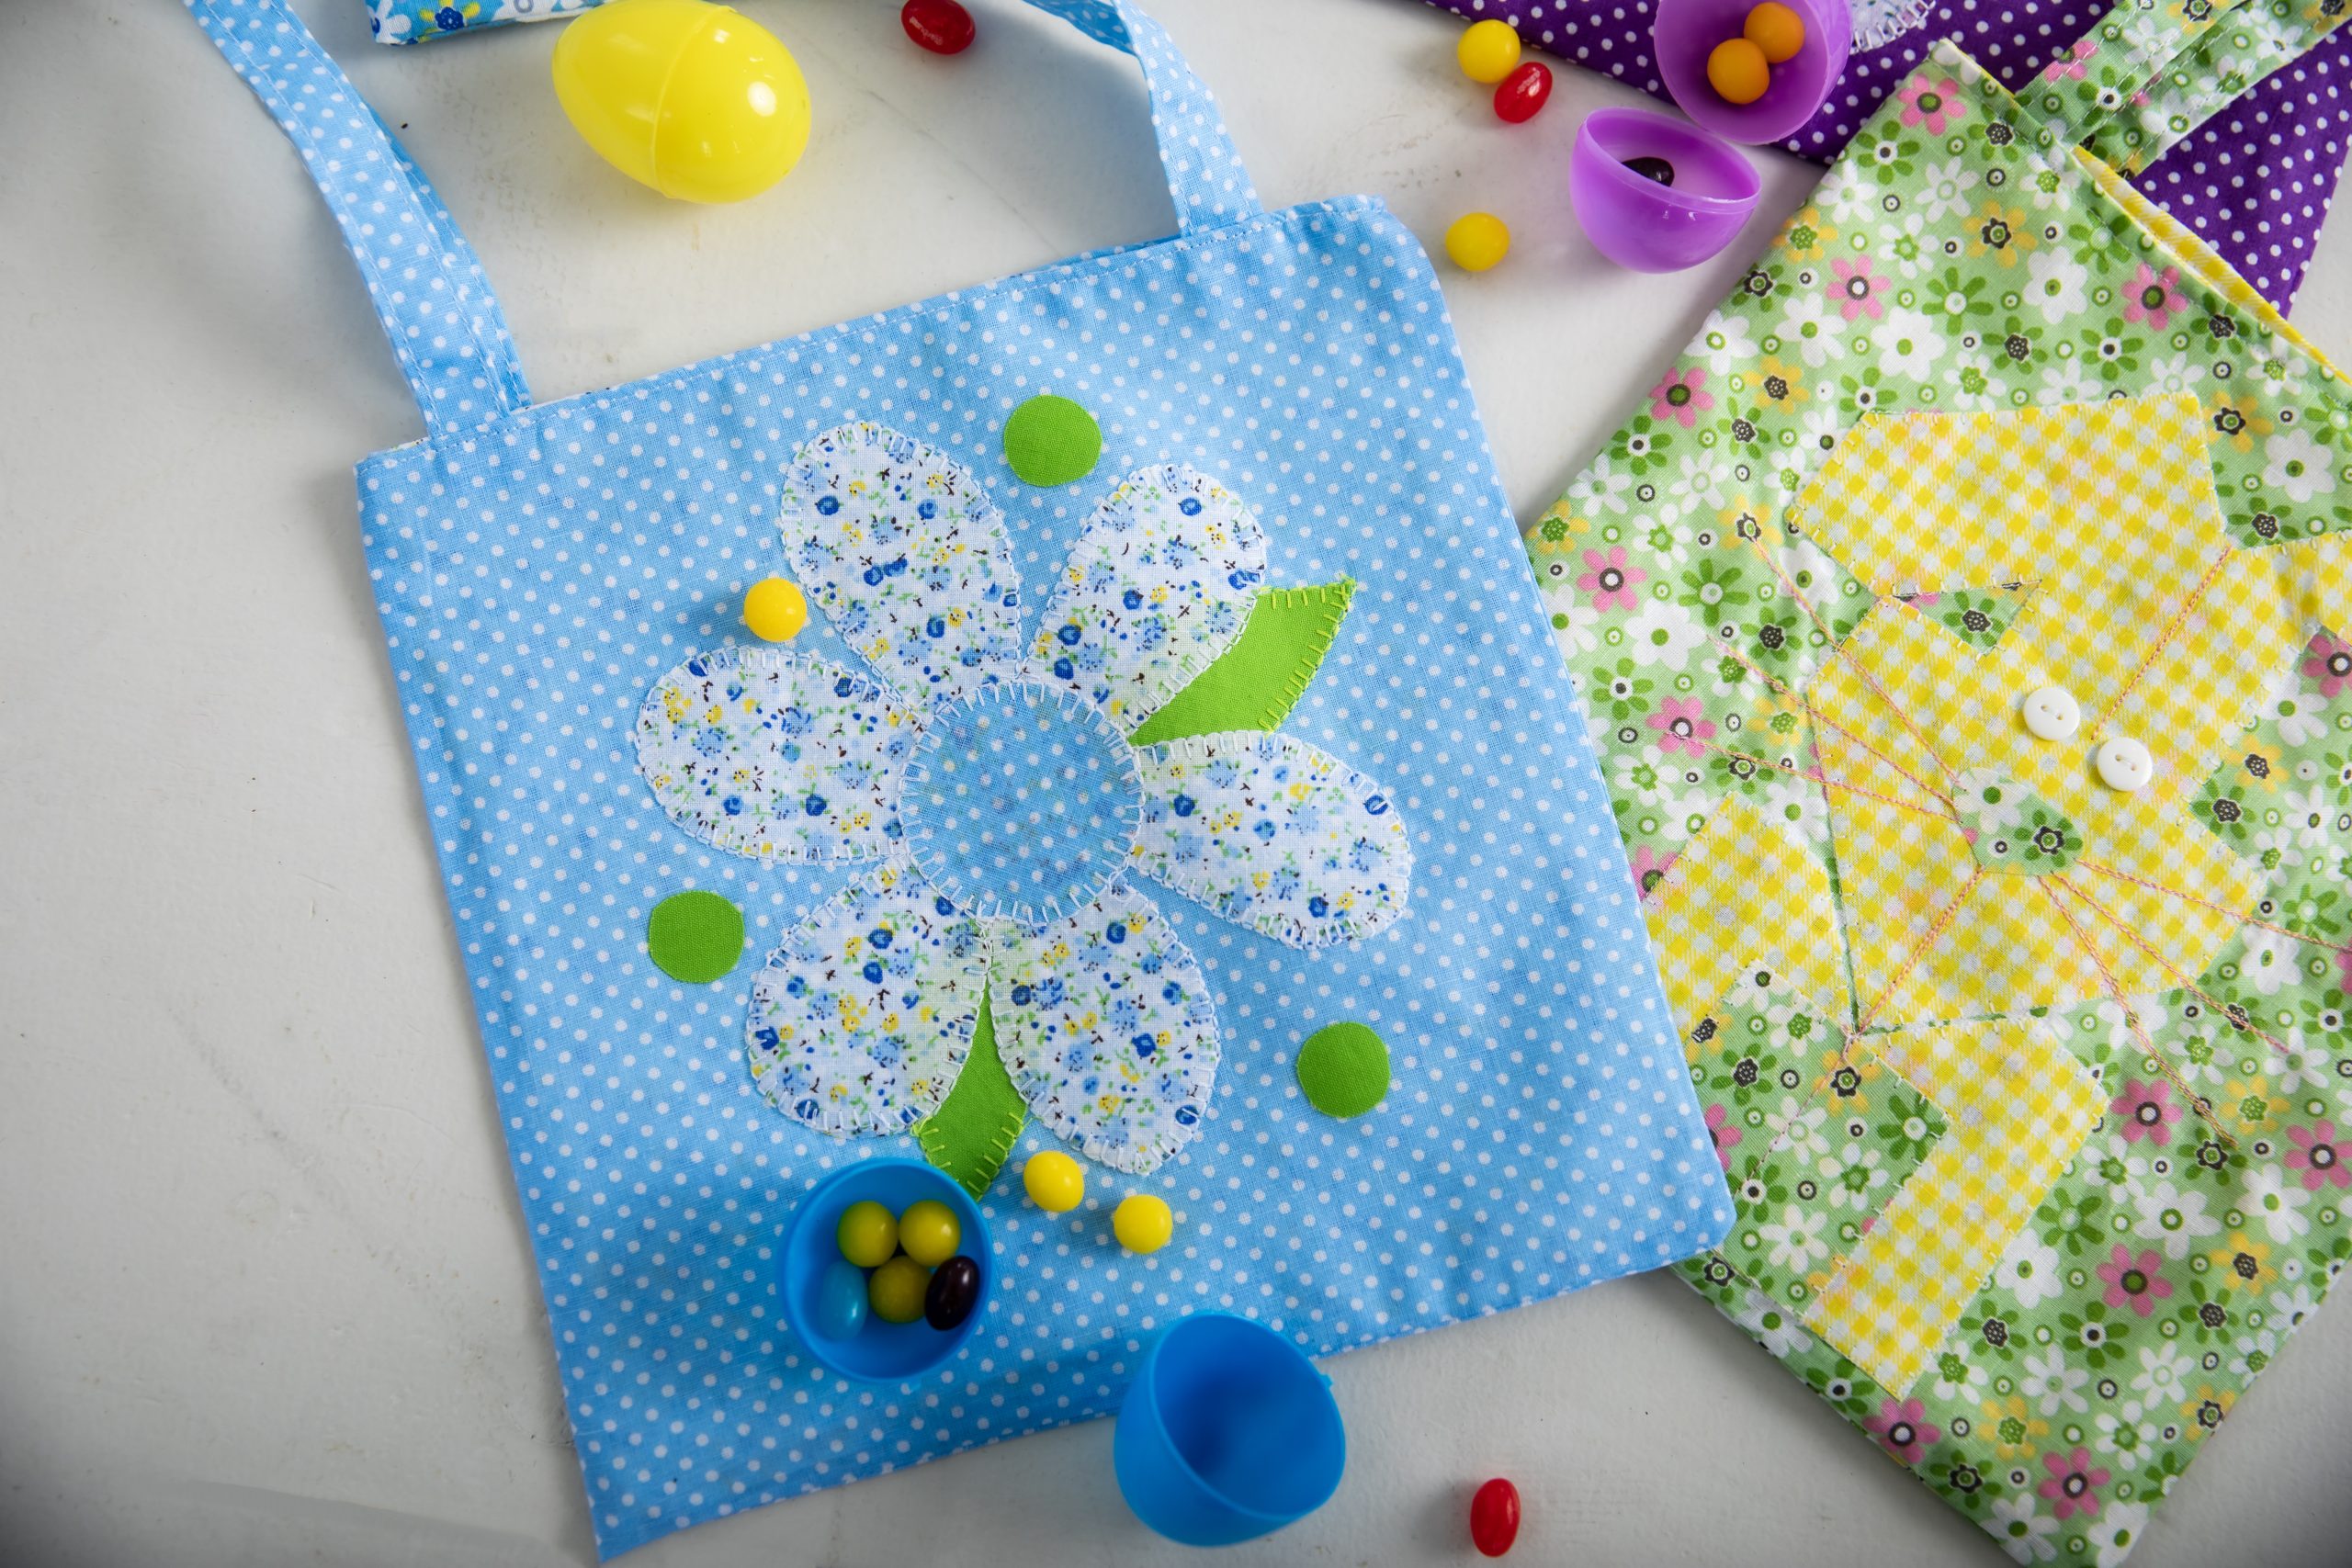
- Insert two green leaves slightly under the white floral flower in the center of (1) purple polka dot square. Press the flower and leaves in place.
- Press the purple center of the flower in place.
- Press the green dots around the flower petals.
- Machine-blanket-stitch, (or by hand), around the flower with white embroidery thread. Stitch around the flower center as well.
- Machine-blanket-stitch, (or by hand), around the leaves with lime green embroidery thread.
- Stitch the (2) purple polka dot bag squares (one with the flower) RST for the bag front, leaving the top open. Clip the corners and do not turn inside out.
- Stitch the (2) white floral squares together RST for the bag lining, leaving one side open for the top. Clip the corners, turn inside out.
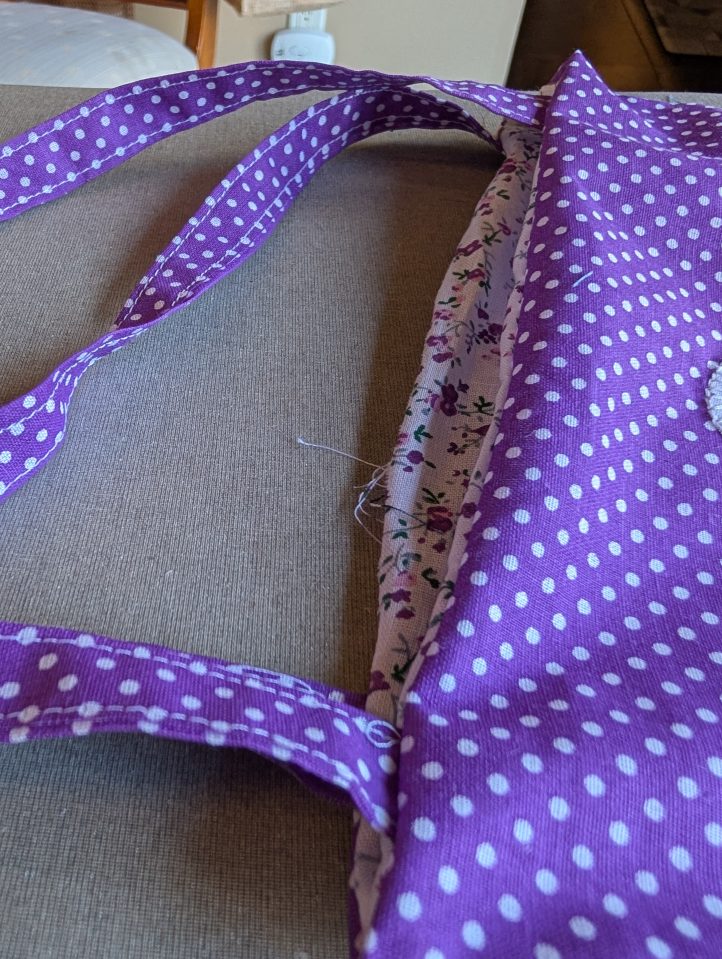
- Fold (1) 2” x 20” strip of purple polka dot fabric in one third lengthwise and iron. Fold the other side over to cover the first side and press flat for a handle. Stitch close to the long edge. Repeat along the other long edge.
- Place the white floral bag inside the purple polka dot bag. (The two bags should be RST.)
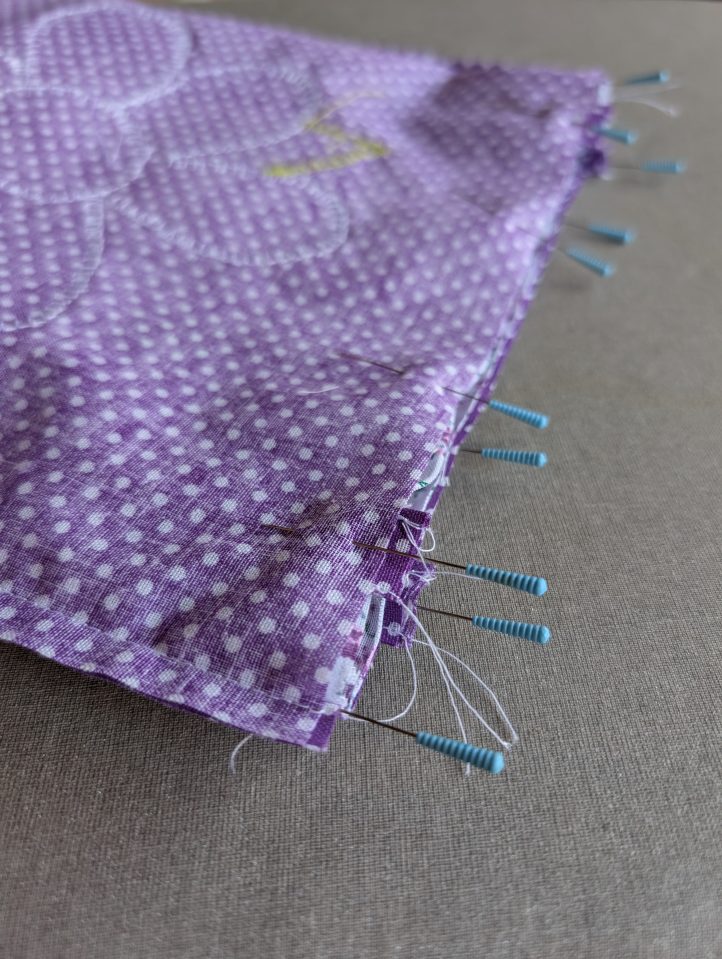
- Place (1) handle inside the bag between the outside bag and the lining with the ends sticking out the top slightly. Place (1) of these ends 1” away from the side seam and pin in place between the two bags. Repeat for the other end of the handle.
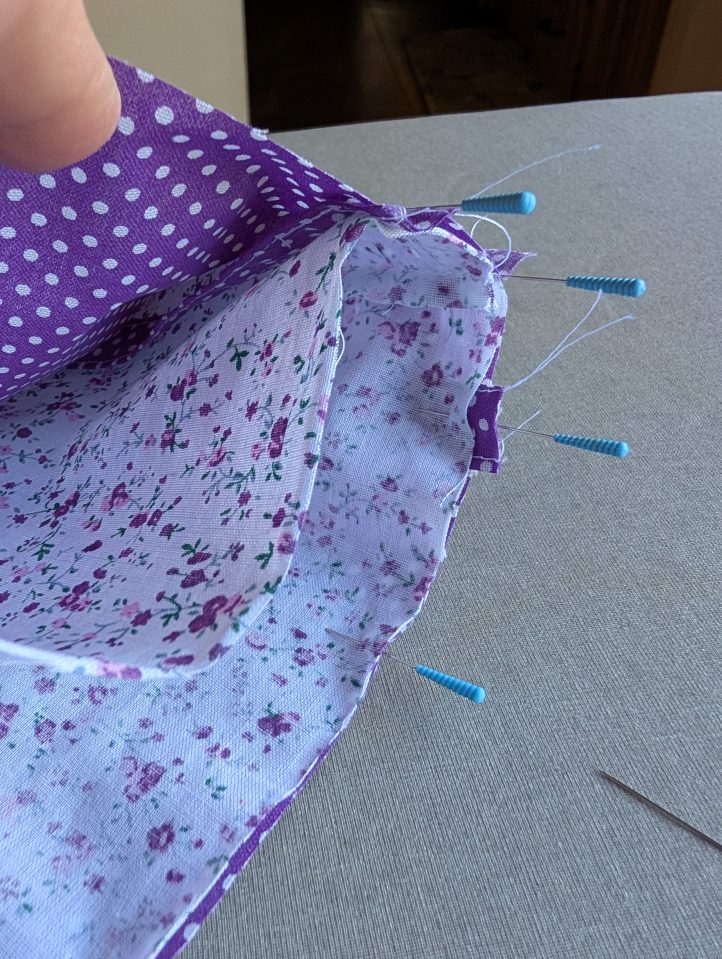
- Repeat Step 17 for the other handle. Pin the two bags together around the bat top, leaving a 3” opening.
- Stitch around the top of the bags to secure them together. Double stitch over the handles and side seams. Do not stitch the unpinned 3” section.
- Flip the bag inside out with the lining on the inside and handles out at the top. Press the bag flat and press the seam inside where unstitched.
- Stitch around the entire top of the bag, close to the opening, to finish the bag.
BLUE POLKA DOT FLOWER BAG:
- Follow Steps 1-21 in the previous section to make the Blue Polka Dot Bag with the white floral lining and flower.
GREEN FLORAL BUNNY BAG:
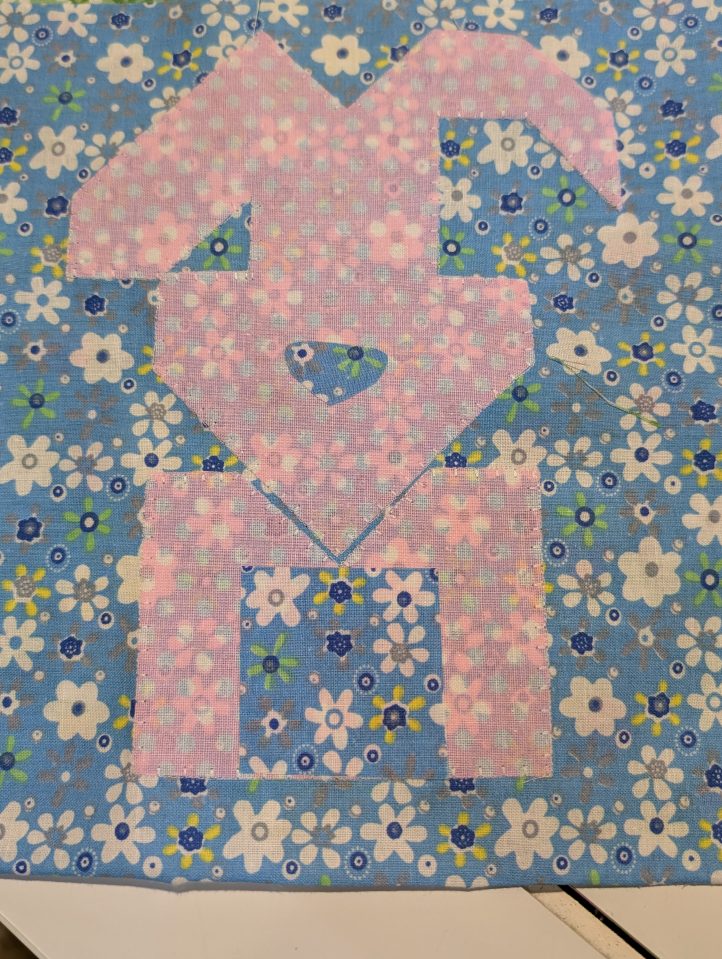
- Follow Steps 1-21 in the first section to make the green bunny bag using the green floral fabric for the bag and the yellow polka dot fabric as the lining, and for the bunny, Pattern E and Pattern F in place of the flower fabric and pattern pieces. The bottom square of the bunny will be green floral fabric Pattern G. Cut your preferred shape for your bunny nose out of the green floral fabric and place it on top of Pattern E.
- Stitch the white buttons on the bunny for eyes. Machine-blanket-stitch (or by hand) around the bunny with white embroidery thread. With pink thread, stitch double straight lines for the separation between the ears, the chin, the whiskers, and the tummy.
BLUE FLORAL BUNNY BAG:
- Follow all above steps except for the Blue Polka Dot Flower Bag step to make the blue bunny bag using the blue floral fabric for the bag and the pink polka dot fabric as the lining and for the bunny.