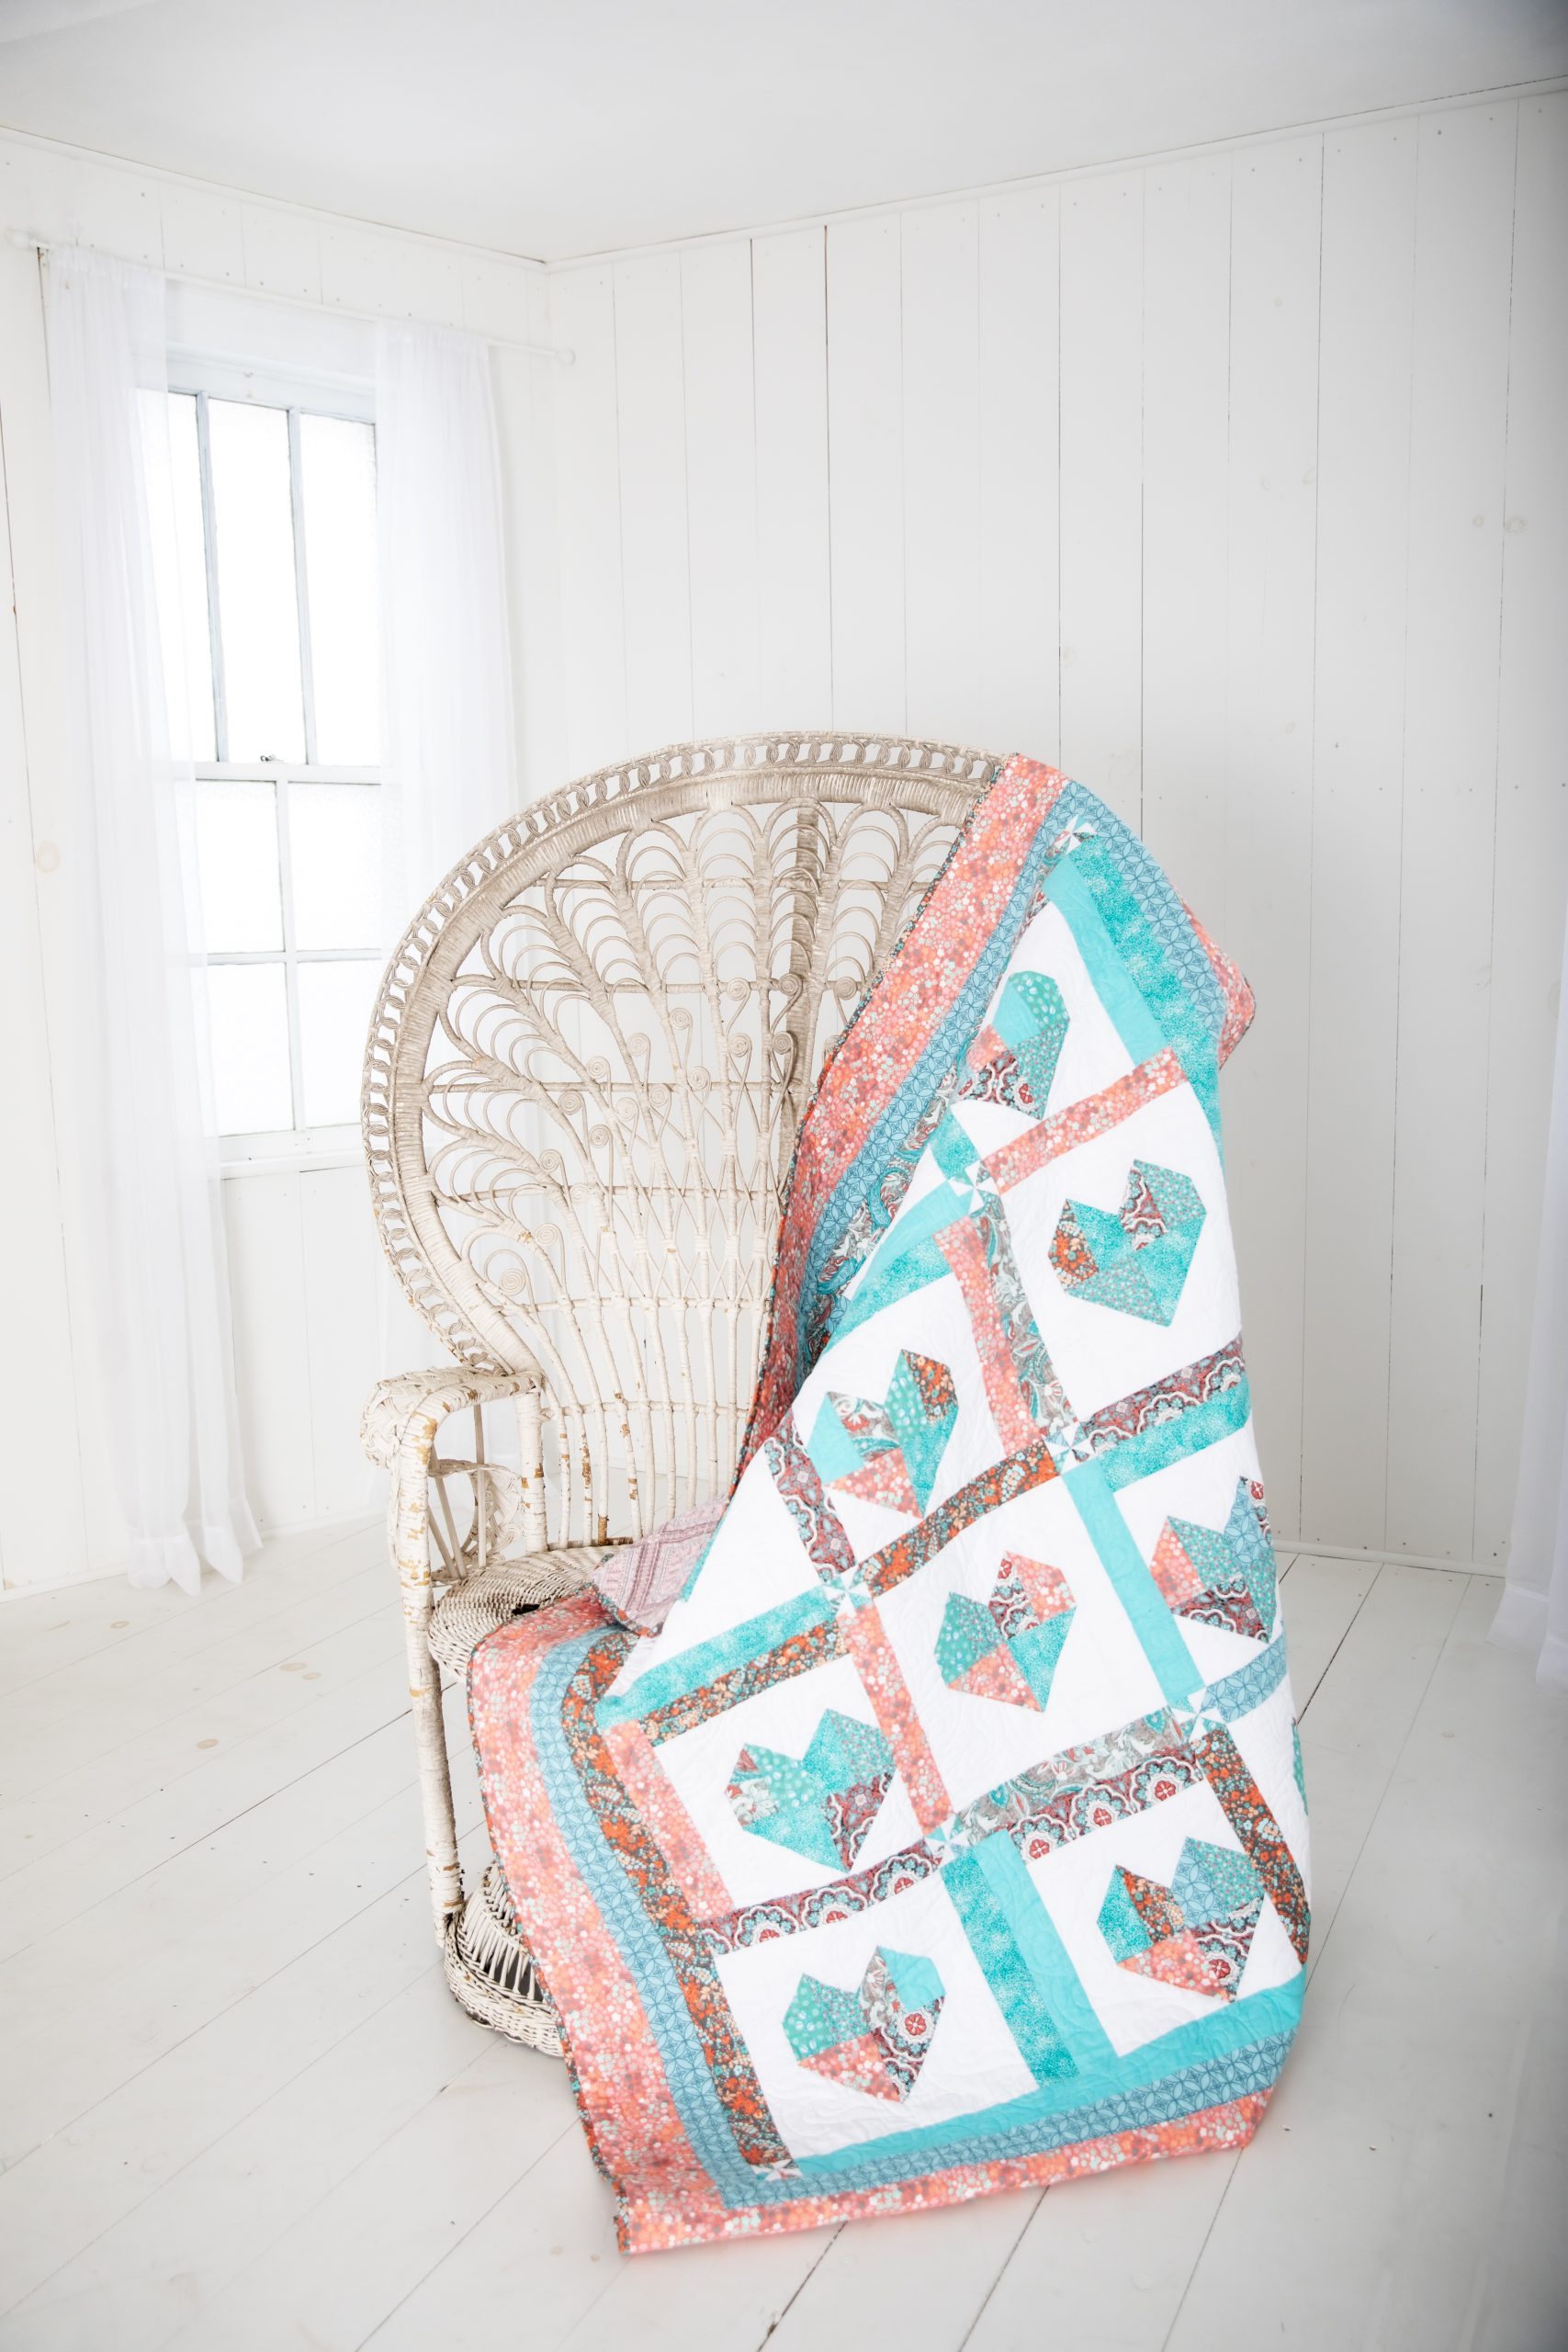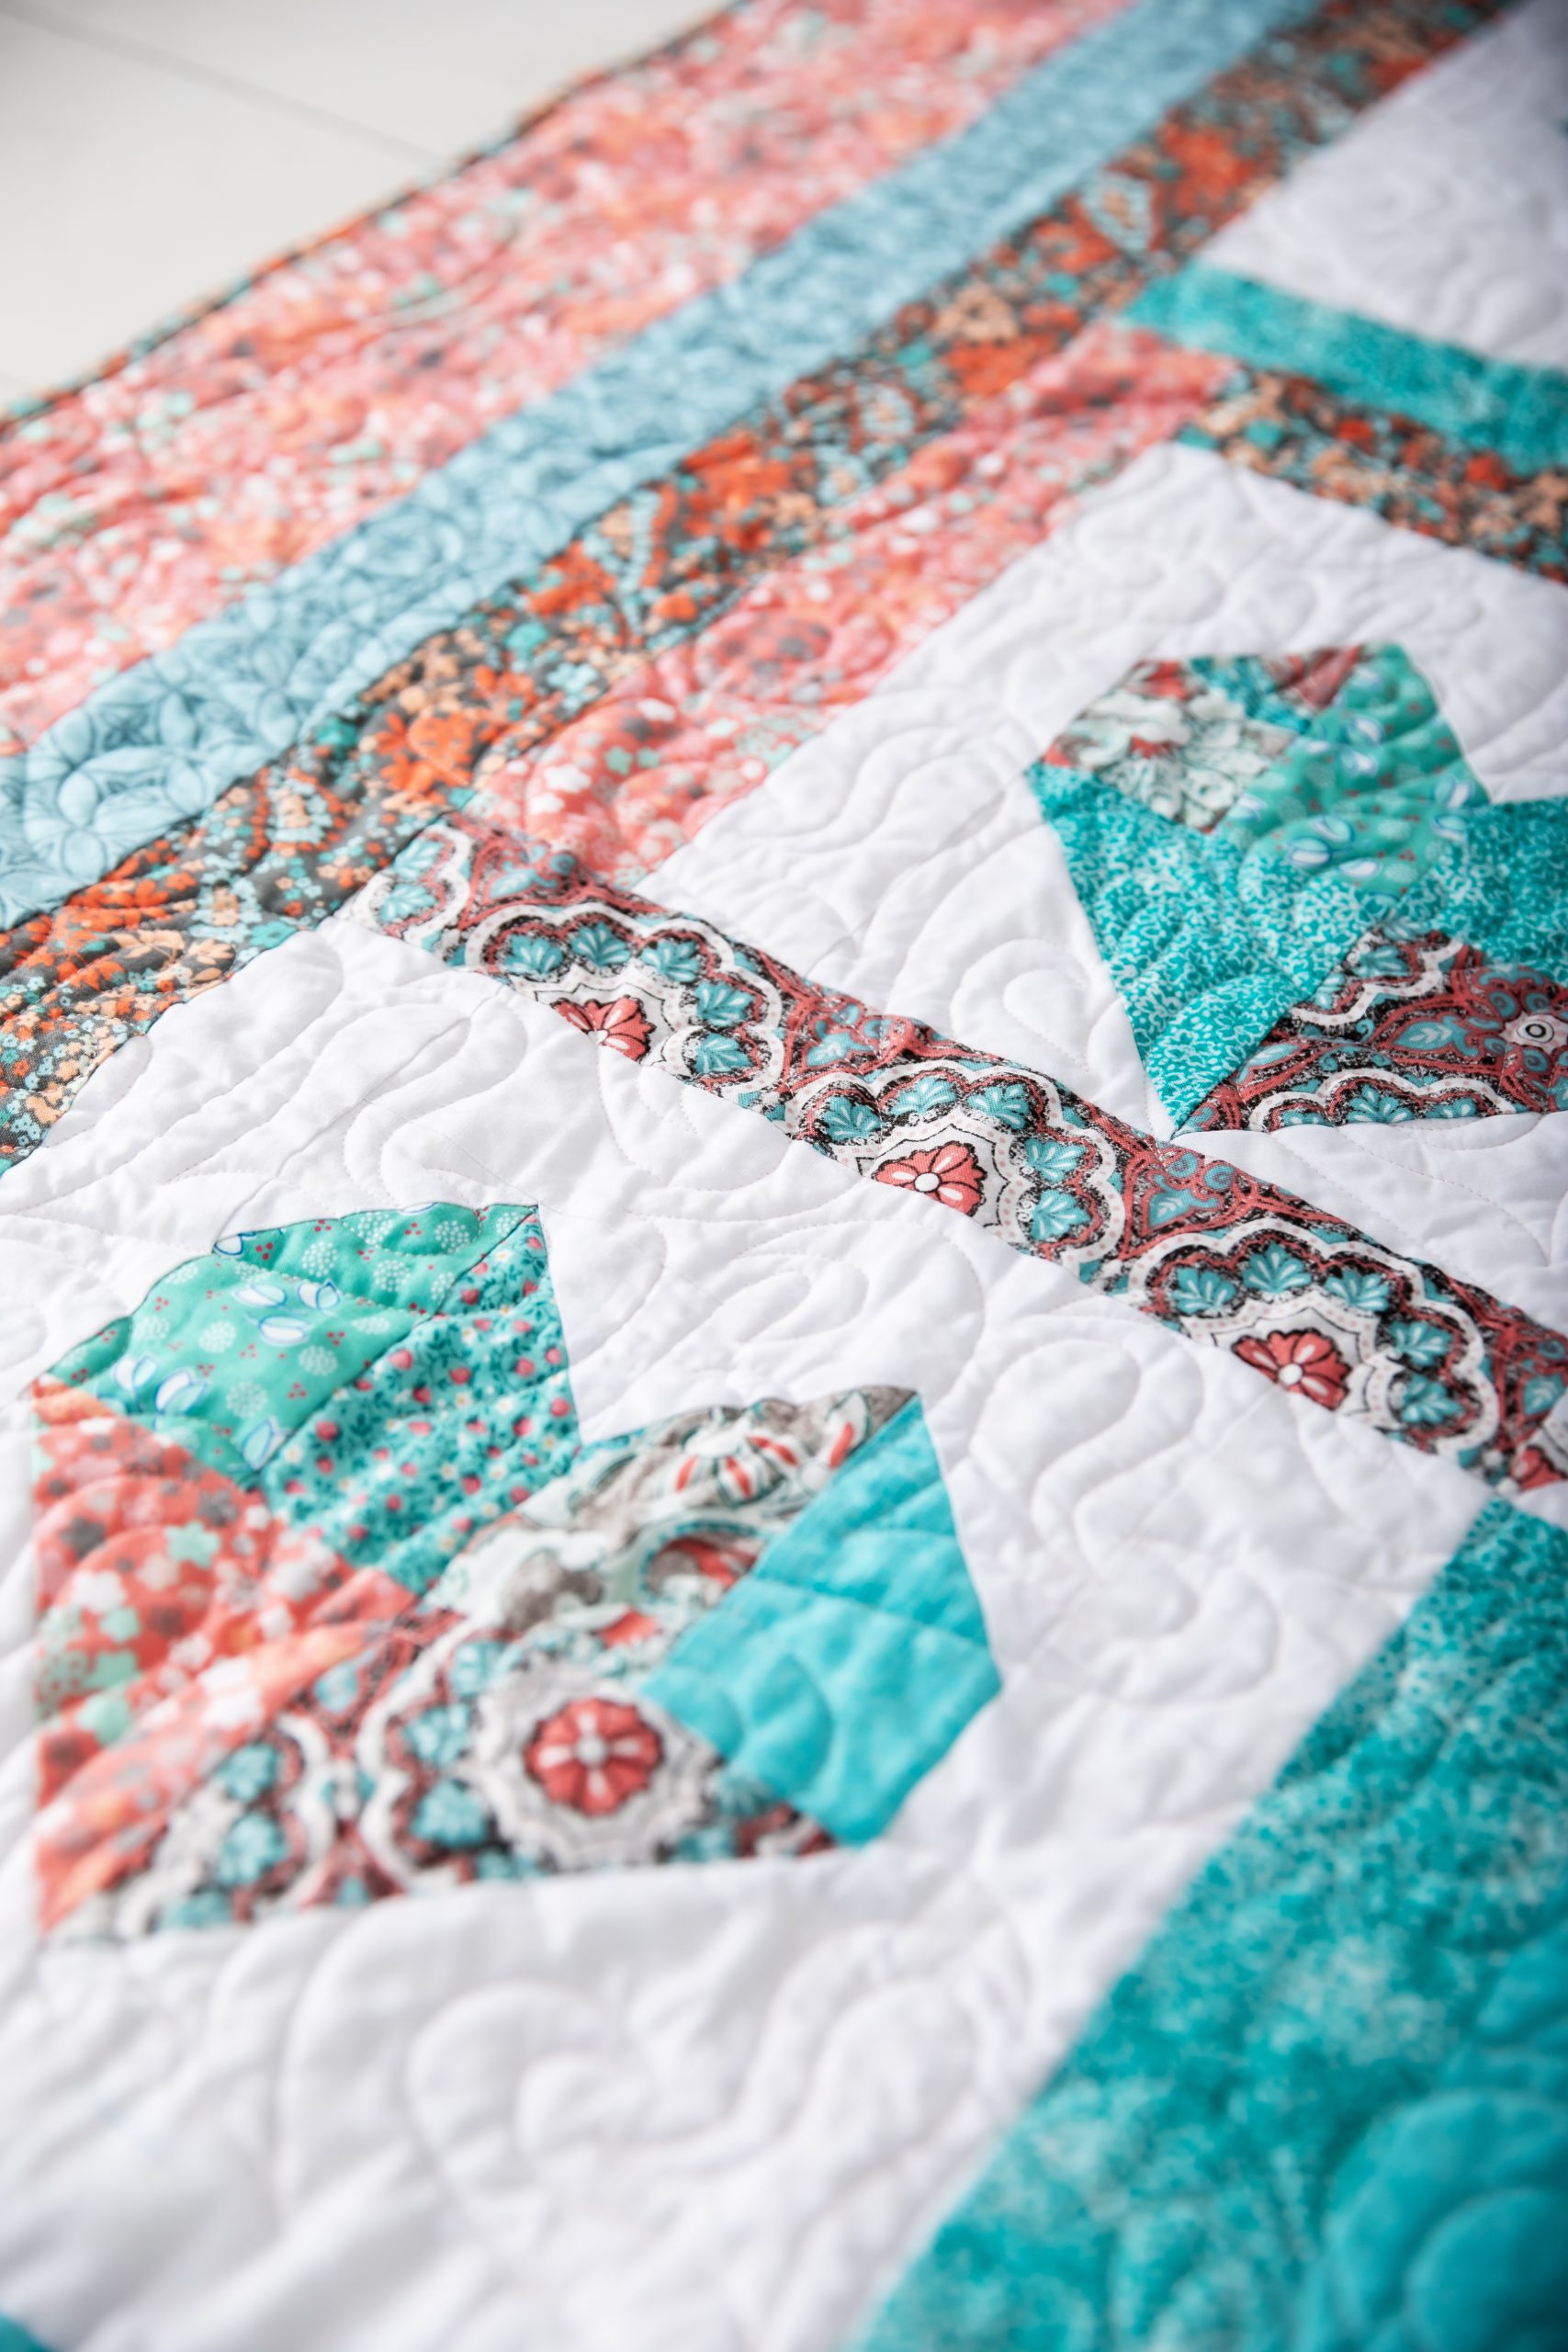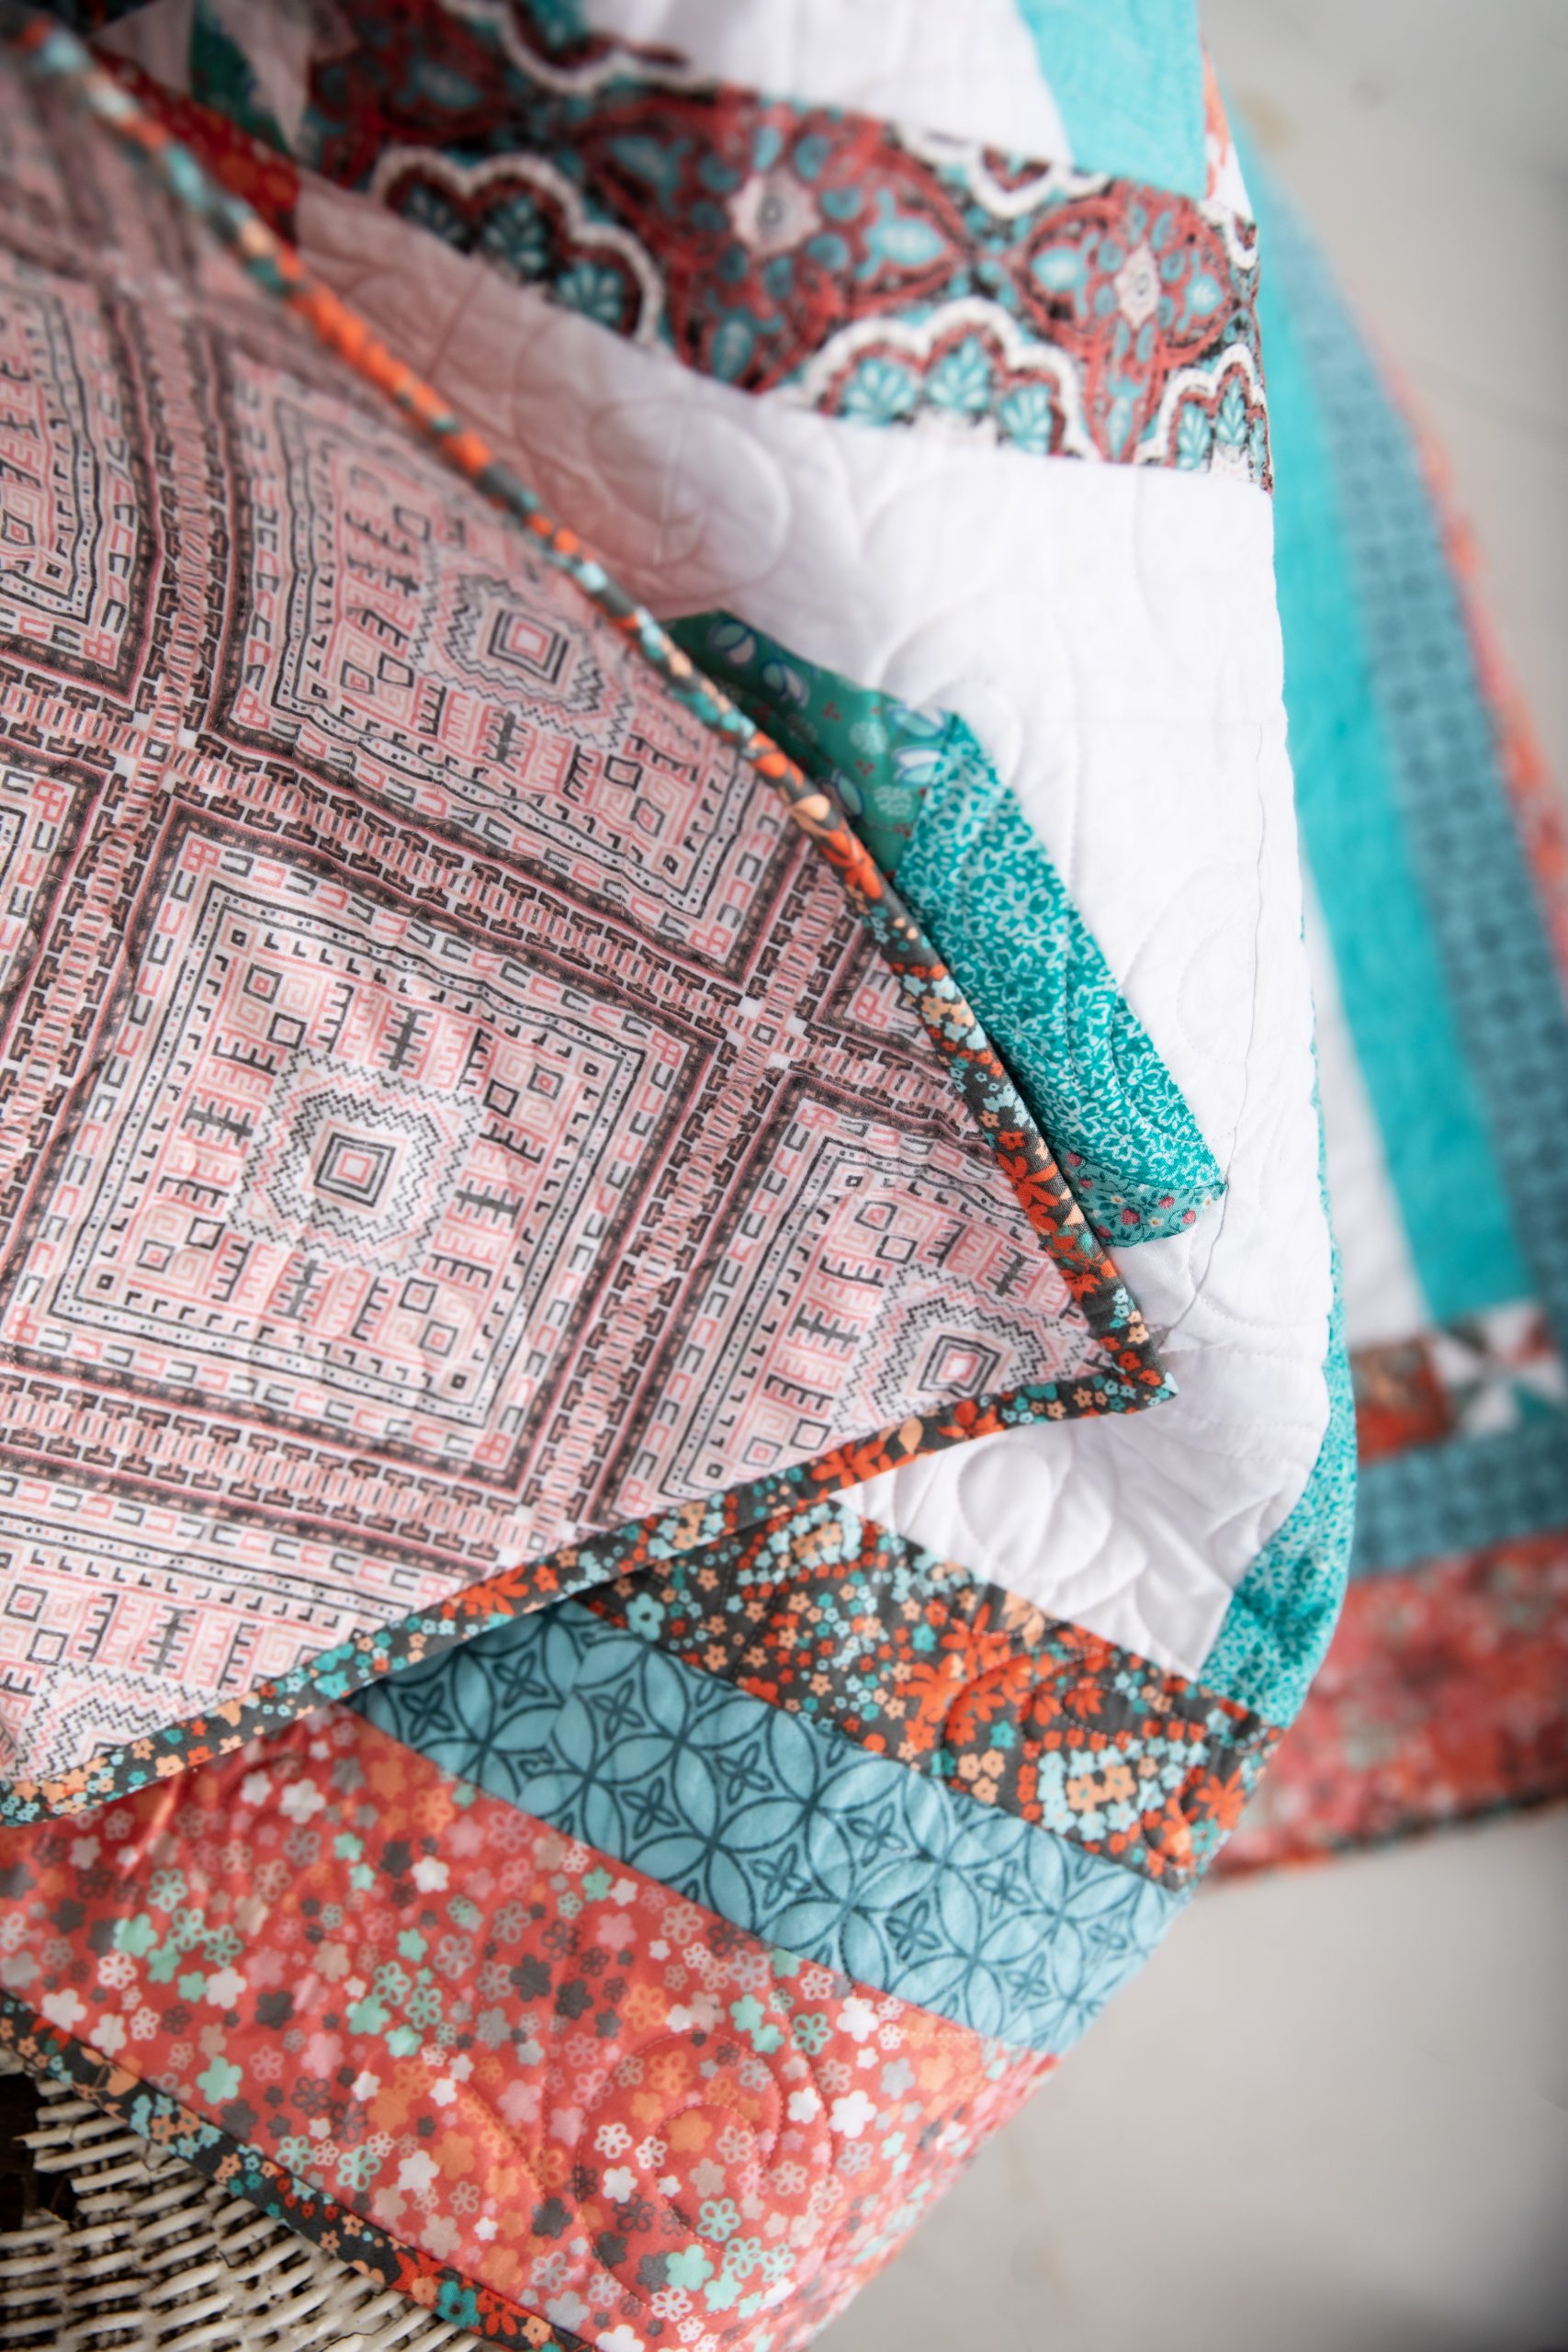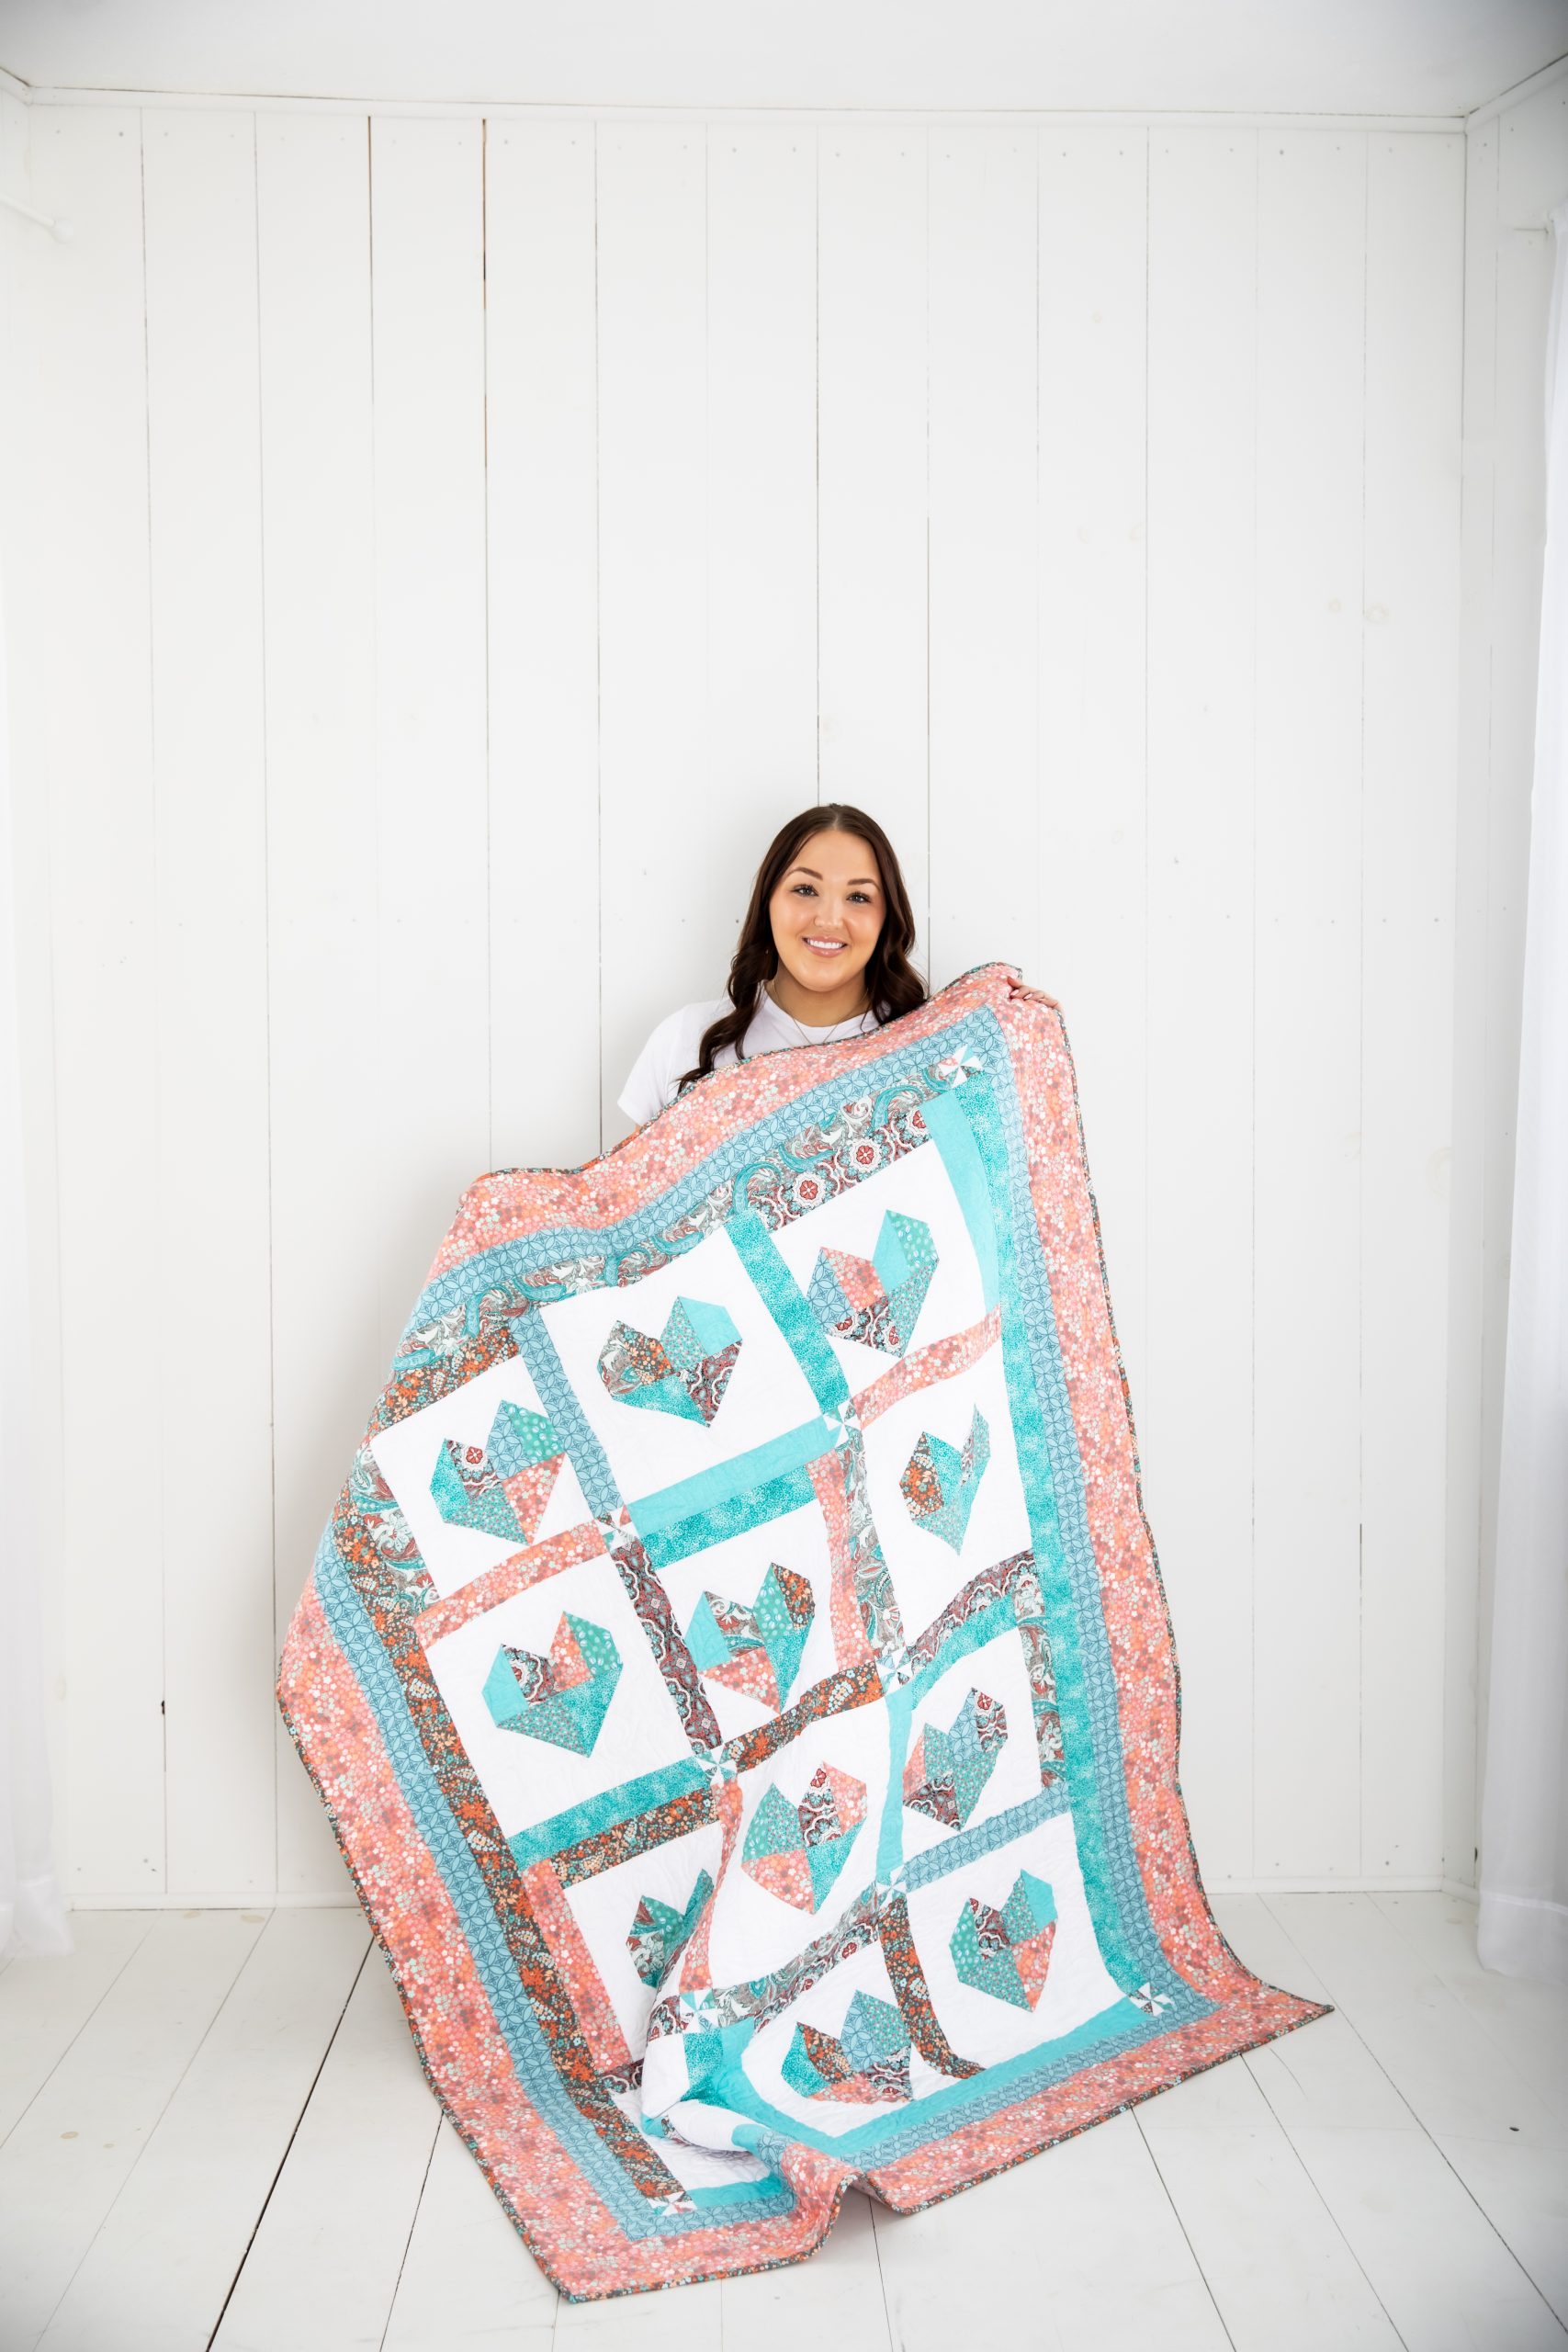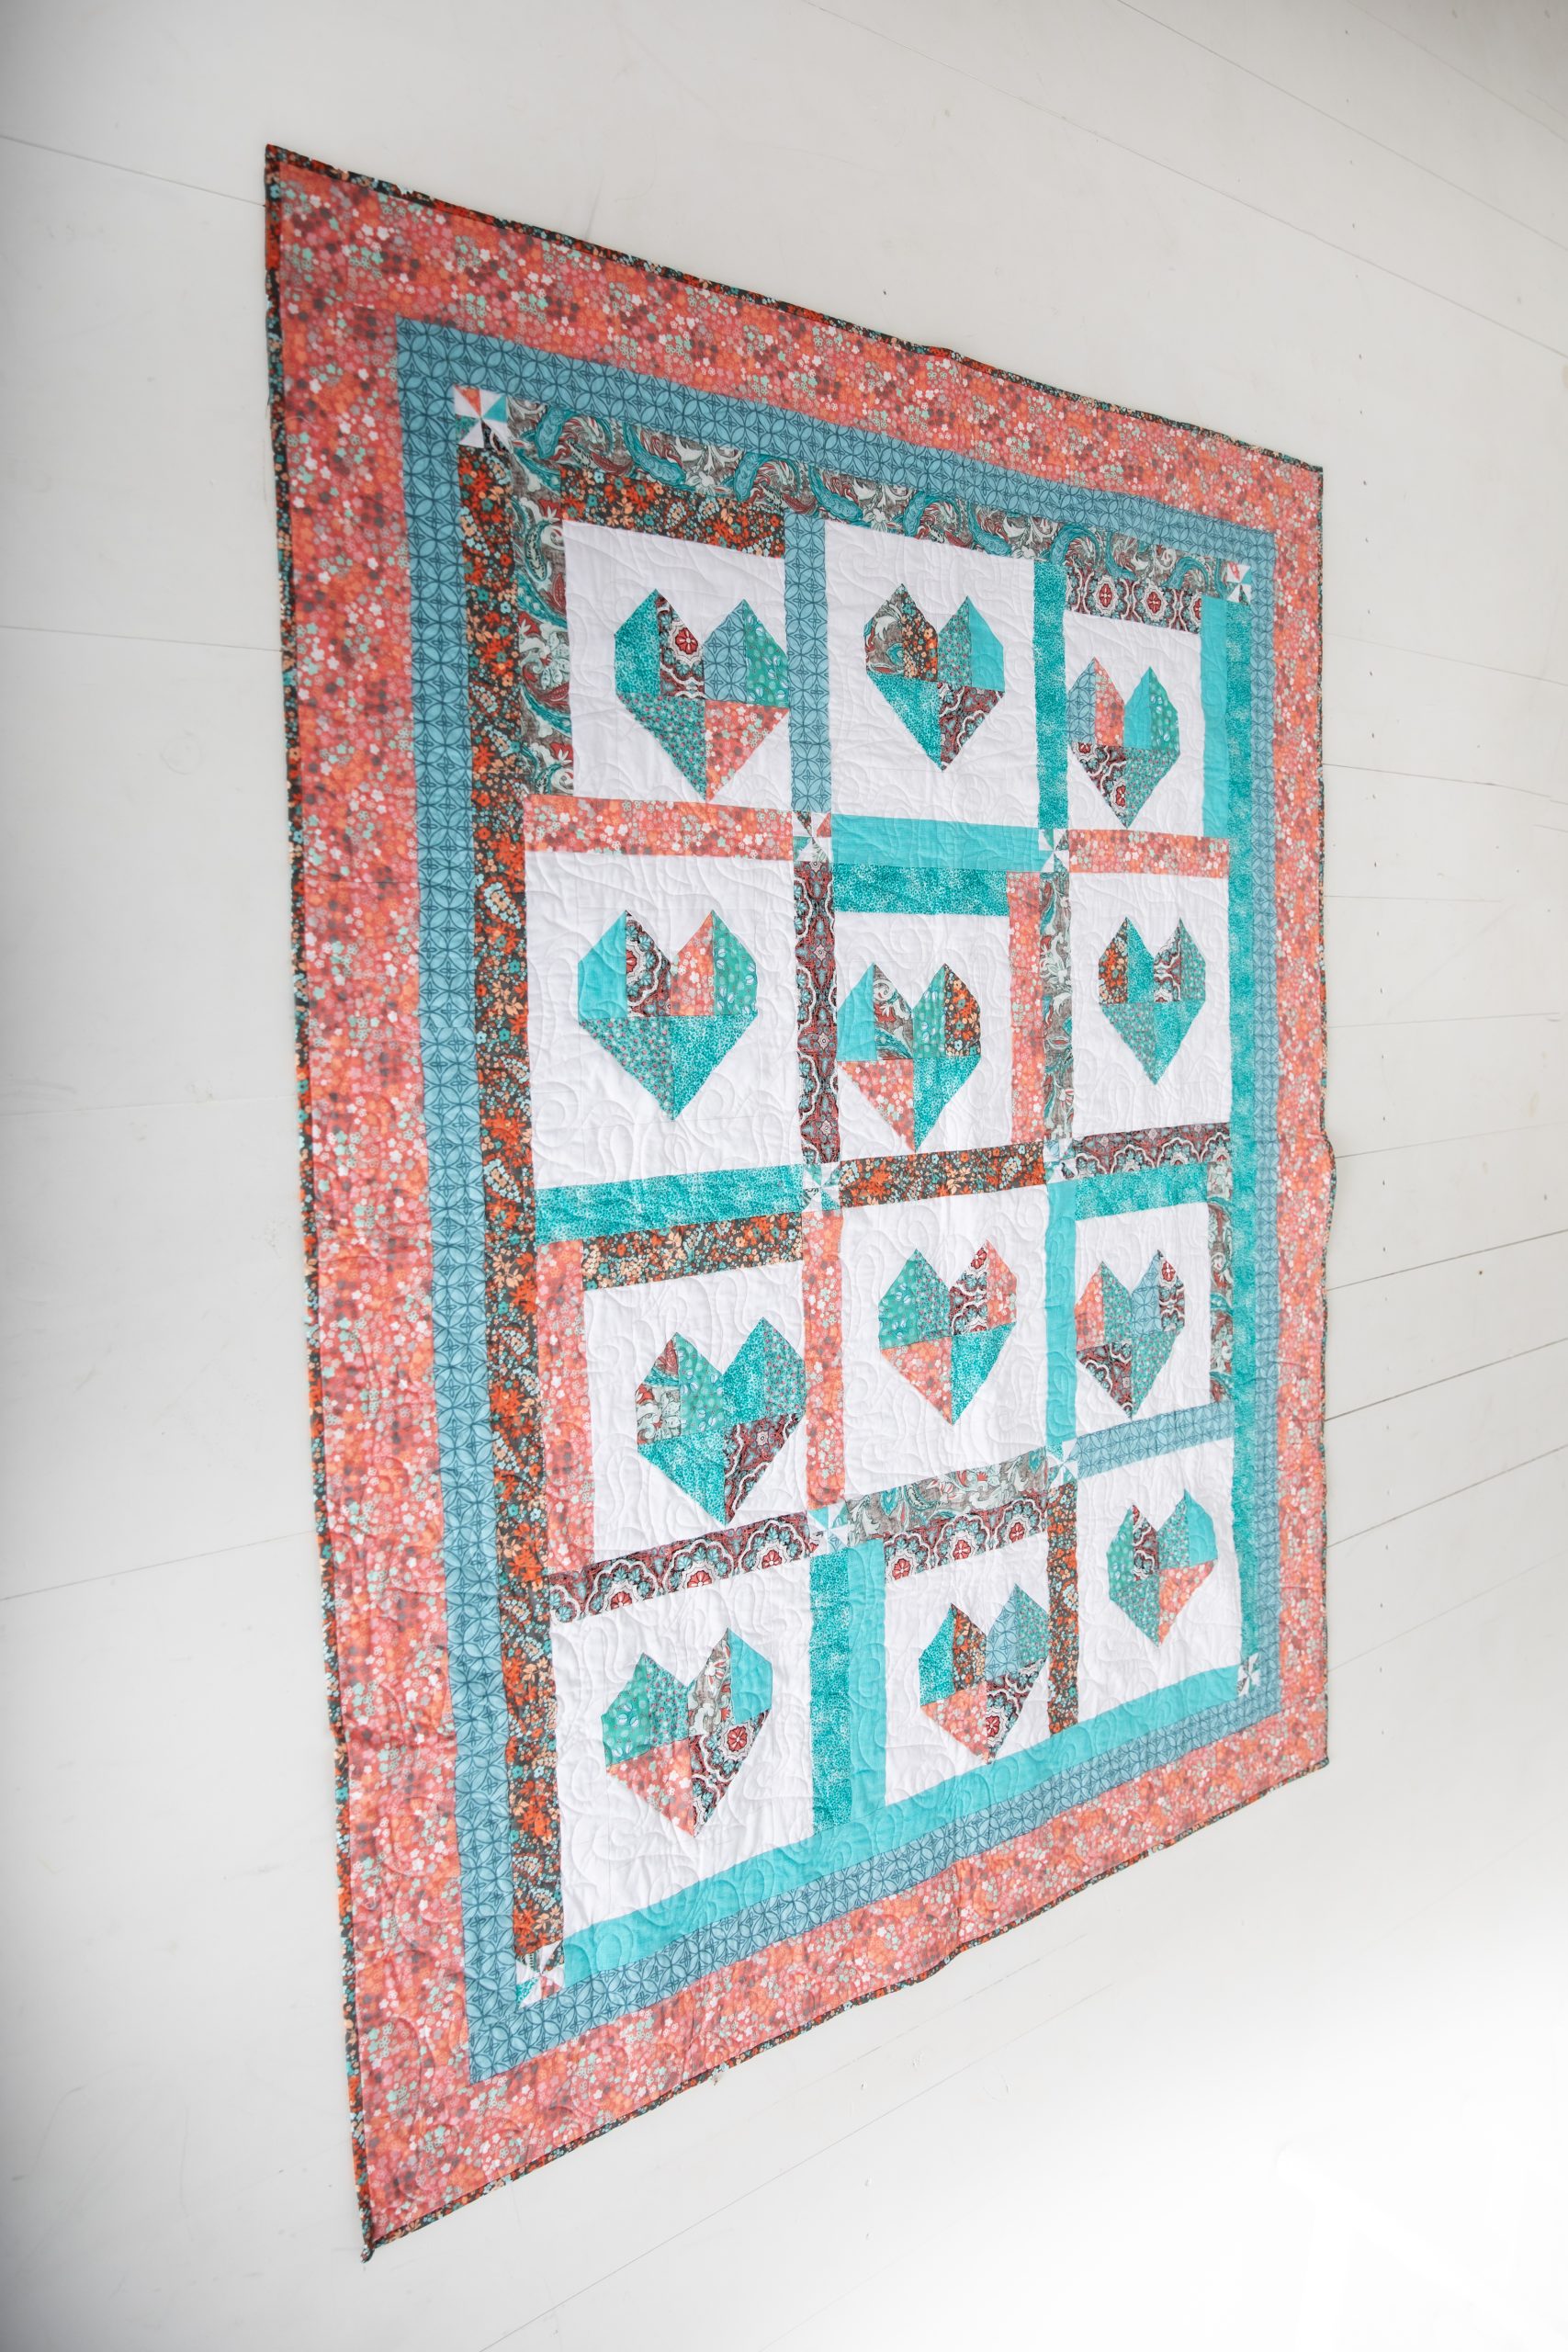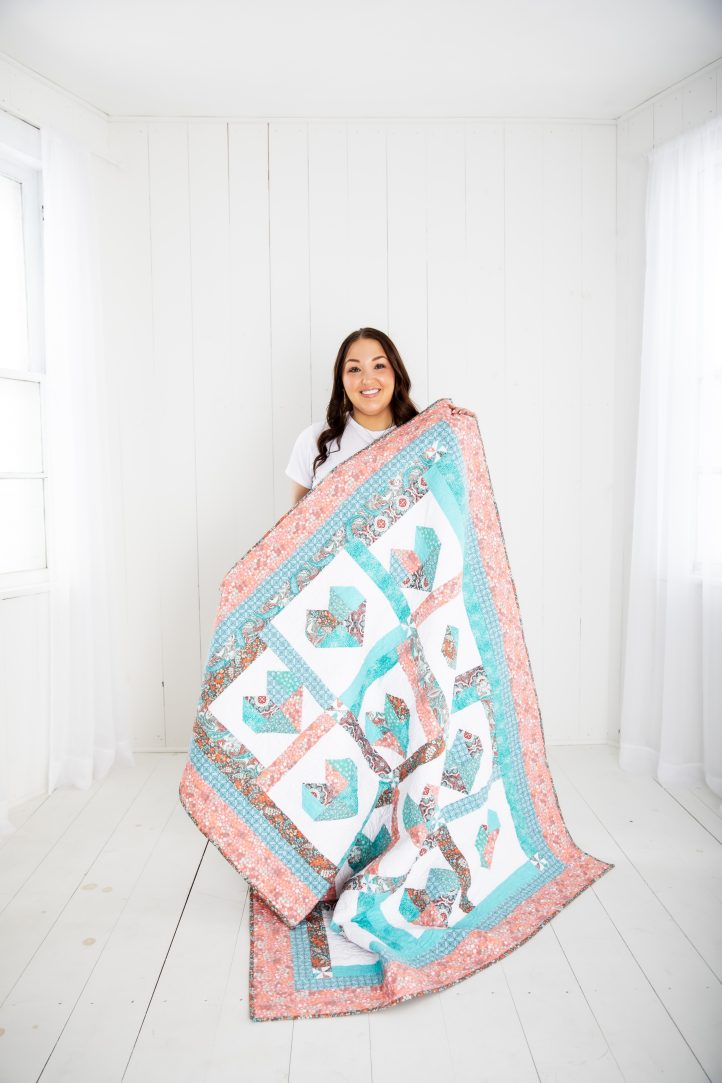
Love quilting with precuts? Then you’re going to want to check out this beautiful spring quilt pattern from Megan Farrell. This stunning heart quilt pattern can be made with either jelly rolls or fabric scraps, finishing at 58 inches by 70 inches. It’s all about the details with this design, and our editors love the tiny pinwheels highlighted in the quilt’s sashing. Make your heart quilt in the ‘80s-inspired peach and turquoise color palette, as shown, or go full pink for a pretty monochromatic look.
Finished Sizes:
- Quilt: 58” x 70”
- Base Block: 8”
- Finished Block: 12” (Total 12)
Designer Note: If you don’t want to make pinwheels for your setting stones, you can cut 10 2 1/2” squares to be used instead. If you choose to go this route, you will not need to do the second part of Step 2 in the base block directions.
Fabric Requirements:
- Scrappy:
- 21 strips 2 1/2” x WOF (can be from jelly roll) – color (this will be for sashing, sashing borders, and top half of your heart blocks) – If buying yardage, you can purchase a total of 1 1/2 yards. If using a jelly roll, please ensure that you have two sets of strips that match for your long sashing borders.
- 5” squares, quantity 12
- Background:
- 1 3/4 yards of light/background fabric
- Suggested Borders:
- 1/2 yard for a 2” finished border
- 1 yard for a 4” finished border
- Binding:
- 3/4 yard
- Backing:
- 4 1/2 yards (to allow extra space if quilting on a longarm)
Cutting Instructions:
- Scrappy – 2 1/2” x 4 1/2” rectangles – 48 each
- Light or Background – 2 1/2” squares – 48 each
- Light or Background – 2 1/2” x 8 1/2” rectangle – 18 each
- Light or Background – 2 1/2” x 10 1/2” rectangle – 18 each
- Scrappy – 2 1/2” x 10 1/2” rectangle – 6 each
- Light or Background – 2 1/2” x 12 1/2” rectangle – 12 each
- Scrappy * Heart Block and Sashing – 2 1/2” x 12 1/2” rectangle
- Background – 5” squares – 12 each
- Scrappy – 5” squares – 12 each
Piecing Instructions:
DIRECTIONS FOR 8″ BASE BLOCK:
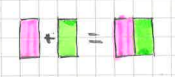
- Make 24 pairs out of the 2 1/2” x 4 1/2” triangles scrappy, put two pieces right side together and sew down one side of the 4 1/2” side. This will make a 4 1/2” square. (Pressing doesn’t matter, press to either side or open.) You will need two sets per base block.
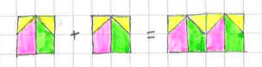
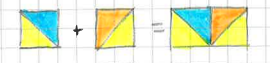
- Take the 4 1/2” squares created in Step 1 and snowball the top outside corners of the 4 1/2” squares using 2 1/2” squares (light or background). You will only snowball the top two corners. Once the initial seamline has been made for the snowball, sew 1/2” away from the first seam towards the outer point to create a secondary half square triangle that will be used for the pinwheel needed for the sashing. Cut between the seams to create the secondary small half square triangle. *** see Designer Notes at the top of the pattern.

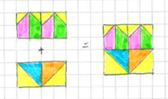
- Join two of the 4 1/2” squares that have been snowballed and sew together to make the top part of the heart.
- To create 4 1/2” half square triangles, you will need the 5” squares. Pair up on scrappy square to one background (or light) square right sides together. Mark wrong side with one diagonal line and sew on either side of the line. Each set of 5” squares will yield two half square triangle. Complete for all 5” squares; this will yield a total of 24 half square triangles.
- To create the bottom of the heart, take two of the 4 1/2″ half square triangles and sew together, matching the scrappy side of the block and stitching so that the seam of the triangle is upper left to lower right.
- Attach the top unit of the heart to the bottom unit of the heart.
Now that the Base blocks are complete, you will use the base blocks to create three different blocks.
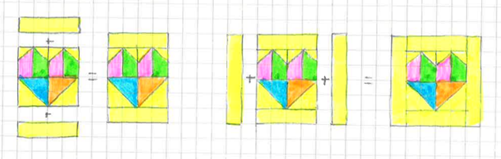
BLOCK A DIRECTIONS:
Note: There will be 6 blocks.
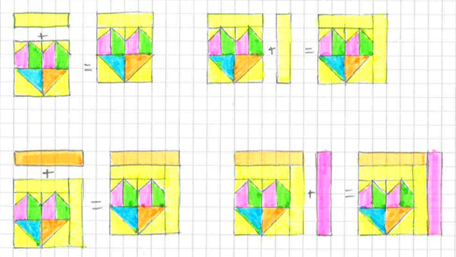
- Attach 2 each, 2 1/2” x 8 1/2” light to the top and bottom of 6 of the base blocks.
- Attach 2 each, 2 1/2” x 12 1/2” lights to the sides of the 6 base blocks.
Note: Heart Base Block will be centered inside a light background border.
BLOCK B DIRECTIONS:
Note: There will be 3 blocks.
- Attach 1 each, 2 1/2” x 8 1/2” light to the top of 3 of the base blocks.
- Attach 1 each, 2 1/2″ x 10 1/2” light to the left of the base blocks.
- Attach 1 each, 2 1/2” x 10 1/2” scrappy to the top of the 3 base blocks.
- Attach 1 each, 2 1/2” x 12 1/2” scrappy to the left side of the base block.
Note: Heart Base Block will be in the lower right-hand corner.
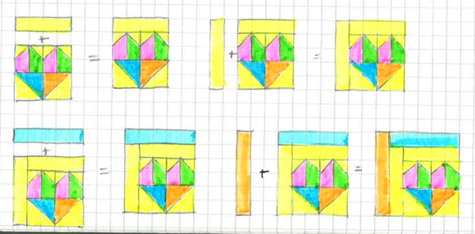
BLOCK C DIRECTIONS:
Note: There will be 3 blocks.
- Attach 1 each, 2 1/2” x 8 1/2” light to the top of 3 of the base blocks.
- Attach 1 each, 2 1/2 “ x 10 1/2” light to the right of the base blocks.
- Attach 1 each, 2 1/2” x 10 1/2” scrappy to the top of the base blocks.
- Attach 1 each, 2 1/2” x 12 1/2” scrappy to the right of the base block.
Note: Heart Base Block will be in the lower left-hand corner.
SASHING:
Using the 1/2 square triangle blocks created from the above snowballs (should be 1 1/2”), create 10 pinwheels. You will have extra left over. Trim the pinwheels to 2 1/2” squares.
Once these have been made, they will be used as part of the sashing. The setting of the blocks will be 4 rows with 3 blocks per row. 6 pinwheels will be placed at the inside of these rows. The remaining 4 pinwheels will be used for the outside corners of the sashing borders.
Inside sashing between the blocks: 17 each, 2 1/2” x 12 1/2” scrappy *The sashing pieces have already been created in the original cutting measurements.
Outside sashing border: 2 each, 2 1/2” x 54 1/2” scrappy
Top and Bottom sashing border: 2 each, 2 1/2” x 40 1/2” scrappy
BORDERS:
- Border 1 is 2” finished.
- Border 2 is 4” finished.