
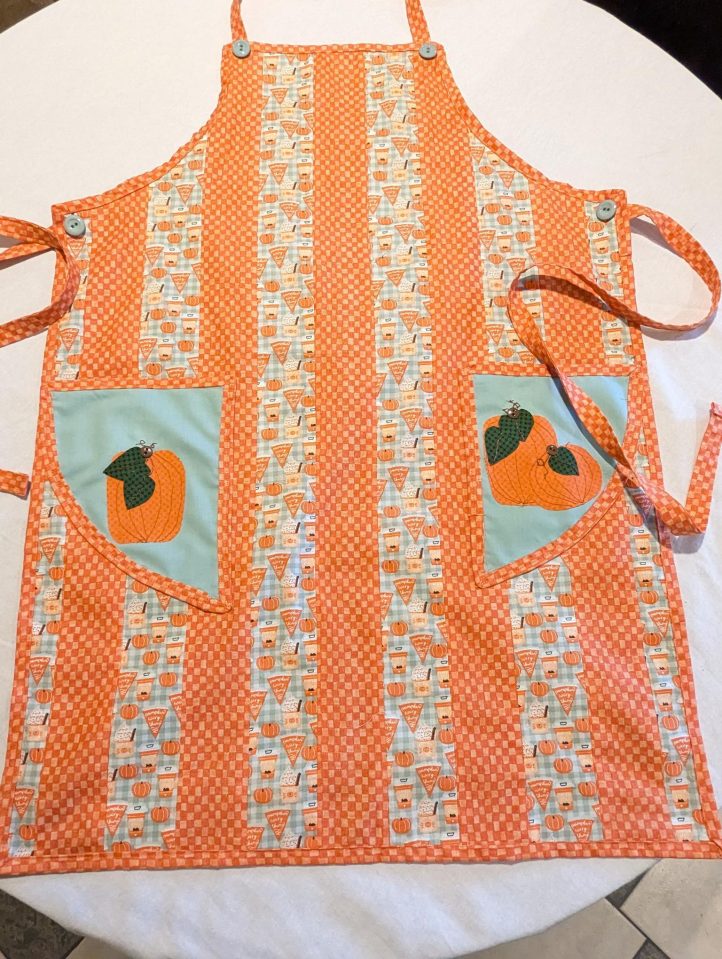
Celebrate the arrival of autumn with this delightful pumpkin apron pattern. Designed by Debi Schmitz, this quilted apron pattern is made with alternating strips of fall fabrics and features two pockets adorned with adorable country pumpkins. Finish your apron with color coordinating buttons and delicately stitch details to your pocket pumpkins.
Materials:
- Fabrics:
- A- Autumn print fabric: 2/3 yard
- B- Complimentary print fabric: 1 yard
- C- Celadon green fabric: 1 yard
- D- Orange print fabric for pumpkin: 5” x 12”
- E- Dark green print fabric for leaves: 5” x 5”
- (3) 3/8” brown buttons
- (4) 3/4” celadon green buttons
- (1) 5” x 17” piece of Heat’n Bond Lite
- Thread to match fabric
- Brown thread
- Brown embroidery floss and needle
- Fabric sewing scissors
- Sewing machine
- Iron
- Cutting mat
- Acrylic ruler
- Rotary cutter
- PDF Layouts – These are located at the bottom of this page. See printing instructions below.
Cutting Instructions:
Cut the following:
Fabric A:
- (6) 3” x 36” strips
Fabric B:
- (5) 3” x 36” strips
- (2) 3” x 32” strips- waist ties
- (1) 3” x 24” strip- collar strip
- (4) 2” x 40” strips for bias tape
Fabric C:
- (1) 32” x 36” (Pockets will be cut from this fabric when apron is trimmed.)
Fabric D:
- (2) Small Pumpkin with Heat’n Bond on back
- (1) Large Pumpkin with Heat’n Bond on back
Fabric E:
- (2) Large Leaves with Heat’n Bond on back
- (3) Small Leaves with Heat’n Bond on back
Paper:
- Print PDF templates (as noted instructions).
PRINTING INSTRUCTIONS:
To download the PDF layouts, click on the download button at the bottom of the page. We recommend opening your download using Adobe Acrobat.
Piecing Instructions:
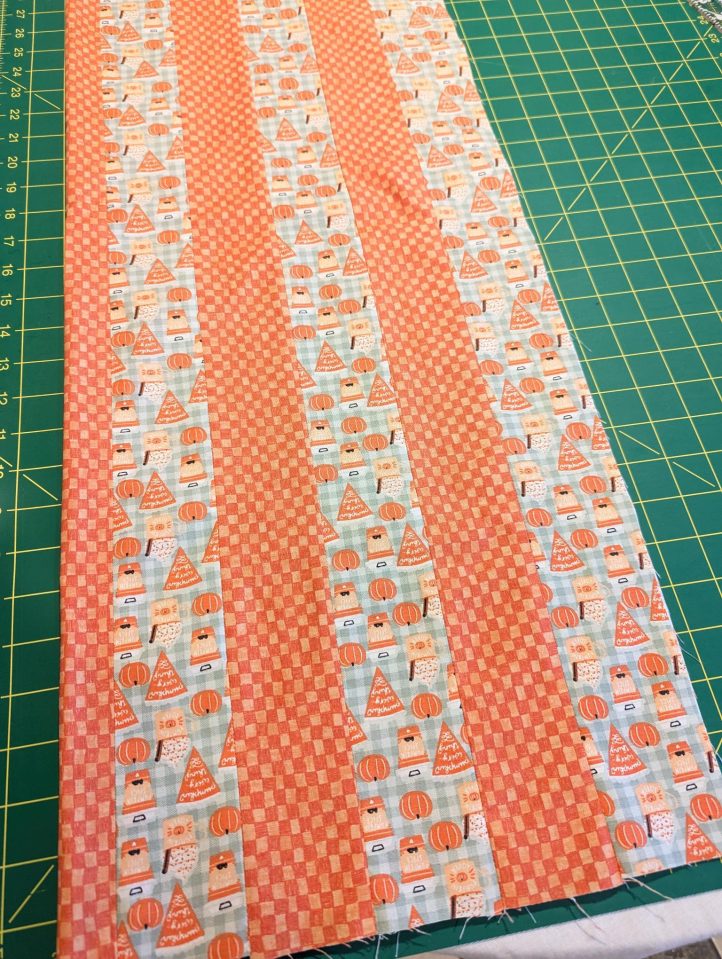
- Sew the (6) Fabric A strips and the first (5) Fabric B strips together, alternating fabrics, starting and stopping with Fabric A as shown in the photo below.
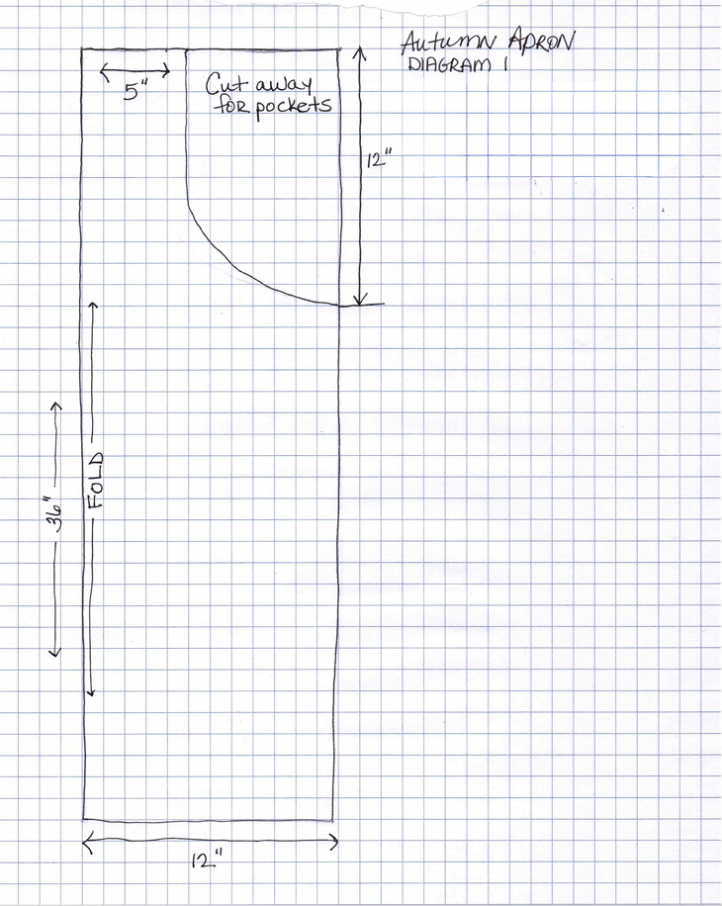
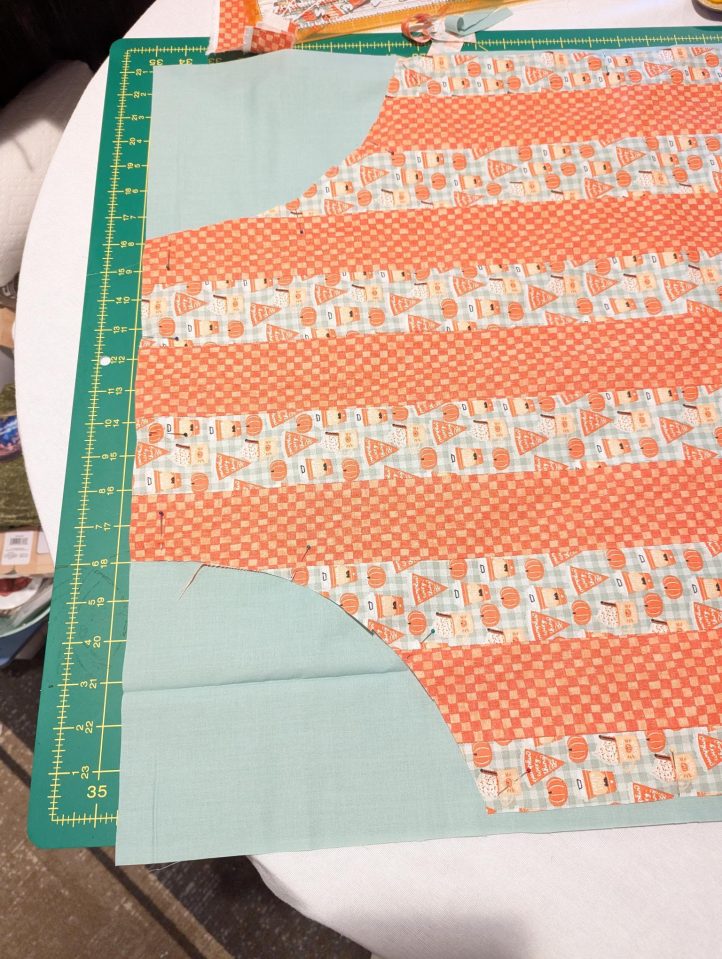
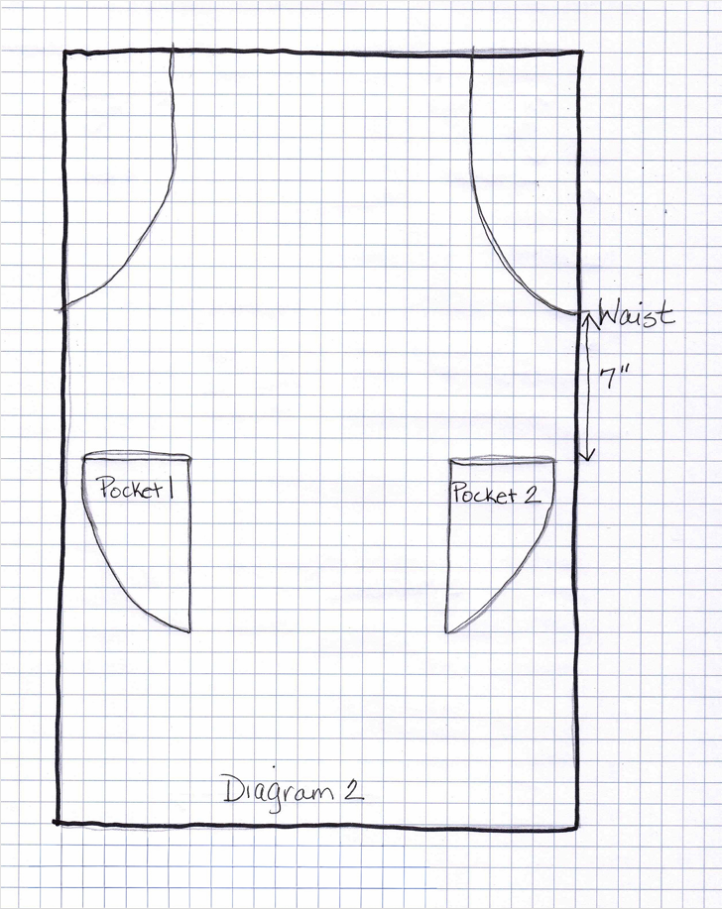
- Trim the apron evenly to 24” x 32”. Fold the striped fabric in half lengthwise and cut the arm holes from this striped fabric as shown in the diagram below.
- Cut (1) 32” x 36” Fabric C to match the apron front as shown in the photo below. Save the cut away fabric.
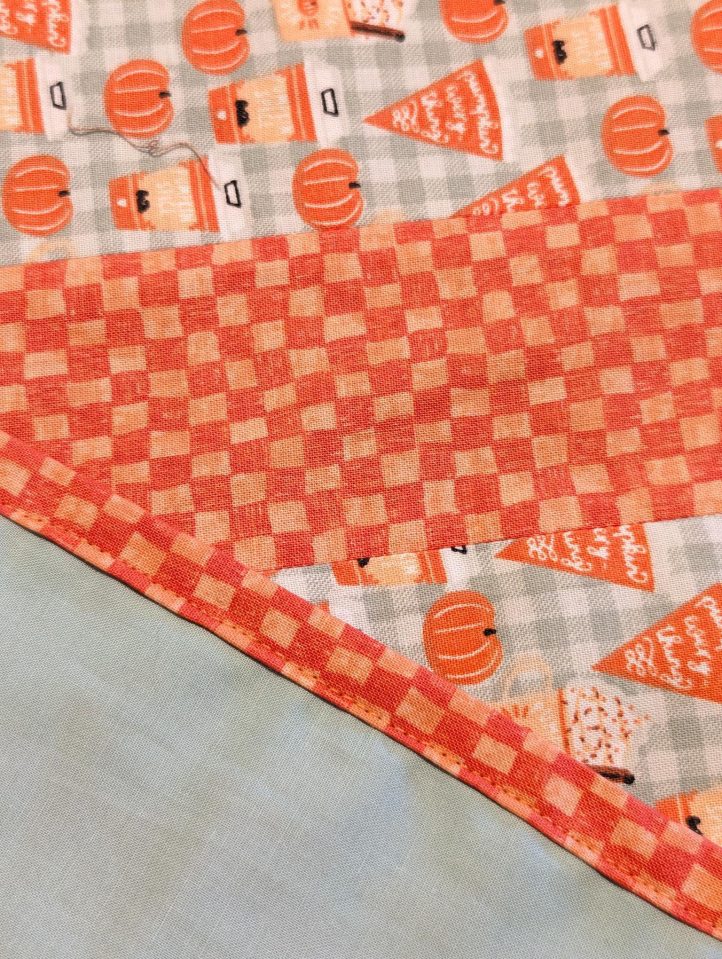
- Sew the (4) 2” x 40” strips of bias tape together. Make bias tape of this fabric length, no need to cut on the bias for this project. Stitch the bias around the outside of the entire apron.
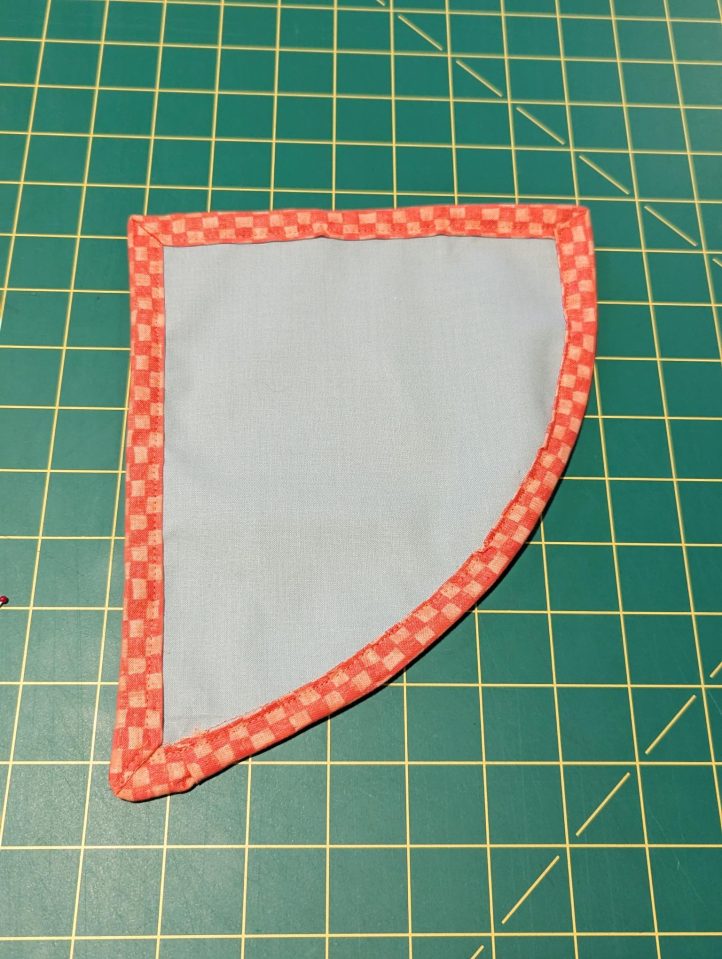
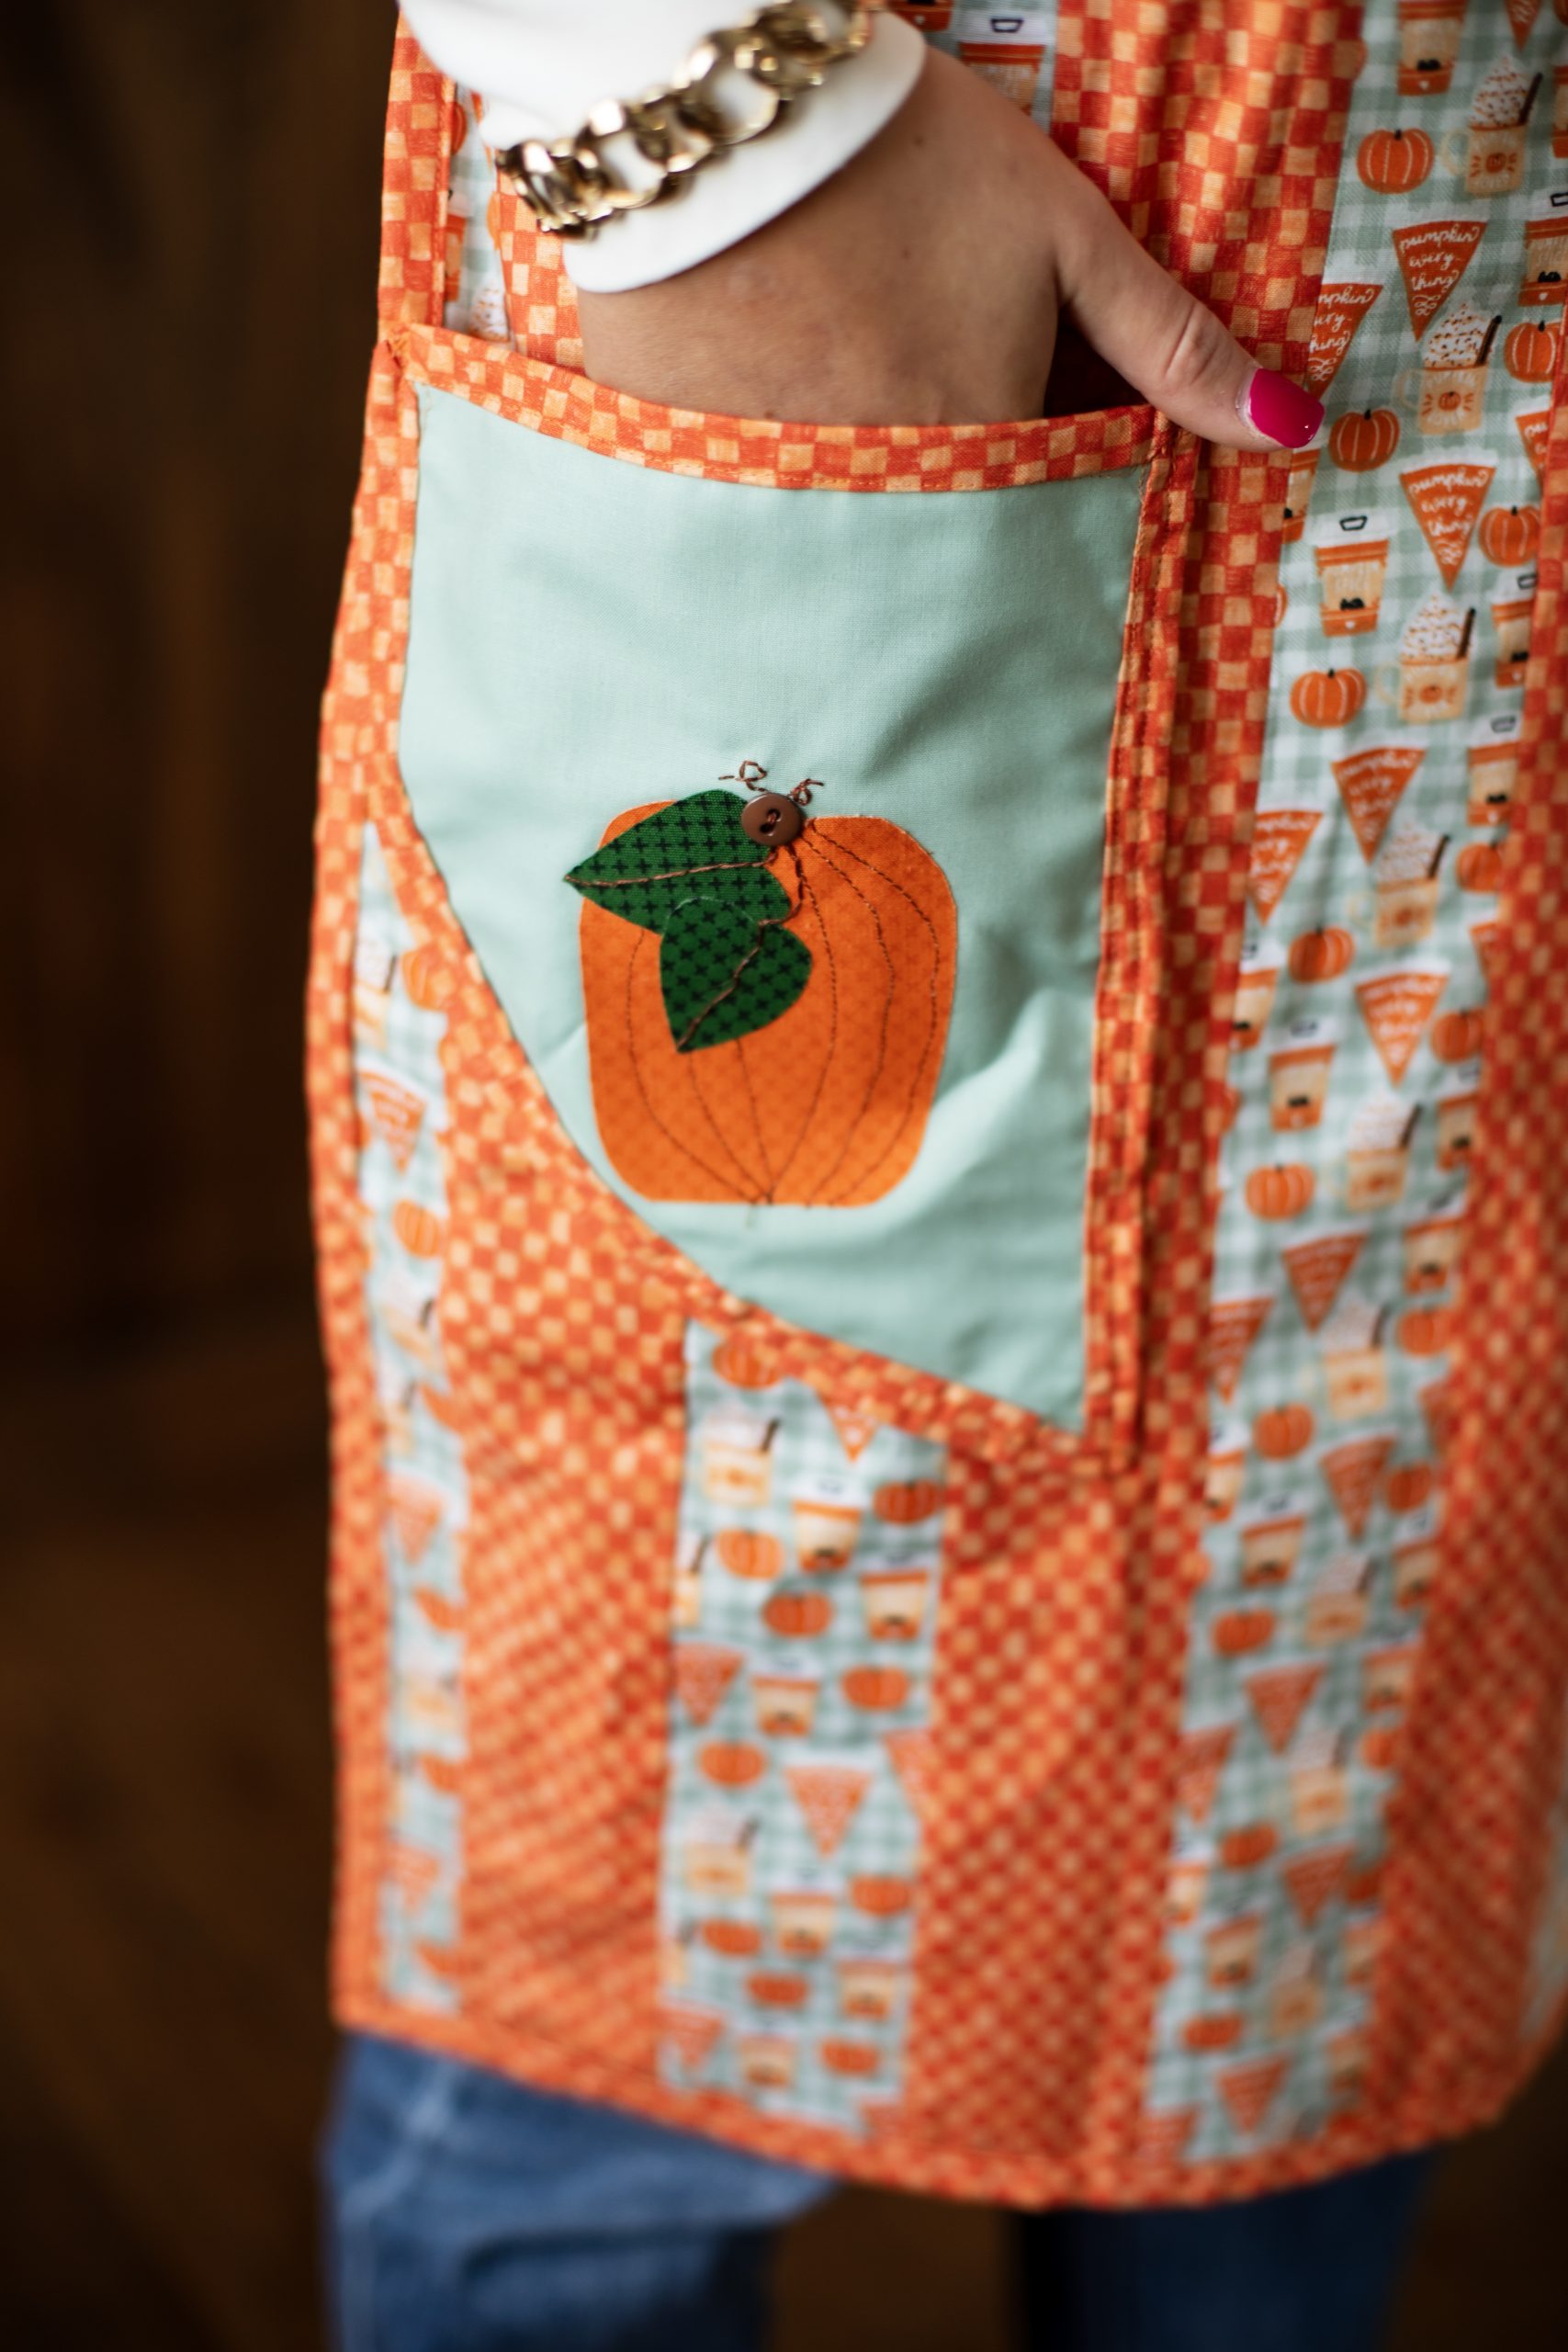
- Use the cut away pieces of Fabric C to make the pockets. They should measure 5” across and 8” long. Sew bias tape around the perimeter of the pockets. Set aside.
- Stitch the pumpkin details and leaf details as shown in the photos below. Stitch the brown buttons in place.
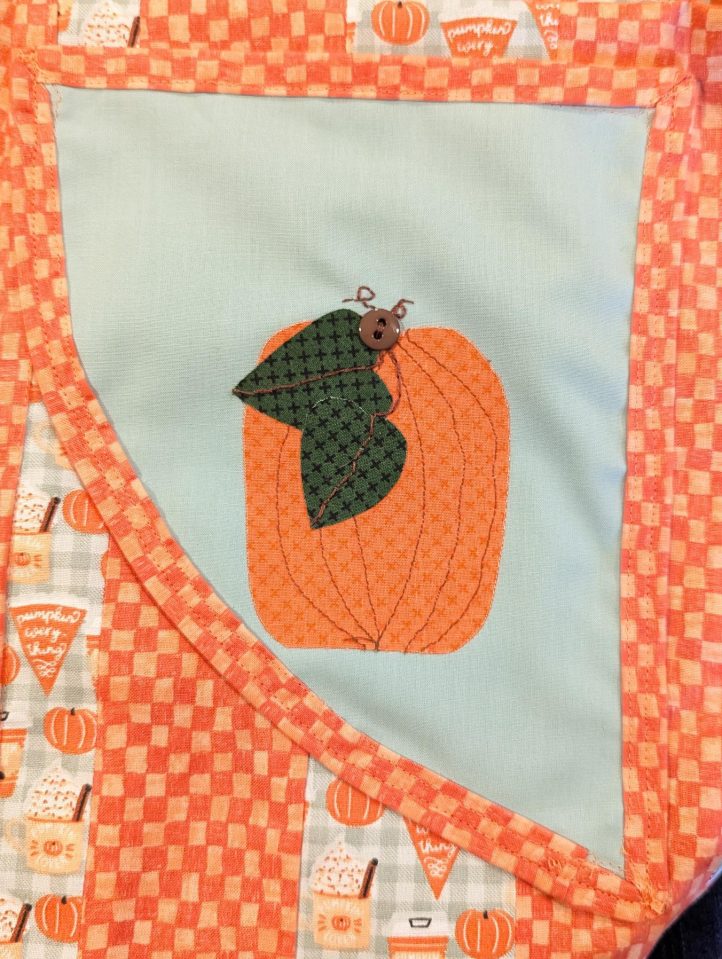
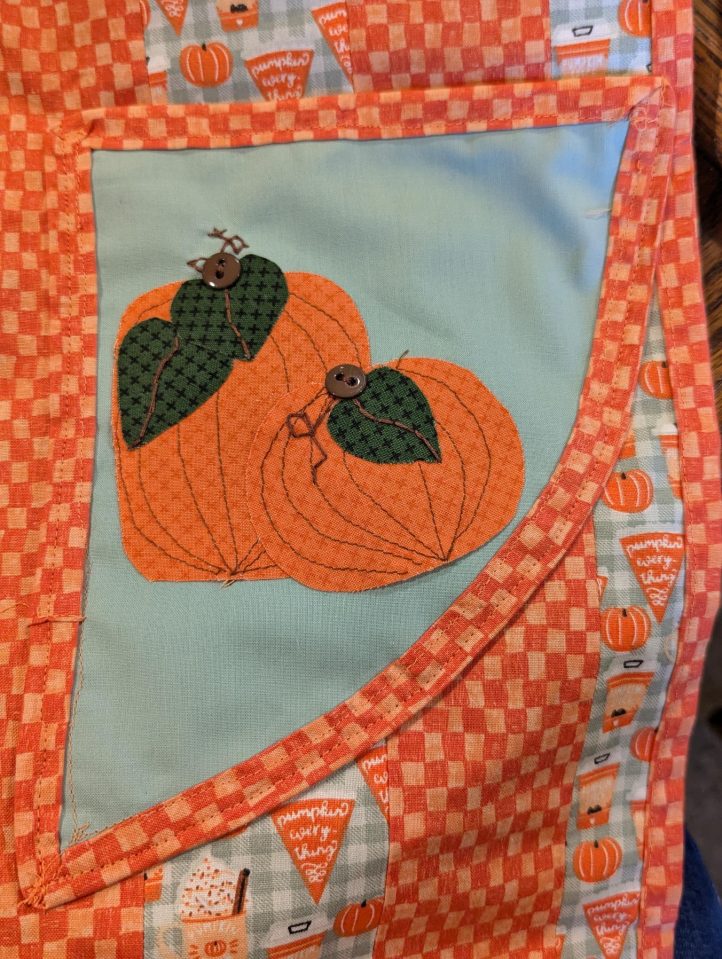
- Pull away the paper on the back and press the pieces in place on the apron as shown in the diagram below.
- Use embroidery floss and needle to stitch the final details as shown on the photos above if desired.
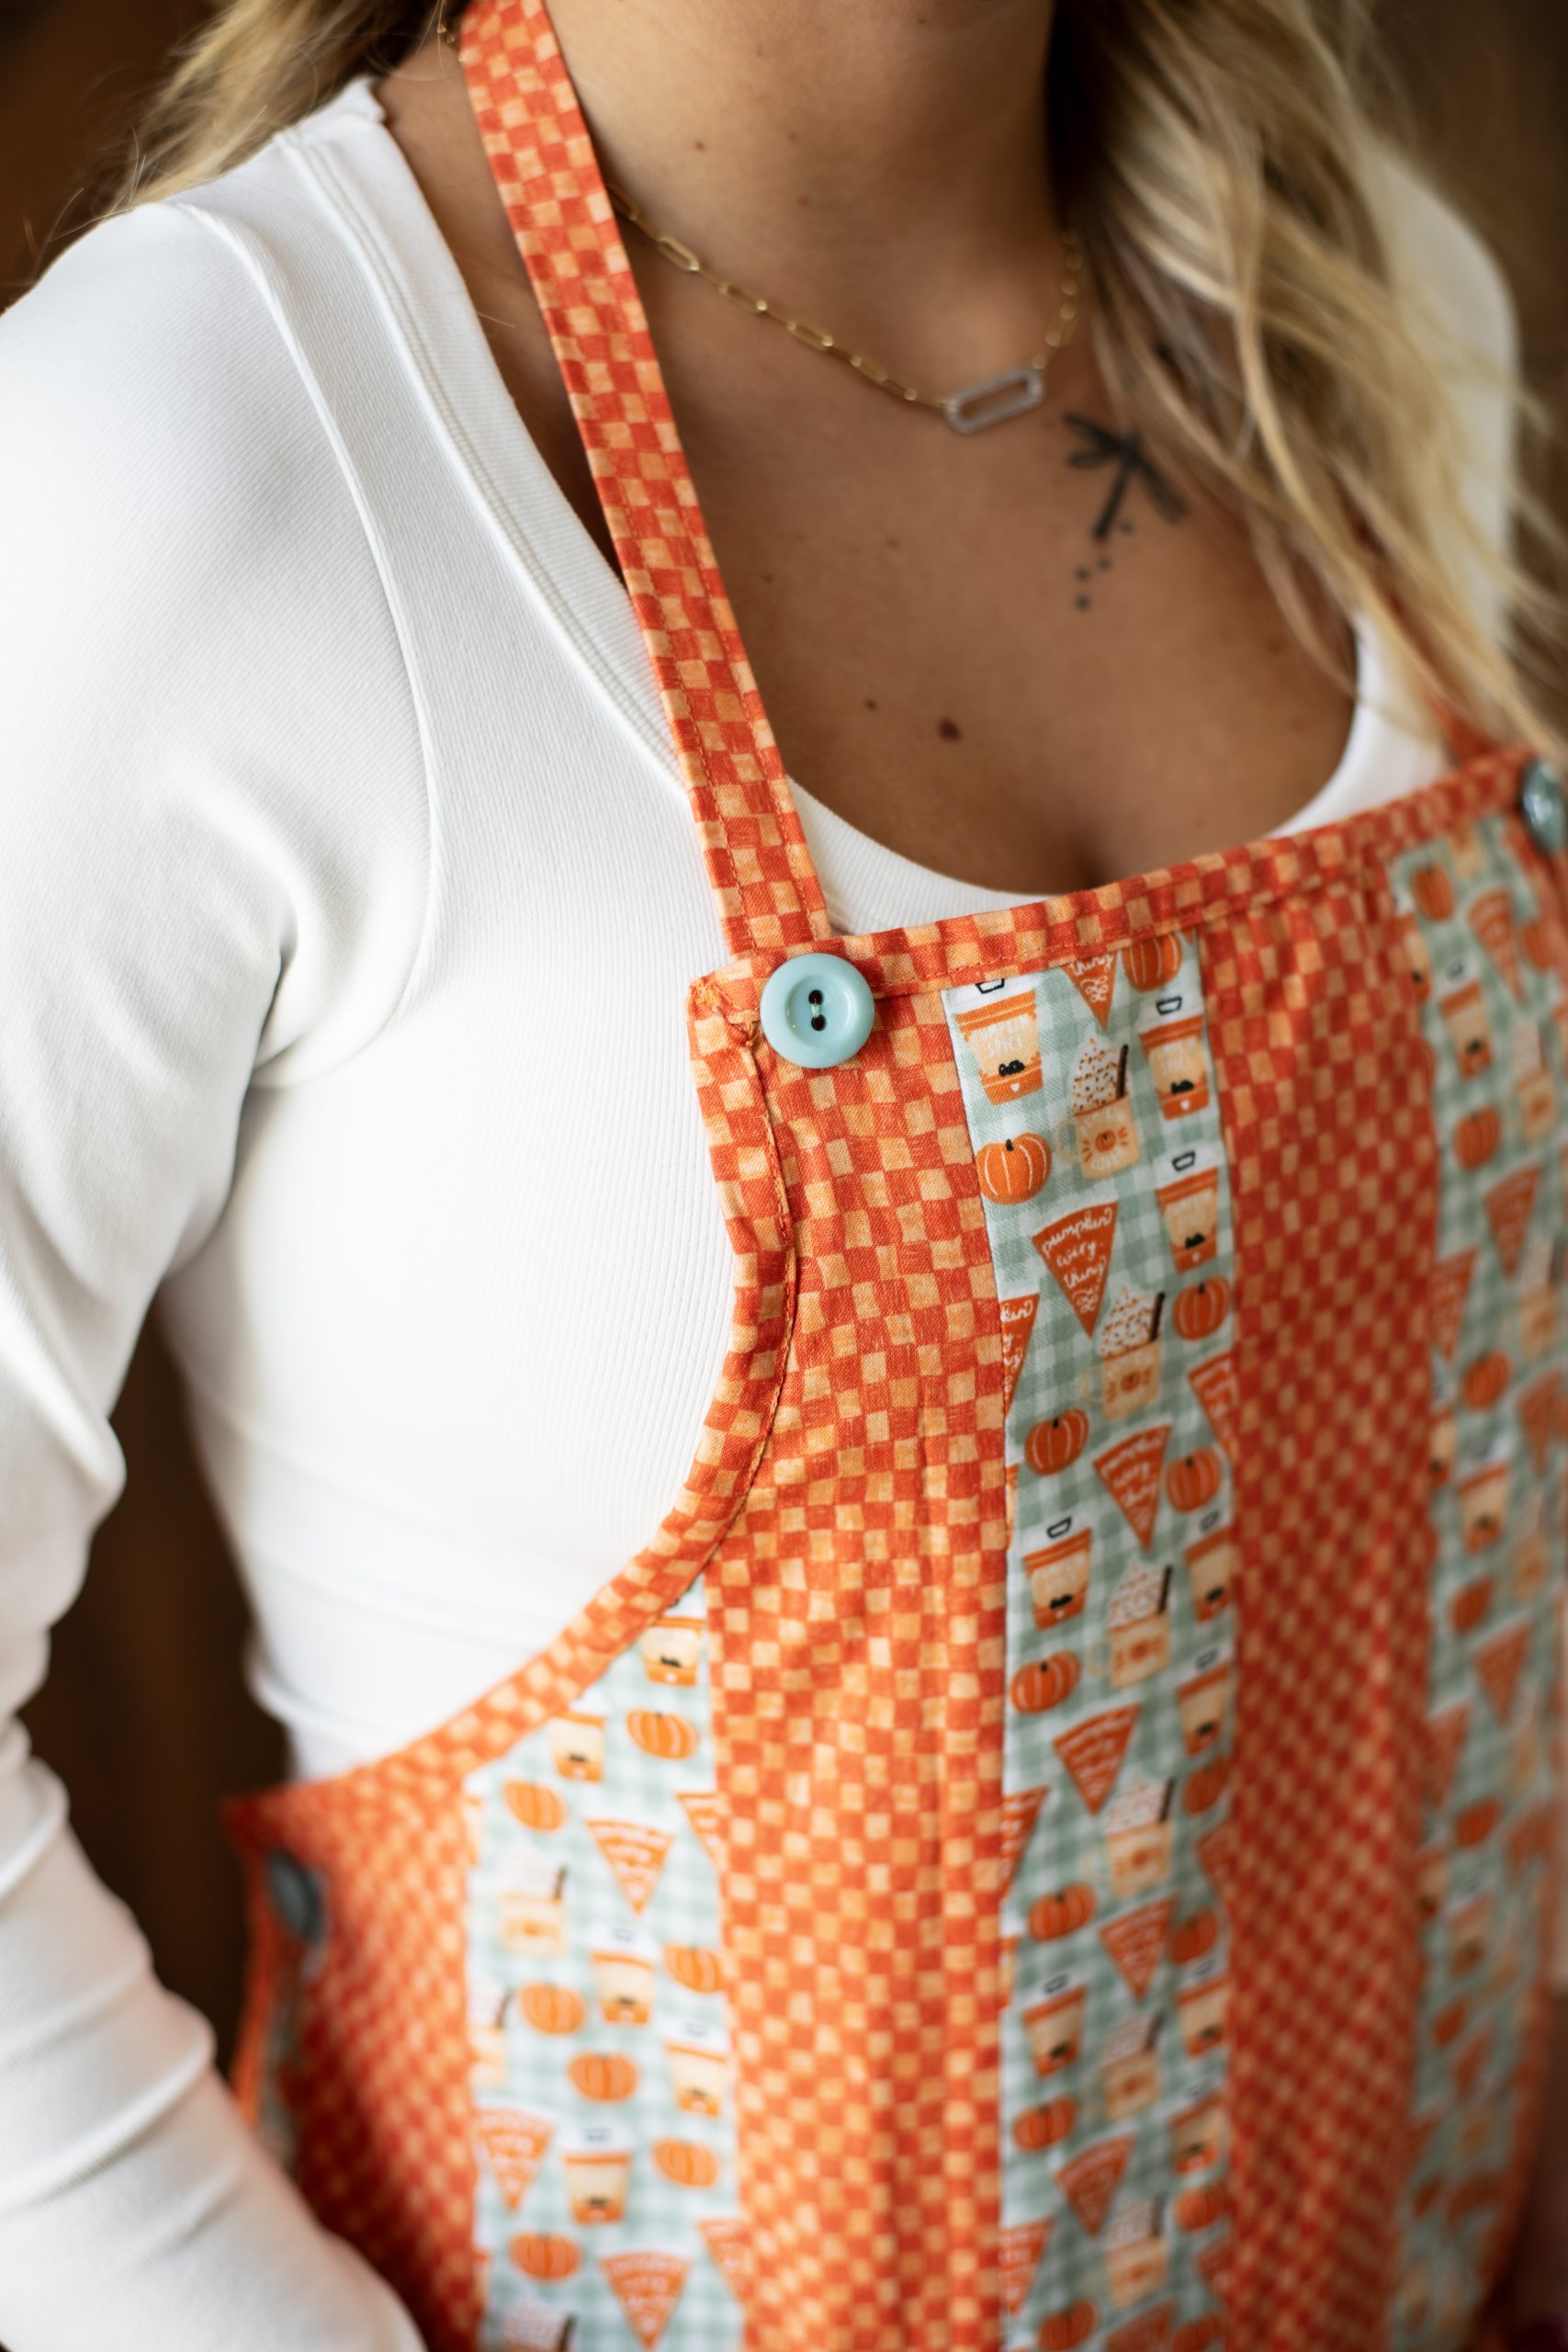
- Make a collar strip of the 3” x 24” Fabric B. Fold one edge in 1/3rd. and press. Fold the other side over the first, press, and stitch close to the edge on both long edges. Fold one end of this strip under and then stitch to the back of the apron bib with a green button on the front. Stitch the other end of the collar strip in place with a button as well.
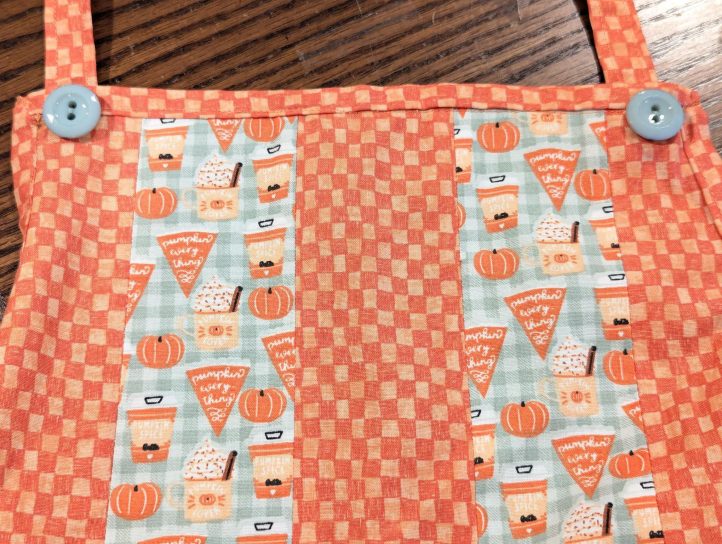
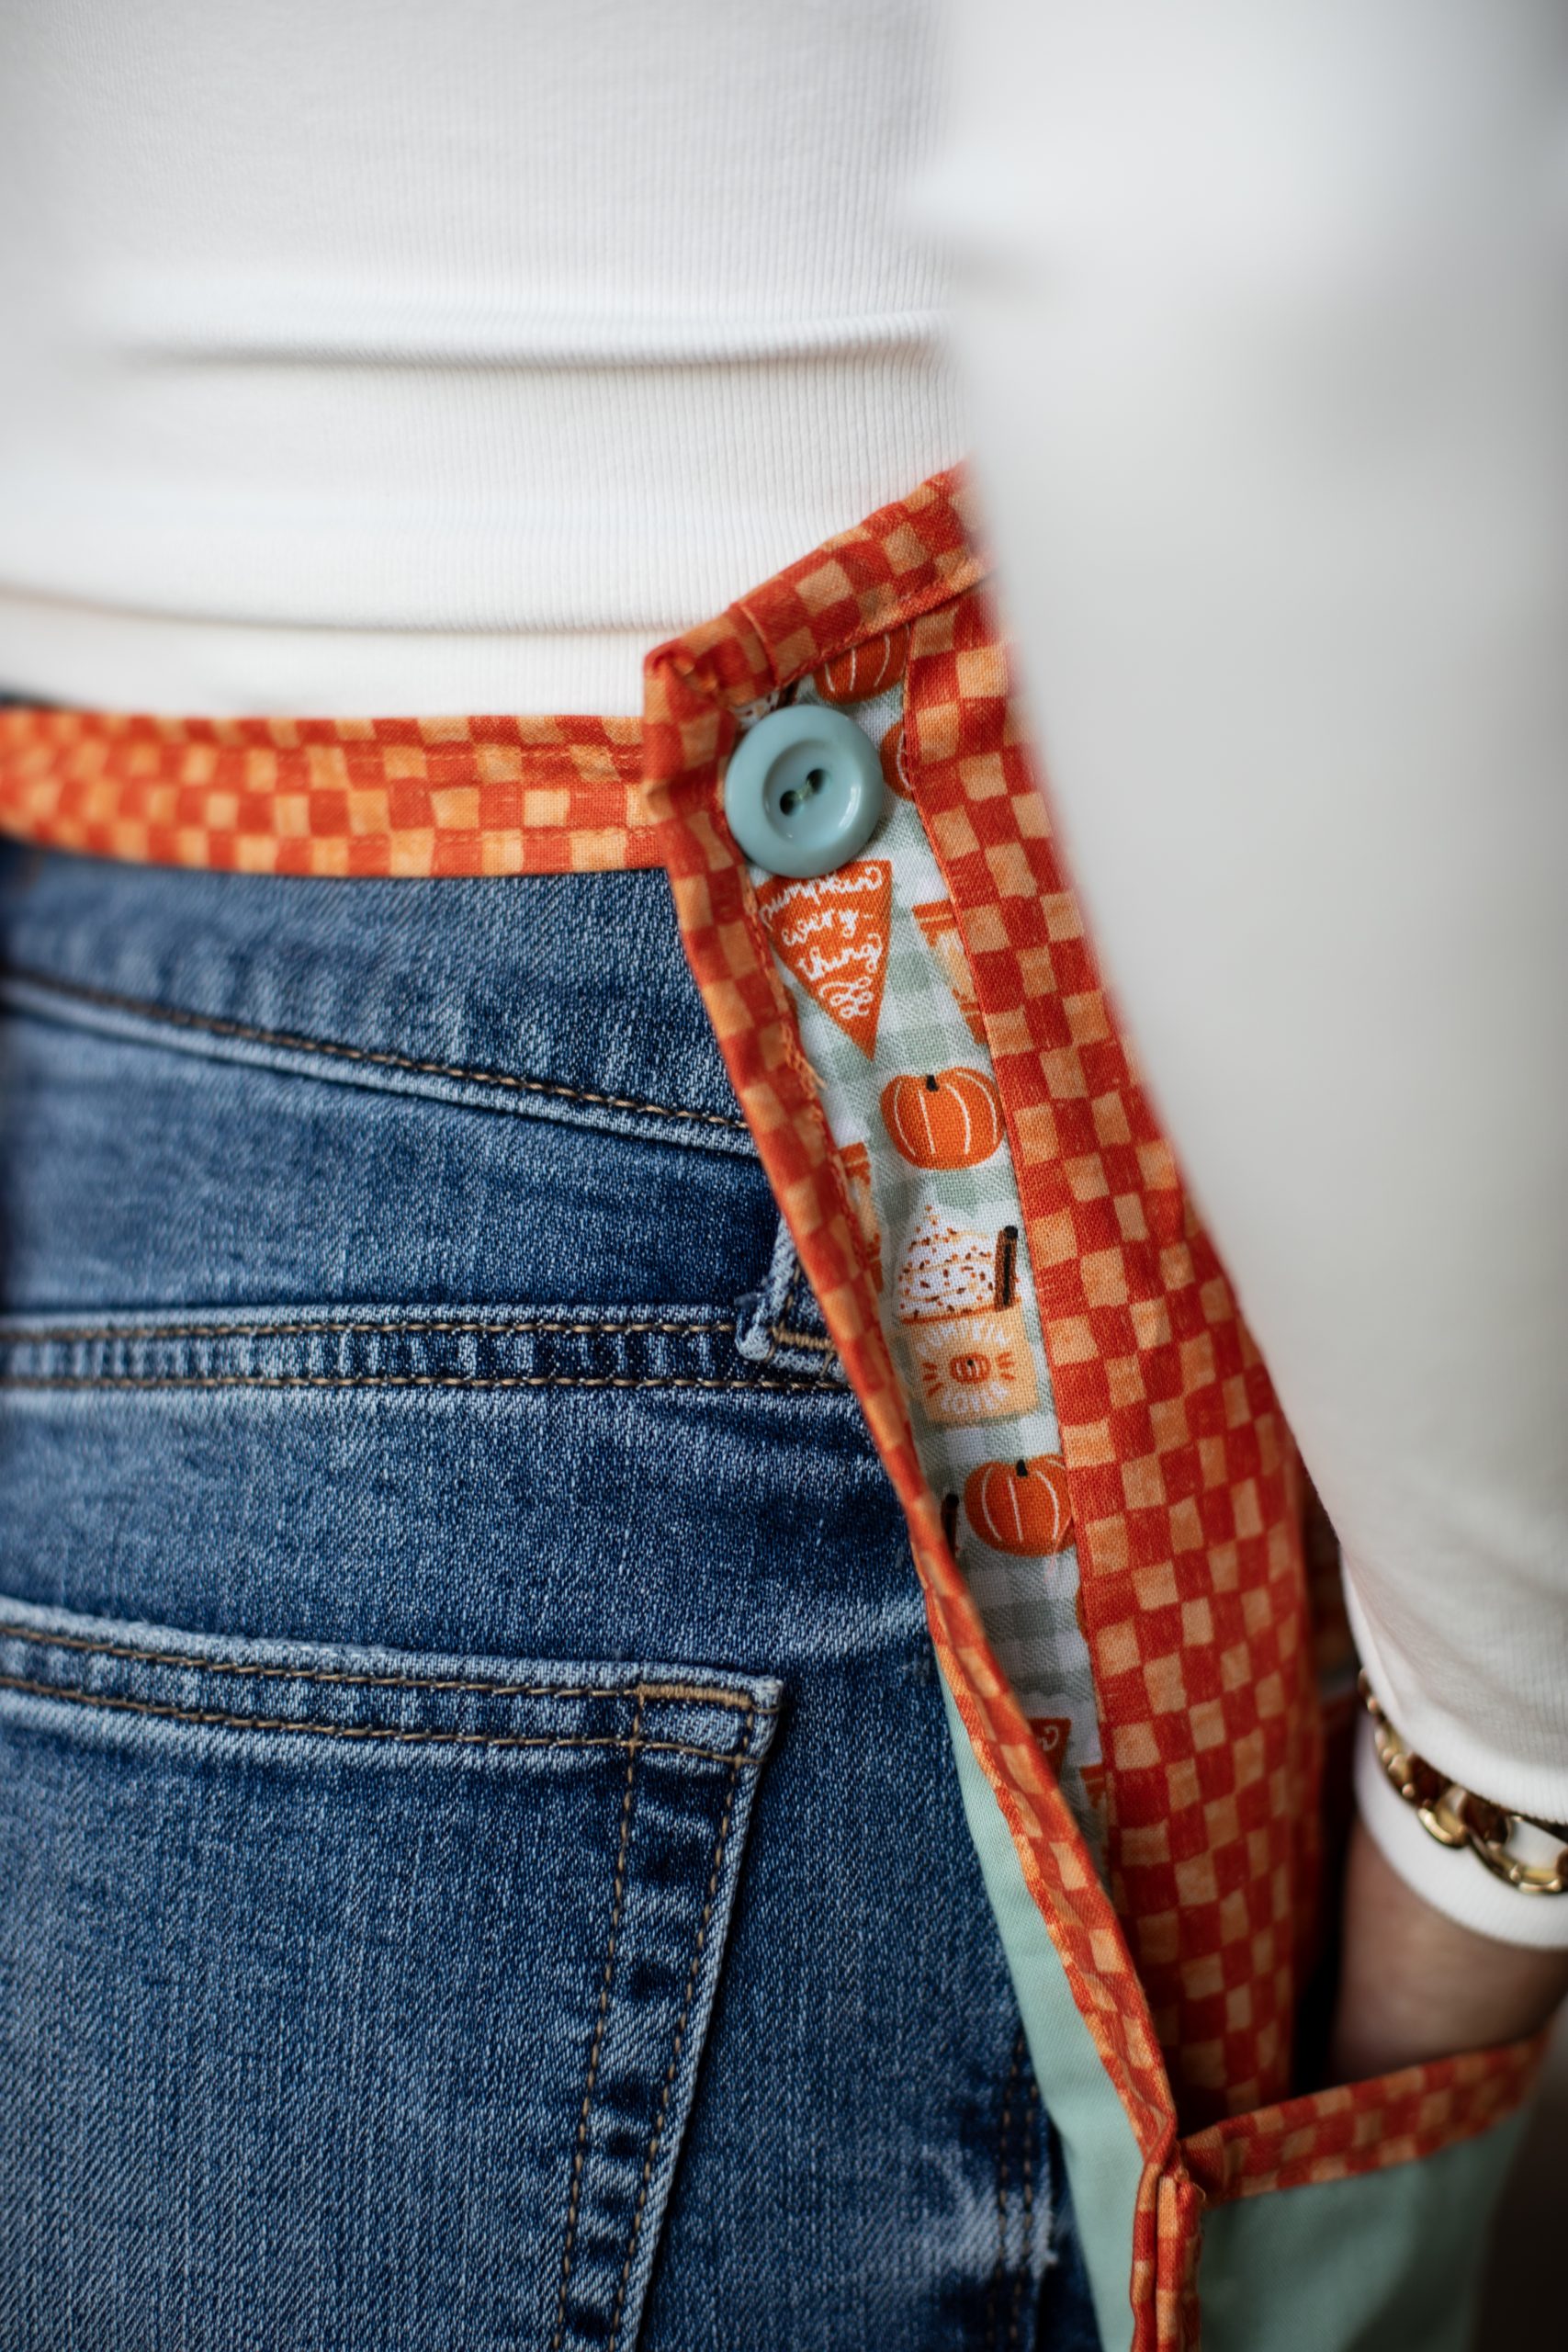
- Make the waist ties of the (2) 3” x 36” the same way as the collar strips. Attach one tie to the apron with the end sewn under with a green button. Repeat for the other tie.
- Stitch the pockets to the apron, leaving the top open following the first diagram. The top of each pocket should be 8” from the waist and 1” in from outer edge.

Look forward to making this.
Thanks so much for your kind comment, Liz! Have a great day 🙂 – Ashley, We Like Quilting