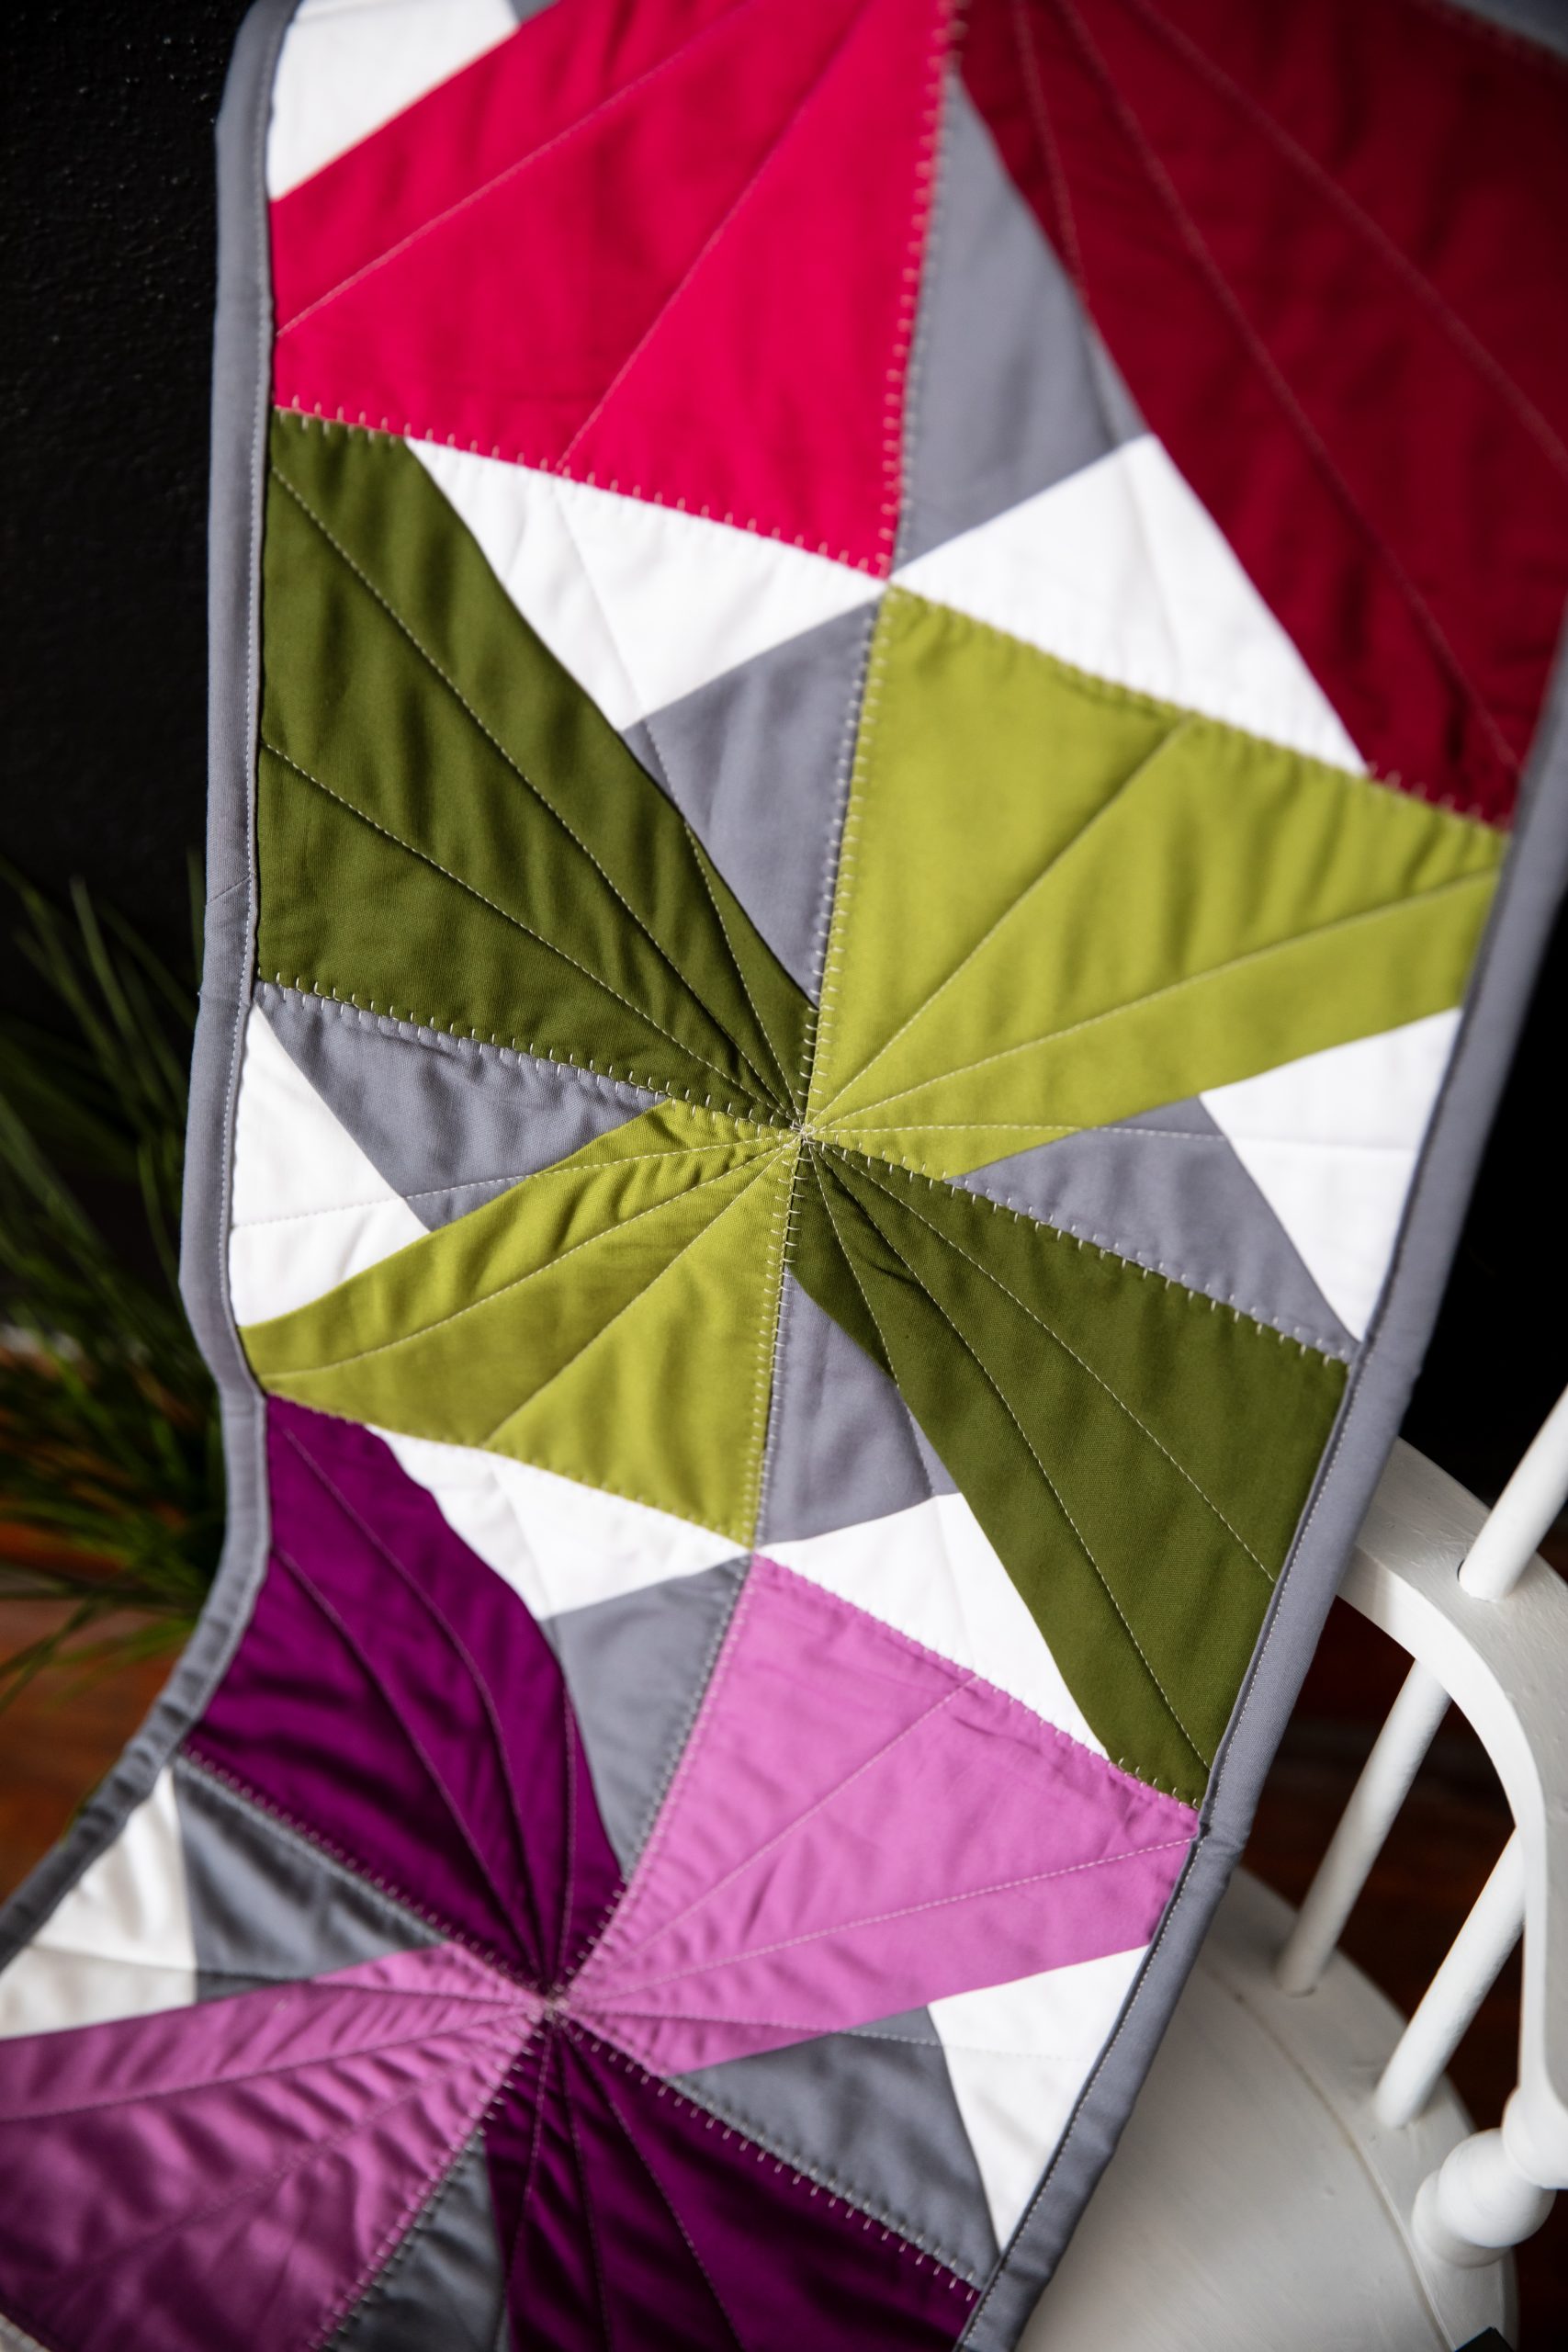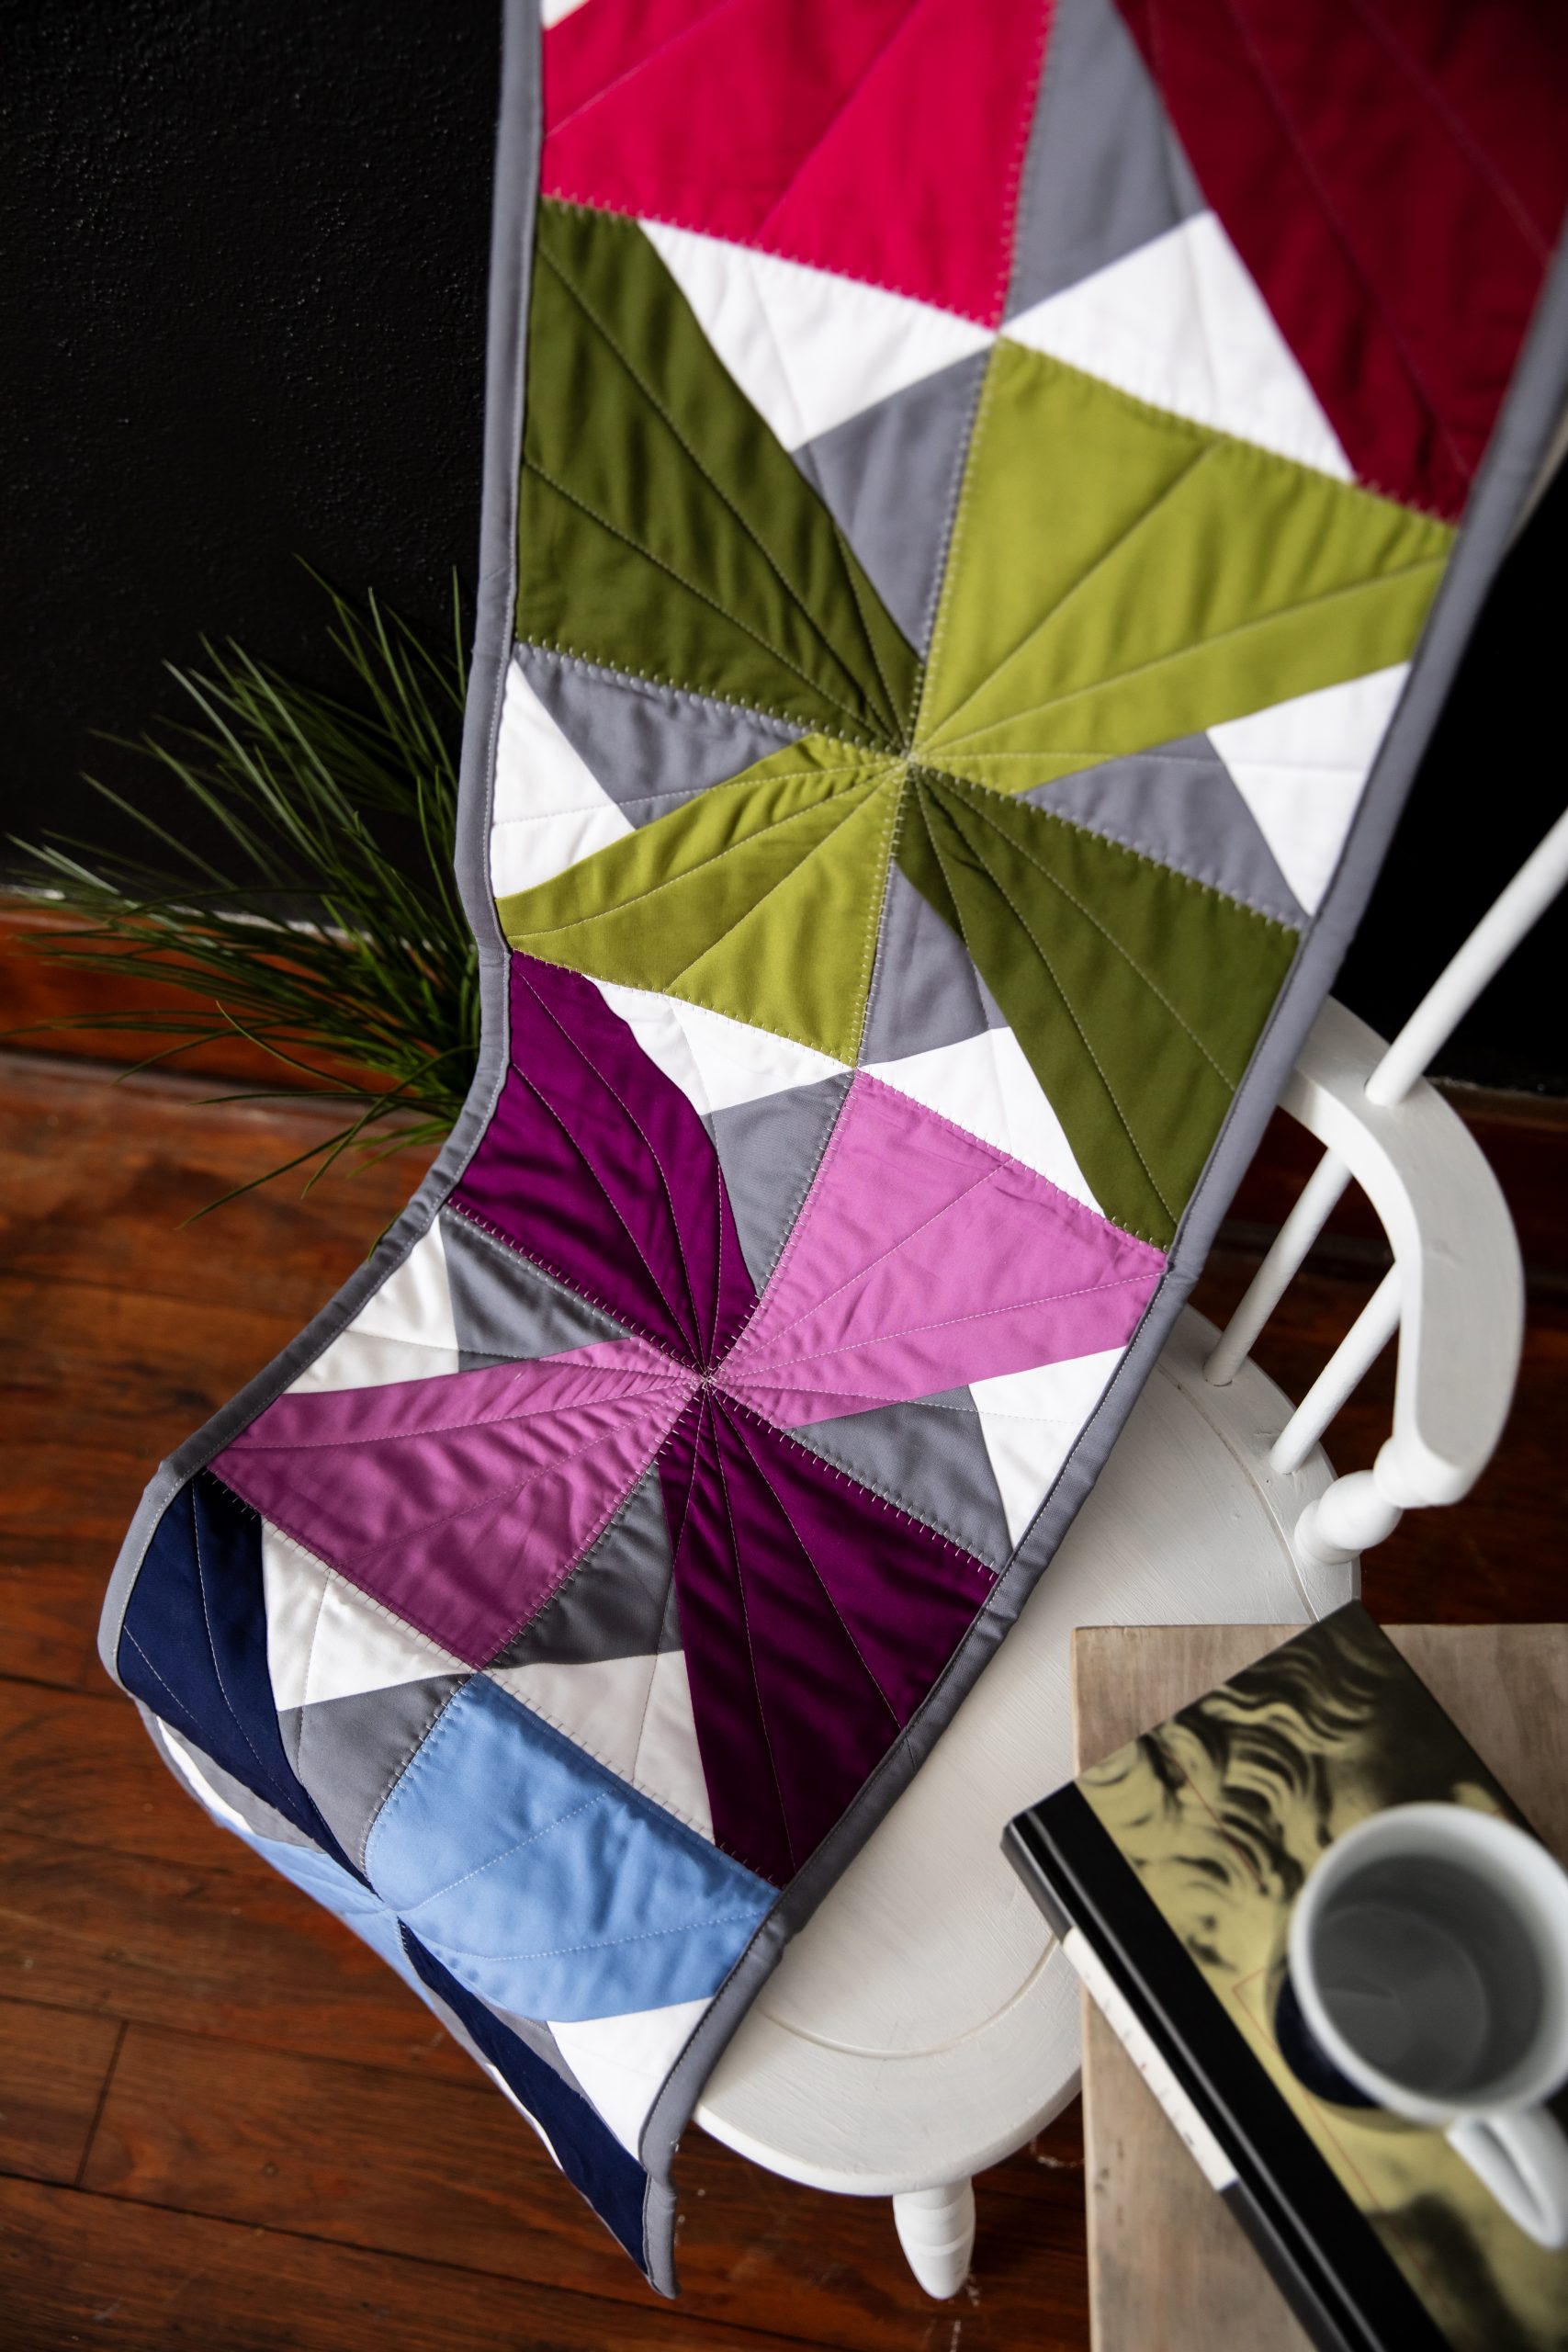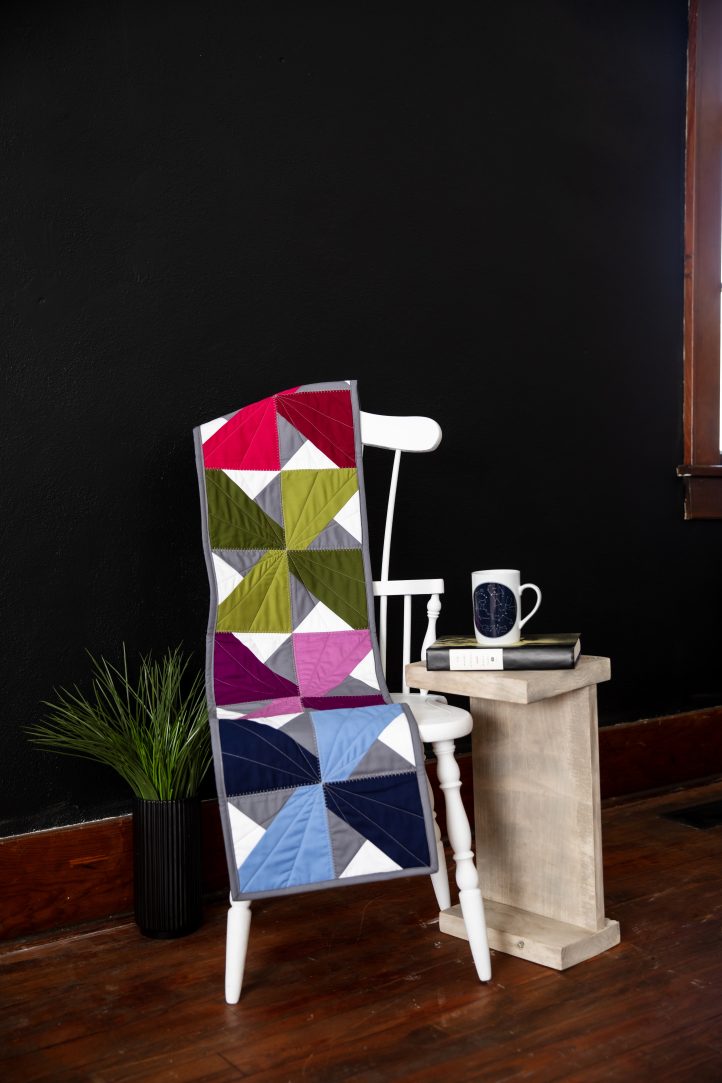
Our readers love pinwheel patterns, and this gorgeous table runner pattern from Staci Wendland features pretty pinwheels in rich jewel tones. Measuring 12 inches by 48 inches, this quilted table runner pattern can be made using fat quarters and features four pinwheel blocks against a gray and white background. The highlight of this design is the alternating light and dark shades that give these pinwheels a multi-faceted, gemstone effect.
Finished Size: 12 inches x 48 inches
Seam Allowances: 1/4 inch
Abbreviations:
- RST = right sides together (all pieces are sewn RST)
- WOF = width of fabric
- WS = wrong side of fabric
- HST = half square triangle
Materials:
- Grey cotton fabric (includes binding): 1/3 yard or 2 fat quarters
- White cotton fabric: 1/3 yard or 2 fat quarters
- Dark blue cotton fabric: 1/4 yard or 1 fat quarter
- Light blue cotton fabric: 1/4 yard or 1 fat quarter
- Dark purple cotton fabric: 1/4 yard or 1 fat quarter
- Light purple cotton fabric: 1/4 yard or 1 fat quarter
- Dark green cotton fabric: 1/4 yard or 1 fat quarter
- Light green cotton fabric: 1/4 yard or 1 fat quarter
- Dark red cotton fabric: 1/4 yard or 1 fat quarter
- Light red cotton fabric: 1/4 yard or 1 fat quarter
- Binding fabric: 1/3 yard
- Backing fabric: 1 1/8 yard
- Batting: 20 inches x 56 inches
- Ruler and scissors
- Matching thread
- Pencil or pin marking tool
Cutting Instructions:
Grey: (2) 12 inches x 12 inches
White: (2) 12 inches x 12 inches
Dark blue: (2) 6 1/2 inches x 6 1/2 inches
Light blue: (2) 6 1/2 inches x 6 1/2 inches
Dark purple: (2) 6 1/2 inches x 6 1/2 inches
Light purple: (2) 6 1/2 inches x 6 1/2 inches
Dark green: (2) 6 1/2 inches x 6 1/2 inches
Light green: (2) 6 1/2 inches x 6 1/2 inches
Dark red: (2) 6 1/2 inches x 6 1/2 inches
Light red: (2) 6 1/2 inches x 6 1/2 inches
Binding: (4) 2 1/2 inches x WOF
Backing: (2) 20 inches x 31 inches
Piecing Instructions:
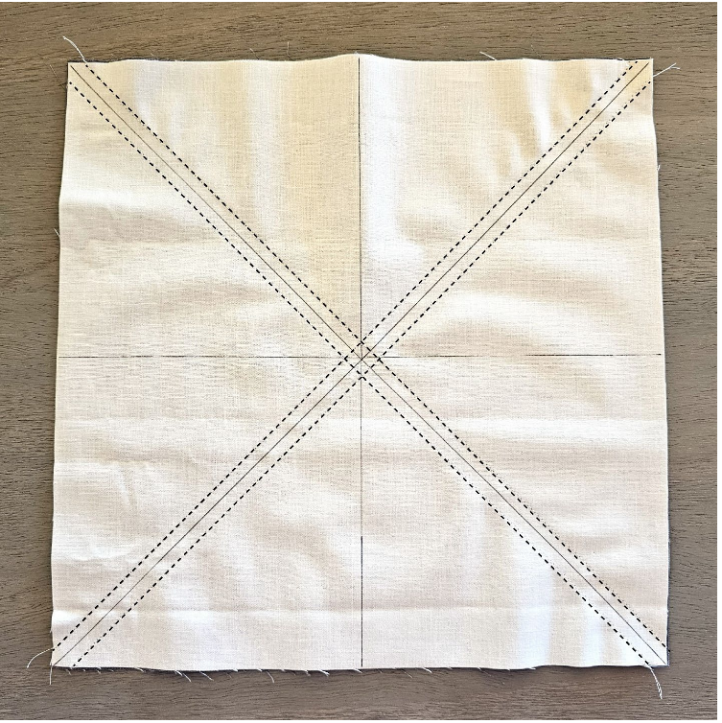
- Draw a diagonal line on the WS of (2) white 12 inch x 12 inch squares from the upper left corner to the lower right corner. Draw a second line from the lower left corner to the upper right corner. Draw the third line horizontally through the center. Draw the fourth line vertically through the center.
- Place (1) white 12 inch x 12 inch on (1) grey 12 inch x 12 inch. Sew 1/4 inch from both sides of each diagonal drawn line. Do not sew the horizontal or vertical lines.
- Cut on each diagonal, horizontal, and vertical line. This will result in (8) HSTs.
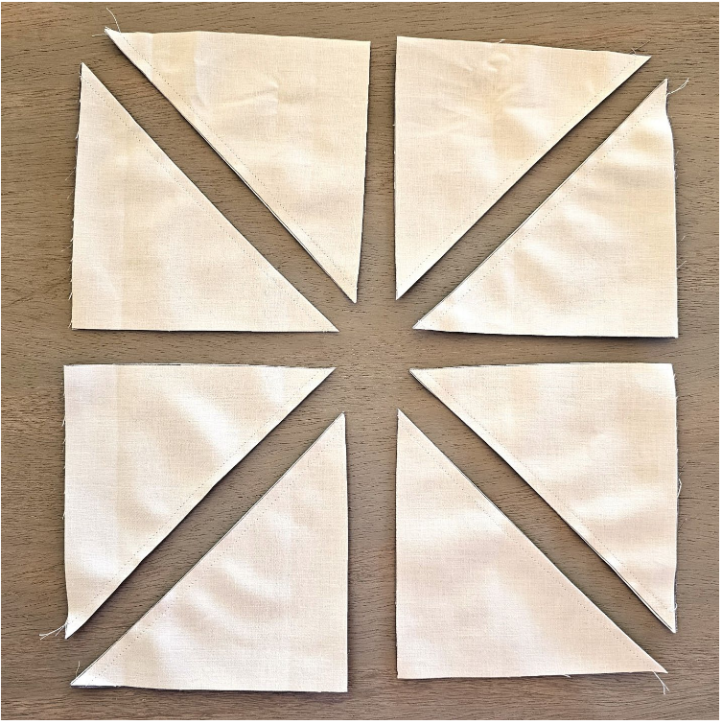
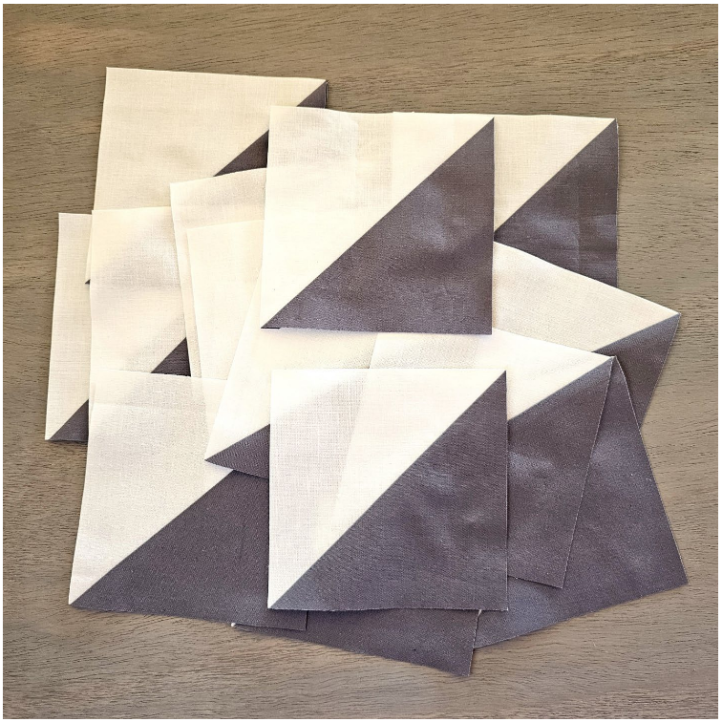
- Trim each HST to 5 inches x 5 inches.
- Repeat Steps 2-4 with (1) white 12 inch x 12 inch and (1) grey 12 inch x 12 inch. At this point, you will have a total of (16) 5 inch x 5 inch white and grey HSTs.
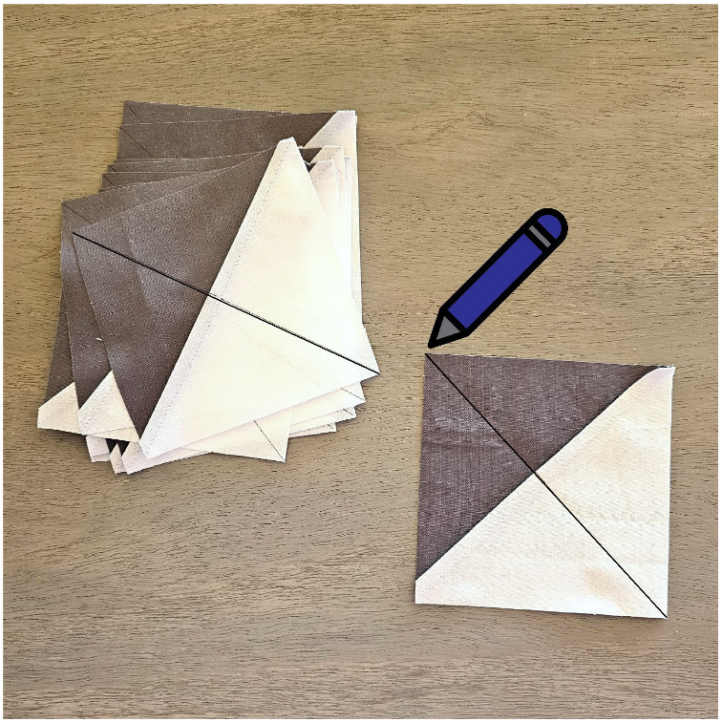
- On the WS of each HST, draw a diagonal line in the opposite direction from the seam.
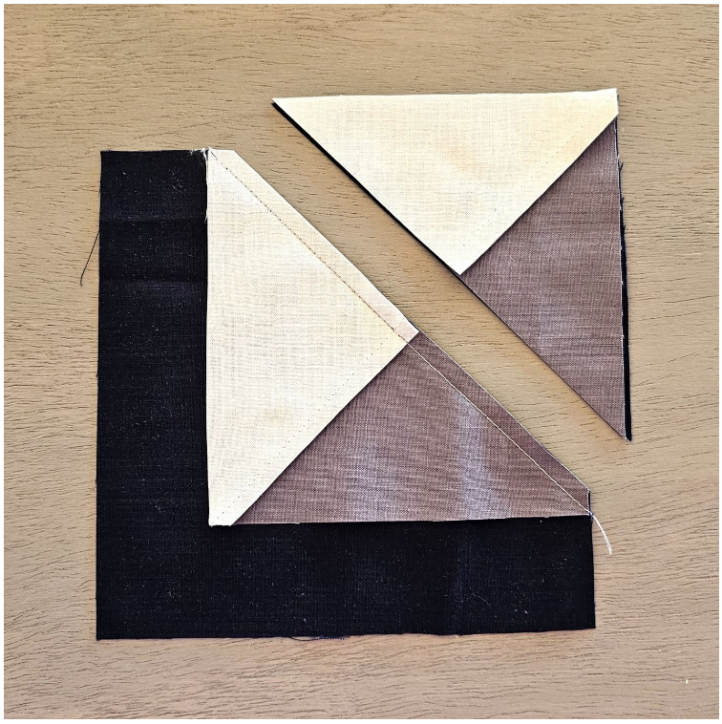
- Place (1) HST on the upper right corner of (1) dark blue 6 1/2 inch x 6 1/2 inch with the seam from the lower left to upper right and the grey on the lower right. The drawn line should run from the upper left to the lower right.
- Sew on the drawn line.
- Trim 1/4 inch from the drawn line toward the corner. Press away from the HST.
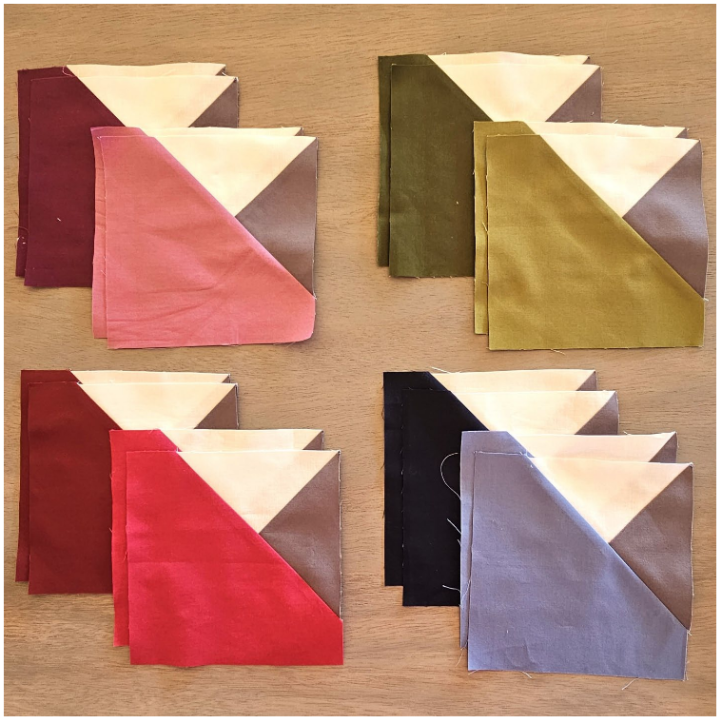
- Repeat Steps 7-9 with (15) HSTs and (1) dark blue, (2) light blue, (2) dark purple, (2) light purple, (2) dark green, (2) light green, (2) dark red, and (2) light red 6 1/2 inch x 6 1/2 inch squares.
- Lay out all blocks as shown.
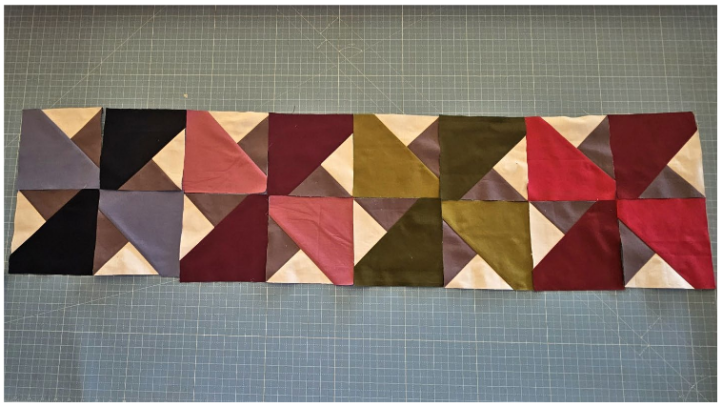
- Sew blocks into (8) vertical rows of (2) blocks each. Alternate pressing towards the top and bottom between rows.
- Sew the rows together. Press open to reduce bulk.
FINISHING THE QUILT:
- Place (2) 20 inch x 31 inch backing pieces RST. Sew 1/2 inch from one short end. Press the seam to one side.
- Layer the backing fabric with the right side down, batting, and the quilt top with the right side up. Pin or baste the layers together.
- Quilt using your preferred method and design. Trim the batting and backing to match the quilt top.
- Trim the selvages from the (4) binding strips. Sew the strips RST, end-to-end, with diagonal seams to make (1) continuous binding strip.
- Sew the binding around the edge using your preferred method.