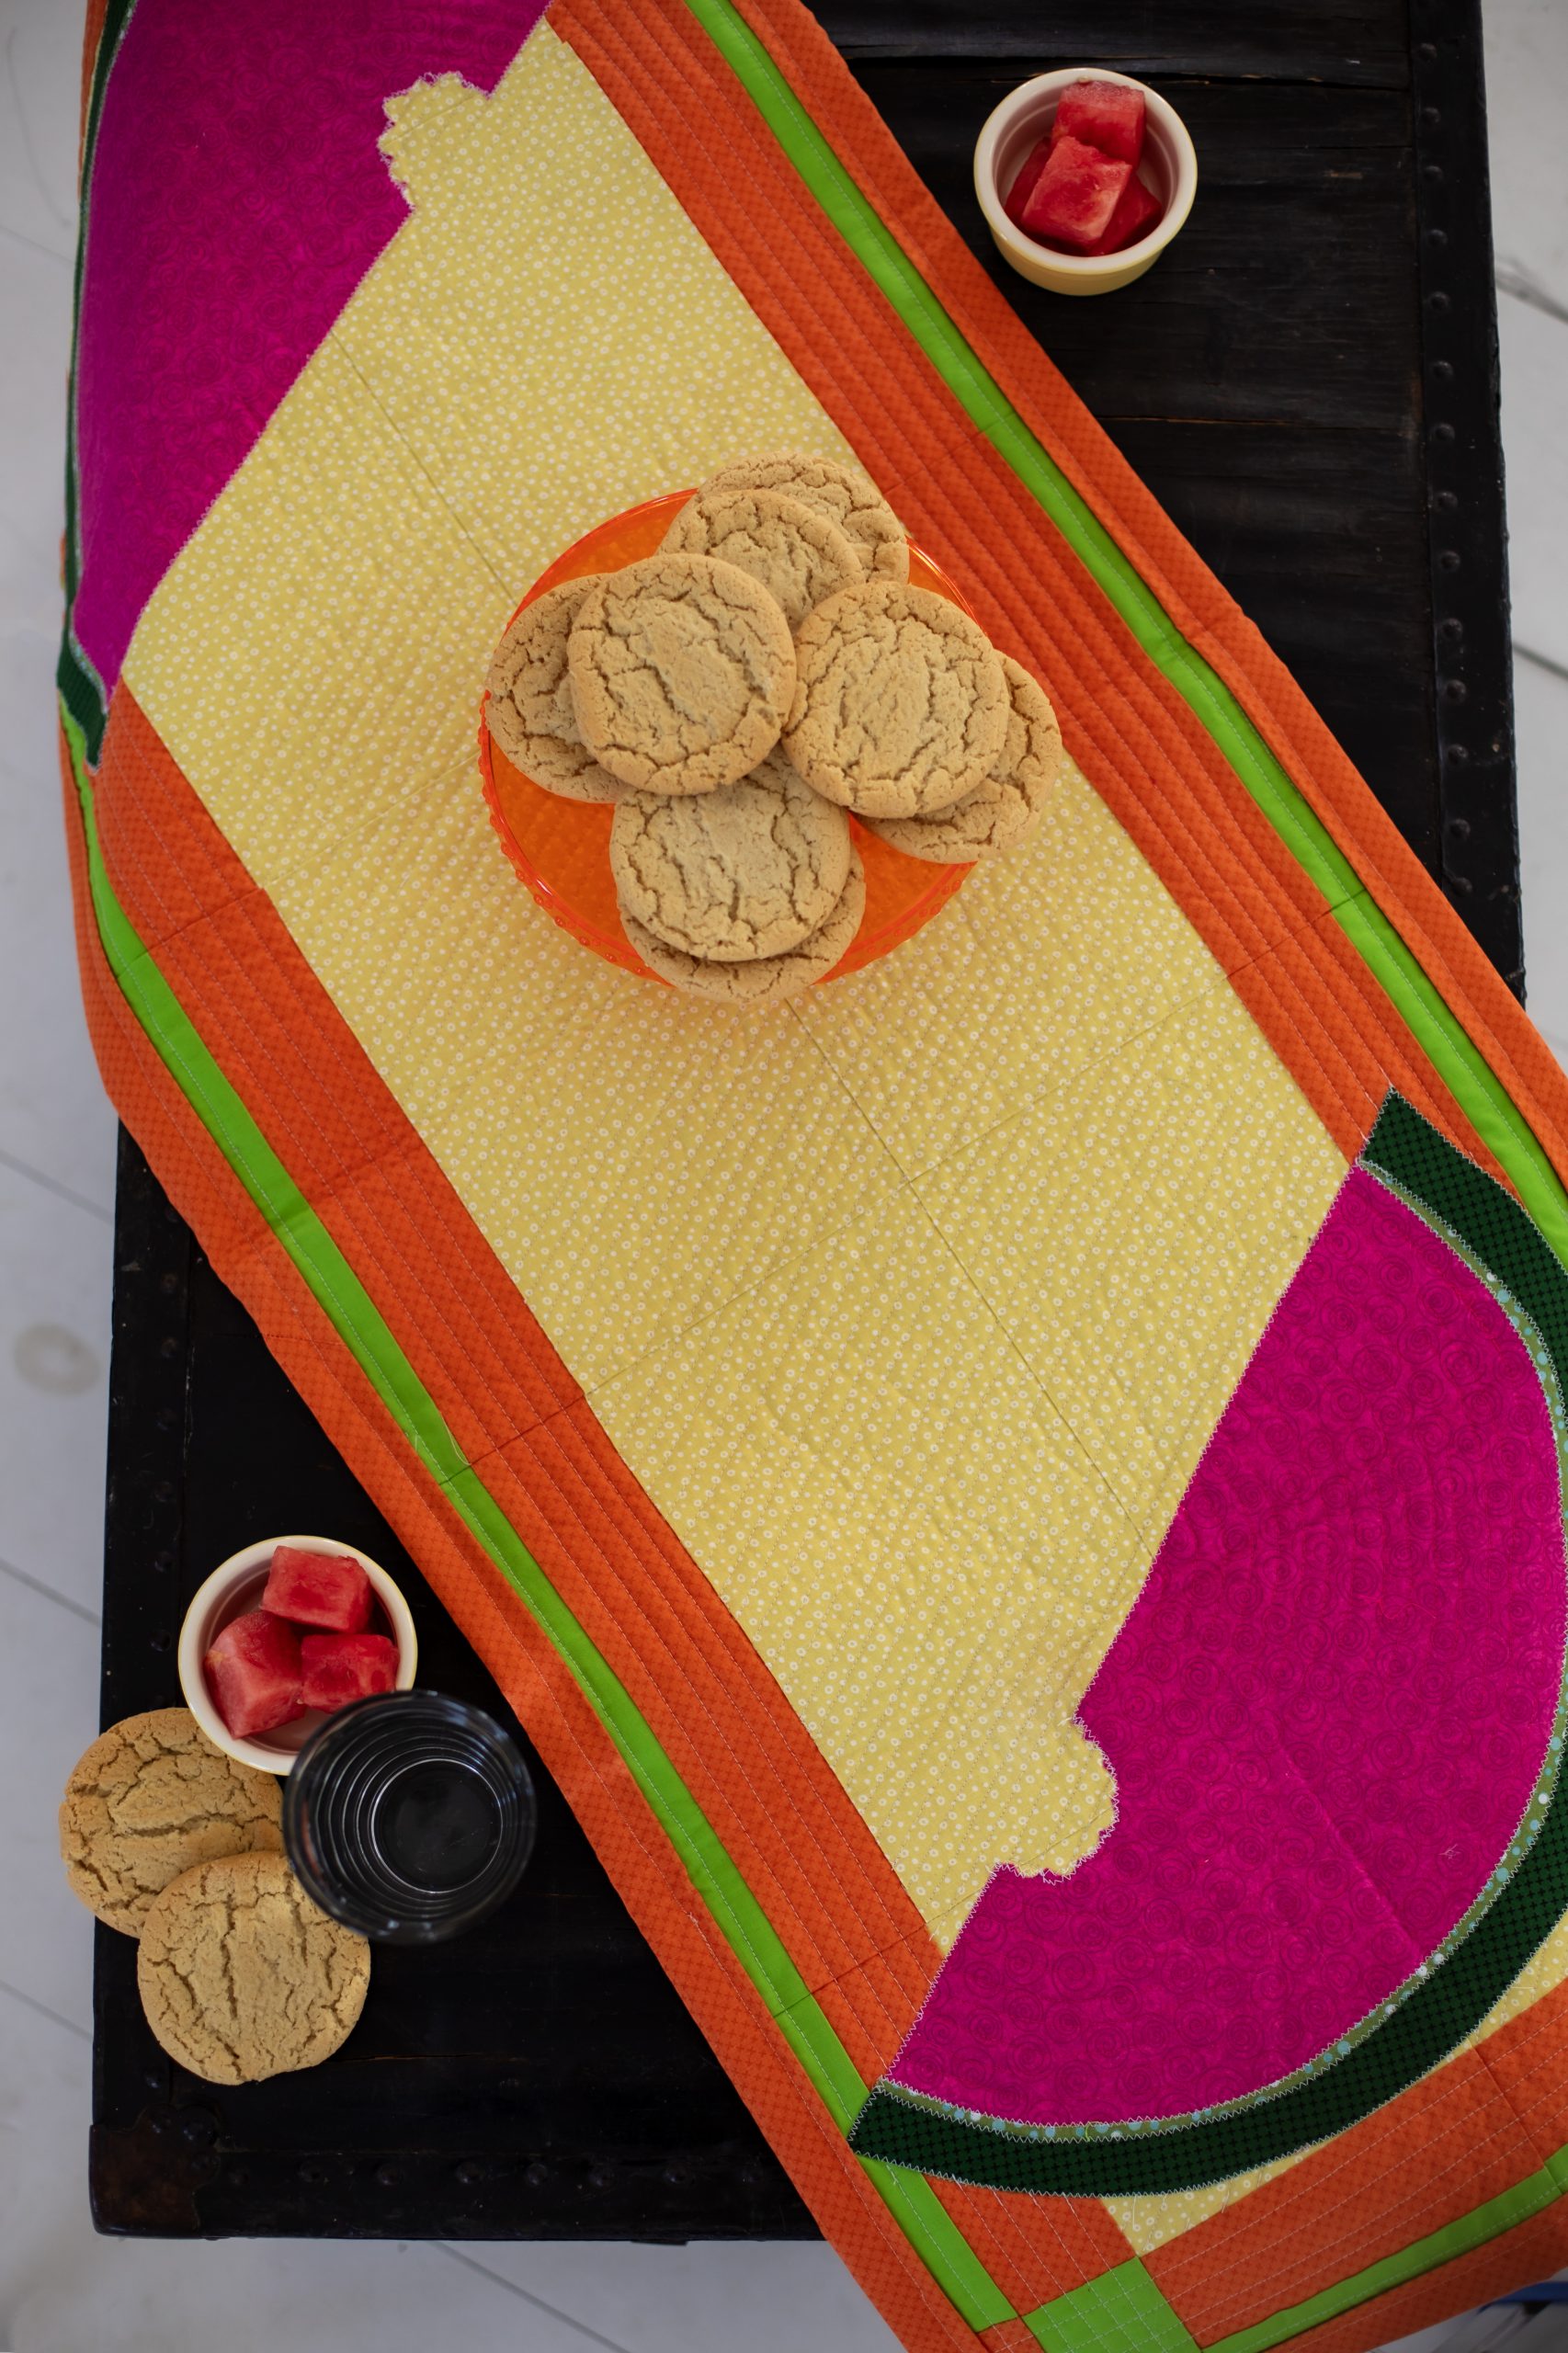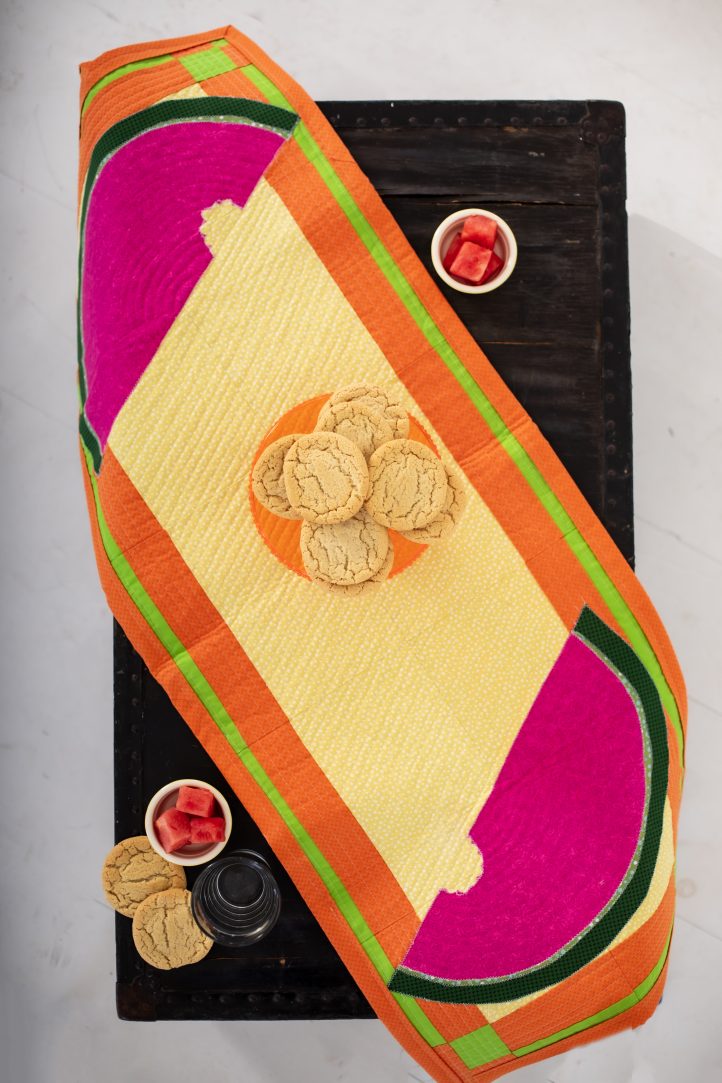
With festive summer gatherings on the horizon, the time to start decorating your home and patio for summer has finally arrived. Design your own bold and bright summer table runner with this playful quilting pattern from Debi Schmitz! Focused around a hot pink watermelon motif, this table runner pattern is ideal for vibrant fabrics and small, summery prints.
Materials:
- Green solid fabric: 1/4 yard
- Yellow print fabric: 1 1/2 yard (20” x 52” for backing)
- Orange solid fabric: 1 1/4 yard (24” x 24” for bias tape)
- Light green print fabric: 1/4 yard
- Dark green print fabric: 1/4 yard
- Hot pink print fabric: 1/3 yard
- Needled cotton batting: 20” x 54”
- Heat’n Bond Lite: 1 1/2 yard x 18”
- White thread
- Red thread or other bright contrasting color for basting
- Sewing machine
- Cutting mat
- Rotary cutter
- Acrylic ruler
- Scissors
- Pins
- Iron
- PDF Pattern – This is located at the bottom of this page. See printing instructions below.
PRINTING INSTRUCTIONS:
To download the PDF pattern, click on the download button at the bottom of the page. We recommend opening your download using Adobe Acrobat.
Cutting Instructions:
Green solid fabric:
- (4) 2 1/2” x 2 1/2”
- (8) 1 1/2” x 4 1/2”
- (14) 1 1/2” x 6 1/2”
Yellow print fabric:
- (4) 4 1/2” x 4 1/2”
- (6) 6 1/2” x 6 1/2”
- (14) 4 1/2” x 6 1/2”
Orange solid fabric:
- (4) 2 1/2” x 2 1/2”
- (8) 1 1/2” x 4 1/2”
- (14) 1 1/2” x 6 1/2”
Light green print:
- (2) 9” x 18”
Dark green print:
- (2) 9” x 18”
Hot pink print:
- (2) 9” x 18”
Light green print with Heat’n Bond ironed on the back:
- See Pattern A, Cut 2
Dark green print with Heat’n Bond ironed on the back:
- See Pattern B, Cut 2
Hot pink print with Heat’n Bond ironed on the back:
- See Pattern C, Cut 2
Sew 1/4” seams unless otherwise noted. Press seams between each step. Follow the manufacturer’s instructions when using the Heat’n Bond Lite.
Piecing Instructions:
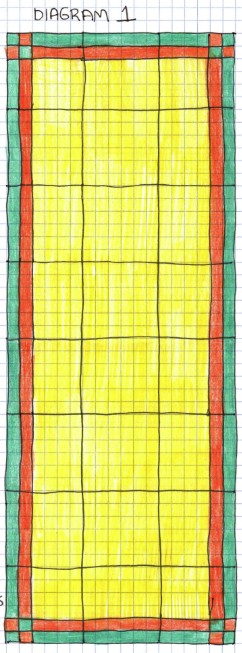
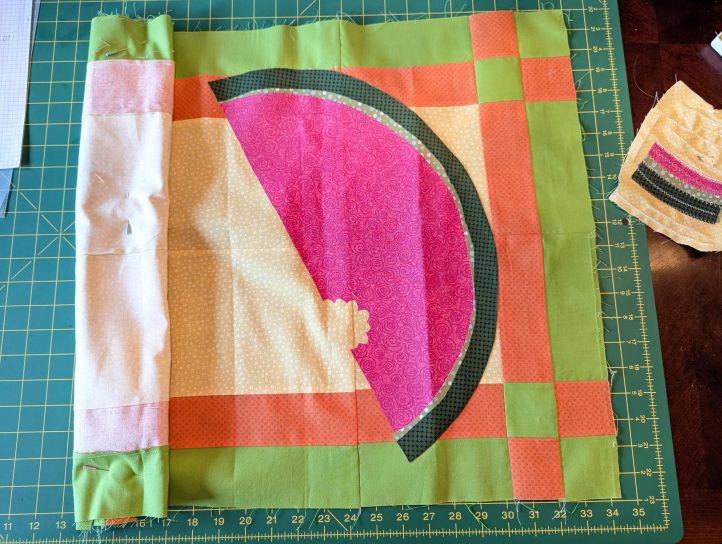
- Cut out all pieces as listed above. Follow Diagram 1 to assemble the table runner.
- Block 1:
- Cut 2 1/2” x 2 1/2” green solid fabric in half for (2) 1 1/2” x 2 1/2” strips.
- Repeat with orange solid fabric. Stitch them right sides together. Cut in half for (2) strips of green and orange. Sew these two strips right sides together alternating the colors.
- Stitch a 1 1/2” x 4 1/2” green solid fabric and a 1 1/2” x 4 1/2” orange fabric right sides together. Stitch the previous square to the green and orange strips as shown in the diagram with right sides together. Set aside, as this is the left side of the block.
- Stitch a 1 1/2” x 4 1/2” green solid fabric and a 1 1/2” x 4 1/2” orange fabric right sides together. Stitch this piece to the 4 1/2” x 4 1/2” yellow square. This is the right side of the block. Stitch the left to the right side of the block with right sides together, as shown. Block 1 completed, see Diagram 2.
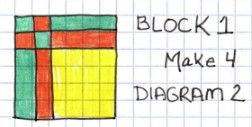
- Repeat Step #2 (3) more times for a total of (4) Corner Blocks- Block 1.
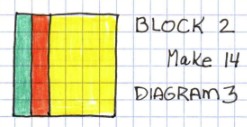
- Block 2:
- Stitch the 1 1/2” x 6 1/2” green solid strip to the 1 1/2” x 6 1/2” orange strip right sides together. Stitch the orange side of the completed strips to the 4 1/2” x 6 1/2” yellow piece. Block 2 completed. See Diagram 3.
- Stitch the 1 1/2” x 6 1/2” green solid strip to the 1 1/2” x 6 1/2” orange strip right sides together. Stitch the orange side of the completed strips to the 4 1/2” x 6 1/2” yellow piece. Block 2 completed. See Diagram 3.
- Repeat Step #4 for (13) more times for a total of (14) of Block 2.
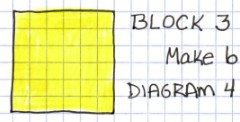
- When all blocks are completed, including the (6) 6 1/2” x 6 1/2” yellow blocks, lay them all out according to Diagram 1.
- Stitch the top 3 blocks together. Be sure to follow the pattern.
- Complete Rows 2-8 as shown in Diagram 1.
- Stitch the rows together to complete the table runner front. Be sure to match the seams.
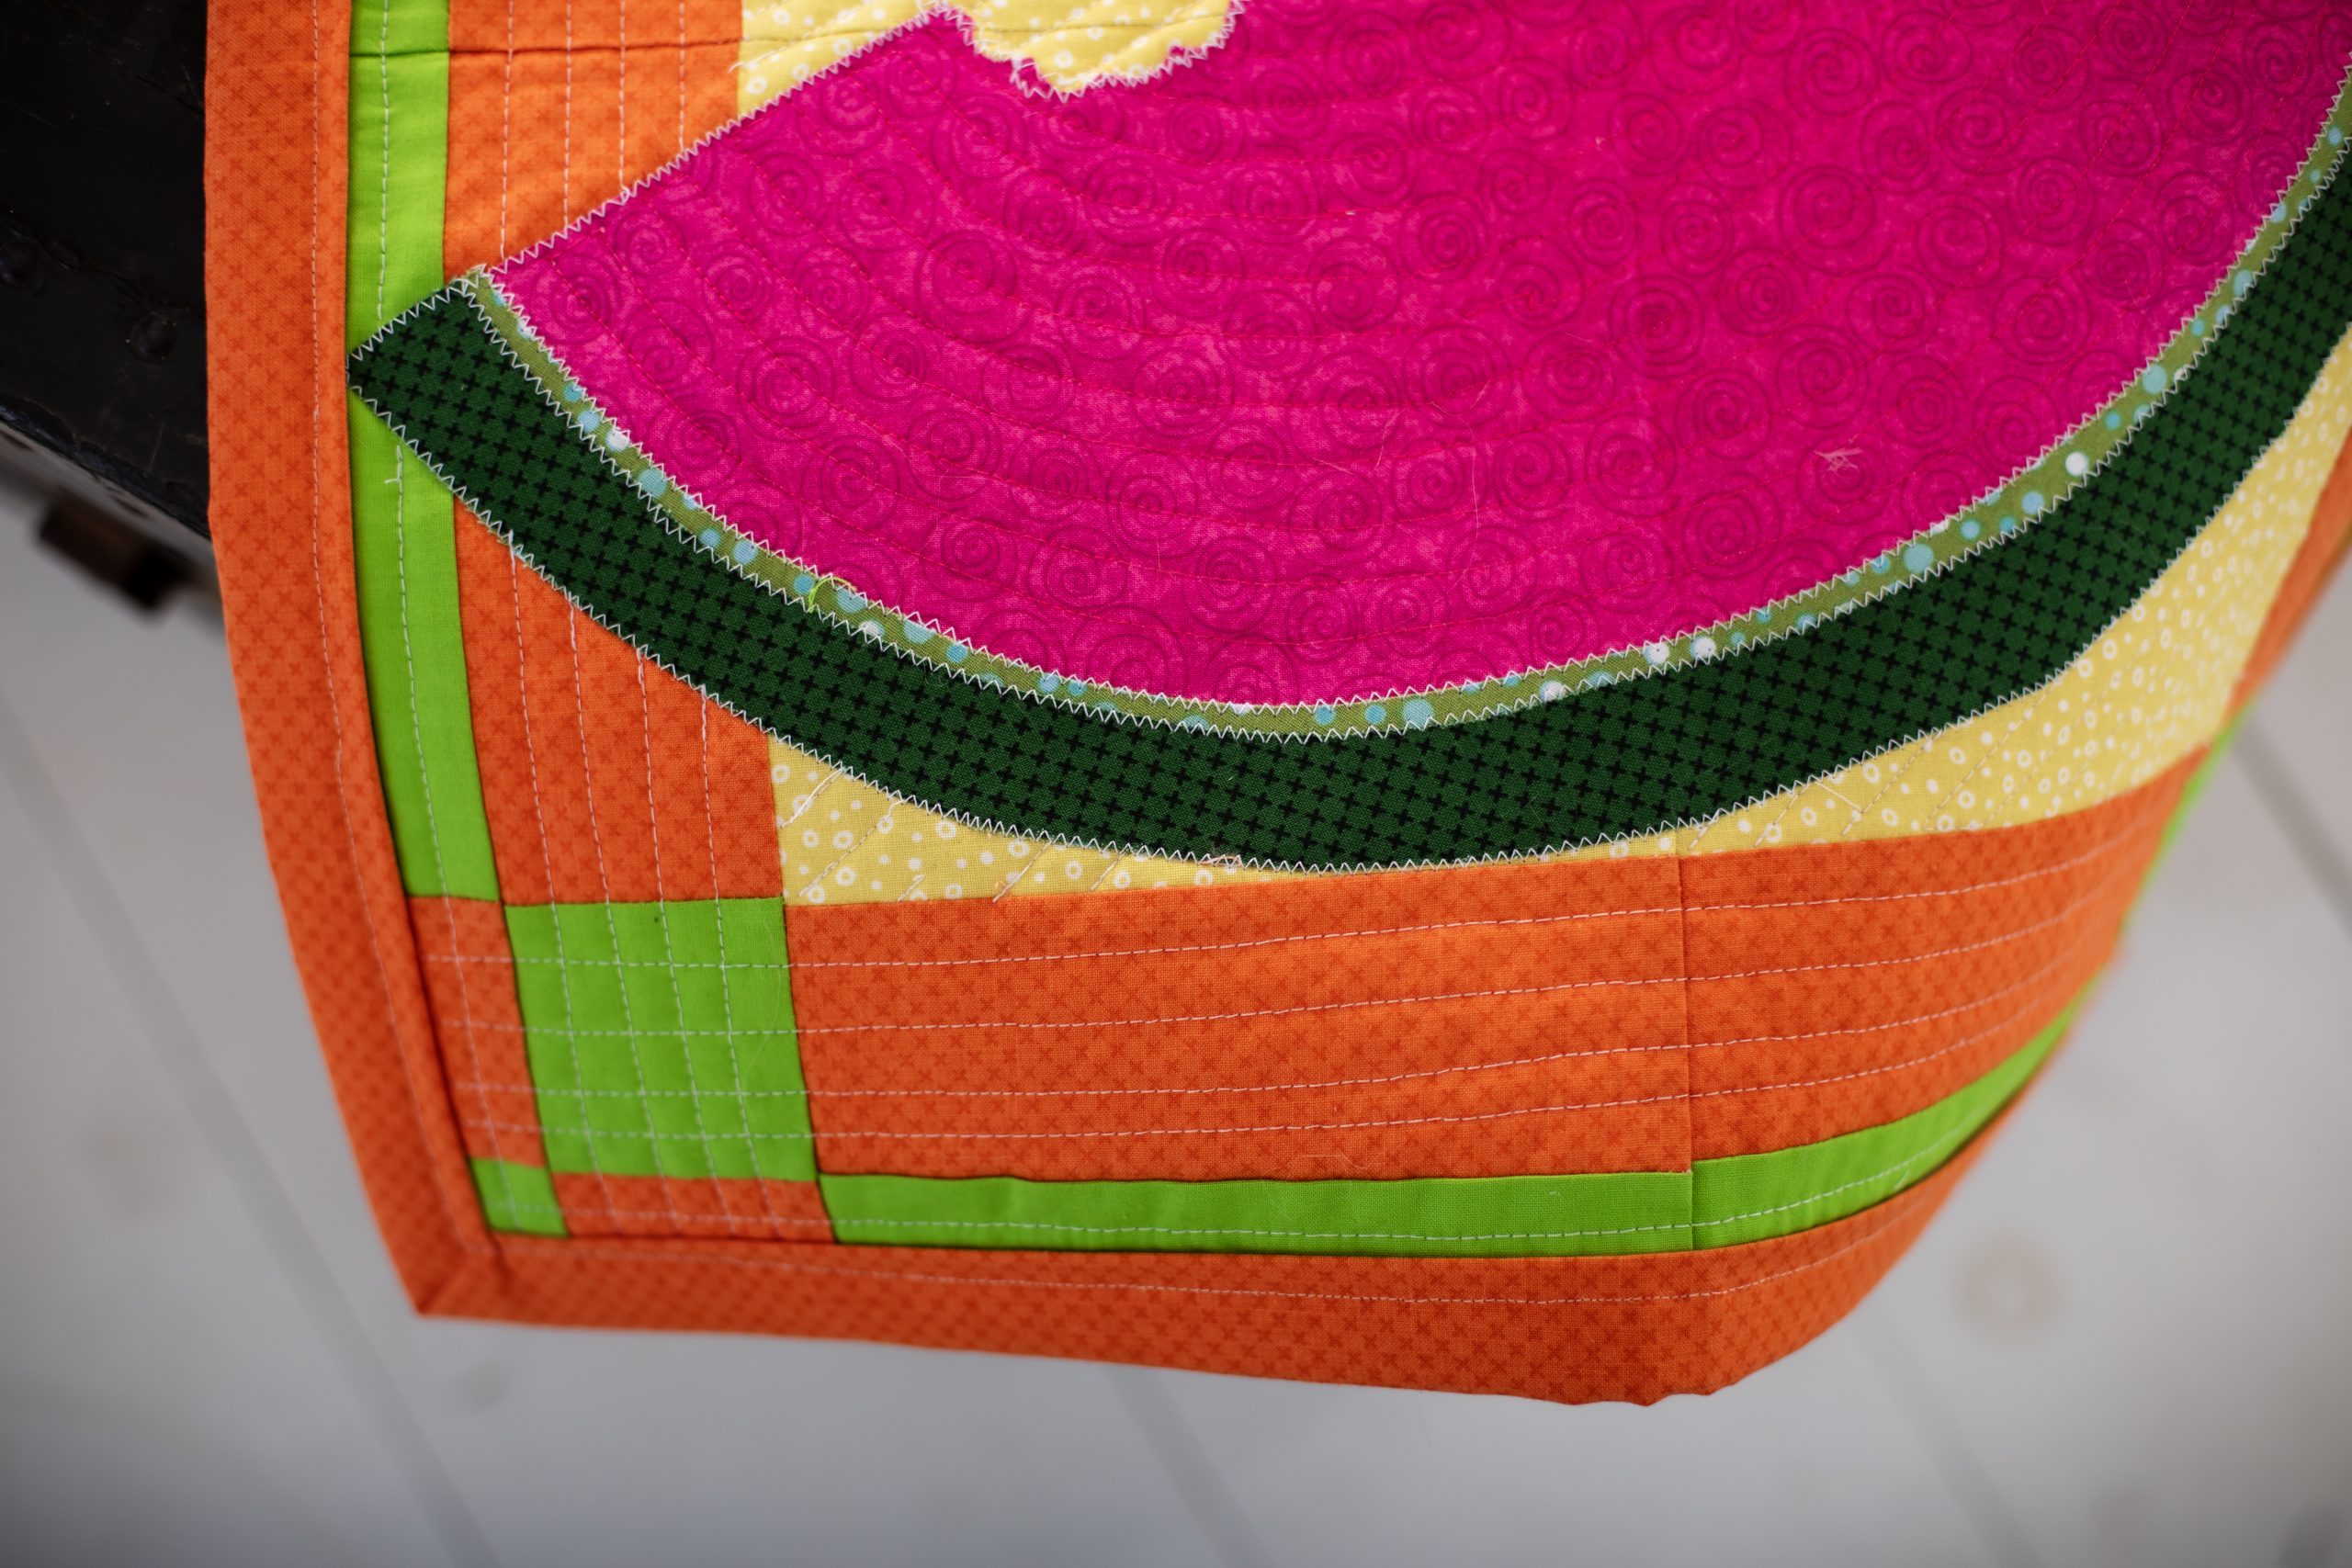
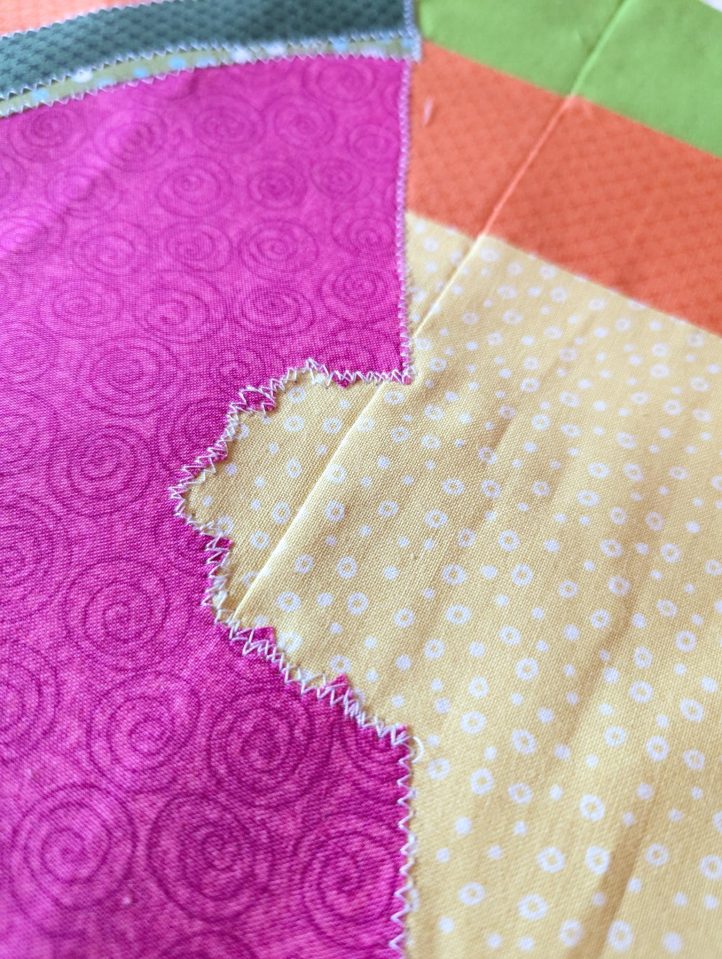
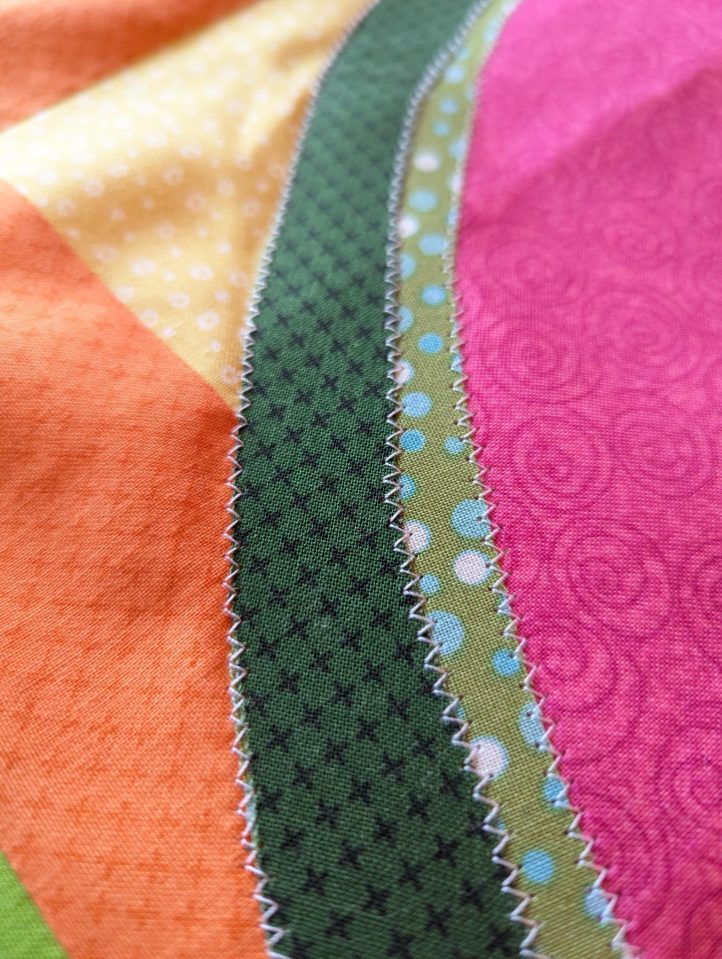
- Remove the adhesive backing paper strips from the watermelon and rind pieces. Press the watermelon to the table banner as shown. Press the light green print watermelon rind to the rounded side of the watermelon. Press the dark print watermelon on top of the light green rind.
- Stitch a small white zig zag around the watermelon to finish. Stitch randomly around the bite mark of the watermelon twice. Repeat for the other watermelon.
- Stitch a small white zig zag around the watermelon to finish. Stitch randomly around the bite mark of the watermelon twice. Repeat for the other watermelon.
- Trim the top and batting only to 18” x 48”.
- Lay the backing on the workspace, right side down. Lay the batting on the backing. Lay the quilt top, wrong side down, to the batting. When it is all layered, use the red thread to baste the layers together with long stitches.
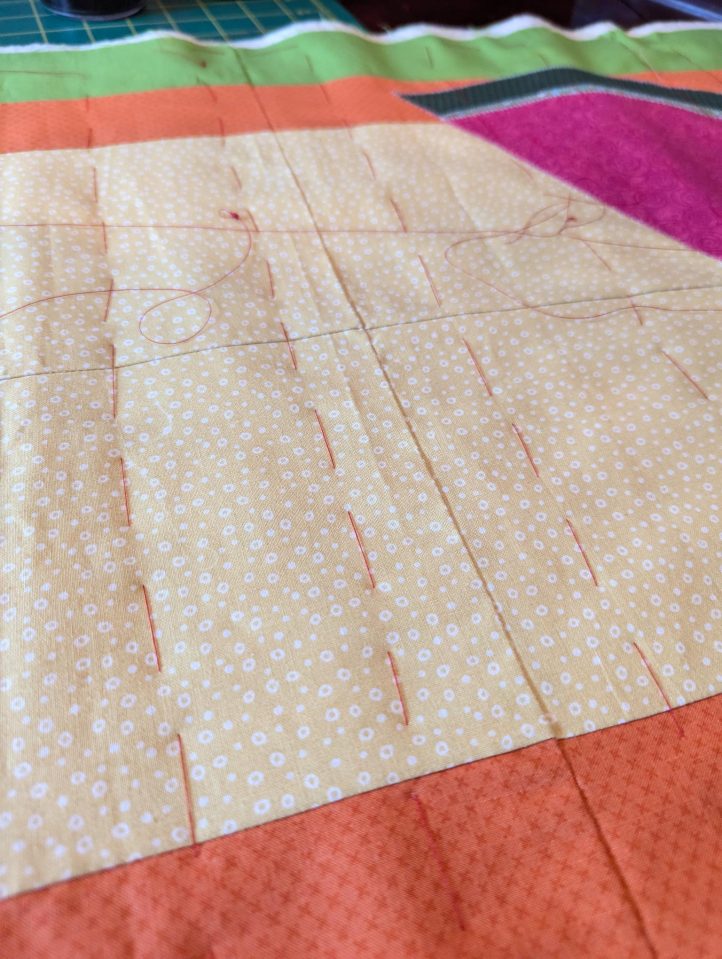
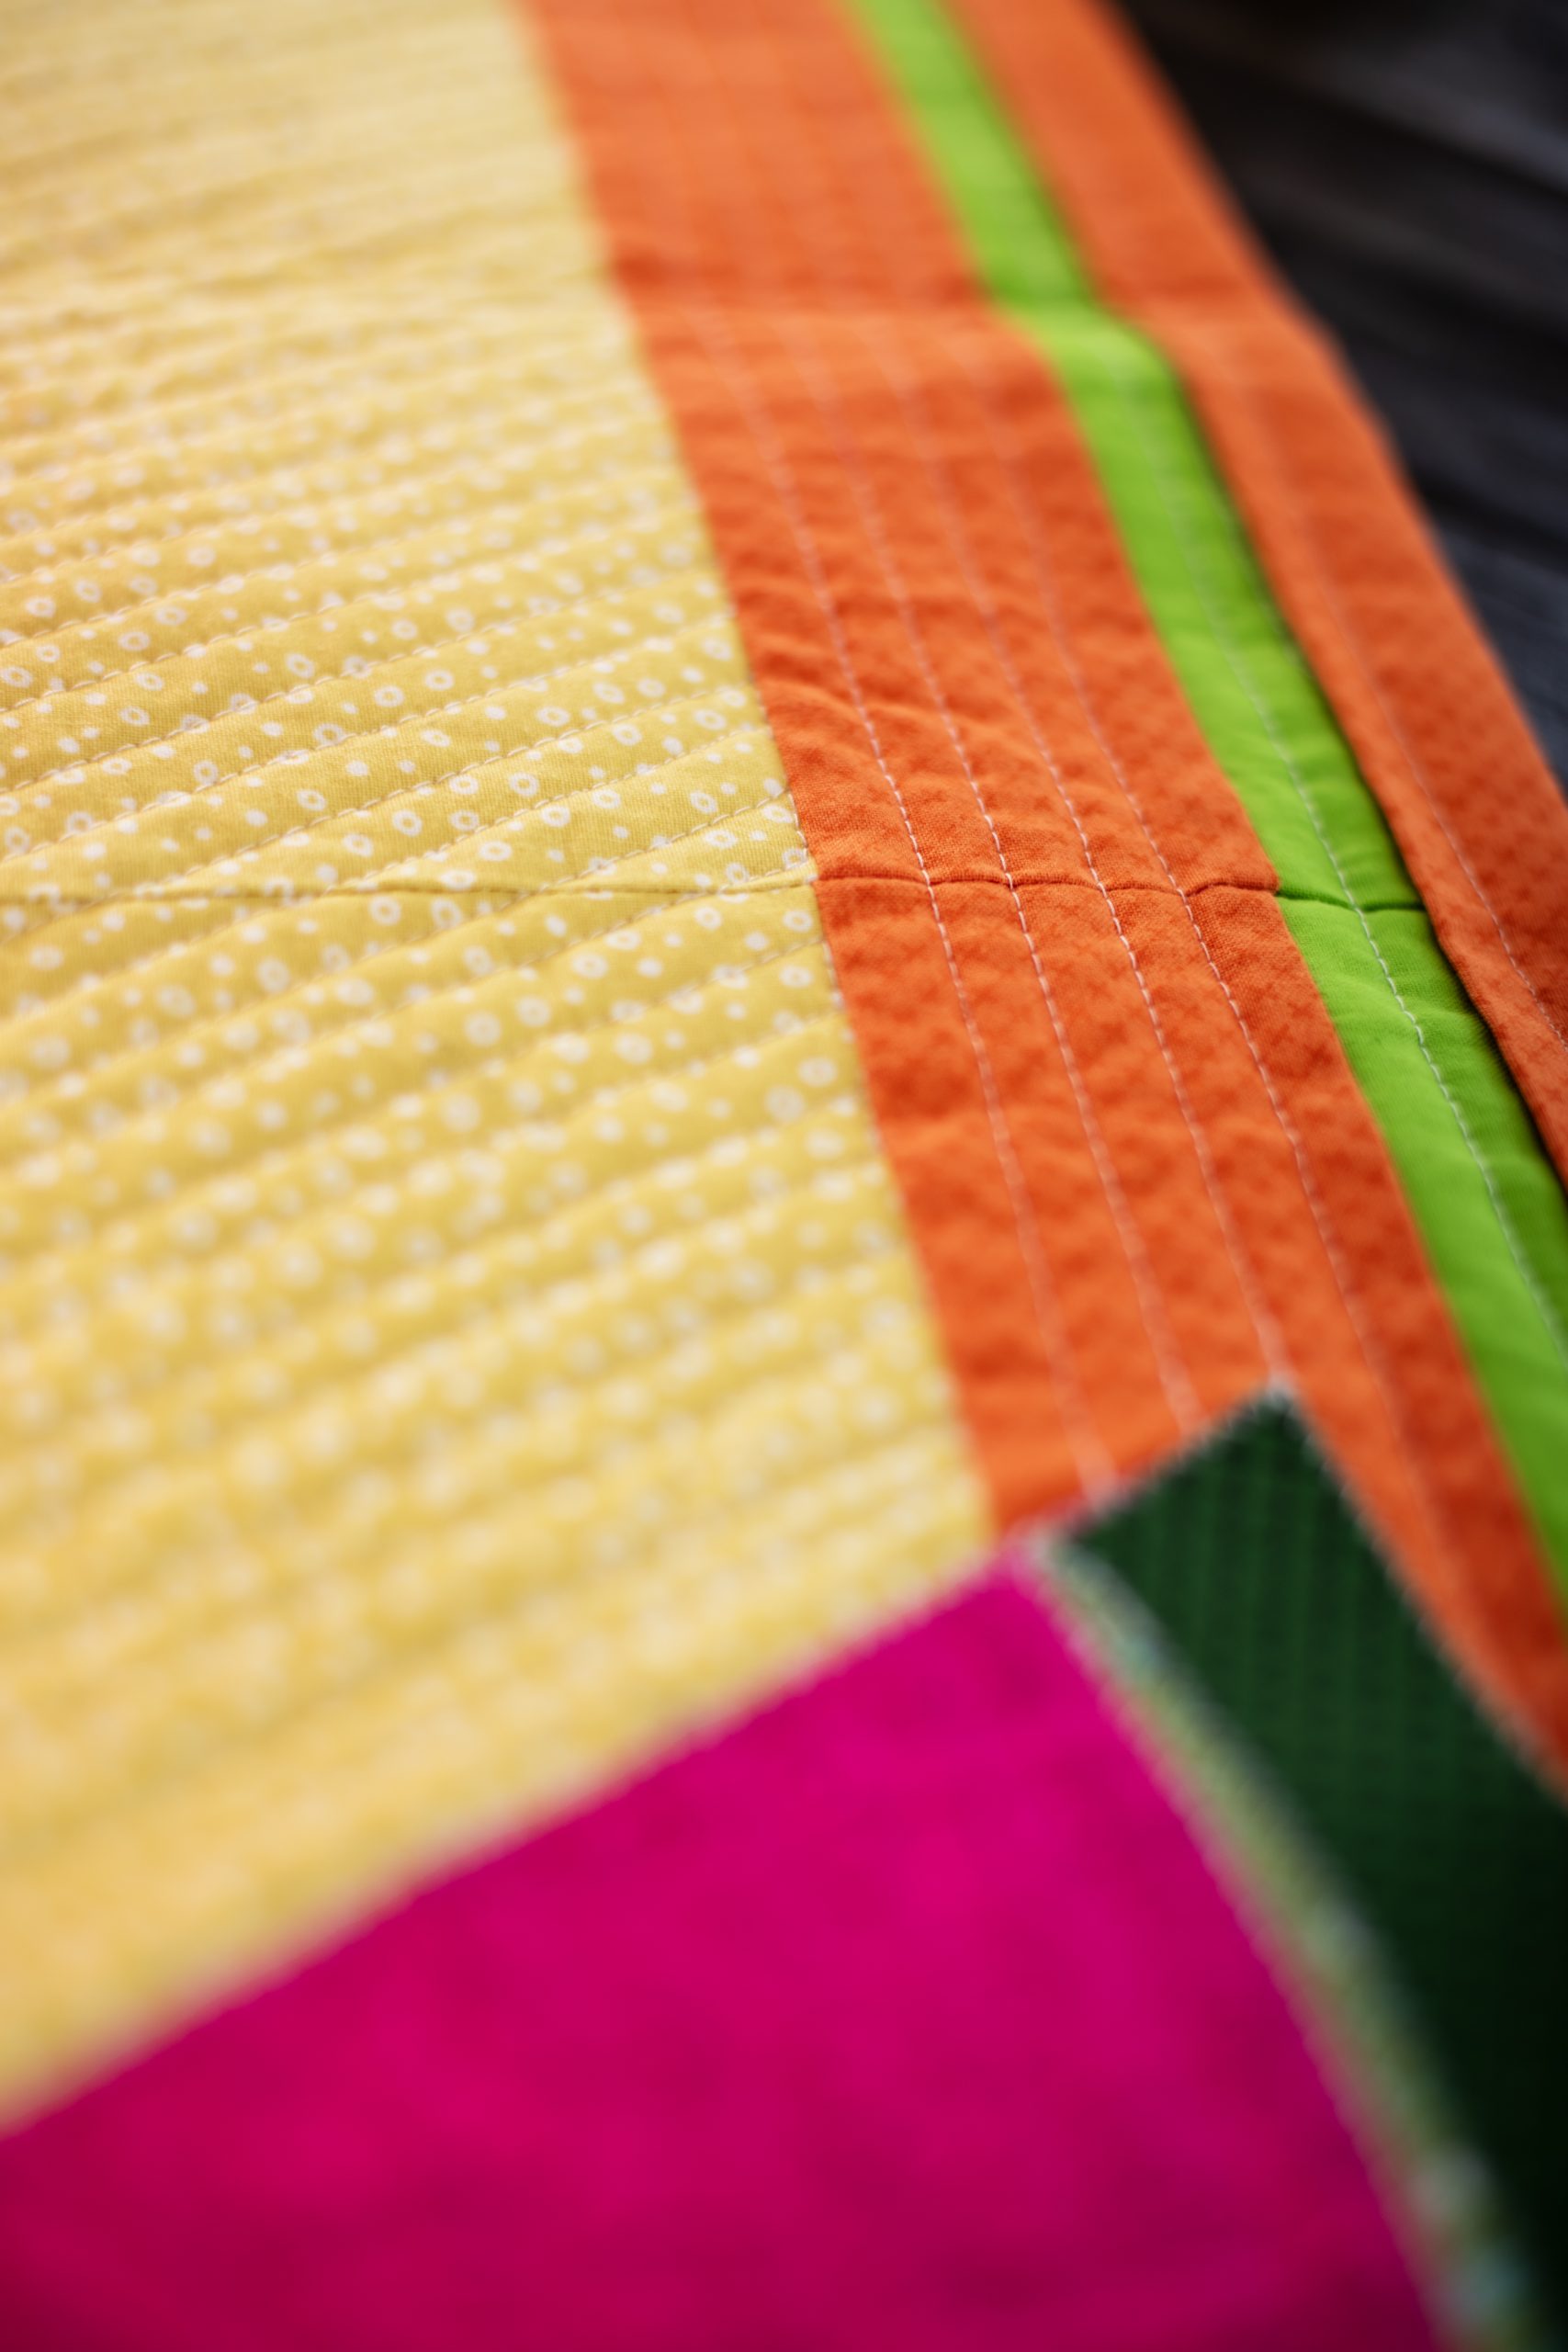
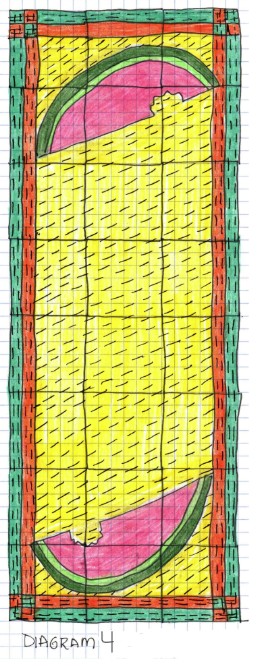
- Quilt the table banner as desired or follow Diagram 4.
- Trim the quilted table runner evenly all around.
- Cut 4” wide bias tape of 24” x 24” orange fabric. Fold in the center and then fold the sides into the center to complete the bias; press flat. Stitch the bias around the outside edge to finish.