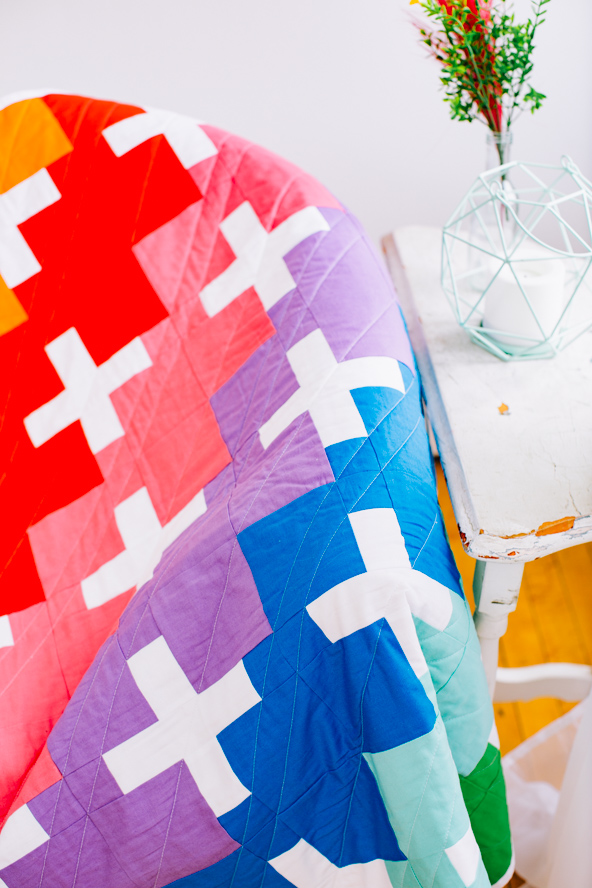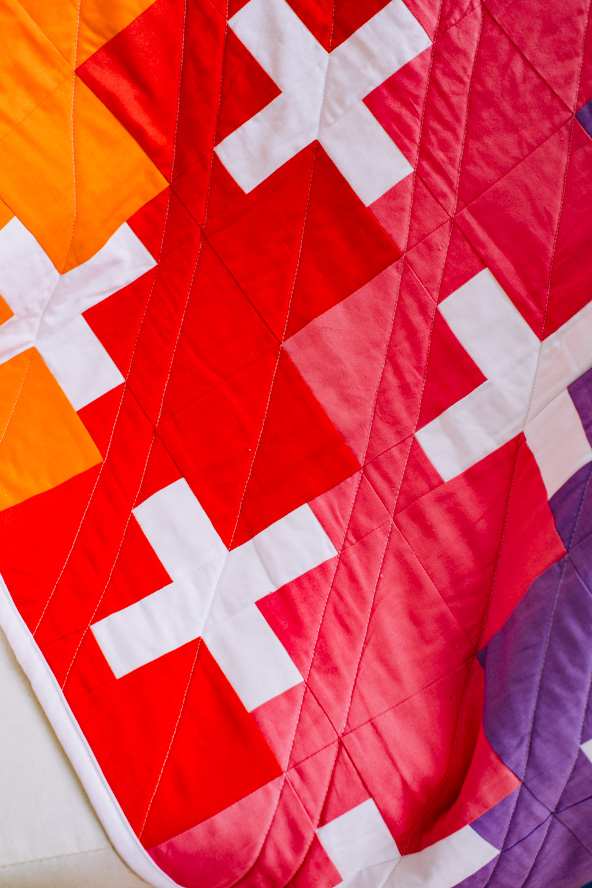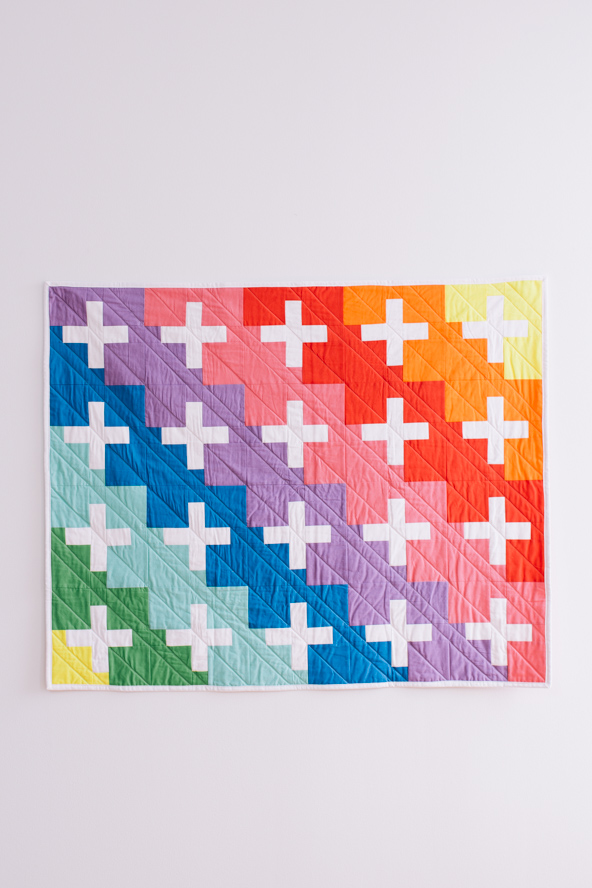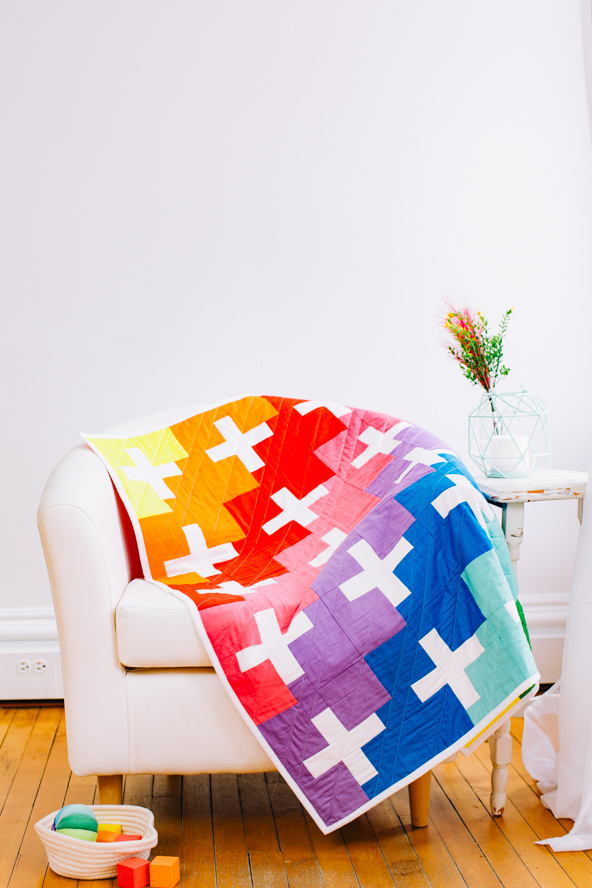
This fall, quilt in all colors of the rainbow! This bright and cheerful baby quilt pattern finishes at 36” x 45” and uses the modern plus quilt pattern for its charming design. Don’t be afraid to play with color with this baby quilt pattern, as this pattern would look dazzling in rainbow, ombre, grayscale and other unique color combinations.
Finished size: 36″ x 45″
Seam allowances: 1/4″
Abbreviations:
- RST = right sides together
- WOF = width of fabric from selvage to selvage
Materials:
- Cotton Fabric Requirements
- Yellow: 1/8 yd
- Orange: 1/8 yd
- Red: 1/4 yd
- Pink: 1/3 yd
- Purple: 1/3 yd
- Blue: 1/4 yd
- Turquoise: 1/4 yd
- Green: 1/8 yd
- White: 1/3 yd
- Binding: 1/2 yd
- Backing: 1 1/2 yds (may require wide fabric if longarming)
Cutting Instructions:
- Yellow Fabric:
- (1) 4 1/4″ x WOF
- Subcut:
- (4) 4 1/4″ x 4 1/4″
- (2) 2″ x 2″
- (1) 2″ x 4″
- Subcut:
- (1) 4 1/4″ x WOF
- Orange Fabric:
- (1) 4 1/4″ x WOF
- Subcut:
- (7) 4 1/4″ x 4 1/4″
- (1) 2″ x 2″
- (1) 2″ x 4″
- (1) 2″ x 6″
- Subcut:
- (1) 4 1/4″ x WOF
- Red Fabric:
- (2) 4 1/4″ x WOF
- Subcut:
- (11) 4 1/4″ x 4 1/4″
- (1) 2″ x 4″
- (1) 2″ x 6″
- (1) 2″ X 10″
- Subcut:
- (2) 4 1/4″ x WOF
- Pink Fabric:
- (2) 4 1/4″ x WOF
- Subcut:
- (15) 4 1/4″ x 4 1/4″
- Subcut:
- (1) 2″ x WOF
- Subcut:
- (1) 2″ x 6″
- (1) 2″ x 8″
- (1) 2″ x 14″
- Subcut:
- (2) 4 1/4″ x WOF
- Purple Fabric:
- (2) 4 1/4″ x WOF
- Subcut:
- (16) 4 1/4″ x 4 1/4″
- Subcut:
- (1) 2″ x WOF
- Subcut:
- (2) 2″ x 8″
- (1) 2″ x 16″
- Subcut:
- (2) 4 1/4″ x WOF
- Blue Fabric:
- (2) 4 1/4″ x WOF
- Subcut:
- (13) 4 1/4″ x 4 1/4″
- (1) 2″ x 6″
- (1) 2″ x 8″
- (1) 2″ x 14″
- Subcut:
- (2) 4 1/4″ x WOF
- Turquoise Fabric:
- (2) 4 1/4″ x WOF
- Subcut:
- (9) 4 1/4″ x 4 1/4″
- (1) 2″ x 4″
- (1) 2″ x 6″
- (1) 2″ x 10″
- Subcut:
- (2) 4 1/4″ x WOF
- Green Fabric:
- (1) 4 1/4″ x WOF
- Subcut:
- (5) 4 1/4″ x 4 1/4″
- (1) 2″ x 2″
- (1) 2″ x 4″
- (1) 2″ x 6″
- Subcut:
- (1) 4 1/4″ x WOF
- White Fabric:
- (1) 6 1/2″ x WOF
- Subcut:
- (2) 2″ x 6 1/2″
- (2) 4″ x 6 1/2″
- (2) 6″ x 6 1/2″
- (2) 8″ x 6 1/2″
- (2) 2 3/4″ x WOF
- Subcut:
- (1) 2 3/4″ x 4″
- (2) 2 3/4″ x 6″
- (2) 2 3/4″ x 10″
- (2) 2 3/4″ x 14″
- (1) 2 3/4″ x 16″
- Subcut:
- (1) 6 1/2″ x WOF
- Binding:
- (5) 2 1/2″ x WOF
- Backing
- (1) 50″ x WOF
Sewing Instructions:
- Sew the following pairs RST, with matching length edges together. Press the seams away from the white:
- (1) yellow 2″ x 4″ to (1) white 2 3/4″ x 4″
- (1) orange 2″ x 6″ to (1) white 2 3/4″ x 6″
- (1) red 2″ x 10″ to (1) white 2 3/4″ x 10″
- (1) pink 2″ x 14″ to (1) white 2 3/4″ x 14″
- (1) purple 2″ x 16″ to (1) white 2 3/4″ x 16″
- (1) blue 2″ x 14″ to (1) white 2 3/4″ x 14″
- (1) turquoise 2″ x 10″ to (1) white 2 3/4″ x 10″
- (1) green 2″ x 6″ to (1) white 2 3/4″ x 6″
- Lay out each pair with the seam running left to right. Cut vertically into the following 2″ wide units:
- yellow/white (3) 2″ x 4 1/4″
- orange/white (2) 2″ x 4 1/4″
- red/white (5) 2″ x 4 1/4″
- pink/white (7) 2″ x 4 1/4″
- purple/white (8) 2″ x 4 1/4″
- blue/white (7) 2″ x 4 1/4″
- turquoise/white (5) 2″ x 4 1/4″
- green/white (3) 2″ x 4 1/4″
- Those units will be used vertically in the quilt top. Set them aside for now.
- Sew the following sets of (3) pieces RST, in the order shown, with matching lengths together. Press the seams away from the white:
- (1) yellow 2″ x 2″ to (1) white 2″ x 6 1/2″ to (1) orange 2″ x 2″
- (1) green 2″ x 2″ to (1) white 2″ x 6 1/2″ to (1) yellow 2″ x 2″
- (1) orange 2″ x 4″ to (1) white 4″ x 6 1/2″ to (1) red 2″ x 4″
- (1) turquoise 2″ x 4″ to (1) white 4″ x 6 1/2″ to (1) green 2″ x 4″
- (1) red 2″ x 6″ to (1) white 6″ x 6 1/2″ to (1) pink 2″ x 6″
- (1) blue 2″ x 6″ to (1) white 6″ x 6 1/2″ to (1) turquoise 2″ x 6″
- (1) pink 2″ x 8″ to (1) white 8″ x 6 1/2″ to (1) purple 2″ x 8″
- (1) purple 2″ x 8″ to (1) white 8″ x 6 1/2″ to (1) blue 2″ x 8″
- Lay out each set with a color at the top and bottom and white in the middle. Cut vertically into the following 2″ wide units:
- yellow/white/orange (1) 2″ x 9 1/2″ (no cuts required)
- green/white/yellow (1) 2″ x 9 1/2″ (no cuts required)
- orange/white/red (2) 2″ x 9 1/2″
- turquoise/white/green (2) 2″ x 9 1/2″
- red/white/pink (3) 2″ x 9 1/2″
- blue/white/turquoise (3) 2″ x 9 1/2″
- pink/white/purple (4) 2″ x 9 1/2″
- purple/white/blue (4) 2″ x 9 1/2″
- Those units will be used horizontally in the quilt top. Set them aside for now.
- Sew the vertical units from Step 2 to the 4 1/4″ squares into (40) rows as shown below. Press the seams toward the 4 1/4″ squares:
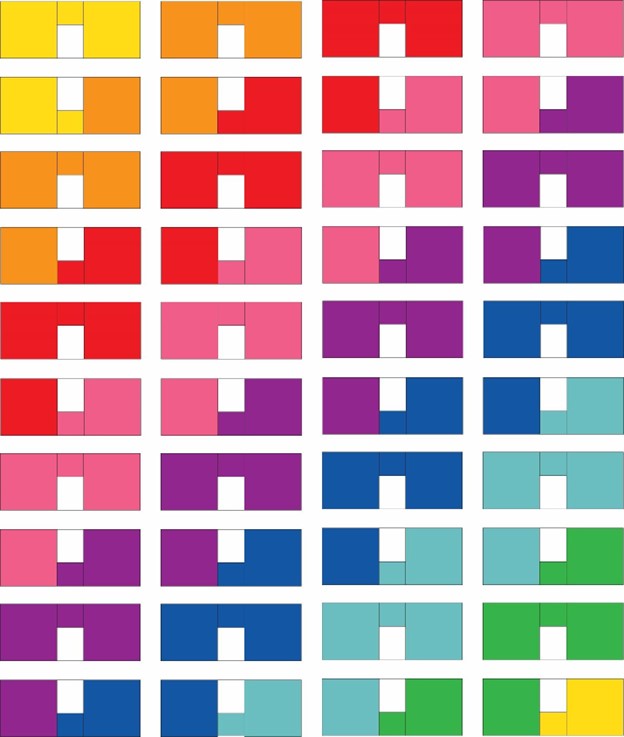
- Sew the horizontal units created in Step 5 between the units created in Step 7 as shown below to create blocks. Press the top seam toward the top and bottom seam toward the bottom.

- Sew the blocks into (5) horizontal rows of (4) blocks each. Alternate pressing the seam to the right and left on each row.
- Sew the rows together. Press the seams toward the bottom.
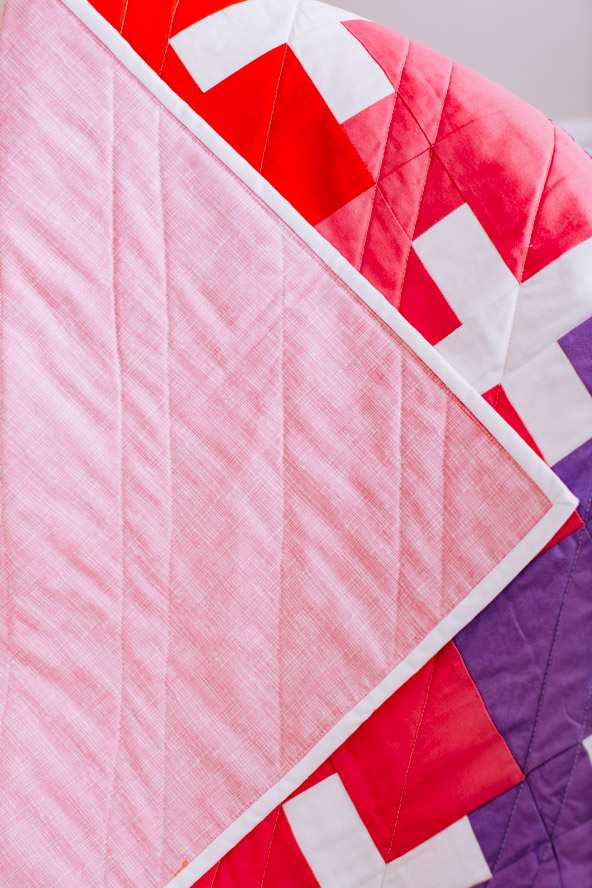
- Trim the selvages from the (1) 50″ x WOF backing piece.
- Trim the selvages from the (5) 2 1/2″ x WOF binding pieces. Sew the ends RST to make (1) continuous strip.
- Layer the backing with the right side down, batting of your choice, and the quilt top with the right side up. Pin or baste.
- Quilt using your preferred method and design. Trim the batting and backing to match the quilt top.
- Sew the binding around the edge using your preferred method.