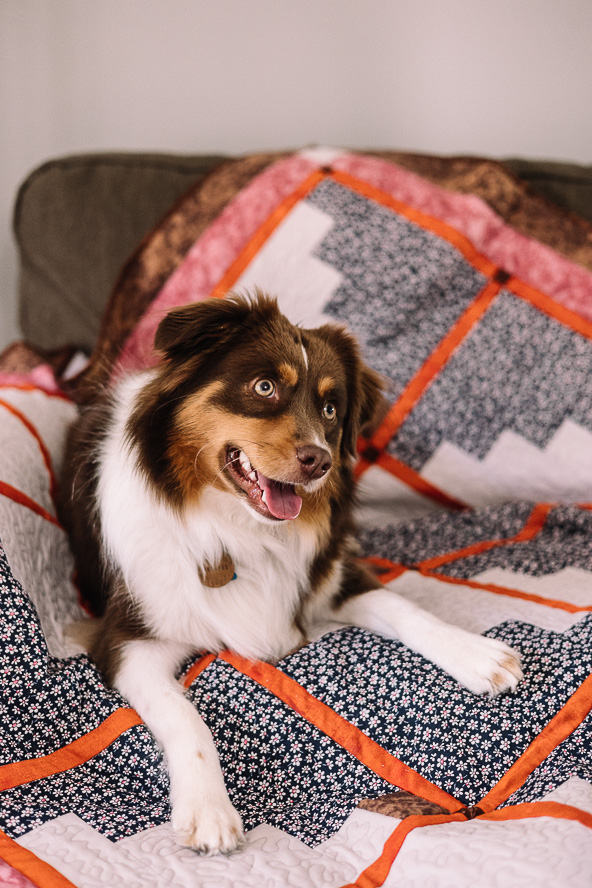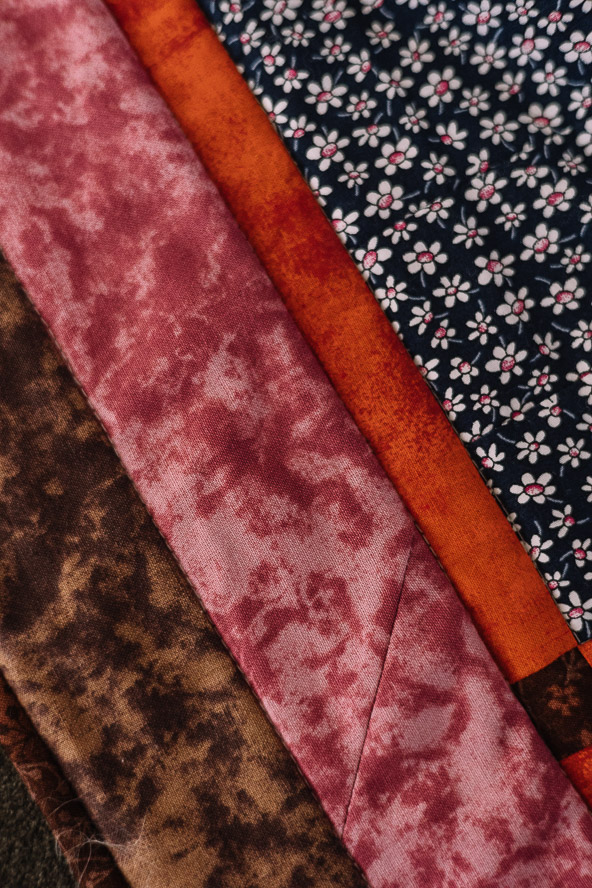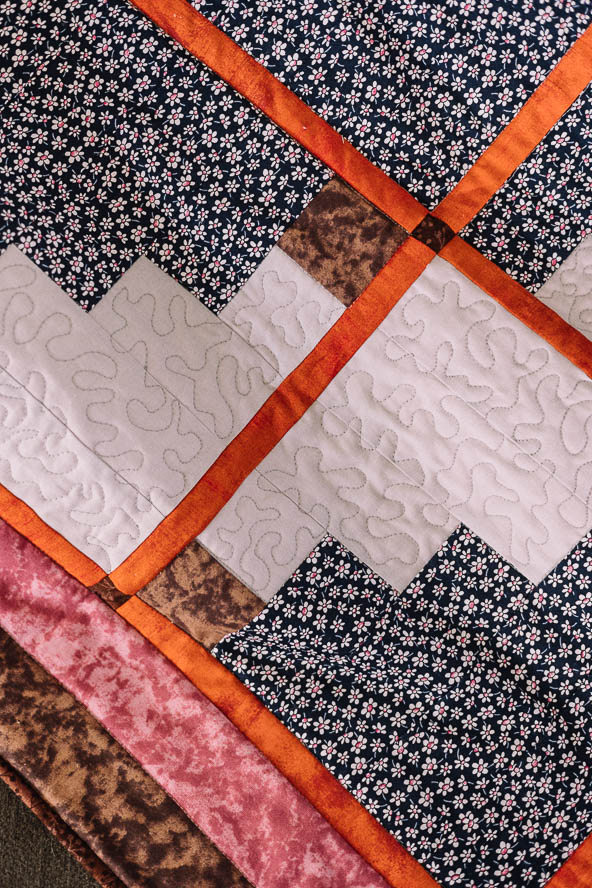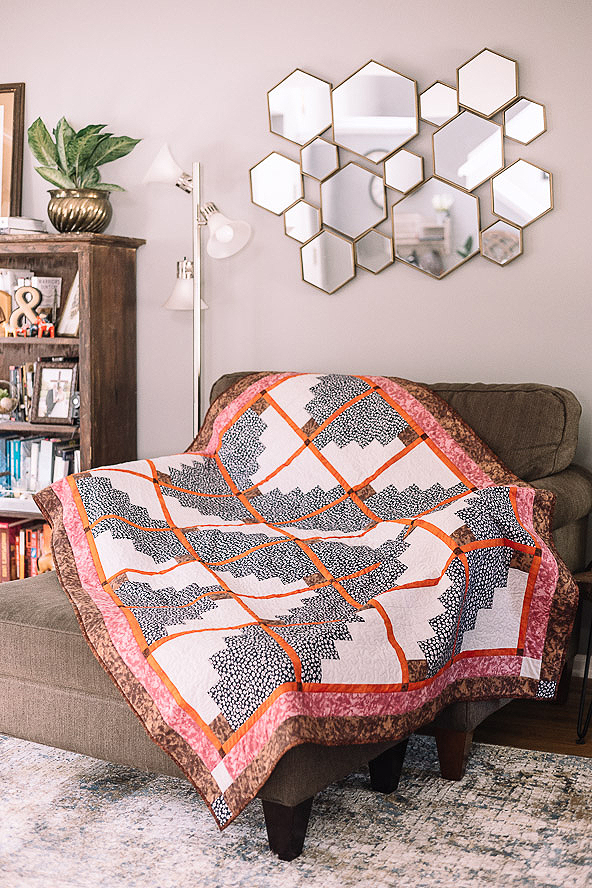
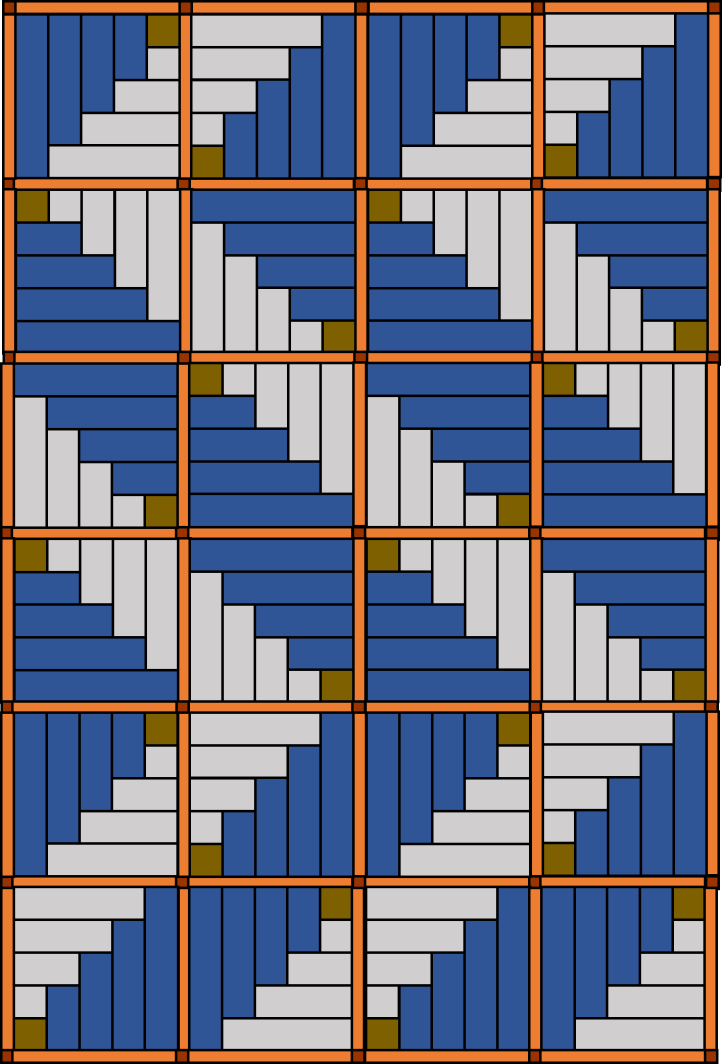
Get ready to break out your prettiest jelly rolls to make this gorgeous log cabin quilt pattern! Log cabin quilts are a classic among quilters and this simple but striking design plays with dark and light fabric to create the effect of a gently flowing river. Made using jelly roll precuts, these log cabin blocks are placed in a zig zag pattern to create a wave-like effect. This log cabin quilt also features sashing in a fiery autumn orange and uses earthy tones of mauve and coffee for its borders, showing you how to play with every color in your jelly roll.
Finished Size: Approximately 74 1/2” x 52 1/2″
Designer Note: Scant 1/4” seams used throughout.
Materials:
- Two jelly roll packs (42 strips each)
- 80” x 60” batting
- 85” x 65” backing fabric
- Basic sewing and quilting notions
SEPARATING YOUR JELLY ROLLS:
Separate the 2 1/2” Jelly Roll Strips into dark, medium and light.
Choose:
- 18 dark strips to make one half of the Log Cabin units
- 14 light strips to make the other half of the Log Cabin units
- 2 dark or medium strips for the corner square in each Log Cabin unit
- 8 medium strips for the sashing between the Log Cabin units
- 1 dark strip for the sashing cornerstones
- 6 strips for the inner border
- 6 strips for the outer border
- 7 strips for the binding
- Light leftovers for the inner border cornerstones
- Dark leftovers for the outer borders cornerstones
Instructions:
LOG CABIN UNITS:
- Cut 24 of the following strips (all 2 1/2” wide):
- Round 1 dark corner square – 2 1/2”
- Round 2 light – 2 1/2”
- Round 3 dark – 4 1/2”
- Round 4 light – 4 1/2”
- Round 5 dark – 6 1/2”
- Round 6 light – 6 1/2”
- Round 7 dark – 8 1/2”
- Round 8 light – 8 1/2”
- Round 9 dark – 10 1/2”
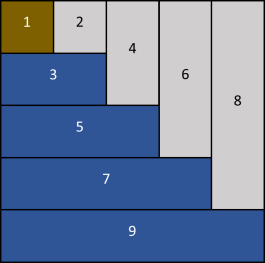
- With right sides together so ‘2’ is on the right hand side, stitch ‘1’ and ‘2’ together. Press the seam towards ‘1’.
- With right sides together and ‘1’ in the top left corner, stitch ‘3’ to the bottom of the ‘1/2’ unit. Press towards ‘3’.
- With right sides together and ‘1’ in the top left corner, stitch ‘4’ to the right of the ‘1/2/3’ unit. Press towards ‘4’.
- Continue to add the strips in number order to the bottom or the right of the unit.
- Make 24 Log Cabin units.
- Tip: Chain piece the strips to finish all the Log Cabin units at the same time.
ADDING THE SASHING AND JOINING THE ROWS:
- Cut twenty-nine (29) 10 1/2” strips from the medium Jelly Roll strips chosen.
- Cut these 29 strips in half so you have fifty-eight (58) 10 1/2” x 1 1/4” strips.
- Cut thirty-five (35) 1 1/4” dark cornerstones by cutting eighteen (18) 1 1/4” strips from the 2 1/2” Jelly Roll strip chosen and then cutting them in half.
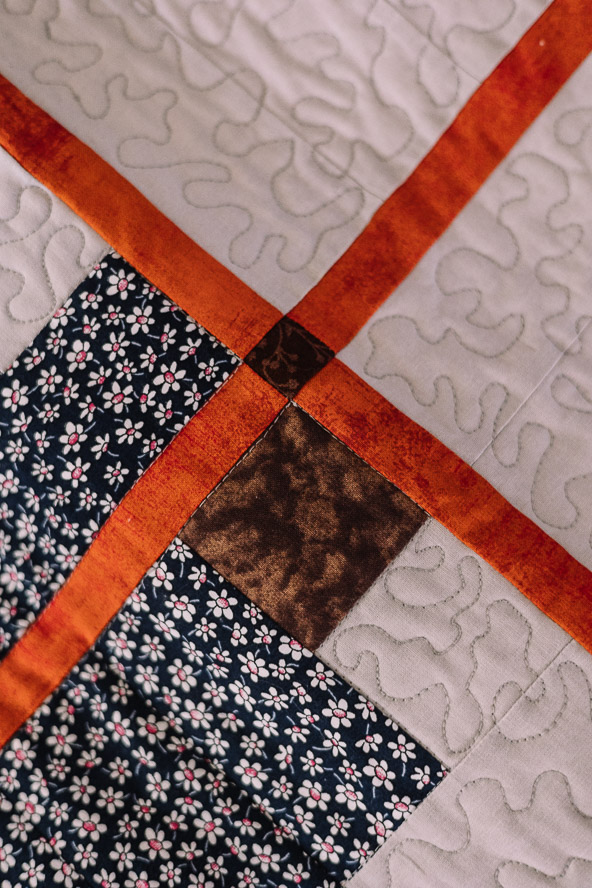
- Stitch four medium strips with a dark cornerstone in-between and at each end. Press the seams towards the cornerstones. Make seven long sashing strips.

- Lay out the Log Cabin units in the Zig Zag pattern. Stitch a sashing strip to both sides of the first Log Cabin unit and to the right side of each of the other Log Cabin units. Repeat for all Log Cabin units.

- Stitch the Log Cabin units into pairs and then into rows of four. Press the seams towards the Log Cabin units. Repeat to make six rows.
- Stitch a long sashing strip to the top and bottom of the first row and then to the bottom of the five other rows. Press the seams in one direction.
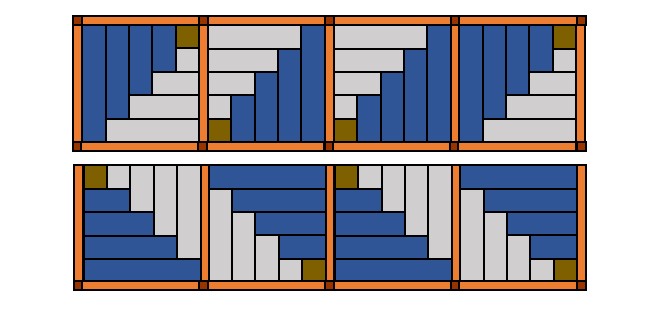
- Stitch the rows into pairs and then stitch the three pairs together. Press the seams in one direction.
ADDING THE INNER BORDER:
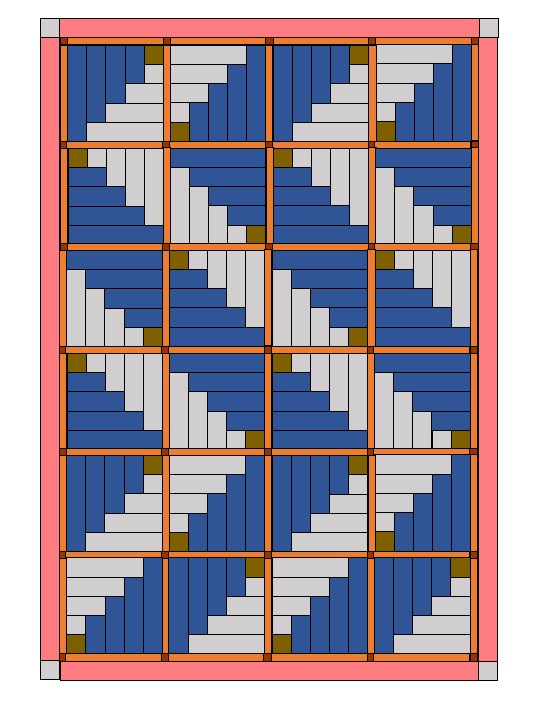
- Measure the quilt top through the middle for the length and width. It will be approximately 66 1/4” x 44 1/2”. Stitch the six medium Jelly Roll strips chosen for the inner border together to make one long strip and cut two strips for the length and two for the width.
- Pin and stitch the longer strips to the left and right sides of the quilt top. Press the seams towards the borders.
- Cut four 2 1/2” squares from the light Jelly Roll strip leftovers. Stitch one square to either end of the shorter border strips. Press the seams towards the border strip.
- Stitch the shorter border strips to the top and bottom of the quilt top, nesting the seams at the cornerstones. Press the seams towards the borders.
ADDING THE OUTER BORDER:
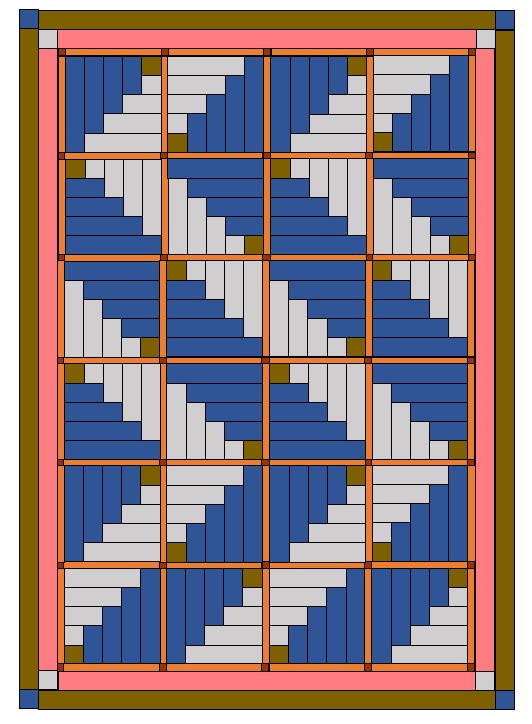
- Measure the quilt top through the middle for the length and width. It will be approximately 70 1/2” x 48 3/4”. Stitch the six medium Jelly Roll strips chosen for the outer border together to make one long strip and cut two strips for the length and two for the width.
- Pin and stitch the longer strips to the left and right sides of the quilt top. Press the seams towards the borders.
- Cut four 2 1/2” squares from the dark Jelly Roll strip leftovers. Stitch one square to either end of the shorter border strips. Press the seams towards the border strip.
- Pin and stitch the shorter border strips to the top and bottom of the quilt top, nesting the seams at the corner stones. Press the seams towards the borders.
QUILTING:
- Layer and secure the quilt top, batting and backing and quilt as desired.
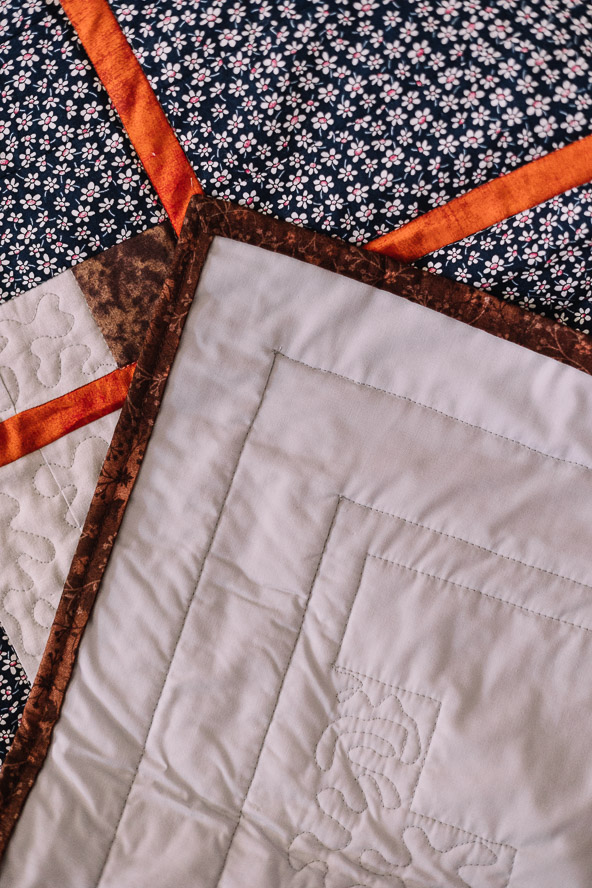
- The designer used free motion quilting on the light half of the Log Cabin units and stitch in the ditch around the whole darker section each unit.
- The designer stitched in the ditch between the sashing and inner border and then the inner border and outer border.
BINDING:
- The designer bound the quilt with seven dark strips, stitched into one long strip and then folded in half width ways, to double bind and miter the corners.

