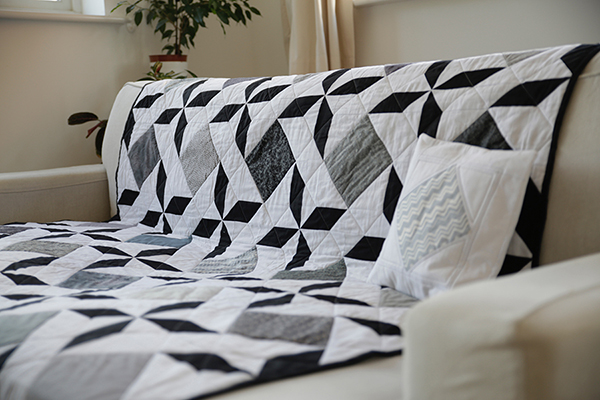
Embrace eye-catching contrast in your quilting color palette with this large lap quilt pattern. Made in striking shades of black, white, and gray, this quilt pattern features an elegant windmill design that requires precise piecing, making it a great project for more experienced quilters. This gorgeous quilt pattern would look stunning draped across your bed or sofa or displayed as a large wall hanging in your living space. Dare to be bold this winter with this attention-grabbing windmill quilt.
Finished Size: 60″ x 60”
Difficulty Level: Intermediate
Materials:
- From cotton fabric 42” wide, you will need:
- Fabric A (black solid): 1 1/2 yards
- Fabric B (white solid): 3 yards
- Fabric C (gray): 25 squares of different gray fabrics, solids, and prints, each at least 7″ x 7”. These squares will be trimmed down in the cutting instructions below. (Note: Don’t use too many directional prints and watch out for any additional colors used in the fabrics)
- Backing fabric (for example, gray print): 4 yards
- Binding fabric (for example, black solid): 1/2 yard
- Pale gray thread for sewing and for quilting
- Black thread for stitching the binding
- Quilt Block/Quilt Diagrams – located at the bottom of this page
Cutting Instructions:
- From fabric A, cut 100 pieces 6 1/2″ x 2 1/2”.
- From fabric B, cut 50 squares 4 7/8″ x 4 7/8”, then cut each square once on the diagonal; cut 100 oblongs 4 1/2″ x 2 1/2” and 200 squares 2 1/2″ x 2 1/2”.
- From fabric C, cut 25 squares 6 1/4″ x 6 1/4” (These are cut on the straight grain of the fabric).
- Cut and join the backing fabric to make a piece at least 70″ x 70”.
- From the binding fabric, cut seven strips 2 1/2” wide across the width of the fabric, remove the selvages, and join at the short ends to make a strip 250” long.
Sewing Instructions:
MAKING THE PATCHWORK
Designer Notes: The quilt has 25 blocks which all have the same formation (see block diagram) but will each have a different fabric in the central square. Use a 1/4” seam allowance throughout.
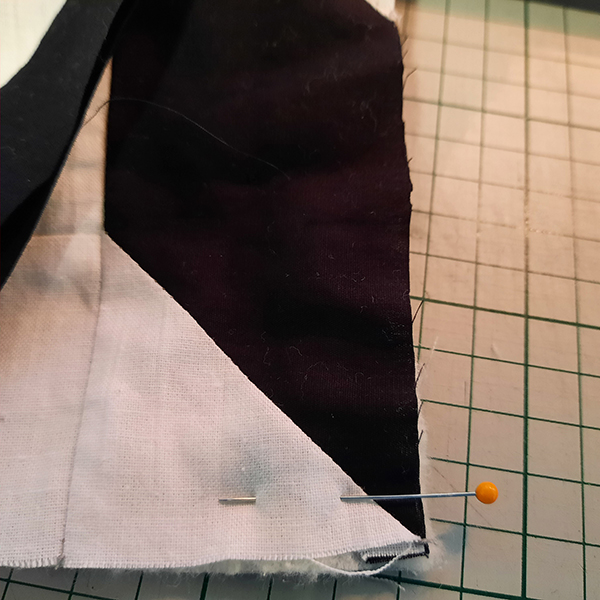
- Make the on-point square blocks. First, lay one of the white triangles (cut from the 4 7/8″ x 4 7/8” squares) on the table and place one side of the square on top, right sides together. You will see that two small triangles stick out on either side (they should be of even size). Pin the square and triangle together with pins inserted at right angles from the wrong side.
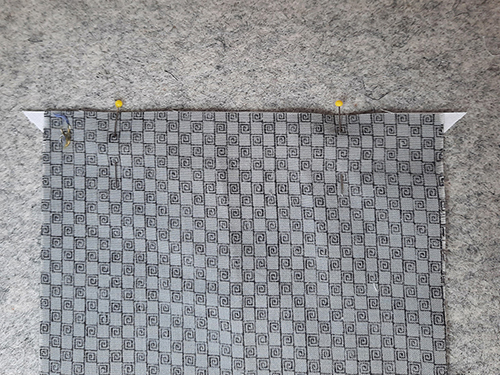
- Stitch the seam, then pin and stitch another triangle to the opposite (third) side of the square, still working from the wrong side.
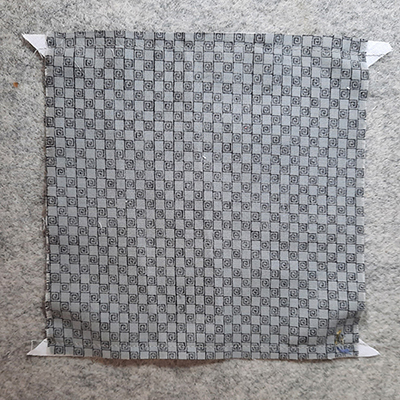
- Press the seams, then open the white triangles and press again, pressing the seam allowances outwards towards the triangles.
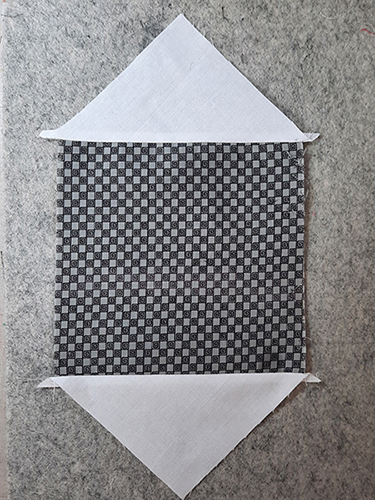
- Now pin and stitch two more white triangles to the remaining sides (second and fourth) of the square in the same way.
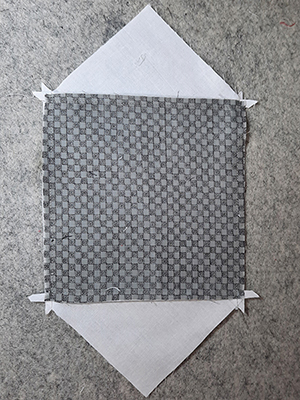
- Press the seams and then press the seam allowances outwards towards the triangles again.
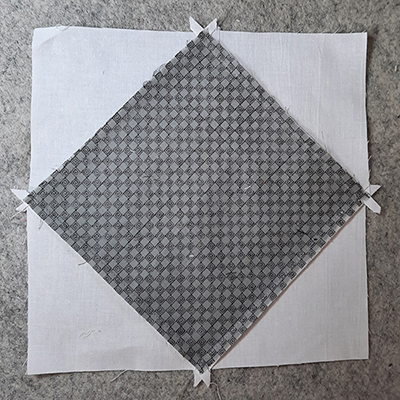
- The center of the block is complete.
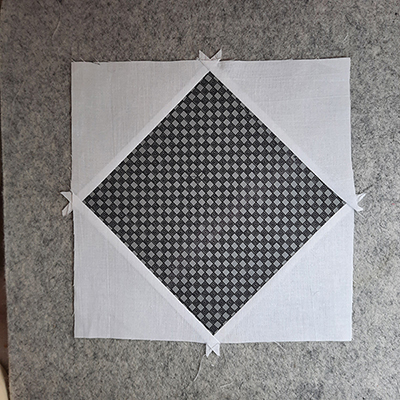
- Repeat steps 1 to 6 to make the remaining 24 block centers. When all the centers are complete, sort them into piles of light, medium, and dark tones of gray fabric. Place the block centers on a design wall, as shown, or lay them out on a flat surface such as a bed, so you can choose how you will use them in the quilt. (Although the block centers in the finished quilt are not exactly adjacent to each other, you will be able to see how the balance of the grays works across the quilt.)
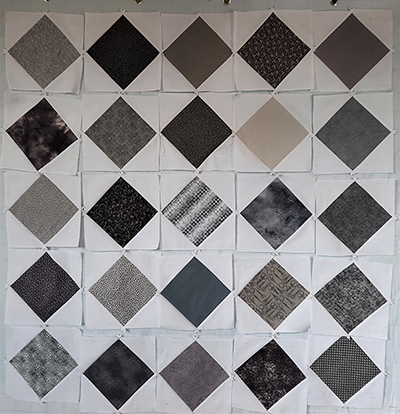
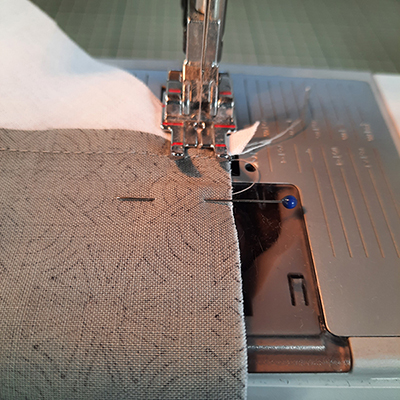
Once you are happy with your arrangement, gather the on-point squares in rows of five, left to right and label each row, so you can make up the quilt correctly. Taking a photo on your phone is also helpful! - Tip: It is important when sewing the second and fourth triangles to the square, that you use an accurate 1/4” seam which should neatly cross the end of previous triangle, as seen in the photo. Insert pins at right angles, removing them just before the presser foot reaches them.
- Make the windmill arms. This pattern uses a quick method of making half-square triangles – which is useful when there are 200 to do! Make a set of four ‘arms’ initially and create one complete block to use as a template next to your machine while you make the remaining 24 blocks. Draw a diagonal line across two white squares (2 1/2 x 2 1/2”) using a sharp pencil or a fabric marker.
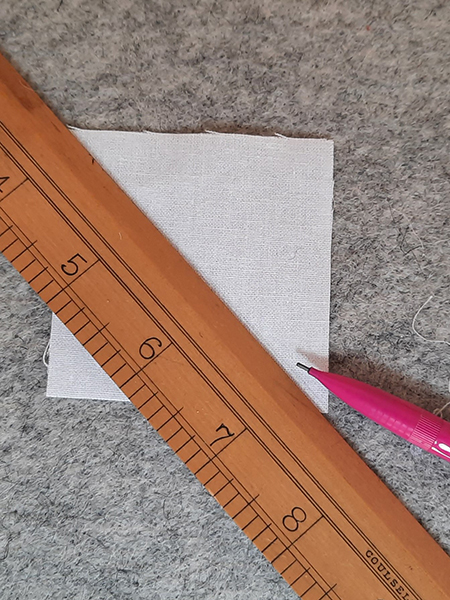
- Place one white square (with the line running down from the top left to the bottom right) at the top end of a black rectangle (6 1/2″ x 2 1/2”) and pin into place.
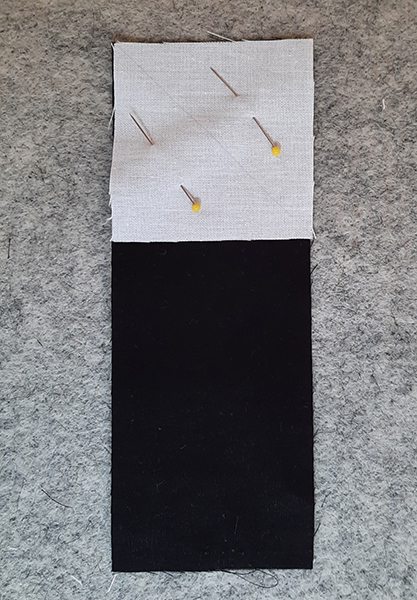
- Pin a second white square, again with the line running down from the left to the right, at the bottom end of the black rectangle and stitch both pieces in place along the marked line.
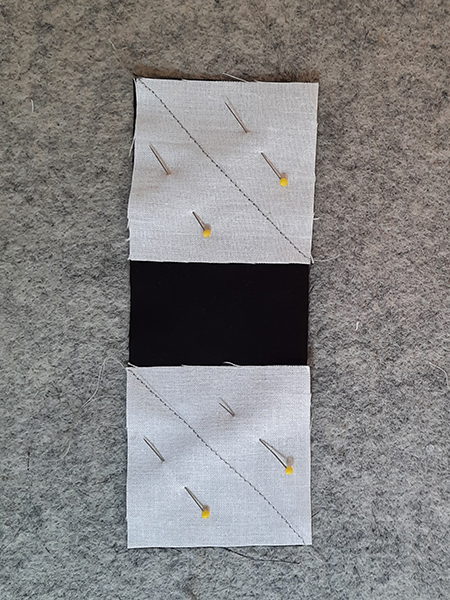
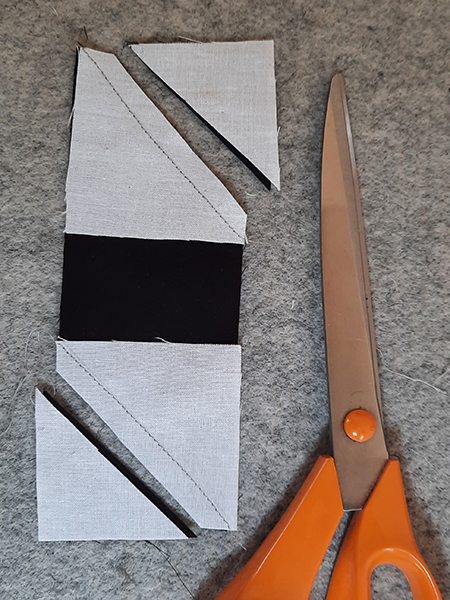
- Using shears, cut along a line exactly 1/4” away from the marked line, as shown in the photo.
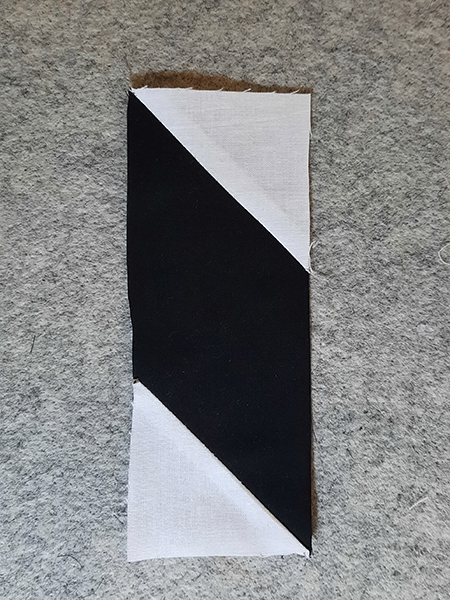
- Press the seam, then open the white triangles and press the seam open, so that the white triangles complete the corner of the black rectangle.
- Repeat steps 11-13 three more times. (Once you get going with making more blocks, you can prepare, then chain-piece these pieces one after another. Cut the threads between them when you have done the stitching.)
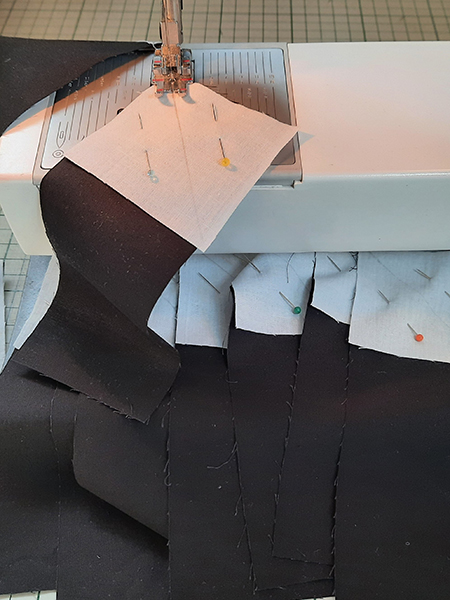
- Stitch a white oblong (4 1/2″ x 2 1/2”) to the left of each white/black/white strip on the short sides. This forms the framing strips for the on-point center block. Set aside.
- Check the block diagram before you start. Begin with the on-point square block which was at the top left in the first row when you planned your quilt in step 7. Place a framing strip, right sides together, along the right-hand edge of the on-point square block with the short end aligning with the top of the block. The solid white end of the framing strip should be at the top. Insert a pin at the top to secure the fabrics together. Insert a second pin at the point where the 1/4” seam in the unit crosses the black parallelogram and align this with the corner in the on-point square. Then insert the remaining pin at the end of the square. You will see that a portion of the strip hangs below the block – this will be stitched in later.
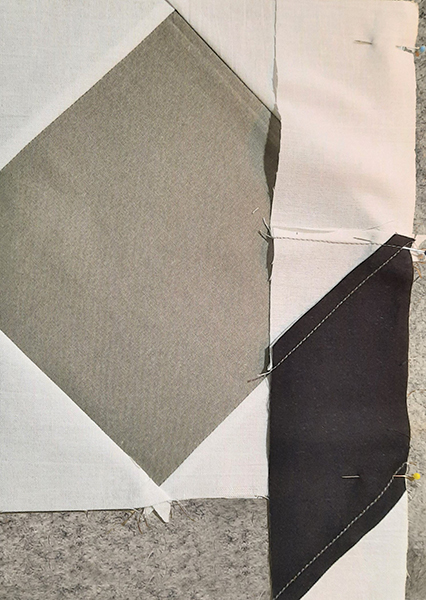
- Stitch, working from the wrong side (removing pins as you go), ensuring that your seam runs exactly across the top of the corner of the on-point square. Press the seam, then press the strip open, with the seam allowances over to the right, away from the block.
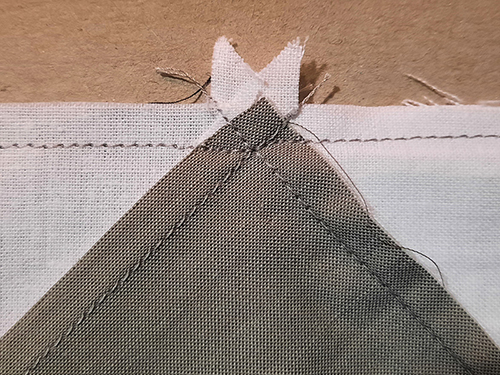
- Working anti-clockwise, place the second framing strip above the center on-point block. Lay the pieces right sides together. Pin accurately as before and this time stitch right across the block and the end of the first unit. Press the seam, then press the seam allowances outwards.
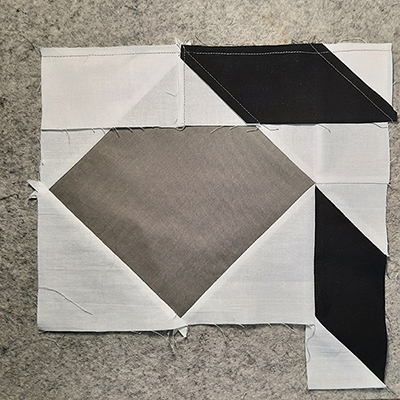
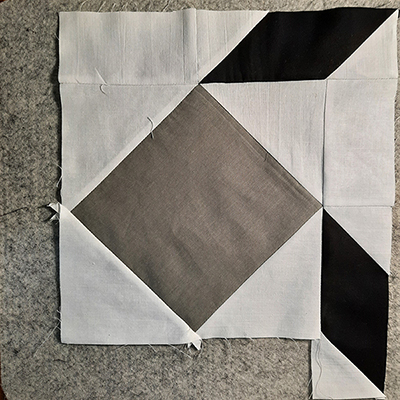
- Continuing anti-clockwise, lay the third framing strip to the left of the center on-point block. Pin, stitch, and press as before.
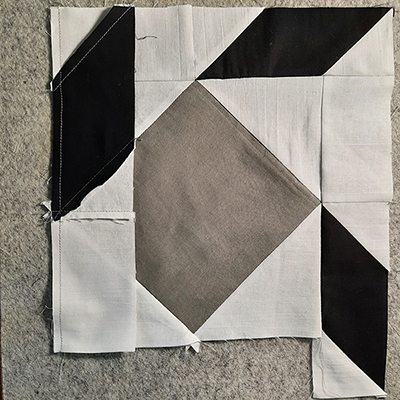
- Still continuing anti-clockwise, lay the fourth framing strip below the center on-point block. Pin in place. Carefully un-pick a few stitches in the seam that attached the first unit (in step 17) so you can pin and stitch this fourth strip right across the bottom of the central square. Press the strip outwards as before with the seam allowances also pressed outwards.
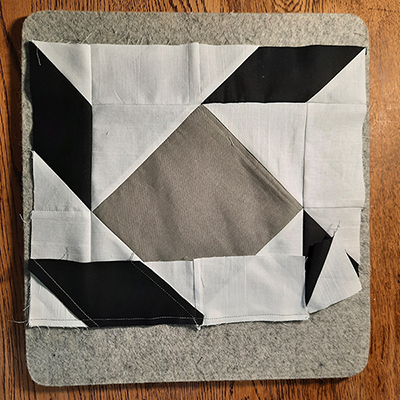
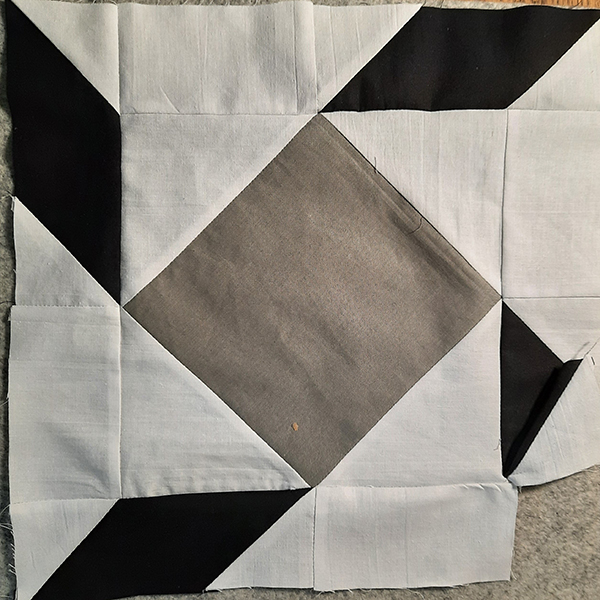
- Now complete the block by stitching the end of the fourth unit to the left lower portion of the first unit.
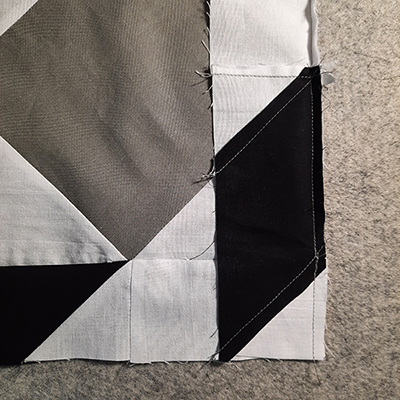
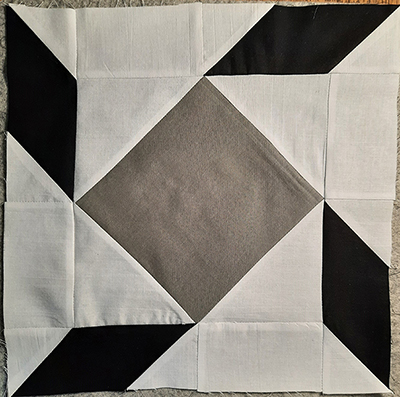
- The first block is now complete. Use this as a template near your machine so you can make sure all your windmill arms are facing the correct way as you make the remaining 24 blocks.
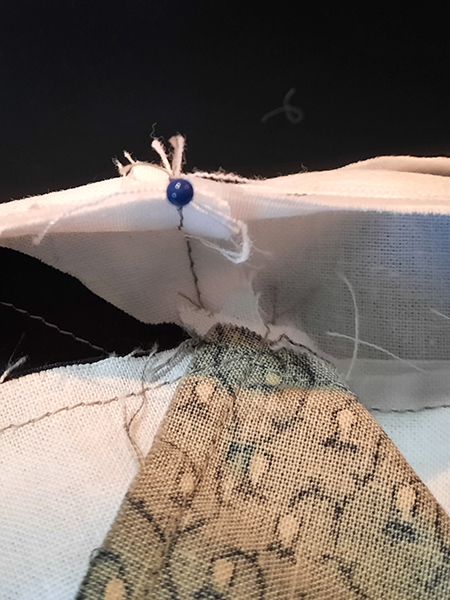
- Join blocks 1 to 5 to make row 1, blocks 6 -10 for row 2, blocks 11-15 for row 3, blocks 16-20 for row 4 and blocks 21 – 25 for row 5. Press the seam allowances in rows 1, 3, and 5 to the right and in rows 2 and 4 to the left. Join the rows, making sure that the vertical seams align. At each point where the vertical seams join, make sure that the seam allowances are facing in opposite directions as shown in the photo.
- Press the quilt top well.
LAYERING UP THE QUILT
- Press the backing fabric. Find the center of each side (by folding it) and insert a pin at the midway point. Lay it on the floor right side down. Secure the corners with masking tape.
- Find the center of each side of the batting in the same way and lay the batting on top of the backing.
- Insert a pin at the mid-point of each side of the quilt top. Lay the quilt top right side up on top of the batting, ensuring that the pins in the top are aligned with the pins in the batting and backing.
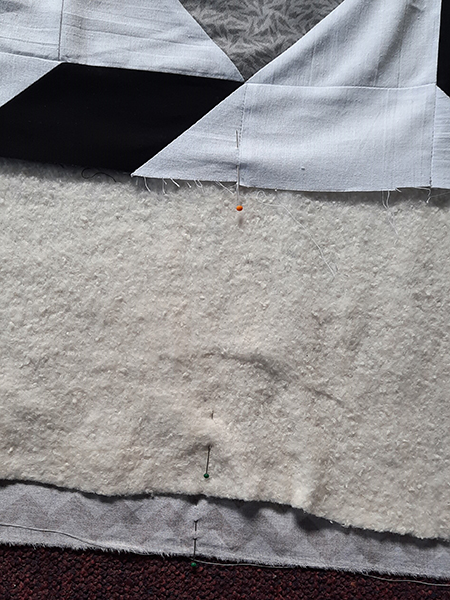
- Join the three layers together, either by using a specialist adhesive spray, or by tacking the layers together in a grid of lines 4” (10cm) apart, or by using quilters’ safety pins.
QUILTING
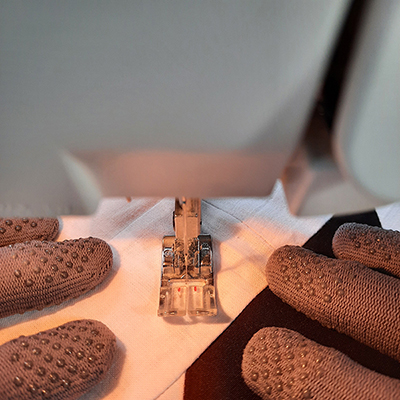
- This quilt was quilted ‘in the ditch’ (along the seam lines) on a domestic sewing machine, with pale gray thread, following the quilting diagram. Start with the lines at the center of the quilt and work progressively outwards. Quilting gloves with non-slip tips will help you keep the fabric steady under the presser foot.
BINDING AND FINISHING
- Fold the strip of binding in half lengthwise and press with an iron.
- Place the folded binding on top of the right side of the quilt, against the right-hand edge, part-way down one side so the raw edges of the binding line up with the raw edges of the quilt.
- Leaving a 5” ‘tail’ of binding at the beginning, machine stitch the binding in place 1/4” (6mm) in from the raw edges.
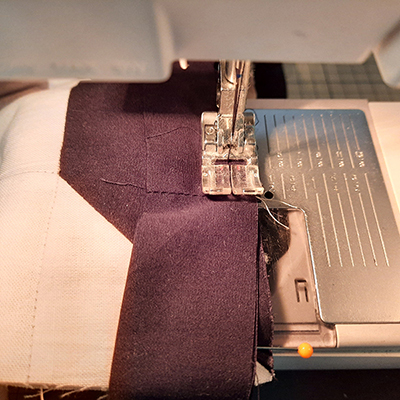
- Insert a pin 1/4” (6mm) in from the first corner. Stitch as far as the pin, then take out the pin and make the final stitch at the spot where the pin was inserted. Then lift the presser foot lever, swing the work round on the needle and stitch straight out to the corner at a 45 degree angle to the previous line of stitching.
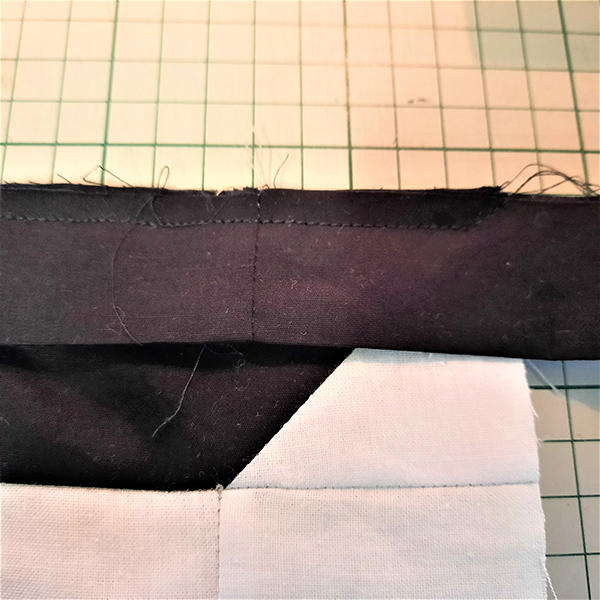
- Now fold the long free end of the binding upwards as shown.
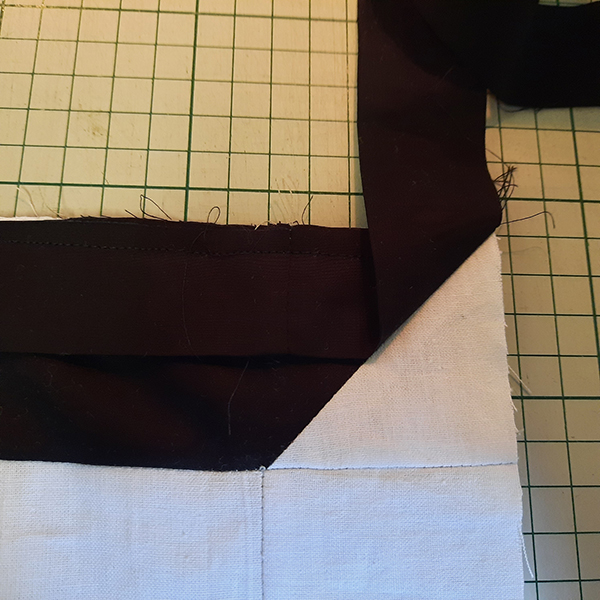
- Next, fold the long end back down again on itself, enclosing the 45-degree angle fold. The top fold should align with the raw edges of the previous side.
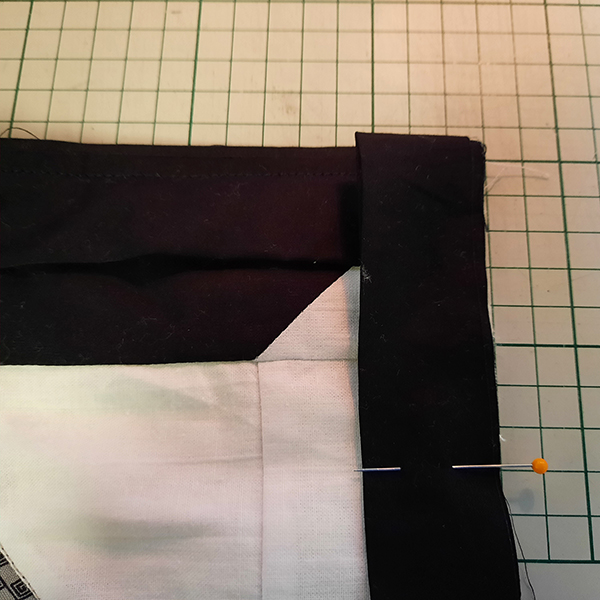
- Beginning at the fold, stitch down the next side of the quilt. In the photo, you can see the second binding strip lying neatly on top of the first binding strip. Repeat steps 4-7 in this section three more times.
- On the final side, stop stitching down the binding at a point about 6” (15cm) from where you started. Take the quilt out of the machine and fold back the two loose ends of binding so that the folds meet. Mark the folds with pins. Trim the ends to about 1” (25mm) beyond the fold.
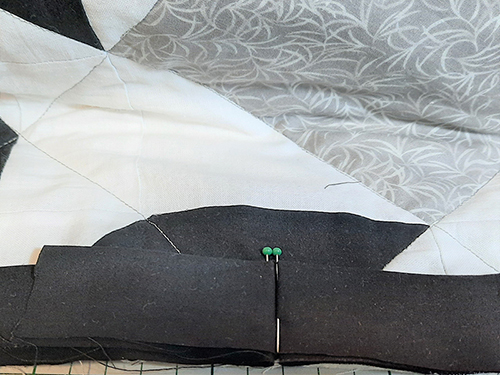
- Finger–press the folds. Open the ends and pin them together, inserting the pins at right angles.
- Re-fold the binding and check that the fit is right. If it is, trim the seam allowances to 1/4” (6mm).
- Re-fold the binding again and stitch the final piece of binding into place.
- Turn the binding to the back of the quilt and slip-stitch the binding to the quilt.

I recently joined and really wish you would show a flat image of the projects
I agree these artistic pictures dont show us anything