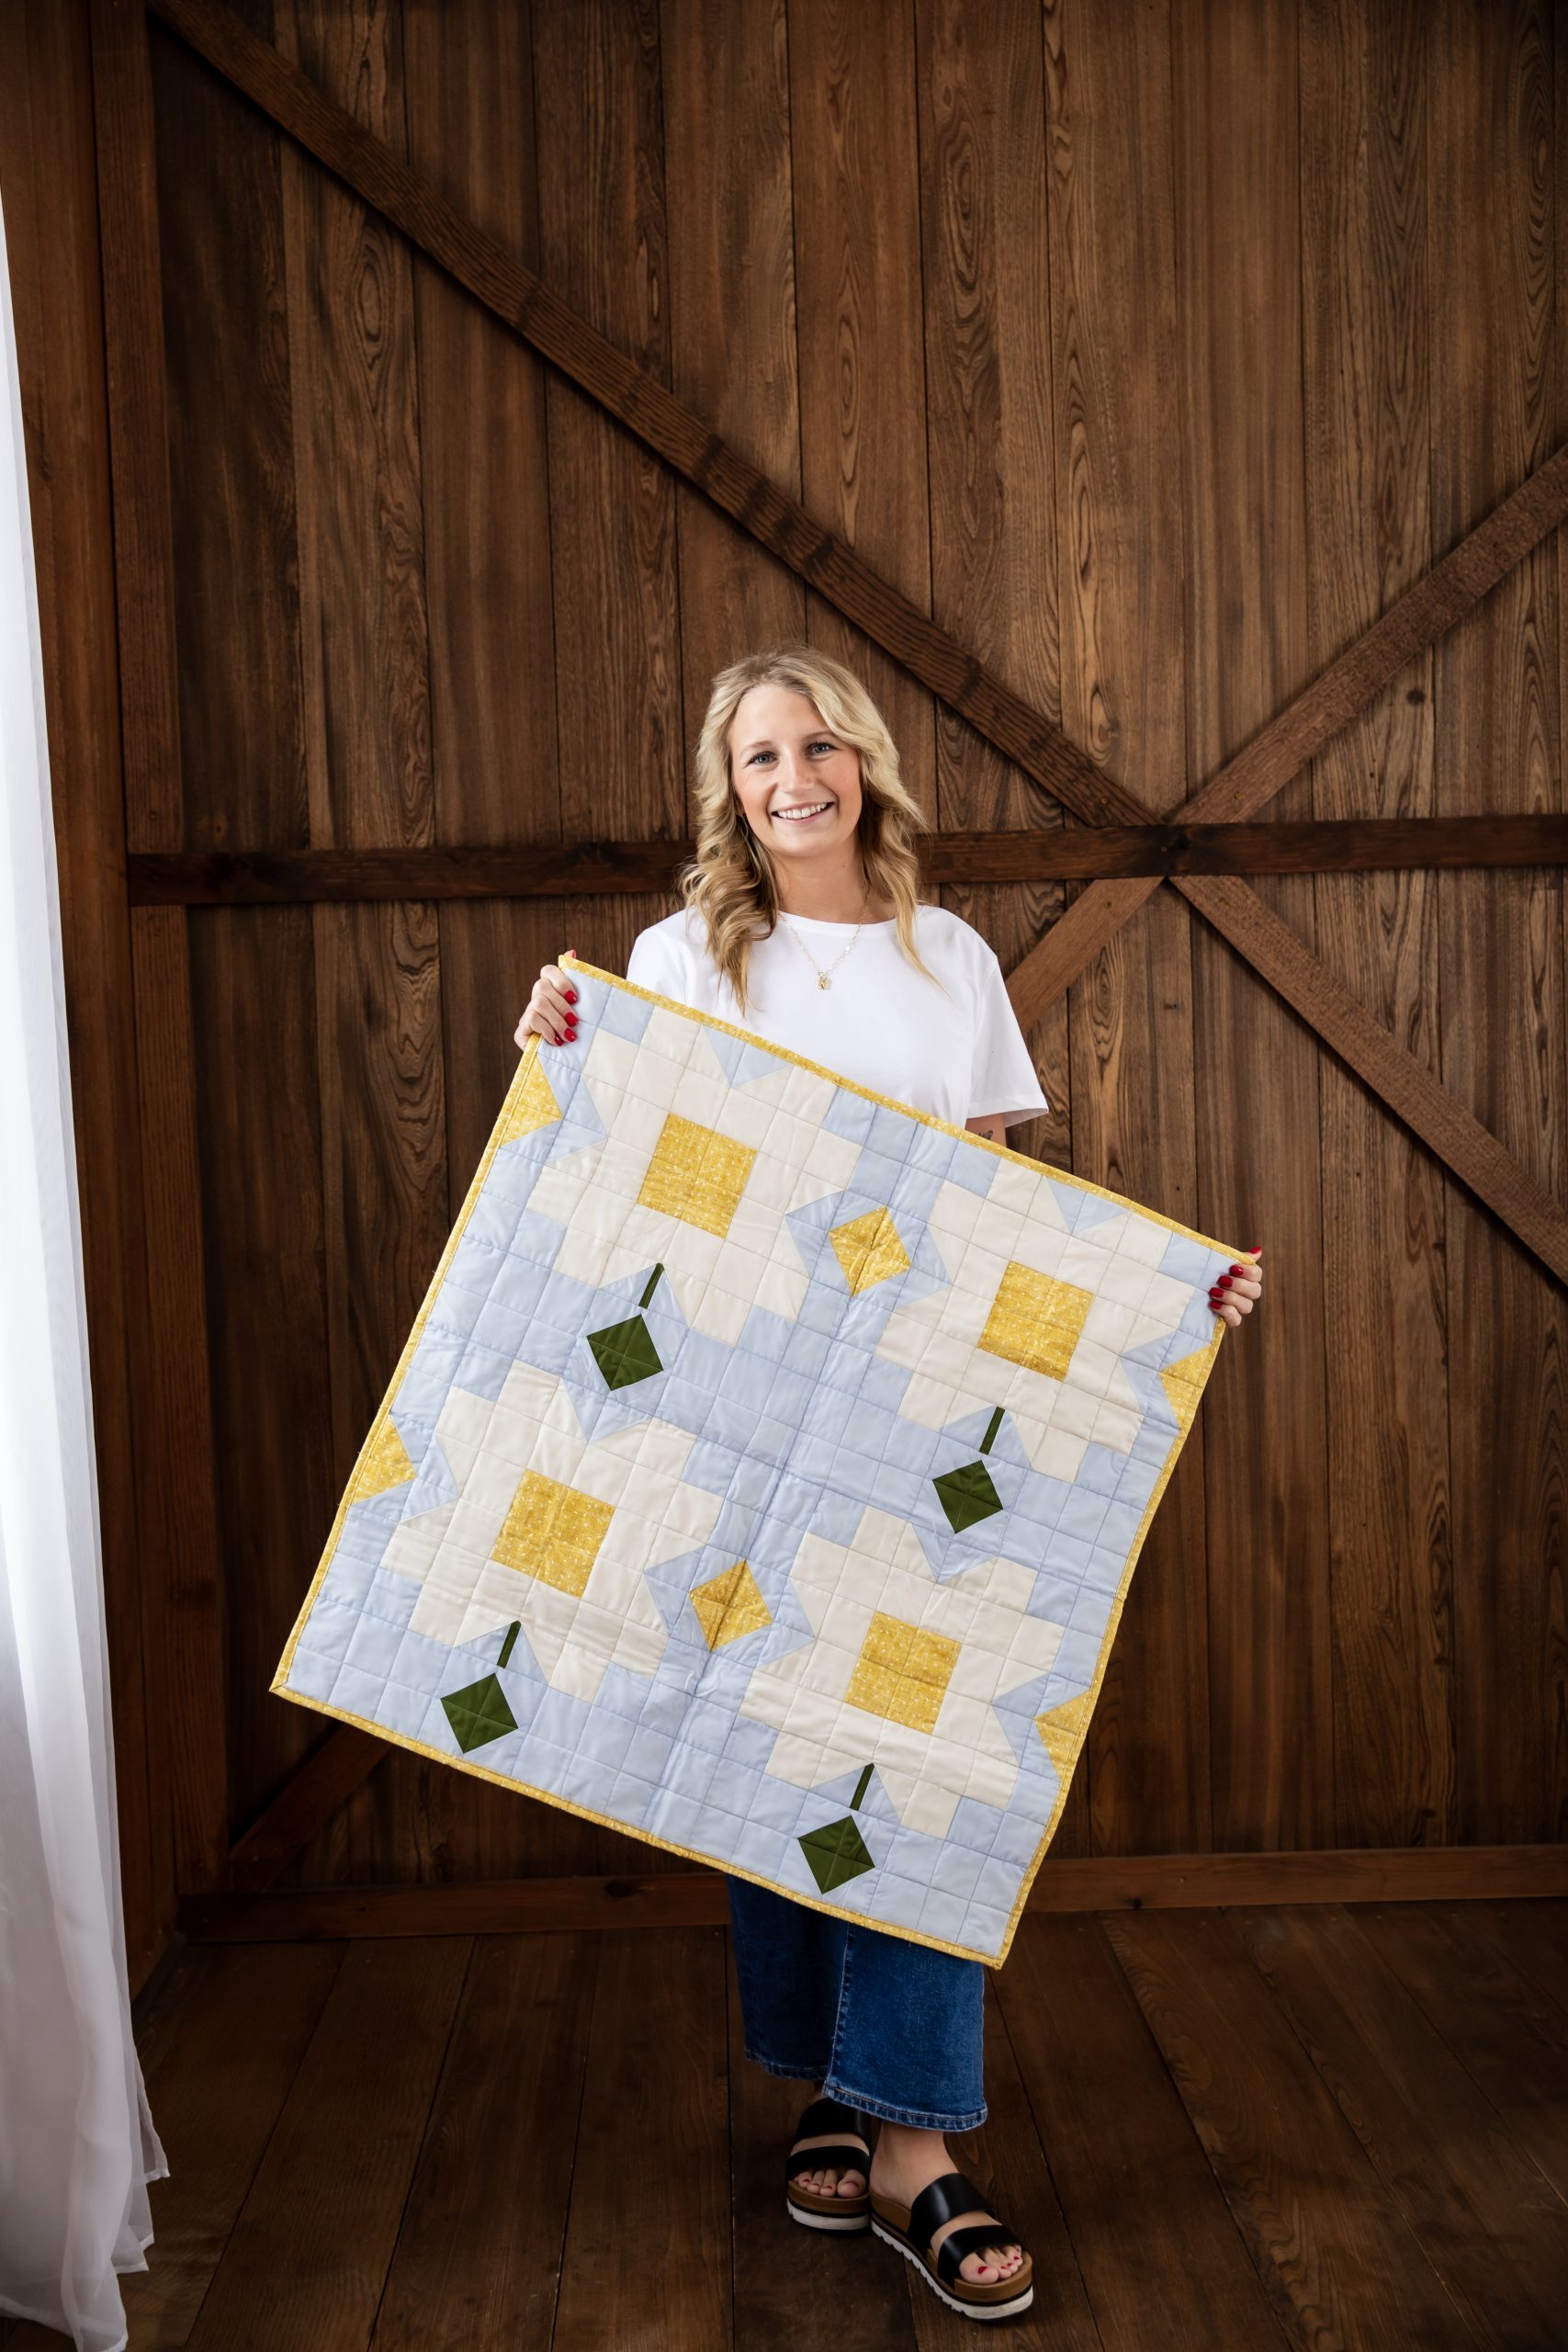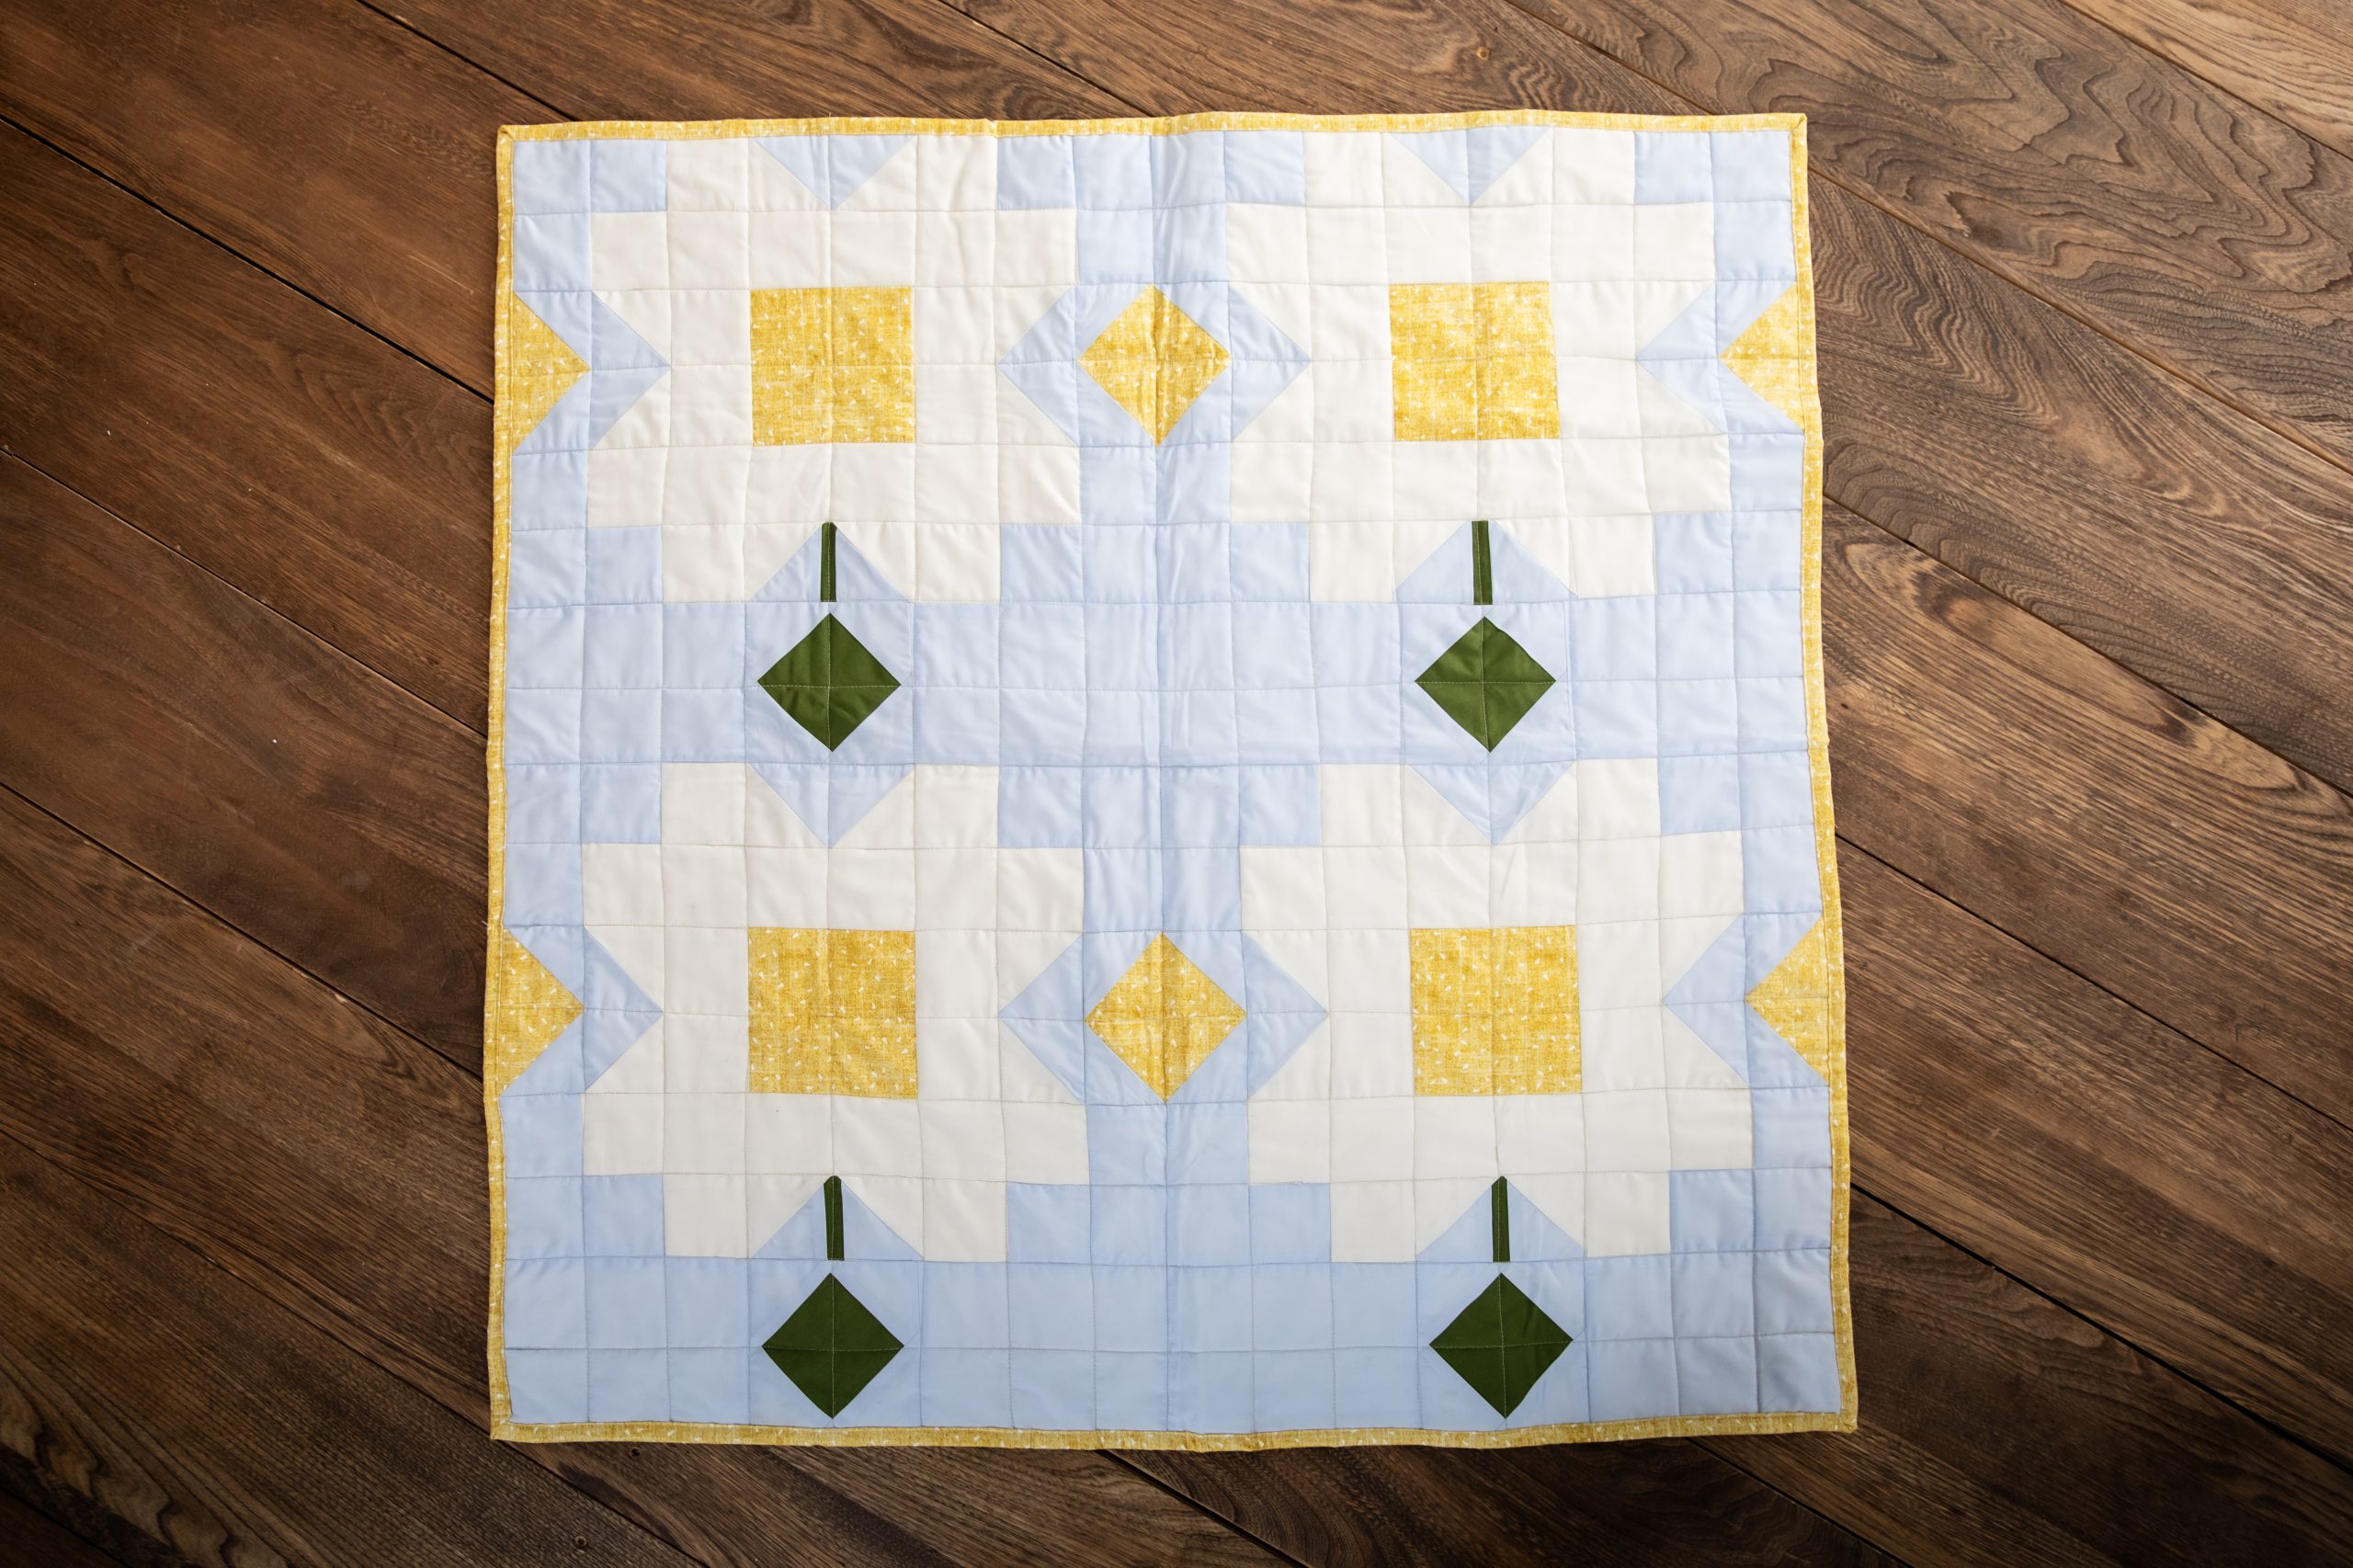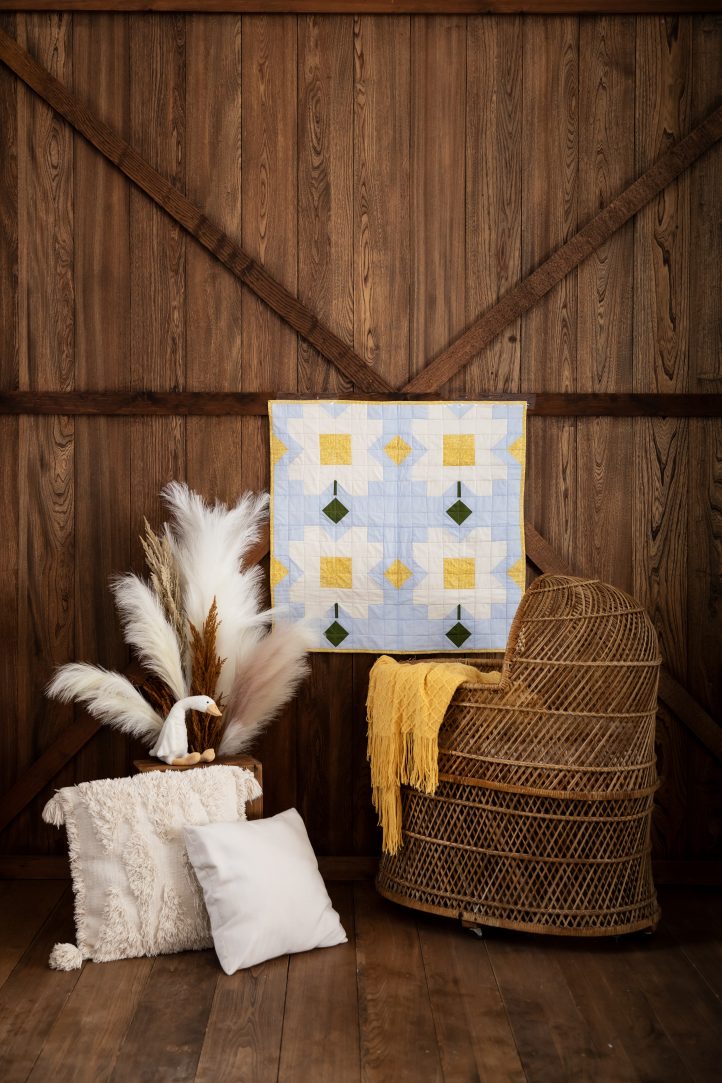
Baby quilts don’t get cuter than this! Design your own gorgeous spring baby quilt with this delightful daisy pattern from Janice Bailor. An excellent pattern for advanced beginners, this baby quilt pattern finishes at a 32-inch square and would look so pretty displayed on a nursery wall. Sew your own daisy quilt in either dreamy pastels or break out your brightest precuts for a playful, retro-inspired look.
Skill Level: Advanced Beginner
Finished Size: 16 inch square blocks, 32 inches square baby quilt
Seam Allowances: Scant 1/4 inch patchwork
Abbreviations: “RST” means Right Sides of fabric together
Designer Notes:
- These blocks would look great made in scraps of fabric or with 4 coordinating fat quarters.
- Starch for pressing the triangles is recommended.
Materials:
- Daisy body (cream or off-white, Kona 1037 Bone) – 3/4 yard
- Daisy center and diamond accents (golden yellow, Kona 353 Sunflower)– fat quarter or 1/4 yard
- Leaf and stem (medium green, Kona 31 Palm) – fat eighth or 1/8 yard
- Background (pale blue, Kona 152 Cloud) – 1 yard
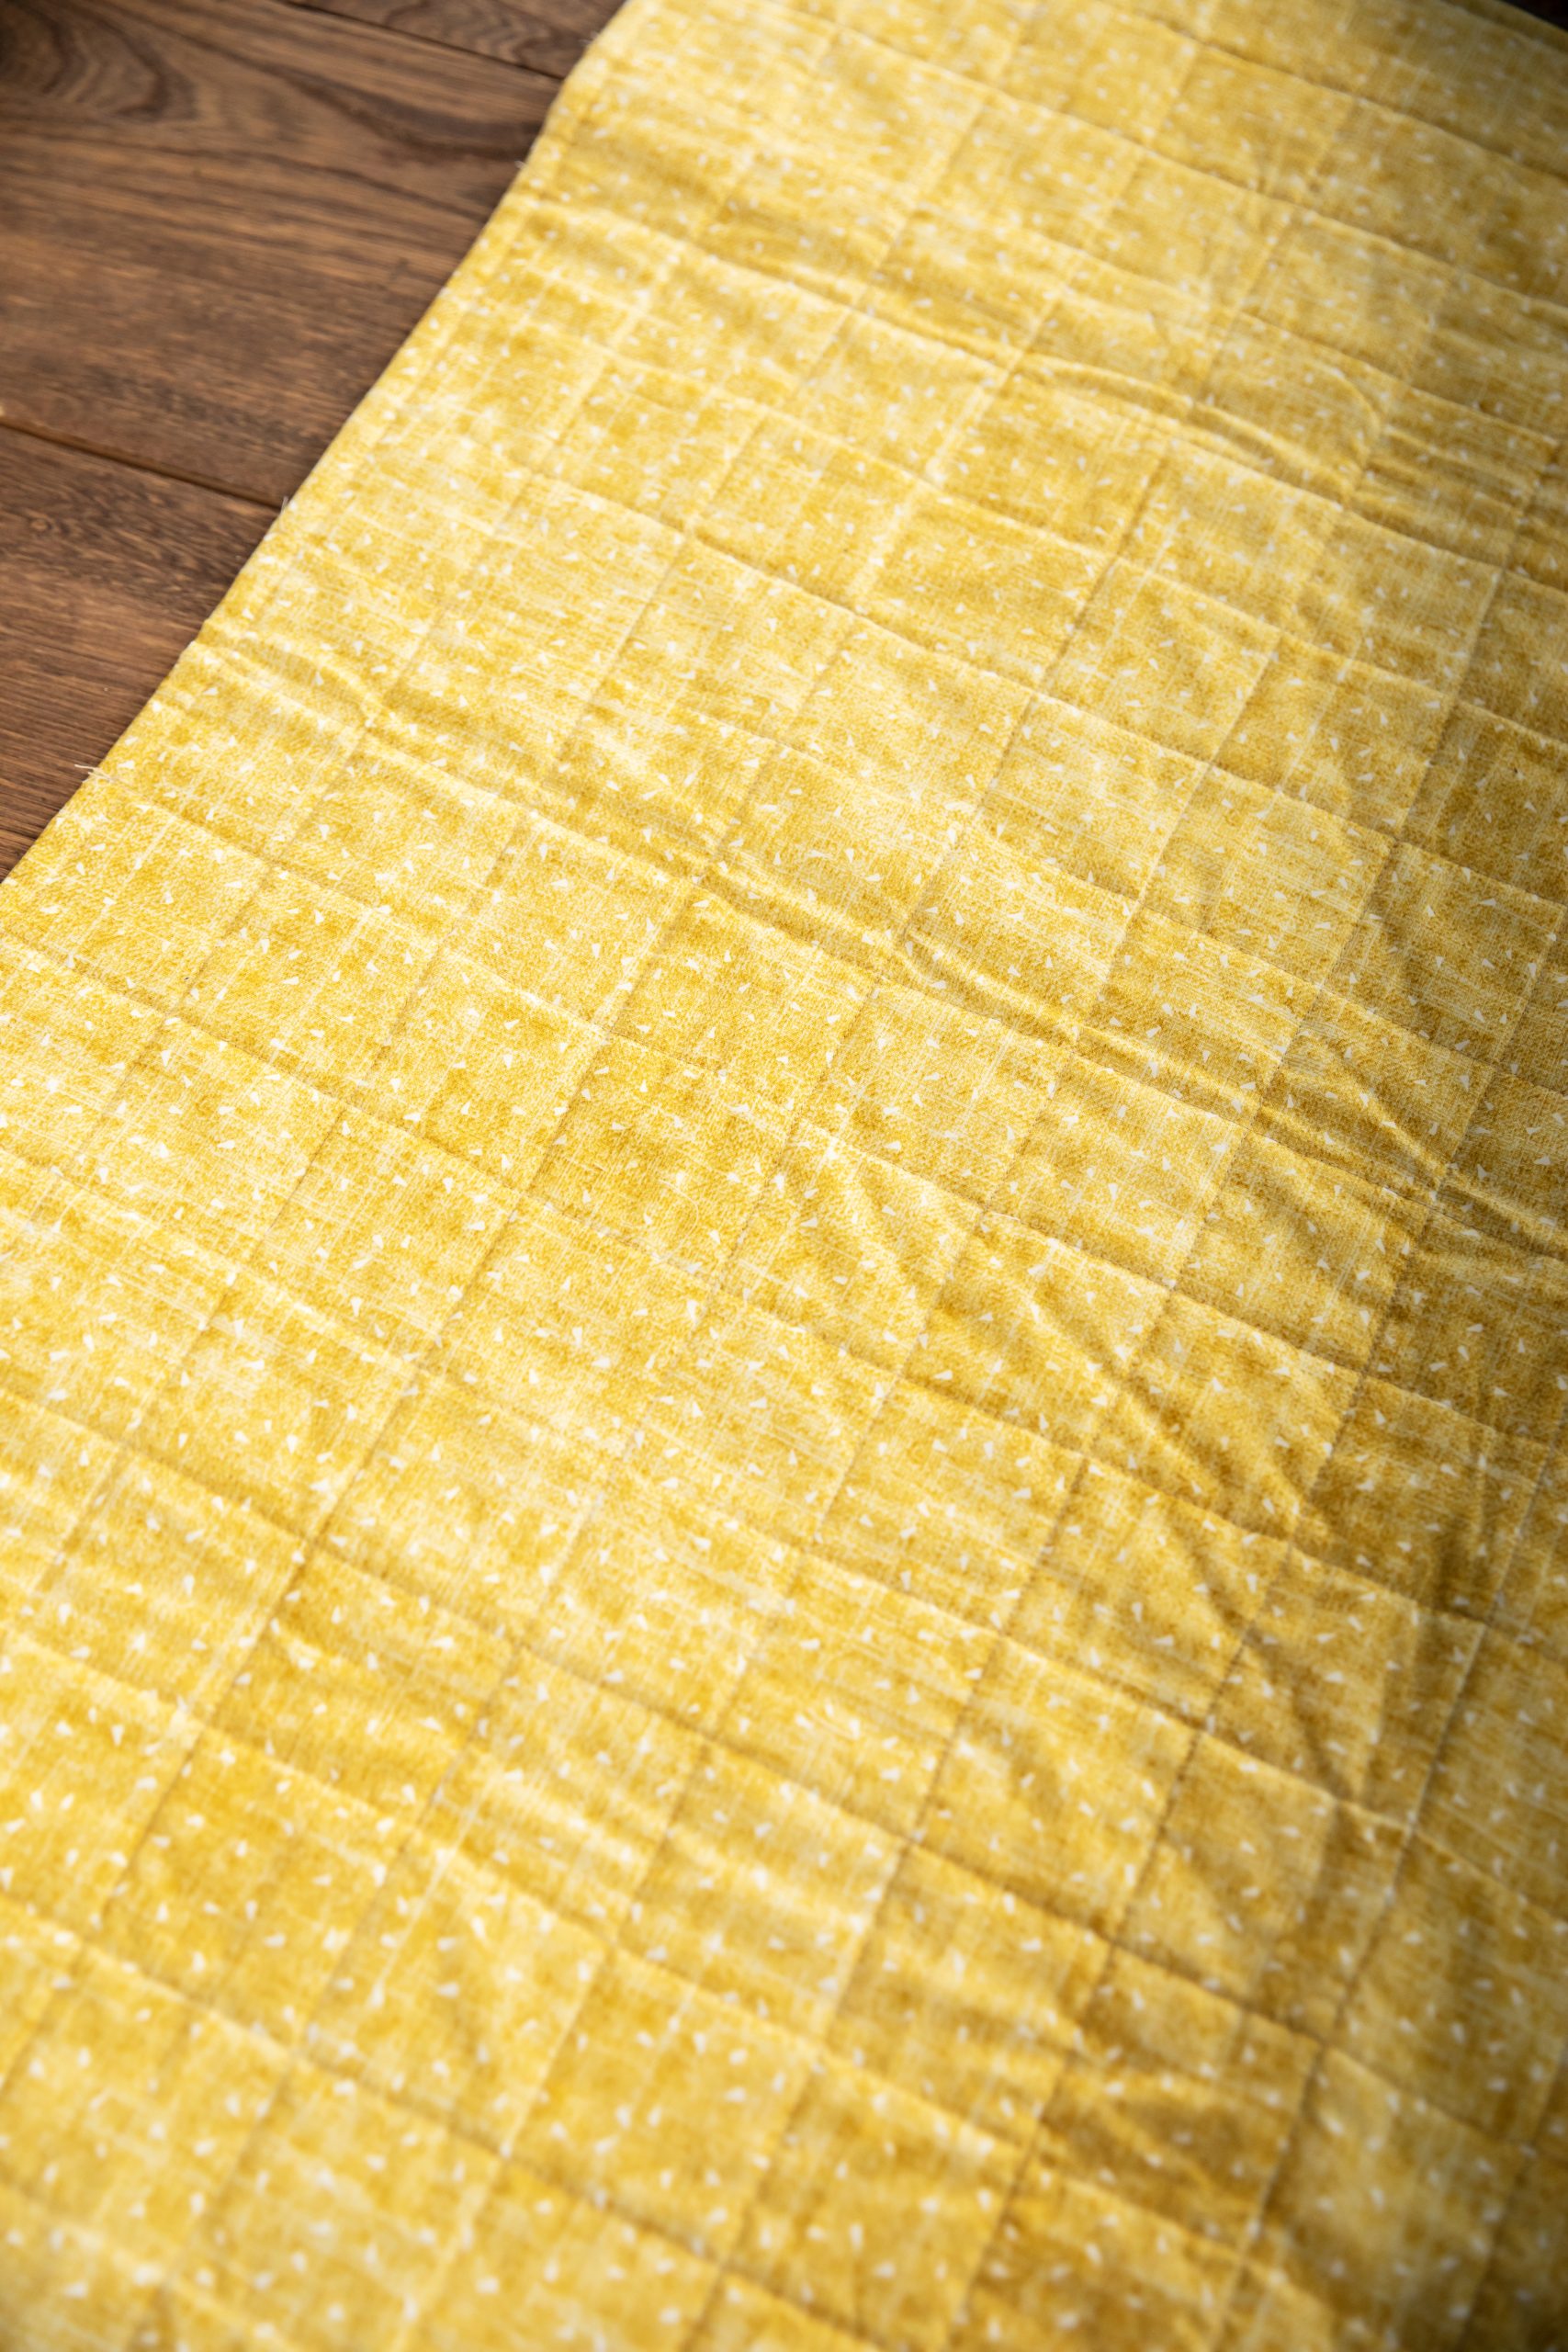
- Backing and binding fabric (Stash Yellow by Figo Fabric)– 1 1/3 yard
- Batting material – 1 yard or 36-inch square piece
Special Tools:
- Rotary cutter
- Cutting mat
- Acrylic ruler
Cutting Instructions:
- Line up selvages and press all fabrics to remove any creasing or wrinkles.
- Neaten and trim up the cut edges along the WOF (Width of Fabric) with a rotary cutter, ruler and cutting mat as required to create an even edge.
- From the newly trimmed edge, use the cutting mat grid and acrylic ruler to cut:
- Daisy Body (cream):
- 16- 2 1/2 inch square
- 8- 2 1/2 by 4 1/2 inch rectangle
- 8- 2 1/2 inch by 12 1/2 inch rectangle
- 16- 3 inch squares
- 4- 3 1/2 inch squares
- Daisy Center and Diamond Points (yellow):
- 4- 4 1/2 inch squares
- 2- 5 1/2 inch squares
- Leaf (green):
- 4- 3 inch squares
- 4- 1 by 5 1/2-inch rectangles
- Background (pale blue):
- 8- 3 inch squares
- 8- 3 1/2 inch squares
- 16 – 2 1/2 inch squares
- 16 – 2 1/2 inch by 4 1/2 inch rectangles
- 8- 4 1/2 by 6 1/2 inch rectangles
- 2- 4 1/2 inch squares
- 3- 5 1/2 inch squares
- Daisy Body (cream):
Piecing Instructions:
MAKE THE FOUR-AT-A-TIME FLYING GEESE PETAL AND POINT UNITS:
Diamond Point Geese:
- Place the 5 1/2 inch yellow square right side up on the work surface and lay two 3 inch background squares RST in opposite corners.
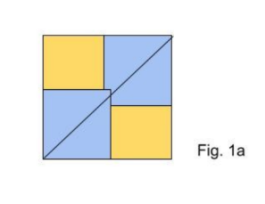
- Using a clear ruler and a pen, draw a diagonal line from corner to corner across both background blocks. See Fig. 1a.
- Sew down both sides of the drawn diagonal line using a scant 1/4 seam.
- Cut the unit apart along the drawn line and press all small triangles open and flat. See Fig. 1b.

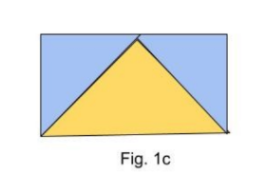
- Place another 3-inch background square in the yellow corner and draw a diagonal line through the center. See Fig. 1b. Repeat for the other unit.
- Again, sew along both sides of the drawn lines using a 1/4 inch seam allowance, then cut apart along the sewn line. Open and press the geese units flat. See Fig. 1c.
- Trim to 2 1/2 by 4 1/2 inch rectangles if necessary. Repeat to make 8 Diamond Point Geese block units.
Petal Geese:
- Repeat the steps above but make sure to replace the 5 1/2 square with the background (pale blue) fabric. Replace the 3 inch squares with the Daisy Petal (cream) fabric, making the inverse petal flying geese units.
- One inverse petal flying geese unit will be left over and replaced with the stem inset block below. Make 3 sets of 4 and use the remaining inverse petal flying geese unit to complete the 4th daisy block.
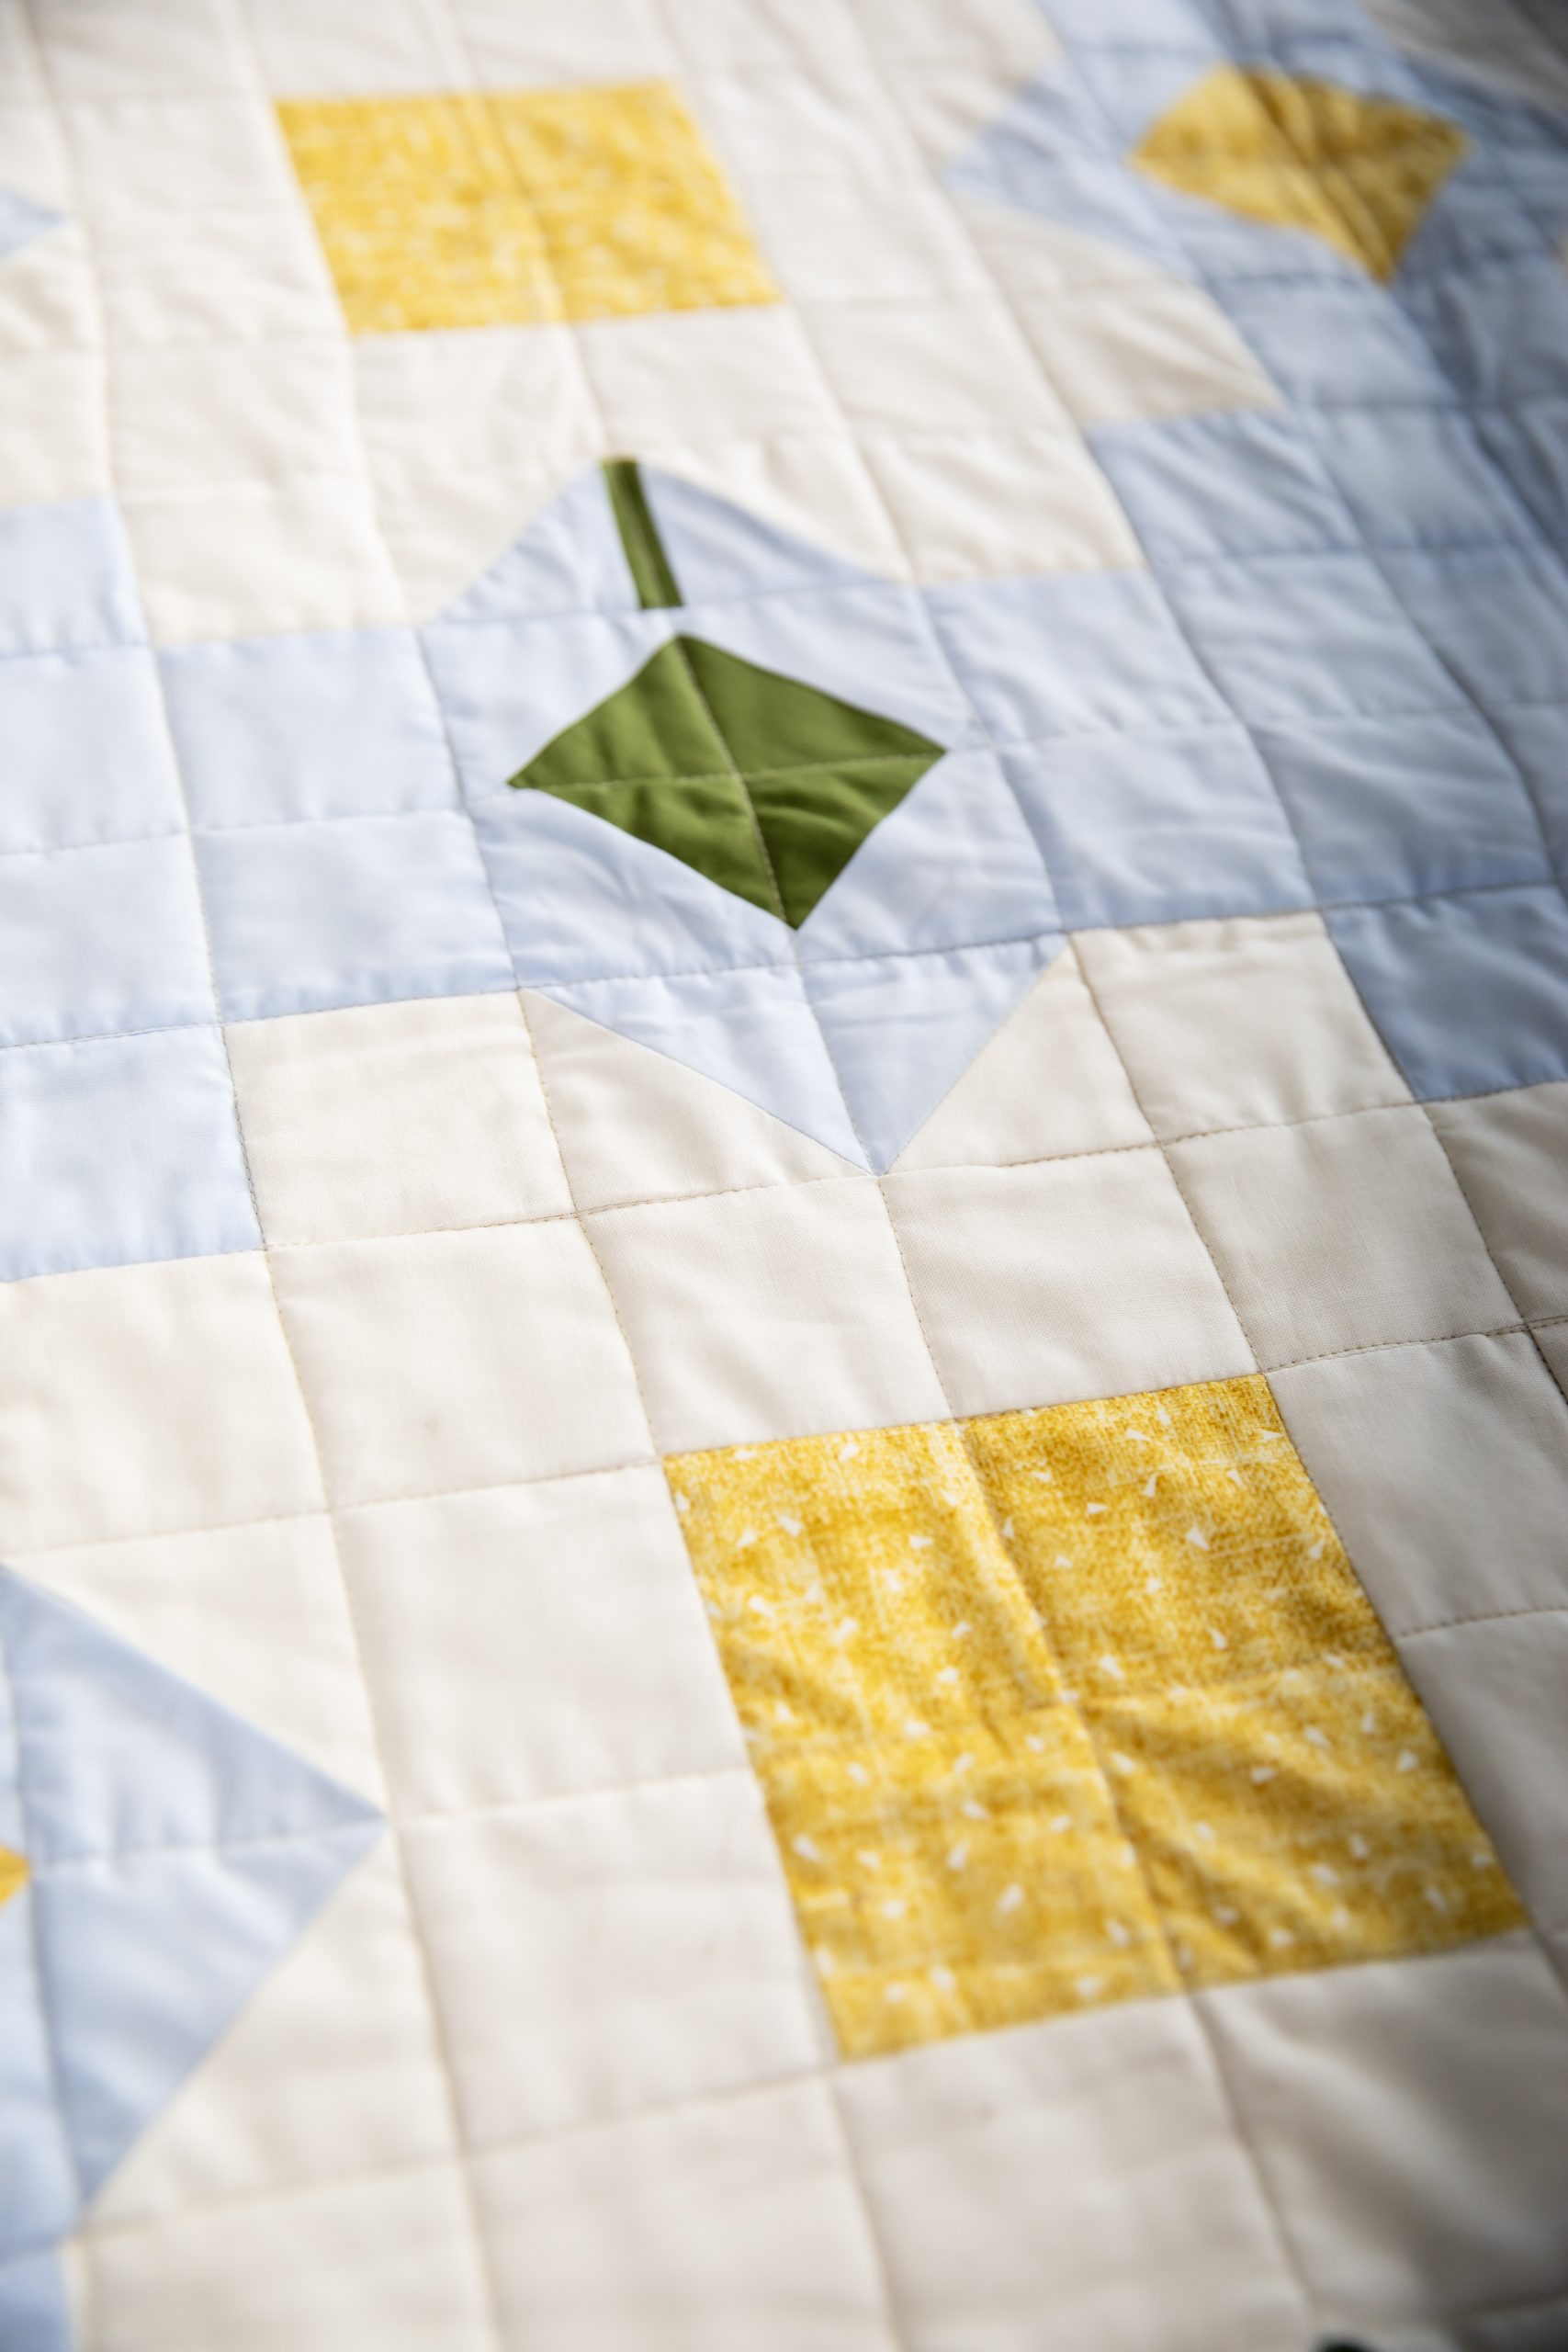
MAKING THE STEM INSET BLOCK UNITS:
- Cut one of the 3 1/2 inch blue background squares on the diagonal from corner to corner to make two triangles.
- Center the point of one of the half triangles along the long edge of the 1 by 5 1/2 inch leaf rectangle and sew in place. See Fig 2a. Press open.
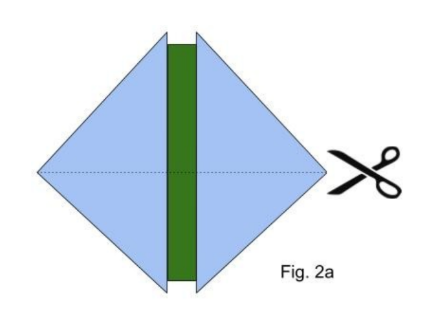
- Line up another background half triangle on the opposite side of the leaf strip and sew to attach. Press open.
- Cut one 3 1/2 inch cream petal fabric square on the diagonal as in Step 1.
- Place the longest edge of one of the petal triangles on the edge of the background triangle’s longest edge and sew together using a 1/4 inch seam. Triangle ends will overhang the stem inset. See Fig. 2b.

- Repeat for the opposite side of the stem inset block.
- Working from the center line of the stem inset, trim the block to 2 1/2 by 4 1/2 inches, making sure to leave a 1/4 inch seam allowance at the top of the stem inset.
- Repeat to create 4 Stem Inset Blocks.
MAKING THE LEAF INSET BLOCK UNITS:
- Cut two of the 3 1/2 inch blue background squares on the diagonal from corner to corner to make two triangles. See Fig. 3a.
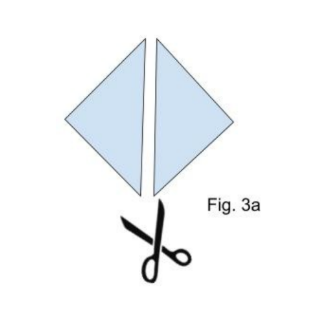
- Working from opposite sides, place one of the long triangle background edges on the 3 inch leaf square. Pin and sew. See Fig. 3b.
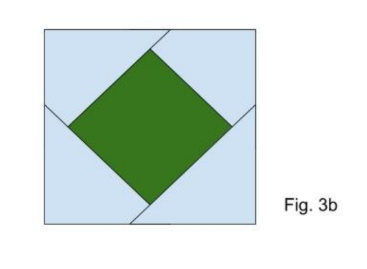
- Rotate to the opposite edge and repeat the process with an additional blue background square until all four sides of the 3 inch green leaf square have a background triangle attached. Press open and flat. Square up the Leaf Inset Block to 4 1/2 inches if necessary.
- Repeat the above steps to make four complete blocks.
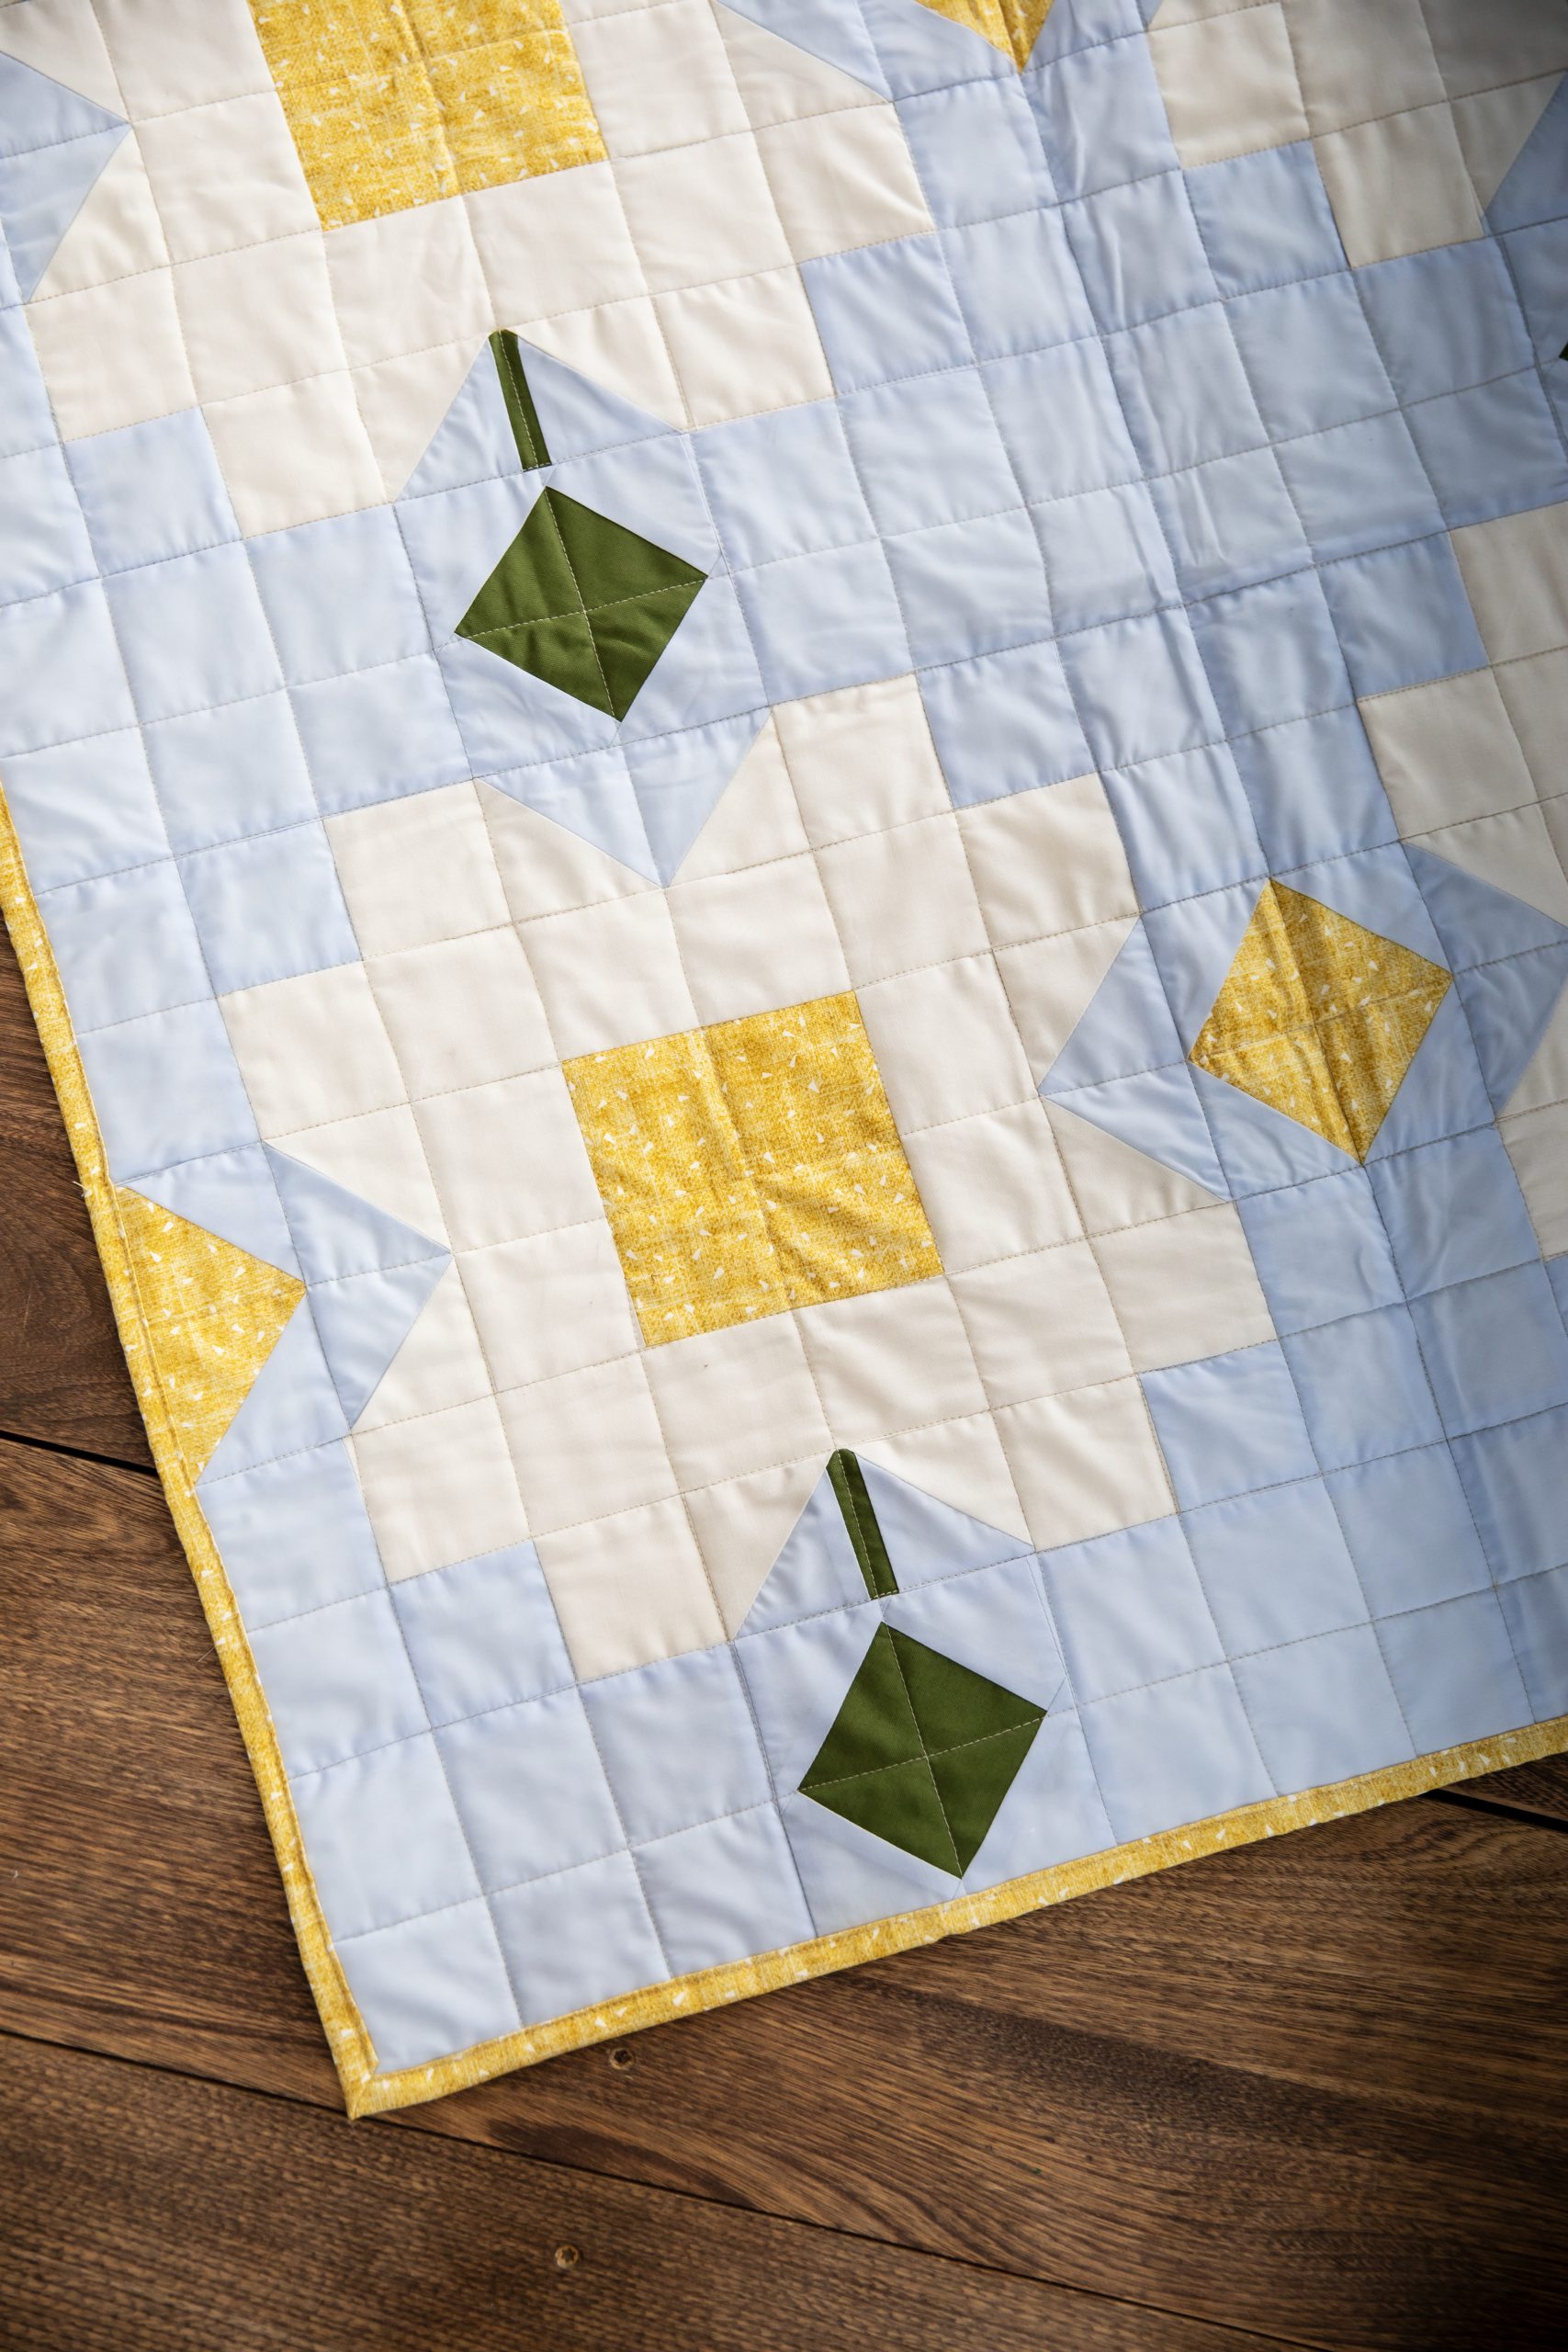
DAISY BLOCK PIECING INSTRUCTIONS:
- Begin by sewing together the center row RST, as shown in Figure 4a.
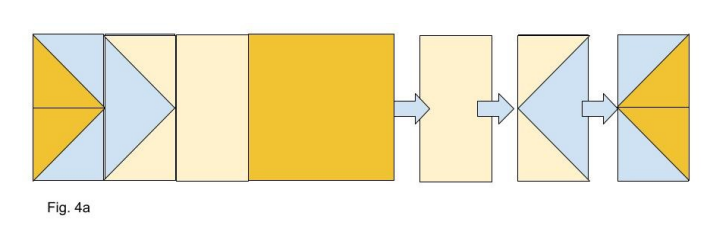
- Place the 2 1/2 by 4 1/2 inch petal geese units on either side of the center 4 1/2 inch yellow square and sew together using a 1/4 seam.
- Place the inverted petal flying geese on either end of the joined Daisy center row, flat petal edges touching, and sew using a scant 1/4 inch seam. Press all row seams open. Fig. 4a.
- Add the diamond accent strips to the left and right sides of the Daisy block unit, using the seams to align the rows. Pin in place and sew. Open the rows and press flat. Fig. 4a.
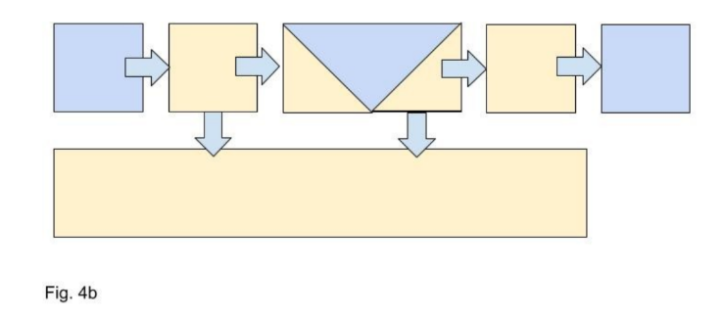
- Create the top and bottom Daisy petal rows by adding a 2 1/2 inch square of background to 2 1/2 inch square of daisy fabric as shown in Figure 4b. Make 4 units.
- Add the 2 1/2 inch square units to either end of the remaining inverted petal flying geese and geese with stem insert blocks. Press all seams open. Figure 4b.
- Add the 2 1/2 inch by 12 1/2 inch rectangles to the top and bottom of the Daisy petal rows as shown in Figure 4b and 4c.
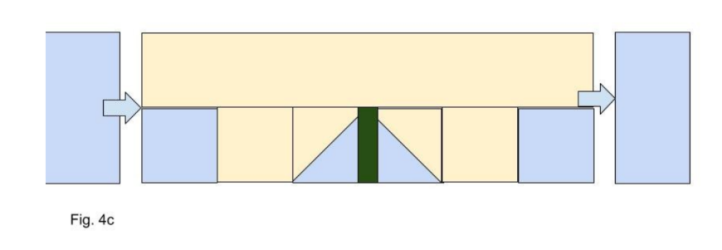
- Lay the Daisy petal rows RST to the top and bottom of the Daisy center row using the center row seams to center and align the petal rows. Sew together and press open. Fig. 4b and 4c.
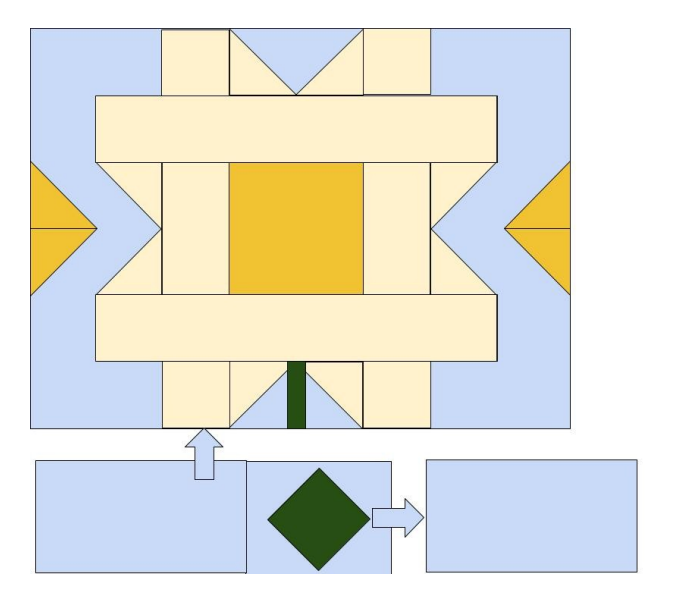
- Place the Daisy leaf block RST with one 4 1/2 by 6 1/2 inch blue background rectangle and sew together. Repeat for the opposite side. Figure 4d.
- Finally, add the Leaf accent strip across the bottom of the Daisy block unit, using the center point of the leaf and center point of the stem to align the row. Pin in place a sew. Open the row and press the entire block flat. Figure 4d.
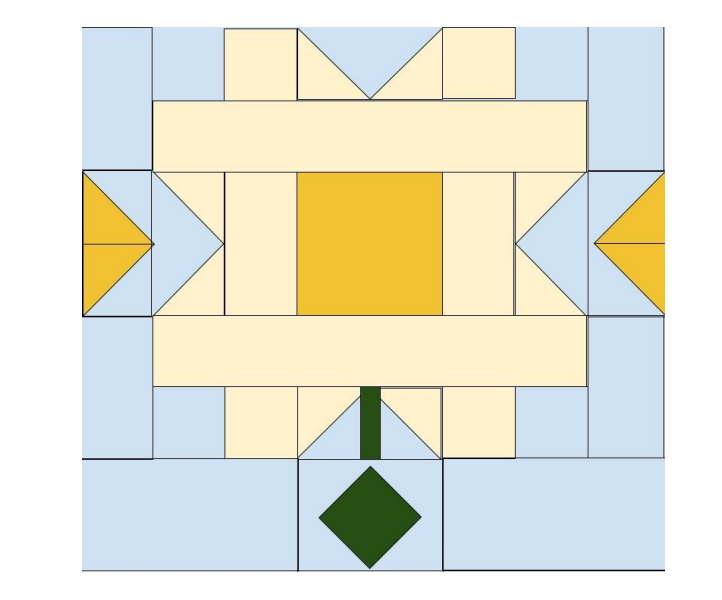
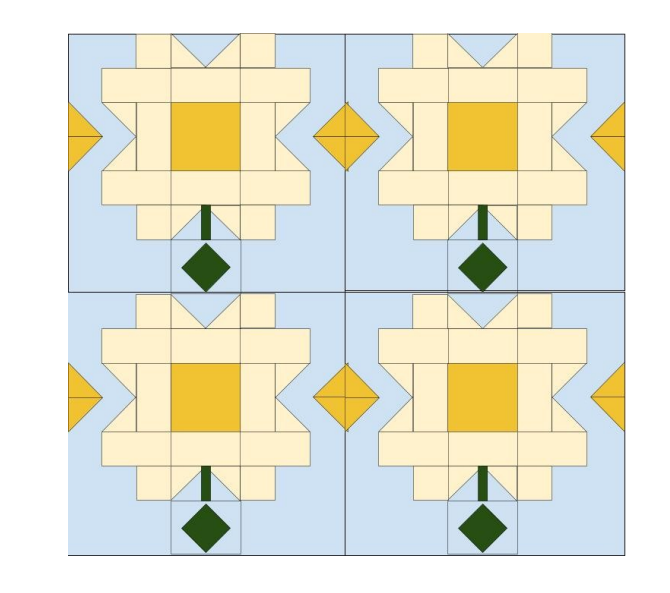
- Attach all rows together as shown in Figure 5.
- Repeat for the remaining 4 Daisy block units. Trim and square up each daisy block unit to 16 inches square.
- Join the four Daisy Quilt Blocks into a two-by-two grid and attach with a 1/4 inch seam as shown in Figure 6. Press all seams flat.
QUILTING AND FINISHING:
- Cut a strip of batting and backing approximately 2-3” wider and longer on all sides than your finished quilt top.
- Assemble the quilt sandwich for the quilt by laying out the backing (right side down), batting in the center and quilt on top, right side up. Baste and quilt as desired and trim edges. The sample quilt has been quilted in a straight line pattern following the seam lines of the piecing.
- Prepare the binding by cutting 2 1/2” by WOF strips of fabric and attaching all strips together on the diagonal. Press strips wrong sides together in half lengthwise along the entire length of the binding to complete.
- Attach binding to the quilt sandwich by lining up all raw edges and mitering the corners as you go.
- To miter corners, sew into the corner stopping a 1/4 in from the end, backstitch, and remove the quilt from the sewing machine.
- With the quilt laying flat, fold the binding up and away from the quilt, making the binding straight with the unsewn side. Fig. 7
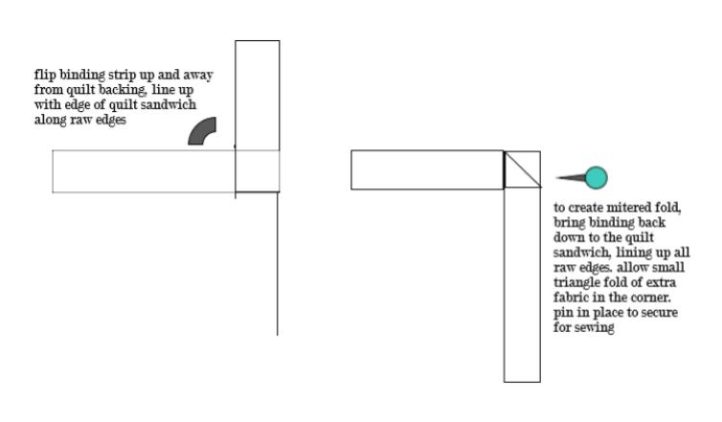
- Fold the binding down to the sewn side, leaving a diagonal fold on the underside of the binding and pin fold in place. Fig. 7
- Place the quilt back into the sewing machine and sew down the fold and continue on sewing the binding.
- Make a miter at each corner, adjusting the amount of fold as necessary.
- Join the ends of the binding together where they meet and attach to the quilt sandwich.
- Press and fold the binding over to the opposite side of the quilt to finish. Tuck the mitered corner flat, pinning it into place as necessary.
- Finish the binding with your preferred method, either by hand stitching in place or by machine stitching.