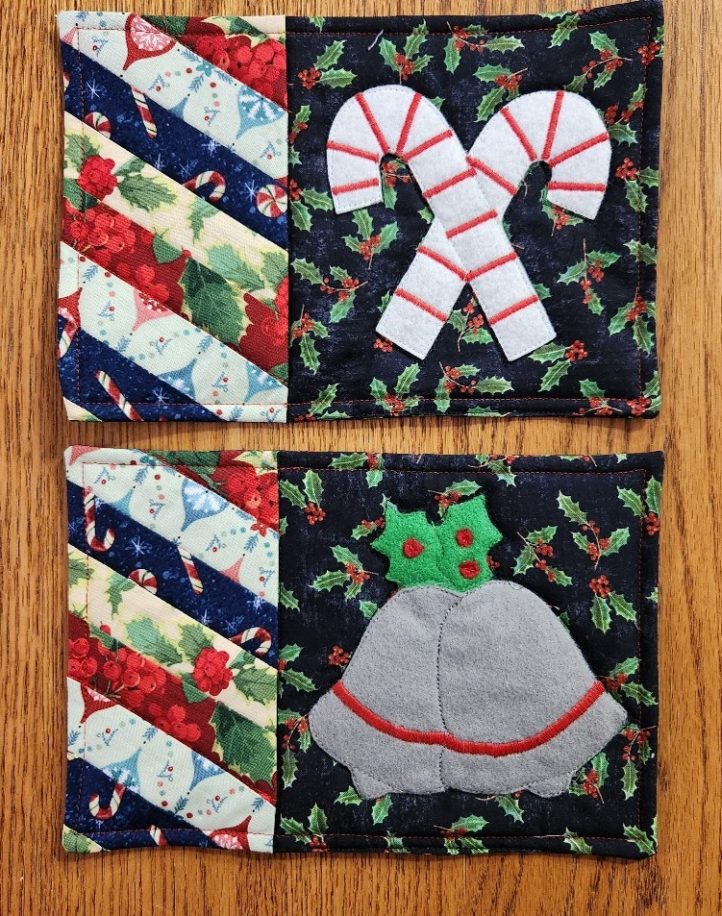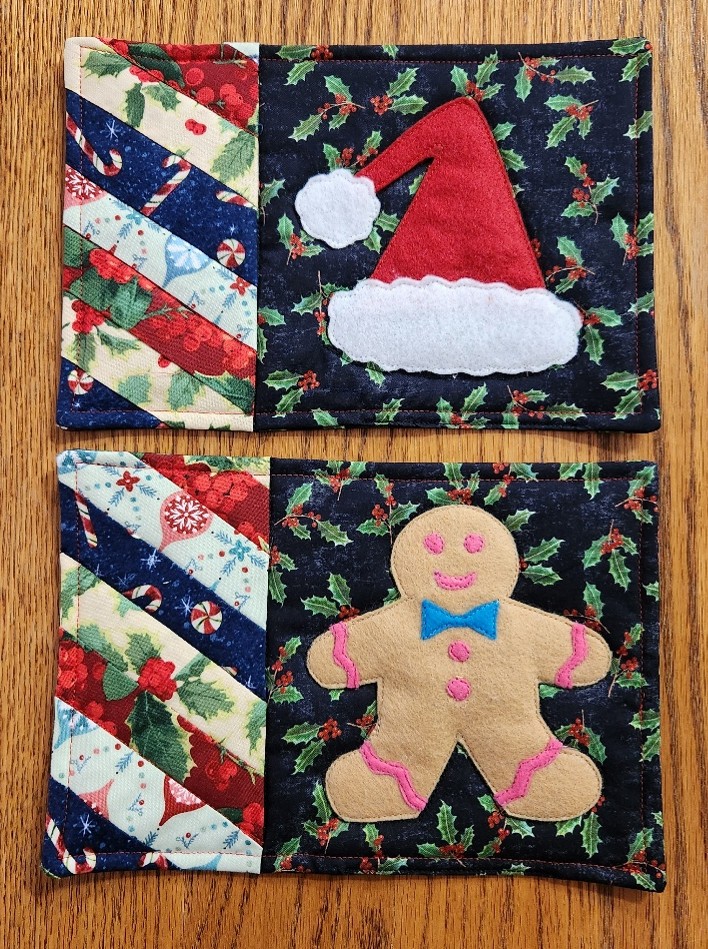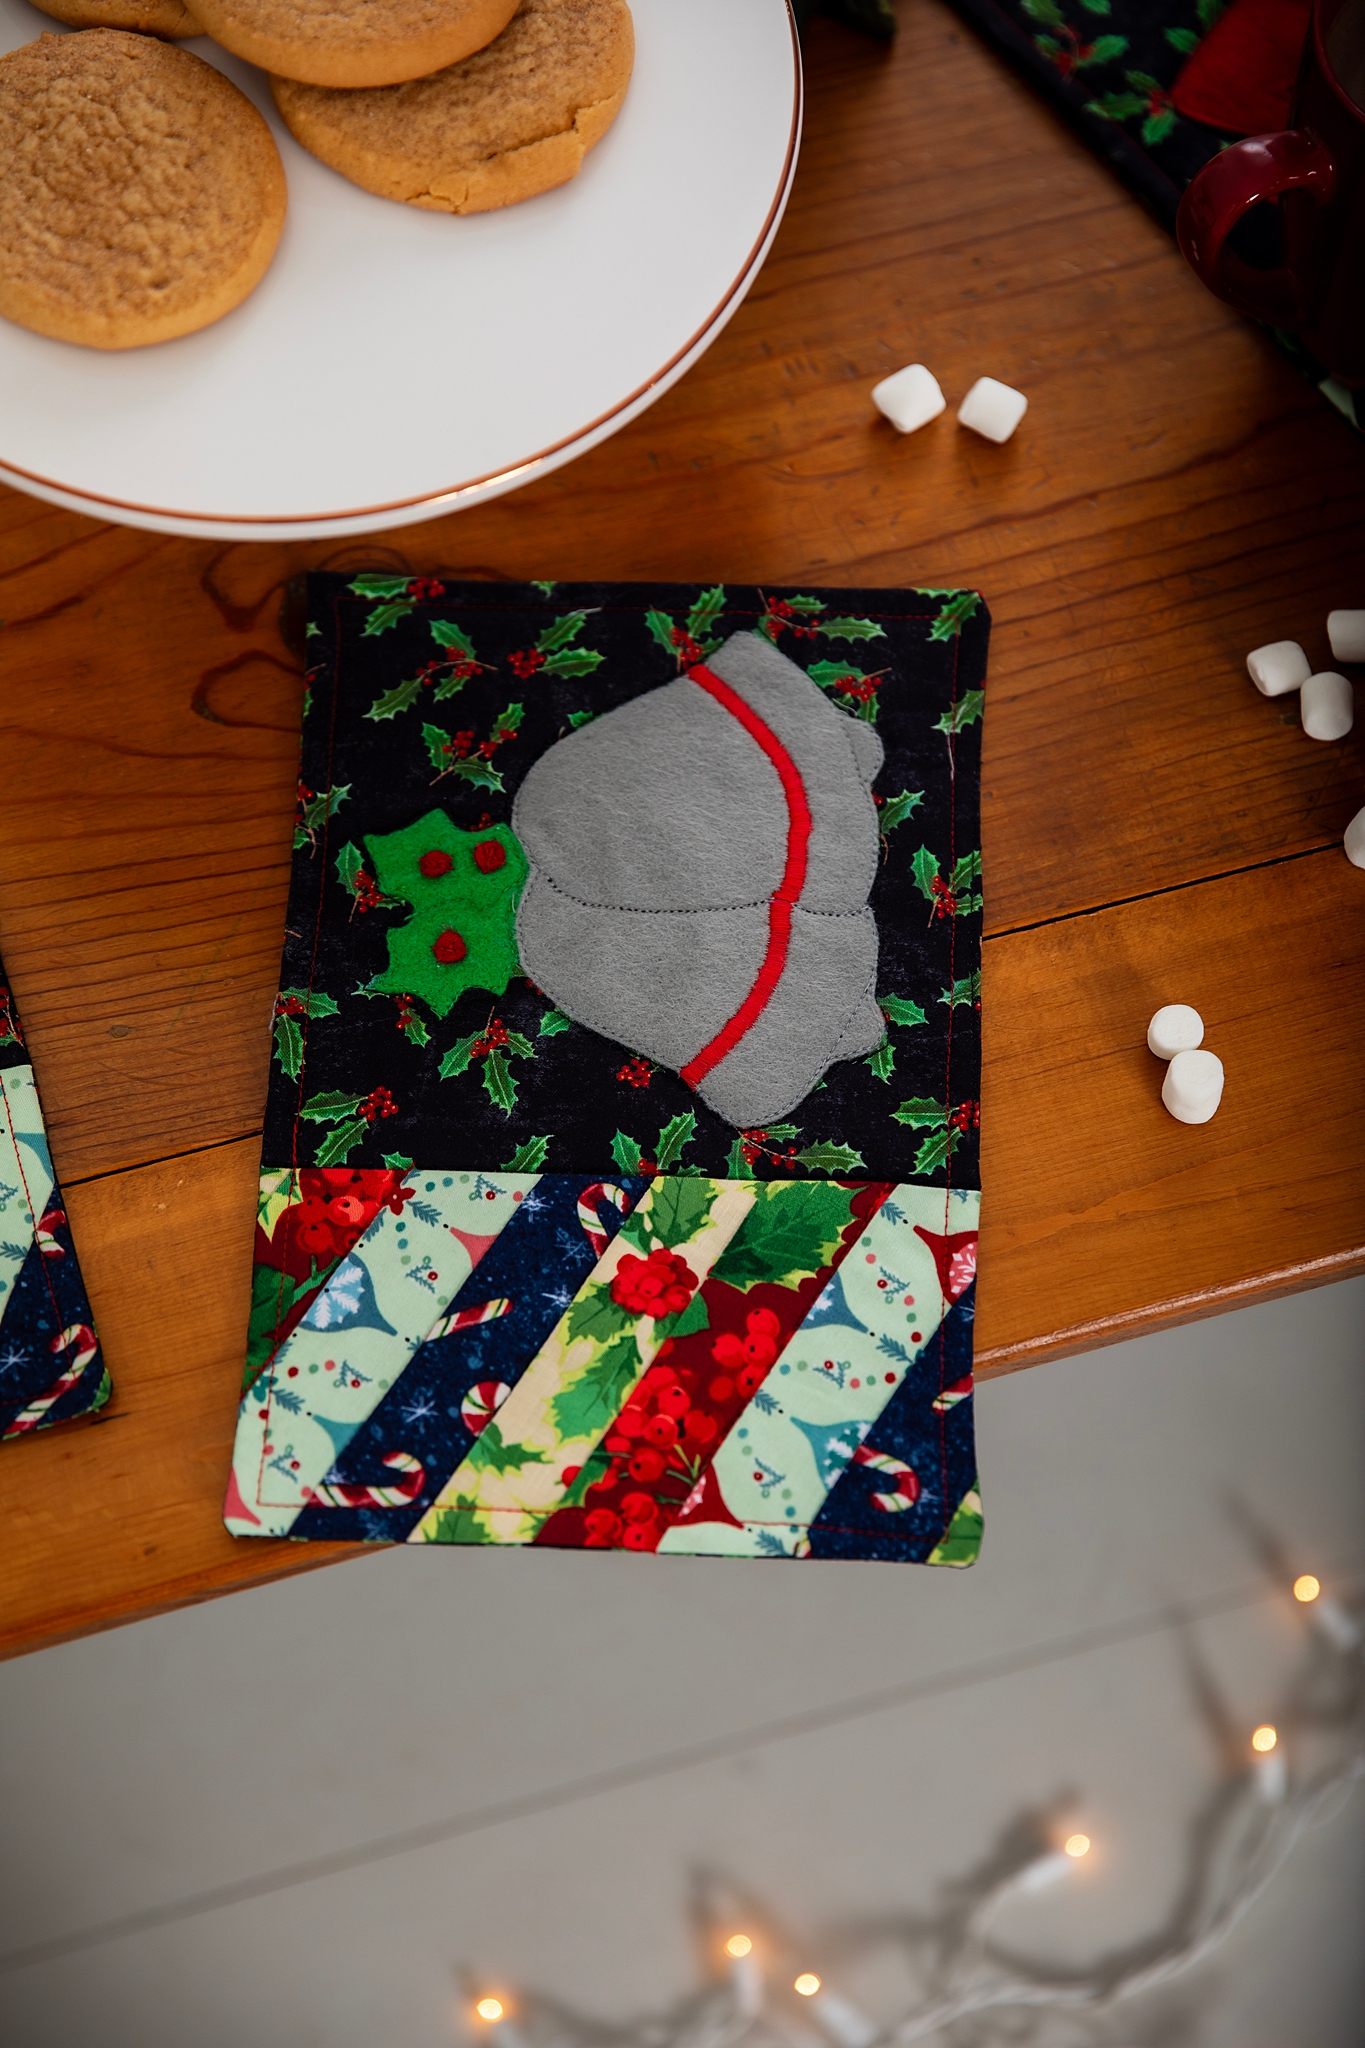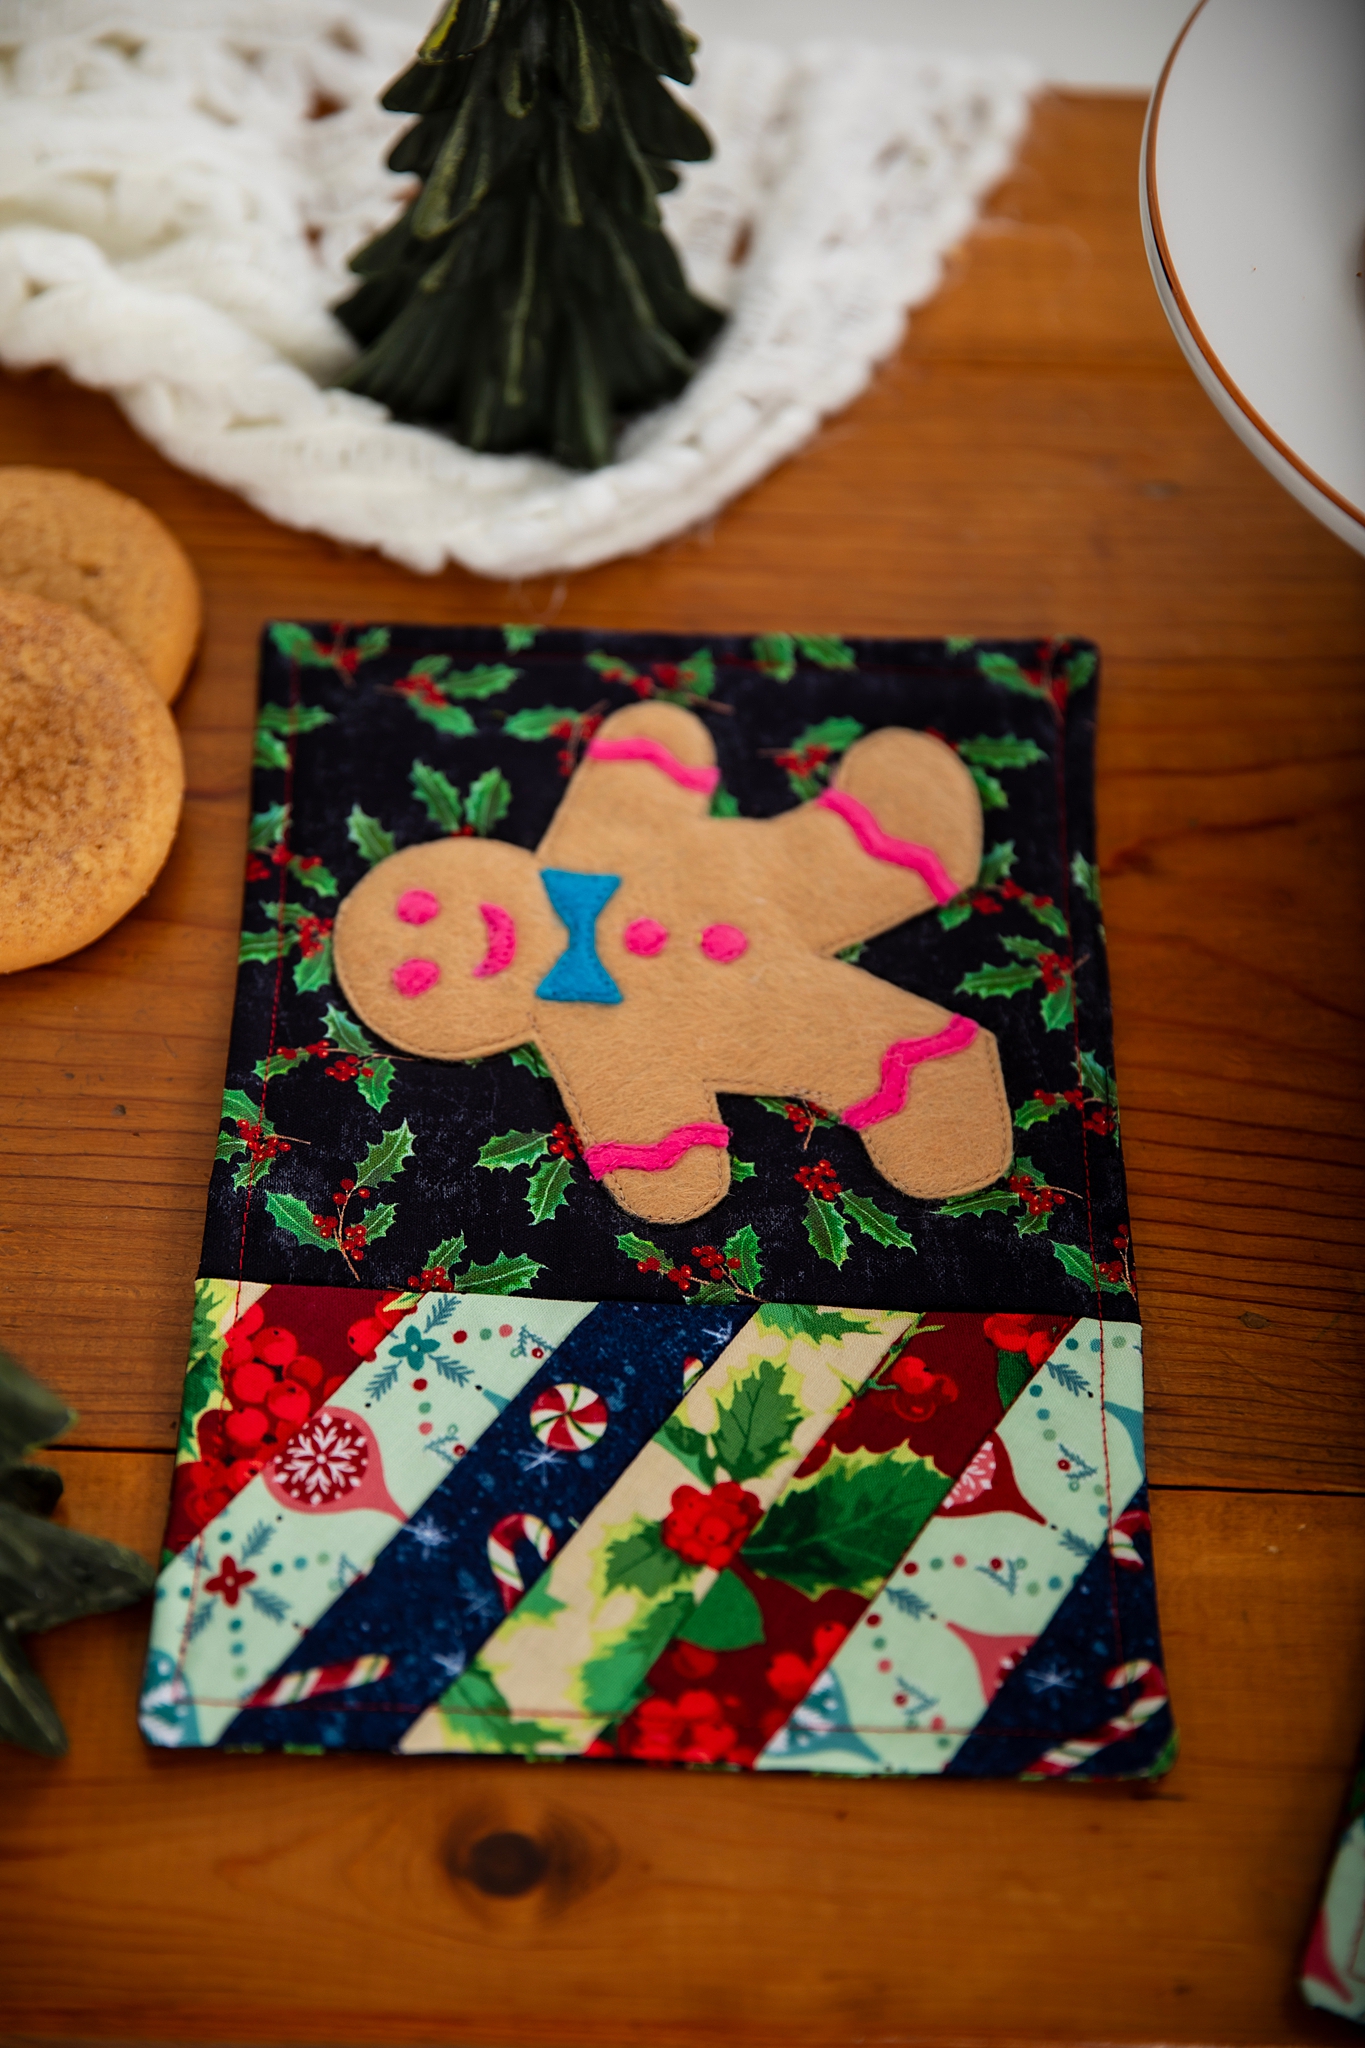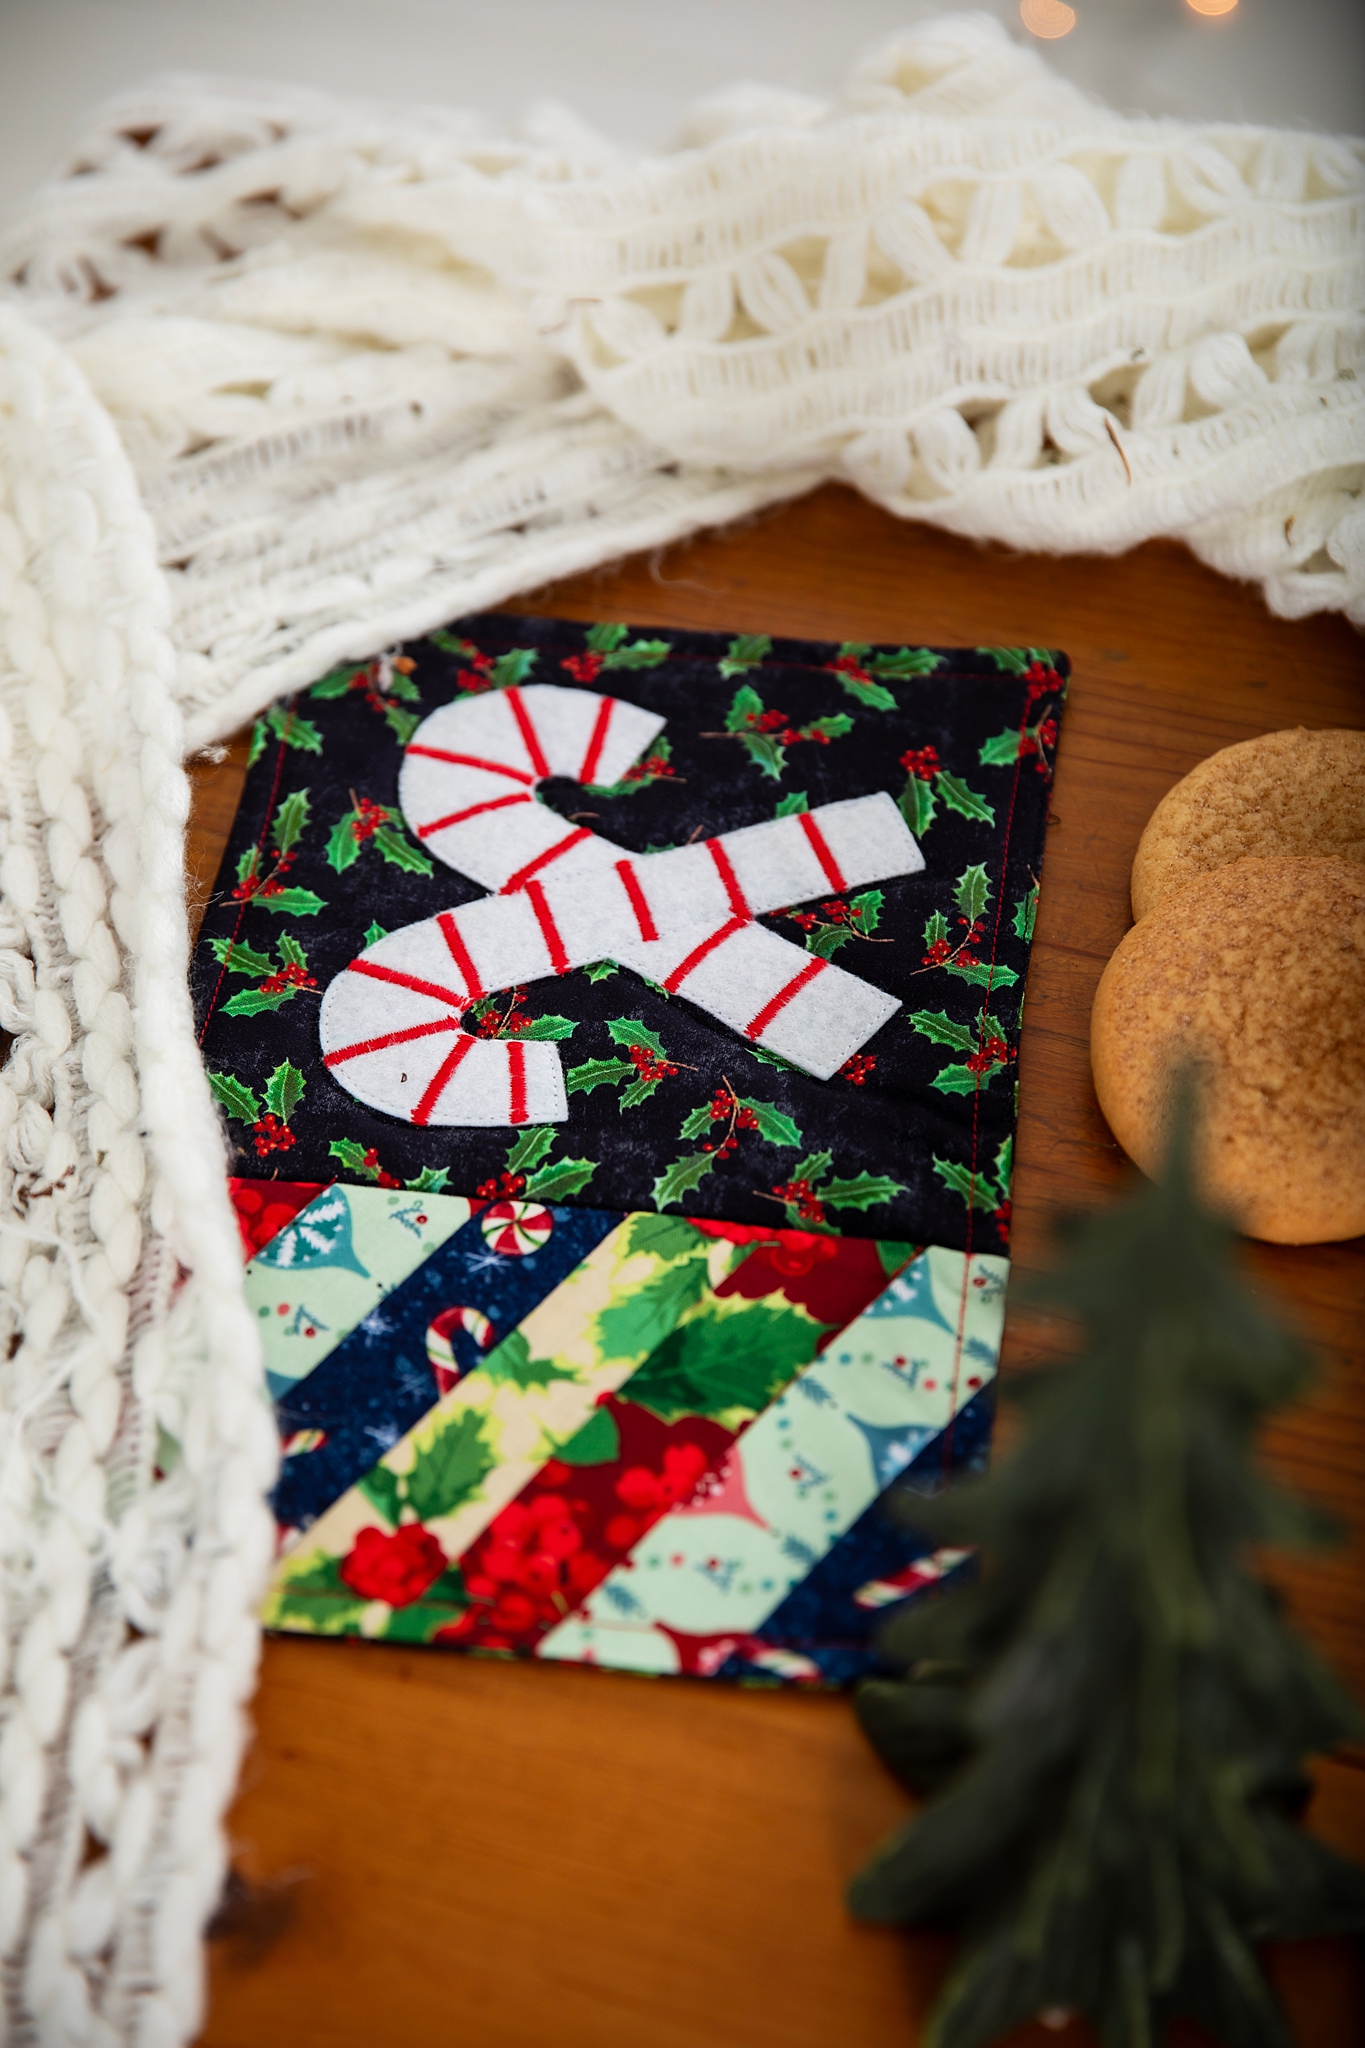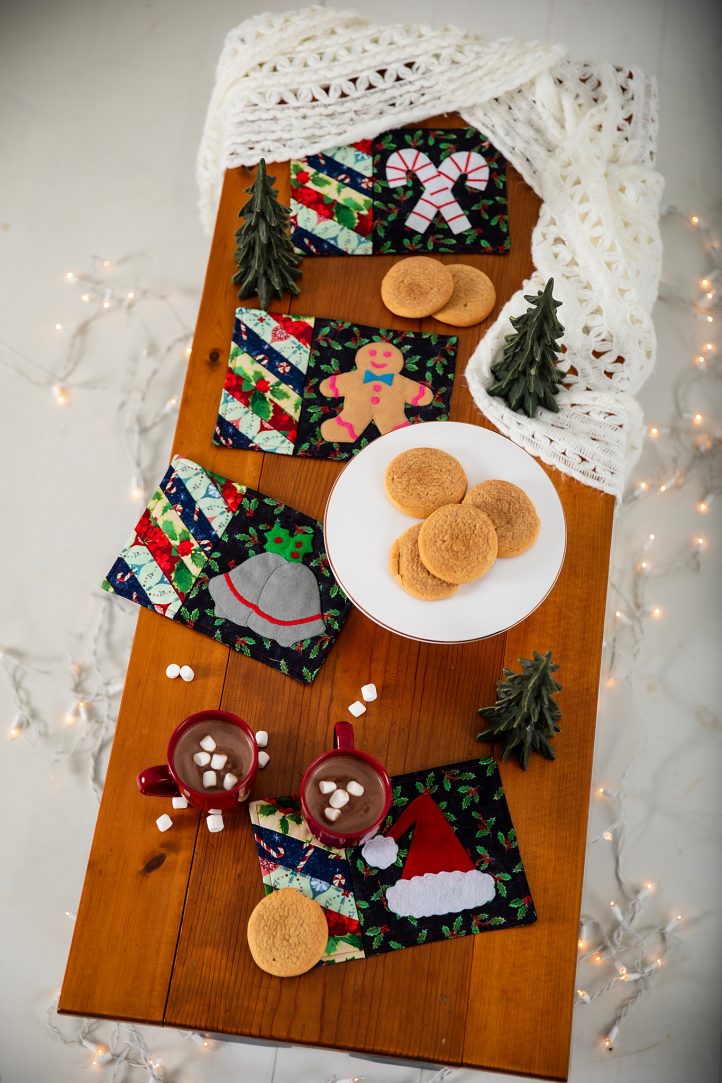
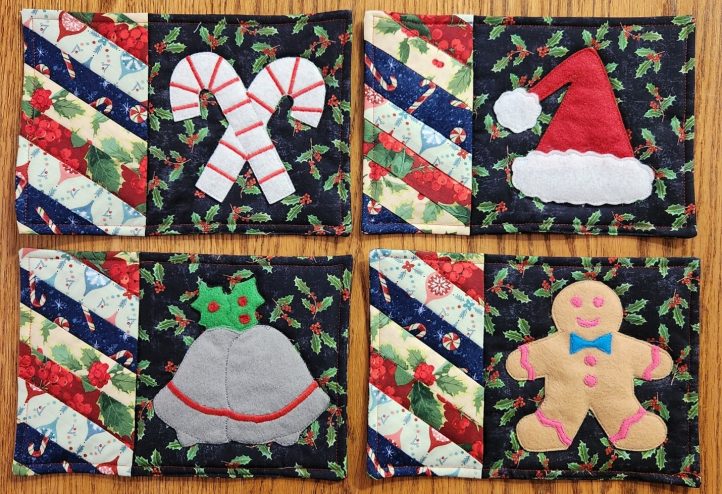
Settle in on chilly winter nights with a mug of hot cocoa, your favorite comfort show and these cheerful holiday mug rugs. These designs from Sujata Ryan will be the first thing you make for Christmas this year, with festive designs including candy canes, silver bells and Santa’s hat. Combine raw edge appliqué and strip piecing to create these mug rug patterns, finishing them using the pillowcase method.
Skill Level: Confident beginner or intermediate
Finished Dimensions: Each mug rug measures approximately 7 in. x 10 in.
Materials:
- Fabrics:
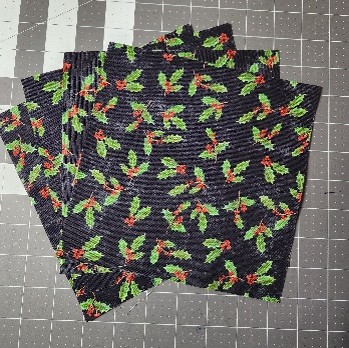
- 1/2 yard main mug rug fabric, a holiday print for the body of the mug rug top and backing (width of fabric must be at least 42 inches or purchase an extra 1/4 yard).
- 1/4 yard or 1 fat-quarter each of 4 holiday prints for side stripes
- 4 pieces of batting, each 7-1/2 inches x 10-1/2 inches
- Felt squares in these colors: Red, white, gray, beige
- Felt scraps (or squares) in these colors: Hot pink, turquoise, leaf green
- Water soluble marking pen
- Optional cardstock for holiday mug rug applique templates
- Optional fabric markers for embellishing the appliques
- Optional double adhesive fusible web for appliqueing (example, Lite Steam a Seam 2)
- Optional fabric glue
- PDF Templates – These are located at the bottom of this page. See printing instructions below.
PRINTING INSTRUCTIONS:
To download the PDF templates, click on the download button at the bottom of the page. We recommend opening your download using Adobe Acrobat.
Piecing Instructions:
- Cutting the pieces – From the main mug rug fabric, cut:
- 4 pieces 7-1/2 in. x 7 in.
- 4 pieces 7-1/2 in. x 11 in.
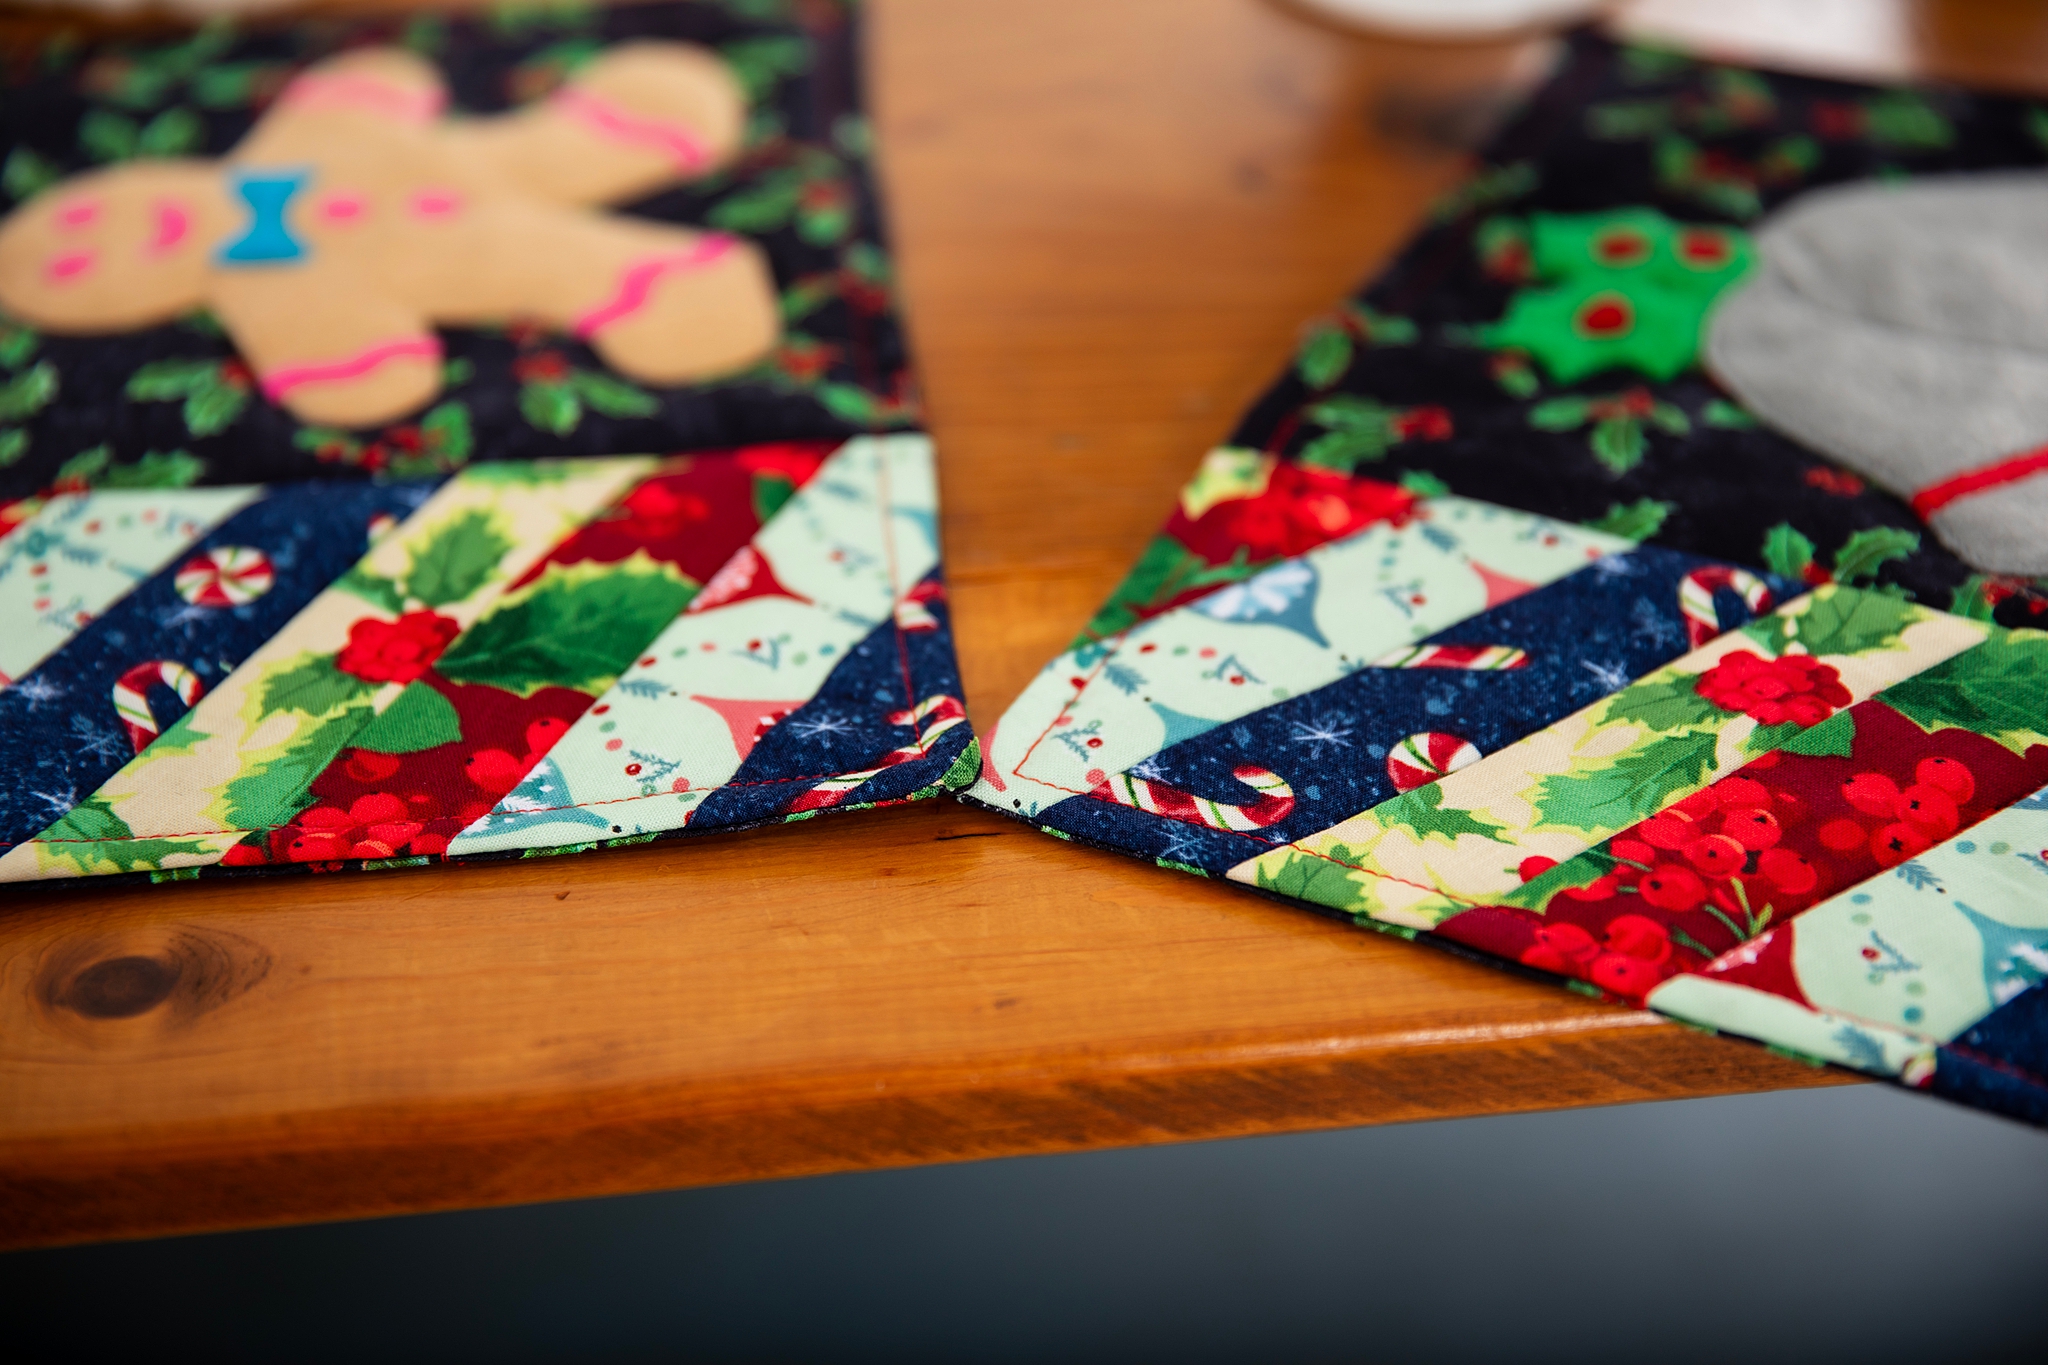
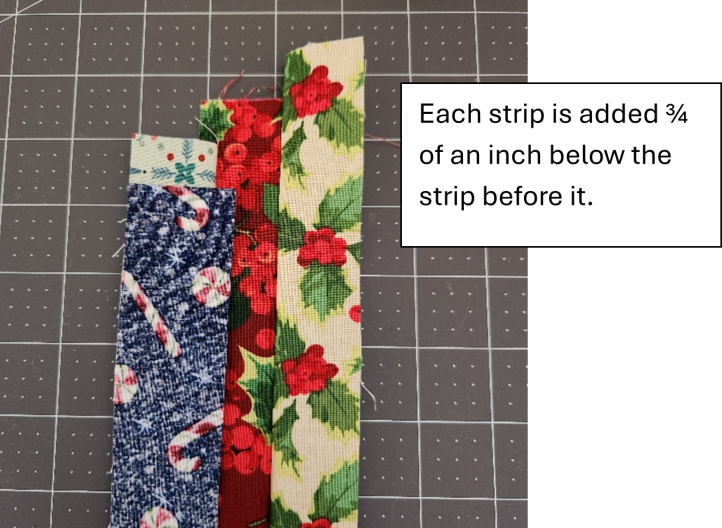
- Cut the other holiday prints into strips measuring 1-1/2 in. x width of fabric.
- For the strip-pieced section: Sew the holiday print strips right sides together, starting each strip 3/4 of an inch below the strip before it, using a 1/4 in. seam allowance. Press all the strips in one direction.
- Trim the edges even along one edge.
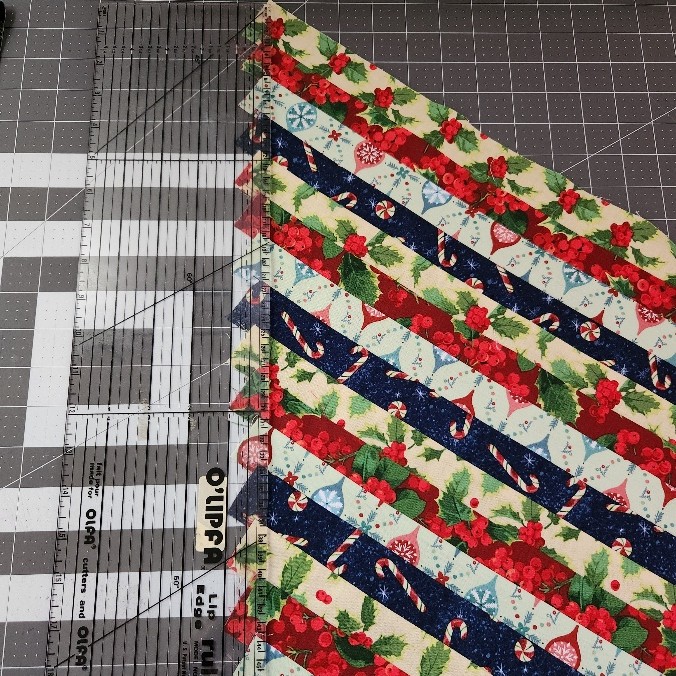
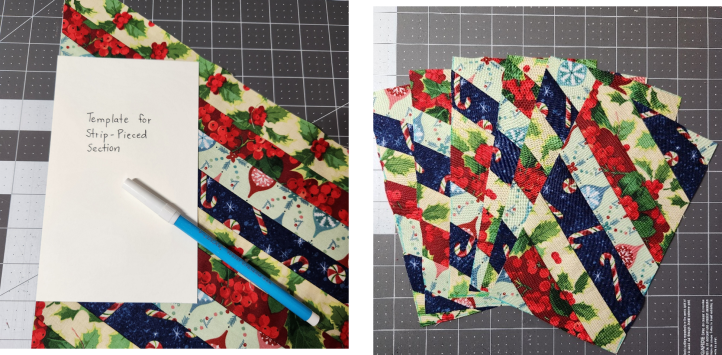
- Cut 4 rectangles each measuring 7-1/2 in. x 4 in from the pieced strips. Making a paper template of this size and tracing it can be helpful.
- Trim the edges even along one edge.
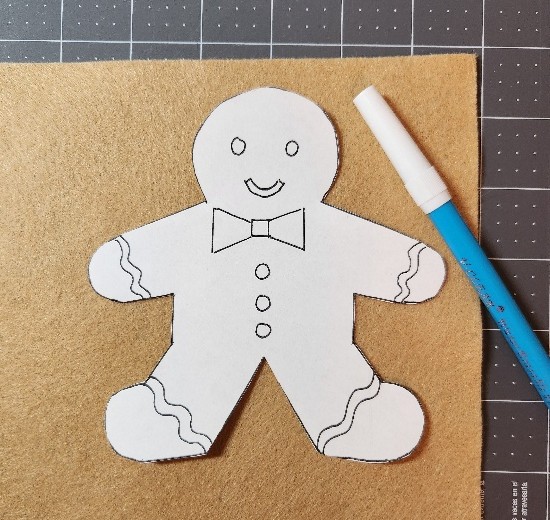
- Print the PDF templates. Cut out the paper applique template pieces.
- If making just one set of mug rugs, the paper templates can be traced on felt.
- If making multiple mug rugs as gifts, it is helpful to glue or trace the template on cardstock for durability.
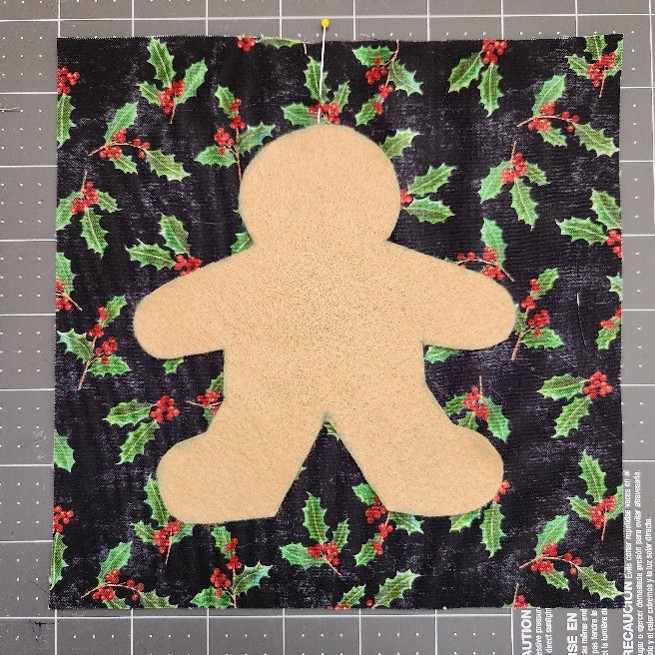
- Applique the main motif on each mug rug. Place each main mug rug section so the 7 inch side is on the bottom and the 7-1/2 inch side is vertical. Measure in 3-1/2 inches from the side and mark this center point with a pin.
- The center of each applique will align with this pin marking.

- For each applique, choose one of the following methods to prepare and stitch the applique onto the main mug rug section.
- Method 1 – No fusible web, pin, and stitch applique in place.
- Trace the applique with a water soluble marker on the appropriate color felt as indicated on the applique template patterns.
- Cut out the applique with sharp scissors as smoothly as possible.
- Place the applique in the center of the mug rug, using the pin as a guide for placement. Use a ruler to check that the space above and below the applique is the same.
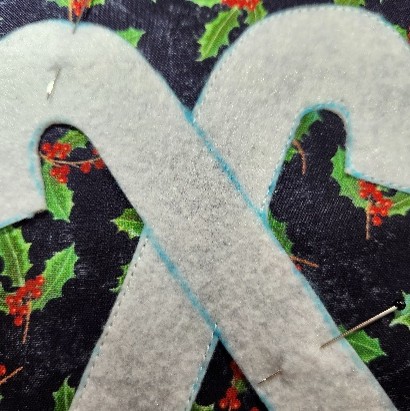
- Edge-stitch in place using matching thread and pivoting frequently around curves and at corners, stitching about 1/8 inch away from the edge of the applique. Each basic applique will be embellished later with details.
- Method 2 – Using fusible web, followed by edge-stitching.
- Follow the manufacturer’s instructions for tracing the template onto the fusible web paper backing (note that some templates may need to be reversed so when they are cut out, they are “right side out”).
- Cut out the appliques, remove the paper backing, and stick them into place. When satisfied with the placement, press using a steam iron, following the manufacturer’s directions.
- Stitch close to the applique edge, about 1/8 inch. from the edge, using matching thread.
- Method 1 – No fusible web, pin, and stitch applique in place.
- The center of each applique will align with this pin marking.
- Add details to the appliques.
- Gingerbread cookie – Use scraps of colorful felt to create the face and cookie details.
- Draw the items freehand on the felt using the water soluble marker and cut them out. Use the template as a guide for drawing.
- OR cut the eyes, mouth, bow-tie, buttons, and icing squiggles out from the paper pattern applique. Trace around each one on the felt and cut them out.
- Hot pink felt – Cut 2 eyes and 2 or 3 buttons, 1 smile, 2 arm icing squiggles, 2 leg icing squiggles.
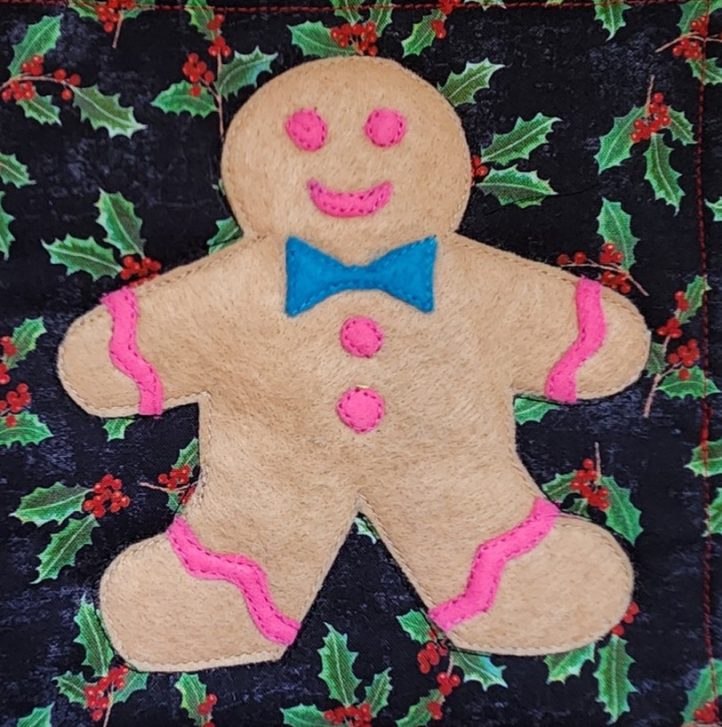
- Turquoise felt – Cut 1 bowtie.
- To attach the pieces, dab a small amount of fabric glue on the back of each piece, then press them into place on the Gingerbread cookie.
- Edge-stitch each piece using matching thread, or they may be left glued in place.
- OR the face and Gingerbread cookie details can be drawn on with fabric markers in colors of your choice.
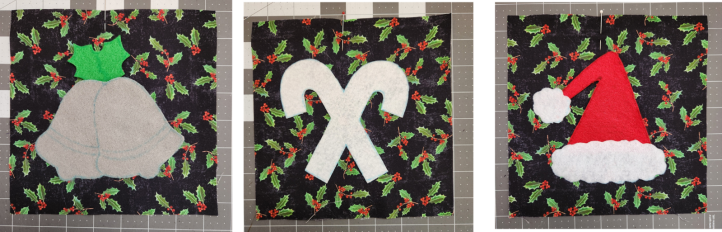
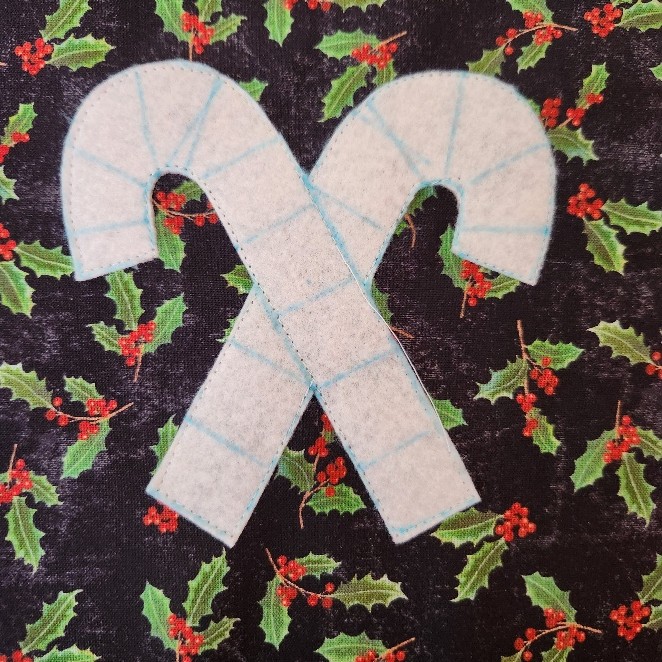
- Candy canes
- Mark the edges of one candy cane as shown, so it seems to overlap the other one.
- Mark straight lines across each candy cane for the red stripes.
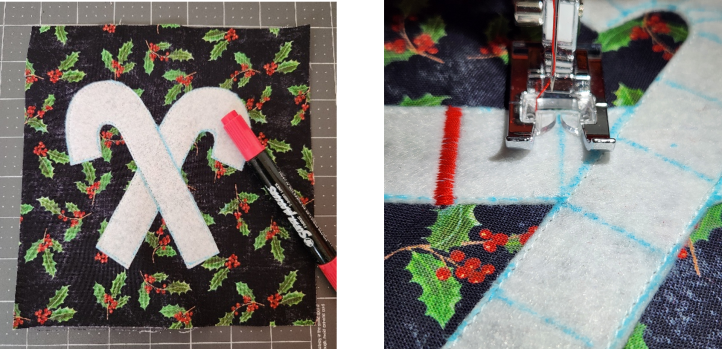
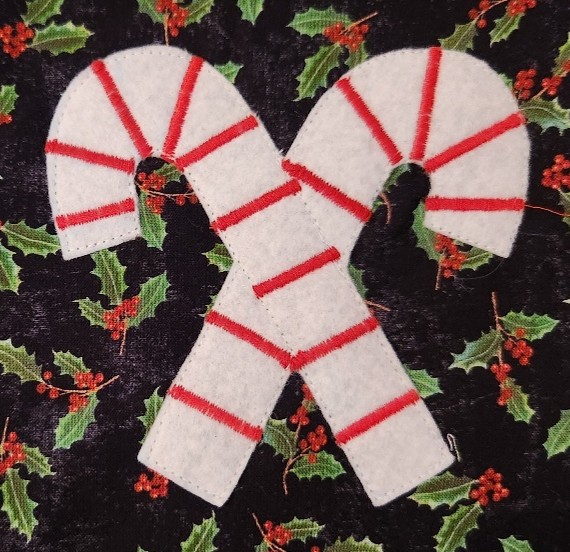
- Either draw the red stripes using a red fabric marker OR satin-stitch each stripe by using a short machine zig-zag stitch (length 0.2, width 3.5) with red thread.
- Mark the edges of one candy cane as shown, so it seems to overlap the other one.
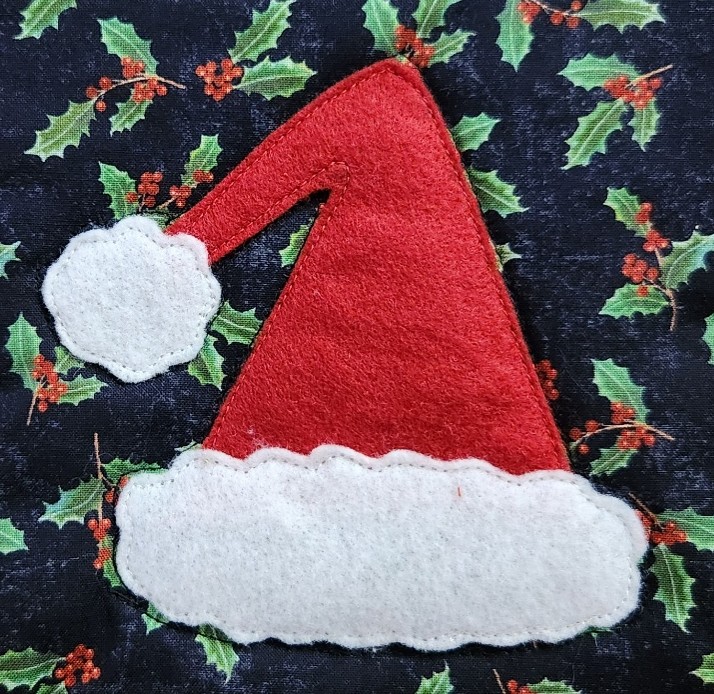
- Santa hat
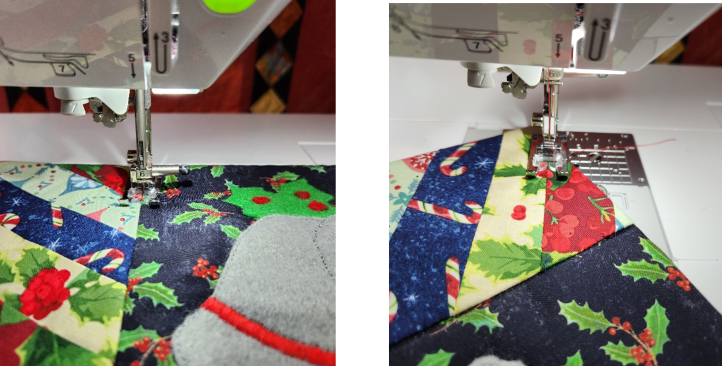
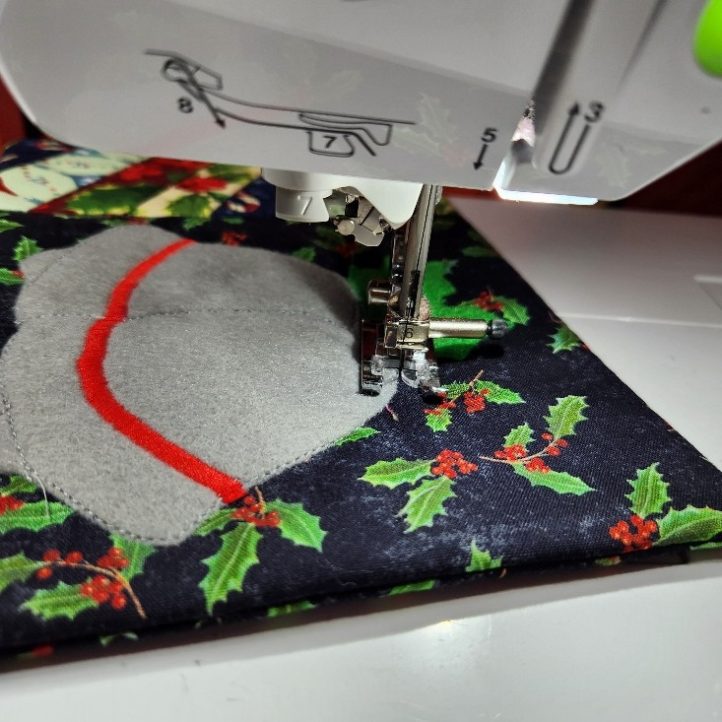
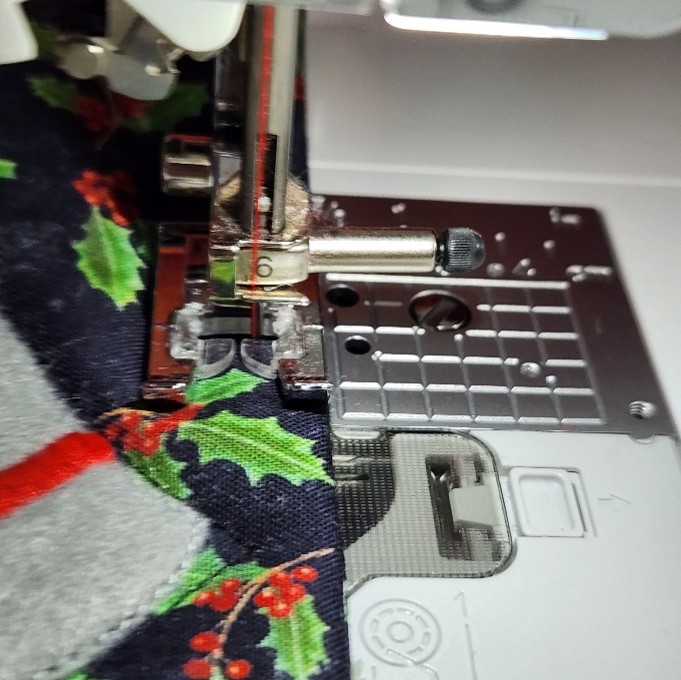
- Stitch the red felt hat in place first. Then place the white pompom felt at the end of the hat and the white “fluff” felt around the hat opening.
- Edge-stitch each piece in place, pivoting frequently.
- Silver bells
- Applique the basic gray bells and green holly in place.
- Cut out berries from red felt by either drawing them freehand or cutting out the berries from the applique template and tracing them. Glue into place and/or edge-stitch with red thread.
- Mark the edges of the band around the bells and either color the band with a red fabric marker OR do a machine satin-stitch, with short stitch length and wider width (length 0.2, width 4.5). Stitch the band, pivoting so the left swing of the needle always stays on the placement line.
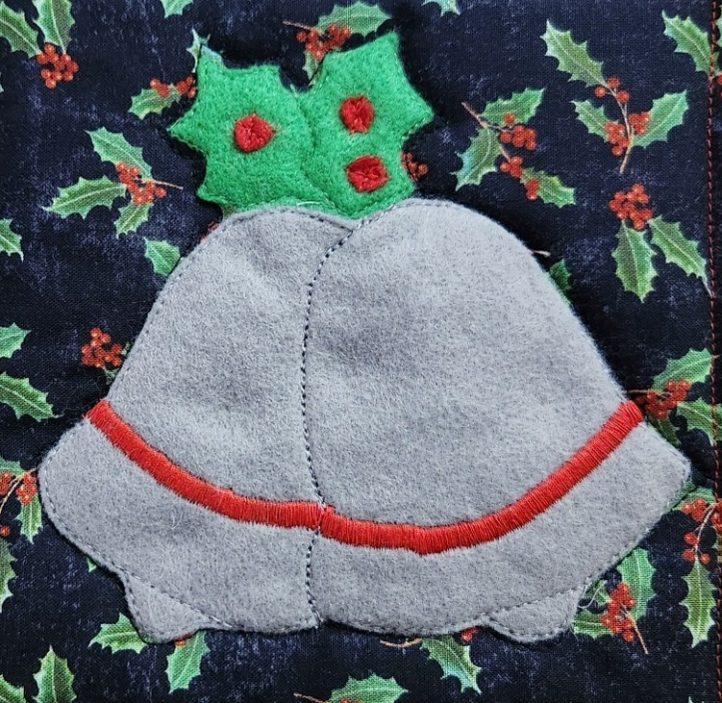
- Stitch the line separating one bell from the other with a triple-straight-stitch if possible (so it stands out) or stitch two or three times with a regular straight-stitch.
- Gingerbread cookie – Use scraps of colorful felt to create the face and cookie details.
- Sew the strip-pieced sections to each main mug rug section.
- Stitch along the 7-1/2 inch edge using a 1/4 inch seam allowance.
- Press the seam toward the strip-pieced section.
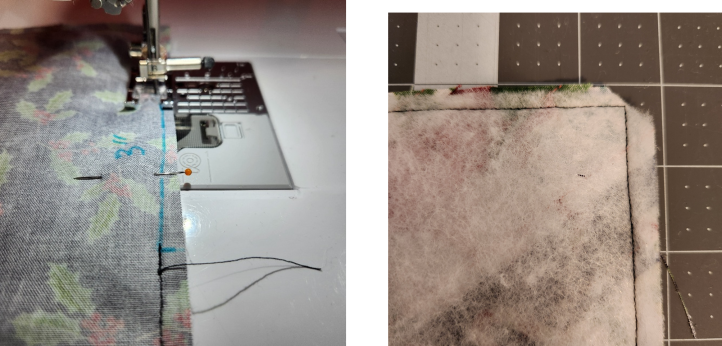
- Stitch the mug rug, batting, and backing together.
- Place a piece of batting onto the BACK of a mug rug.
- Place the mug rug/batting unit RIGHT SIDES TOGETHER with the backing.
- Stitch around all edges in a 1/4 inch seam, LEAVING A 3 INCH OPENING along the bottom. Trim the corners on the diagonal.
- Turn each mug rug right side out. Push the corners out using a pencil to help make them as square as possible.
- Press the edges to help define the shape of the mug rug.
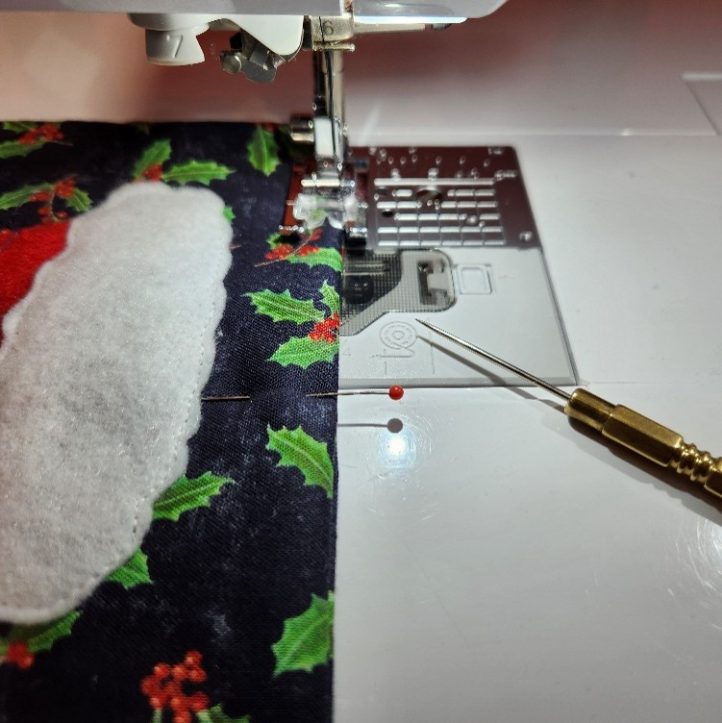
- Fold and press the edges of the opening shut. Pin in place. Stitch along the edge with matching thread.
- Quilt the mug rugs as follows.
- Stitch in the ditch along the seam between the strip-pieced section and the main mug rug section.
- Stitch in the ditch between every 2 strips in the pieced section.
- Quilt around each applique, pivoting frequently and following the shape closely.
- Finishing the edges: Stitch 1/4 inch from the edge all around each mug rug, using matching or contrast thread as desired.
- The mug rugs are now finished!