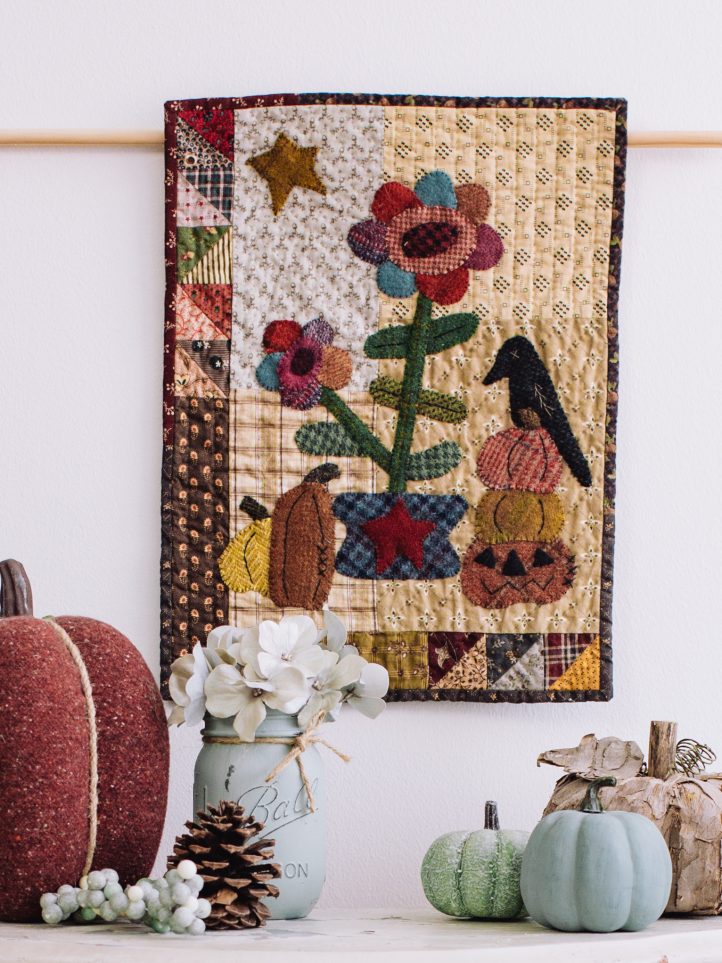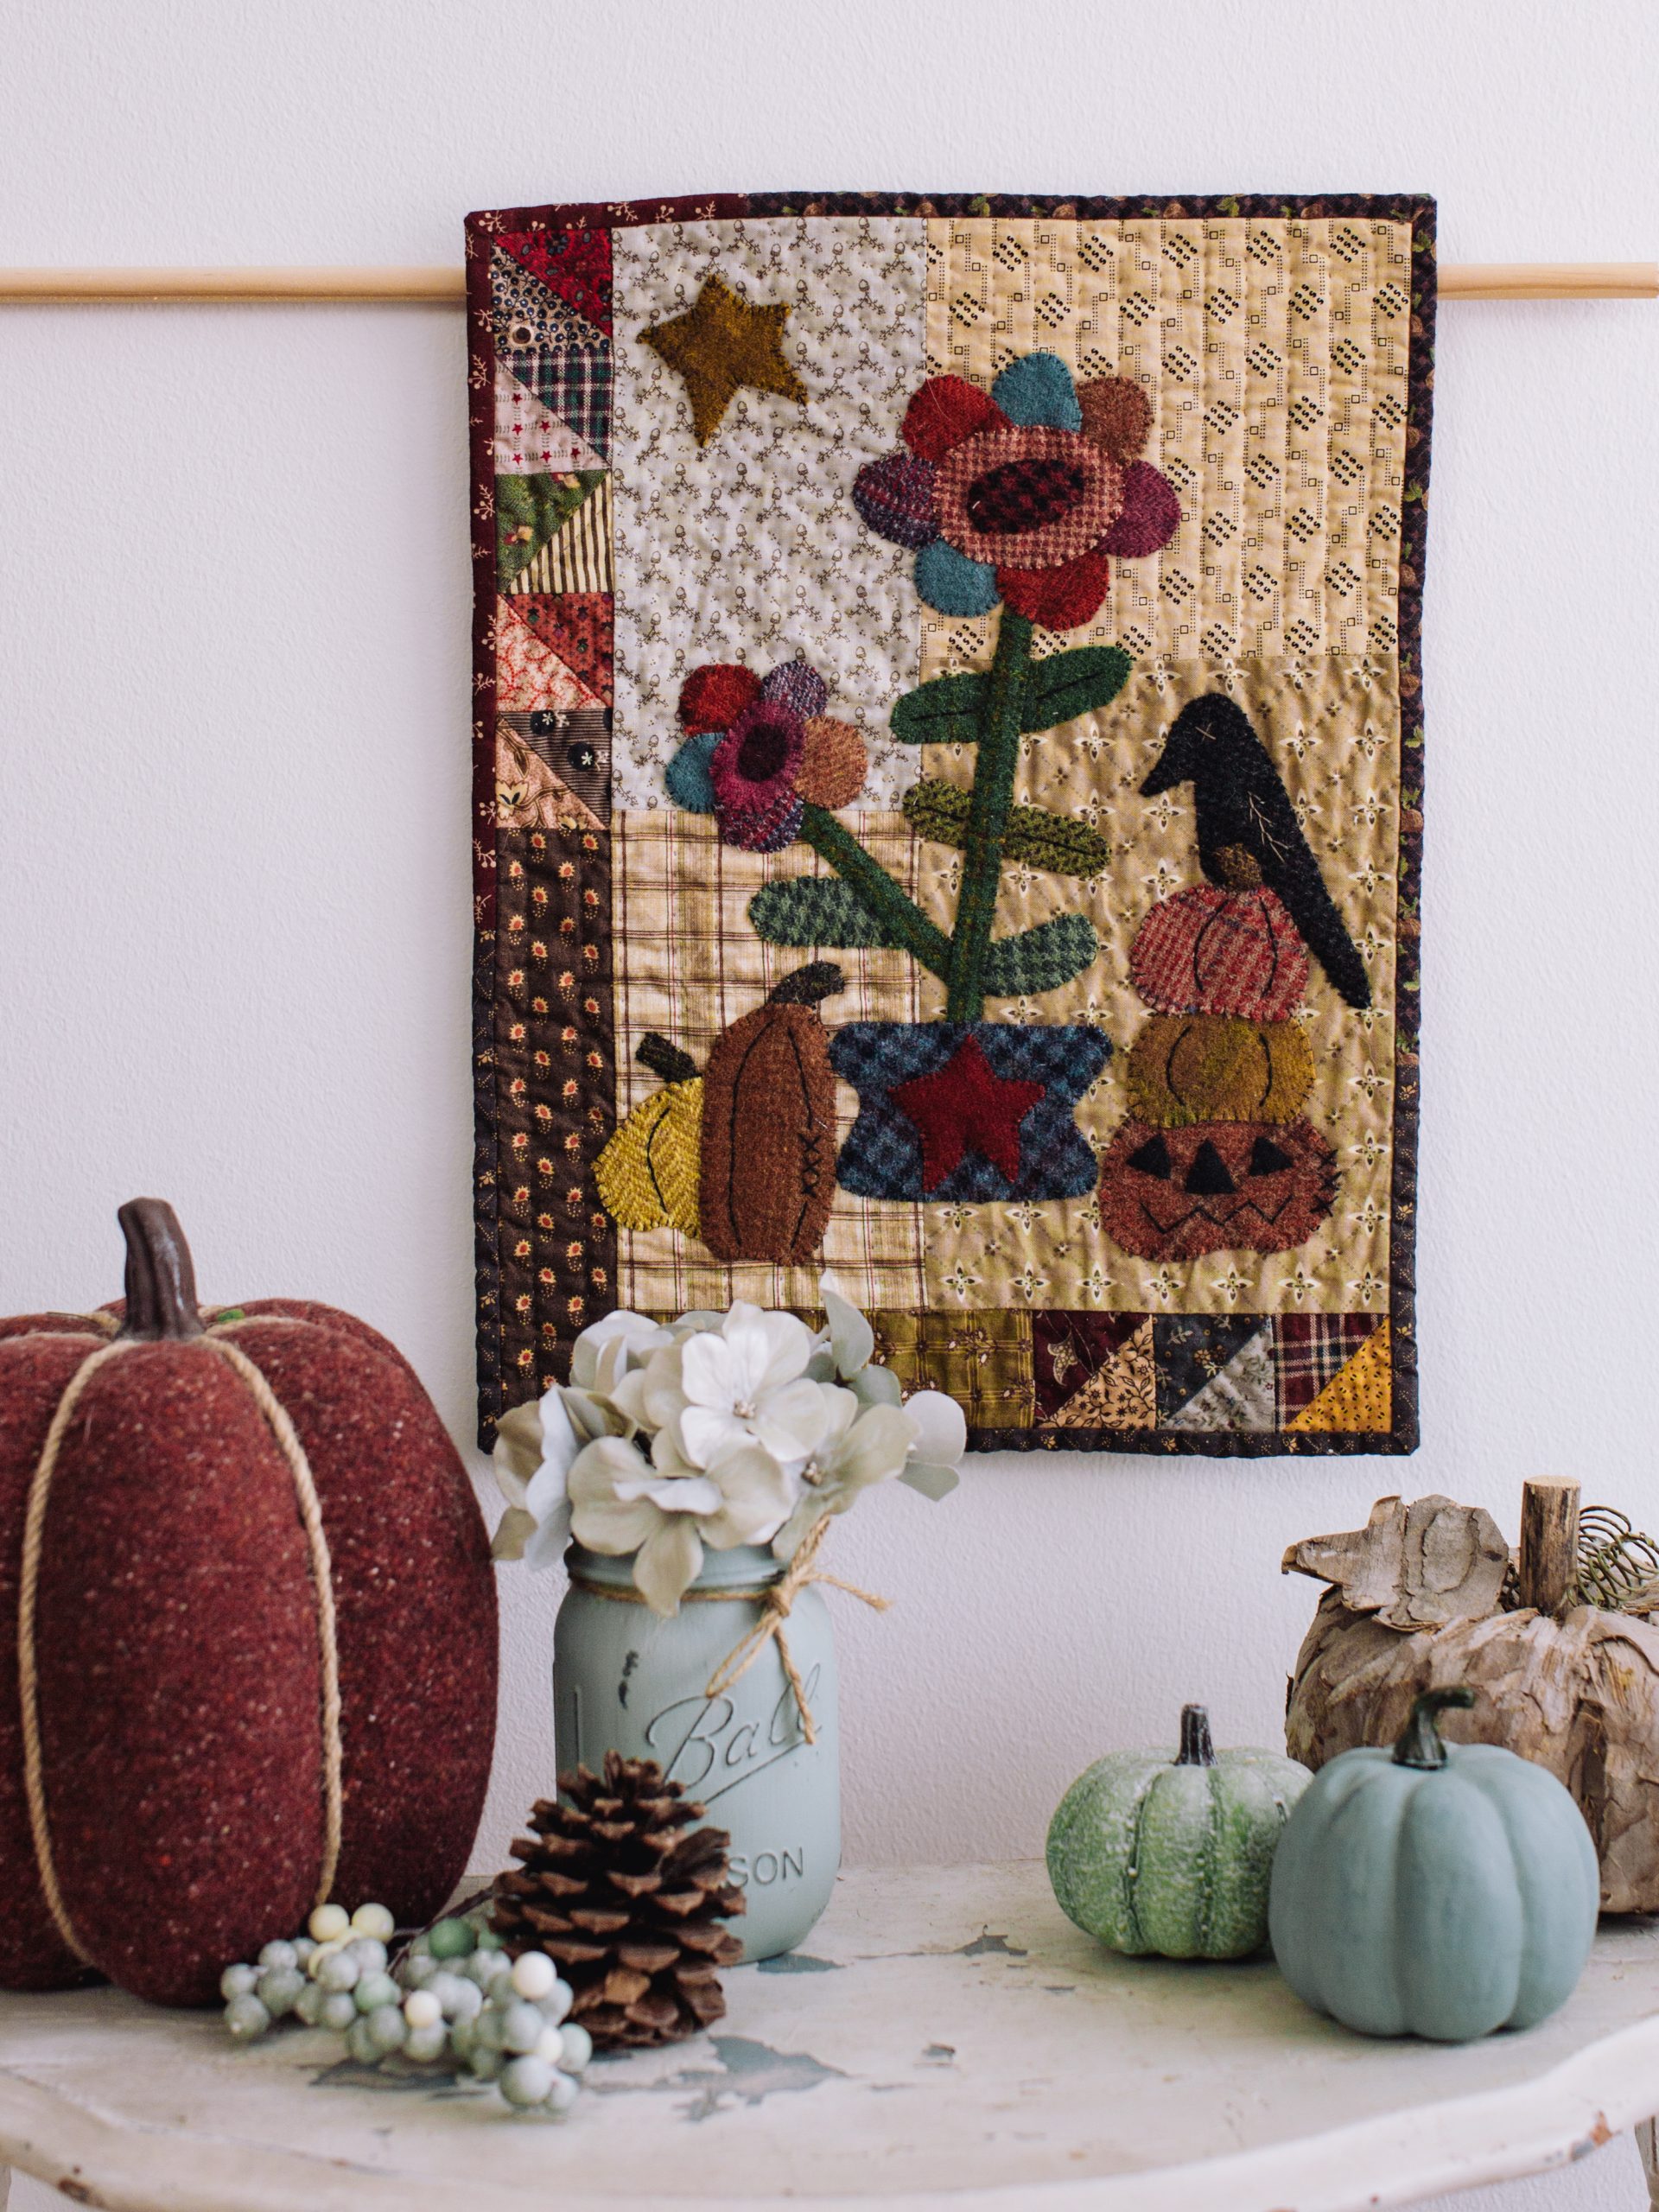
Imagine a quaint, countryside autumn scene of sunflower fields, scarecrows, and pumpkin patches. Turn your idyllic fall farmyard into a fabric reality with this darling mini quilt pattern. Perfect for reproduction fabrics and homespun plaids or fabric scraps, this mini quilt pattern uses wool applique to create its rich, primitive farm scene. Designer Marian Edwards shows you how to sew your own autumn landscape with this lovely mini quilt.
Finished Size: 11 1/2” x 15 1/4″
From the Designer:
- I love designing and making scrappy little quilts; it’s always more fun when the design includes wool appliqué. I hope you enjoy making this prim fall mini quilt.
- I will often use leftover fabric scraps from other projects, and I suggest you do the same; in which case, you will only need to stock up on a few fat eighths and fat quarters.
Designer Notes:
- For best results all quilt fabrics, including the batting, need to be 100% cotton.
- The designer’s personal favorites are reproduction fabrics and homespun plaids.
- Please read all the instructions before you start cutting into your precious fabrics.
Materials:
- An assortment of fabrics in light, medium and dark prints, for quilt background. For fabric quantities, refer to photo with ‘cutting and piecing instructions for quilt top’.
- Uneven 4-patch (background) – 4 fat eighths (light/medium prints)
- Border Half Square Triangles (HST’s) – 16 ~ 2 inch squares (light, medium & dark prints)
- Borders:
- 1 ~ 2”x 6” (medium print)
- 1 ~ 2”x 8 1/4” (dark print)
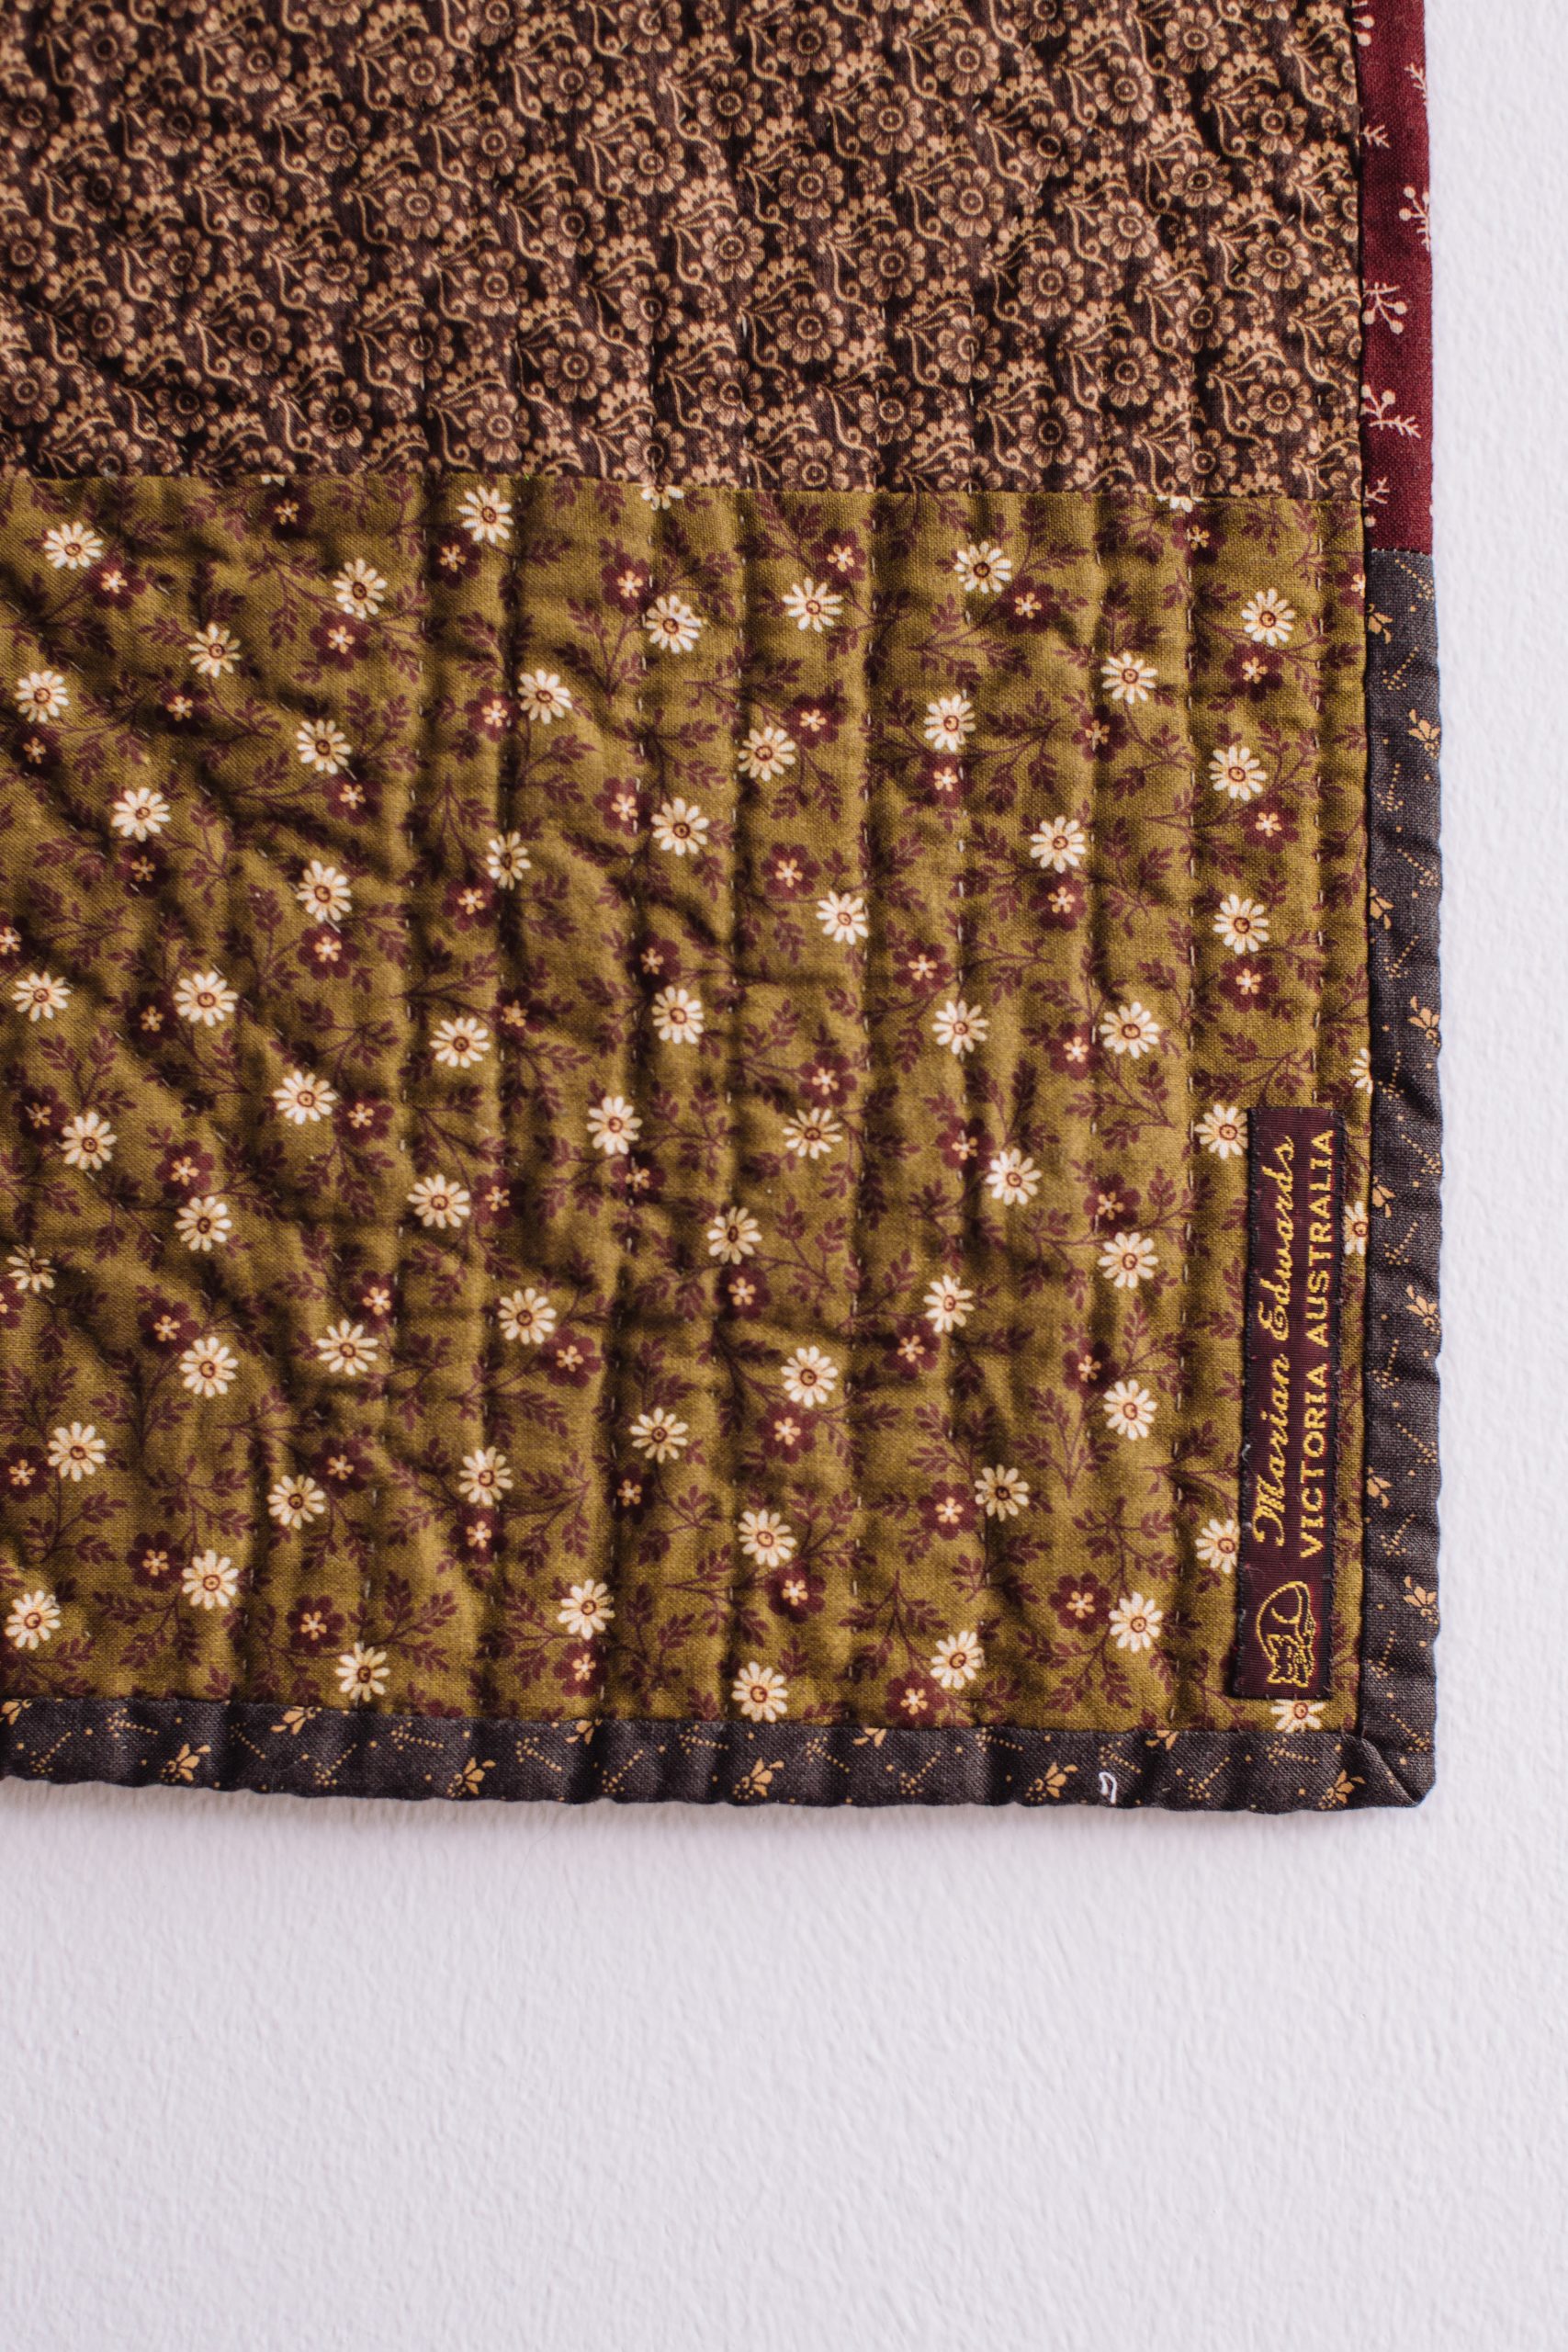
- Pieced backing – 2 fat quarters
- Cotton batting – 13” x 17”
- Binding (scrappy – single fold) – 3 fat eighths
- Felted wool – an assortment of small wool pieces (refer to page with wool appliqué templates)
- Black embroidery floss
- Quilting thread of choice (the designer use Gutermann cotton 30 – taupe)
- Hera marker or marker of choice
- Chenille needle size 24 (for wool appliqué)
- Quilting needle
- Quilting clips (optional)
- Appliqué pins
- Scissors ~ sharp snips (for wool appliqué)
- PDF Template – This is located at the bottom of this page. See printing instructions below.
PRINTING INSTRUCTIONS:
To download the PDF template, click on the download button at the bottom of the page. We recommend opening your download using Adobe Acrobat.
Cutting Instructions:
Refer to photo ‘cutting and piecing instructions for quilt top’.


- Backing – 14” x 18”
- If you prefer a pieced backing like mine:
- Cut 1 ~ 7 1/2“x 14”.
- Cut 1 ~ 11” x 14”.
- If you prefer a pieced backing like mine:
- Batting – Cut 1 ~ 13” x 17”.
- Binding (scrappy) – 1 1/4” x 60” (The designer used three different fabrics for a scrappy binding)

Sewing Instructions:
FINISHING THE QUILT:
- Layer the quilt top, batting and backing and baste the layers together.
- Quilt as desired ~ The designer kept the quilting simple. She used a Hera marker to mark the quilting lines. Marian also chose to quilt with Gutermann sulky cotton thread. which has a soft sheen to it.
- Attach the binding to the quilt and fold over to the back. Slip stitch to back of quilt.
- Now that your quilt is finished, it’s time to give it a hot bath. Of course, this process is optional… BUT… if you like the vintage-y, time-worn look (as the designer does), then please give it a try… you can’t go wrong!!
NOTE: For those of you who may be wondering: The wool appliqué is added after the quilt has been washed. It may sound complicated but believe me it’s not; it really is easy peasy!!!
HOW TO GIVE YOUR QUILT A VINTAGE-Y, TIME-WORN APPEARANCE:
The designer likes to use the laundry sink ~ it’s the perfect size for small quilts. For best results the fabric, batting and thread must be 100% cotton.
- So, when your quilt is finished i.e. pieced, quilted and the binding sewn on, then it’s time to wash it.
- Pop your quilt into the hand basin and squeeze a small amount of liquid soap directly onto the quilt. Turn on the hot water tap and start washing the quilt under the running water.
- As soon as the water gets hot, pop the plug in. The quilt needs to be completely submerged.
- Soak for approx 5 mins, turning once. Rinse the quilt in hot water. Squeeze and wring out any excess water.
- The designer spread the quilt out on a towel to dry; draped over a drying rack, under a ceiling fan. She then turned the quilt once or twice during the drying stage, gently pulling it into shape. The magic happens overnight. She is always pleasantly surprised by the results the next morning ~ you will be, too.
NOTES:
- The quilt will shrink slightly after it has been washed (1/2“ – 3/4“approx).
- After the quilt has been washed, it should measure 11 1/2” x 15 1/4“approx.
NOW IT’S TIME FOR WOOL APPLIQUE:
As stated earlier, the wool appliqué is added to the quilt at the very end, after the quilt has been washed. Refer to photo of finished quilt for wool appliqué placement.
Here’s How to Do It:
- Cut out the paper motifs and pin them onto the wool.
- Use quilting clips instead of pins when cutting out the wool motifs.
- Pin the wool appliqué shapes onto the quilt using small appliqué pins.
- Use a chenille needle and black floss (single strand).
- Use whip stitch to sew the appliqué to the quilt.
- To begin, draw the needle under the wool appliqué to hide the knot. When doing the whip stitch, push the needle through to catch the batting and back out again…it’s as simple as that.
- When you get to the end, tie a knot and pull it through the quilt layers, to bury it…just like quilting.
How to Do the Stitchery on Wool:
When all the wool appliqué is stitched down, that’s when to add the stitchery.
- Eyeball the stitchery onto the wool appliqué.
- Use a chenille needle and black floss (3 strands).
- To begin, draw the needle under the wool appliqué to hide the knot. When you get to the end, push the needle through to the back of the quilt – tie a knot and bury it inside the quilt layers.
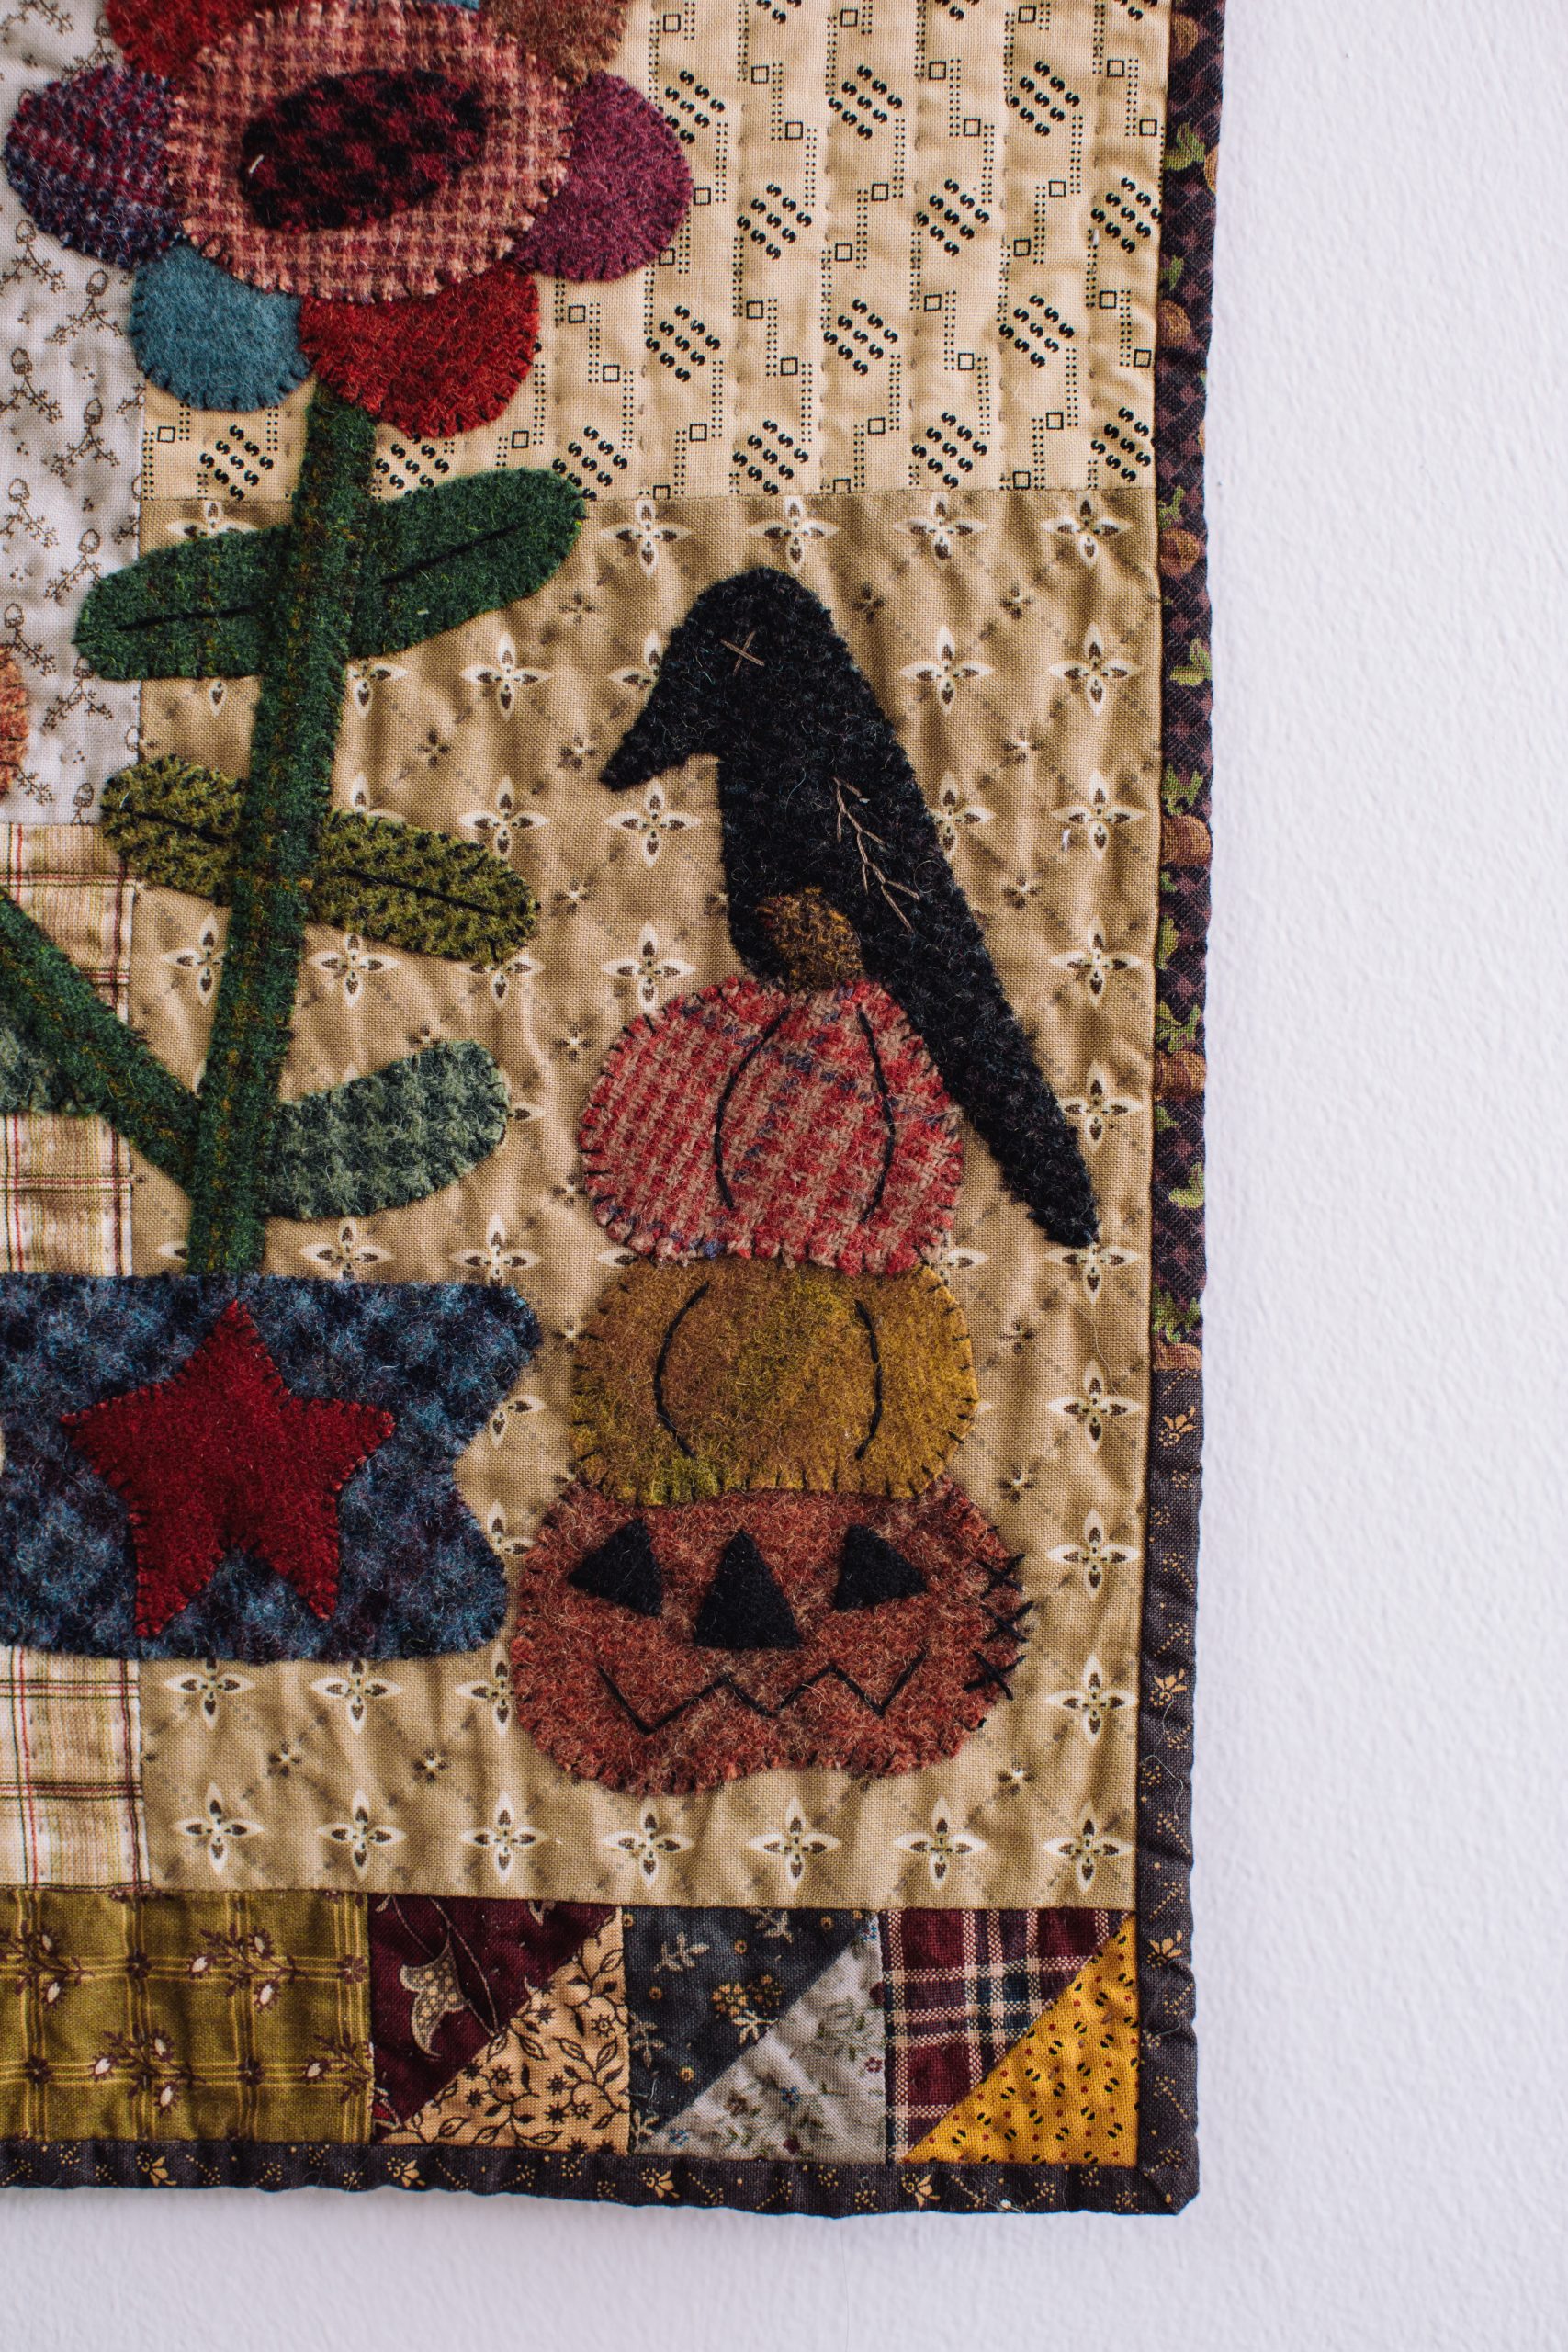
- The pumpkins and leaf veins are worked in backstitch, using black floss (3 strands).
- The crosses on the pumpkins are stitched using black floss (3 strands).
- The crow’s eye is stitched in Gutermann Sulky (2 strands) – or your choice of floss.
- The crow’s wing is worked in feather stitch using Gutermann Sulky (2 strands) – or your choice of floss.
The finished quilt with wool appliqué:


I just love Marian Edwards designs. Her patterns a a joy to do. thank you.
Thank you so much for the kind comment, Sue! Have a great day 🙂 – Ashley, We Like Quilting