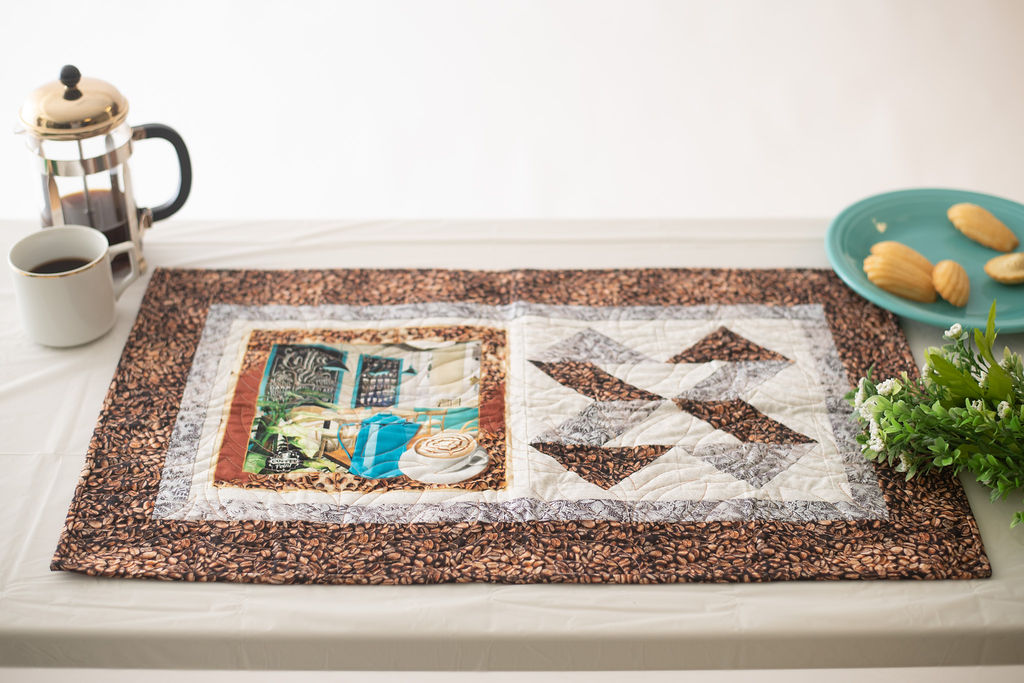
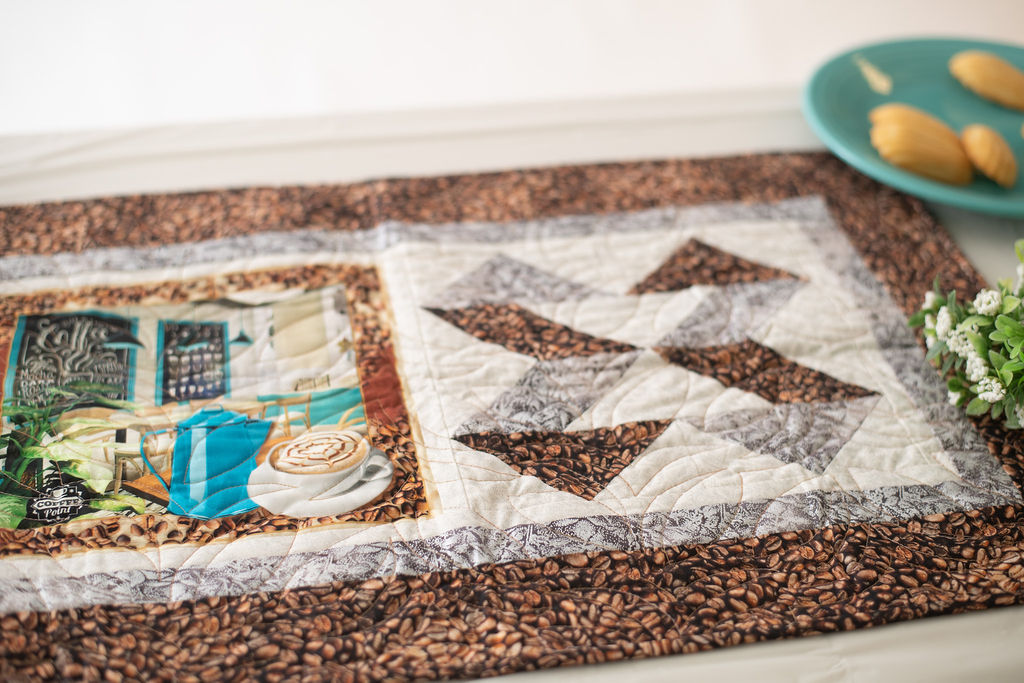
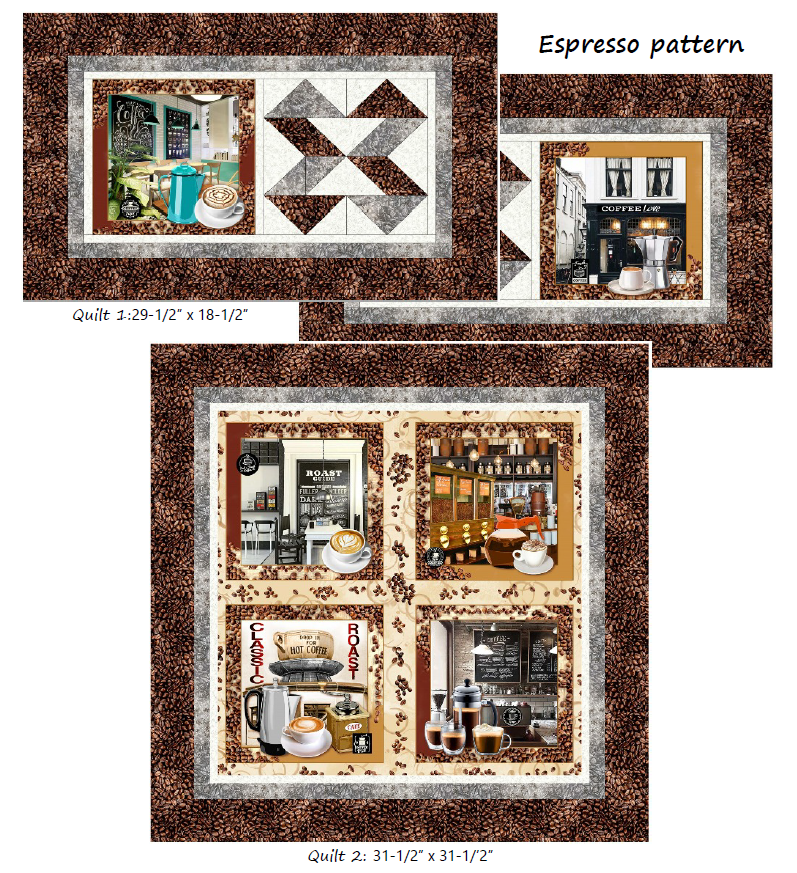
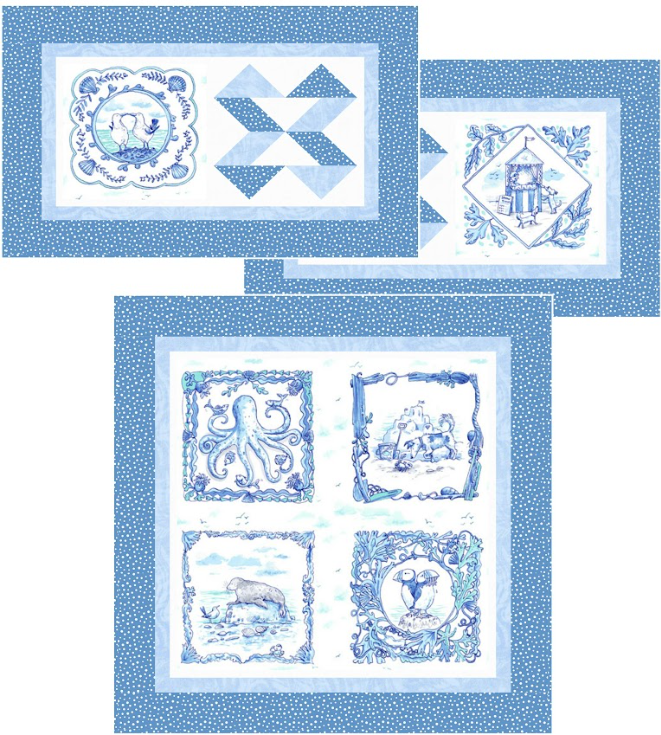
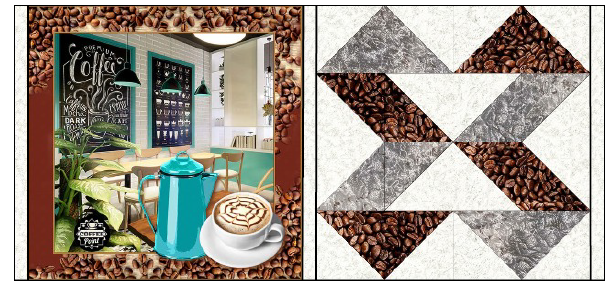
Can’t start your day without your morning cup of coffee? Then we know you’ll love these fun panel quilt projects from Brenda Plaster! Designed to make the most of panel designs, the designer has included instructions for creating smaller projects, such as table toppers, to mini quilts, wall hangings, or throw quilts that measure at 31 1/2” inches. Incorporate the classic ribbon quilt block to fully show off the whimsical fabrics featured in your favorite eye-catching collections.
Finished Sizes:
- Quilt 1: 29-1/2” x 18-1/2”
- Quilt 2: 31-1/2” x 31-1/’2”
Designer Notes:
- Three from one! A 24” panel composed of 10” square images is the focus of this design. Two images are used to make smaller quilts and the remainder of the panel is “framed” to make a larger quilt. The quilts can be used as table toppers or wall hangings.
- Please read pattern before starting your project.
ADDITIONAL COLORWAYS:
The designer has provided fabric information for the sample shown, as well as additional colorways as inspiration for our readers!
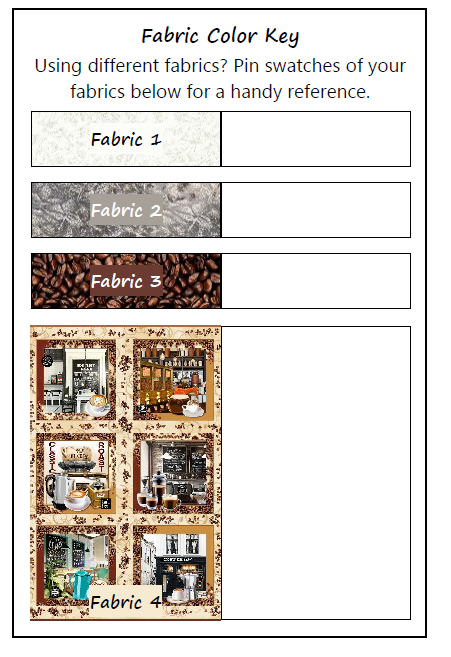
Fabric from Expresso Yourself Collection by Michael Miller Fabrics
Fabric from Sandy Toes Collection by Clothworks
The larger quilt center as illustrated has a 21″ square center.
PATCH SUMMARY:
Note: Do not cut from this summary; see Fabric Requirements and Cuts. Patch descriptions refer to fabric pieces cut to construct patches, not the finished patch sizes.

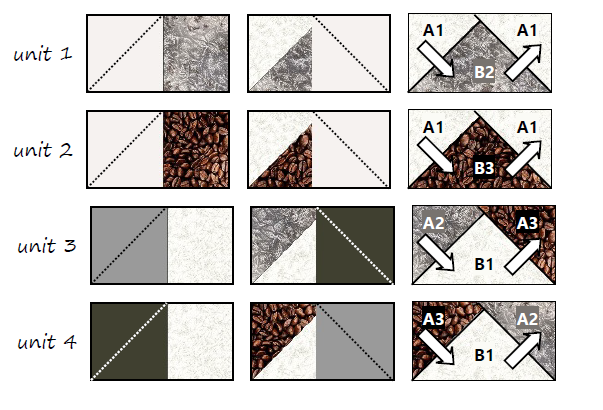
A: 3” square: 4 A1, 4 A3
B: 3” x 5-1/2” rectangle: 16 B2
C (plain block)*: 10-1/2” square: 1 C4
D (sash): 1” x 10-1/2” rectangle: 1 sash
E (unpieced block)*: 10-1/2” square: 2 E4
Fabric estimates are based on useable fabric width (selvage to selvage) of at least 42”. Add yardage if you prewash your fabrics or are fussy-cutting.
Cuts across the fabric width are indicated as WOF (width of fabric). Some cuts are lengthwise (LOF-parallel to selvage) to enable lengthwise cuts for the outer border. This avoids distorted/wavy borders, as fabric does not stretch on the lengthwise grain. (First and second borders are cut WOF to save fabric.)
In the patch labels (see Patch Summary), the letter refers to the patch. The number refers to the fabric from which it is cut. For example, A1 is an A patch cut from Fabric 1.
*Note: The width of E (the unpieced block) can be more or less than stated in the pattern; adjust the remaining patches to accommodate the difference. But the length needs to be that of the block in order to align with it.
Fabric Requirements and Cuts:
Fabric 1: 5/8 yard
- A1 and B1: Cut WOF [3] 3” strips.
- From these, cut [8] 3” x 5-1/2” A1 rectangles and [16] 3” x 3” B1 squares.
- Inner border and sashing: Cut WOF [5] 1” strips.
- From these, cut [4] 1” inner border strips and [1] sashing strip.
- Quilt 2 inner border: Cut WOF [4] 1” strips.
Fabric 2: 3/4 yard
- A2 and B2: Cut WOF [2] 3” strips. From these, cut [4] 3” x 5-1/2” A1 rectangles and [8] 3” x 3” B1 squares.
- Quilt 1 middle border: Cut WOF [4] 1-1/2” strips.
- Quilt 2 middle border: Cut WOF [4]1-1/2 strips.
Fabric 3: 1-5/8 yards
- Cut a 3/4 yard length. From this, cut:
- Binding: Cut enough 2-1/4” or 2-1/2” bias or straight of grain strips (your preference) to join and make a total of about 336” binding.
- From remaining 7/8 yard, cut:
- A3 and B3: Cut lengthwise of fabric [2] 3” strips. From these, cut [4] 3” x 5-1/2” A3 rectangles and [8] 3” x 3” B3 squares.
- Quilt 1 outer border: Cut lengthwise of fabric [6] 3” strips.
- Quilt 2 outer border: Cut lengthwise of fabric [4] 3” strips.
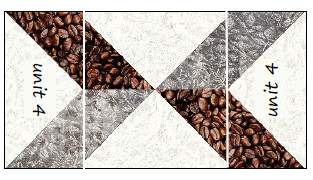
Fabric 4: 24” x 34” panel (Note: See Designer Notes at top of pattern).
- E4: Cut [2] 10-1/2” x 10-1/2” images from the panel. Remainder of the panel is the center of Quilt 2.
Backing:
- Quilt 1: 1-1/2 yards
- Quilt 2: 1-1/8 yards
- Backing 4” larger on all sides than the quilt top is recommended for longarm quilting (38” x 26-1/2” and 39-1/2” x 39-1/2”).
- Quilt 1: 1-1/2 yards makes [2] 42” x 27” backings.
- Quilt 2: 1-1/8 yards makes a WOF” x 40-1/2” backing.
Piecing Instructions – Quilt 1:
All seams are 1/4”. Press seams as indicated in instructions or illustrations. Or there’s the option of pressing seams open.
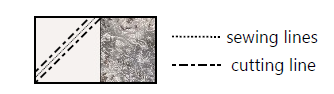
- Draw a diagonal line on wrong side of 3” A squares. Place right sides down on sides of 5-1/2” x 3” B rectangles, aligning outer edges and orienting stitch lines as shown. Stitch on drawn line.* Cut away excess fabric, leaving a 1/4” seam. Sew 4 of each.
- *Note: Hate to waste the trimmed triangles? Draw a line 1/2” from the center diagonal line drawn on the squares. Sew on that line. Cut between these lines, leaving a 1/4” seam on each unit. You’ll have HST (Half Square Triangles) squares you can use in another project.
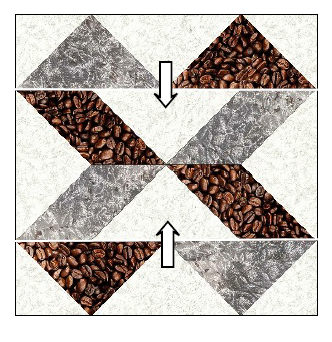
- Combine the flying geese units made in Step 1 as illustrated below to complete the pieced blocks.
- *Note: Hate to waste the trimmed triangles? Draw a line 1/2” from the center diagonal line drawn on the squares. Sew on that line. Cut between these lines, leaving a 1/4” seam on each unit. You’ll have HST (Half Square Triangles) squares you can use in another project.
- Combine units as shown at right to make the blocks’ top and bottom rows. Make 4. Press seams to one side or open.

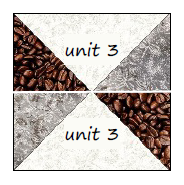
- Combine units as shown to make the blocks’ middle row centers. Make 2. Press seams open.
- Sew units to sides as shown to make the blocks’ middle rows. Make 2. Press seams open.
- Sew units to sides as shown to make the blocks’ middle rows. Make 2. Press seams open.
- Combine block rows made in Steps 2 and 3 to complete [2] 10-1/2” x 10-1/2” blocks, as illustrated. Press seams.
- Cut 2 sashing strips and 4 inner border strips to the length of the pieced and unpieced blocks (should be 10-1/2”). Join unpieced block, sashing strip, border, pieced block and inner border strips as shown. Press seams toward sashing and border.
- Measure width of quilts. Cut 4 inner border strips to this length. Sew to top and bottom of quilts.
- Measure length of quilts. Cut 4 middle border strips to this length. Sew to sides of quilts. Measure width of quilts. Cut 4 middle border strips to this length. Sew to top and bottom of quilts. Add outer border in the same way. Press seams toward borders.
- Layer top, batting and backing. Quilt as desired. Bind with Fabric 3 binding strip.
Piecing Instructions – Quilt 2:
- Trim remainder of panel to the size preferred. (22-3/4” x 22-3/4” is used in the illustrated quilt.) Add borders as indicated in Step 5 and finish quilt as indicated in Step 6.