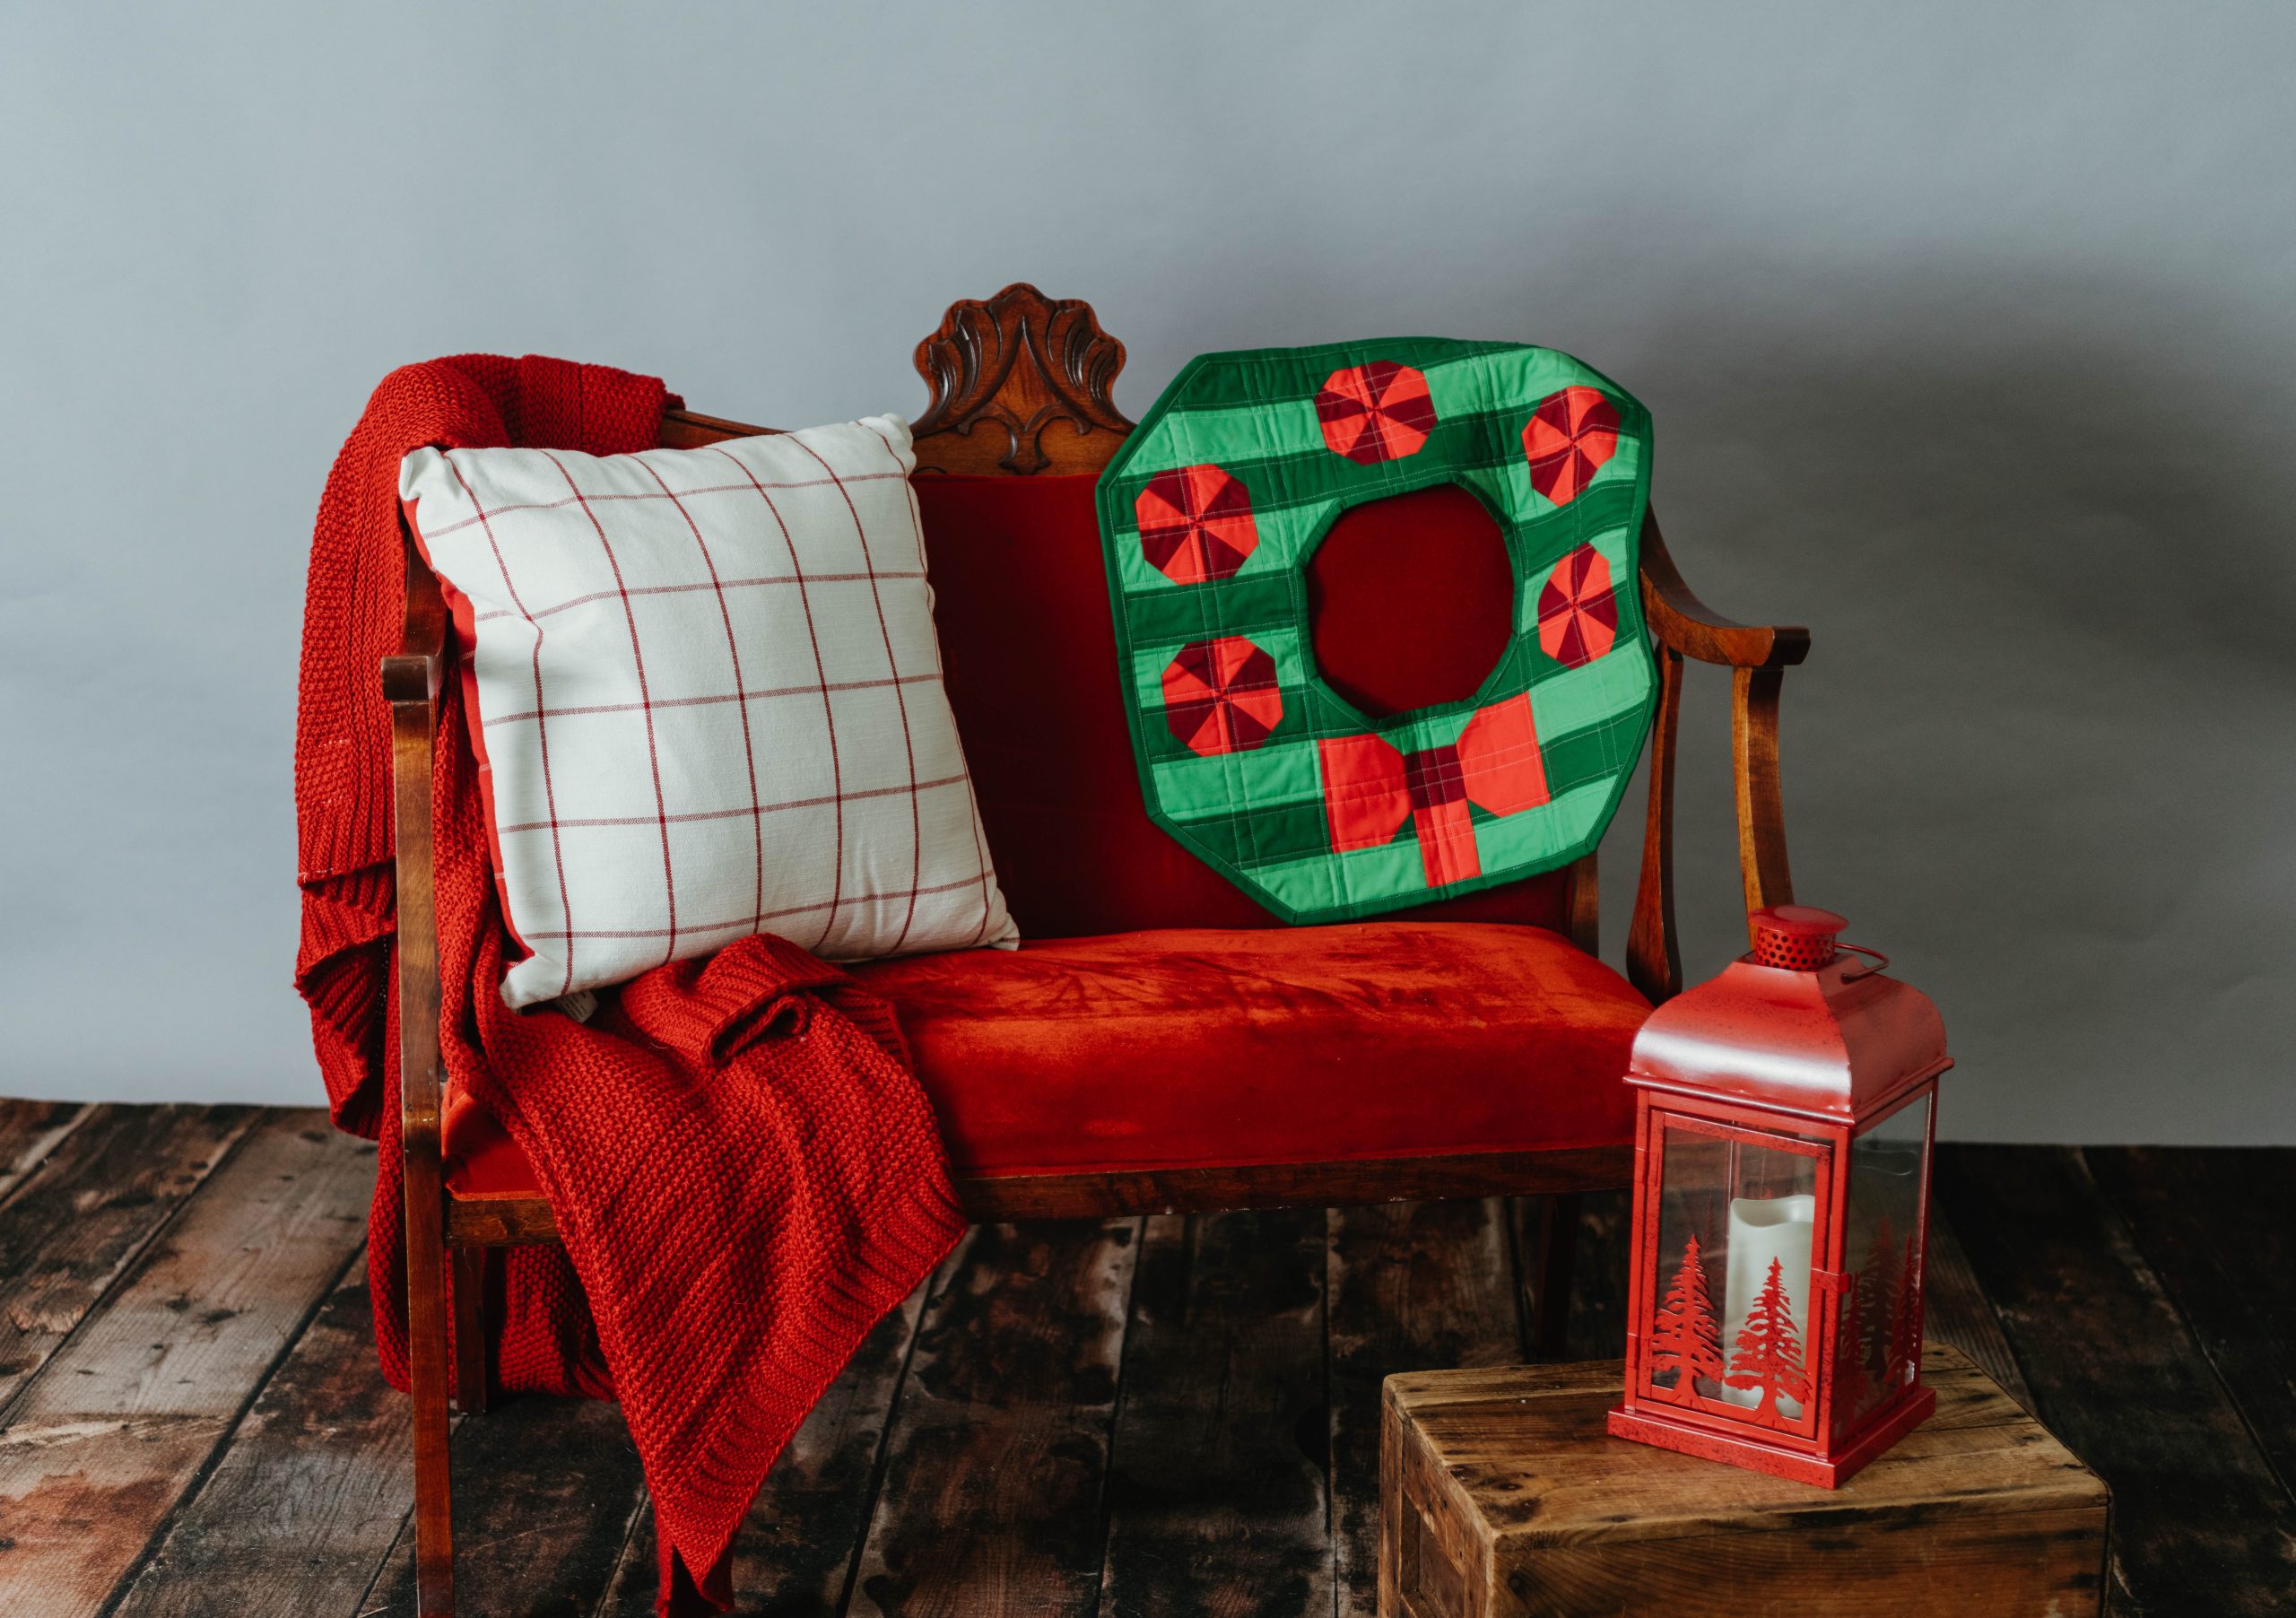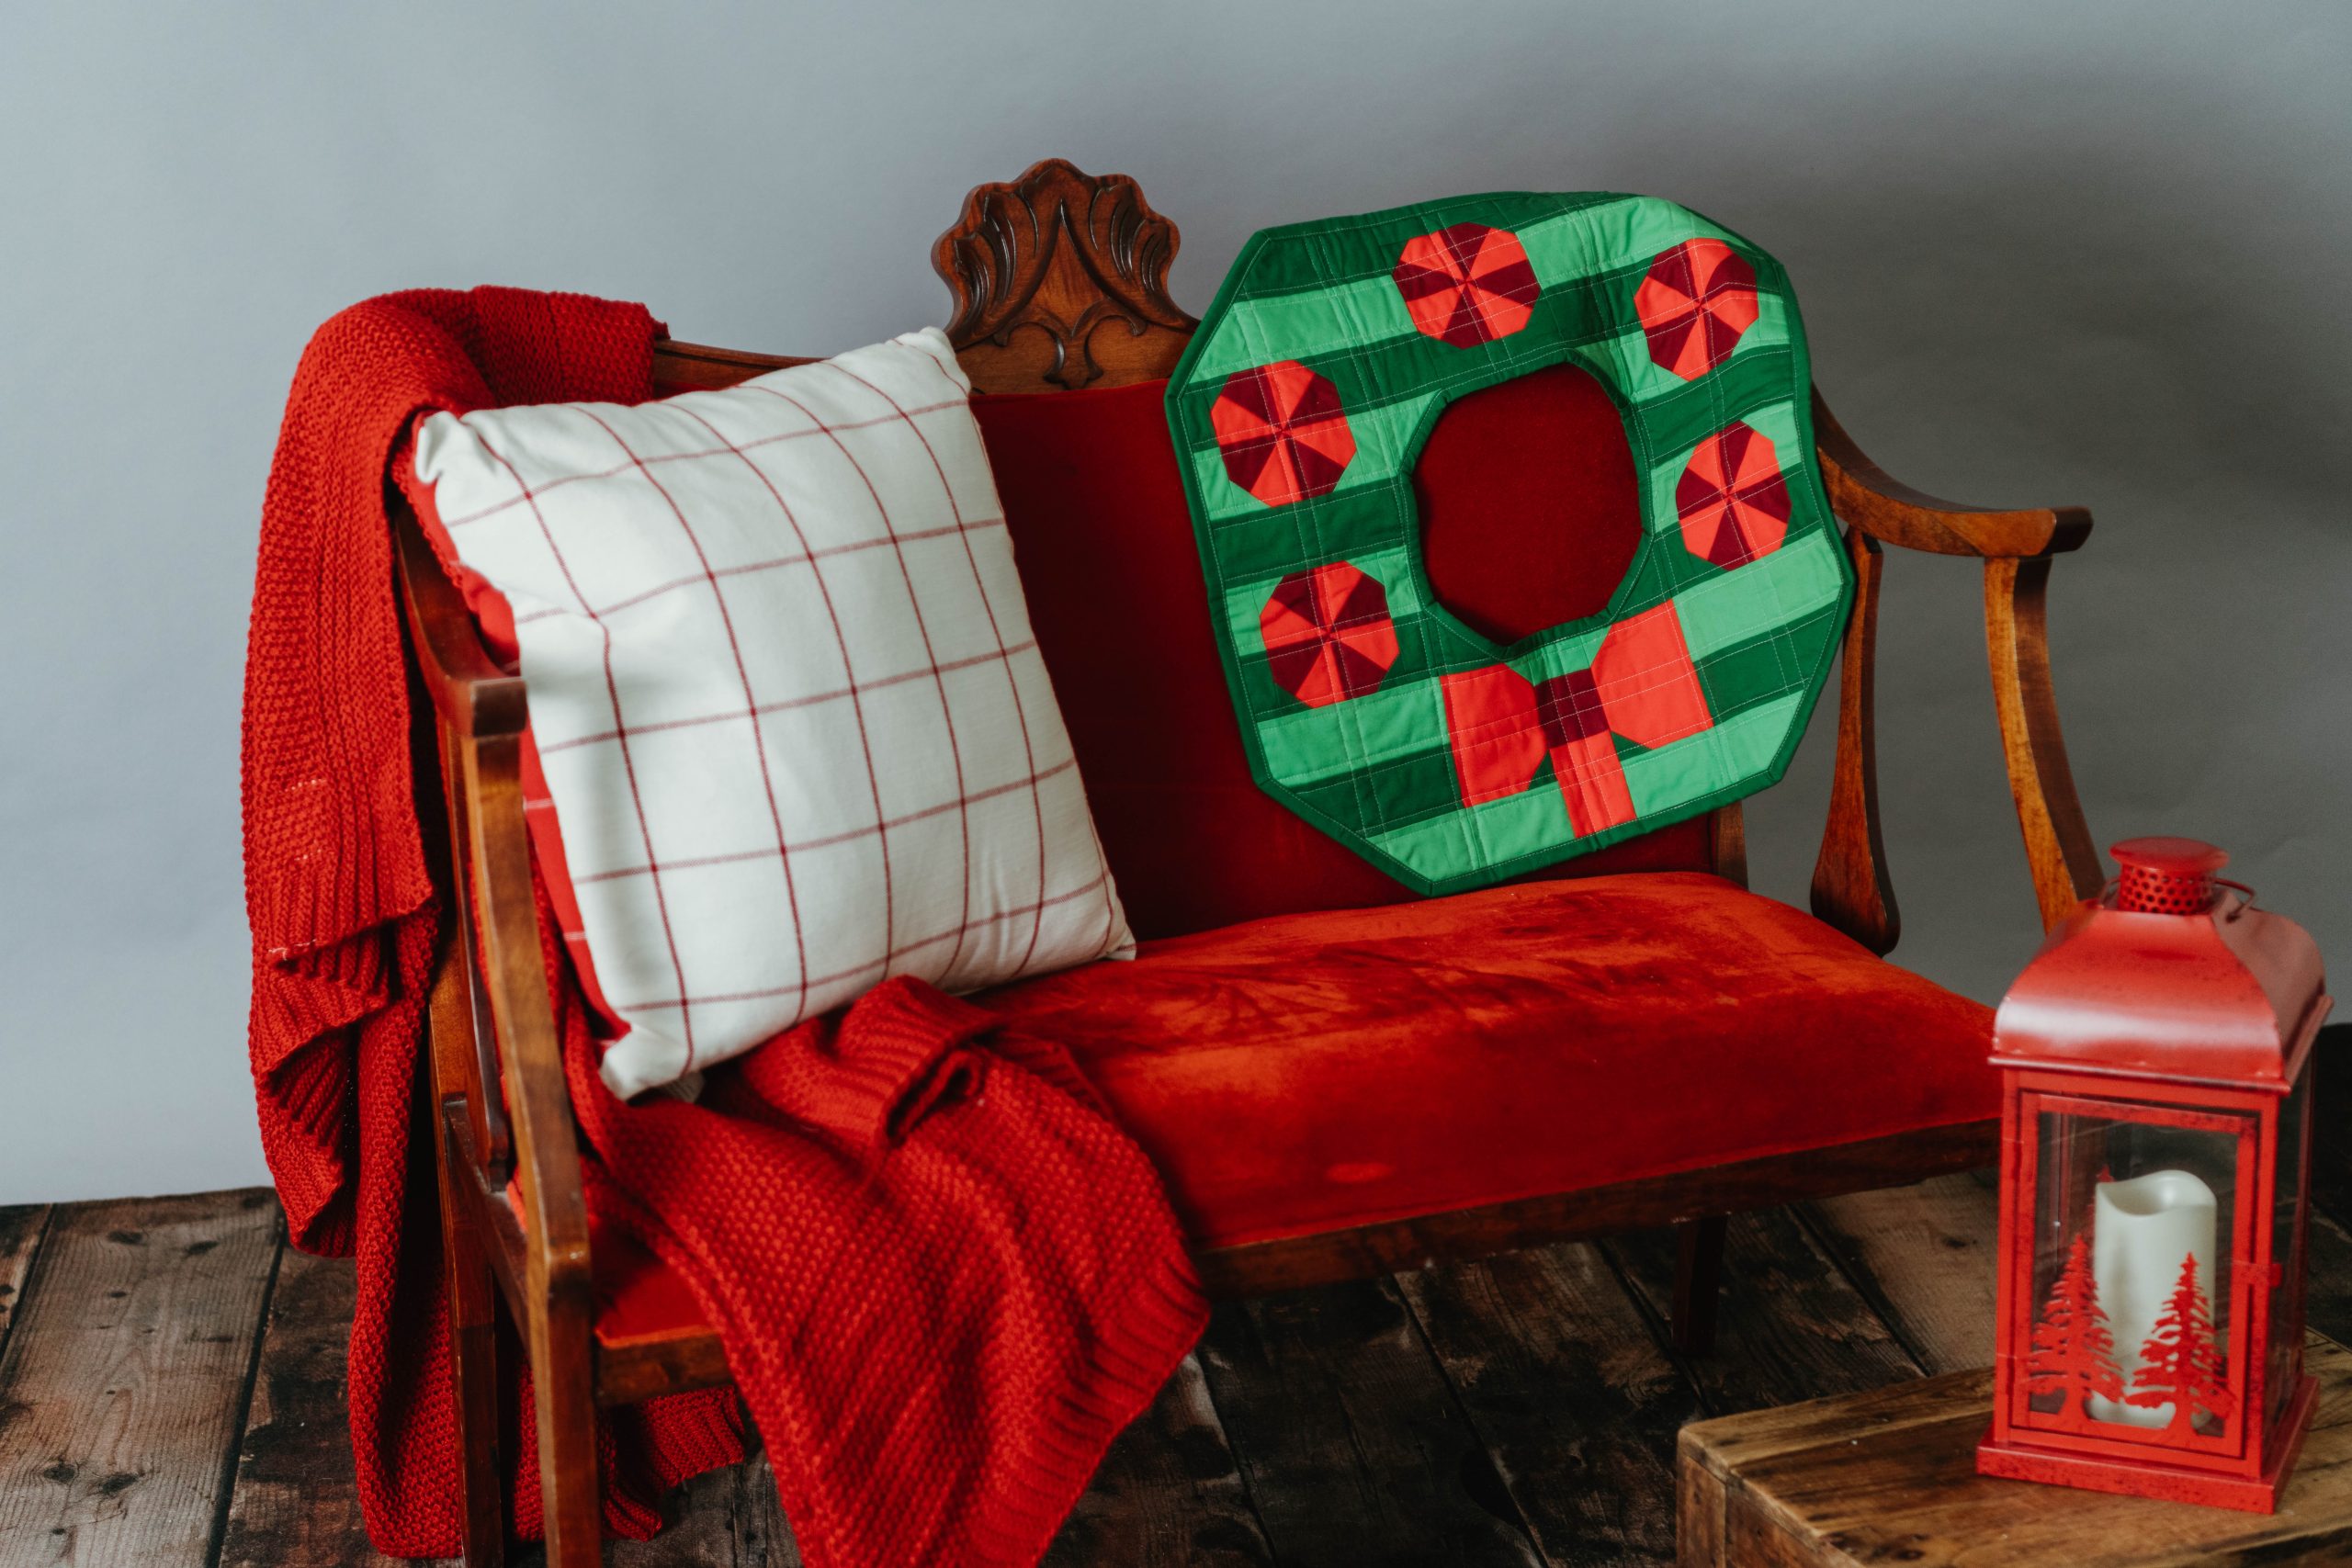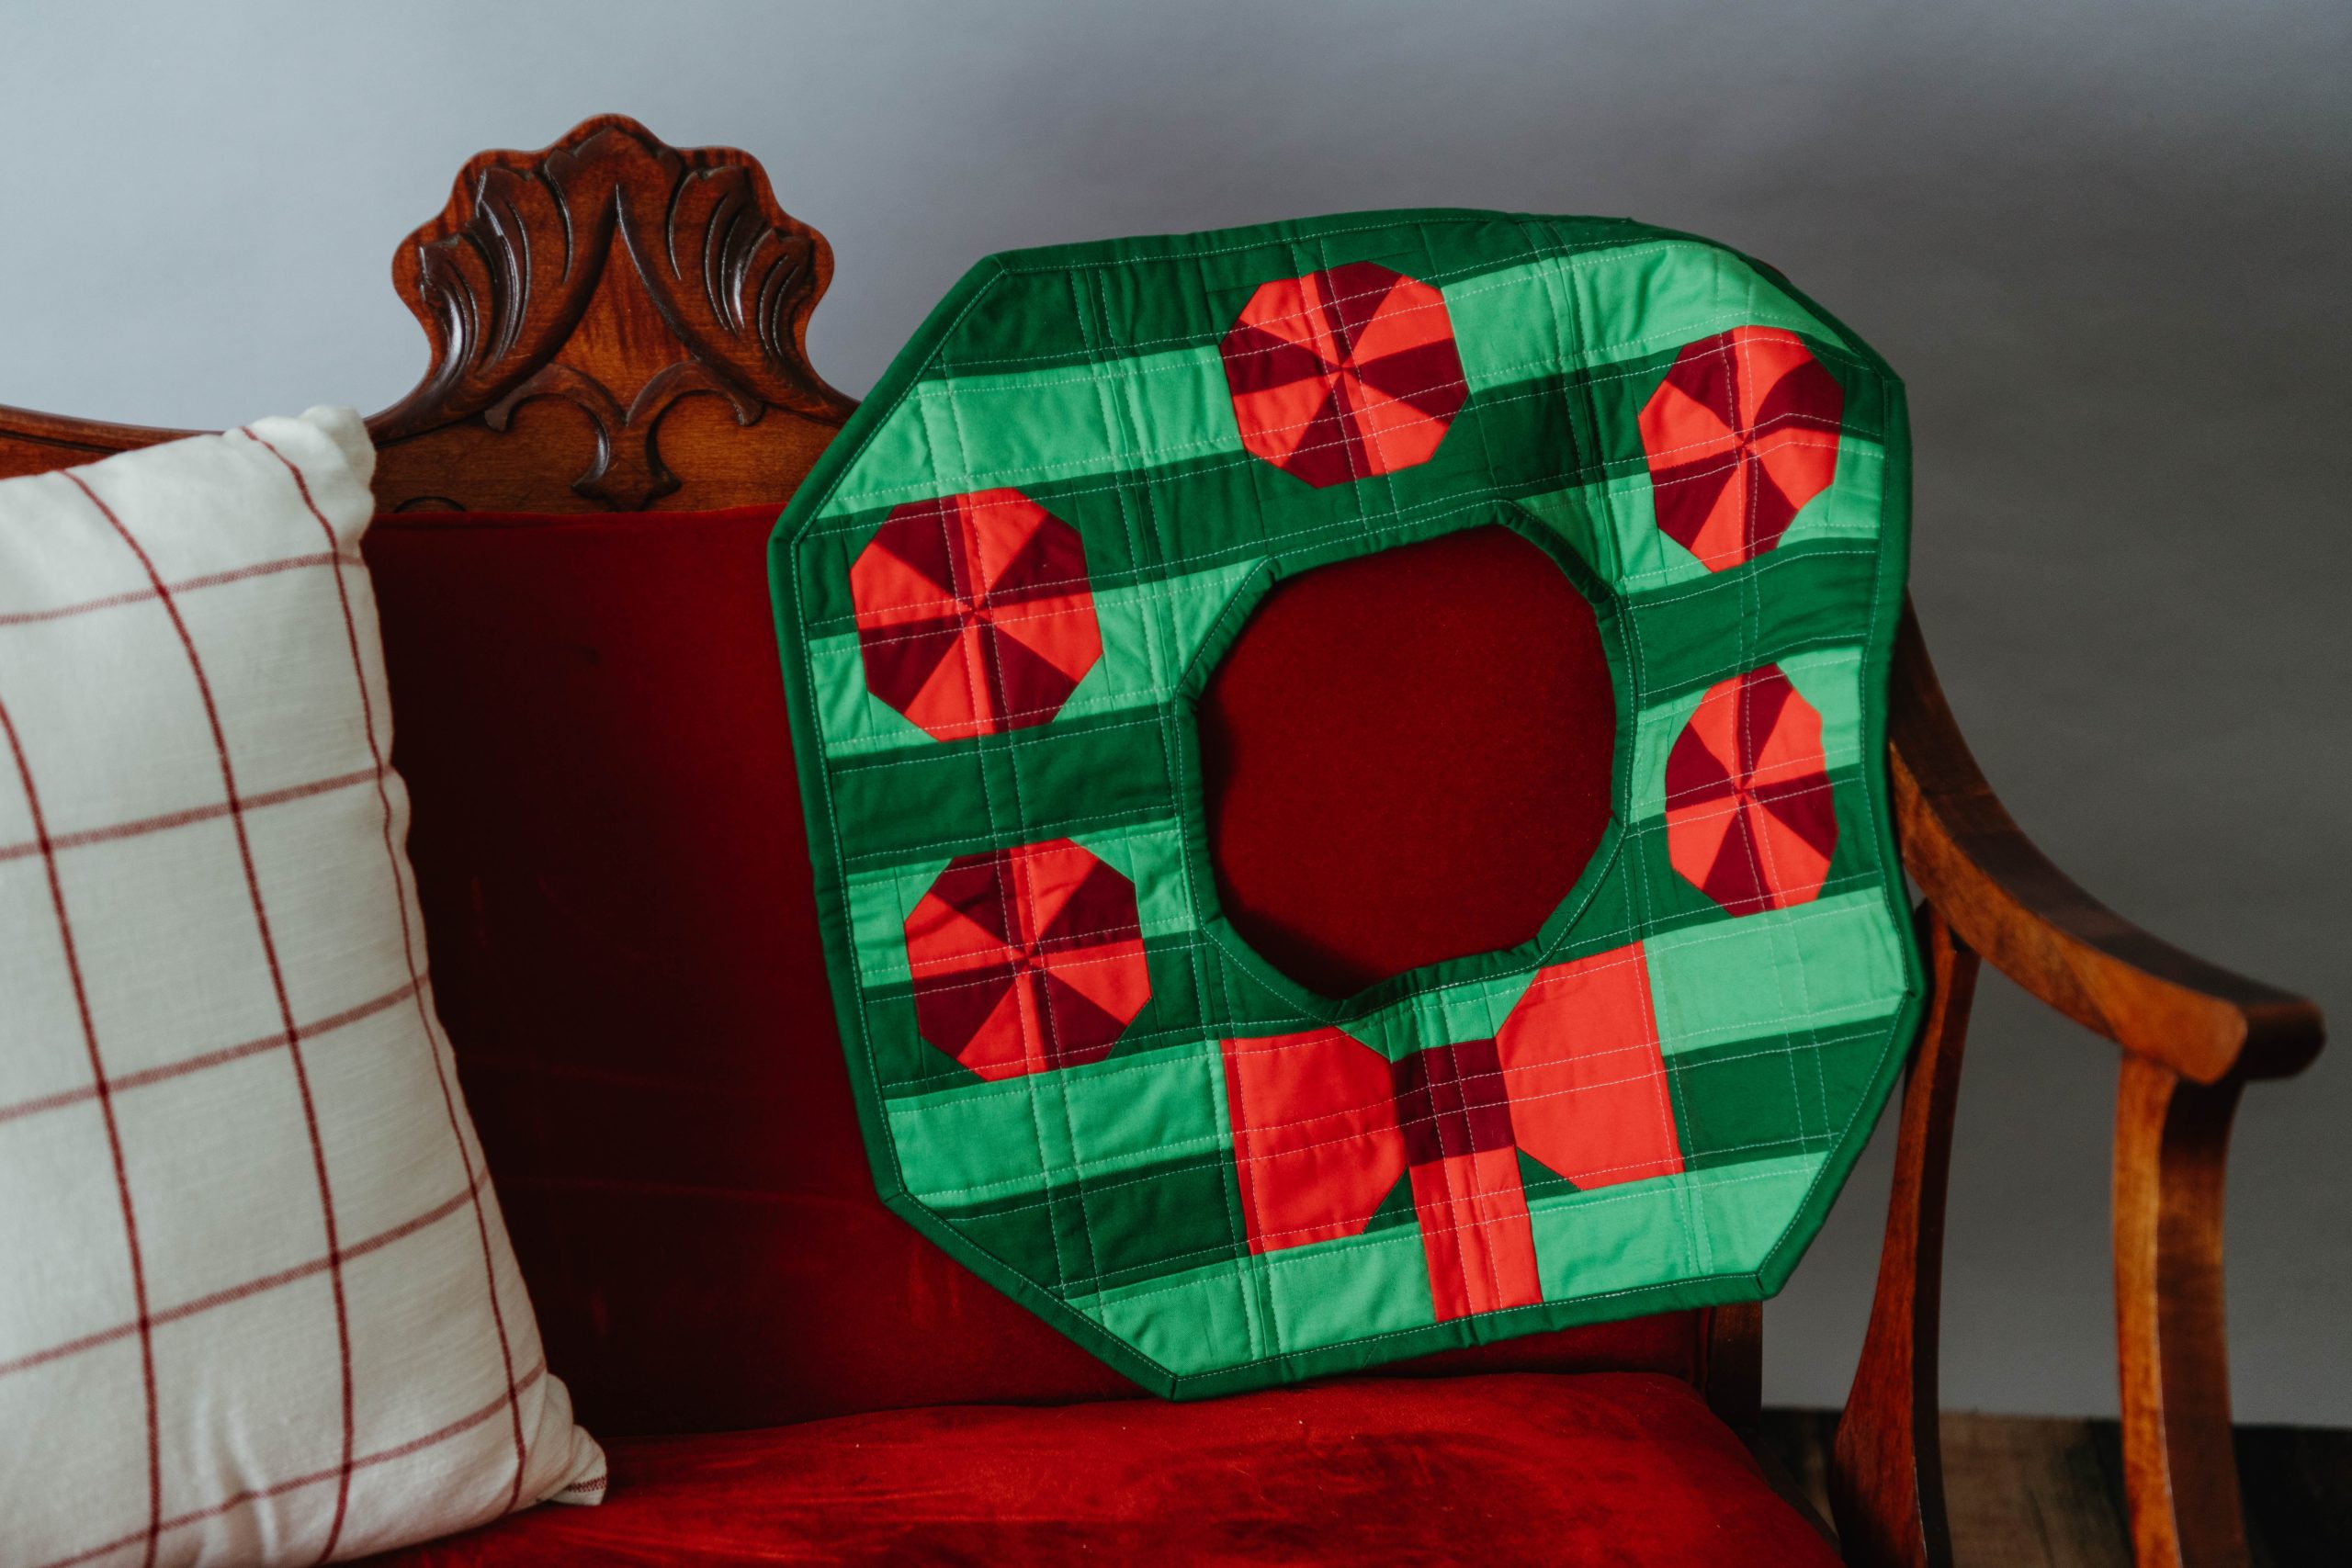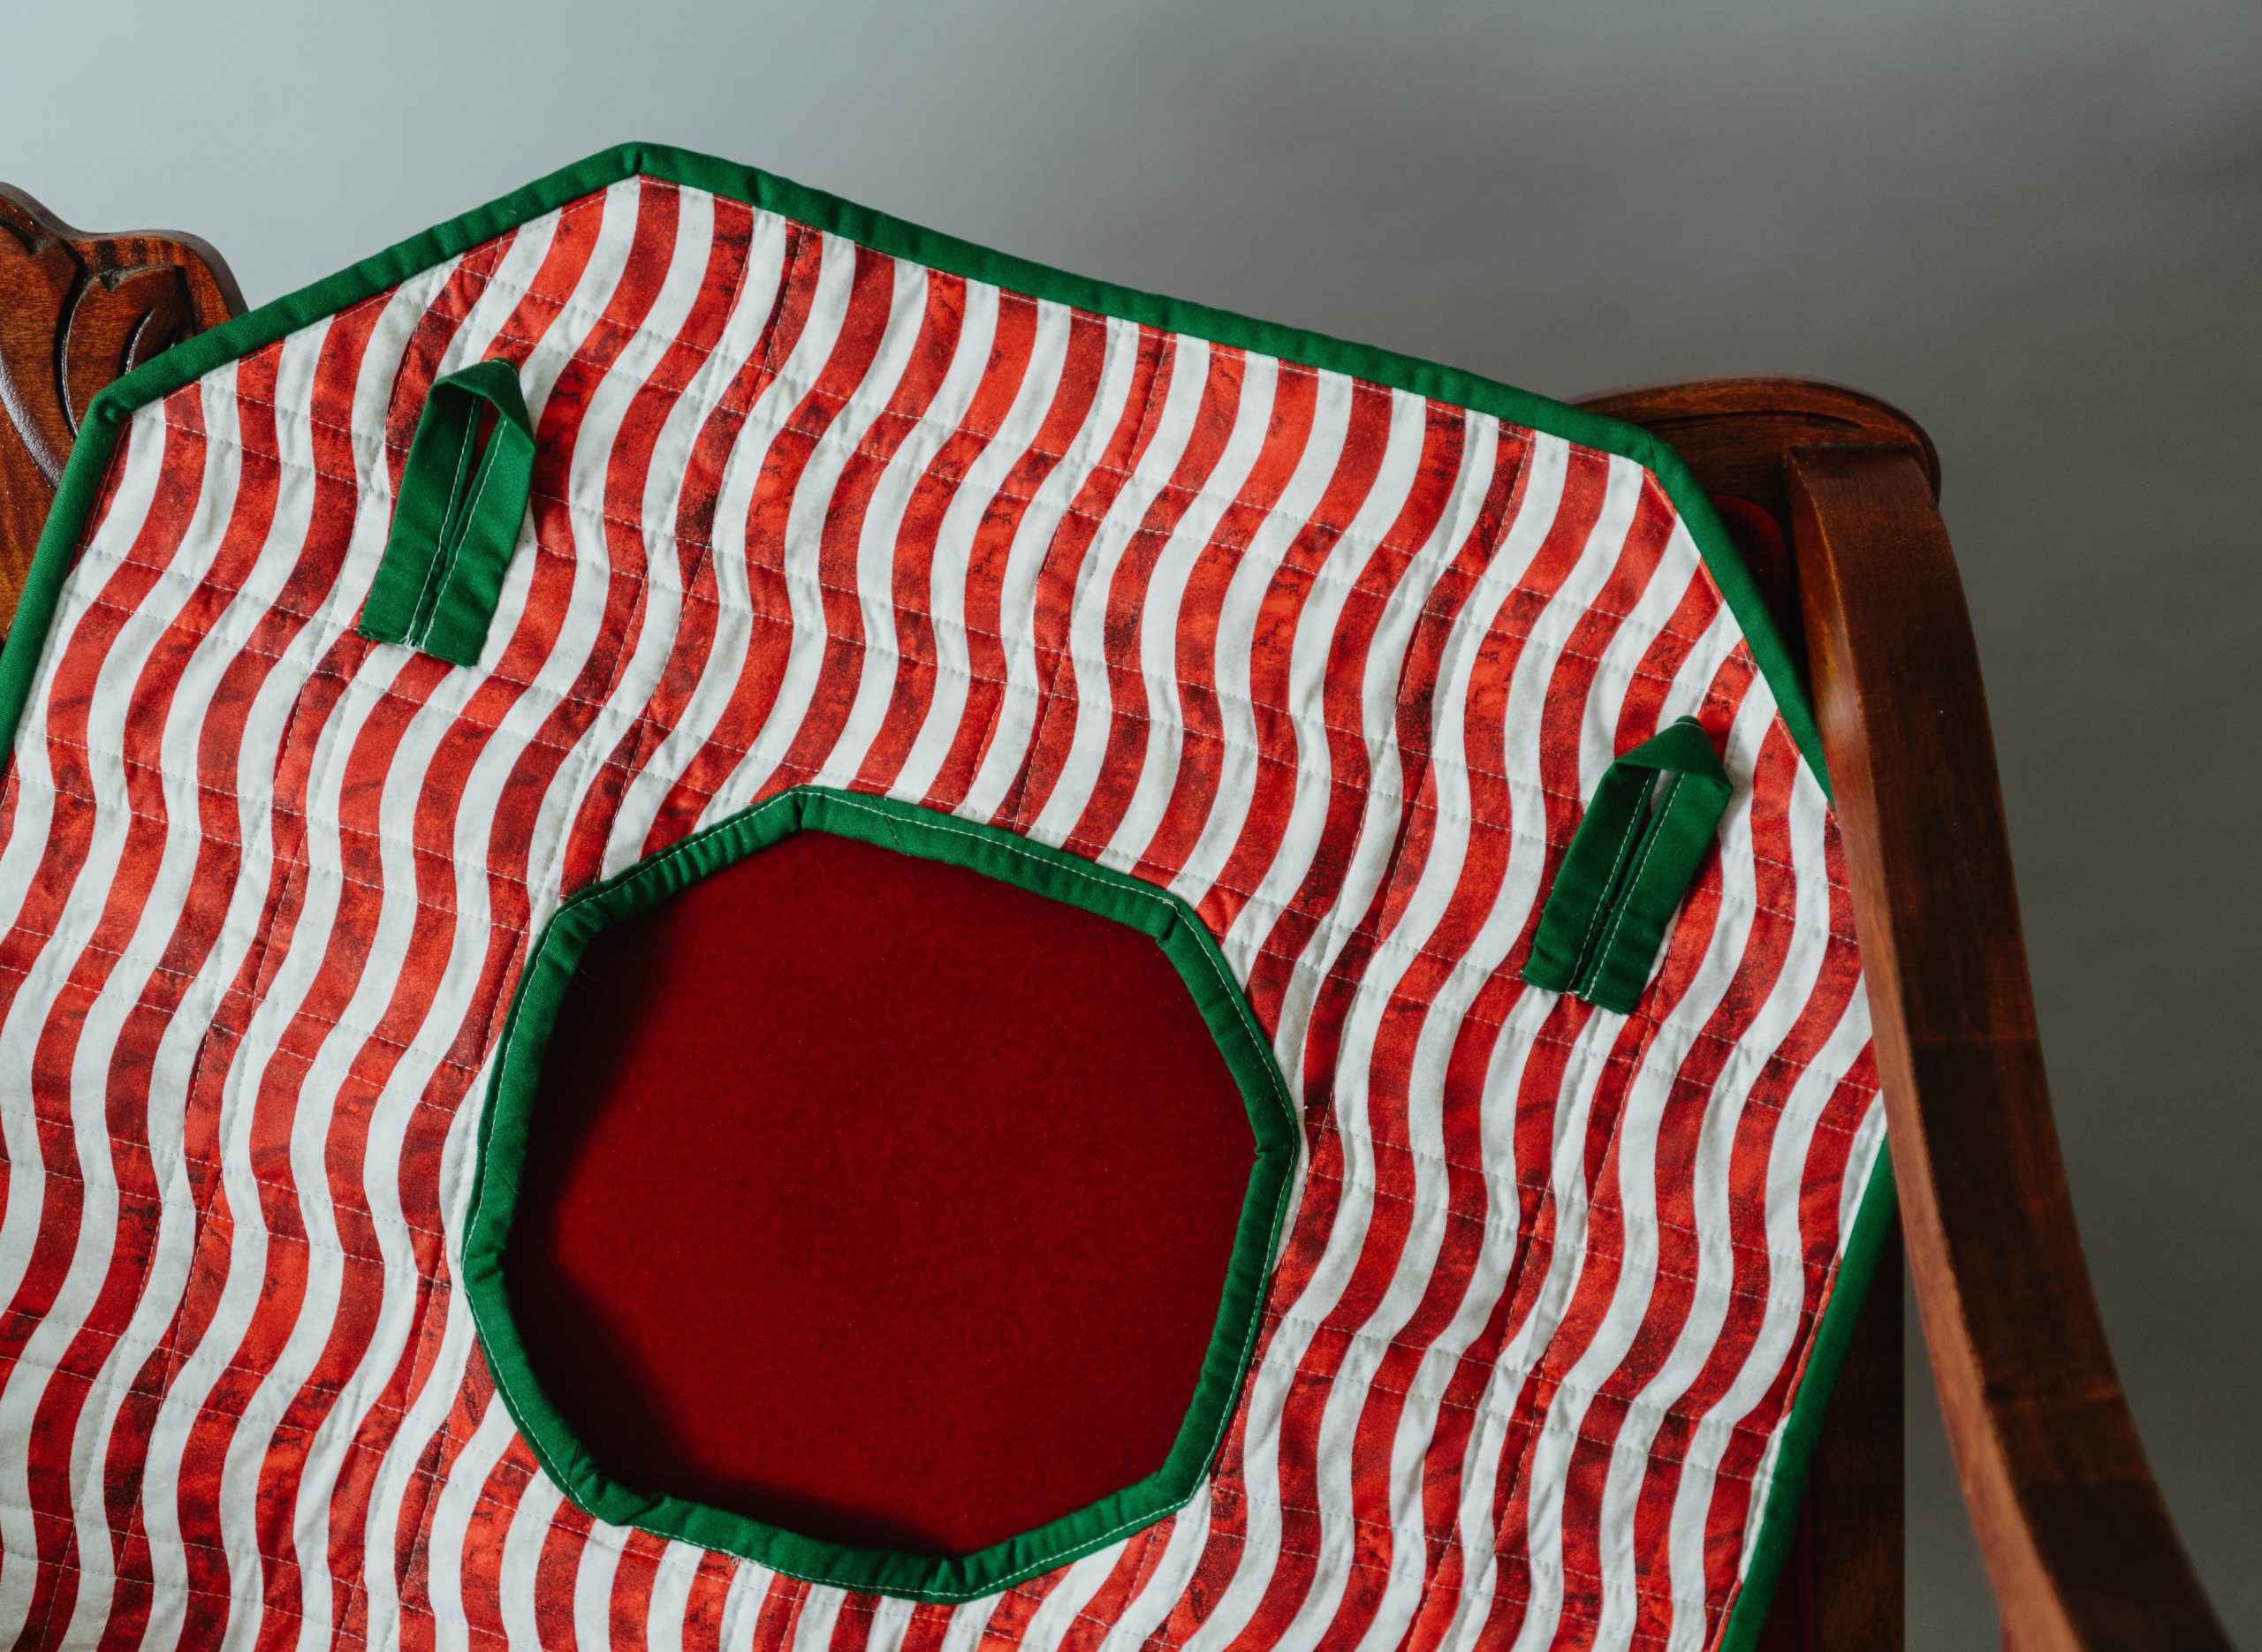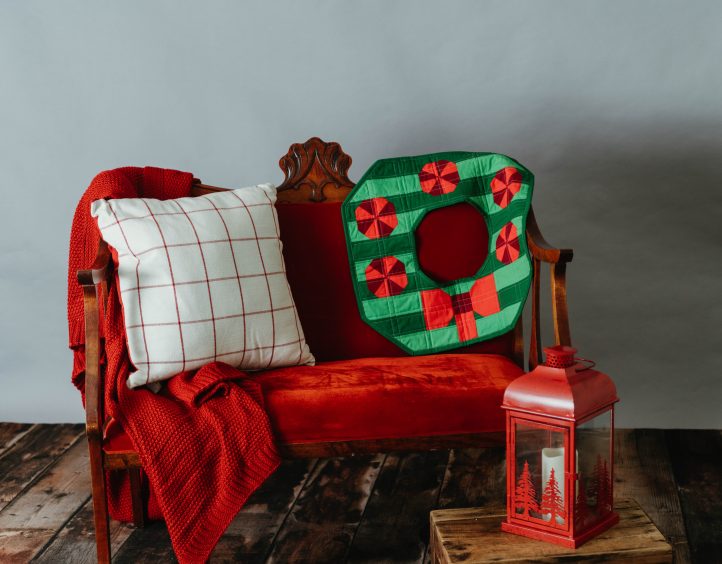
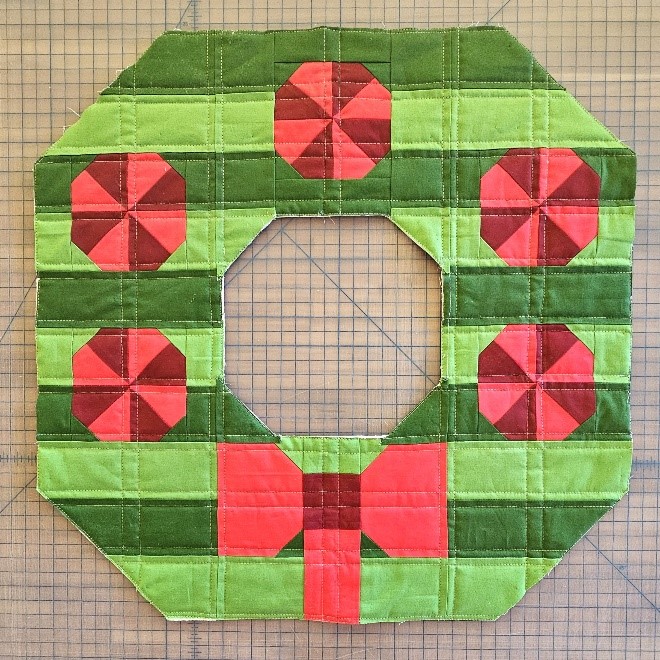
Obsessed doesn’t even begin to cover how we feel about this festive mini quilt pattern from Staci Wendland! This fabric wreath pattern is a darling way to add a dreamy, quilted Christmas touch to your front door, foyer or mantel and features back loops for easy hanging. Using half and quarter yards of fabric, this charming Christmas quilt pattern finishes at 20” x 20” and is a delightful way to give guests to your home a warm welcome during the cold winter months.
Finished Size: 20″ x 20″
Seam Allowances: 1/4″
Abbreviations:
- RST = right sides together
- WOF = width of fabric
- WS = wrong side of fabric
- HST = half square triangle
Materials:
- Dark green cotton fabric (pieces and binding): 1/2 yard
- Bright green cotton fabric: 1/4 yard
- Dark red cotton fabric: 1/4 yard
- Bright red cotton fabric: 1/4 yard
- Backing fabric: 1 yard
- Batting: (1) 28″ x 28″
Cutting Instructions:
Dark green fabric:
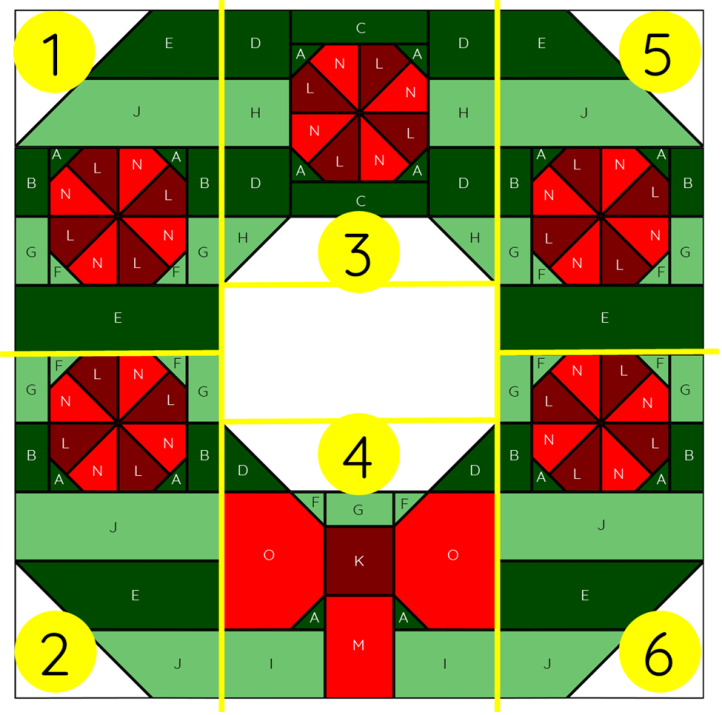
- A: (14) 1 1/2″ x 1 1/2″
- B: (8) 1 1/2″ x 2 1/2″
- C: (2) 1 1/2″ x 4 1/2″
- D: (6) 2 1/2″ x 2 1/2″
- E: (6) 2 1/2″ x 6 1/2″
- Binding: (3) 2 1/2″ x WOF
Bright green fabric:
- F: (10) 1 1/2″ x 1 1/2″
- G: (9) 1 1/2″ x 2 1/2″
- H: (4) 2 1/2″ x 2 1/2″
- I: (2) 2 1/2″ x 3 1/2″
- J: (6) 2 1/2″ x 6 1/2″
Dark red fabric:
- K: (1) 2 1/2″ x 2 1/2″
- L: (10) 3 1/4″ x 3 1/4″
Bright red fabric:
- M: (1) 2 1/2″ x 3 1/2″
- N: (10) 3 1/4″ x 3 1/4″
- O: (2) 3 1/2″ x 4 1/2″
Backing fabric:
- (1) 28″ x 28″
Piecing Instructions:
PREPPING HSTs:
- Draw a diagonal line, corner to corner, on the WS of (10) N.
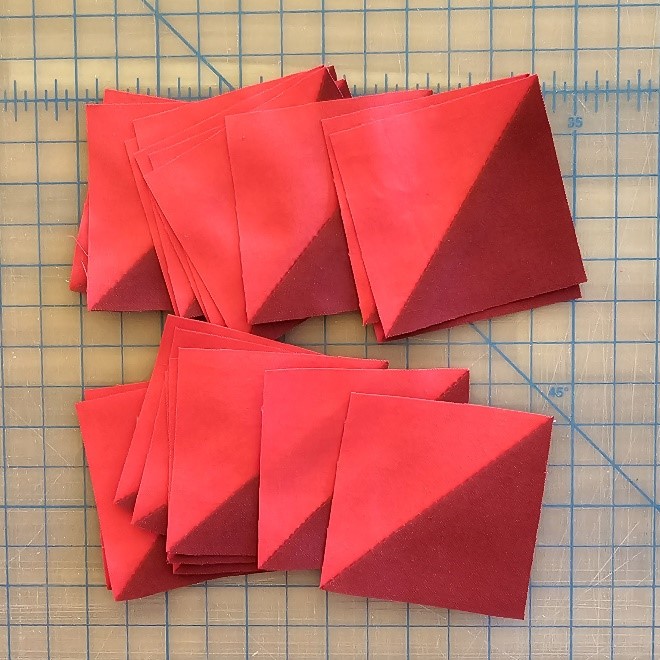
- Place (1) N on (1) L. Sew 1/4″ from each side of the line. Cut on the line. Press open with the seam to L. Trim to 2 1/2″ x 2 1/2″.
- Repeat with remaining (9) N and (9) L. You will have a total of (20) HSTs.
UNIT 1:
- Draw a diagonal line, corner to corner, on the WS of (2) A and (2) F.
- Lay out (1) HST with N on the bottom left and L on the top right. Place (1) A on the upper left corner with the line from the lower left to upper right. Sew on the line. Trim. Press to A. Repeat with a second HST and (1) A.
- Repeat Step 2 in this section using (2) F and (2) HSTs. Press to F.
- Lay out the (4) HSTs in a square with A on the upper left and upper right, and F on the lower left and lower right.
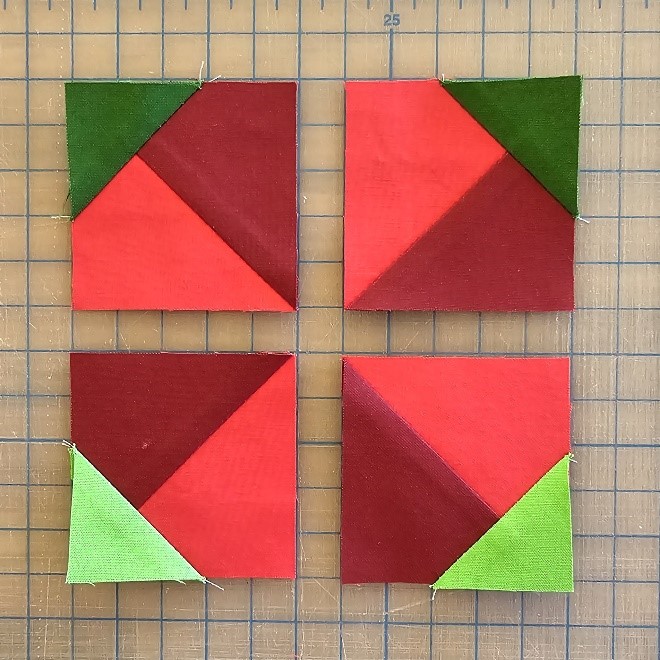
- Sew the top (2) HSTs into a row. Press left. Sew (1) B to the right and (1) B to the left. Press to B.
- Sew the bottom (2) HSTs into a row. Press right. Sew (1) G to the right and (1) G to the left. Press to F/L/N.
- Sew the rows together. Press the seam open to cut down on bulk in the center.
- Sew (1) J to the top. Press to J.
- Sew (1) E to the top. Press to E. Sew (1) E to the bottom. Press to E. Set aside.
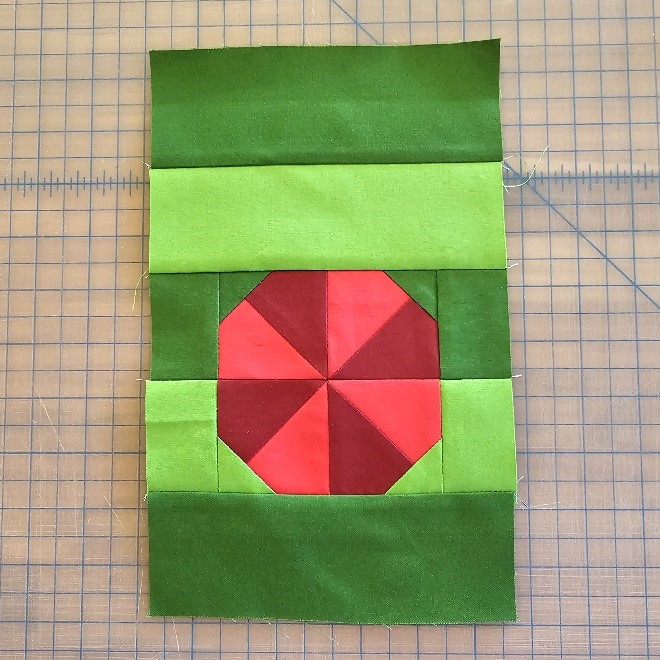
UNIT 2:
- Repeat Steps 1-7 from the Unit 1 section with (4) HSTs, (2) F, (2) A, (2) G, and (2) B, but with F and G on the top row and A and B on the bottom.
- Sew (1) J to the bottom. Press to J.
- Sew (1) E to the bottom. Press to E.
- Sew (1) J to the bottom. Press to J. Set aside.
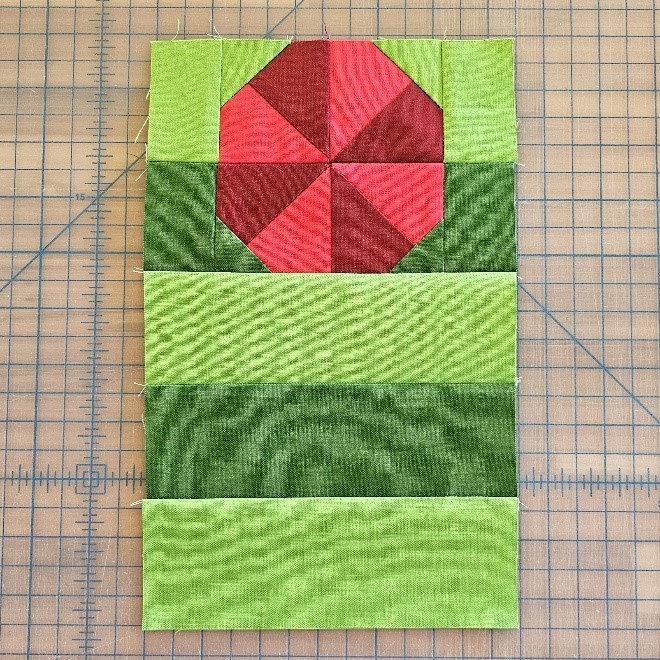
UNIT 3:
- Draw a diagonal line, corner to corner, on the WS of (4) A.
- Lay out (1) HST with L on the bottom left and N on the top right. Place (1) A on the upper left corner with the line from the lower left to upper right. Sew on the line. Trim. Press to A. Repeat with (3) HSTs and (3) A.
- Lay out the (4) HSTs in a square with A on the upper and lower left and upper and lower right.
- Sew the top (2) HSTs into a row. Press left.
- Sew the bottom (2) HSTs into a row. Press right.
- Sew the rows together. Press the seam open.
- Sew (1) C to the top. Press to C.
- Sew (1) C to the bottom. Press to C.
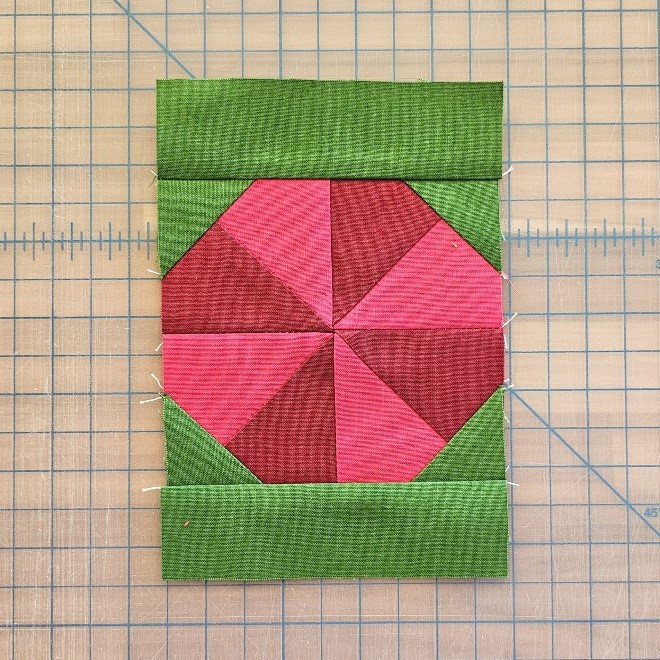
- Sew (1) D, (1) H, and (1) D into a vertical row. Press to the bottom.
- Trim (1) H diagonally, 1/4″ from the corners. Sew to the bottom of the D/H/D row with the cut from the lower left to upper right. Press to the bottom.
- Sew to the left of Unit 3. Press to the left.
- Sew a second set of (1) D, (1) H, and (1) D into a vertical row. Press to the bottom.
- Trim (1) H diagonally, 1/4″ from the corners. Sew to the bottom of the second D/H/D row with the cut from the upper left to lower right. Press to the bottom.
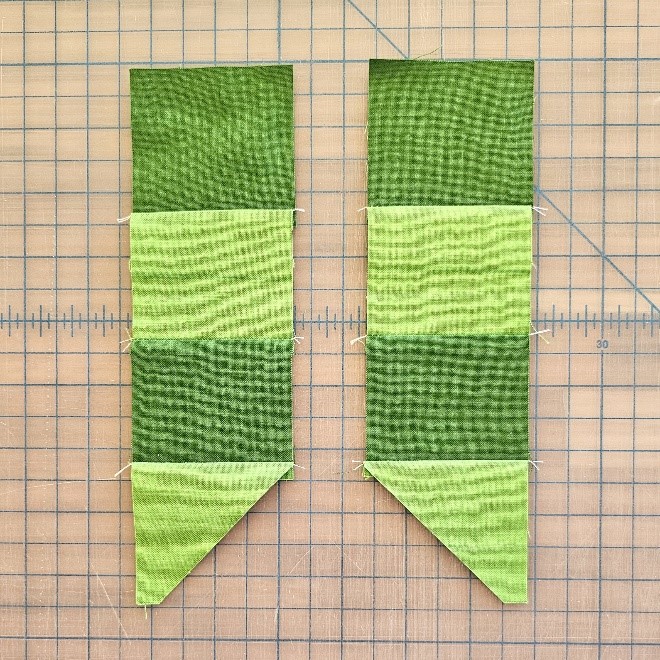
- Sew to the right of Unit 3. Press to the right. Set aside.
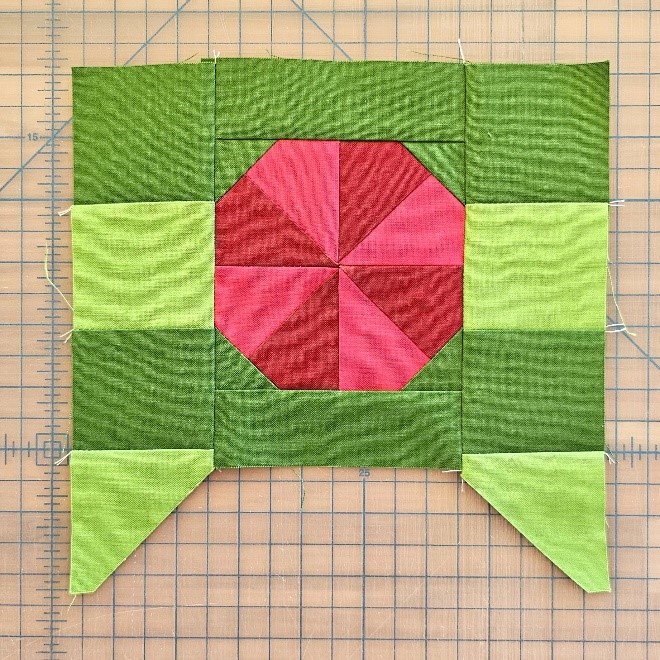
UNIT 4:
- Draw a diagonal line, corner to corner, on the WS of (2) F and (2) A.
- Place (1) F on the upper right corner of (1) O with the line from the upper left to lower right. Sew on the line. Trim. Press to F.
- Place (1) A on the lower right of the same O with the line from the lower left to upper right. Sew on the line. Trim. Press to A.
- Sew (1) I to the bottom. Press to O.
- Trim (1) D diagonally, 1/4” from the corners. Sew to the top of O with the left edges even and the cut from the upper left to lower right. Press to D. Set aside.
- Place (1) F on the upper left corner of (1) O with the line from the lower left to upper right. Sew on the line. Trim. Press to F.
- Place (1) A on the lower left corner of the same O with the line from the upper left to lower right. Sew on the line. Trim. Press to A.
- Sew (1) I to the bottom. Press to O.
- Trim (1) D diagonally, 1/4” from the corners. Sew to the top of O with the right edges even and the cut from the lower left to upper right. Press to D. Set aside.
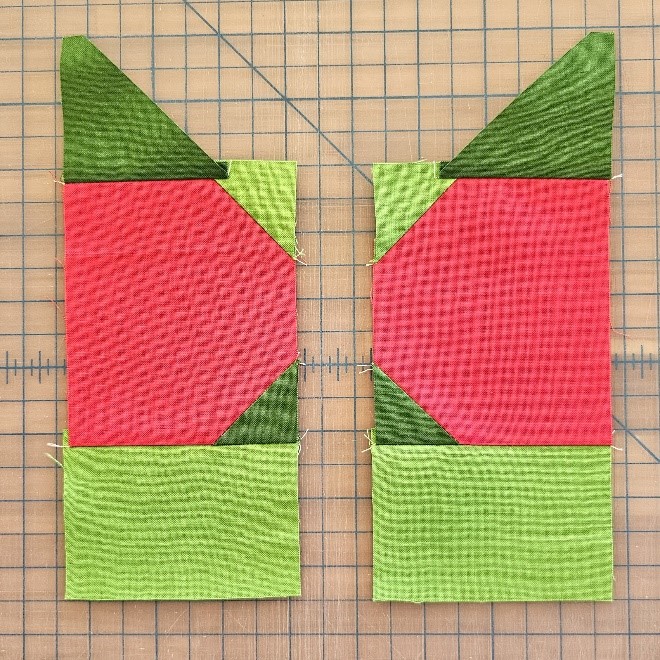
- Sew (1) G, (1) K, and (1) M into a vertical row. Press to K.
- Gather the (3) sections. Sew the G/K/M between the (2) O/F/A/I with all F and A to the center. Press the seams to the outside.
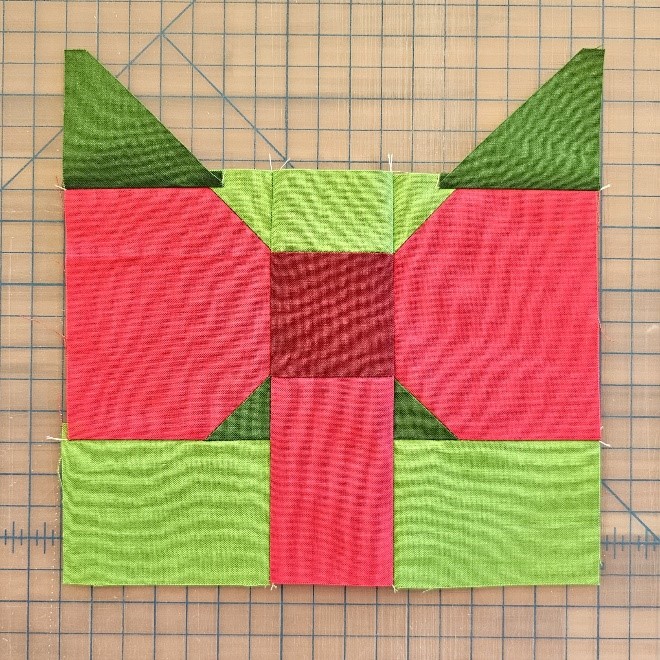
UNIT 5:
- Repeat Steps 1-9 in the Unit 1 section to complete Unit 5.
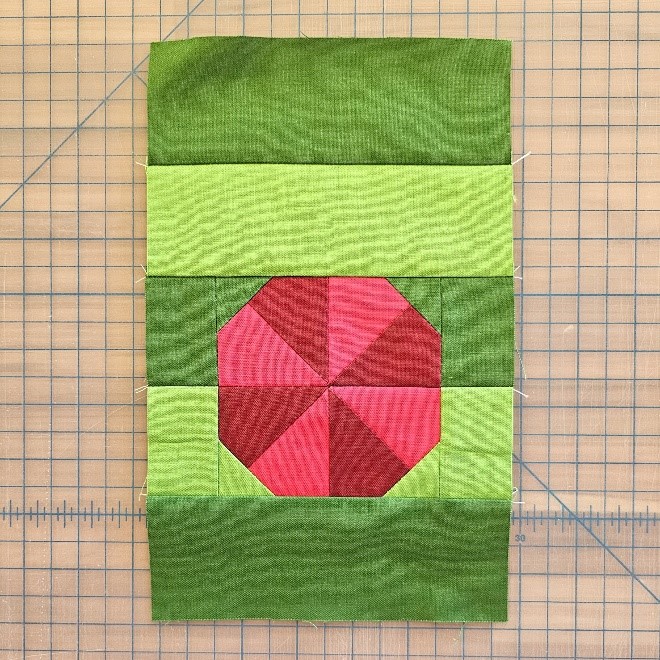
UNIT 6:
- Repeat Steps 1-4 in the Unit 2 section to complete Unit 6, except lay out the HSTs with L on the lower left and N on the upper right.
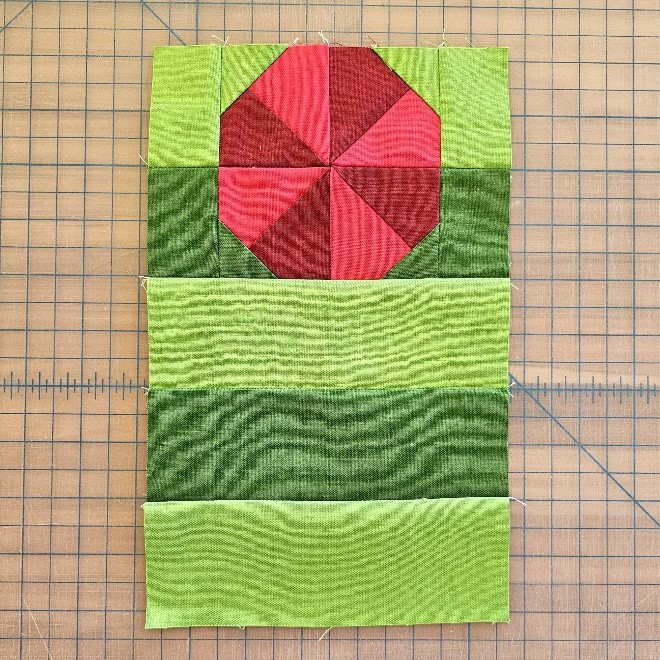
FULL QUILT TOP:
- Gather all Units 1-6.
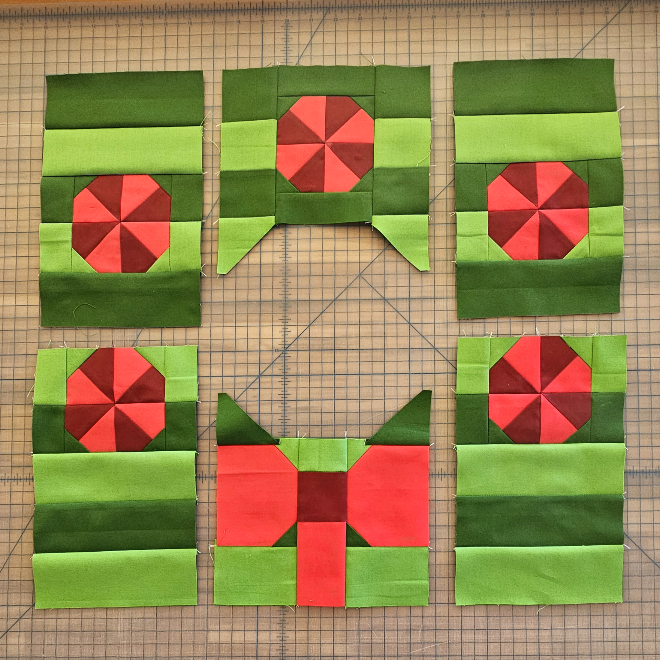
- Sew Unit 1 to the top of Unit 2. Press to Unit 1.
- Sew Unit 5 to the top of Unit 6. Press to Unit 5.
- Place Unit 3 RST with Unit 1 with the top and right edges even. Match up the seams. Sew from the top to bottom edges of Unit 3. Press to Unit 3.
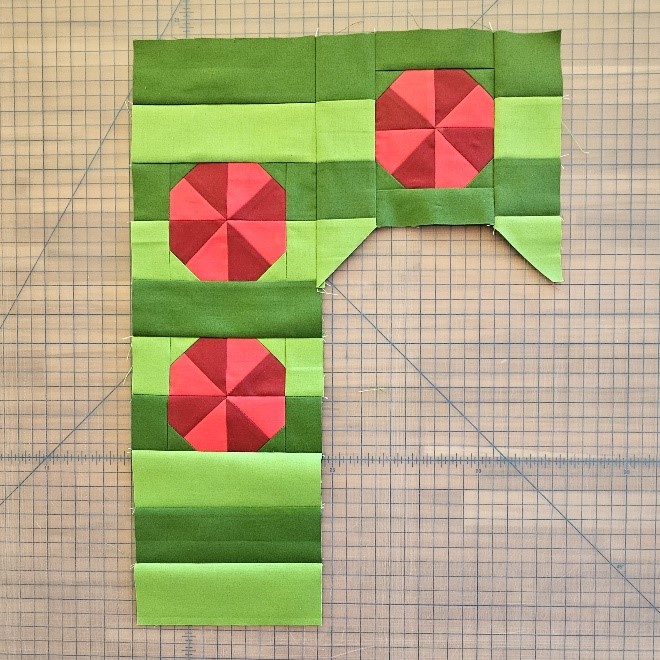
- Place Unit 4 RST with Unit 2 with the bottom and right edges even. Match up the seams. Sew from the top to bottom edges of Unit 4. Press to Unit 4.
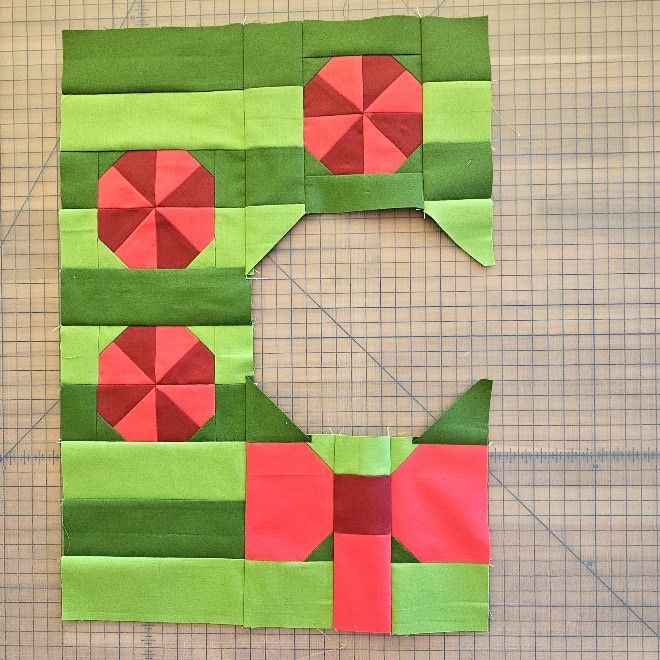
- Place Units 5 and 6 RST on Units 3 and 4 with the top, bottom, and right edges even. Sew from the top to bottom edges of Units 5 and 6. Press to Units 3 and 4.
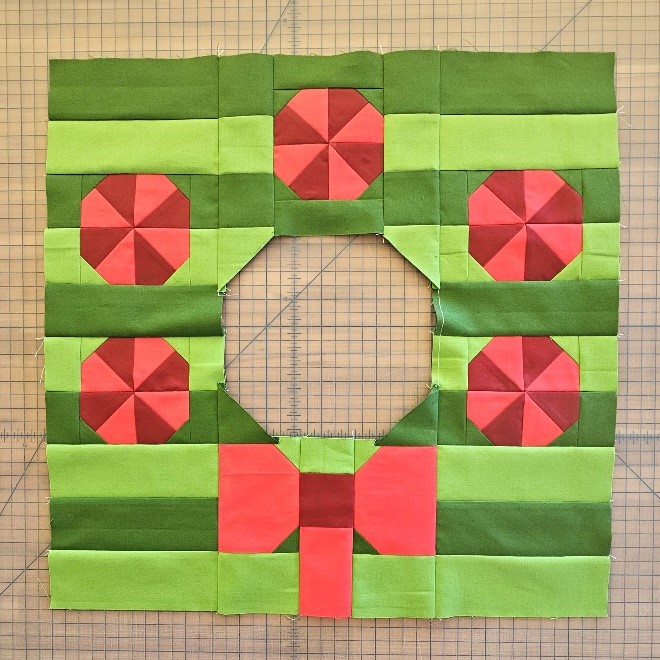
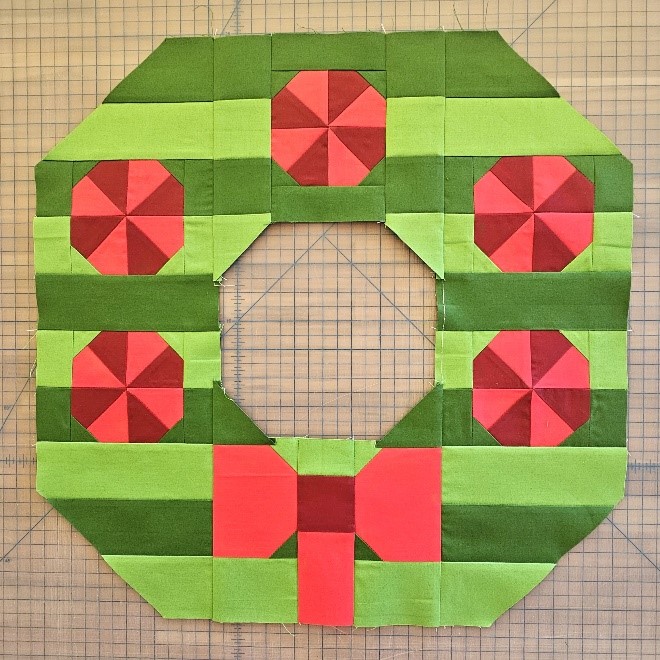
- Make a small mark 4 1/2″ from each side of each corner of the quilt top.
- Draw diagonally across each corner between the marks. Cut on the drawn line to remove each corner.
FINISHING THE QUILT:
- Layer the backing fabric with the right side down, batting, and the quilt top with the right side up. Pin or baste the layers together.
- Quilt using your preferred method and design.
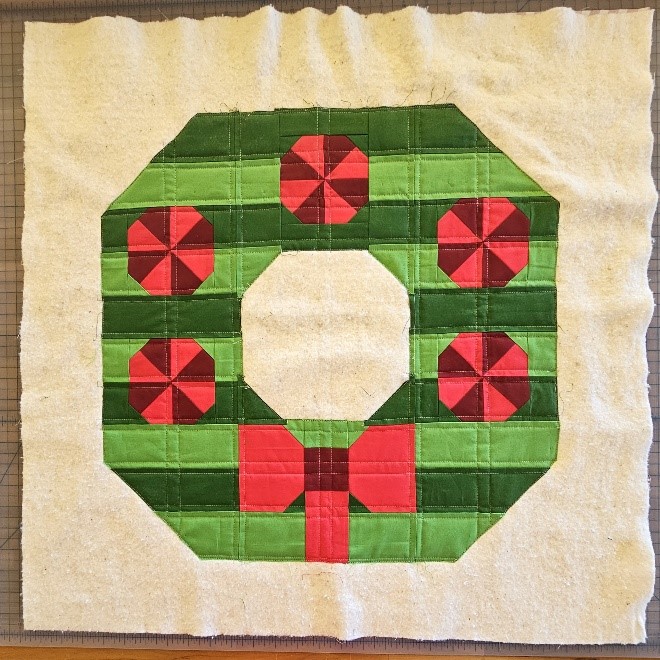
- Trim the batting and backing to match the quilt top. To avoid cutting into the quilt when trimming the center, cut the straight edges with a rotary cutter, stopping 1/2″ before reaching the corner. Clip to the corner using a pair of sharp scissors.
- Trim the selvages from the (3) binding strips. Sew the strips RST, end-to-end, with diagonal seams to make (1) continuous binding strip. Fold in half lengthwise with WS together and press.
- Sew the binding around the outer edge using your preferred method, rotating at each corner.
- To sew the binding around the inner edge, clip in just under 1/4″ at each corner.
- As you sew on the binding to the quilt, stop a few inches prior to each corner and mark a line on the binding 1/4″ from the edge on each side. Those marks should intersect at the corner.
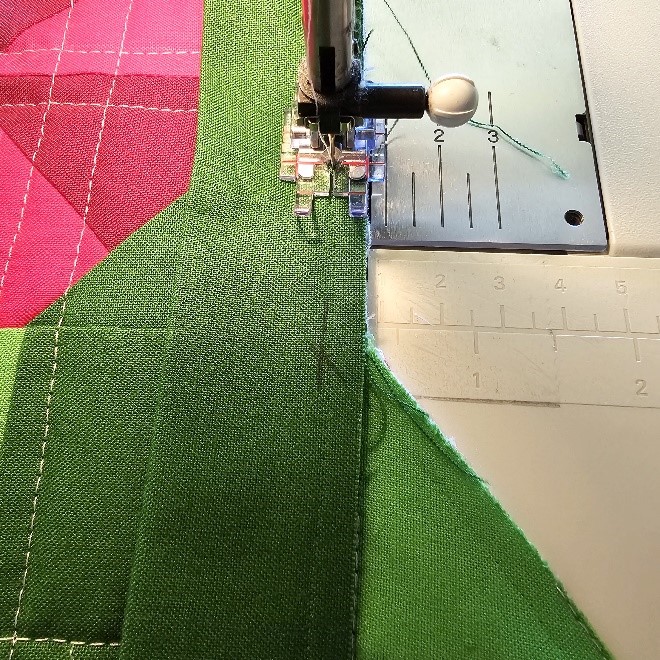
- Continue sewing. Stop with the needle down at the point where the two drawn lines intersect. Carefully pull the quilt straight at the corner, along with the binding. Continue sewing.
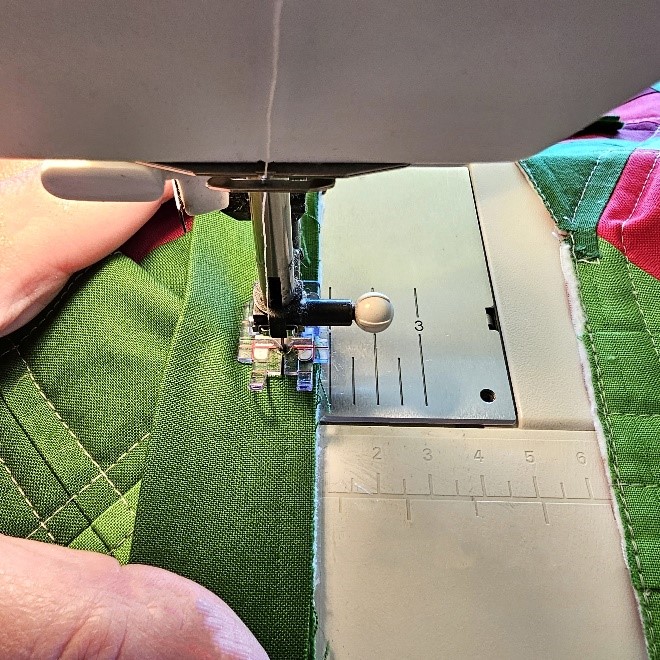
- Repeat at each corner.
- If you have difficultly joining the binding ends, remove some of the stitches in the seam and re-sew after joining.
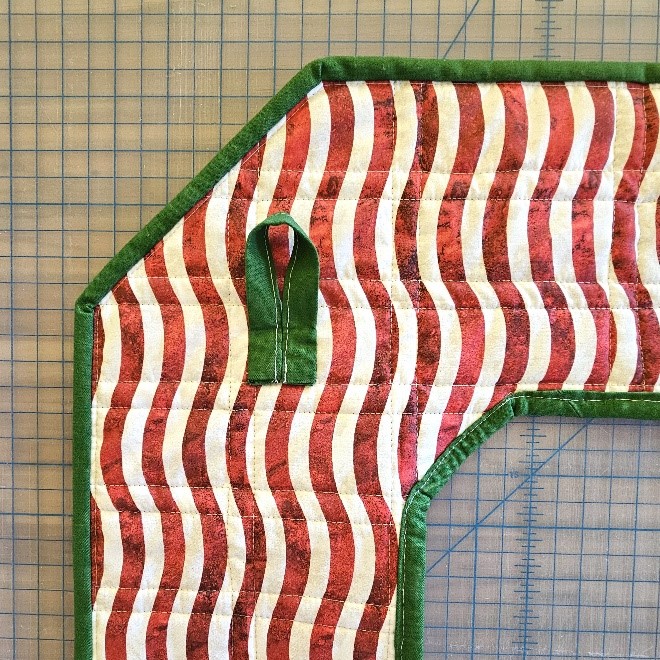
- To make hanging loops, cut (2) 7″ strips from the remaining binding.
- Fold the short ends under 1/4″ and press. Fold the long edges in to the fold and press.
- Stitch 1/8″ from the double-fold edges.
- Fold each strip in half. Pin the bottoms 3″ from each side and 6″ from the top on the back of the quilt.
- Hand sew in place.
