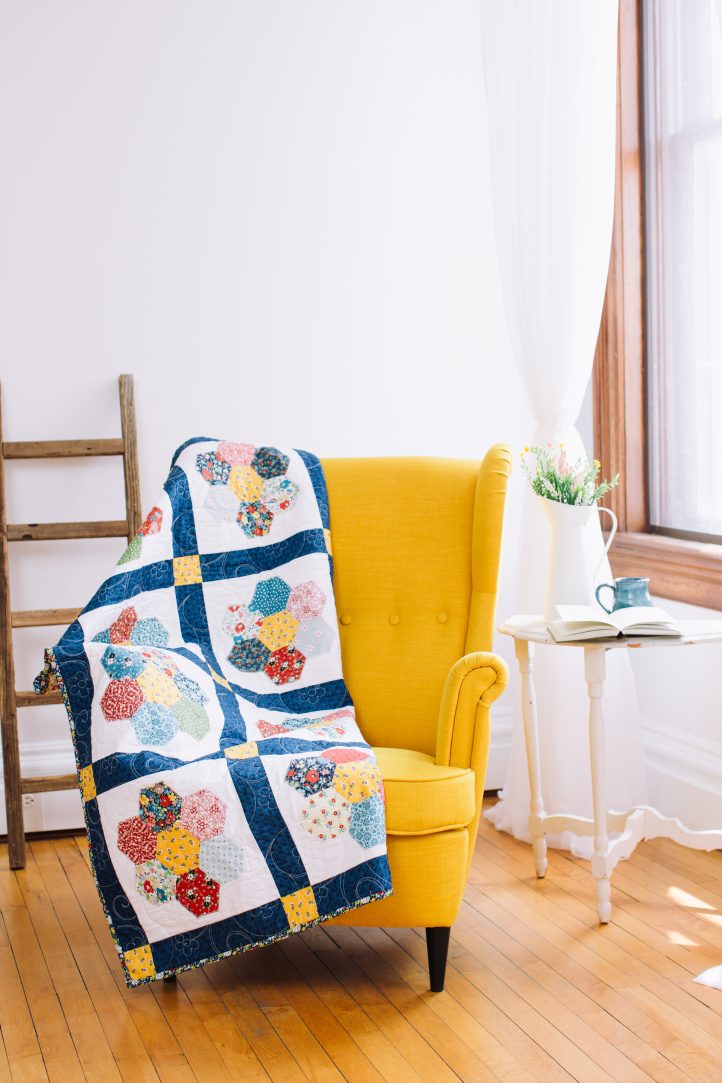
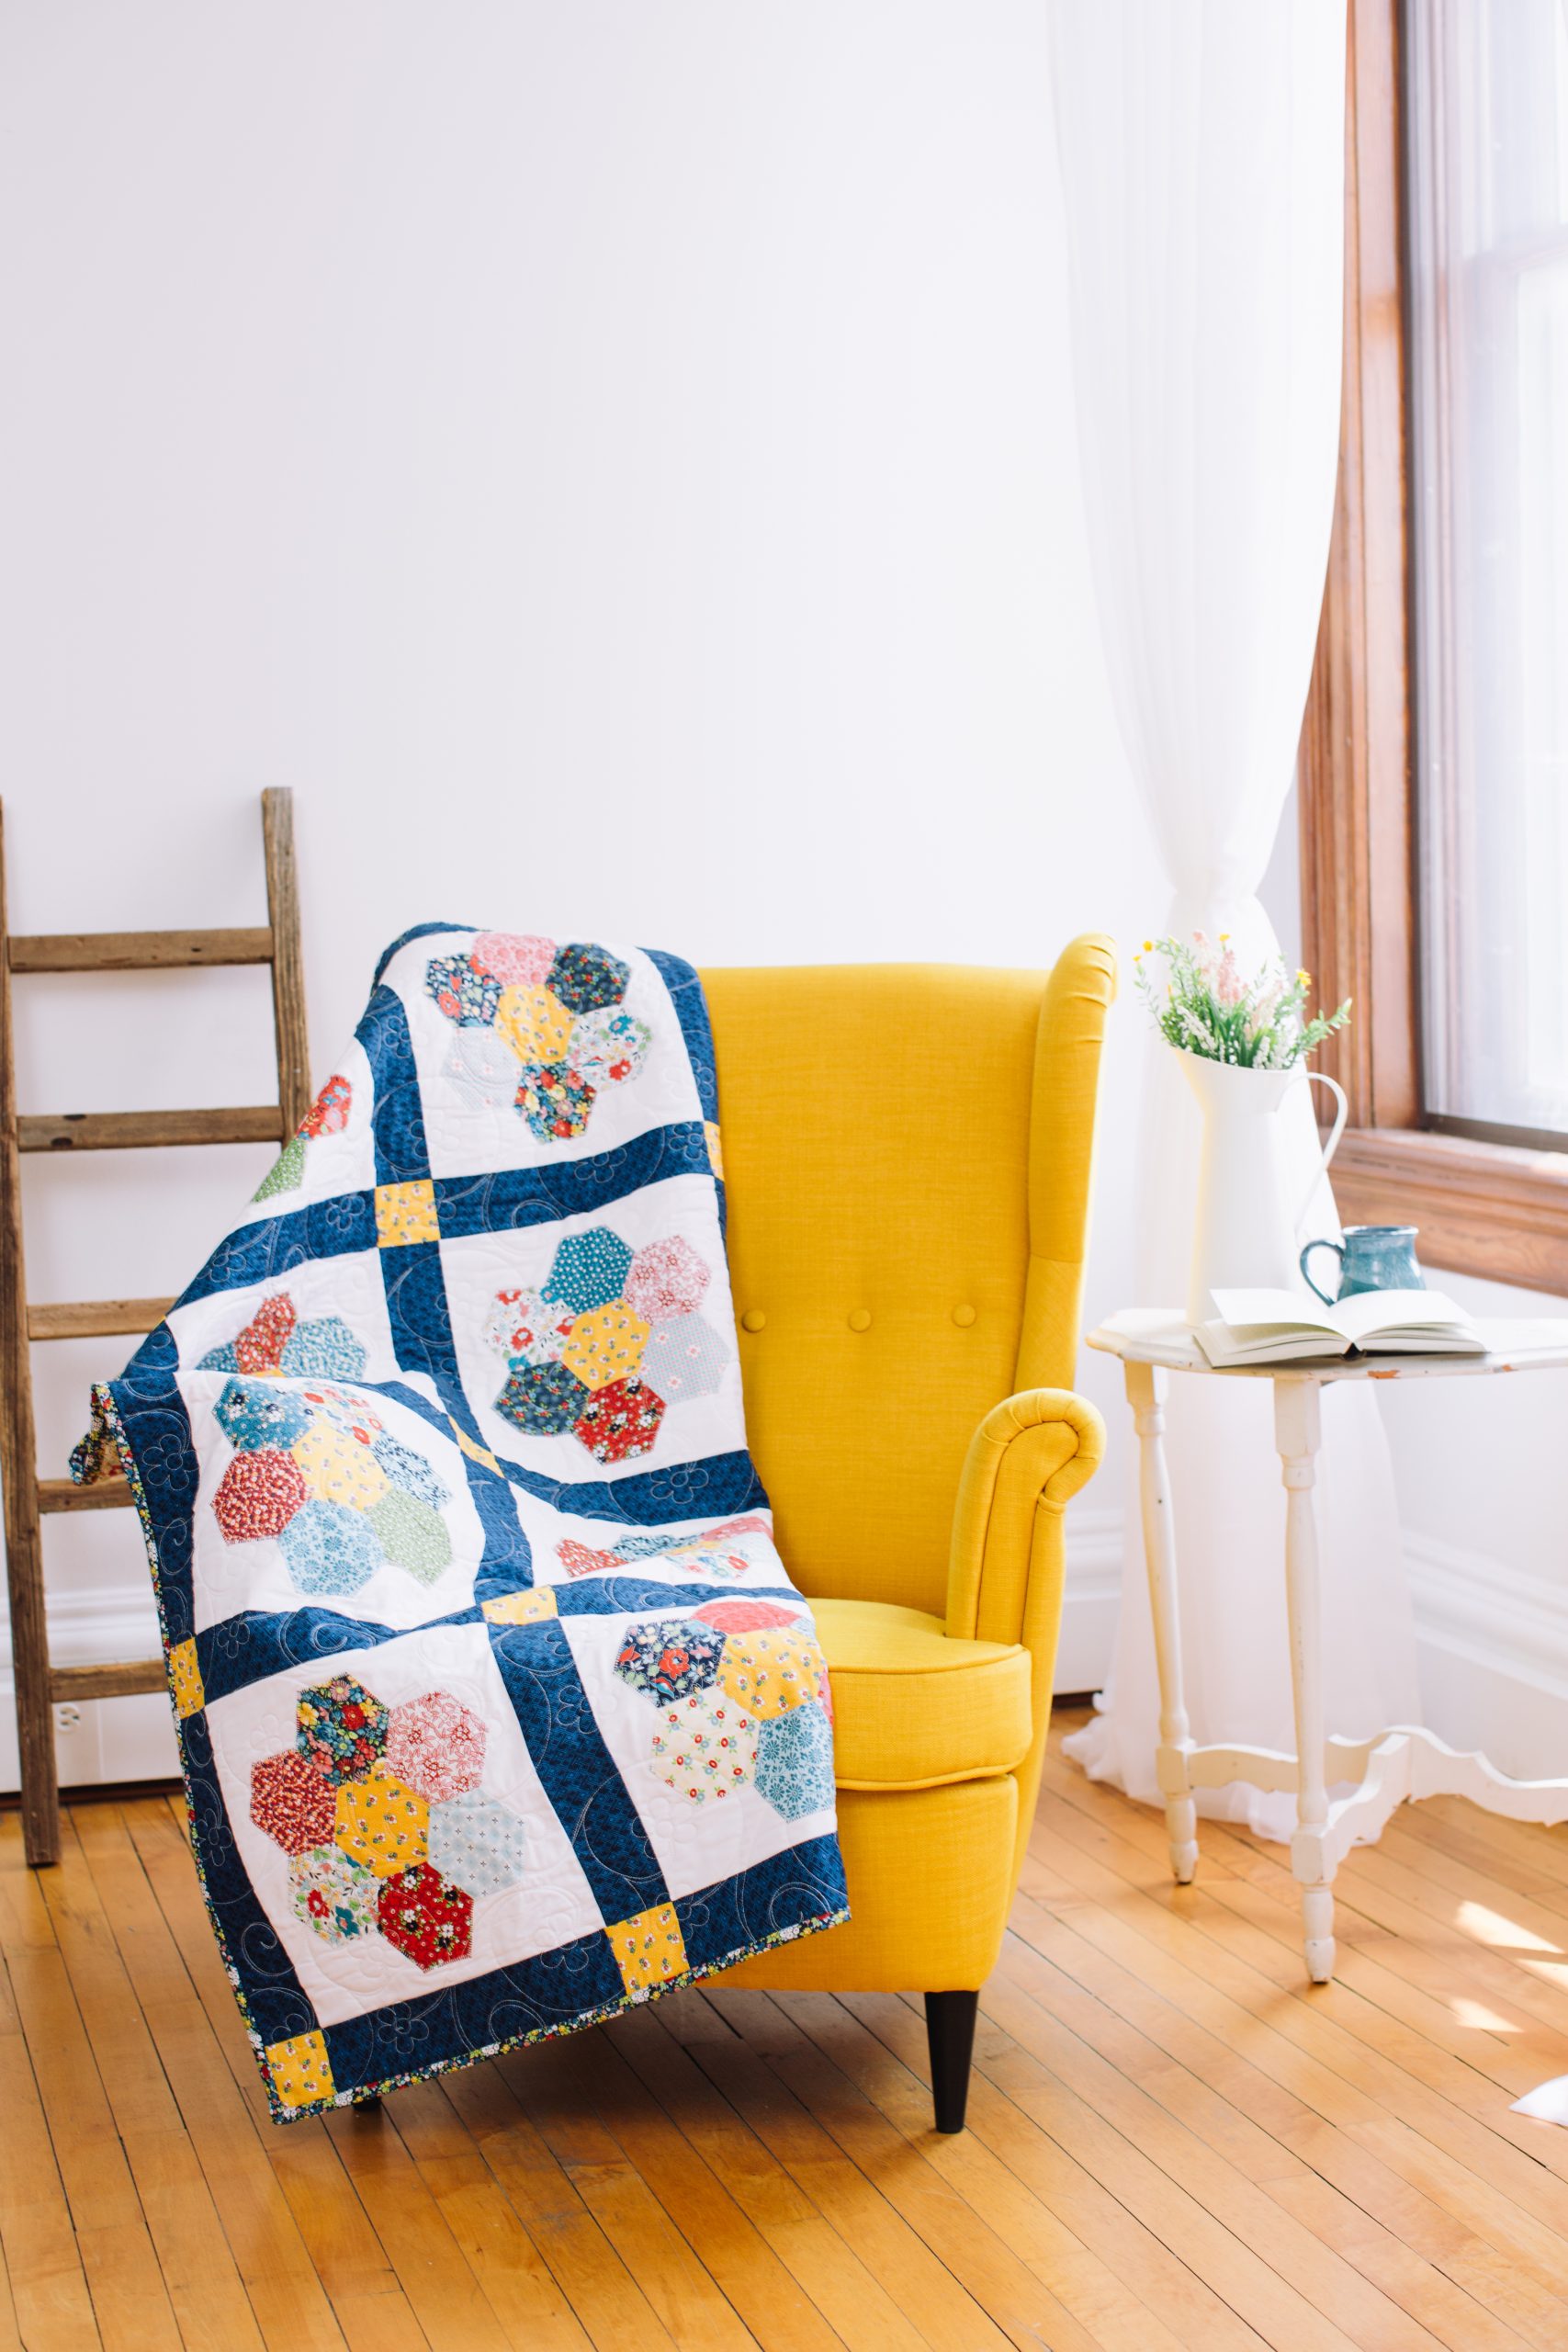
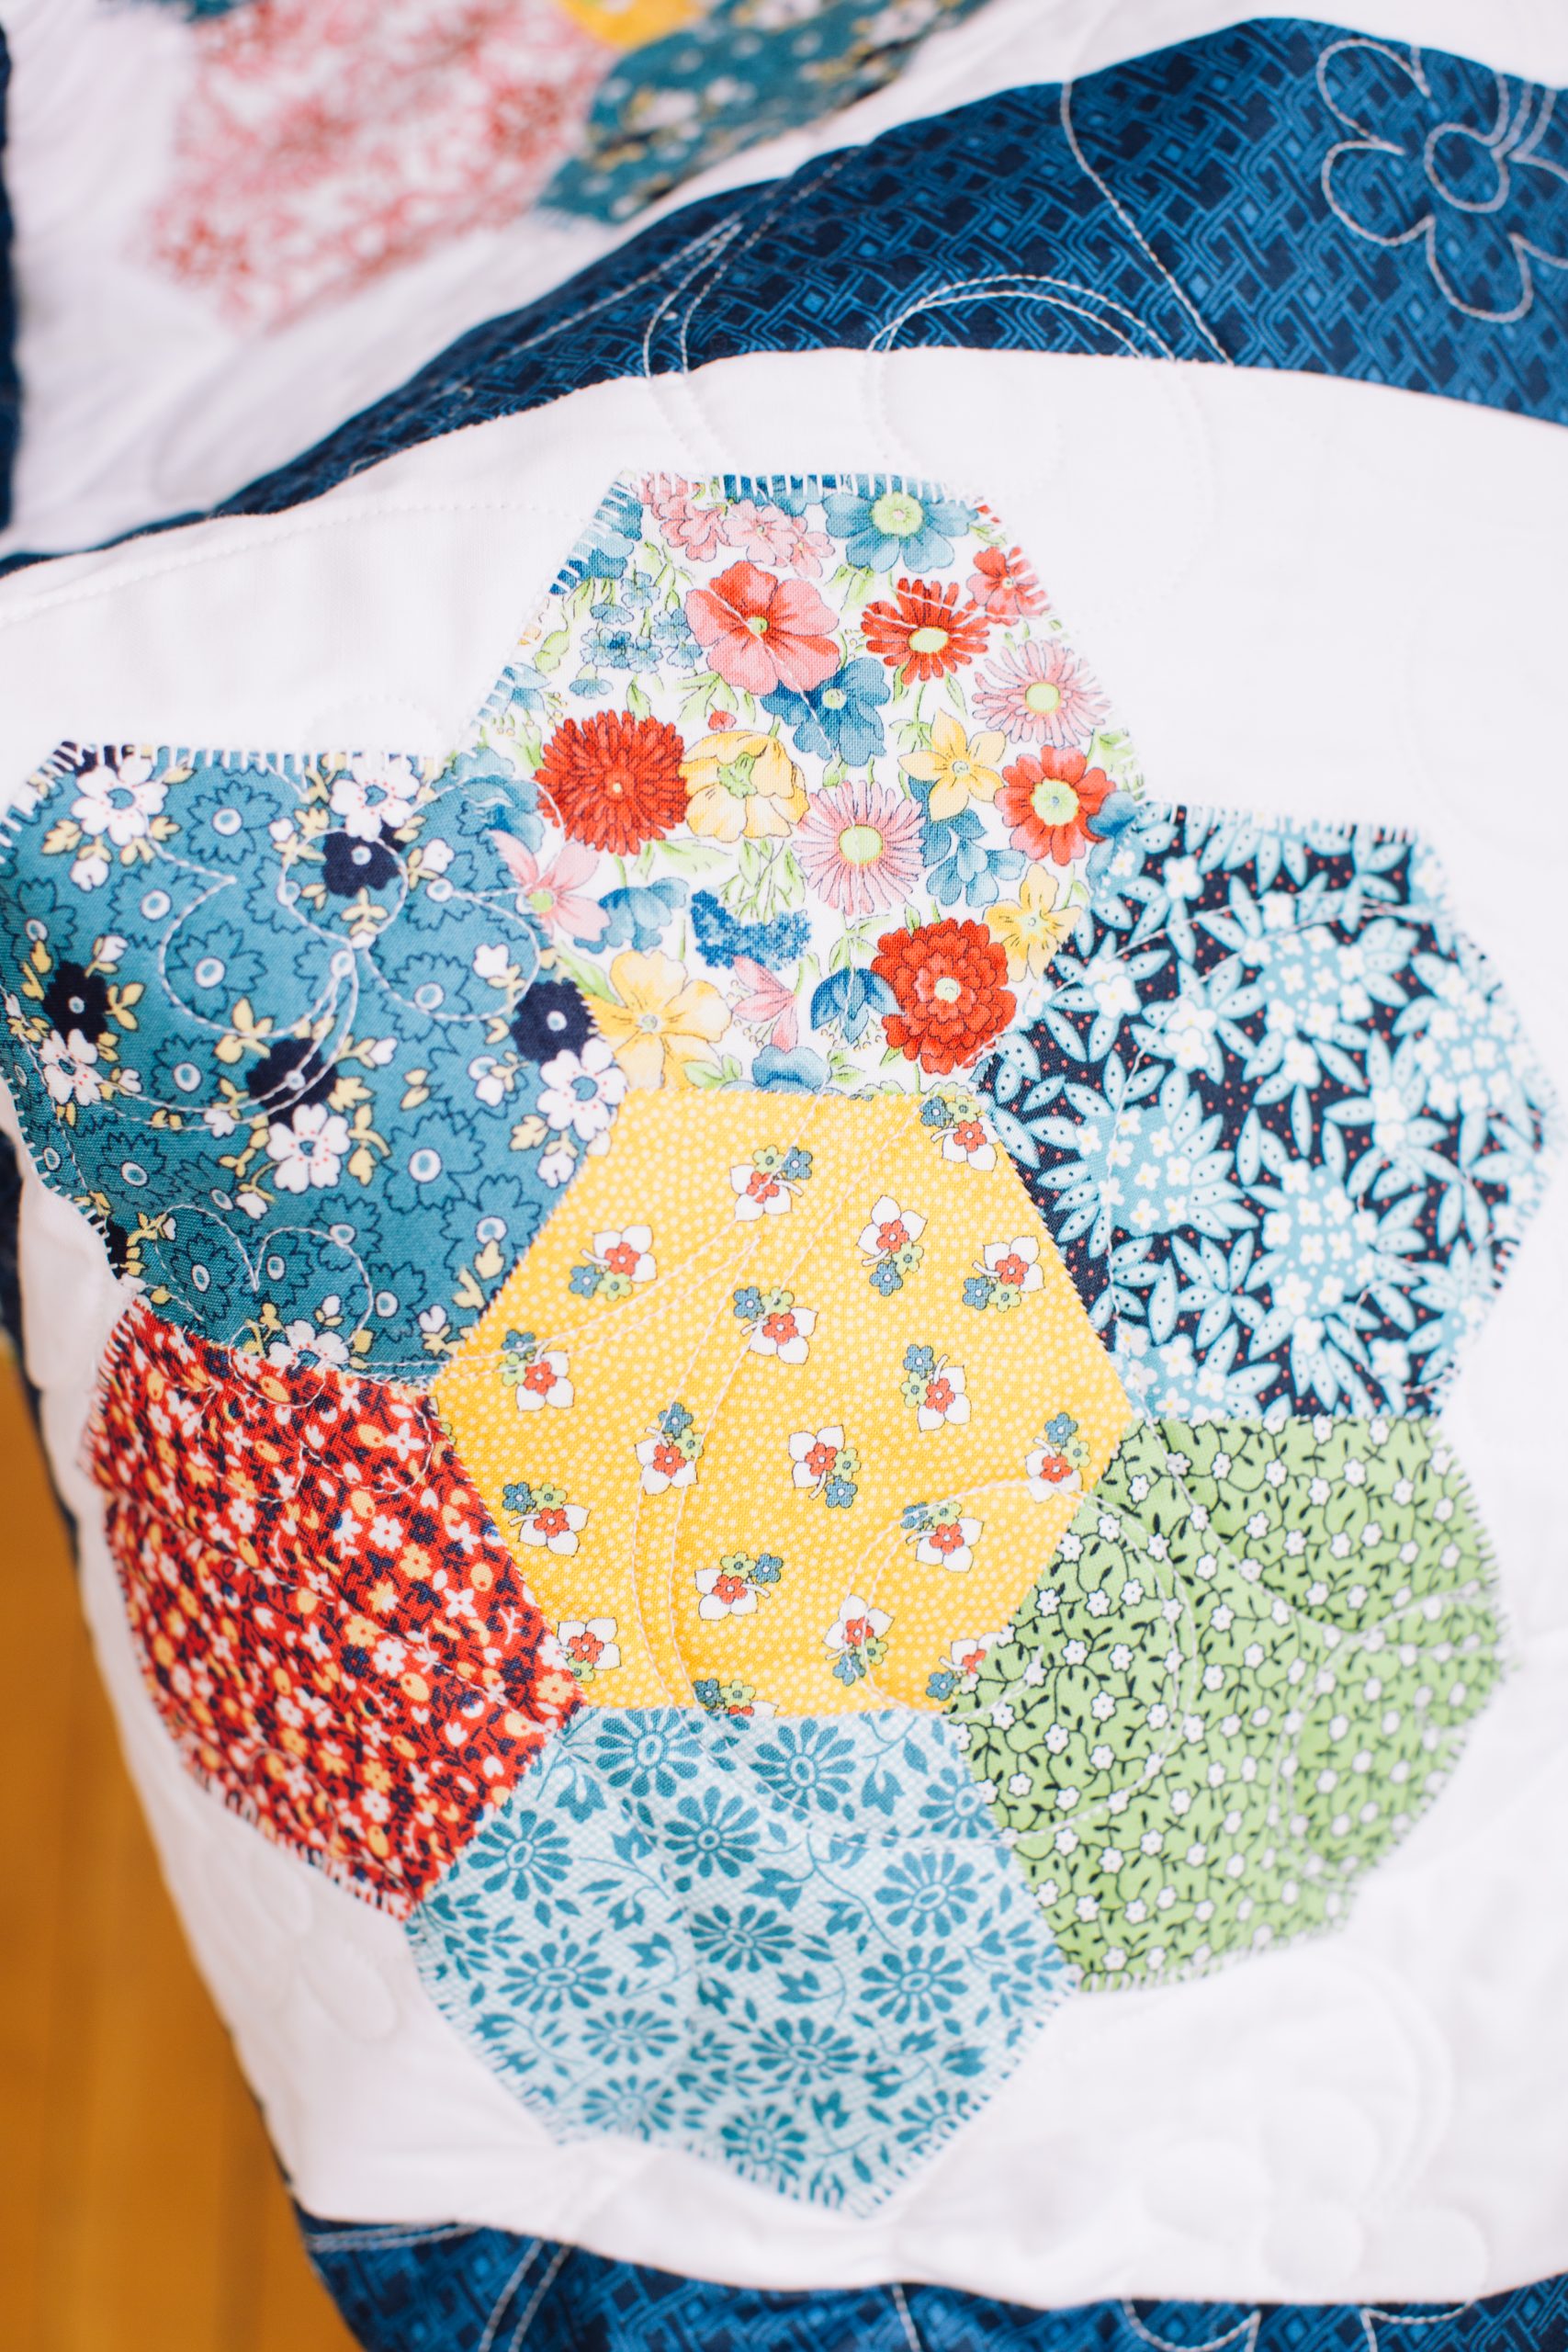
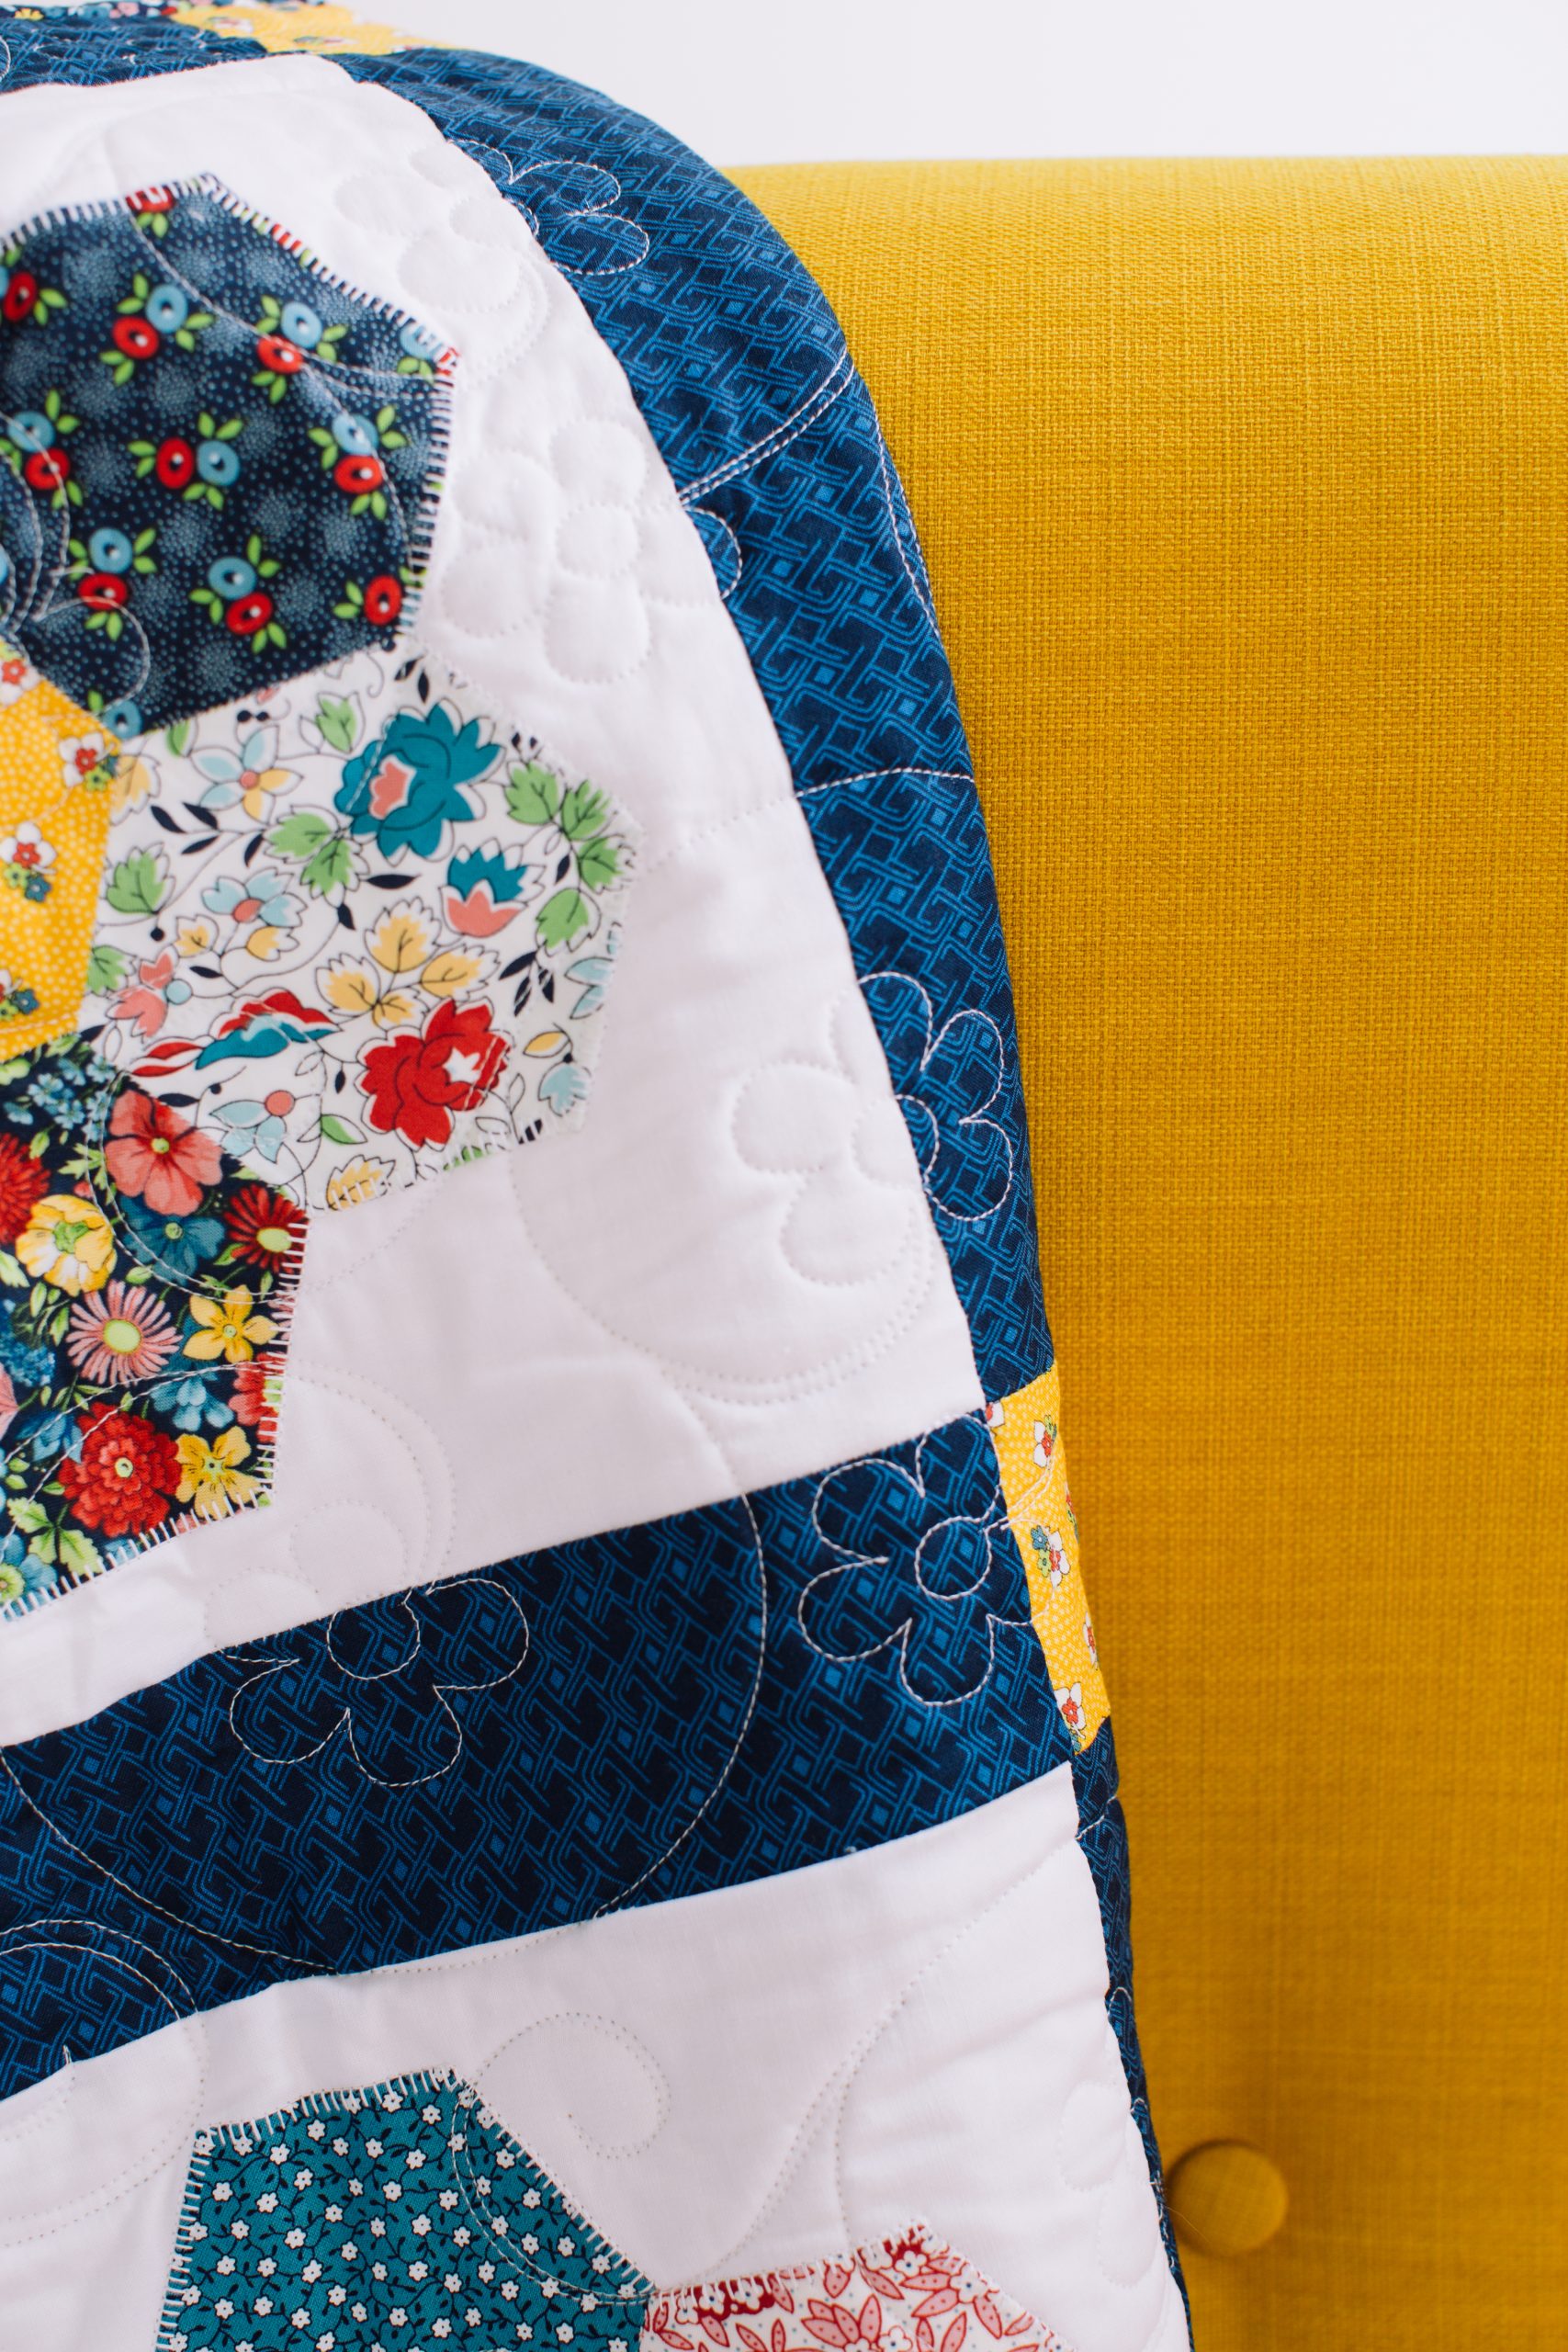
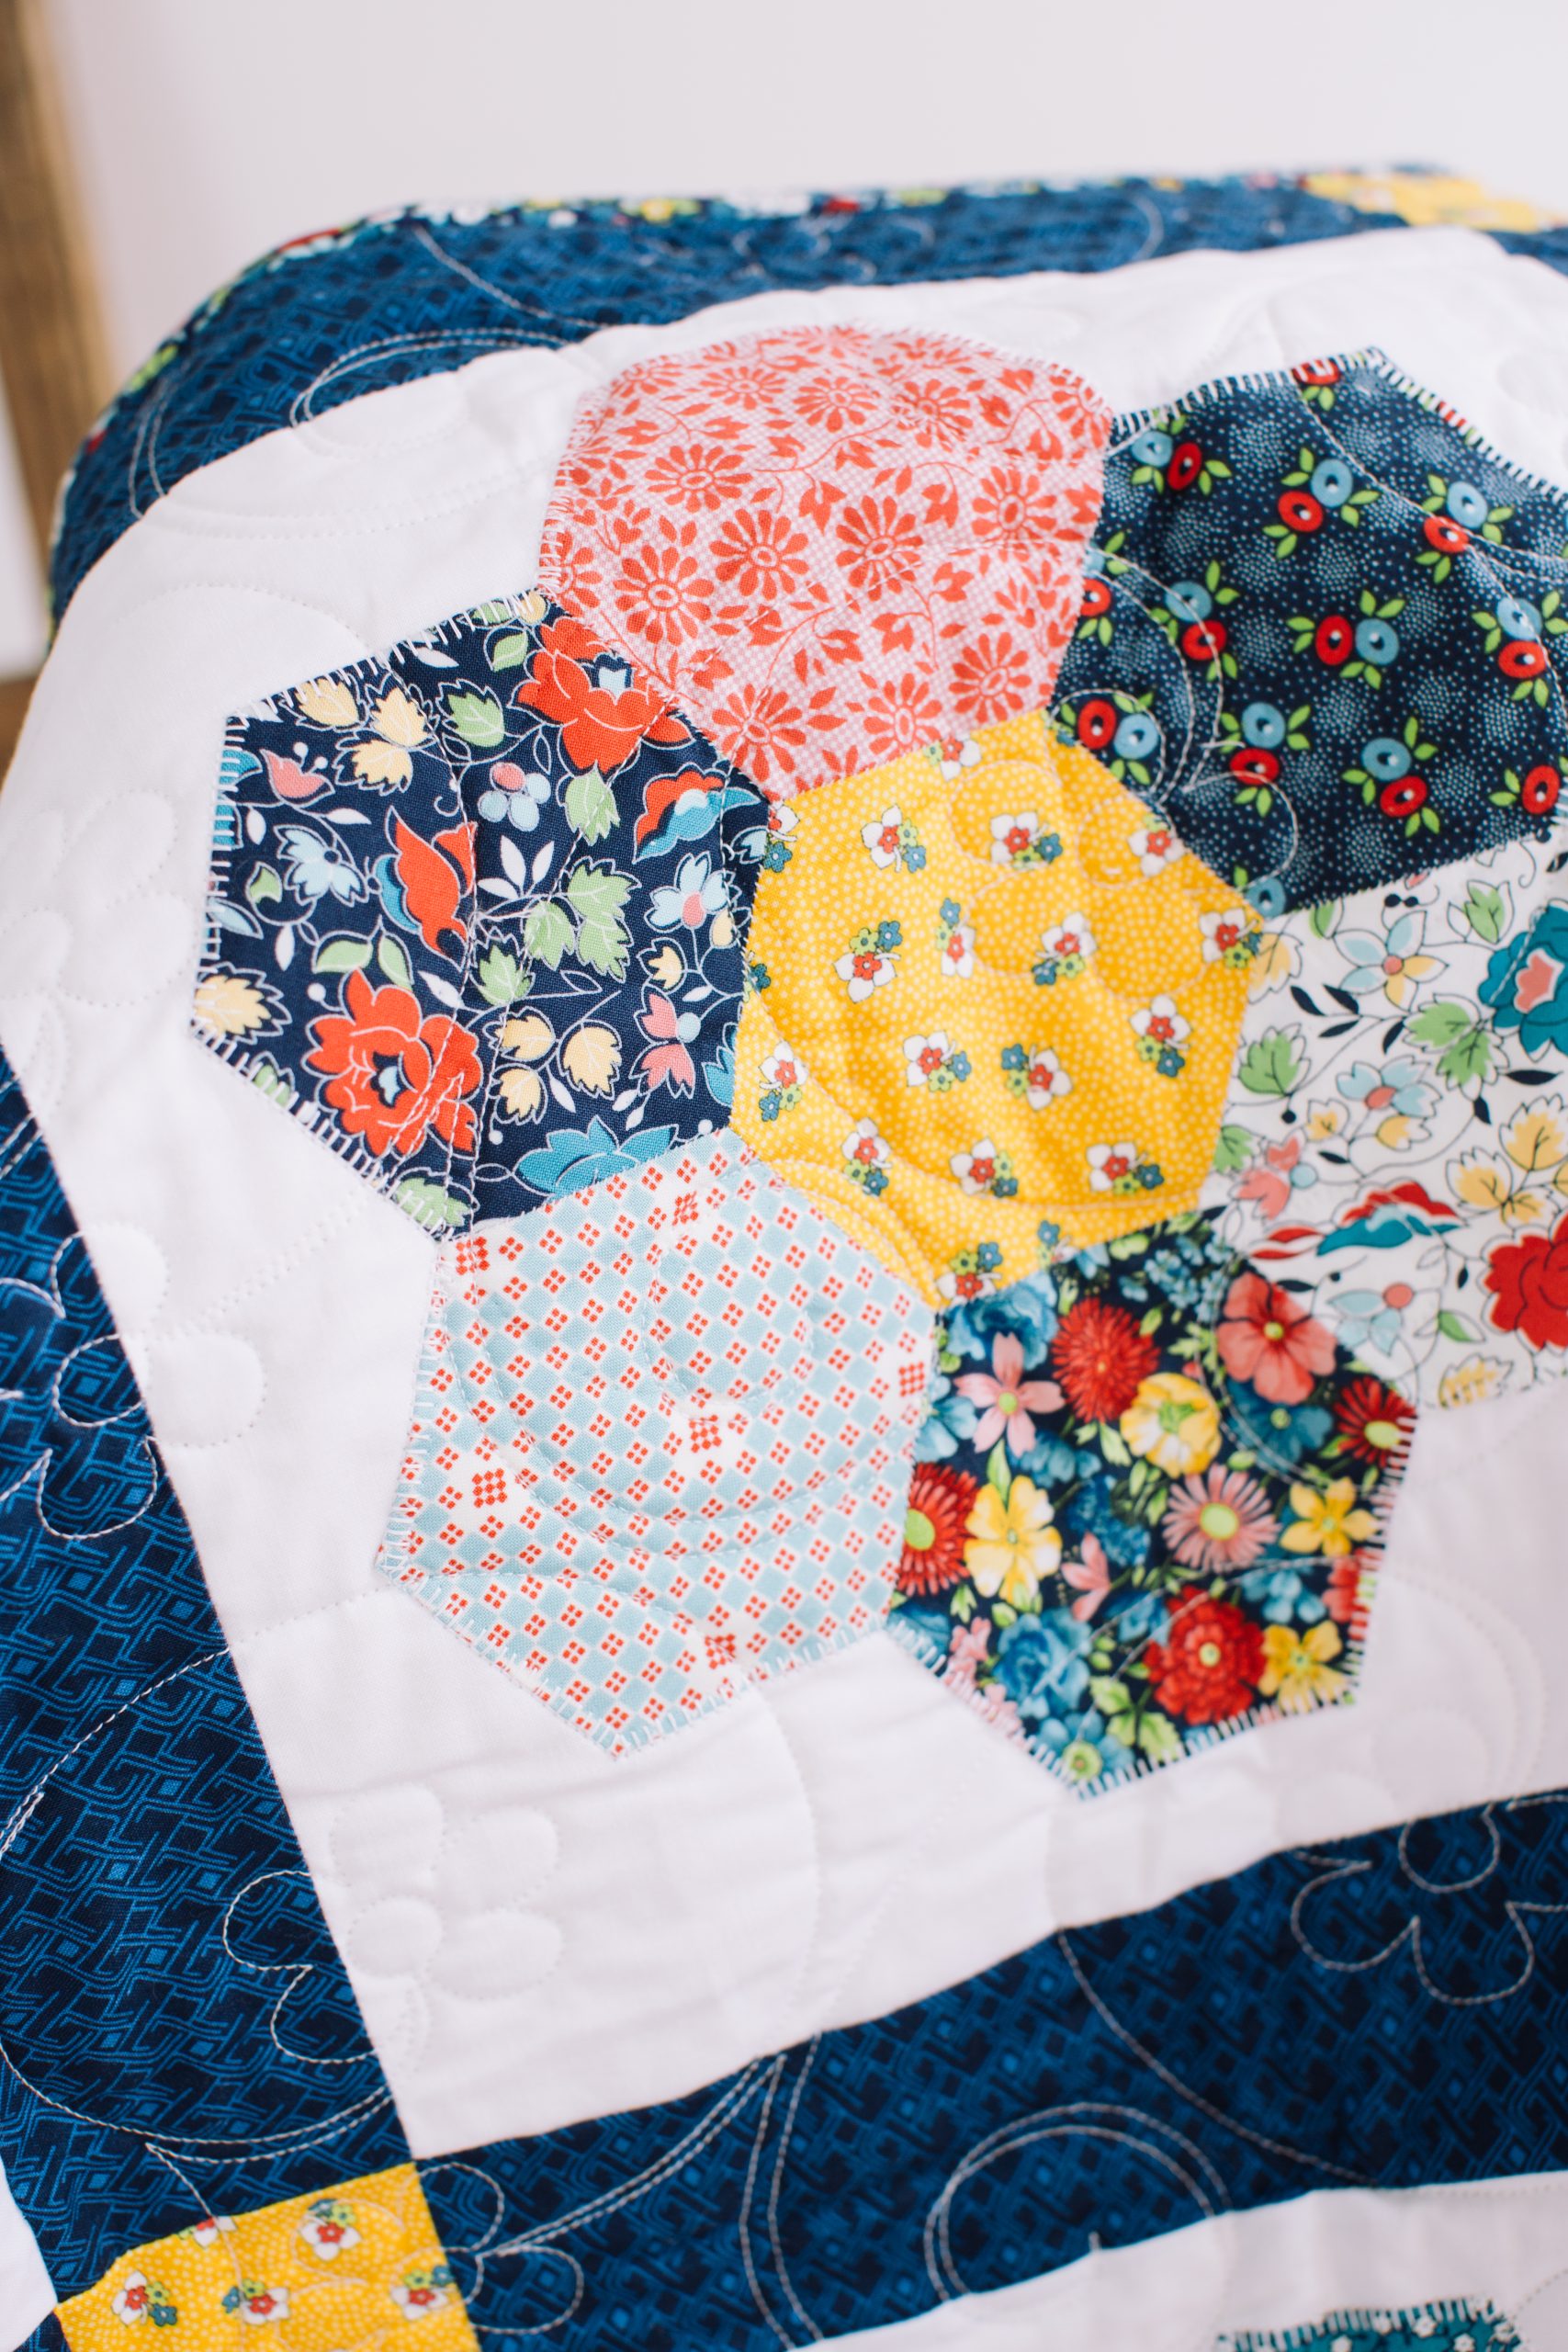
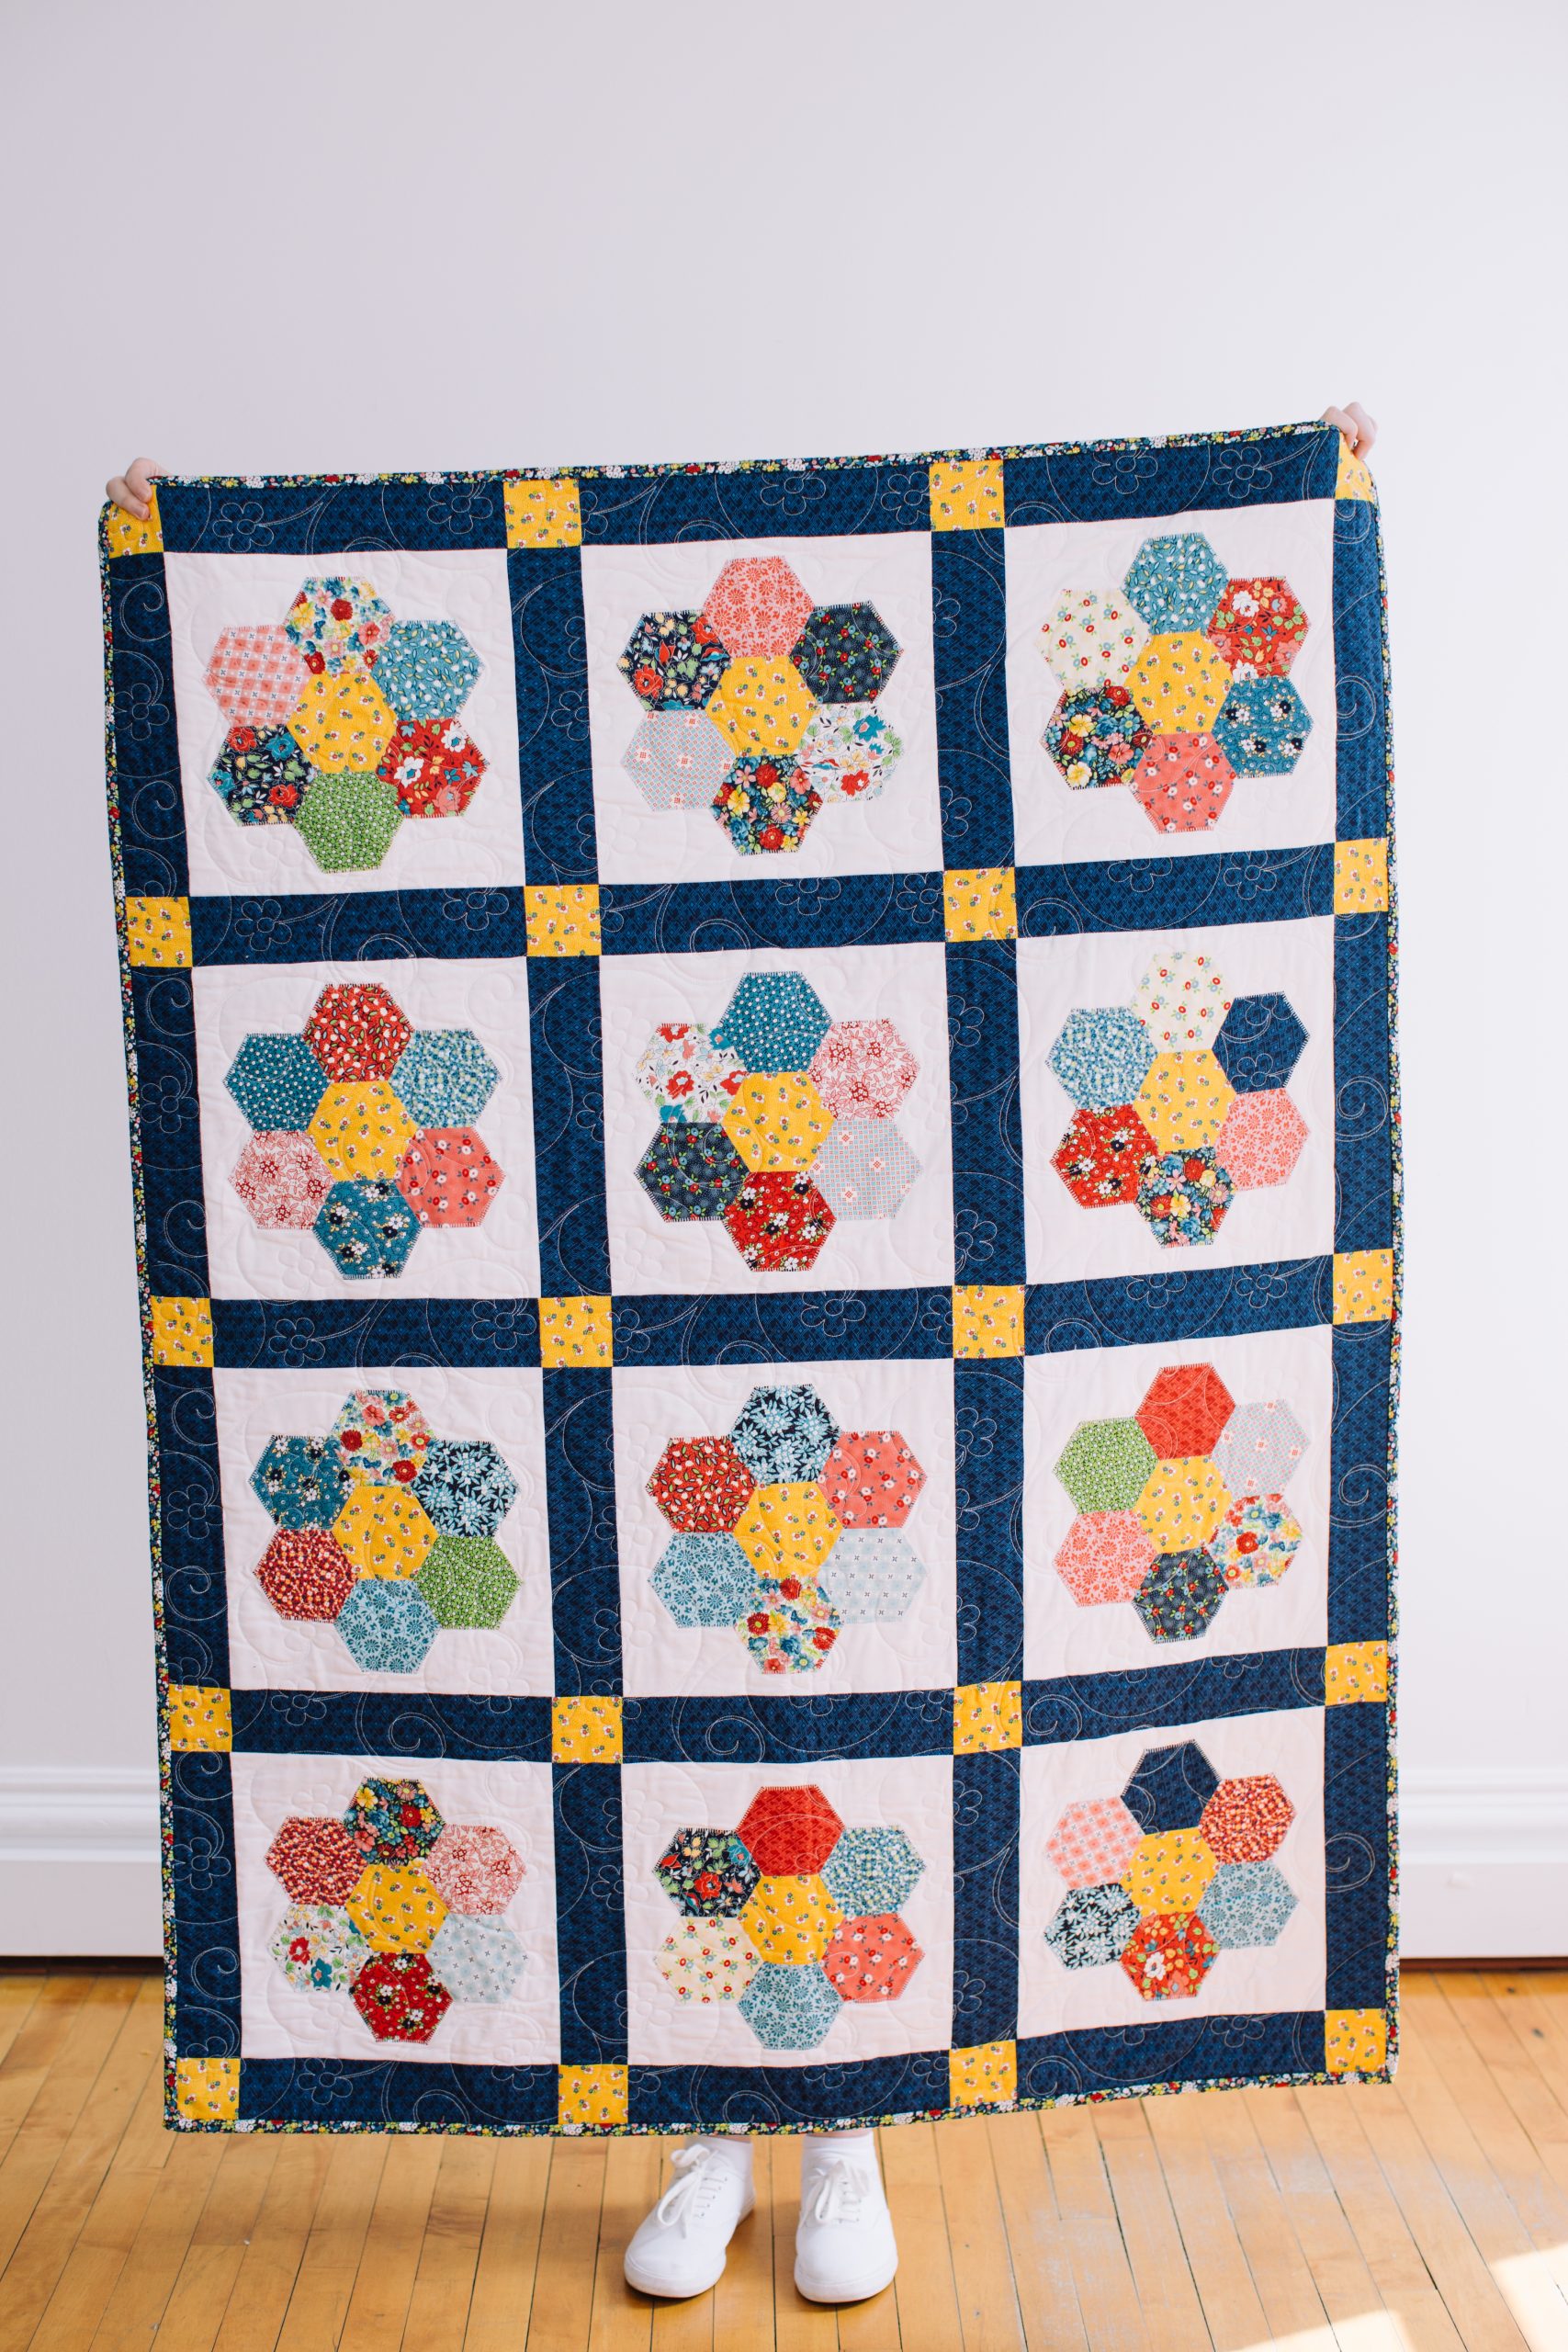
We adore the retro vibes of this colorful throw quilt pattern! A dreamy way to give your living space a cottagecore vibe, this vintage-inspired quilt pattern uses hexies to make its flower blocks and comes with a printable hexagon template. Make your flower quilt pattern using layer cakes or charm packs or raid your fabric scraps to give your quilt a sweet, homespun feel.
Skill Level: Easy
Materials:
Fabric:
- 2 charm packs or one layer cake
- 1 1/2 yards white or cream fabric
- 1/2 yard yellow fabric for cornerstones and center hexies
- 1 yard navy fabric for sashing
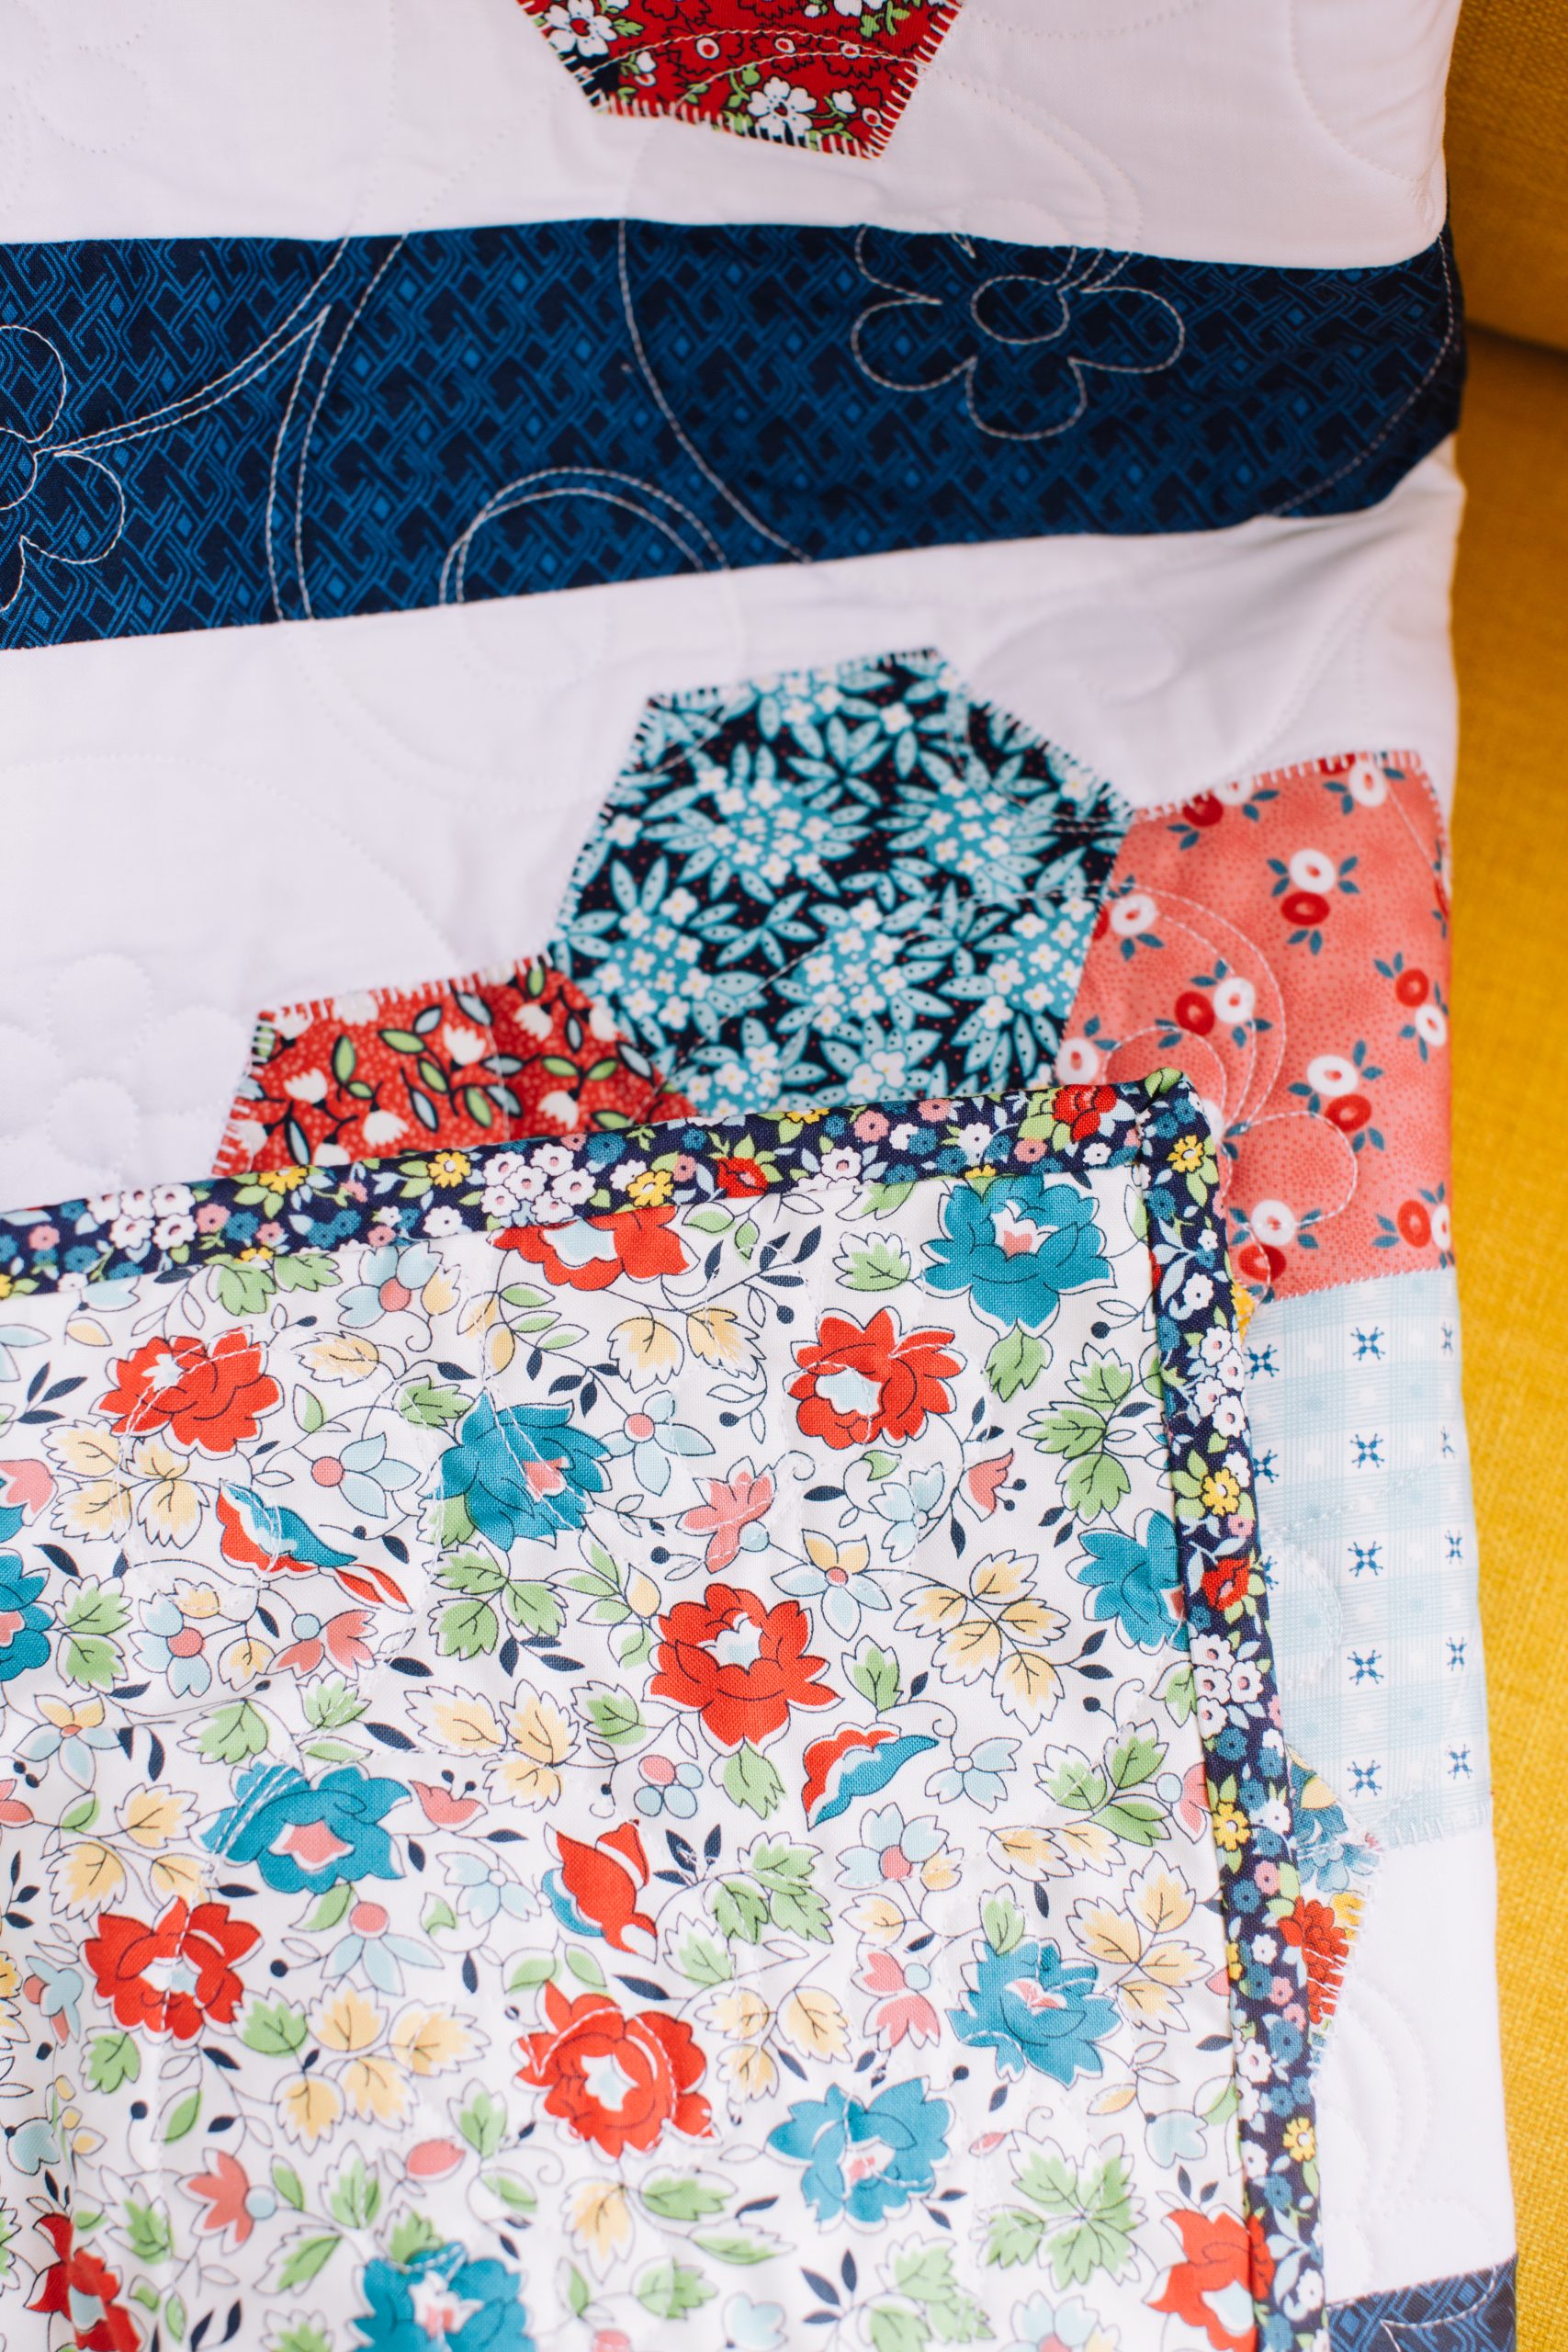
- 1/2 yard fabric for binding
- 3 1/4 yards fabric for backing
- 55” X 70” piece of batting (A twin sized packaged batting will work)
- 3 yards iron-on fusible adhesive (Pellon 805)
- Fabrics Used: All fabric (except the white) was from the lines General Store Volume 1 & Volume 2 by Connecting Threads.
- White fabric – Kona Bleached White
- Cornerstones/Centers – Dottie Sprigs – Marigold
- Sashing – Diamond Dance – navy
- Binding – Posie Bunch – navy
- Backing – Gertrude garden – ivory
- Flower Petals – General Store charm packs
- Fabrics Used: All fabric (except the white) was from the lines General Store Volume 1 & Volume 2 by Connecting Threads.
Designer Notes:
- A charm pack is a selection of coordinating fabric that is precut into 5 inch squares. A layer cake is similar, but cut into 10 inch squares. The designer prefers using a charm pack or layer cake because it gives a large variety of fabrics to give the quilt a scrappy feel.
- Fusible adhesive is used to adhere the hexagons to the quilt block. Rachel used Pellon 805. It’s a paper backed iron-on adhesive that is machine stitchable.
Supplies:
- 2” hexagon PDF template (This template includes the seam allowance needed. Print, cut and trace onto chipboard. This template is used for cutting out the fabric.) This is located at the bottom of this page. See printing instructions below.
- 2” hexagon paper pieces (smooth lightweight cardstock is best)
- Washable glue stick
- Seam roller
- Thread (polyester thread works well for paper piecing)
- Needles (a number 9,10, or 11 milliners needle works well)
- Sewing clips (So helpful for keeping the hexies in place while sewing)
- Iron / ironing board or mat
- Sewing machine
- Scissors
- Point turner
Designer Notes:
- In English paper piecing, a hexagon is measured by its side. So a 2 inch hexagon means that one side is 2 inches long. The 2” hexagon template measures 2 1/4 inches on one side to include the seam allowance. The hexagon sides of the paper pieces should measure exactly 2 inches.
- You can purchase pre-cut hexagons. If you prefer to print your own, it is ideal to use a smooth lightweight cardstock with a semi-gloss finish. (Don’t get caught up on the type of paper though. Most any light cardstock will work, the semi-gloss finish is slightly easier to work with.)
PRINTING INSTRUCTIONS:
To download the PDF template, click on the download button at the bottom of the page. We recommend opening your download using Adobe Acrobat.
Instructions:
Please read all instructions before beginning.
MAKING THE FLOWER HEXAGONS:
Prepping the Hexagons:
- Using the hexagon template, cut 12 hexagons out of the yellow fabric. Then cut 72 hexagons from the charm pack or layer cake.
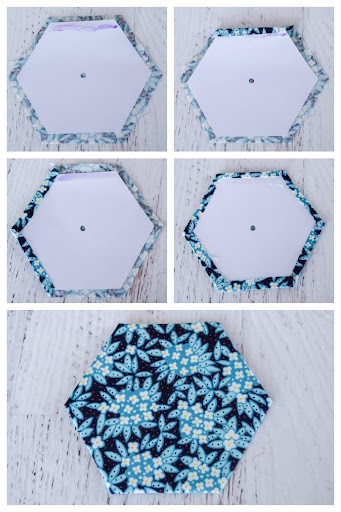
- Arrange six of the hexagons around the yellow center hexie. Now it’s time to wrap the fabric around the paper pieces. Place a paper hexie in the center of the fabric hexie. Add a strip of glue with your glue stick to one edge of the hexagon paper. Wrap the edge of the fabric down on the glue. Repeat for all six sides of the hexagon.
- Glue all the hexagon papers to the fabric. You can work in batches – gluing enough hexies for one or two flowers at a time. Or you can prep all of your hexagons before sewing them together.
- Tip: The designer finds it helpful to use a seam roller to press all the sides flat. This will be especially helpful when the papers are removed to applique to the block. A seam roller is a tool used to roll across the fabric, essentially pressing it without heat. You can also run popsicle stick or your fingernail over the edges to create creases.
Sewing the Hexagons:
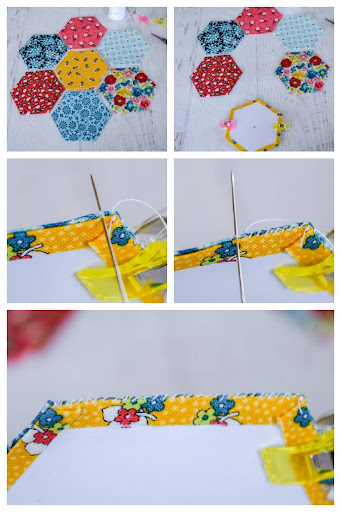
- Now sew the hexagons together. Grab the center hexie and one of the others. Place one right on top of the other with right sides together. Clip two sides to keep in place.
- Beginning on one corner, sew one edge together using a whip stitch.
- When you reach the end of the first edge, unclip the the hexies. Grab the next hexagon, place it on the center hexie with right sides together and sew the sides together using a whip stitch.
- Continue to add hexagons around the center hexie in this manner. Work in a circle around the center hexagon as you sew each petal on.
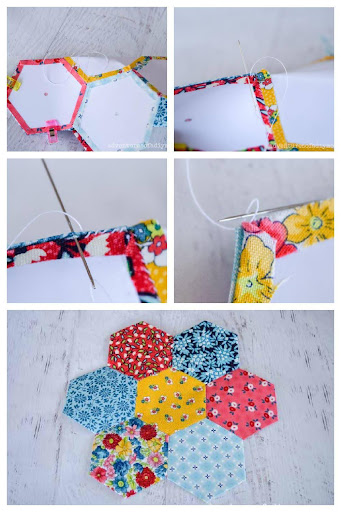
- Once all the petal hexagons are sewn to the center, sew the petals to each other.
- You will need to fold and manipulate the center hexagon in order to allow the sides to lay flat with right sides together. The clips are especially helpful at this point to keep everything exactly in place.
- Beginning at the center, use a whip stitch to sew along the side. When you get to the end of the side, tie off the string. To tie off, place your needle in the loop of the thread. This will create a knot as you pull it through. Do 2-3 of these little knots, then clip the thread.
- Rearrange your flower so your next sides are right sides together and sew it together in the same manner. Continue until all the flower petals are secured to each other.
- Make a total of 12 hexagon flowers. Leave the papers in until ready to applique to the block.
MAKING THE QUILT BLOCKS:
- Cut 12) 12 1/2 inch squares from white fabric.
- Trace around one of your flower hexagons onto a piece of paper (Rachel taped two together to be big enough). Then draw lines 1/8 inside the lines. These inner lines will be your template for tracing onto the fusible adhesive.
- Place the fusible web on top of the template you just created with the smooth side facing up. Trace the template onto the paper, then cut it out. Repeat for all 12 flowers.
- Remove the papers from your hexagon flower.
- Press the edges so all the raw edges are tucked under. Then trim any loose strings.
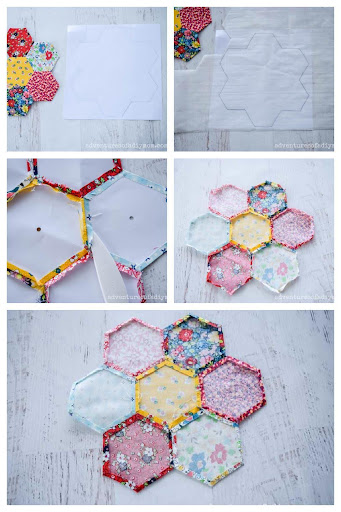
- Place the rough side of the fusible web on the wrong side of the fabric.
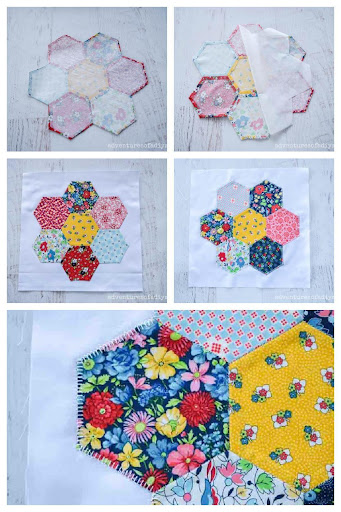
- With a hot dry iron, press firmly for 5-8 seconds. Move the iron to a new area and repeat until the whole flower has been pressed.
- Let cool before gently peeling off the paper backing.
- Center the flower (right side up) on the white 12 1/2” square. Press firmly for 10-15 seconds, moving the iron as needed to press the whole flower.
- Repeat for all 12 blocks.
- Stitch around each flower block. You can do this by hand, or machine. A zigzag stitch or blanket stitch works well.
Tips:
- Use a point turner or letter opener to loosen the fabric from the paper.
- If you have an Cricut EasyPress, you can use it in place of an iron. Heat it to 300° and press 10 seconds.
CORNERSTONES AND SASHING:
- Cut 20) 3” squares from the yellow fabric.
- Cut 31) 12 1/2” X 3” strips from navy fabric (15 of these will be used for the sashing strips, the remainder will be added between the blocks in the next section).
- Use a 1/4 inch seam allowance and remember to sew with right sides together.
Sew Together the Horizontal Sashing Strips:
- Collect 4) yellow squares and 3) navy strips. Beginning with a square, alternate the squares and strips, sewing them together end to end to create a long sashing strip.
- Press the seams toward the navy strips.
- Repeat until you have 5 sashing row strips.
ASSEMBLING THE QUILT TOP:
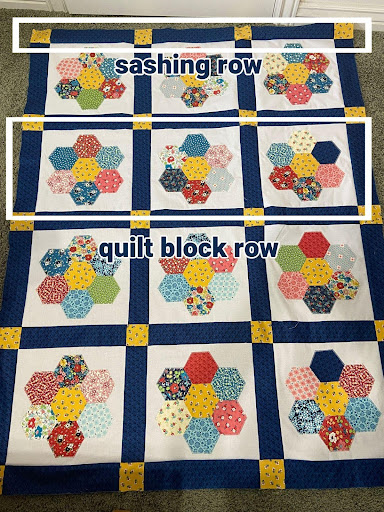
- Begin by laying out your blocks to arrange them in a pleasing way. There should be three squares across and 4 squares down.
Sew Together the Horizontal Rows of Quilt Blocks:
(Remember 1/4 inch seam allowance and right sides together.)
- Collect the three quilt blocks for the top row, and 4 sashing strips.
- Begin with a navy sashing strip and alternate strips with quilt blocks to create the row, ending with a strip.
- Press the seams toward the navy sashing strips.
- Repeat this process for all four rows.
- Next, sew the quilt block rows to the sashing rows.
- Press the seams toward the sashing and away from the block.
FINISHING THE QUILT:
- Find a floor space large enough to lay out the quilt.
- Lay the backing down with the right side down.
- Place the batting on the backing.
- Next add the top with the right side up.
- Trim the back and batting to 4” bigger on all sides.
- Pin the layers together.
- Quilt as desired, then trim the batting and back to match up with the top.
BINDING THE QUILT:
- Cut the fabric you’ve chosen for the binding into 3 inch strips. Sew the strips together, end to end to make one very long strip of fabric for the binding.
- Press the strip in half lengthwise, with right sides out to create the binding.
- Bind the quilt.

I am sewing Hexies but did not have a pattern to finish the quilt. This is perfect. LOVE IT!
We’re so glad that you enjoyed this pattern, Elizabeth! Have a great day 🙂 – Ashley, We Like Quilting
Love this pattern! However, as a beginner quilter it looks like a daunting project.
Hi Debbie! Thank you for your thoughtful comment. I’ve added in an “Easy” skill level note, so that readers know some quilting experience is required to make this pattern. Thanks so much! – Ashley, We Like Quilting