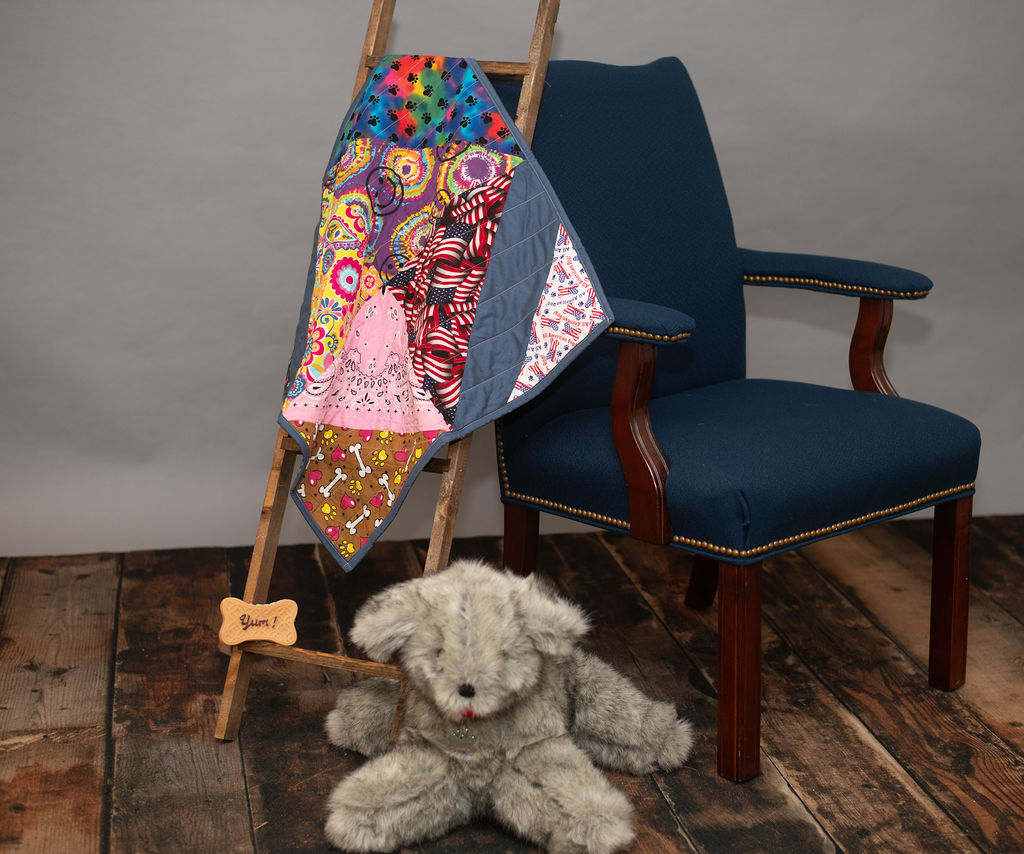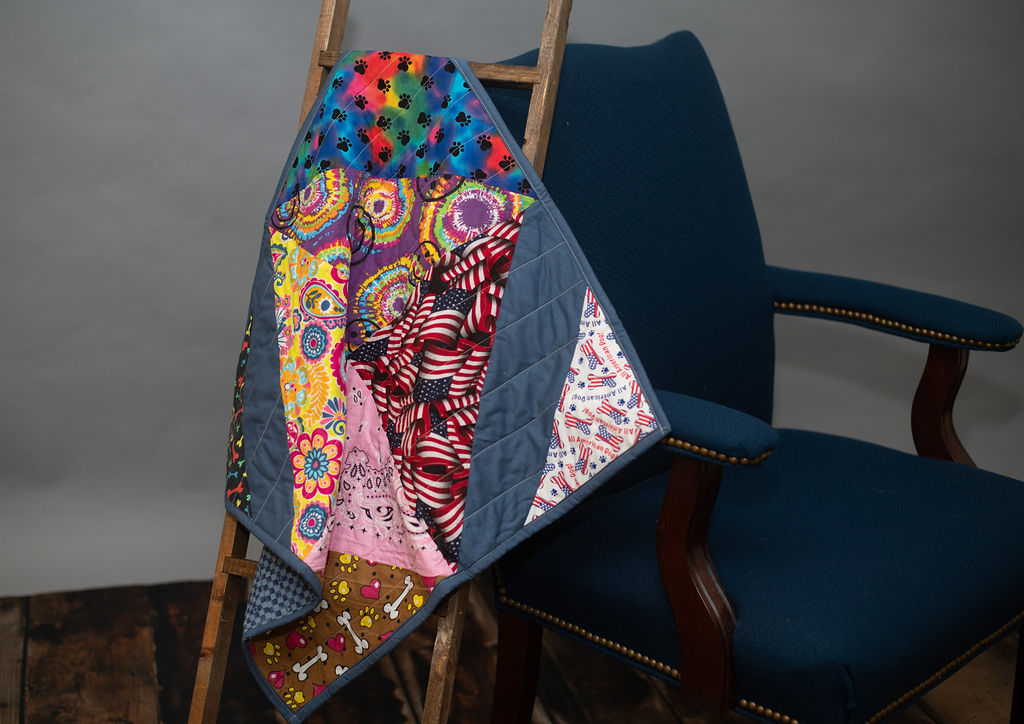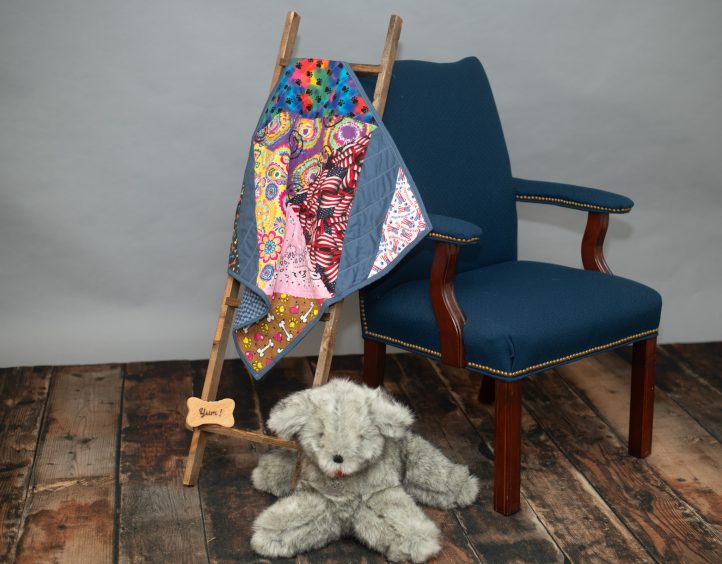
If you’ve been saving up doggie bandanas from your pet’s trips to the groomers, why not give them a second life as a sweet homemade quilt? Designed by Janice Bailor, this advanced beginner quilt pattern is made using colorful upcycled bandanas and finishes at a 25” square, making it the perfect size for your pet. This small quilting project is also a precious memory quilt for friends or family who have lost a beloved pet, so that they can have a personalized keepsake for years to come.
Skill Level: Advanced beginner
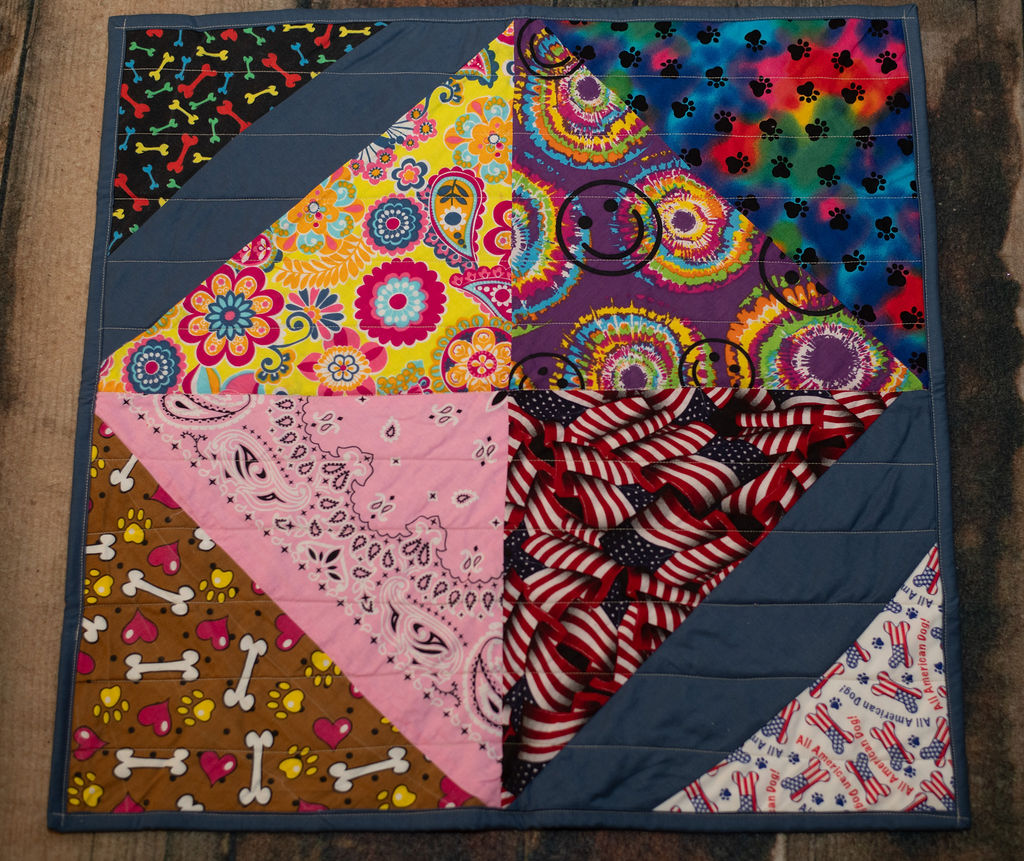
Finished Size: 25 inch square
Seam Allowances: 1/4 inch
Designer Note: RST = Right Sides Together
Materials:
- Selection of 6-8 cotton bandanas measuring approximately 14 inches (short sides) by 20 inches (long sides)
- 2 cotton bandanas measuring approximately 13 inches (short sides) by 19 inches (long side)
- Solid cotton accent fabric: 1/4 yard
- Binding fabric: 1/3 yard
- Quilt batting: Approx. 30 inches square or 1 yard
- Backing fabric: 1 yard
- Grid cutting mat and ruler
Cutting Instructions:
Solid accent fabric:
- Cut 2 – 22 inch by 3 inch strips.
Binding fabric:
- Cut 4 – 2 1/2 inch by WOF strips and combine.
Piecing Instructions:
PREPARING THE SMALL BANDANAS:
- Prepare all bandanas by washing, starching, and pressing flat to make the bias edges easier to sew.
- From the 13 inch by 19 inch Bandanas and Solid Accent strips, bring together the two corners on either end of the longest edge and press in half to make a center crease.
- Use the center creases to line up the Bandanas and Accent Strips, placing them RST, and pin in place.
- Working from the center of the longest side of the triangle or hypotenuse to one edge, sew Small Bandanas and Accent Strip together. Ease the strip gently through the curves, arcing the fabrics together as you work out from the center.
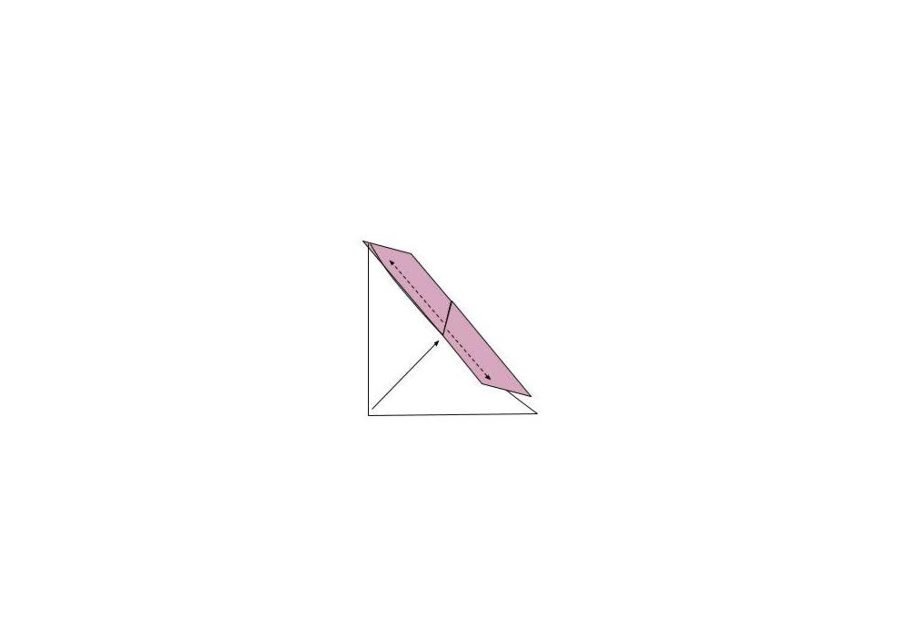
Figure 1
- Rotate the bandana pieces and sew the other side from the center out. Strips will slightly overhang the edges of the bandanas.
- Press the seam to the dark side to lessen the warping of rows.
- Using the grid lines of a cutting mat, place the Small Bandana with Accent Strip on the grid and follow the lines to trim the triangle to 14 inch short sides and 20 inch long hypotenuse side.
PIECING THE BLOCKS:
- Arrange the selection of Bandanas and Bandanas with Accent Strips in complementary pairs.
- Use a hot iron to crease all Bandanas to make a center fold from the long 20 inch hypotenuse (or longest side of the triangle) end to the center point of the triangle.
- Use the center hypotenuse crease to place Bandana Pairs RST and pin in place.
- Sew Bandana Pairs together across the long 20 inch hypotenuse (or longest side of the triangle) ends to join into a half square block. Press seams flat. See Figure . Using the grid lines of a cutting mat, place the Bandana Pair blocks on the grid and follow the lines to square block to 13 inches.
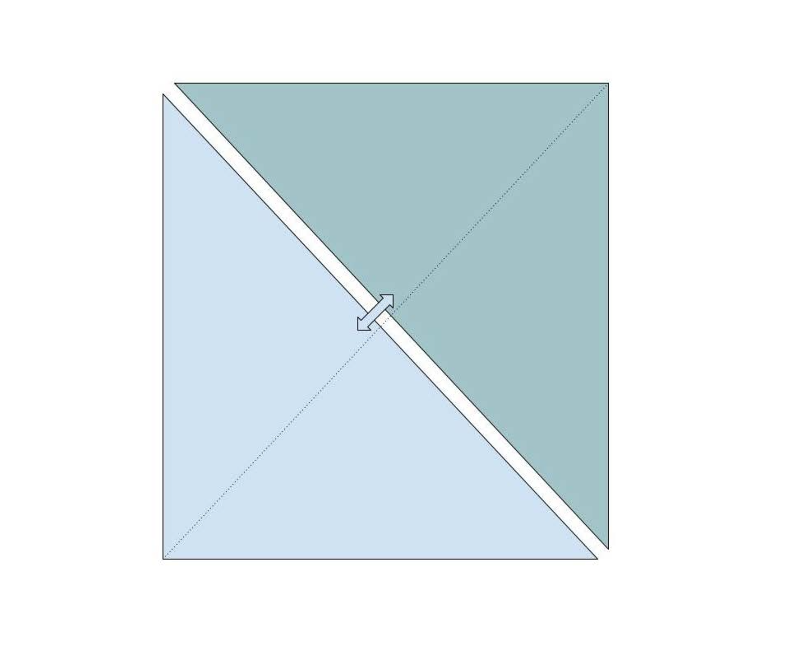
Figure 2
ASSEMBLING THE QUILT TOP:
- Arrange the Bandana Pair blocks in complementary pair rows of two as shown in Figure 3.

Figure 3
- Place blocks RST and sew together at the center seam. Press open and repeat for bottom row.
- Place the top row RST with the bottom row and sew together at the center seam. Press flat.
QUILTING AND FINISHING:
- Cut a strip of batting and backing approximately 2-3 inches wider and longer on all sides than your finished quilt top.
- Assemble the quilt sandwich for the quilt by laying out the backing (right side down), batting in the center and quilt on top, right side up. Baste and quilt as desired and trim edges. The cover quilt has been quilted in a grid pattern following the seam lines of the piecing.
- Prepare the binding by cutting 2 1/2 inches by WOF strips of fabric and attaching all strips together on the diagonal. Press strips wrong sides together in half lengthwise along the entire length of the binding to complete.
- Attach binding to the quilt sandwich by lining up all raw edges and mitering the corners as you go.
- To miter corners, sew into the corner stopping a 1/4 inch from the end, backstitch, and remove the quilt from the sewing machine.
- With the quilt laying flat, fold the binding up and away from the quilt, making the binding straight with the unsewn side. Fig. 4
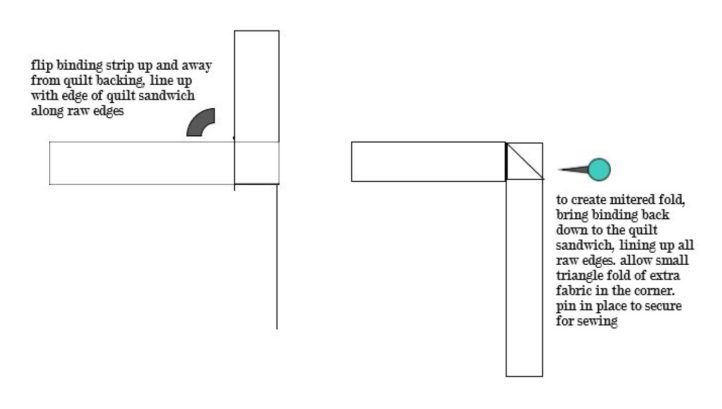
Figure 4
- Fold the binding down to the sewn side, leaving a diagonal fold on the underside of the binding and pin fold in place. Fig. 4
- Place the quilt back into the sewing machine and sew down the fold and continue on sewing binding.
- Make a miter at each corner, adjusting the amount of fold as necessary.
- Join the ends of the binding together where they meet and attach to the quilt sandwich.
- Press and fold the binding over to the opposite side of the quilt to finish. Tuck the mitered corner flat, pinning it into place as necessary.
- Finish the binding with your preferred method, either by hand stitching in place or by machine stitching.