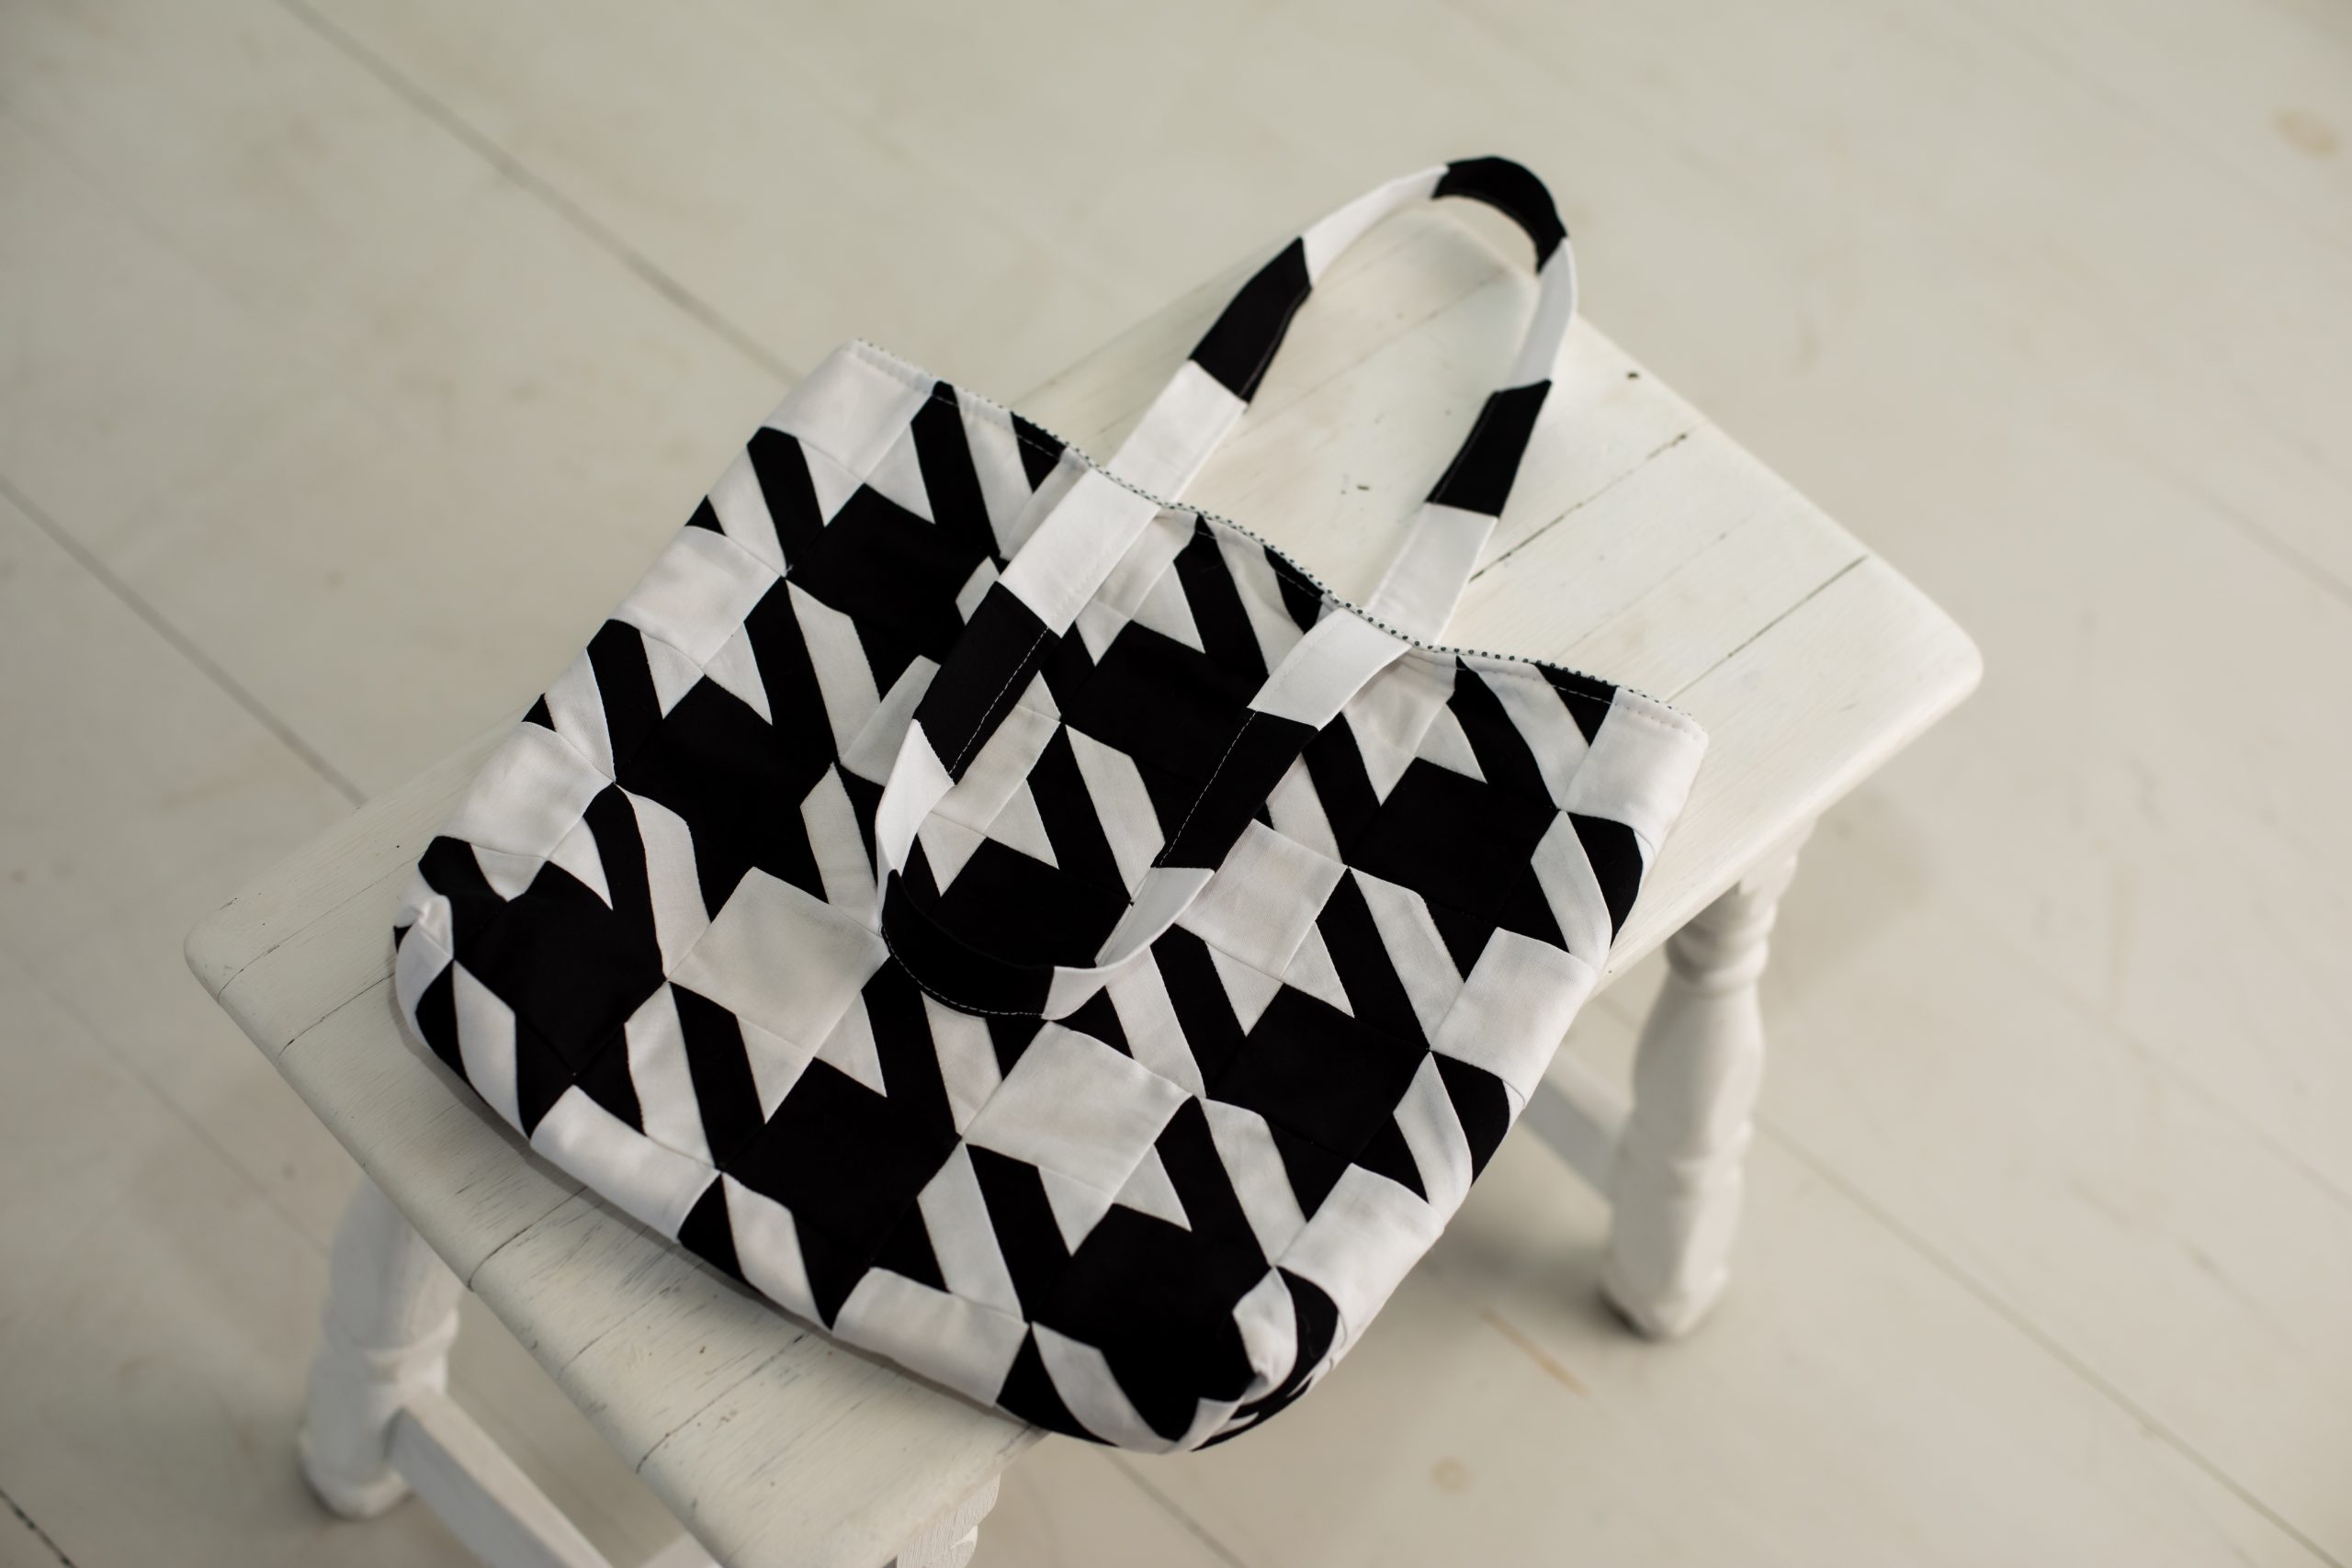
Bold accessories are a quick and playful way to dress up a simple outfit, which is why we can’t get enough of Sophie Tarrant’s bold houndstooth bag. Made in a striking black and white combo, this quilted tote bag pattern is a beginner quilting project that uses old-school style inspiration to create a chic, modern design. Using simple paper piecing, this houndstooth quilt project easily holds your water bottle, current read, wallet and other daily necessities. Get inspired by classic mod looks with this easy tote bag pattern.
Skill Level: Beginner
Finished Size: 14” x 13” x 3” (minus straps)
Designer Notes: Precision Matters! When working on a bold graphic design like this houndstooth, precision is everything. Use a 1/4” quilting foot if you have one, and take your time lining up each piece before stitching. Consistent seam allowances will help your points meet perfectly, giving the finished pattern a crisp, professional look. We’ve included our seam allowances on the patchwork block template, so if you prefer, you can copy them onto your fabric with chalk and sew directly over them for added accuracy.
Materials:
- Fabric: Black cotton, white cotton, polka dot cotton, one yard of each
- Quilt wadding, one yard
- Heavyweight fusible interfacing, one fat quarter
- Thread: White
- PDF Template – This is located at the bottom of this page. See printing instructions below.
Tools:
- Rotary cutter and cutting mat
- Quilting ruler
- Pins
- Sewing clips
- Sewing machine
- Iron
PRINTING INSTRUCTIONS:
To download the PDF template, click on the download button at the bottom of the page. We recommend opening your download using Adobe Acrobat.
Piecing Instructions:
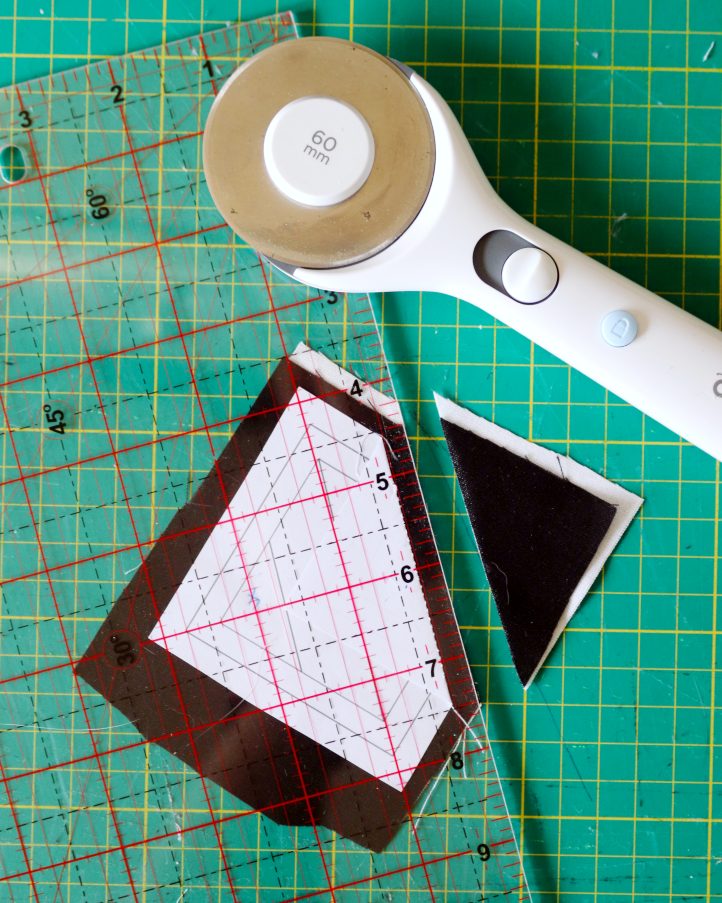
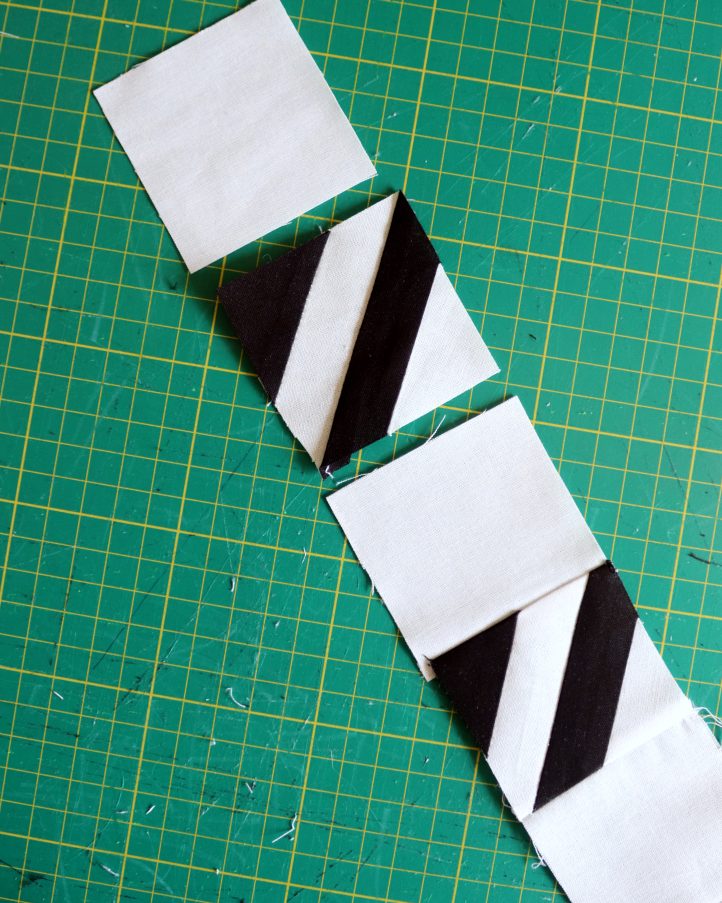
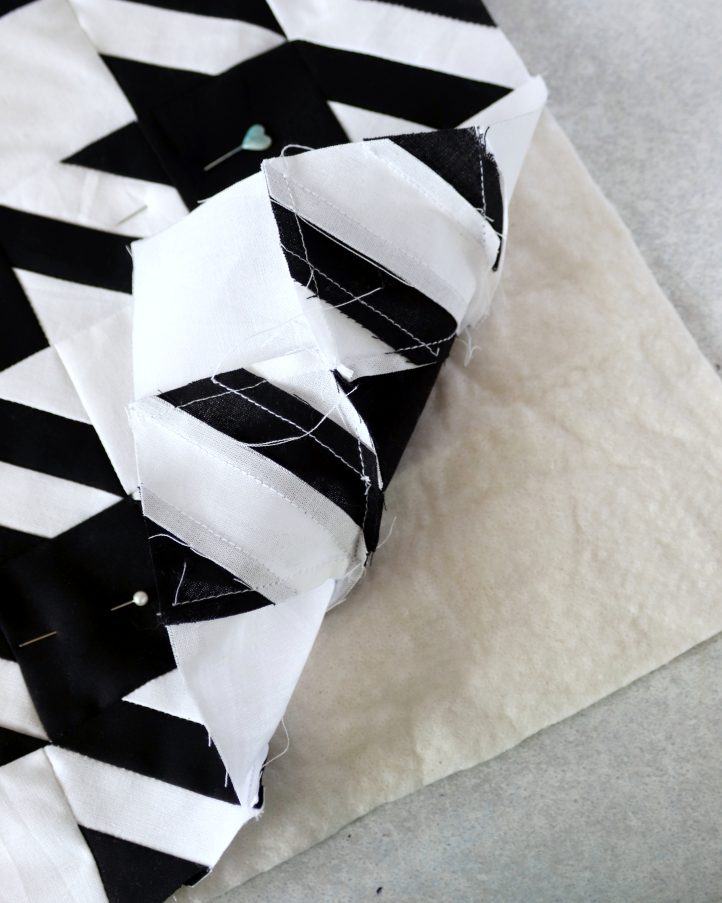
- Begin by printing out the paper piecing templates. These will be used to create the patchwork blocks, which will then be combined with plain black and white squares to form the houndstooth pattern. To save paper, we’ve arranged six templates on each sheet – cut them into six individual pieces. Cut a piece of white fabric that’s approximately 1/2” larger on all sides than the template. Place it on your work surface with the right side facing up. Next, cut a piece of black fabric to the same size and place it over the white fabric with the right side facing down. Finally, place the template over the top of the fabric stack. Pin everything in place, then sew along the line that separates the two sections with a straight machine stitch.
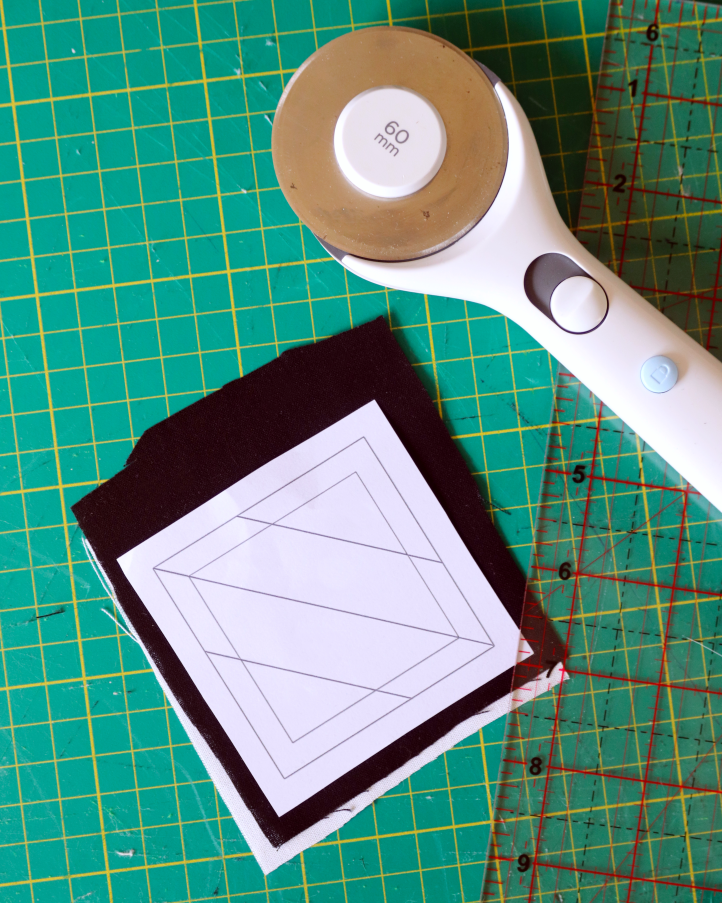
- Take your work to a cutting mat. Fold the paper template back along the seam you just stitched and use a rotary cutter and quilting ruler to trim the seam allowance down to 1/4”. Turn the work over so the fabric is facing up. Fold the fabric back along the seam line, allowing it to open out, and press to fix it in place. Section one should now be white fabric, and section two should be black.
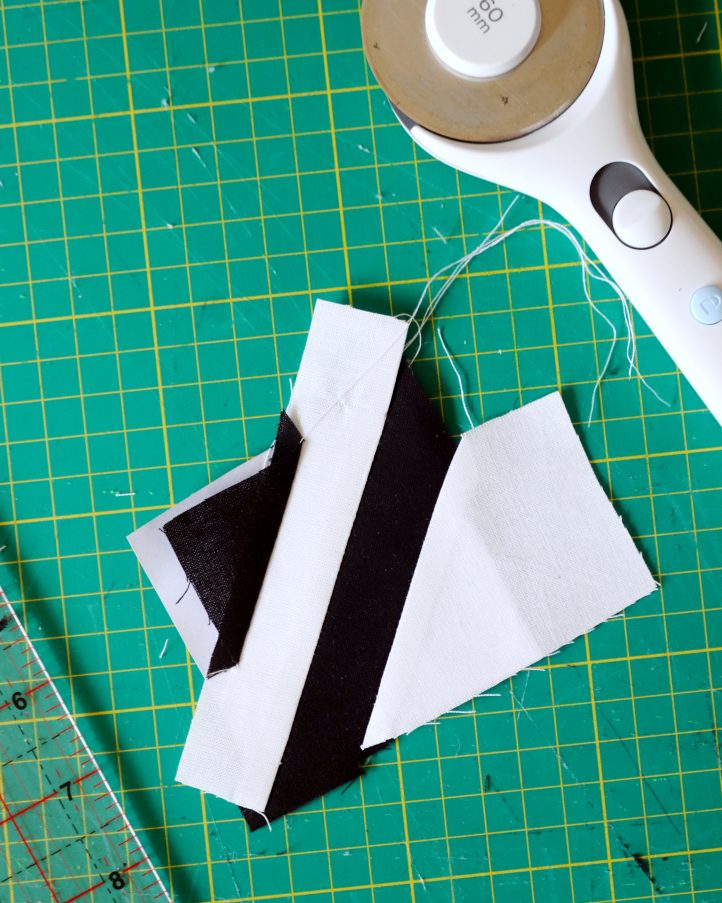
- Now, let’s add the next section. Cut another piece of white fabric, making it at least 1/2” larger on all sides than section three of the block. Place it over the pressed work with the right side facing down, ensuring it’s correctly positioned over the seam line between sections two and three. To make it easier to see the template through the fabric, you can hold the work up to a window or use a lightbox. Pin the fabric in place, then stitch, trim, and press as before.

- Finally, we’ll add the fourth section. Cut a piece of black fabric, making it at least 1/2” larger on all sides than section four of the block. Place it over the work with the right side facing down, making sure it’s positioned correctly over the seam line between sections three and four. Pin, stitch, trim, and press as you did with the previous sections.
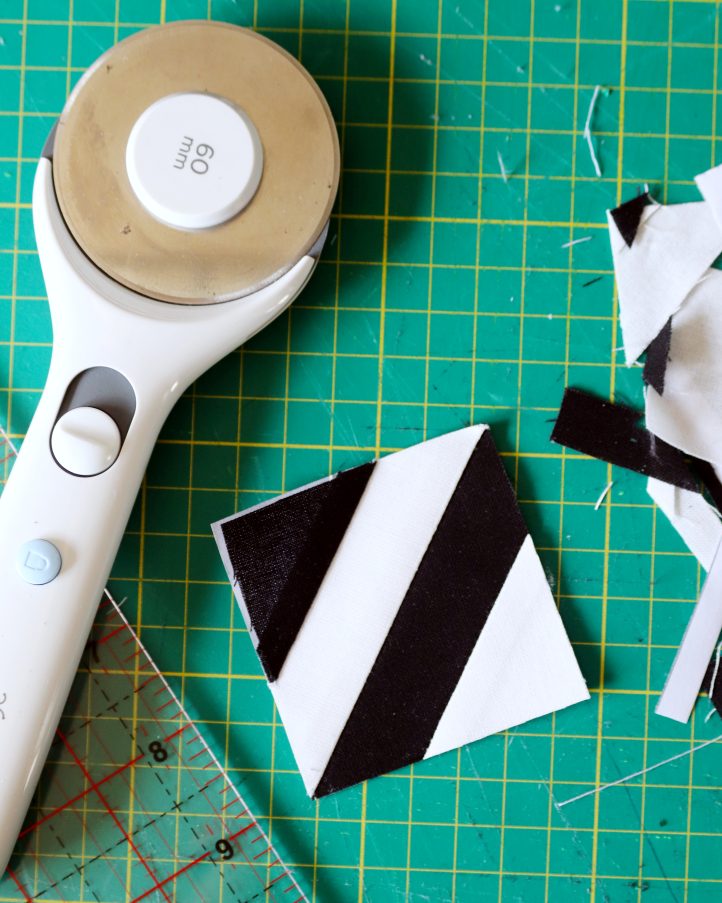
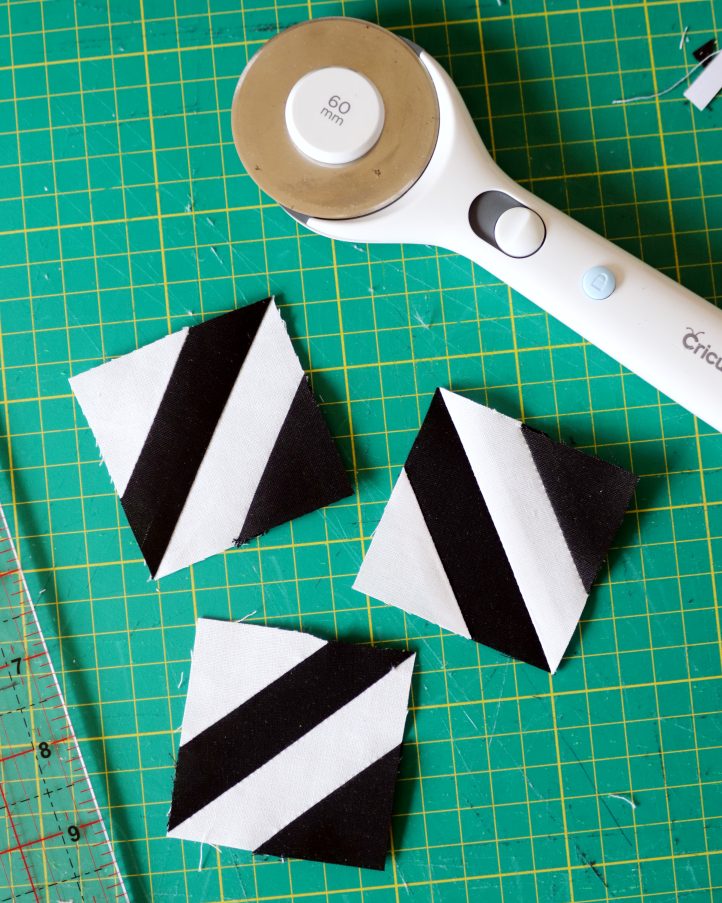
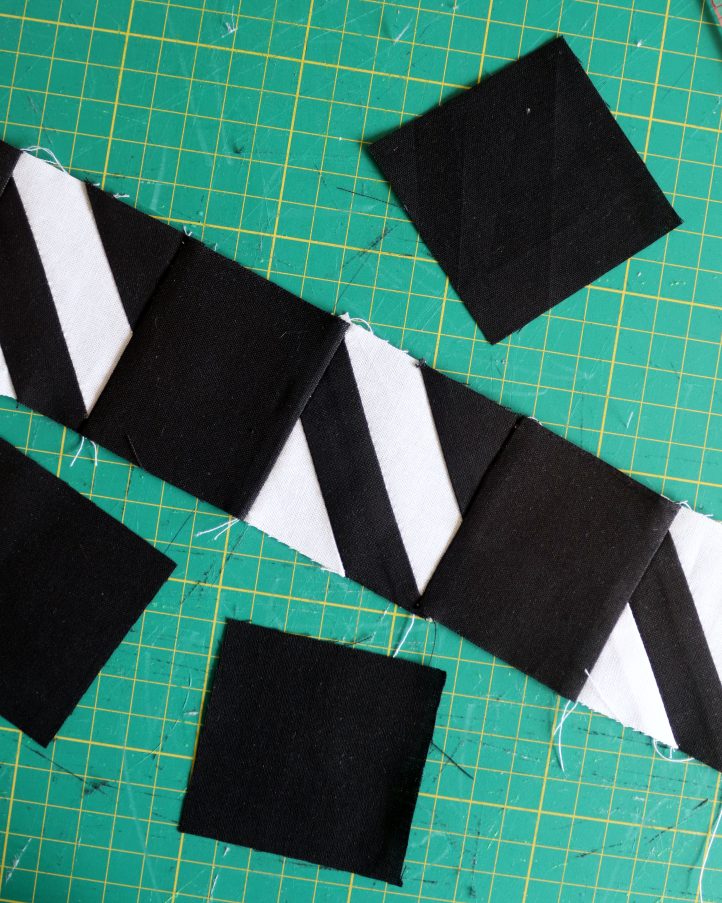
- Place your stitched block on a cutting mat with template facing up. It includes an outer cutting line, as well as an inner border, which marks the seam allowance. Use a quilting ruler and rotary cutter to trim the fabric down to the outer cutting line, then tear away the paper. Congratulations, you’ve now made your first block!
- Repeat Steps 1-5 to make a total of 48 patchwork blocks.
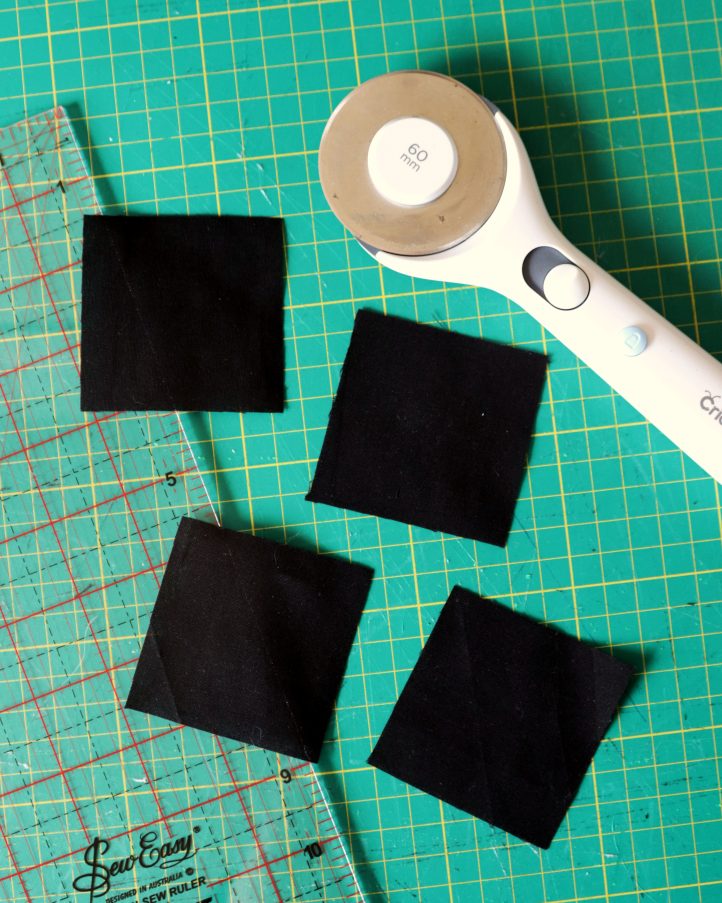
- With all your blocks made, it’s time to start constructing the patchwork tote. Use a rotary cutter and a quilting ruler to cut 18 plain black 2-1/2” squares, and 32 plain white 2-1/2” squares.
- Sew your first row. Take four plain white squares and three patchwork squares, and lay them out with the right sides facing up, alternating between each type. The row should start and end with a plain white square. Make sure the white corner of each patchwork block is positioned at the top right of the shape. Begin by sewing the first two squares together along the side edge, leaving a 1/4” seam allowance. Press the allowance over to the patchwork side, then add the next square. Continue in the same way until the entire row is stitched together.
- Sew the next row in the same way, this time alternating four patchwork blocks with three plain black squares. This row should start and end with patchwork squares. Make sure the black corner of each patchwork block is positioned at the top right of the shape. Press the seam allowances towards the black fabric this time, rather than the patchwork squares.
- Take your first two rows and sew them together with right sides facing, aligning the long edges and leaving a 1/4” seam allowance. Take care to match up the seams as neatly as possible – the more accurate you are, the sharper the houndstooth pattern will look.
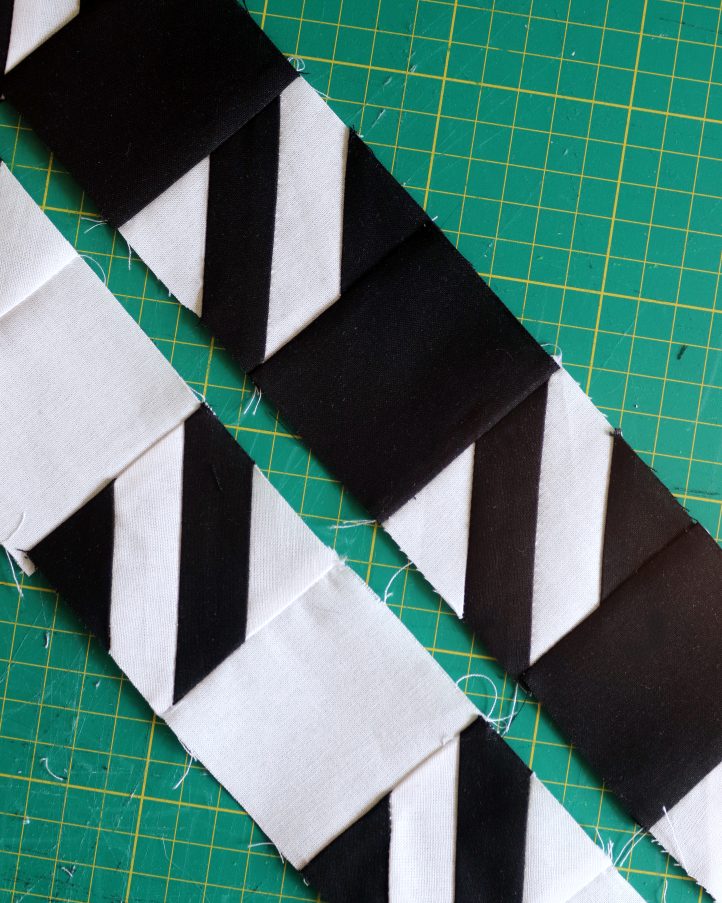
- Repeat Steps 8–10 until you’ve stitched a total of 14 rows together. You’ve now completed the outer part of your tote bag!

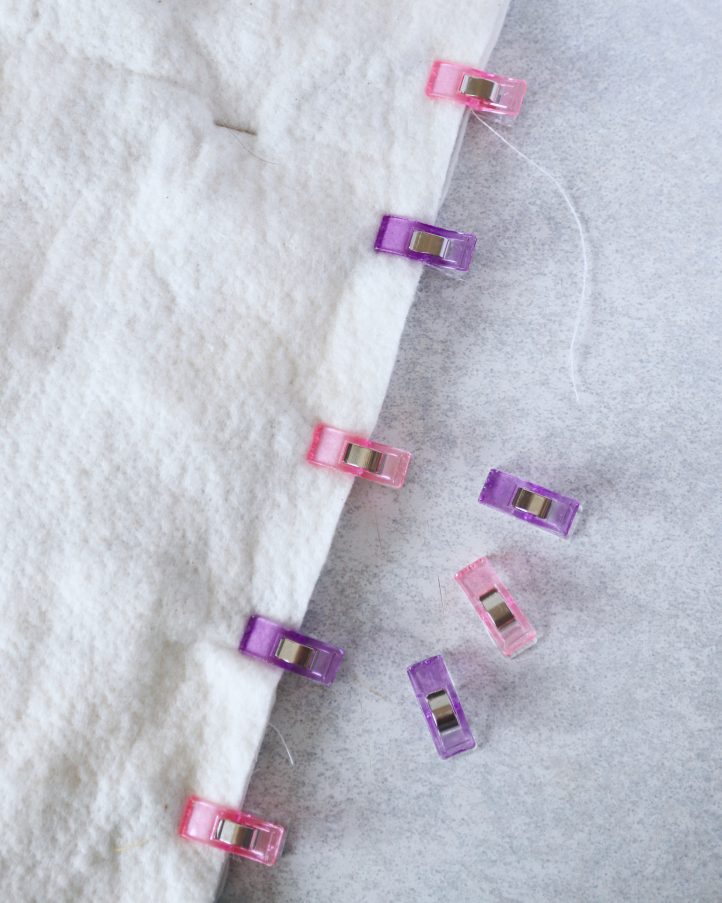
- Lay a piece of quilt wadding on your work surface, smoothing out any wrinkles. Place your pressed patchwork panel on top with the right side facing up. Smooth out the fabric to ensure it lies completely flat, then pin the two layers together. Trim around the edge so the wadding is exactly the same size as the patchwork.
- Keeping the patchwork and wadding pinned together, fold the panel in half with right sides facing to form a bag shape. Clip or pin the long edges together and sew down both sides, leaving a 1/4” seam allowance. You can now remove the pins that hold the layers together.
- To create gussets at the base of the bag, pinch one bottom corner so the side seam runs down the center and the corner forms a triangle. Use a ruler to measure and mark a line 3” across the base of the triangle. Sew along this line, then trim away the excess fabric, leaving a 1/4” seam allowance. Repeat to add another gusset to the other bottom corner in the same way.

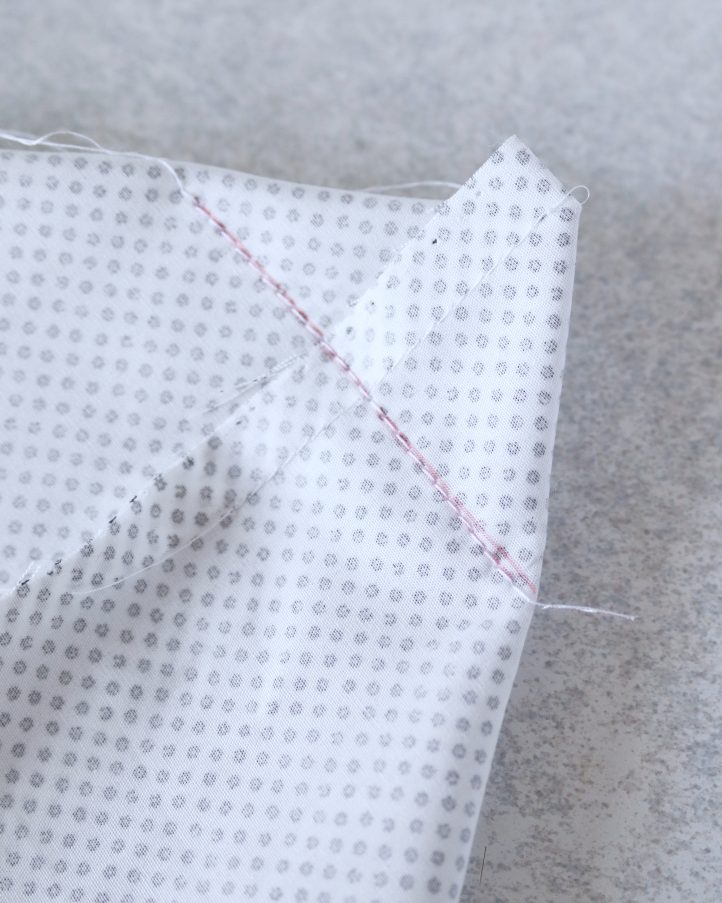
- Now make the lining. Cut a 14-1/2” x 29” rectangle from polka dot fabric and fold it in half with right sides facing. Sew down both side edges with a 1/4” seam allowance, leaving a 3” gap on one side for turning through later. As with the outer bag, create gussets in both bottom corners using the same method.
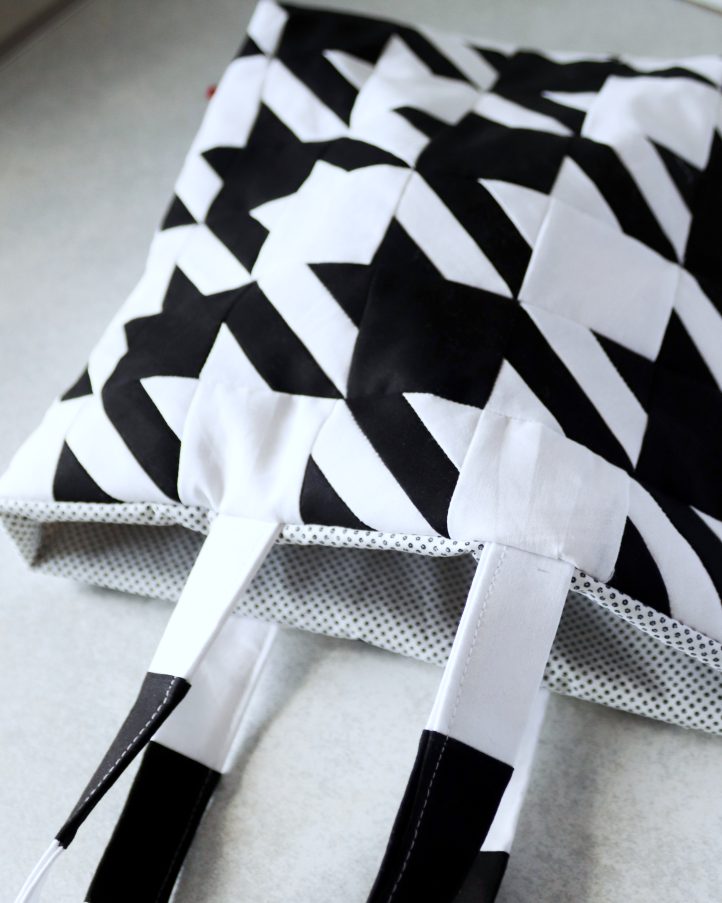
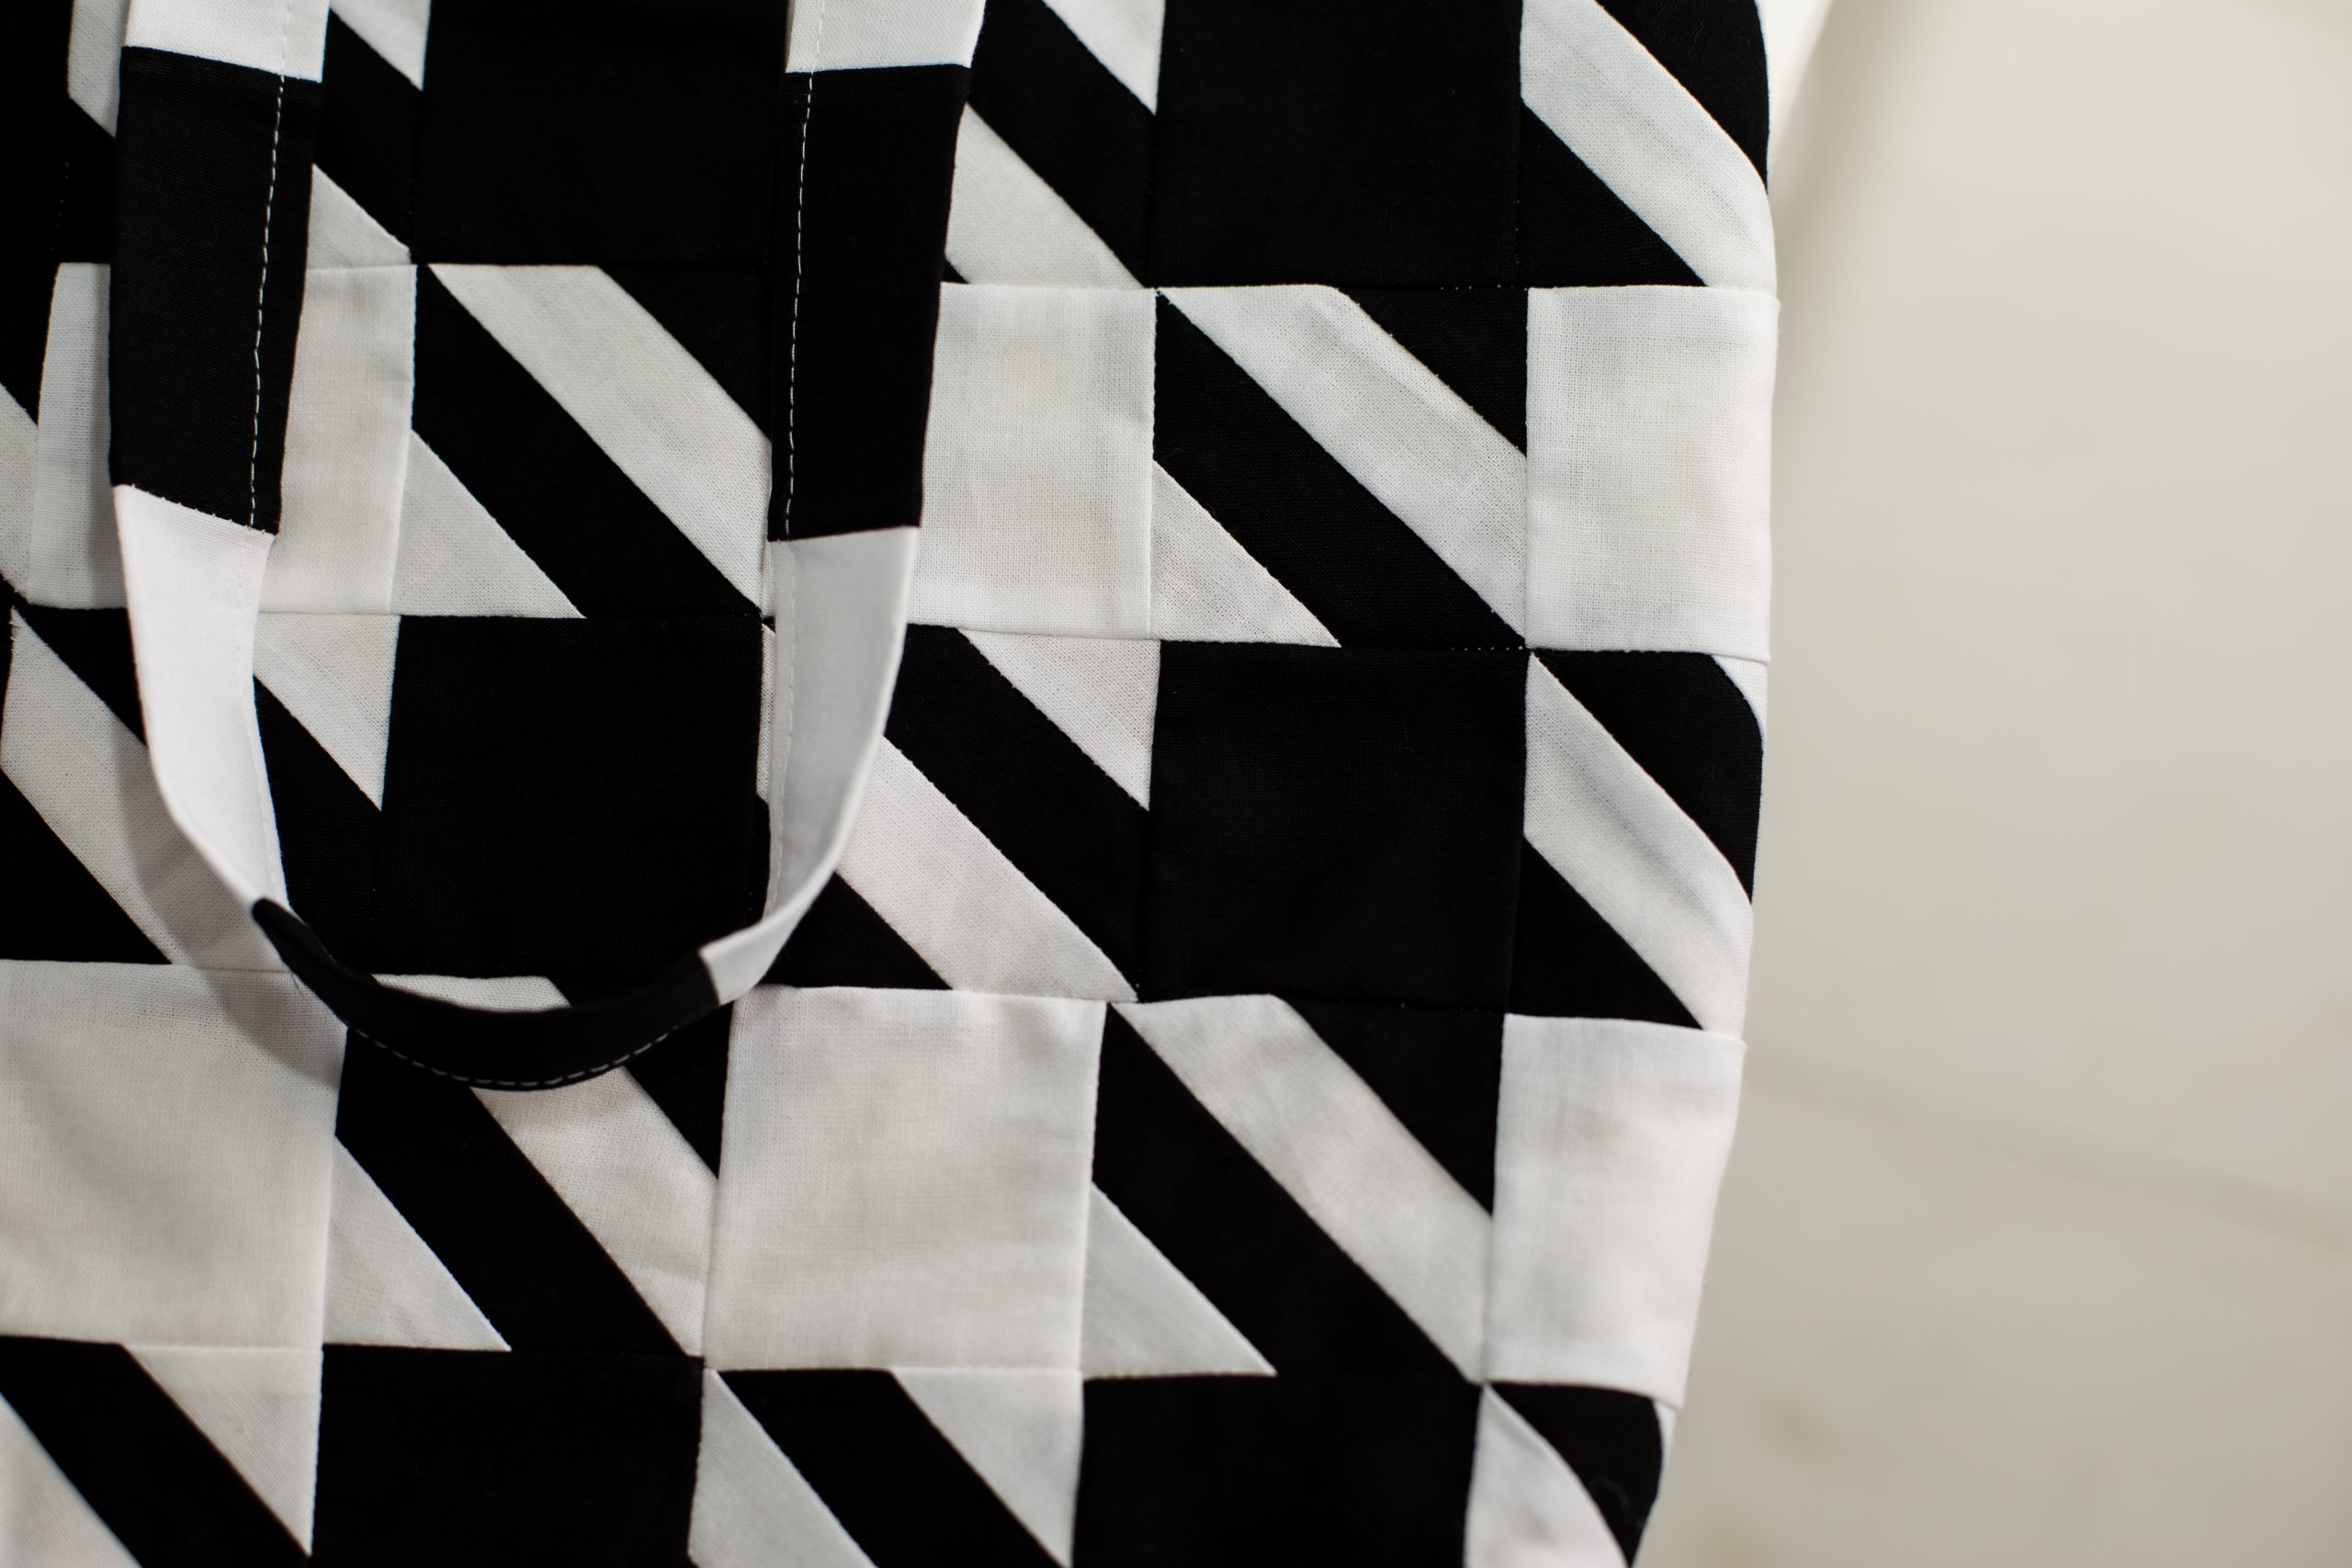
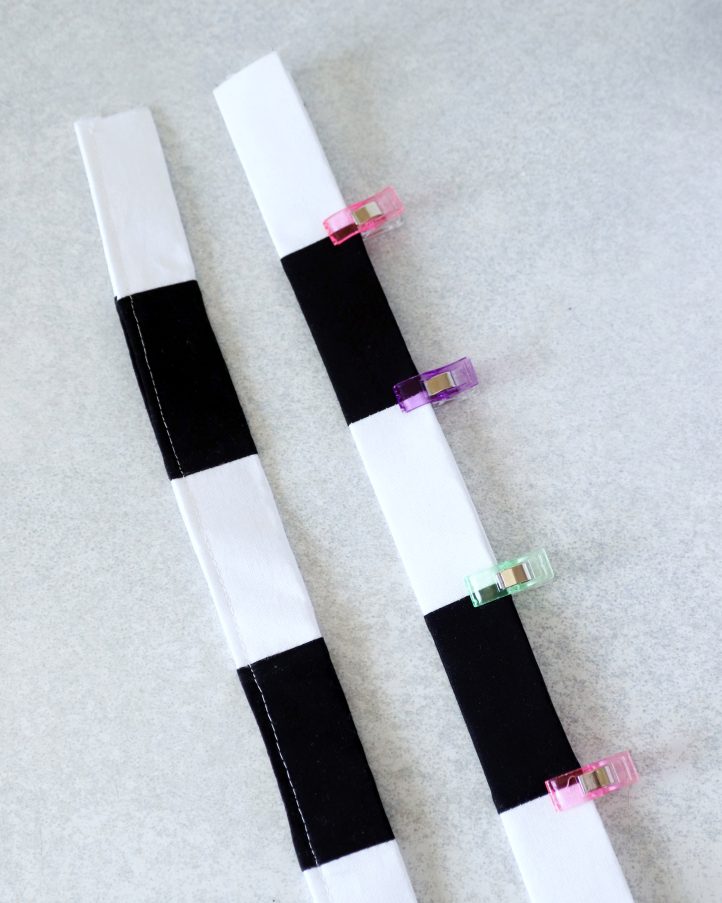
- To make the first strap, cut four white 3” squares and three black 3” squares. Sew them together in an alternating pattern, starting and ending with white, leaving a 1/4” seam allowance for each join. Back the strip with heavyweight fusible interfacing, then fold each long edge inwards by 1/4” and press. Fold the strip in half lengthwise and press again, to enclose the raw edges. Pin, then topstitch along the open edge with a straight machine stitch. Repeat to make the second strap in the same way.
- Finally, assemble the tote. Slide the lining over the outer bag with right sides facing, aligning the side seams. Tuck the straps between the two layers, positioning them at the top edge with the loops facing downward. Make sure the strap ends are evenly placed on each side. Sew around the top edge with a 1/4” seam allowance. Turn the bag right sides out through the gap in the lining, then hand stitch the opening closed. Finish with a topstitch around the top edge to give your tote a clean, professional finish.