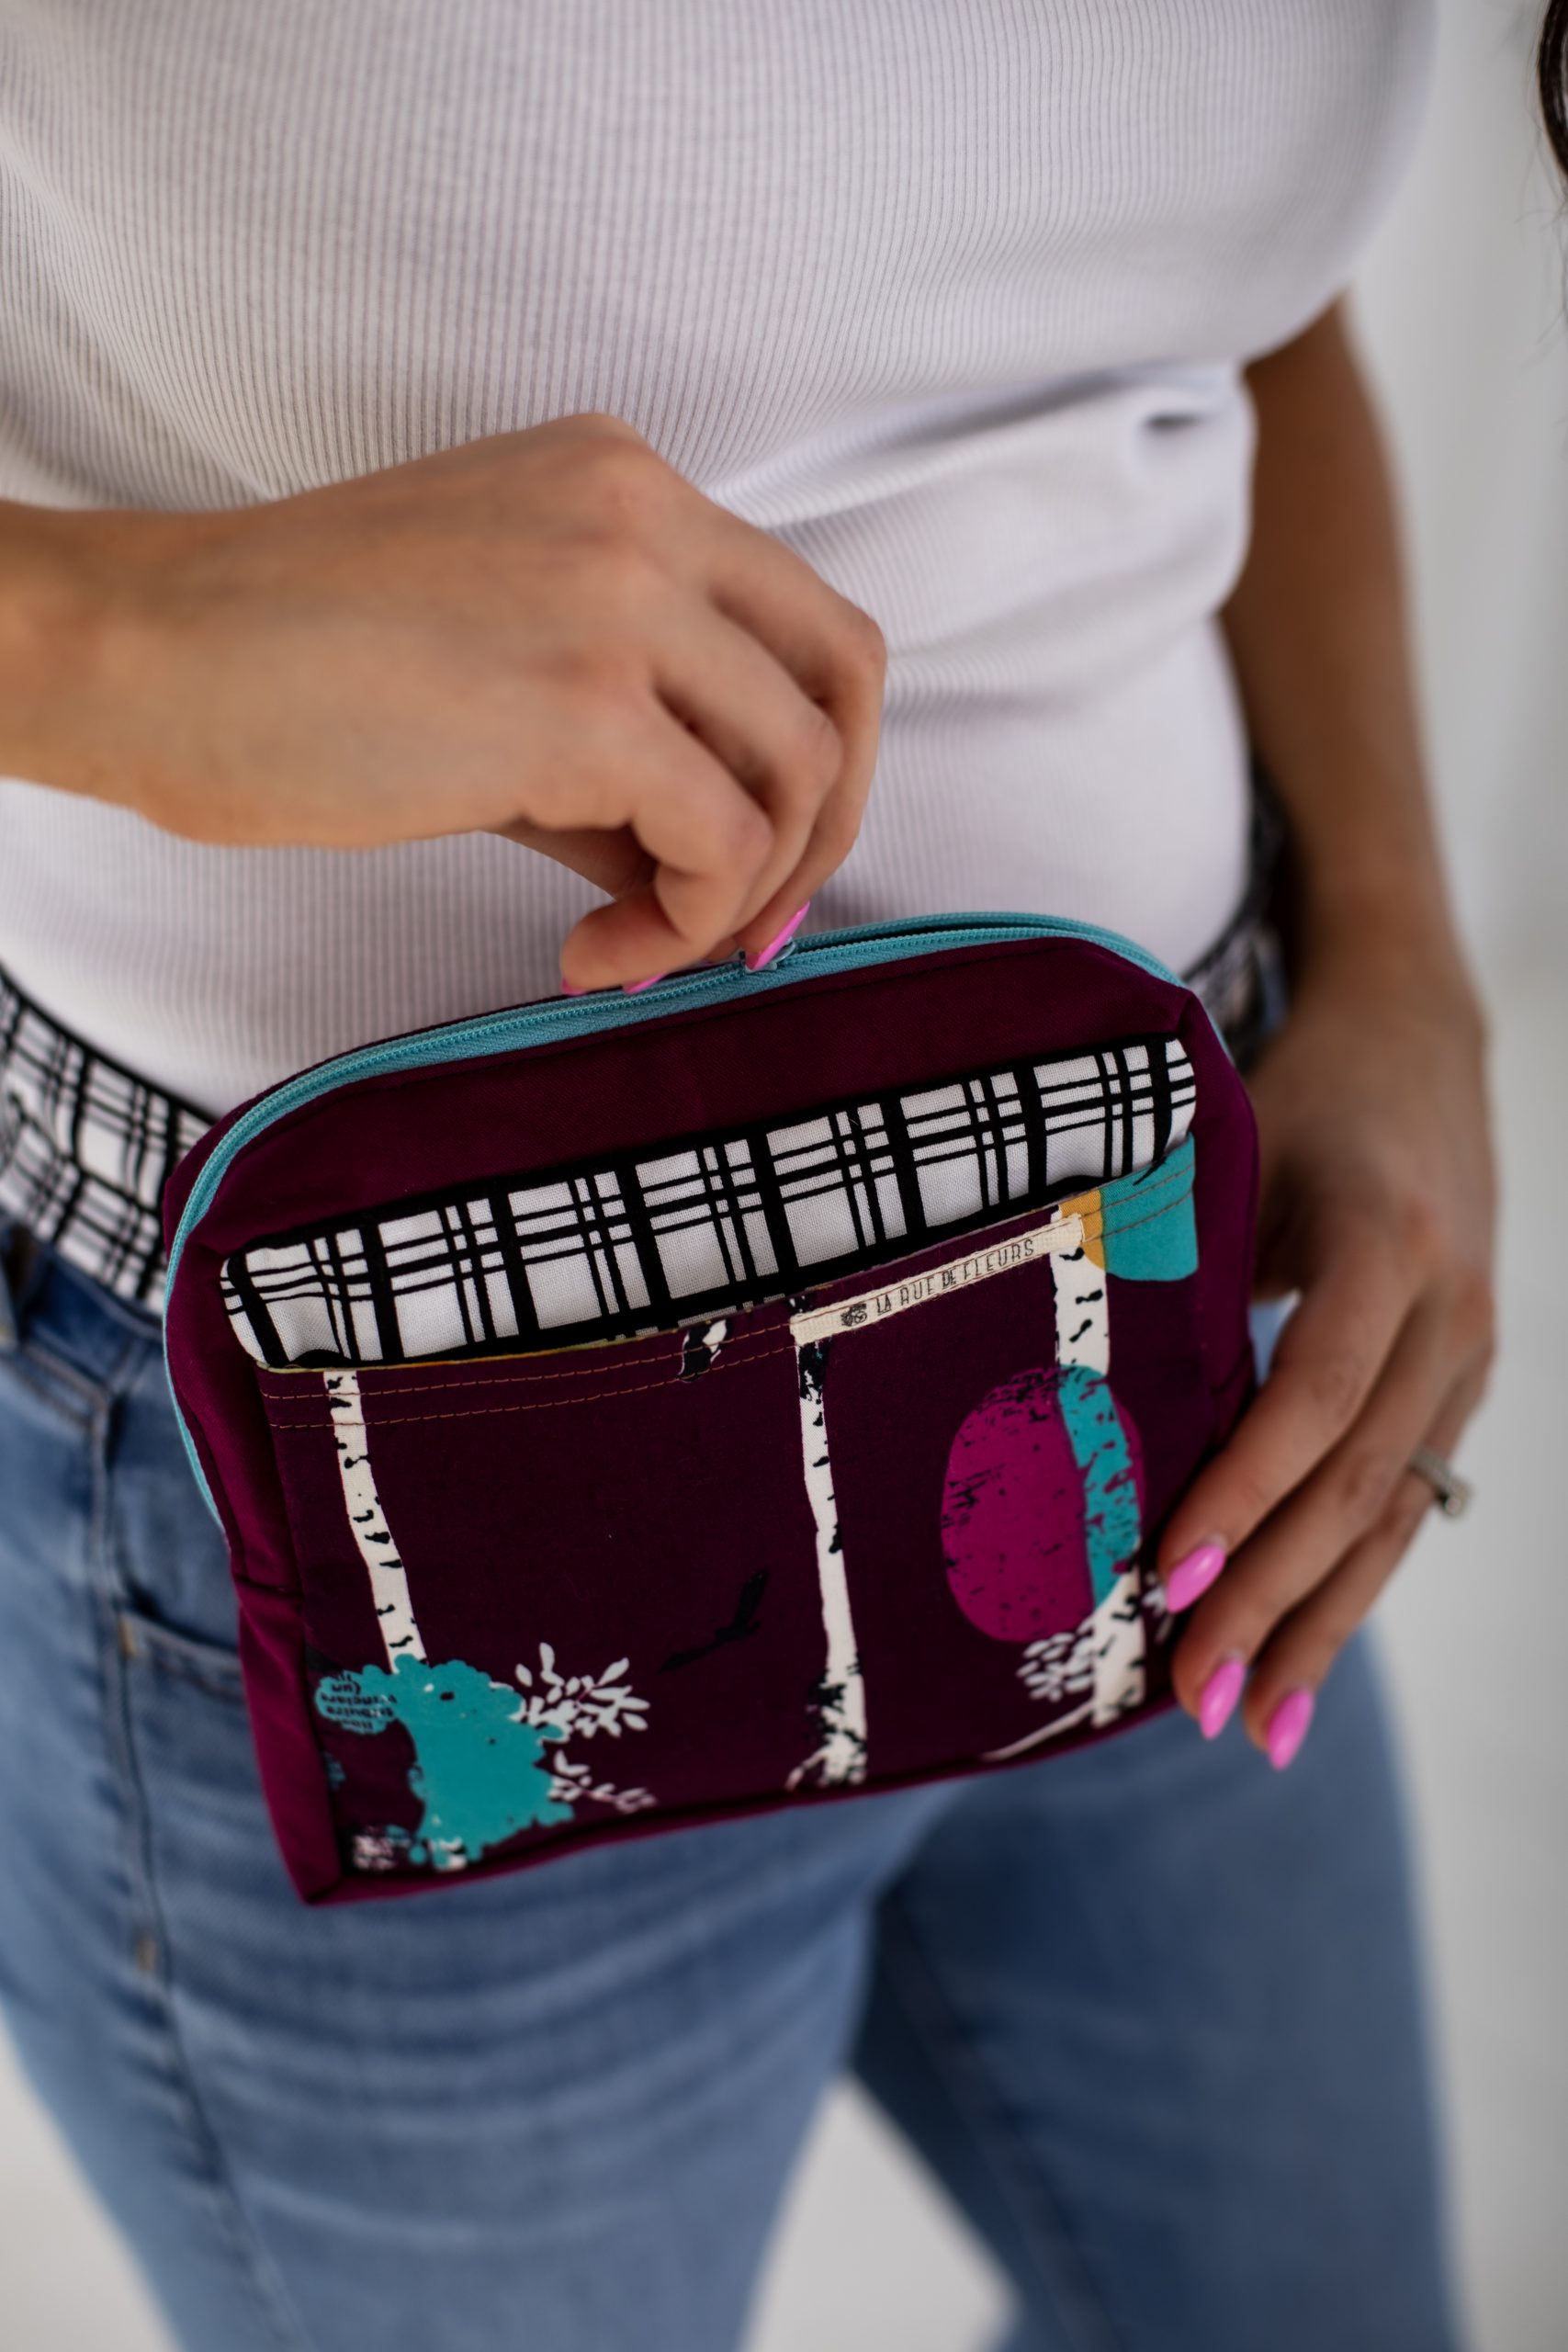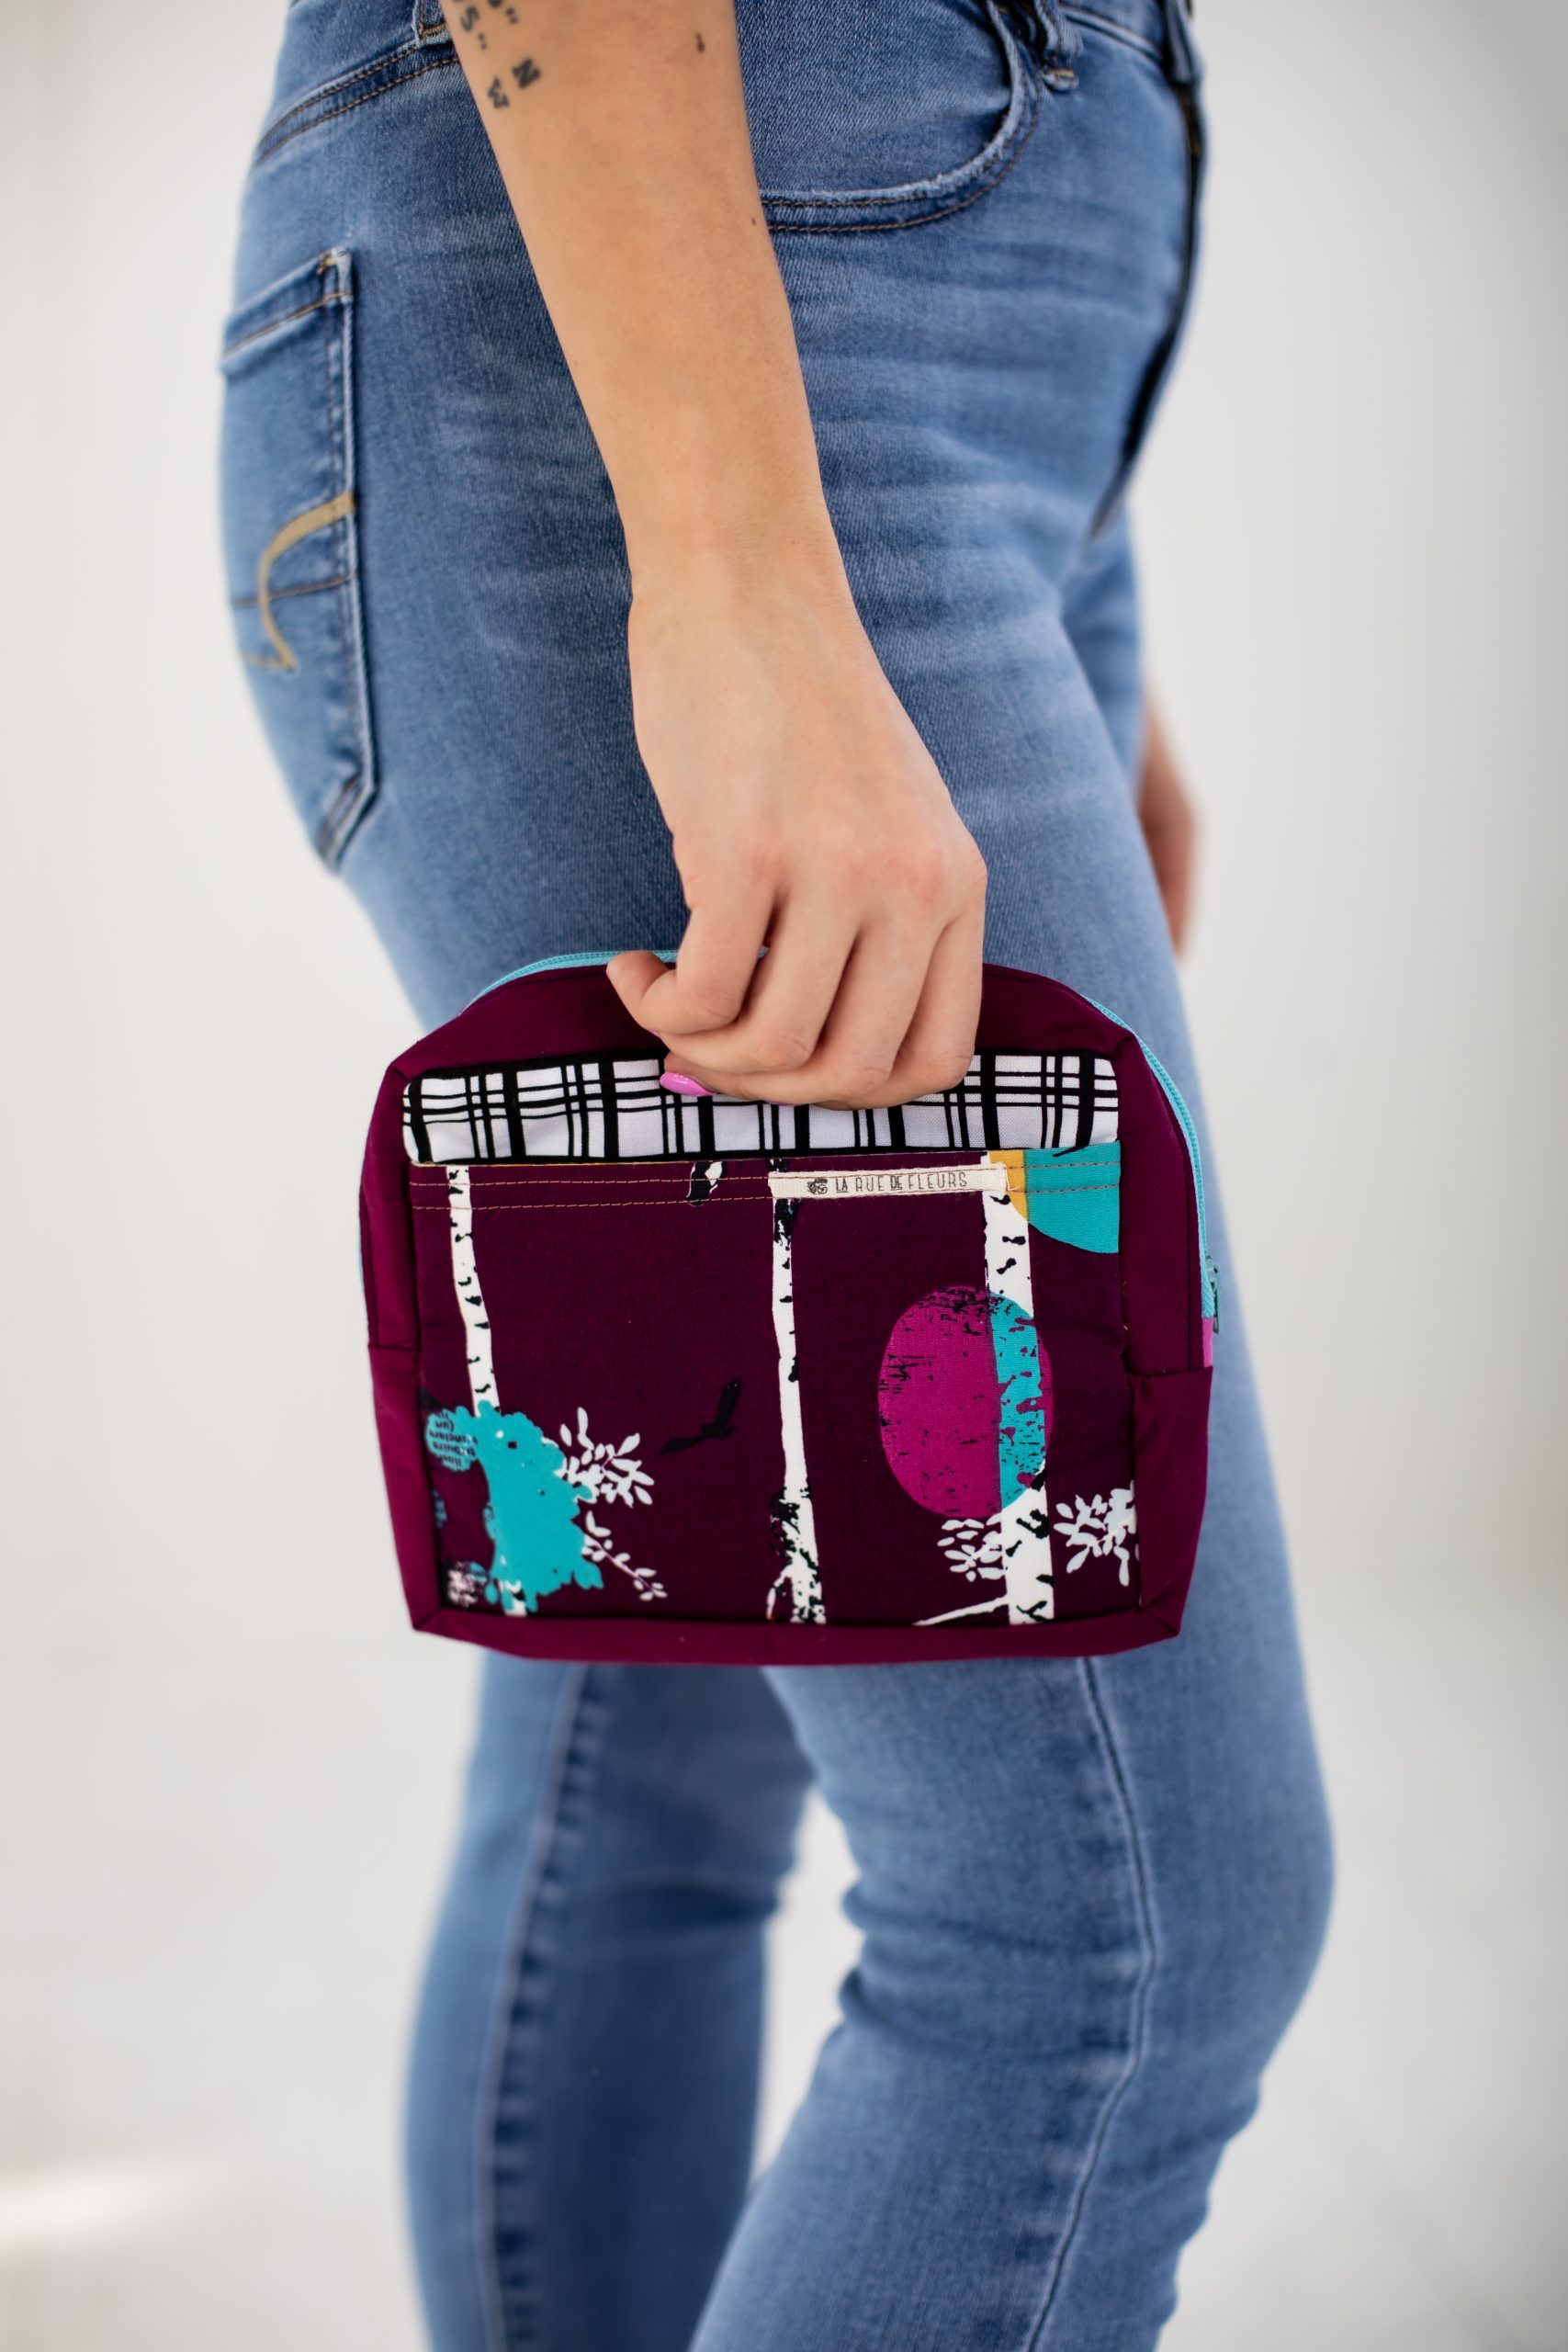
An ‘80s classic gets a sleek, colorful update with this new quilted bag pattern from designer Janice Bailor. Sew yourself a bold quilted fanny pack that perfectly holds your phone, wallet, and other daily necessities. Style your fanny pack pattern with a coordinating sash tie to wear with jeans and a simple t-shirt or switch it up by carrying your bag as a summery, lightweight clutch.
Skill Level: Advanced Beginner
Finished Dimensions: 5 1/2”h by 7” w, 42” tie
Seam Allowances: 1/4″
Materials:
- Feature print cotton fabric: 1 fat eighth or 1/8 yard cut
- Solid cotton fabric: 1 fat eighth or 1/8 yard cut
- Cotton lining fabric: One fat quarter or 1/4 yard cut, plus 1/8 yard by width of fabric “WOF” (for tie)
- Fusible interfacing: 1/2 yard
Special Notions:
- Fusible interfacing
- 14” zipper
- Zipper and walking sewing machine feet
Cutting Instructions:
Feature print cotton fabric:
- Cut 2 each- 7 1/2” by 6” rectangles and 2 1/2” by 4” rectangles.
- Cut 1- 7 1/2” by 5” rectangle and 3 1/2” square.
Cotton lining fabric:
- Cut 2- 7 1/2” by 6” rectangles.
- Cut 1- 7 1/2” by 5” rectangle, 2 1/2” by 11 1/2” rectangle and 3 1/2” square.
- Cut 1 to 2- 4” by WOF strip.
Solid cotton fabric:
- Cut 4 – 1 1/4” by 11 1/2” rectangles.
- Cut 2- 2 1/2” by 11 1/2” rectangle.
Fusible interfacing:
- Cut 1- 2 1/2” by 11 1/2” rectangle, 7 1/2” by 5” rectangle and 3 1/2” square.
- Cut 2- 7 1/2” by 6” rectangles, 3/4” by 4” strips.
- Cut 4- 1” by 11 1/2” rectangles.
Piecing Instructions:
PREPARING THE PACK PANELS WITH INTERFACING:
- Begin by matching the fabric pieces with the corresponding fusible interfacing cuts and follow the manufacturer’s instructions to create:
- 2 Feature Fabrics plus Fusible Interfacing 7 1/2” by 6” rectangles for the exterior side panels.
- 1 Solid Fabric 2 1/2” by 11 1/2” rectangle for the bottom gusset.
- 1 Feature print 7 1/2” by 5” rectangle for the front slide pocket.
- 1 Feature Print 3 1/2” square for the interior slip pocket.
- 2 Feature print 3/4” by 4” strips for the tie tabs.
- And 4 Solid Fabric 1” by 11 1/2” rectangles for the zipper gusset strips.
FUSING THE TIE TABS AND ZIPPER GUSSETS:
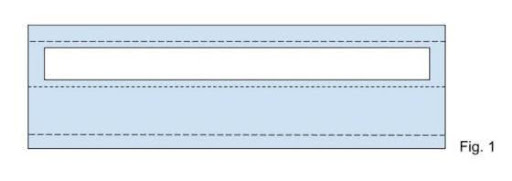
- At the ironing board, press the tie tab in half to form a strong central crease.
- Open the tab, place the right side of the fabric down and fold the long WOF edges in toward the wrong side 1/4”. Press with a hot iron to hold the fold and pin the wrong sides together, right sides out along the folded edge. See Figure 1.
- Topstitch approximately 1/8” around the entire perimeter of the tab to hold the turned edges in place.
- Press the end of each tab 1/2” in and set aside. Repeat for both tabs.
- Place the 1 1/4” by 11 1/2” solid fabric RSD on the ironing board and adhere the 1” by 11 1/2” strips of interfacing, lining up on one side only so there is 1/4” of unlined fabric. Fuse to hold in place. Repeat for all four zipper gusset strips and set aside.
PREPARING THE SLIDE POCKETS:
- Place the pocket front piece and pocket lining piece RST and sew a 1/4” seam across the top 7” long side.
- Flip the front of the pocket down, lining up both pieces with right sides out, and press firmly across the top seam. Topstitch approximately 1/4” from the sewn and folded edge.
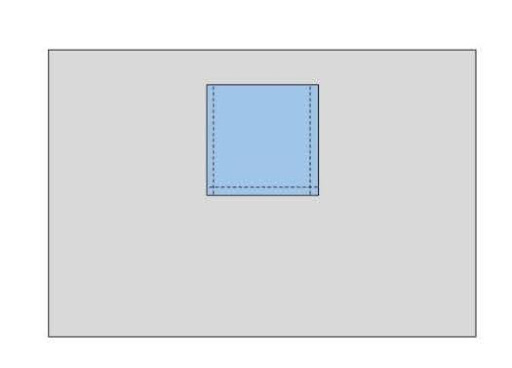
- Place the pocket piece on top of one of the Exterior Side Panels, lining up the 7” raw edge bottom of the pocket with the bottom of the base piece, with both right sides facing up. See Figure 2a. Pin in place.

- Sew a 1/8” basting stitch around the raw edges to secure and set aside.
- Repeat Steps 1 and 2 above for the 3 1/2” square slide pocket.
- Fold in remaining raw edges 1/4” and use a hot iron to press a crisp fold.
- Choose an interior lining 7” by 6” piece and measure in to the center and down from the top approximately 1 1/2” and align the slide pocket top.
- Make sure the slide pocket edges are turned under and top stitch 1/8” around the folded sides to secure onto the lining. Set aside. See Figure 2b.
PREPARING THE ZIPPER:
- Sandwich one zipper gusset strip right side up, layer on the zipper right side up and another zipper gusset right side down. (Both zipper gusset strips should have the unlined 1/4” touching the raw edge of the zipper.) Pin or clip in place.
- Using the zipper foot attachment, sew along the edge of the zipper sandwich, adjusting the zipper pull out of the way as necessary.
- Flip the zipper gussets right sides out (wrong sides together) exposing the zipper and press lining and pieced panels flat along the top zipper seam.
- Top sew 1/8” from the zipper edge across the pieced zipper gussets.
- Repeat Steps 1-4 for the opposite zipper side and zipper gusset strips.
- Open the entire zipper gusset flat and trim away any excess zipper ends.
CREATING THE EXTERIOR AND LINING PANELS:
- Find the center line of all Exterior, Interior, Zipper and Bottom Gusset strips by folding together all of the short ends and creasing with a hot iron. Use the center creases to line up all pieces below.
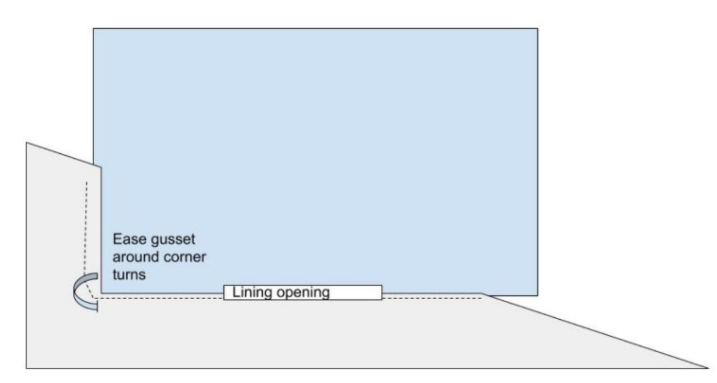
- Sew the bottom of the Exterior Pocket Panel RST to the Bottom Exterior Gusset Strip, gently pivoting the fabric around the corners. Leave a 1/4” seam allowance at either end. Set aside.
- Place the Tie Tabs on the remaining Exterior Panel 1” from the top and at 2 1/2” and 5” in from the left edge. Pin in place to hold.
- Topstitch a 1/2” square at the top and bottom of the folded under tab ends to secure in place.
- Align the bottom center crease of the Exterior Tab Panel to the Bottom Exterior Gusset Strip RST and sew in place, gently pivoting the gusset at the corners of the panel. Leave a 1/4” seam allowance at either end. See Figure 3.
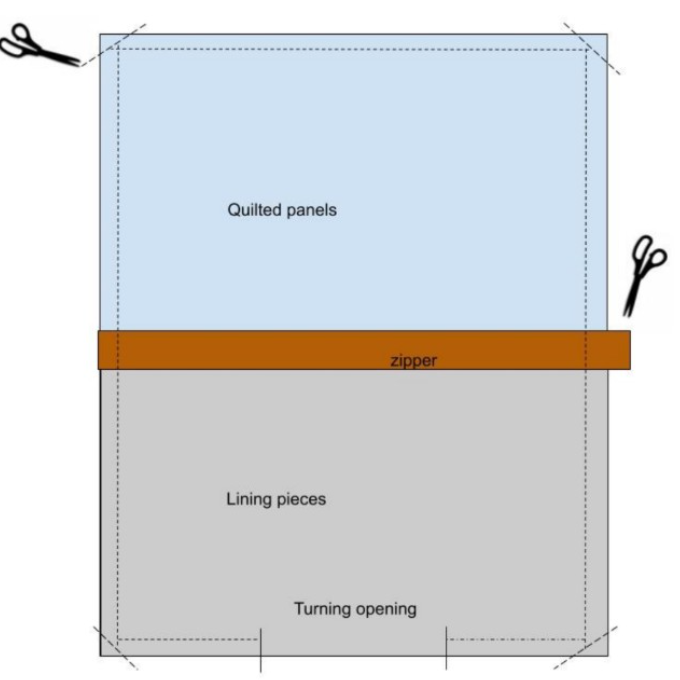
- Create the lining by sewing the bottom of the Lining Panel with Slide pocket RST with the Bottom Lining Gusset Strip, gently pivoting the fabric around the corners. Leave a 1/4” seam allowance at either end.
- Sew the remaining Lining Panel to the remaining side of the Bottom Lining Gusset Strip, leaving a 2-3” opening for turning the bag. Backstitch at the start and stop of the opening. See Figure 3 above.
FINISHING THE FANNY POUCH BODY:
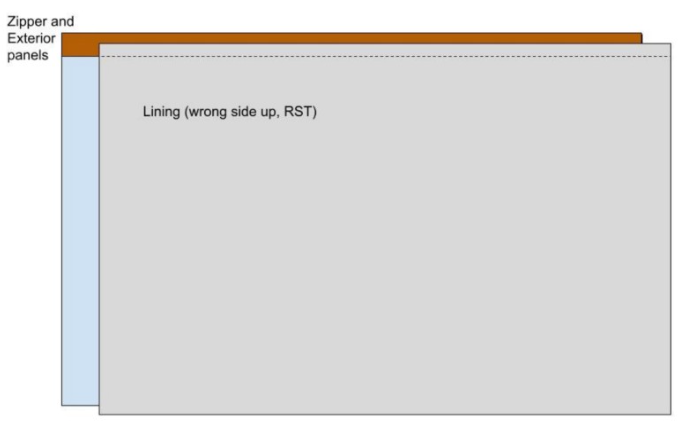
- Aligning all pieces at the center crease, sandwiching the Exterior Slide Pocket Panel right side up, Zipper Gusset exterior print side down, and Lining right side down. Pin in place.
- Sew together, gently pivoting the zipper around the panel corners. Leave a 1/4” seam allowance on all ends.
- Repeat with the remaining long sides to attach the Exterior and Lining to the zipper. *Note: The second interior lining will momentarily trap the previous lined side when sewing in place. See Figure 4.
- **Make sure the zipper remains open at least halfway throughout the following step to allow access through to all pieces when turning the purse right side out.**
- Bring the Zipper Gusset and Bottom Gusset ends together and sew closed. *Note: Use caution when approaching the zipper ends to avoid hitting the end stops of the zipper and damaging the needle.
- Crop the corners of the Exterior Panel and Lining by cutting 1/8” diagonally on the outside of the corner seams. See Figure 5.
- Reach into the lining opening and turn the bag right side out. Use a blunt stick or fingers to press gently into the seams and corners and push them fully out.
- Sew the bottom lining opening closed with a top stitch 1/8” in from the edge.
- Stuff the Lining into the Fanny Pack body to complete the pack!
CREATING THE SASH TIE:
- Fold the 4” by WOF strip in half and use a hot iron to create a center crease. If desired, use more than one strip and join together at the short 4” ends to create additional length for the tie.
- Open the tie, place the right side of the fabric down, and fold the long WOF edges toward the wrong side 1/4”. Press with a hot iron to hold the fold and fold in half, wrong sides together, right sides out along the folded edge. See Figure 1.
- Topstitch approximately 1/8” around the entire perimeter of the tab to hold the turned edges in place.
- Thread the tie through the Tab Loops on the back of the pouch and tie around waist or cross-body to secure and use bag.