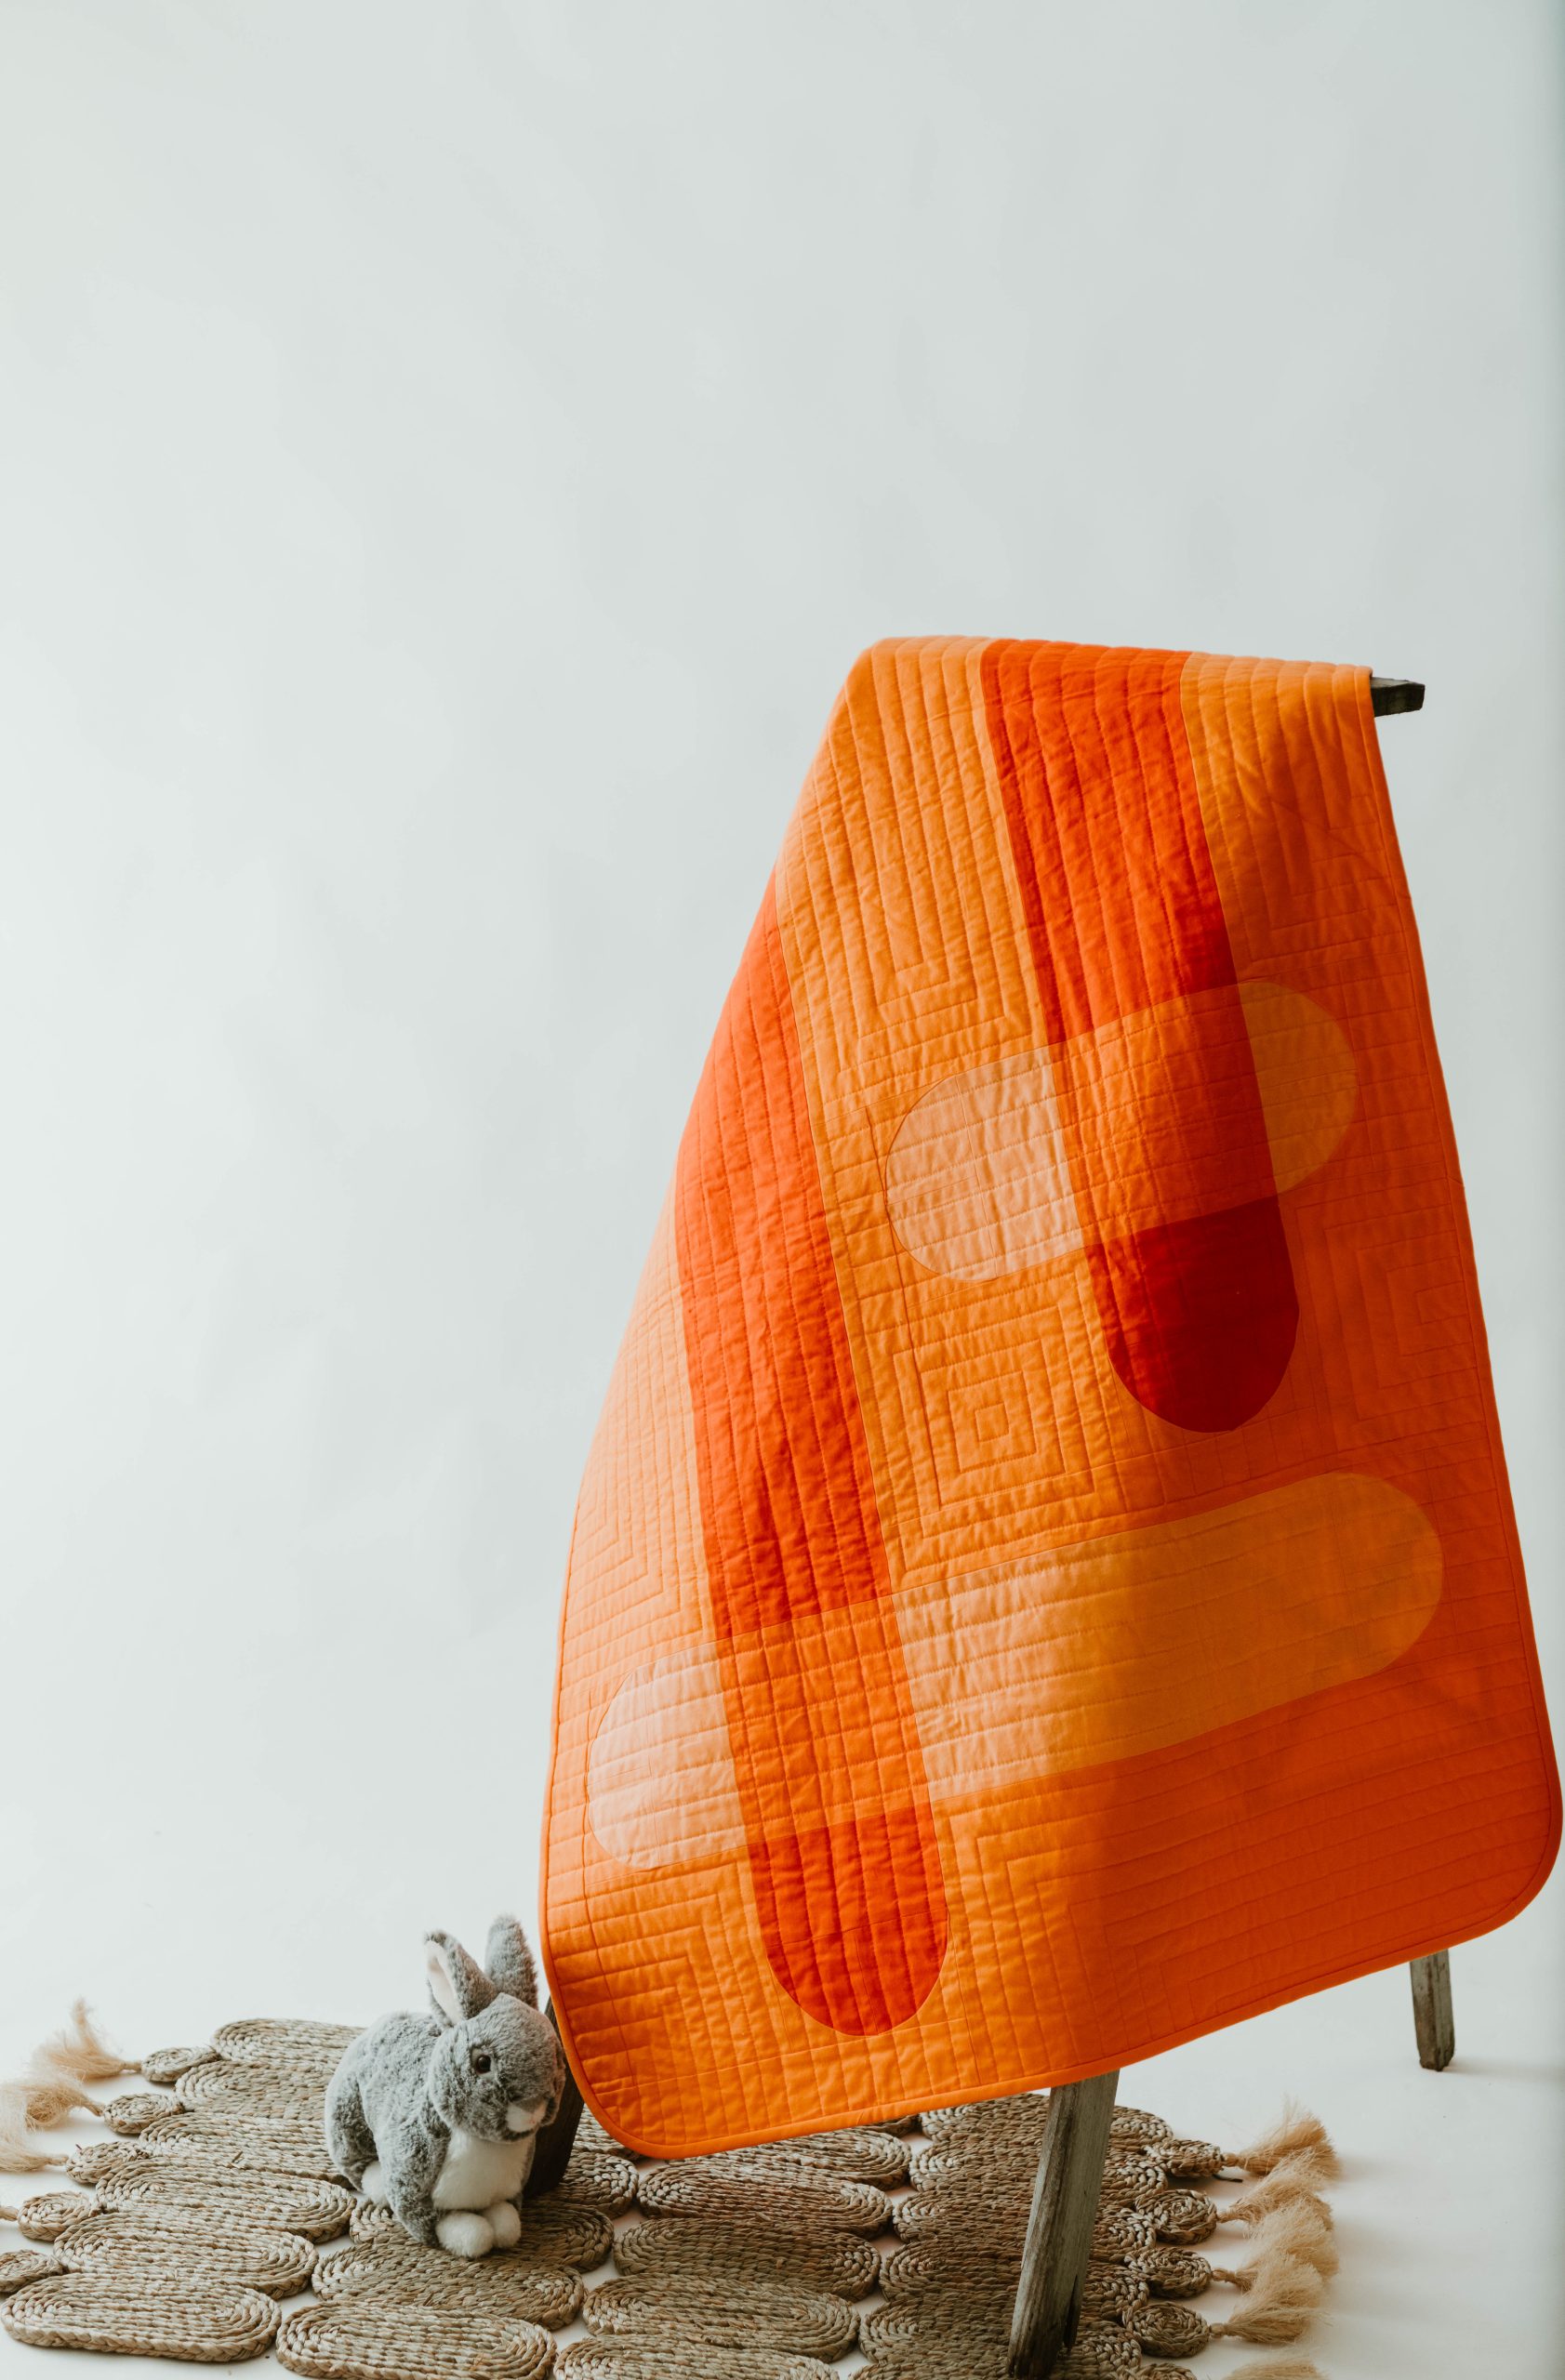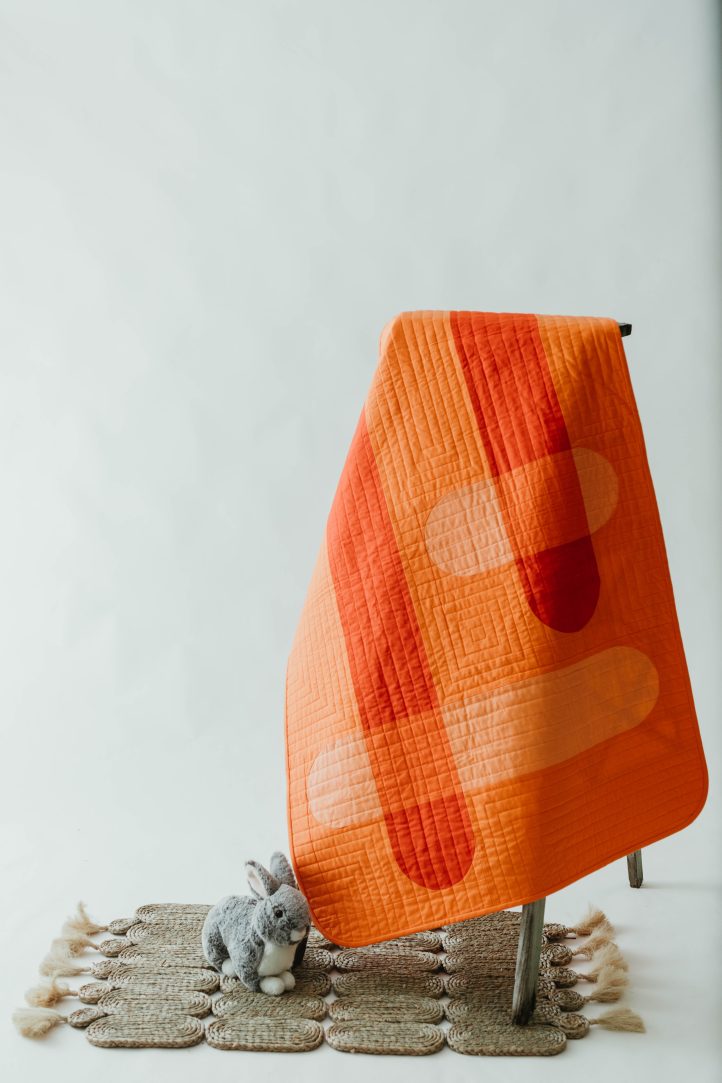
Welcome your newest addition with a bold, bright baby quilt that’s easy enough for confident beginner quilters. Designed by Kathy Greer, this modern baby quilt pattern is inspired by childhood treats and features interlocking rounded sticks in lively shades of orange. This easy baby quilt pattern finishes at 33 1/2” x 48 1/2” and is suggested for a monochromatic color scheme, as seen in the designer’s additional colorway options.
Skill Level: Confident beginner
Finished Size: 33 1/2″ x 48 1/2″
Seam Allowance: 1/4″
Designer Notes:
- All fabric cutting directions assume fabrics have been pre-washed.
- Unfinished block size is 14 1/2″ x 14 1/2″.
- A shorter stitch length is recommended when sewing curves and when seams are pressed open.
Abbreviations:
- FQ: Fat Quarter
- RST: Right sides together
- WOF: Width of fabric. All pattern measurements assume 40″ usable width.
- HSU: Horizontal Stick Units
- VSU: Vertical Stick Units

PATTERN NOTES:
This pattern is inspired by two childhood favorites…eating ice pops and weaving the saved sticks to make stars that burst apart when thrown. For this pattern, the weaving is simplified with the area of overlap providing an effect of transparency between the vertical and horizontal ice pop sticks. An analogous or monochromatic color scheme is suggested with numerous color combinations possible.
ADDITIONAL COLORWAYS:
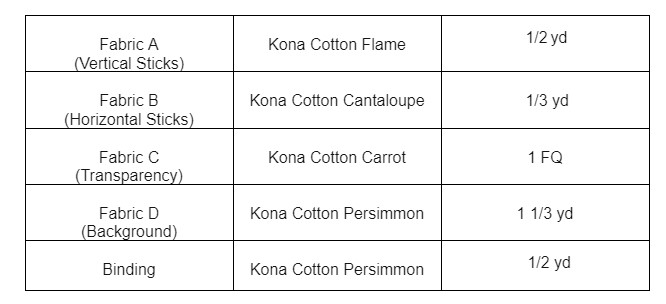
The designer has provided fabric information for additional colorways as inspiration for our readers! Fabrics for the shown photography sample are located below in the Materials list.
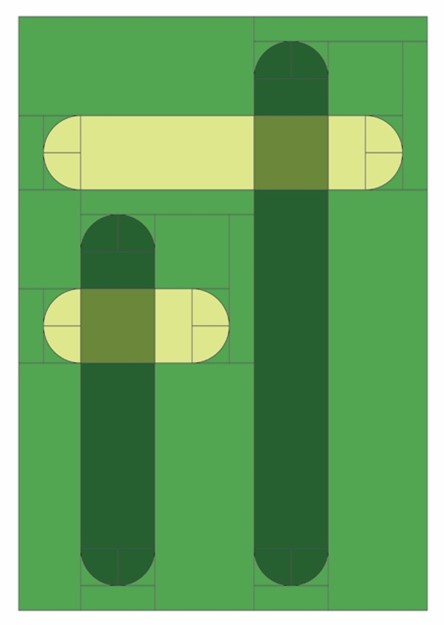
Green:
Kona Cotton: Kiwi, Grasshopper, Grass Green, Cactus
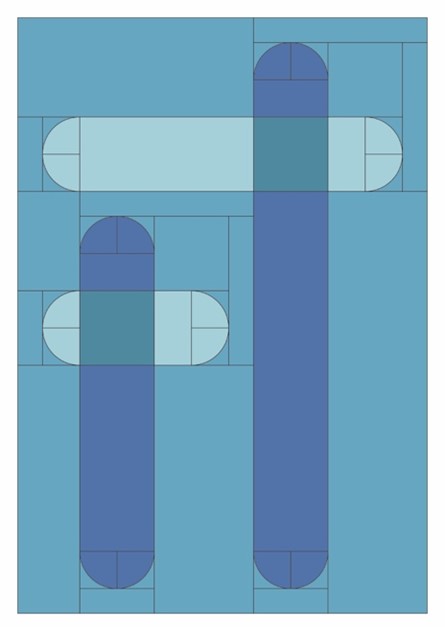
Blue:
Kona Cotton: Lapis, Lake, Stratosphere, Waterfall
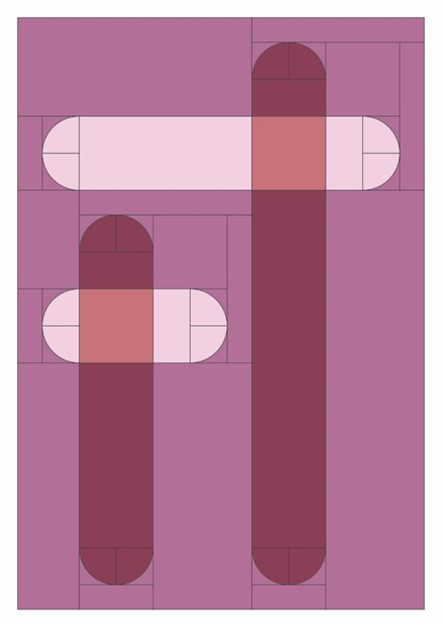
Fuschia:
Kona Cotton: Rose, Plum, Pink, Lupine
Materials:
- Fabrics:
- Cotton Batting: 39″ x 54″
- PDF Templates – These are located at the bottom of this page. See printing instructions below.
- Print quarter circle templates. Test printing accuracy using 1 inch square.
PRINTING INSTRUCTIONS:
To download the PDF templates, click on the download button at the bottom of the page. We recommend opening your download using Adobe Acrobat.
Cutting Instructions:
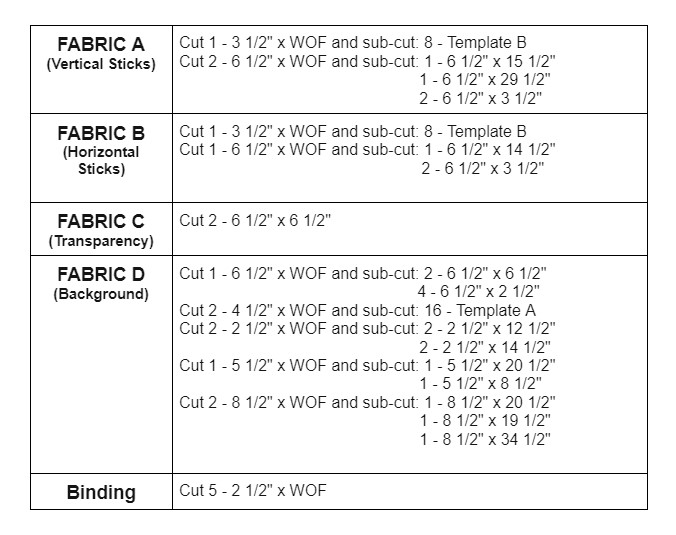
Two templates (A & B) are included in this pattern. Cutting instructions assume the concave Template A will be cut from a 4 1/2″ x WOF strip and the convex Template B will be cut from a 3 1/2″ x WOF strip. If using directional fabric, you may want to rotate these templates so the prints are oriented correctly in the finished quilt.
CUTTING DIAGRAMS:
Template A:
From 4 1/2″ x WOF strips, sub-cut the designated number of Template A. (Refer to fabric cutting table.)

Template B:
From 3 1/2″ x WOF strips, sub-cut the designated number of Template B. (Refer to fabric cutting table.)

FABRIC CUTTING TABLE FOR CRIB (33 1/2″ x 48 1/2″):
Piecing Instructions:
QUARTER CIRCLE UNIT:
- Fold each Template A and Template B piece in half to find the center line. Align the straight edges and finger press.
- Place Template A piece on top of Template B with RST. With straight edges aligned, pin at center fold. Figure 1
- Pin or glue the corners, shorten stitch length and slowly sew the curved edge, adjusting fabric as you sew. Keep sewing machine needle in down position when adjusting fabric. Figure 2
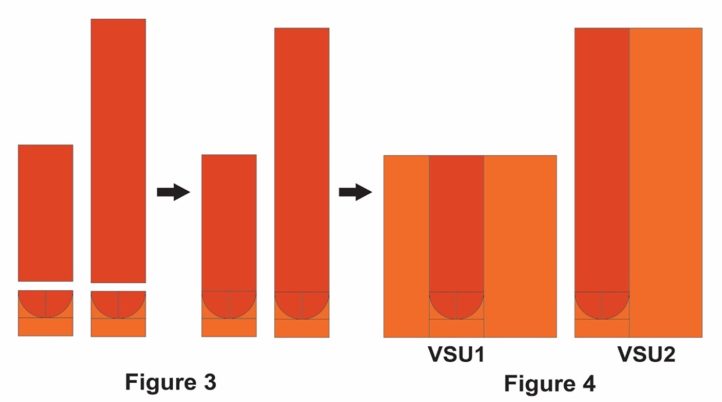
- Press seam allowance toward Template A and trim the excess fabric from Template A to square up Quarter Circle Units to measure 3 1/2″ x 3 1/2″. Figure 3

- Repeat Steps 1-4 for all Template A and Template B pieces.
BLOCK ASSEMBLY:
- Sew 2 Quarter Circle Units of Fabric A together and 2 Quarter Circle Units of Fabric B together to make Half Circle Units.

- Sew a Half Circle Unit to a 6 1/2″ x 3 1/2″ rectangle of the same color for Half Circle Rectangle components.

- Orient each Half Circle Rectangle component as seen in Figure 1. Sew one 6 1/2″ x 6 1/2″ background Fabric D to Fabric A Half Circle Rectangle component and sew one 6 1/2″ x 6 1/2″ transparency Fabric C to Fabric B Half Circle Rectangle component. Sew the 2 rectangles from Step 3 together for a 12 1/2″ x 12 1/2″ square.
- To complete the block, sew a 2 1/2″ x 12 1/2″ background Fabric D to the right side of the square and then a 2 1/2″ x 14 1/2″ background Fabric D to the top for a final block size of 14 1/2″ x 14 1/2″. Figure 2

- Repeat Steps 1-4 for a second 14 1/2″ x 14 1/2″ block.
STICK TIP ASSEMBLY:
- Sew a 6 1/2″ x 2 1/2″ background Fabric D to remaining Half Circle Units for Fabric A and Fabric B.

VERTICAL STICK ASSEMBLY:
Fabric Pieces Required:
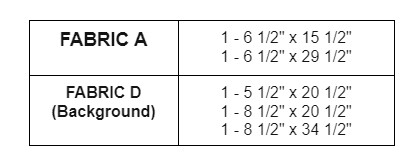
- Sew Fabric A stick tip to the end of each Fabric A rectangle. Figure 3
- Sew Fabric D rectangles to each Fabric A stick from Fig. 3 to create Vertical Stick Units 1 and 2 (VSU1 & VSU2). Figure 4
HORIZONTAL STICK ASSEMBLY:
Fabric Pieces Required:

- Sew Fabric B stick tip to the end of the Fabric B rectangle. Figure 5
- Sew Fabric D rectangles to each Fabric B stick from Fig. 8. Figure 6
- Sew a 14 1/2″ x 14 1/2″ quilt block to create Horizontal Stick Units 1 and 2 (HSU1 & HSU2). Figure 7

QUILT TOP ASSEMBLY:
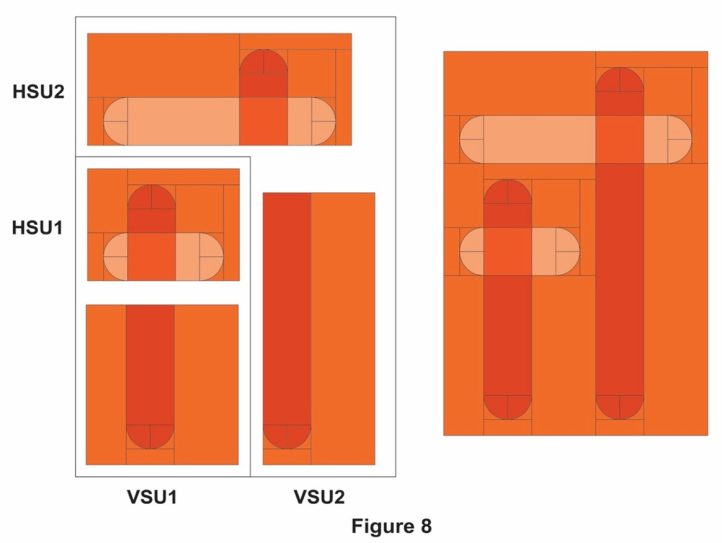
- Arrange the horizontal stick and vertical stick units according to diagram in Figure 8.
- Sew HSU1 to VSU1 for lower left Corner Unit.
- Sew VSU2 to Corner Unit as per diagram. Sew HSU2 to the top of this component.
- Final quilt top will measure 33 1/2″ x 48 1/2″.
FINISHING:
- Baste and quilt using preferred method.
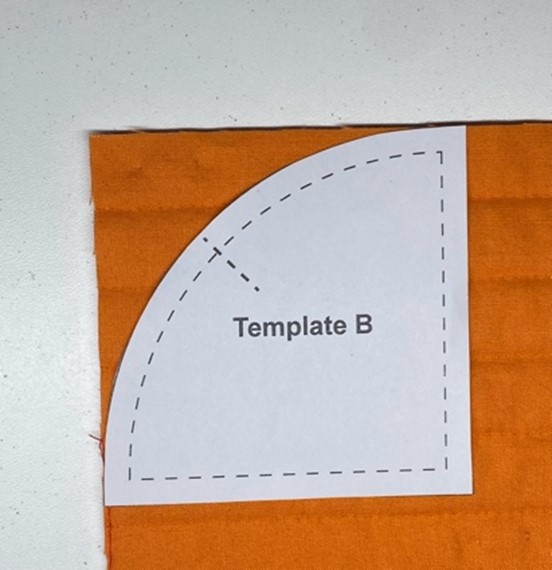
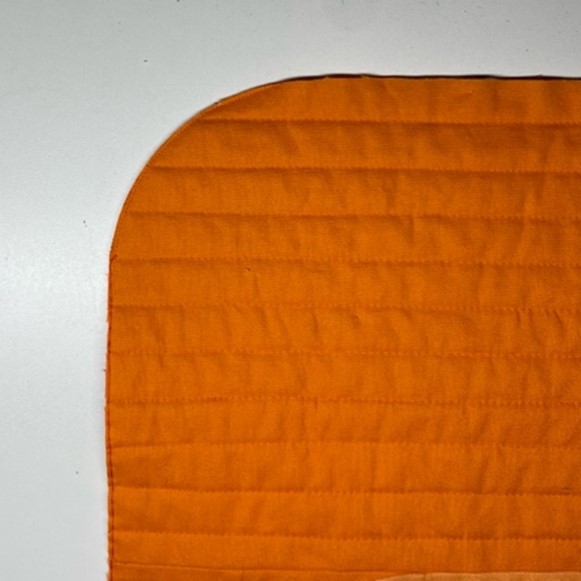
- Options for corners: Keep corners square or use Template B to round after quilting.
- Bind using preferred method.

