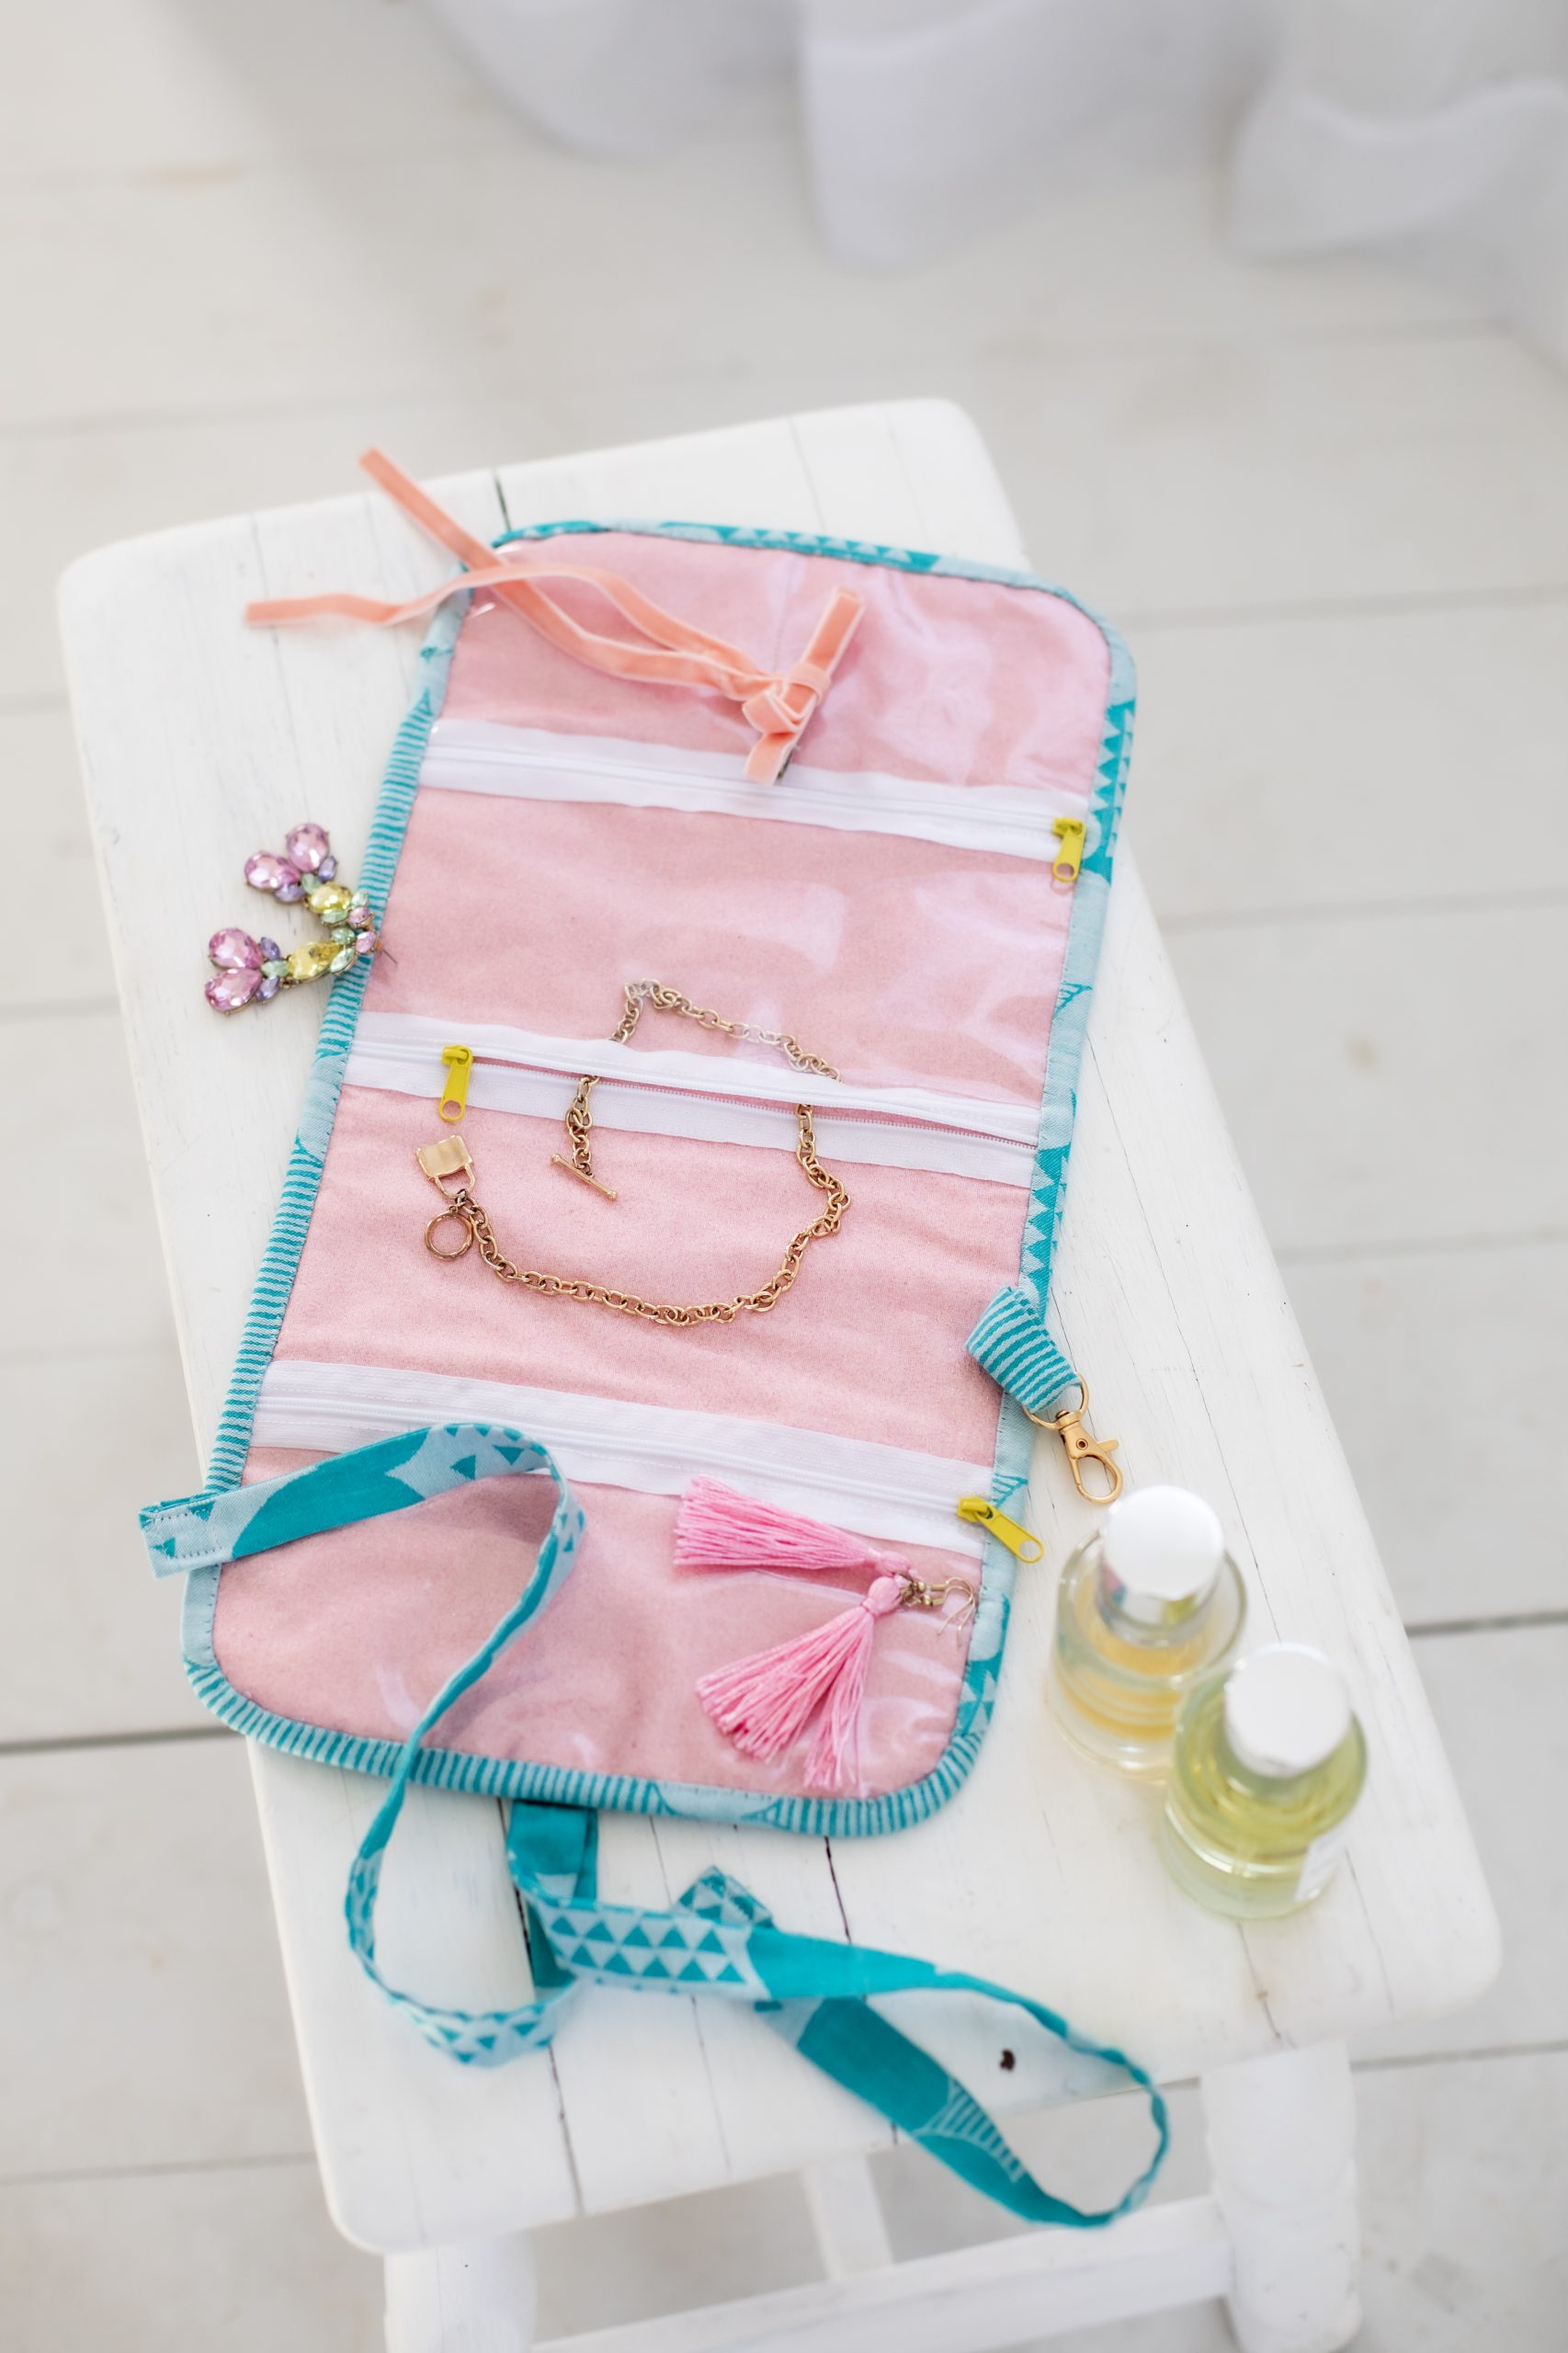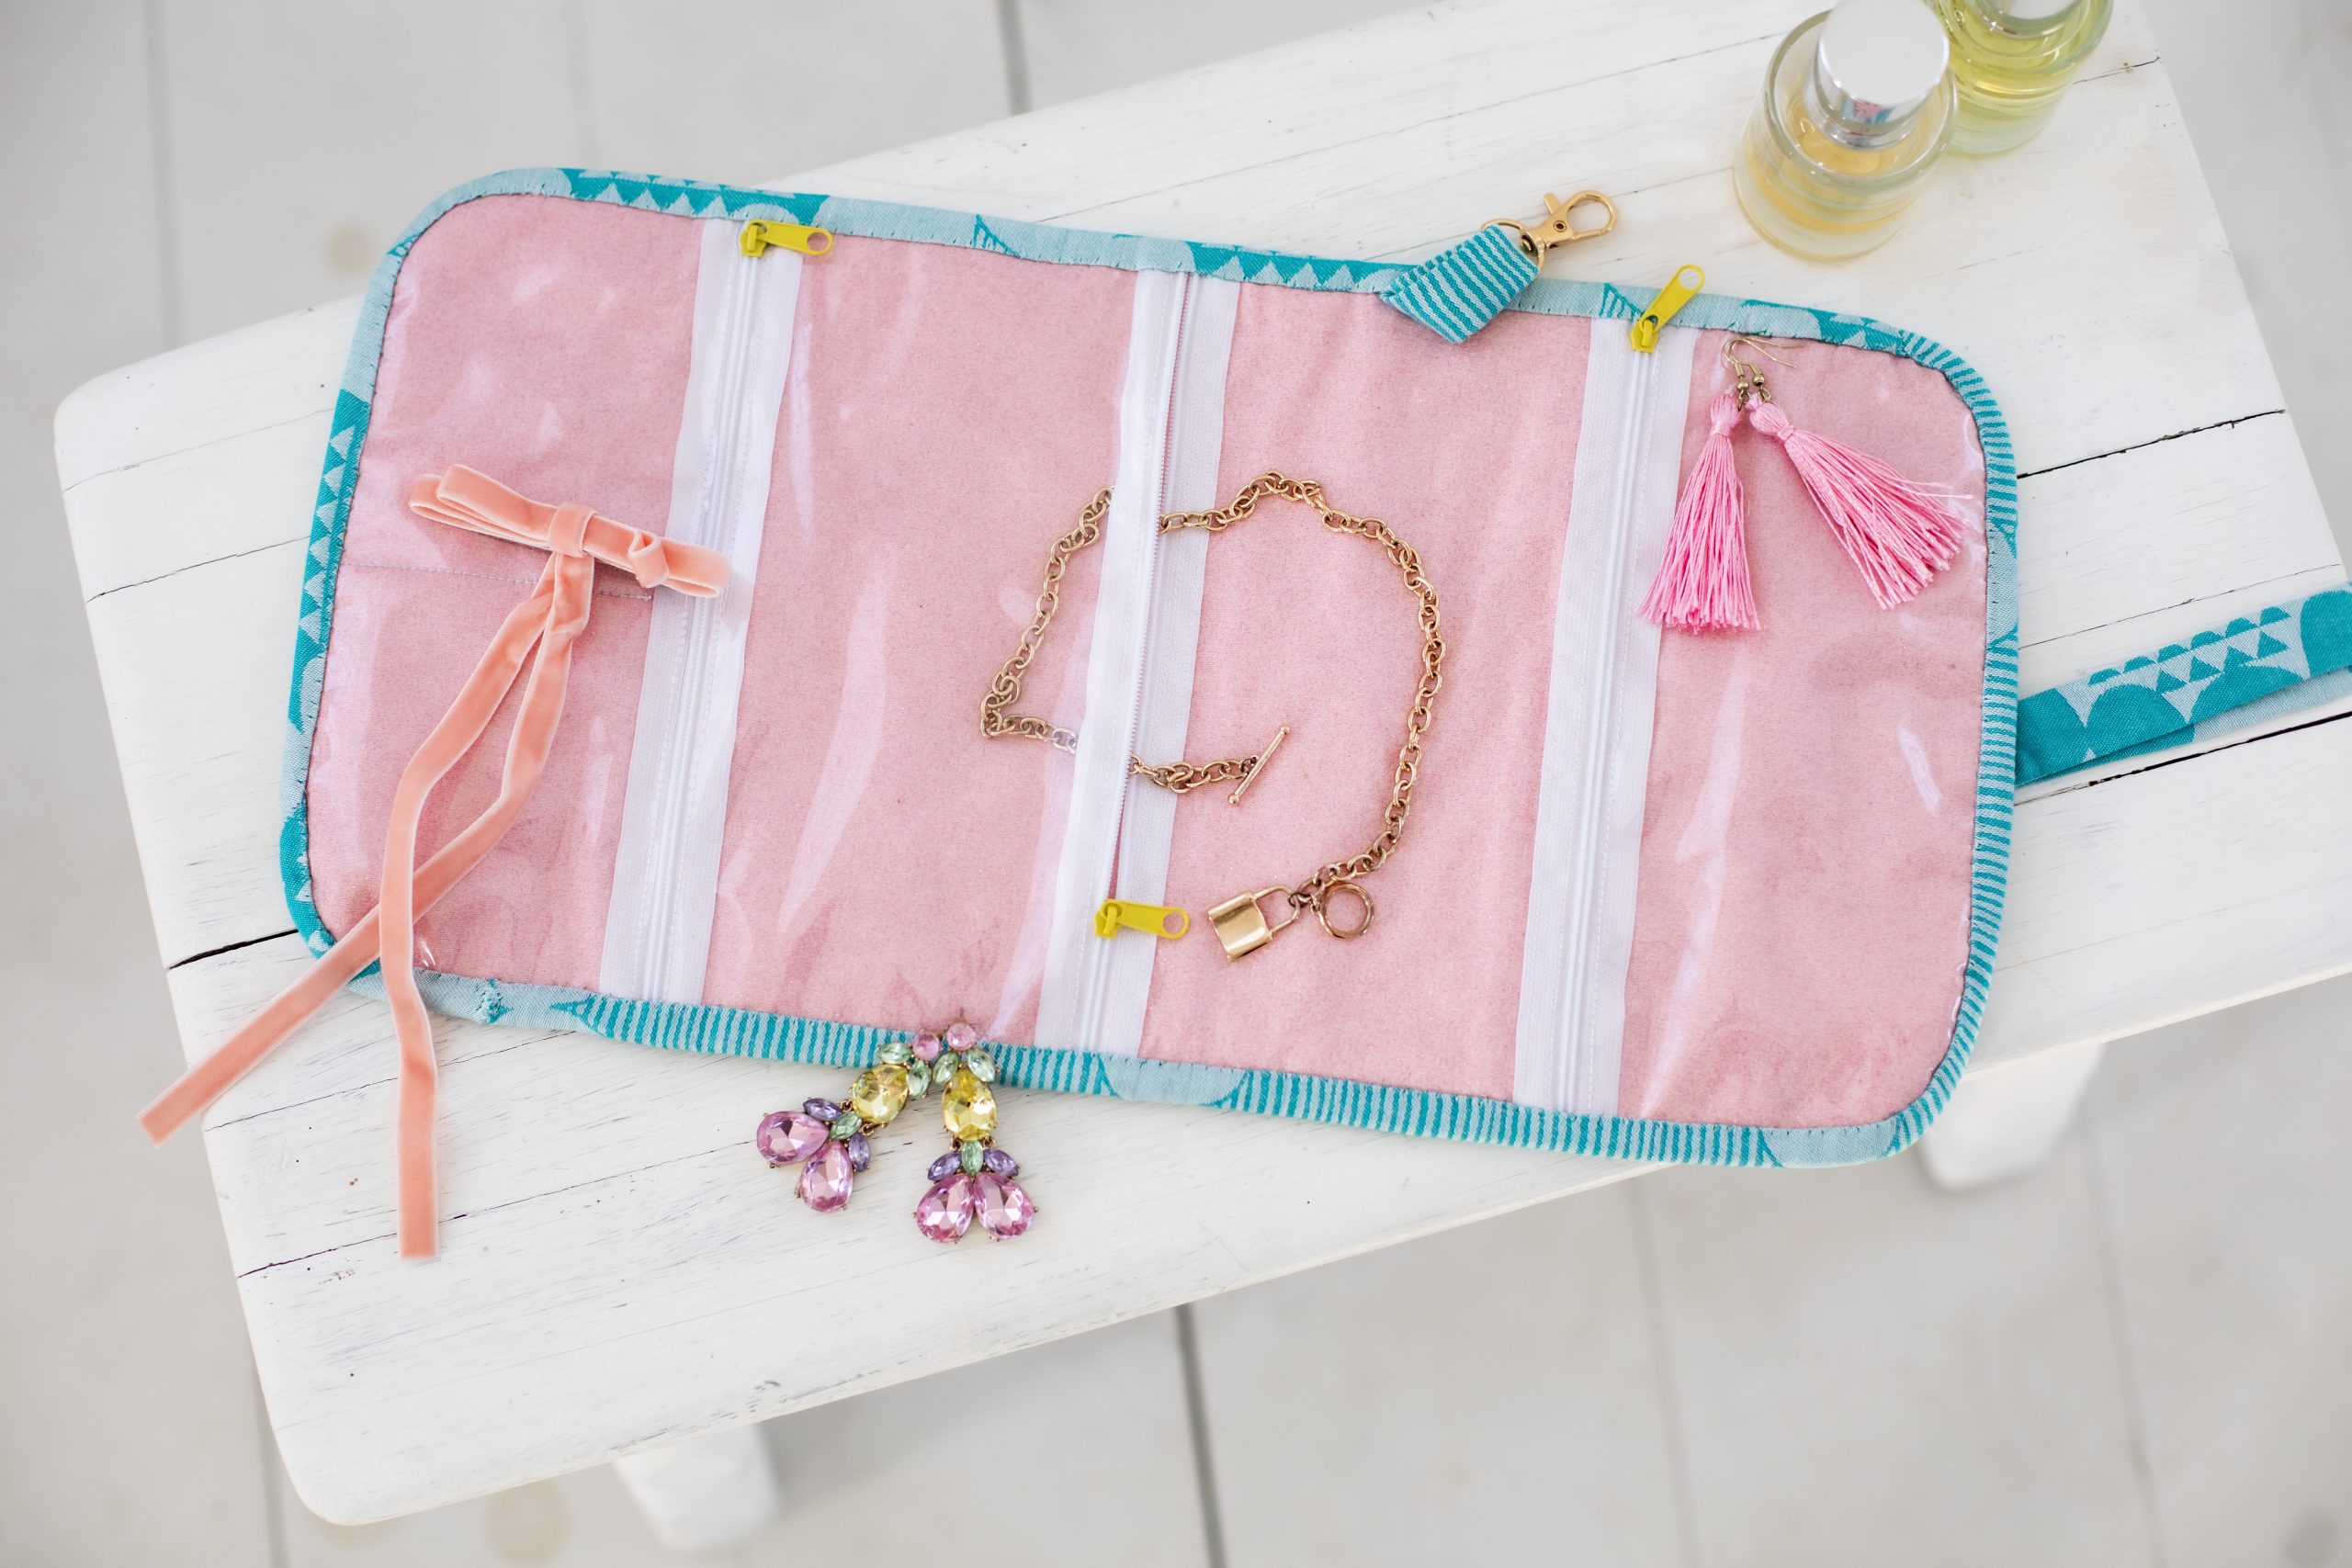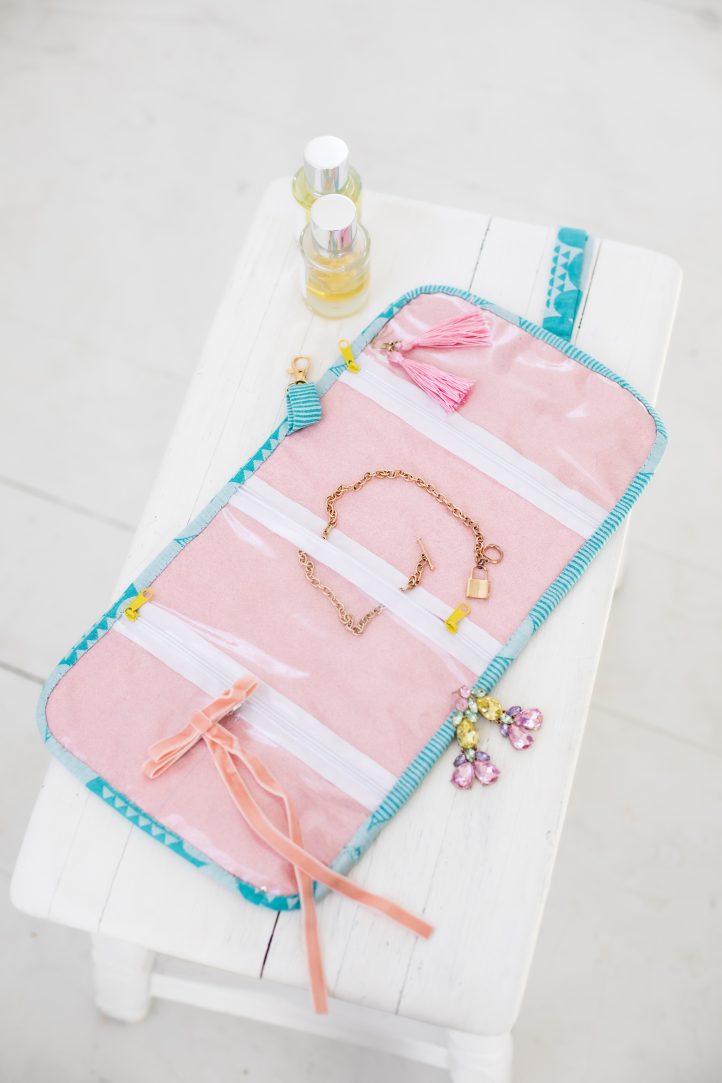
Keep your jewelry safe and secure while traveling with this sweet, rolled storage solution. Designed by Sophie Tarrant, this quilted organizer pattern features a striking chevron design on the outside of the case, while its inner section has multiple clear plastic zippered compartments. Make your storage case using bright, floral fat quarters and finish your quilting project with a chic rose gold fastener.
Skill Level: Beginner
Finished Size: 8” x 16”
Designer Notes: When working with vinyl, it’s vital that you don’t use pins to hold your layers together. The sharp points of the pins will leave unsightly holes in the fabric, so always clip your layers instead. Similarly, make sure to use a longer than usual stitch length when sewing vinyl, as a short stitch may lead to the fabric perforating and tearing away at the seams.
Materials:
- Fabric: White cotton, pink floral cotton, blue cotton, and pink glitter cotton, one fat quarter of each
- Quilt batting: One fat quarter
- Clear vinyl: One fat quarter
- Thread: White
- Zipper tape: White, 1 yard
- Zipper pulls: Three, yellow
- Rose gold clip fastener
Tools:
- Pencil
- Quilting ruler
- Rotary cutter and mat
- Iron
- Pins or clips
Piecing Instructions:
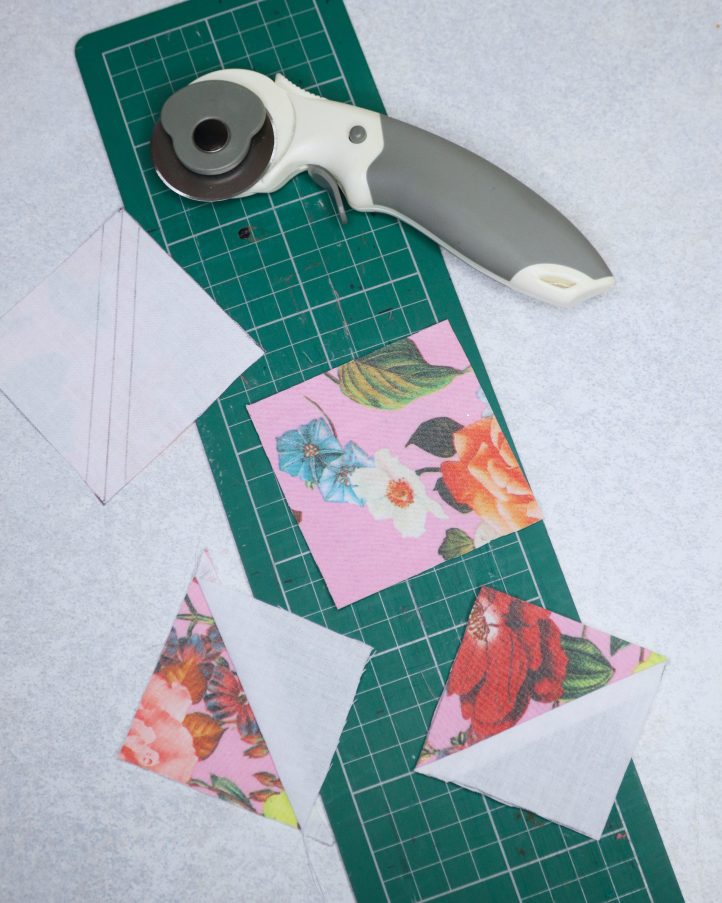
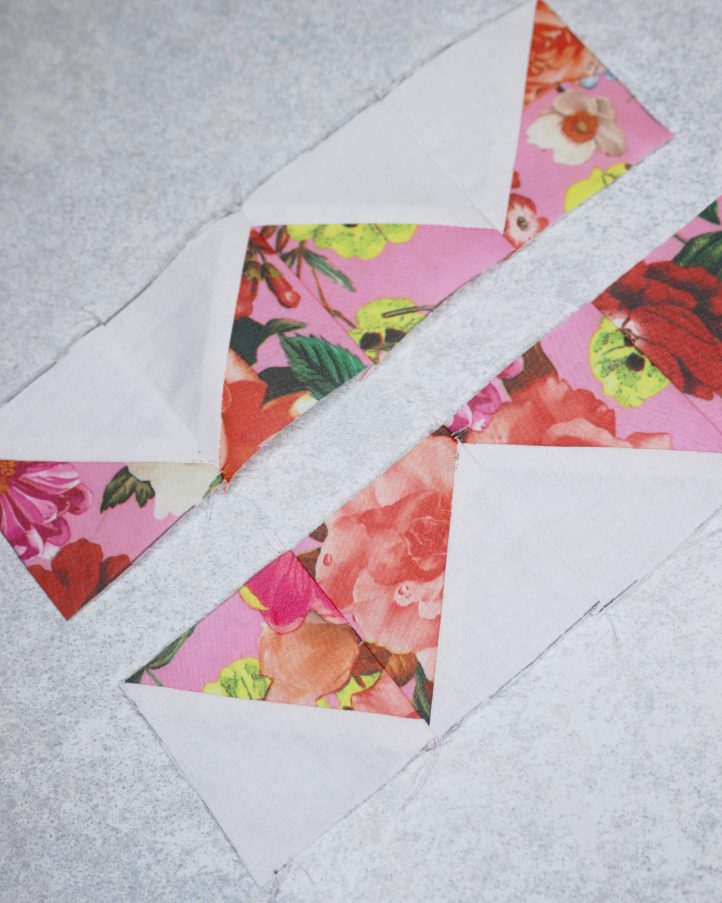
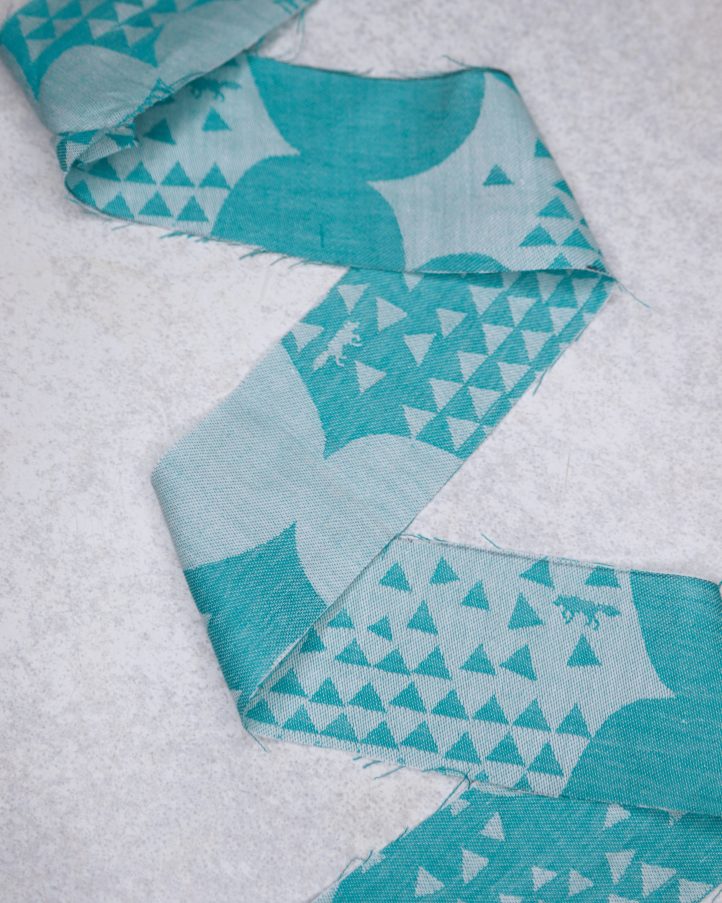
- The quilted outer of this jewelry roll features a striking chevron design made from half-square triangles (HSTs). To create your HSTs, start by cutting sixteen 3” squares from both your white cotton and your pink floral cotton. Pair one square of each fabric, placing them right sides together. Use a ruler to draw a diagonal line from corner to corner, then draw two parallel lines, 1/4” out from either side of the central diagonal. Machine stitch along both of the outer 1/4” lines, then cut along the central line to separate the square into two triangles. Open each triangle along the seam, and press it flat to create two HSTs. Repeat these steps until you’ve made 32 HSTs, then trim each one to precisely 2 1/2” square using a rotary cutter and a quilting ruler.
- Arrange your HSTs on your work surface in a 4″ x 8″ grid. Rotate every other HST by 90° (degrees) counterclockwise, to create a pink and white chevron pattern. Starting with the top row, take the first two HSTs and place them right sides together. Machine stitch along the right-hand edge with a 1/4” seam allowance. Add the third HST to the right-hand edge of the second in the same way, followed by the fourth. Once the row is complete, press the seam allowances flat. Repeat this process to sew each row of four HSTs.
- Take the top row of HSTs and the row below it, and place them right sides together. Align the seams of each square carefully, then secure them with clips or pins. Machine sew along the long edge with a 1/4” seam allowance, then open the rows out and press the seam allowances flat. Repeat this process to attach the next row, continuing until all the rows are sewn together to form a single block.
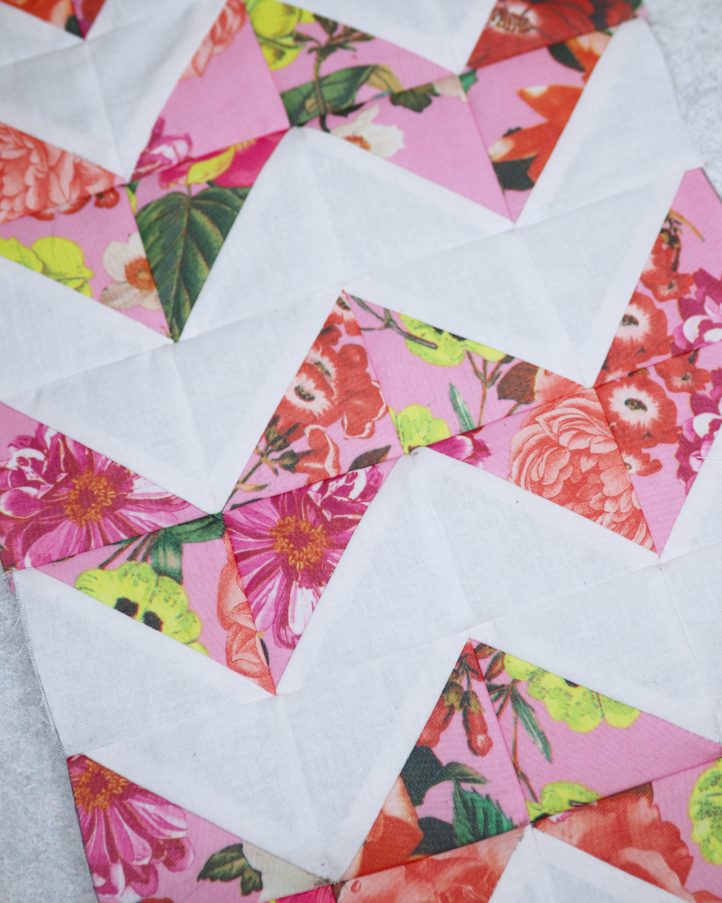
- Place your patchwork block on top of a piece of quilt batting and smooth it out until it lies completely flat. Secure the layers together with pins or clips. Using white thread, quilt the block by machine stitching straight lines along the edges of each chevron, ensuring the layers are firmly secured and evenly quilted. Trim the edges of the quilted block down so it measures exactly 8 1/2” x 16 1/2”.
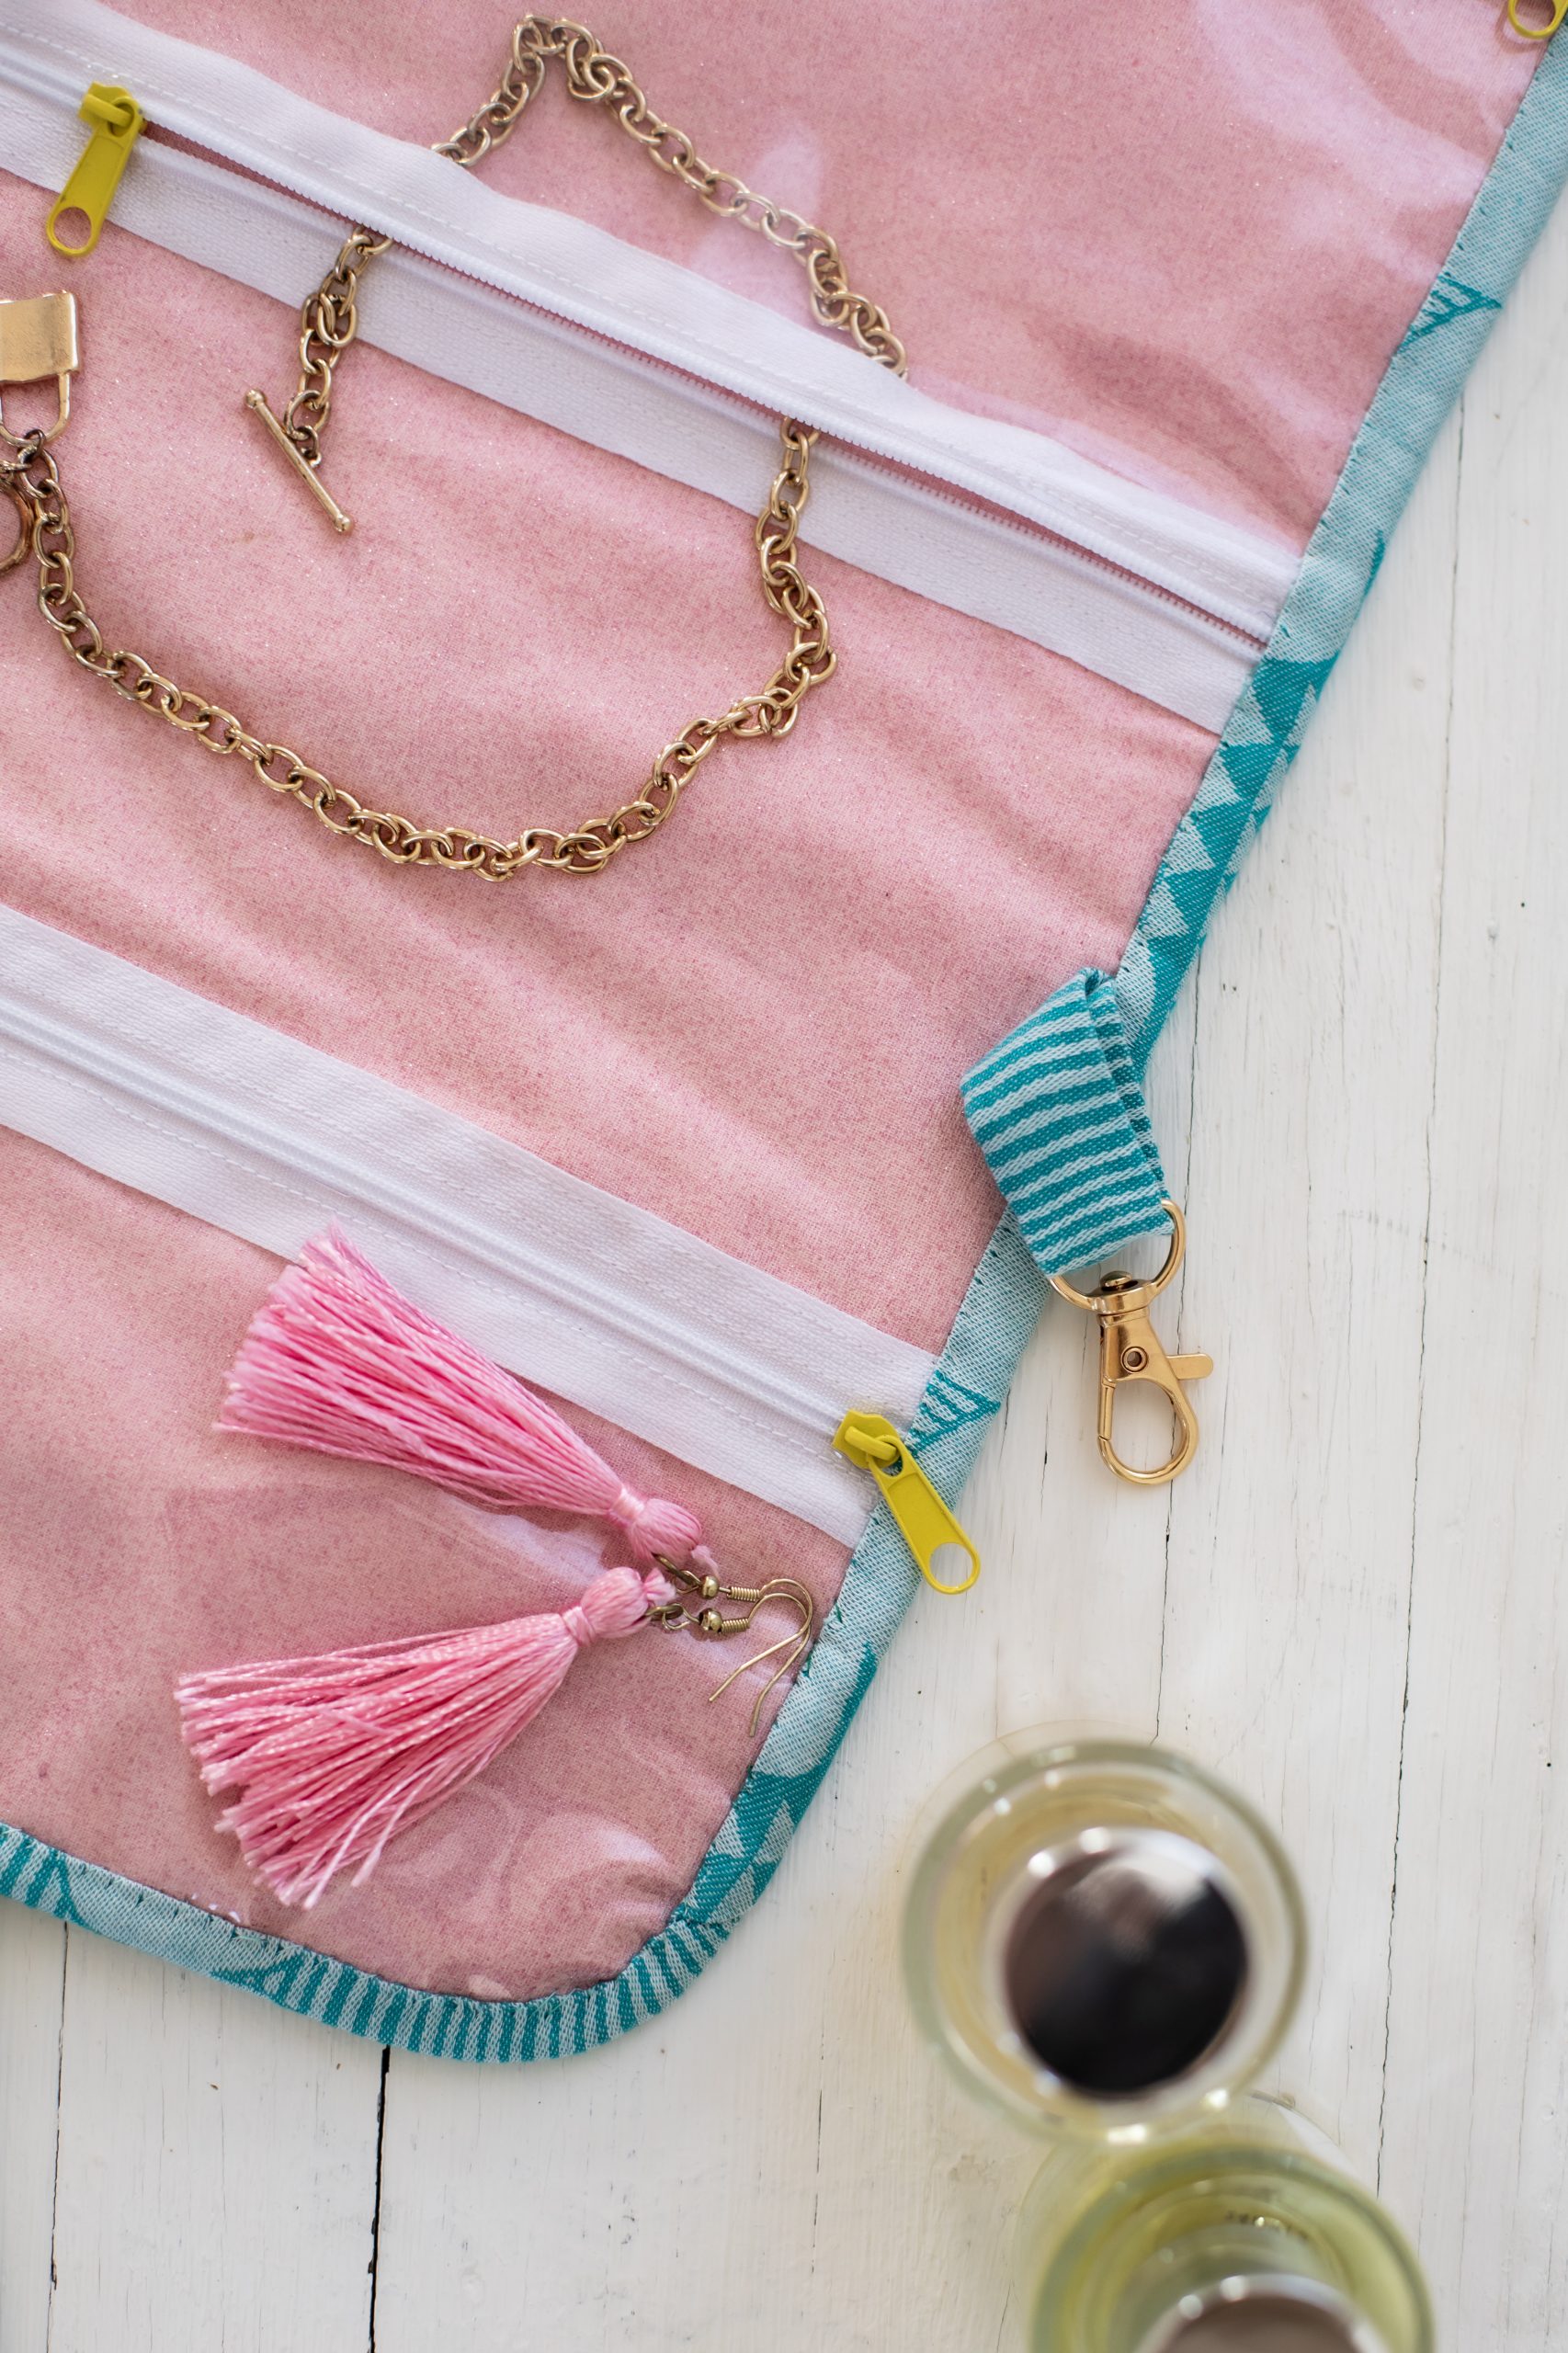
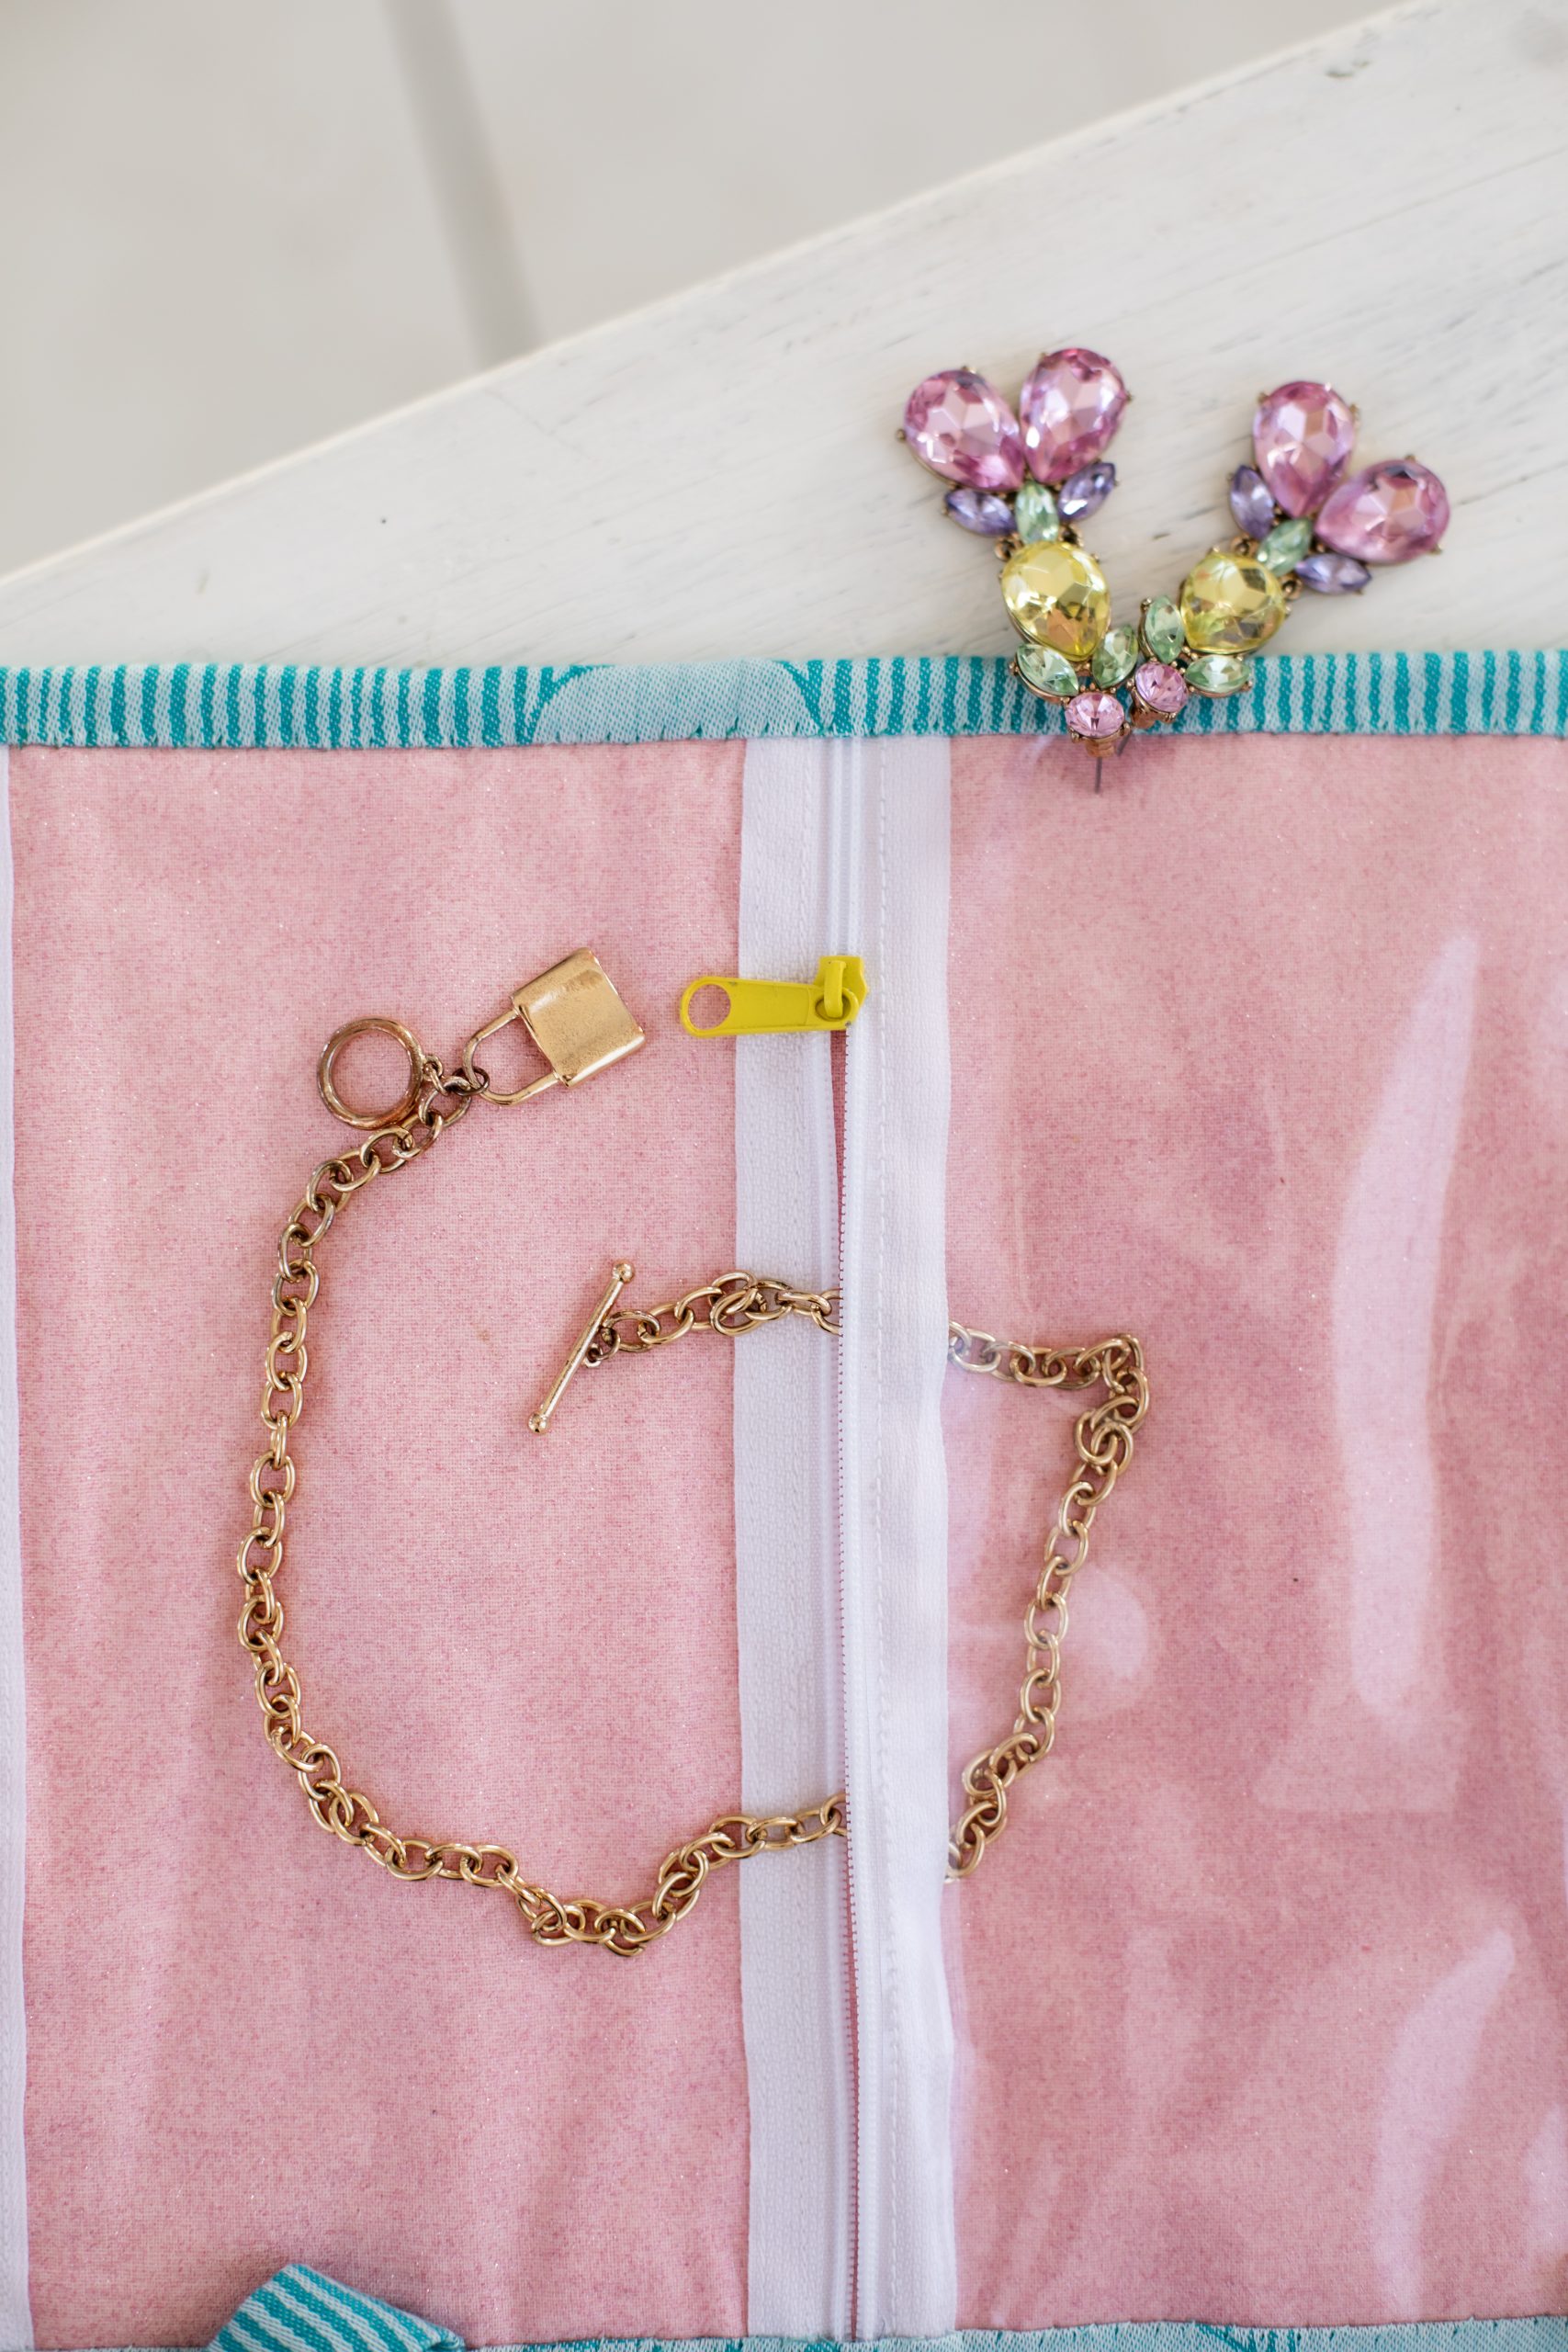
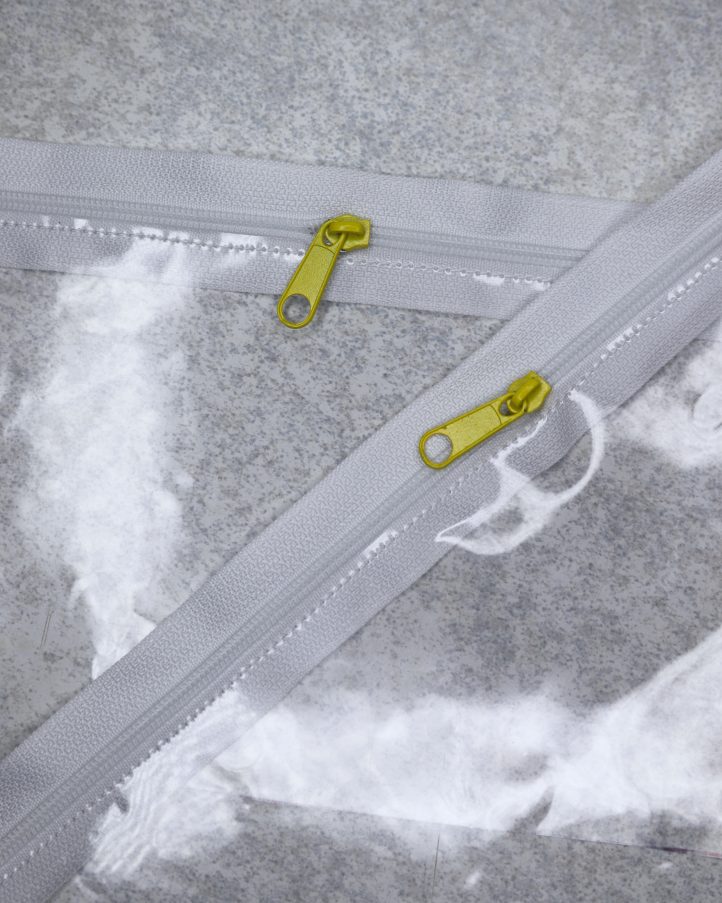
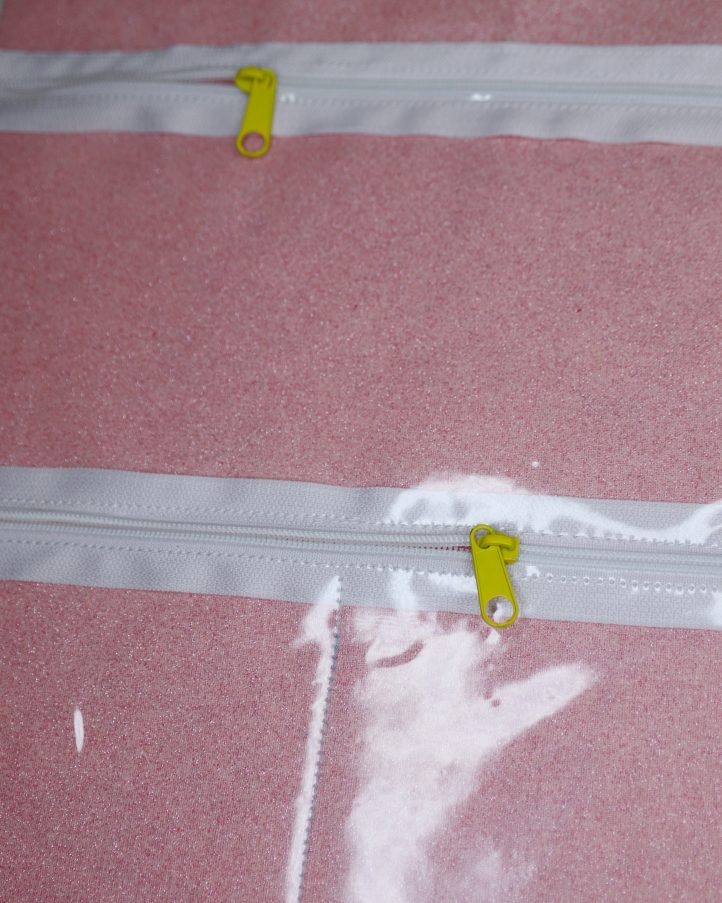
- Next, we’ll construct the clear plastic pockets that sit inside the roll. Start by cutting three 4” x 8 1/2” rectangles from clear vinyl. Take the first vinyl piece and align one long edge with a length of white zipper tape, positioning it as close to the teeth as possible while ensuring the zipper can still open freely. Place the vinyl on top of the zipper tape, not beneath it. Avoid pinning the vinyl to prevent unsightly holes. Machine stitch the zipper into place, then repeat the process to attach a zipper along one long edge of the remaining two vinyl pieces in the same way. Add a zipper pull to each tape.
- Now it’s time to assemble the lining. Cut an 8 1/2” x 16 1/2” piece of pink glitter cotton and lay it flat with the right side facing up in portrait orientation. Start by placing the first vinyl pocket on top, aligning its long non-zipper edge with the bottom edge of the fabric, and secure it in place with clips. Next, position the second vinyl pocket so its long non-zipper edge sits along the opposite side of the first pocket’s zipper tape, ensuring the vinyl overlaps the tape. Stitch along this edge to secure both pockets and create a seam between them. Place the third vinyl pocket into position, aligning its long non-zipper edge with the top edge of the pink fabric, and sew along the opposite side of its zipper tape to secure and close the pocket. Finally, divide the bottom pocket into two sections by sewing a vertical line down its center.
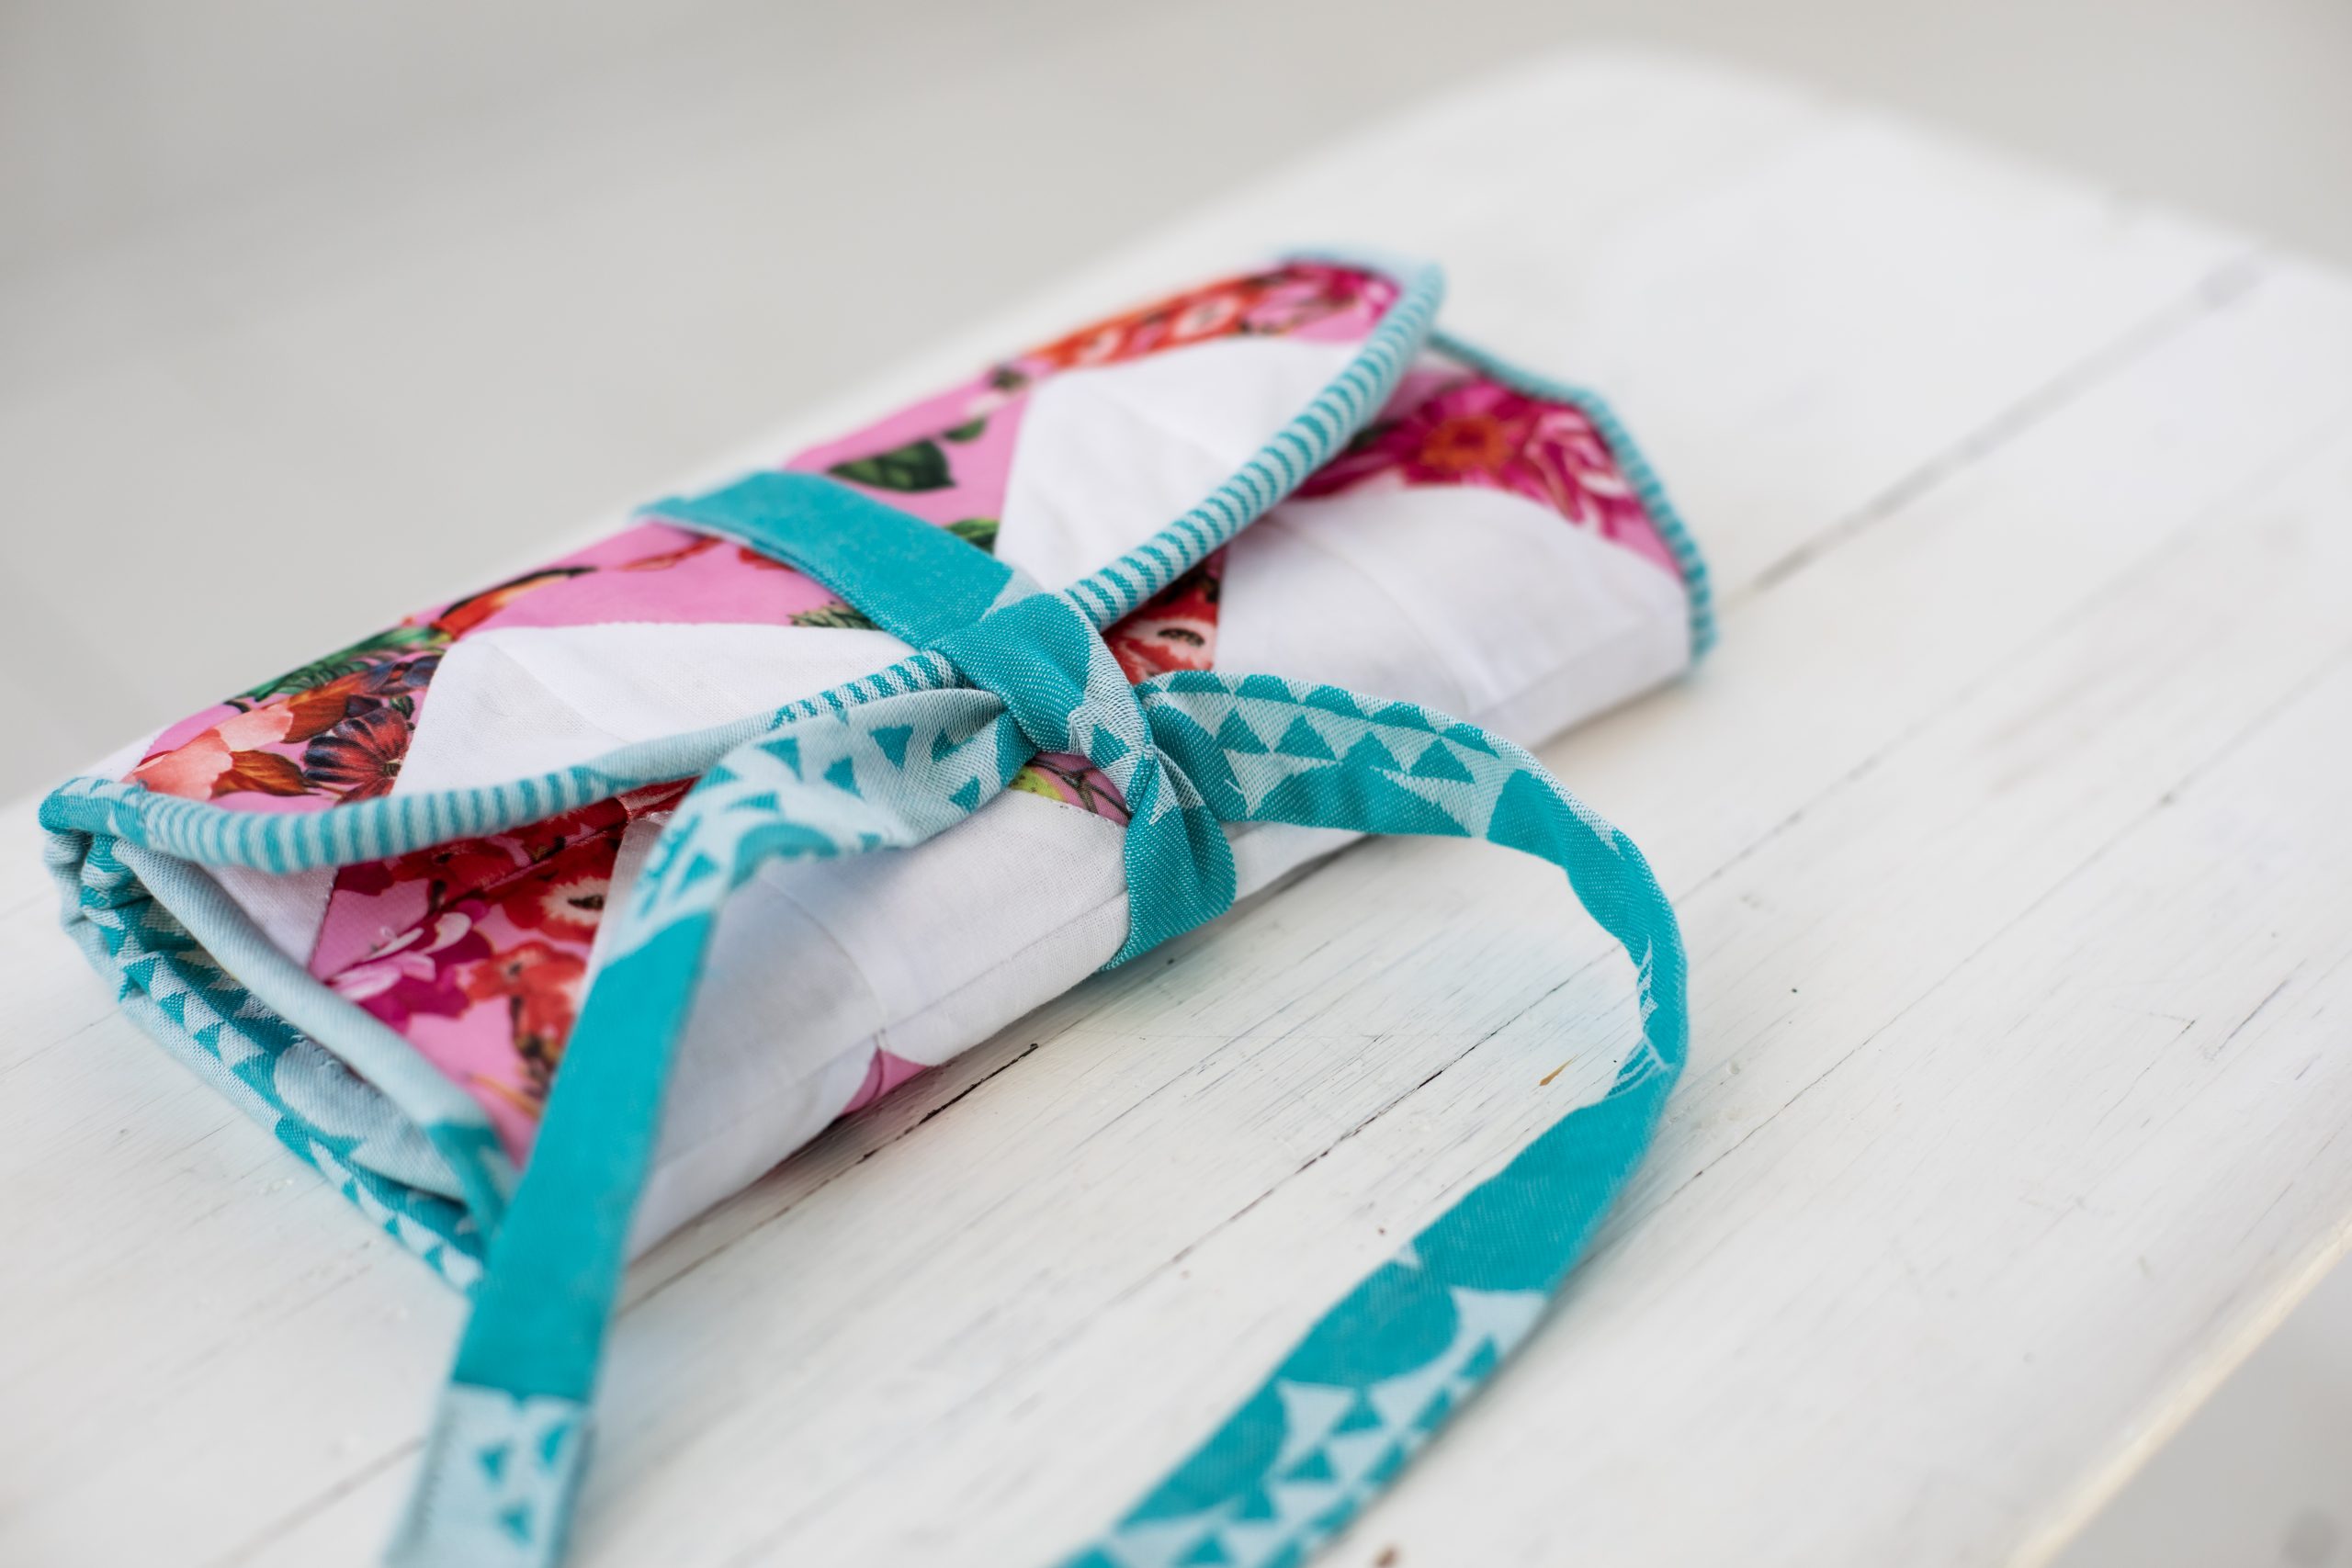
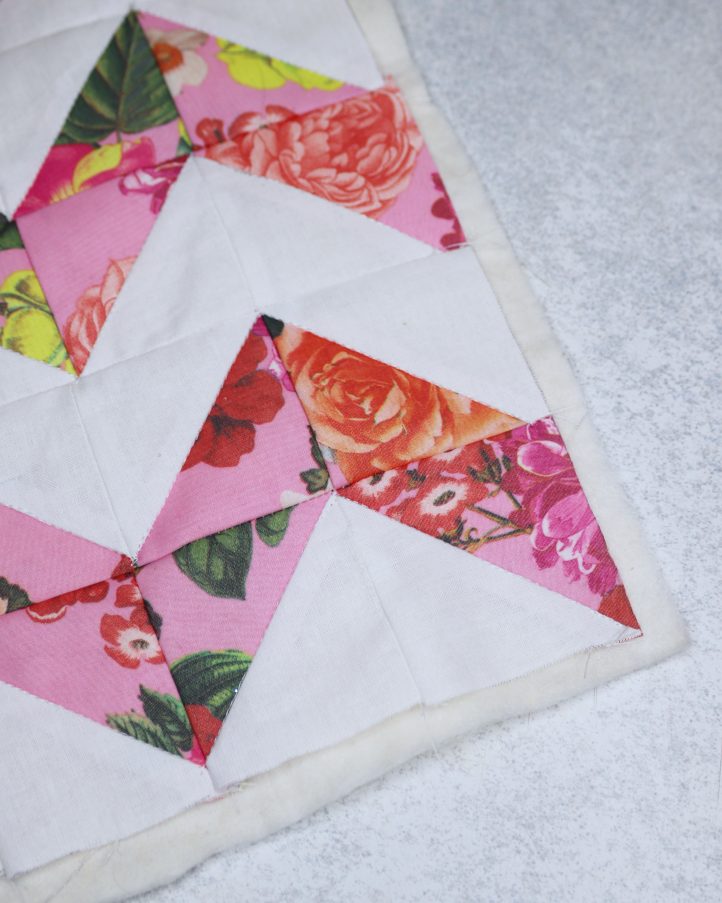
- Lay the quilted block flat with the right side facing down and place the pink/vinyl pocket lining on top with the right side facing up, aligning the edges. Round off the corners using a cup or glass, then trim the excess fabric for a neat finish. To make the binding that will sit around the edge of the work, cut a 3” x 60” strip of blue cotton fabric, joining shorter strips together if needed. Fold the binding in half lengthwise with the right sides facing out, then press. Starting in the middle of the bottom edge of the bag, leave a 3” tail of binding unattached then clip the binding around the edge of the work, aligning the raw edges of both. Leave another 3” tail at the opposite end, then trim away any excess.
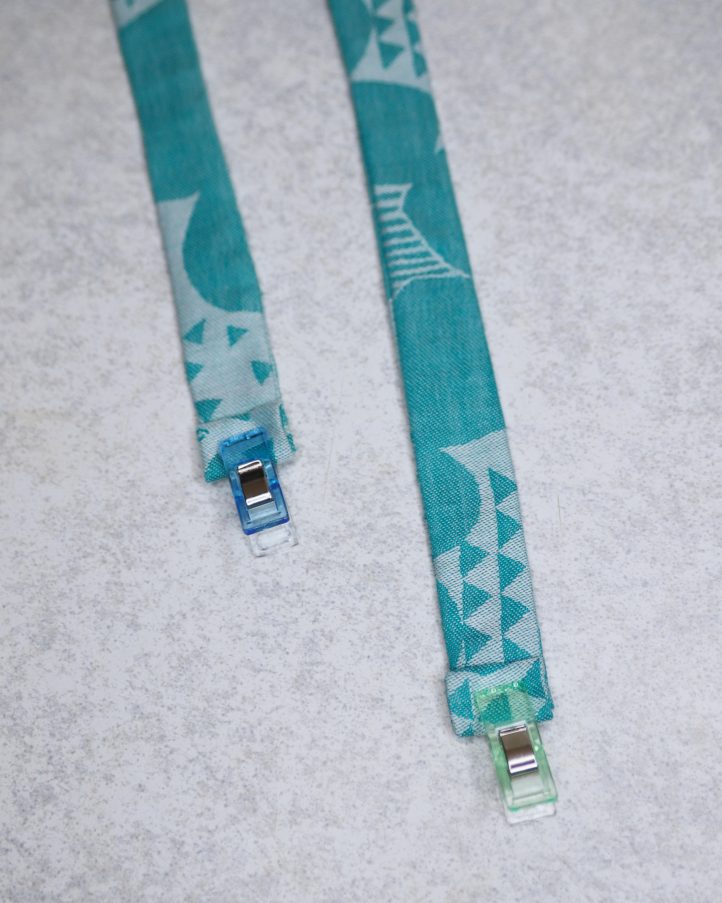
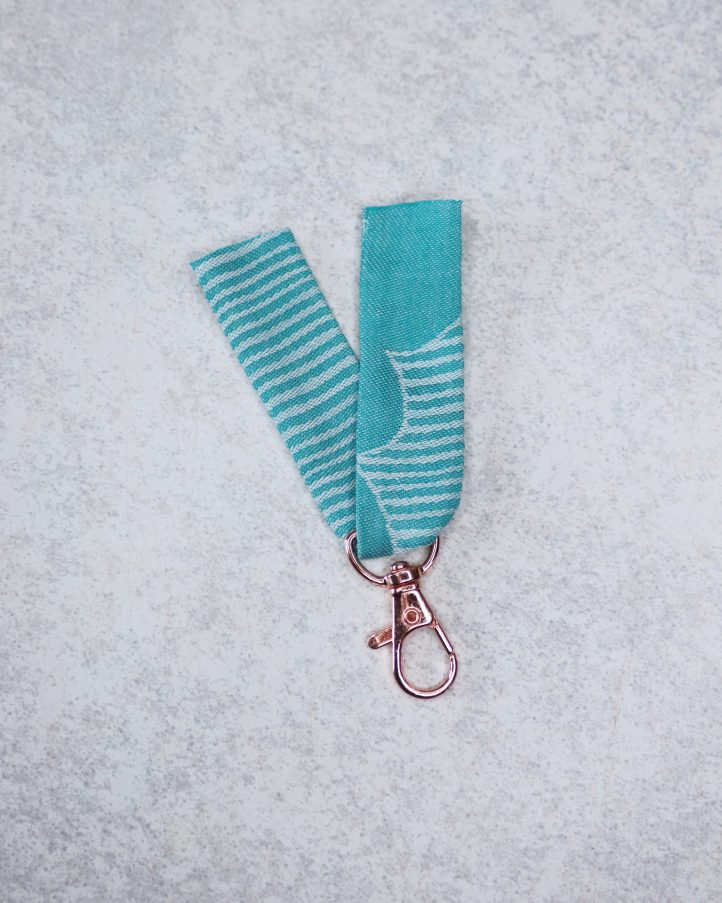
- Before stitching the binding into place, there are a few final details to add. Start by cutting a 2” x 6” strip of blue fabric, then fold it in half lengthwise with the right sides facing. Stitch along the long open edge with a 1/8” seam allowance to make a tube. Turn the tube right sides out and press it flat to make a strap. Thread a rose gold clip fastener onto the strap, fold it in half, then slip the ends of the strap under the binding in the middle of the non-pocketed area of the jewelry roll, ensuring the clip faces inward and the raw edges of the strap extend over the fabric edge. Clip in place.
- Cut two 2” x 20” strips of blue fabric and repeat Step 8 to fold and stitch them into straps. Slip the ends of each strap under the binding at the center of one of the short edges of your jewelry roll. With the clip fastener and straps in place, stitch the binding around the edge with a 1/4” seam allowance, leaving the first and last 3” unstitched, as well as the extra 3” you added to each end. To finish, locate the point where the two unattached binding ends meet, clip them together, and stitch with the right sides facing. Trim the seam allowance, then sew the joined binding neatly into place around the edge of the roll. Trim the outer seam allowance down to 1/4”, then wrap the folded edge of the binding around to the front of the jewelry roll and hand stitch it into place, concealing the raw edges inside for a neat finish.