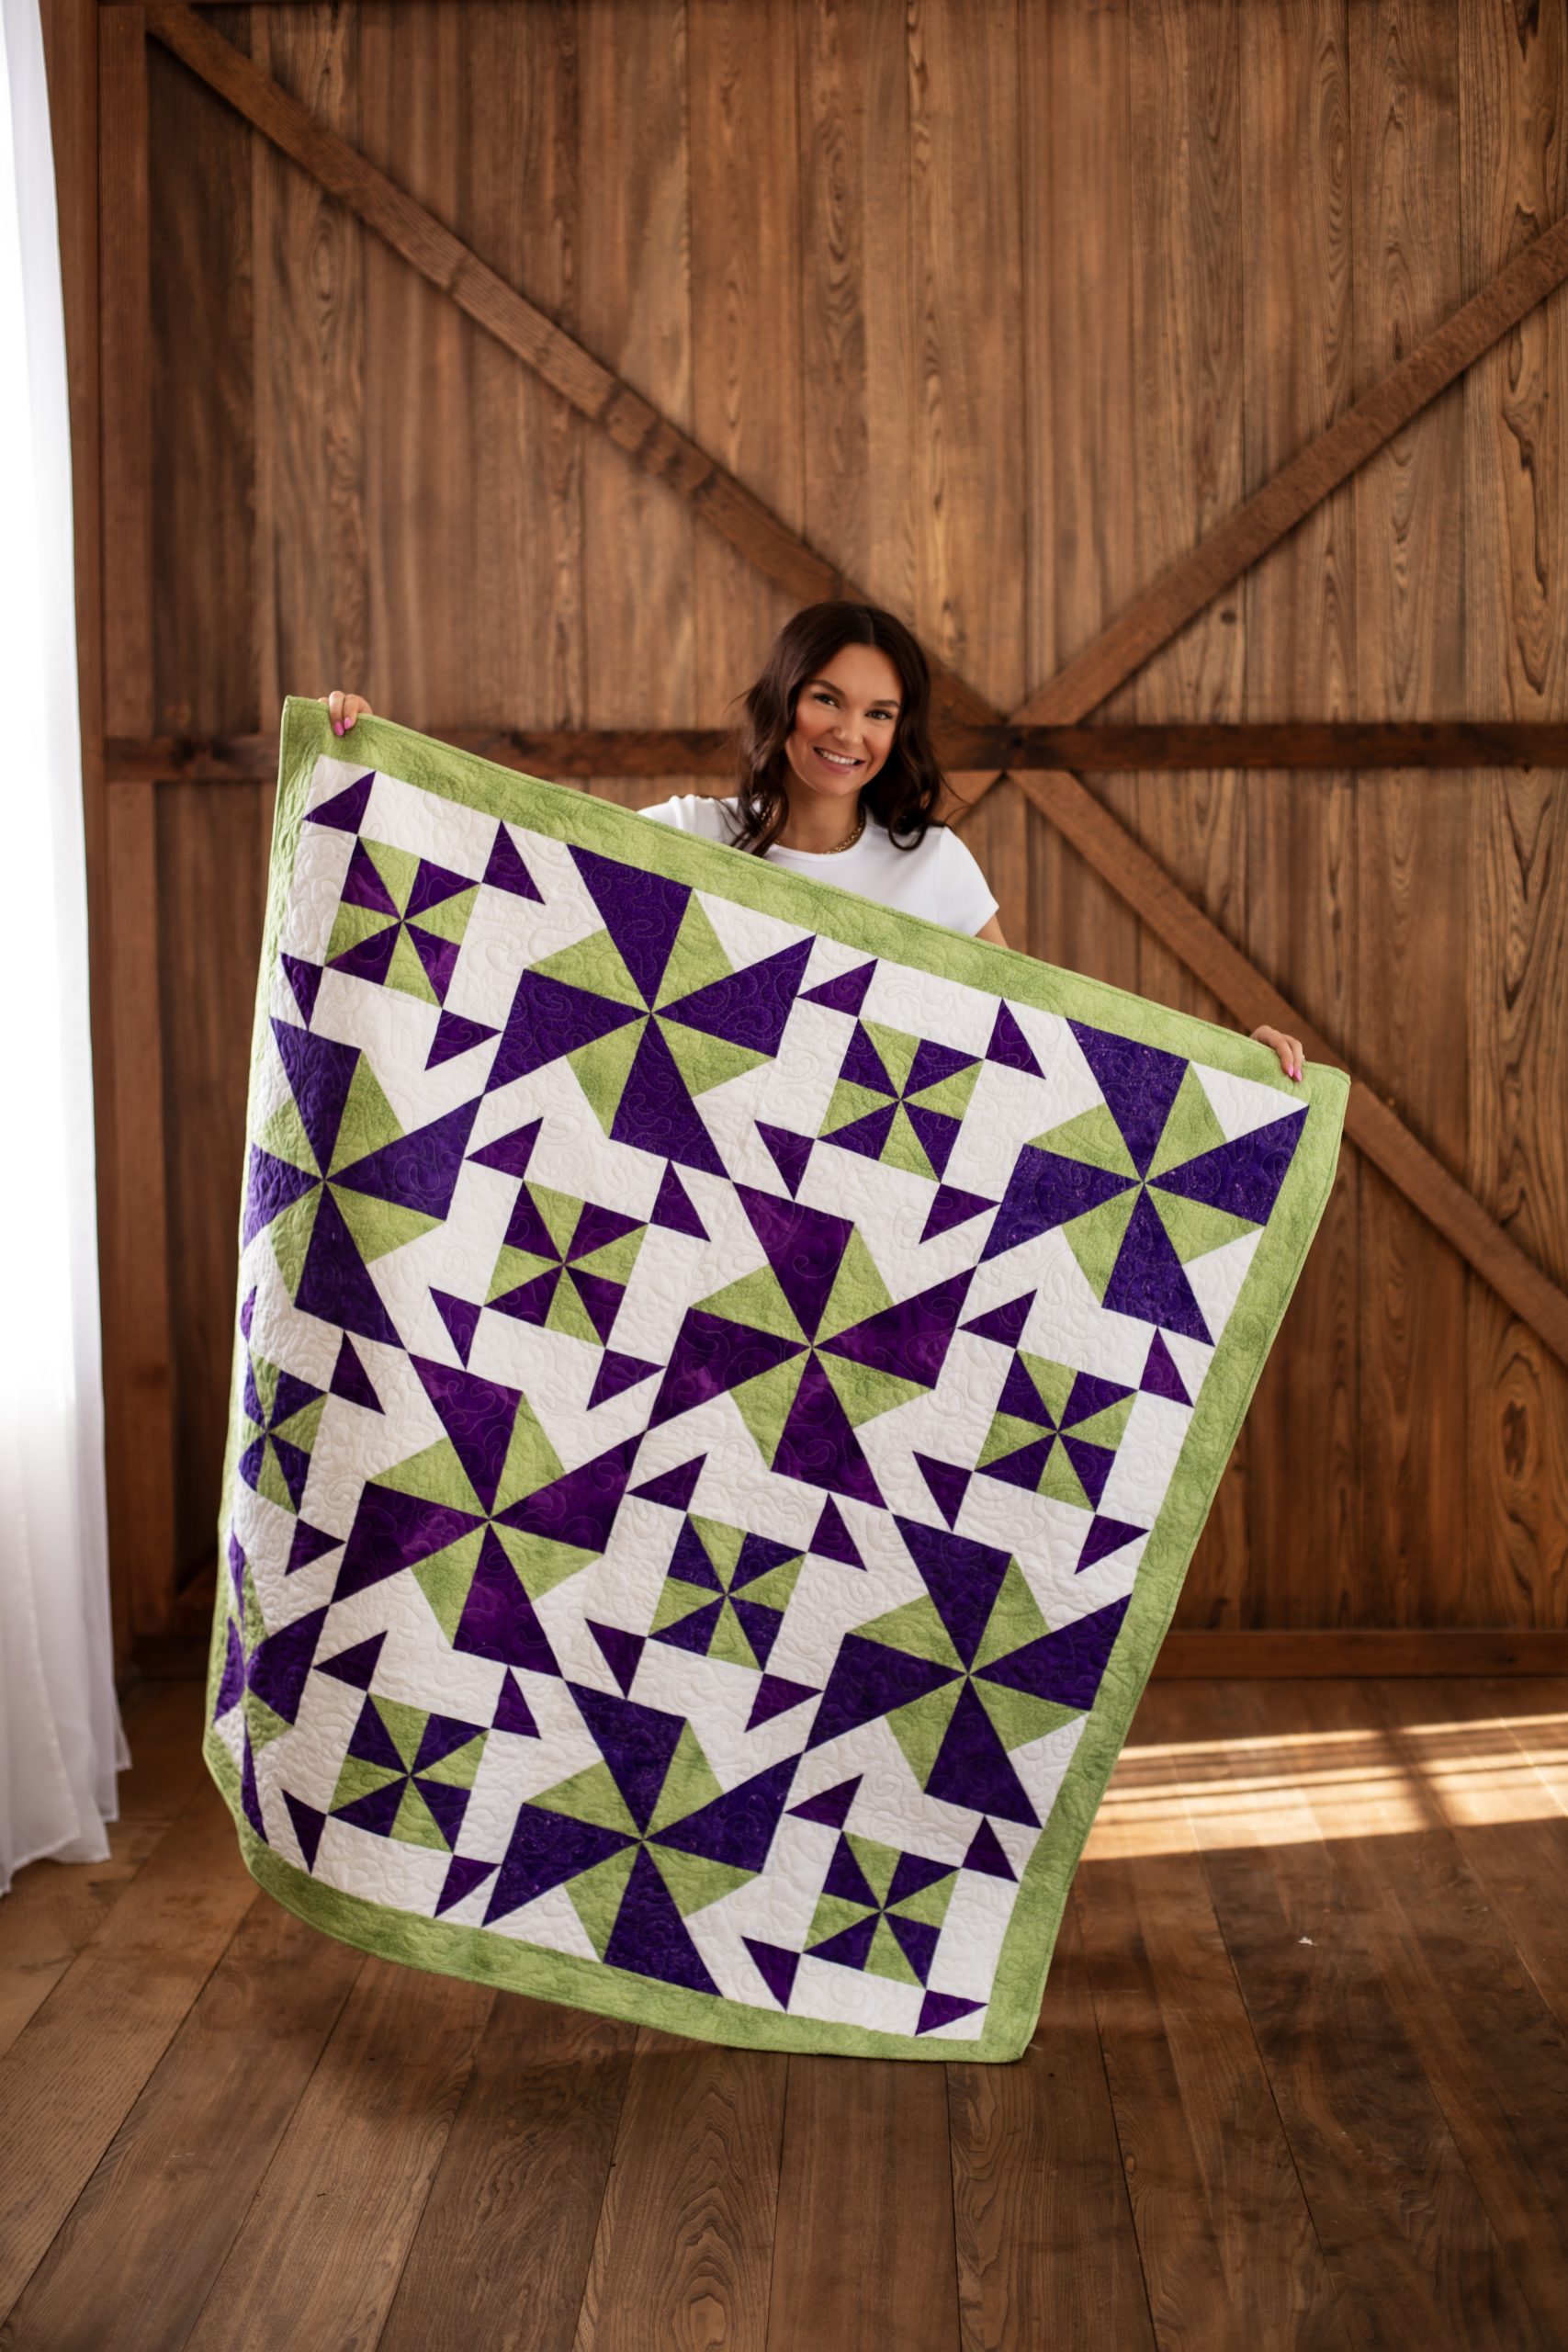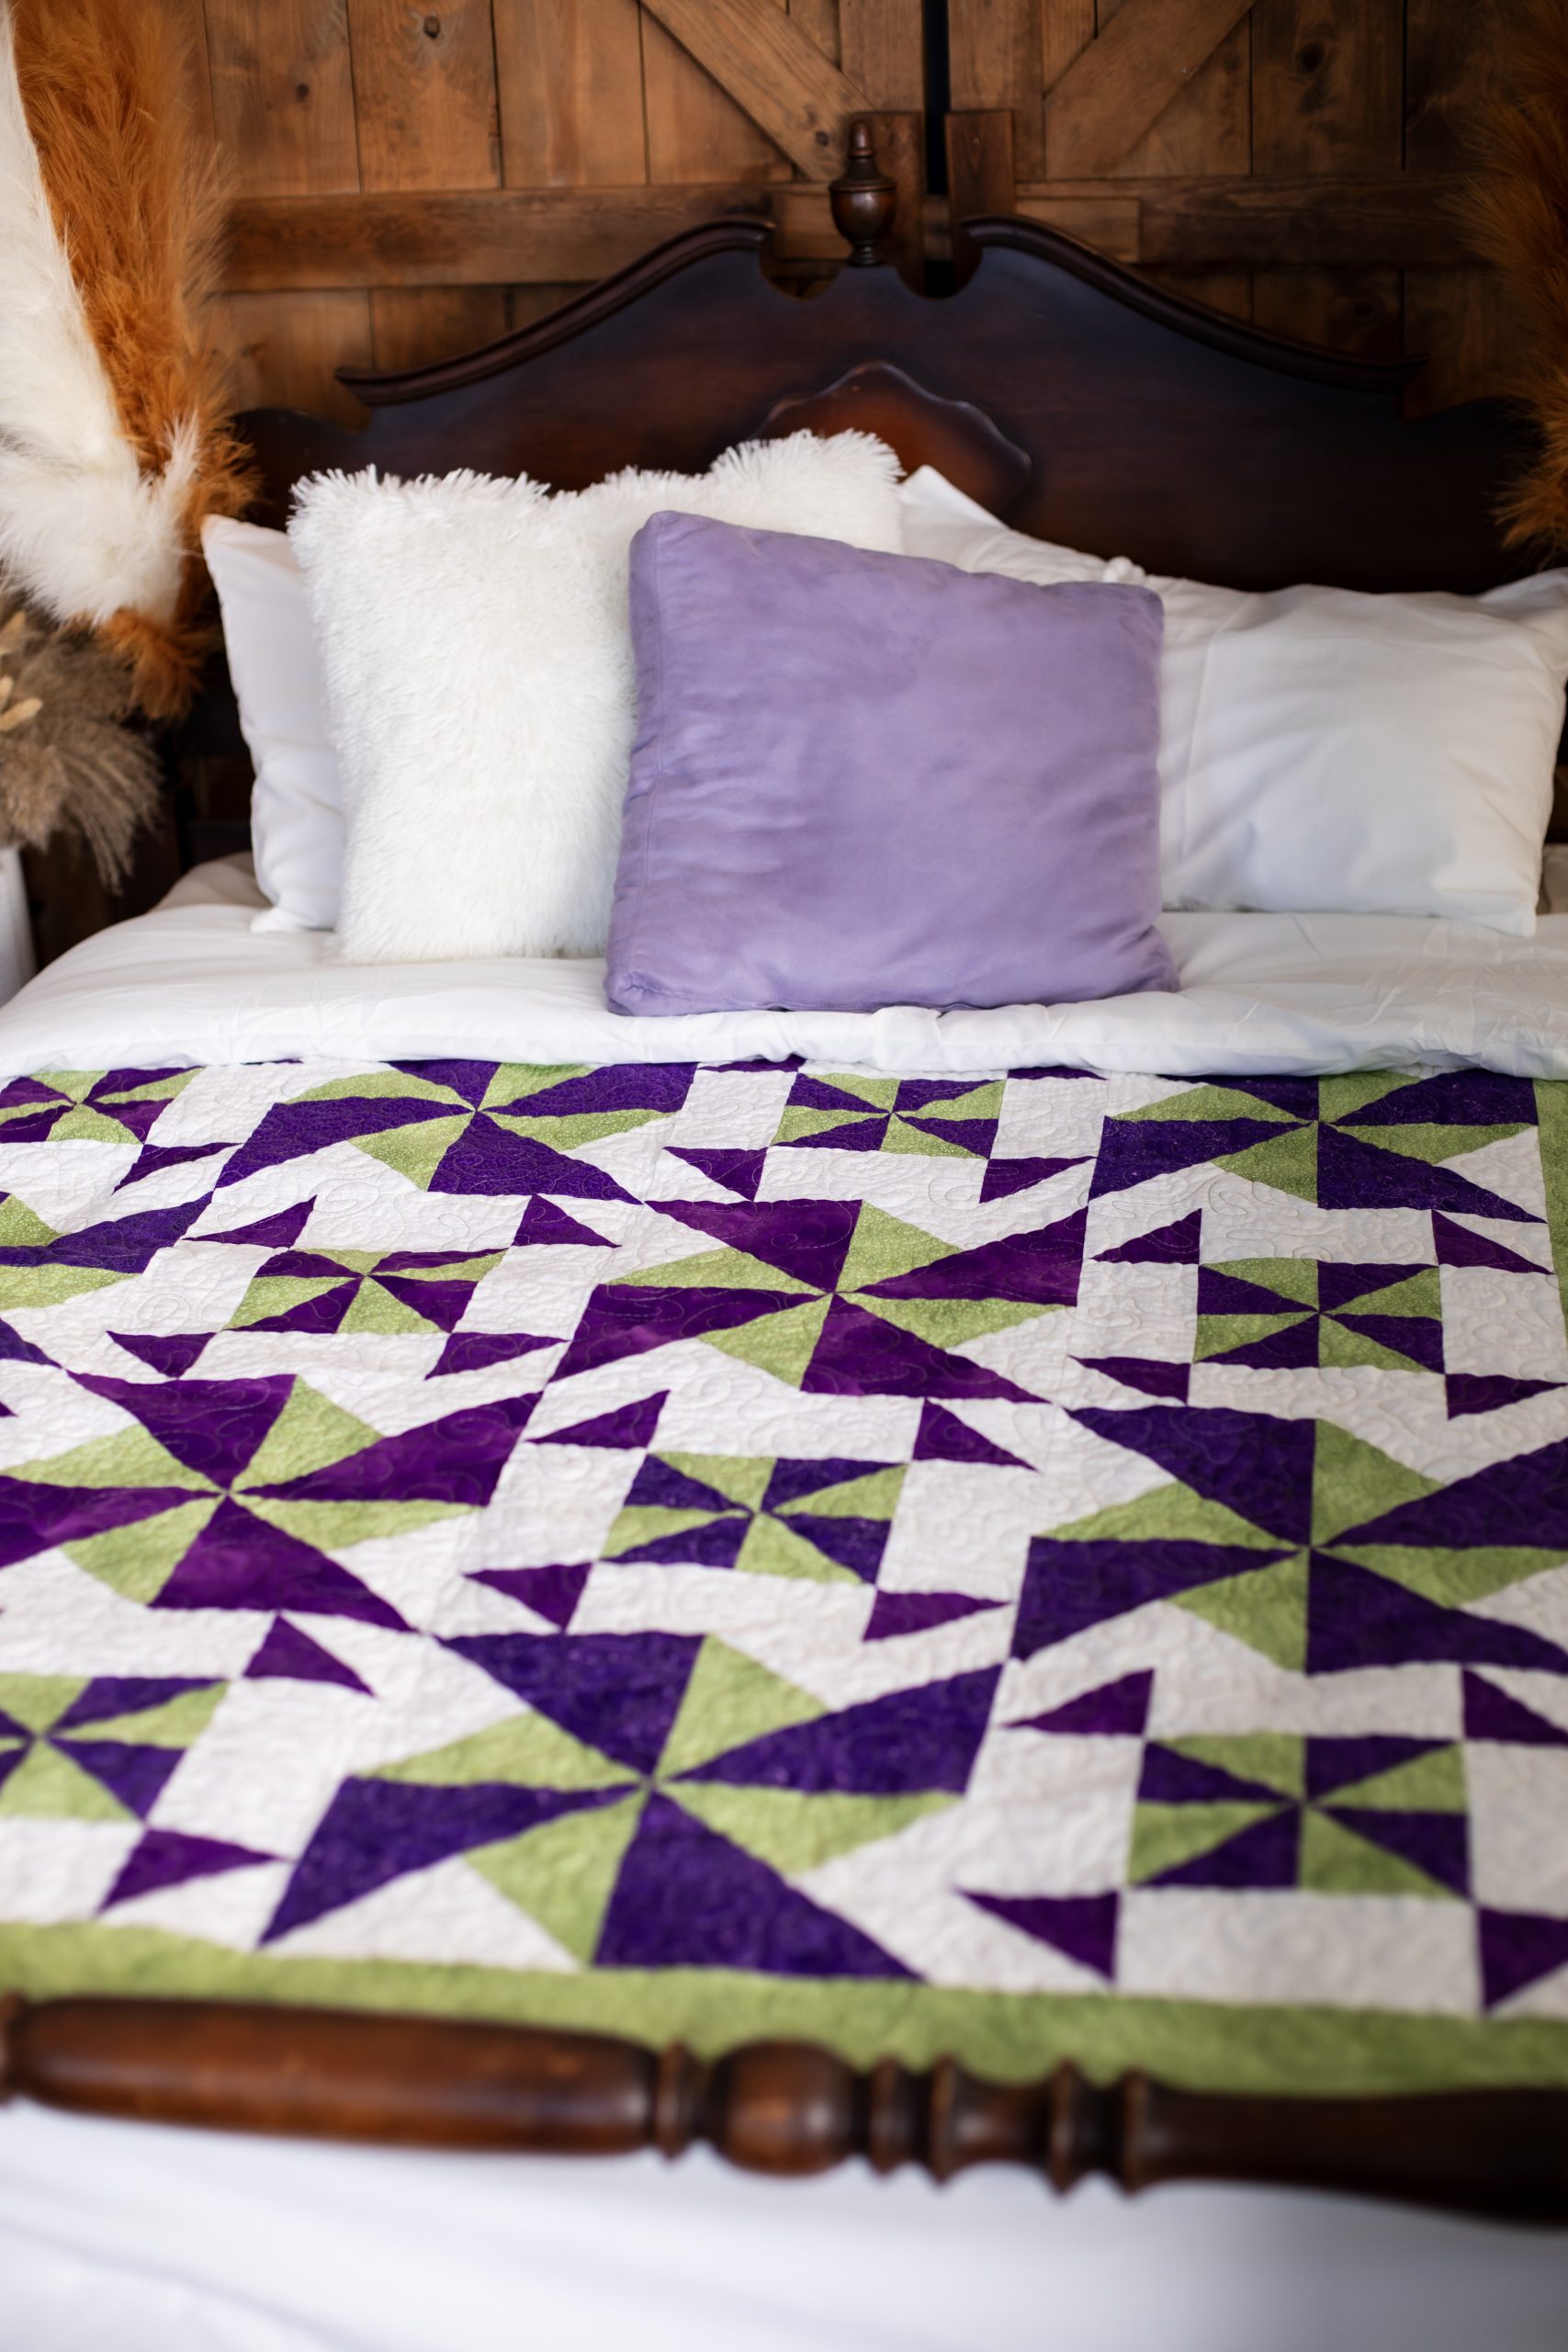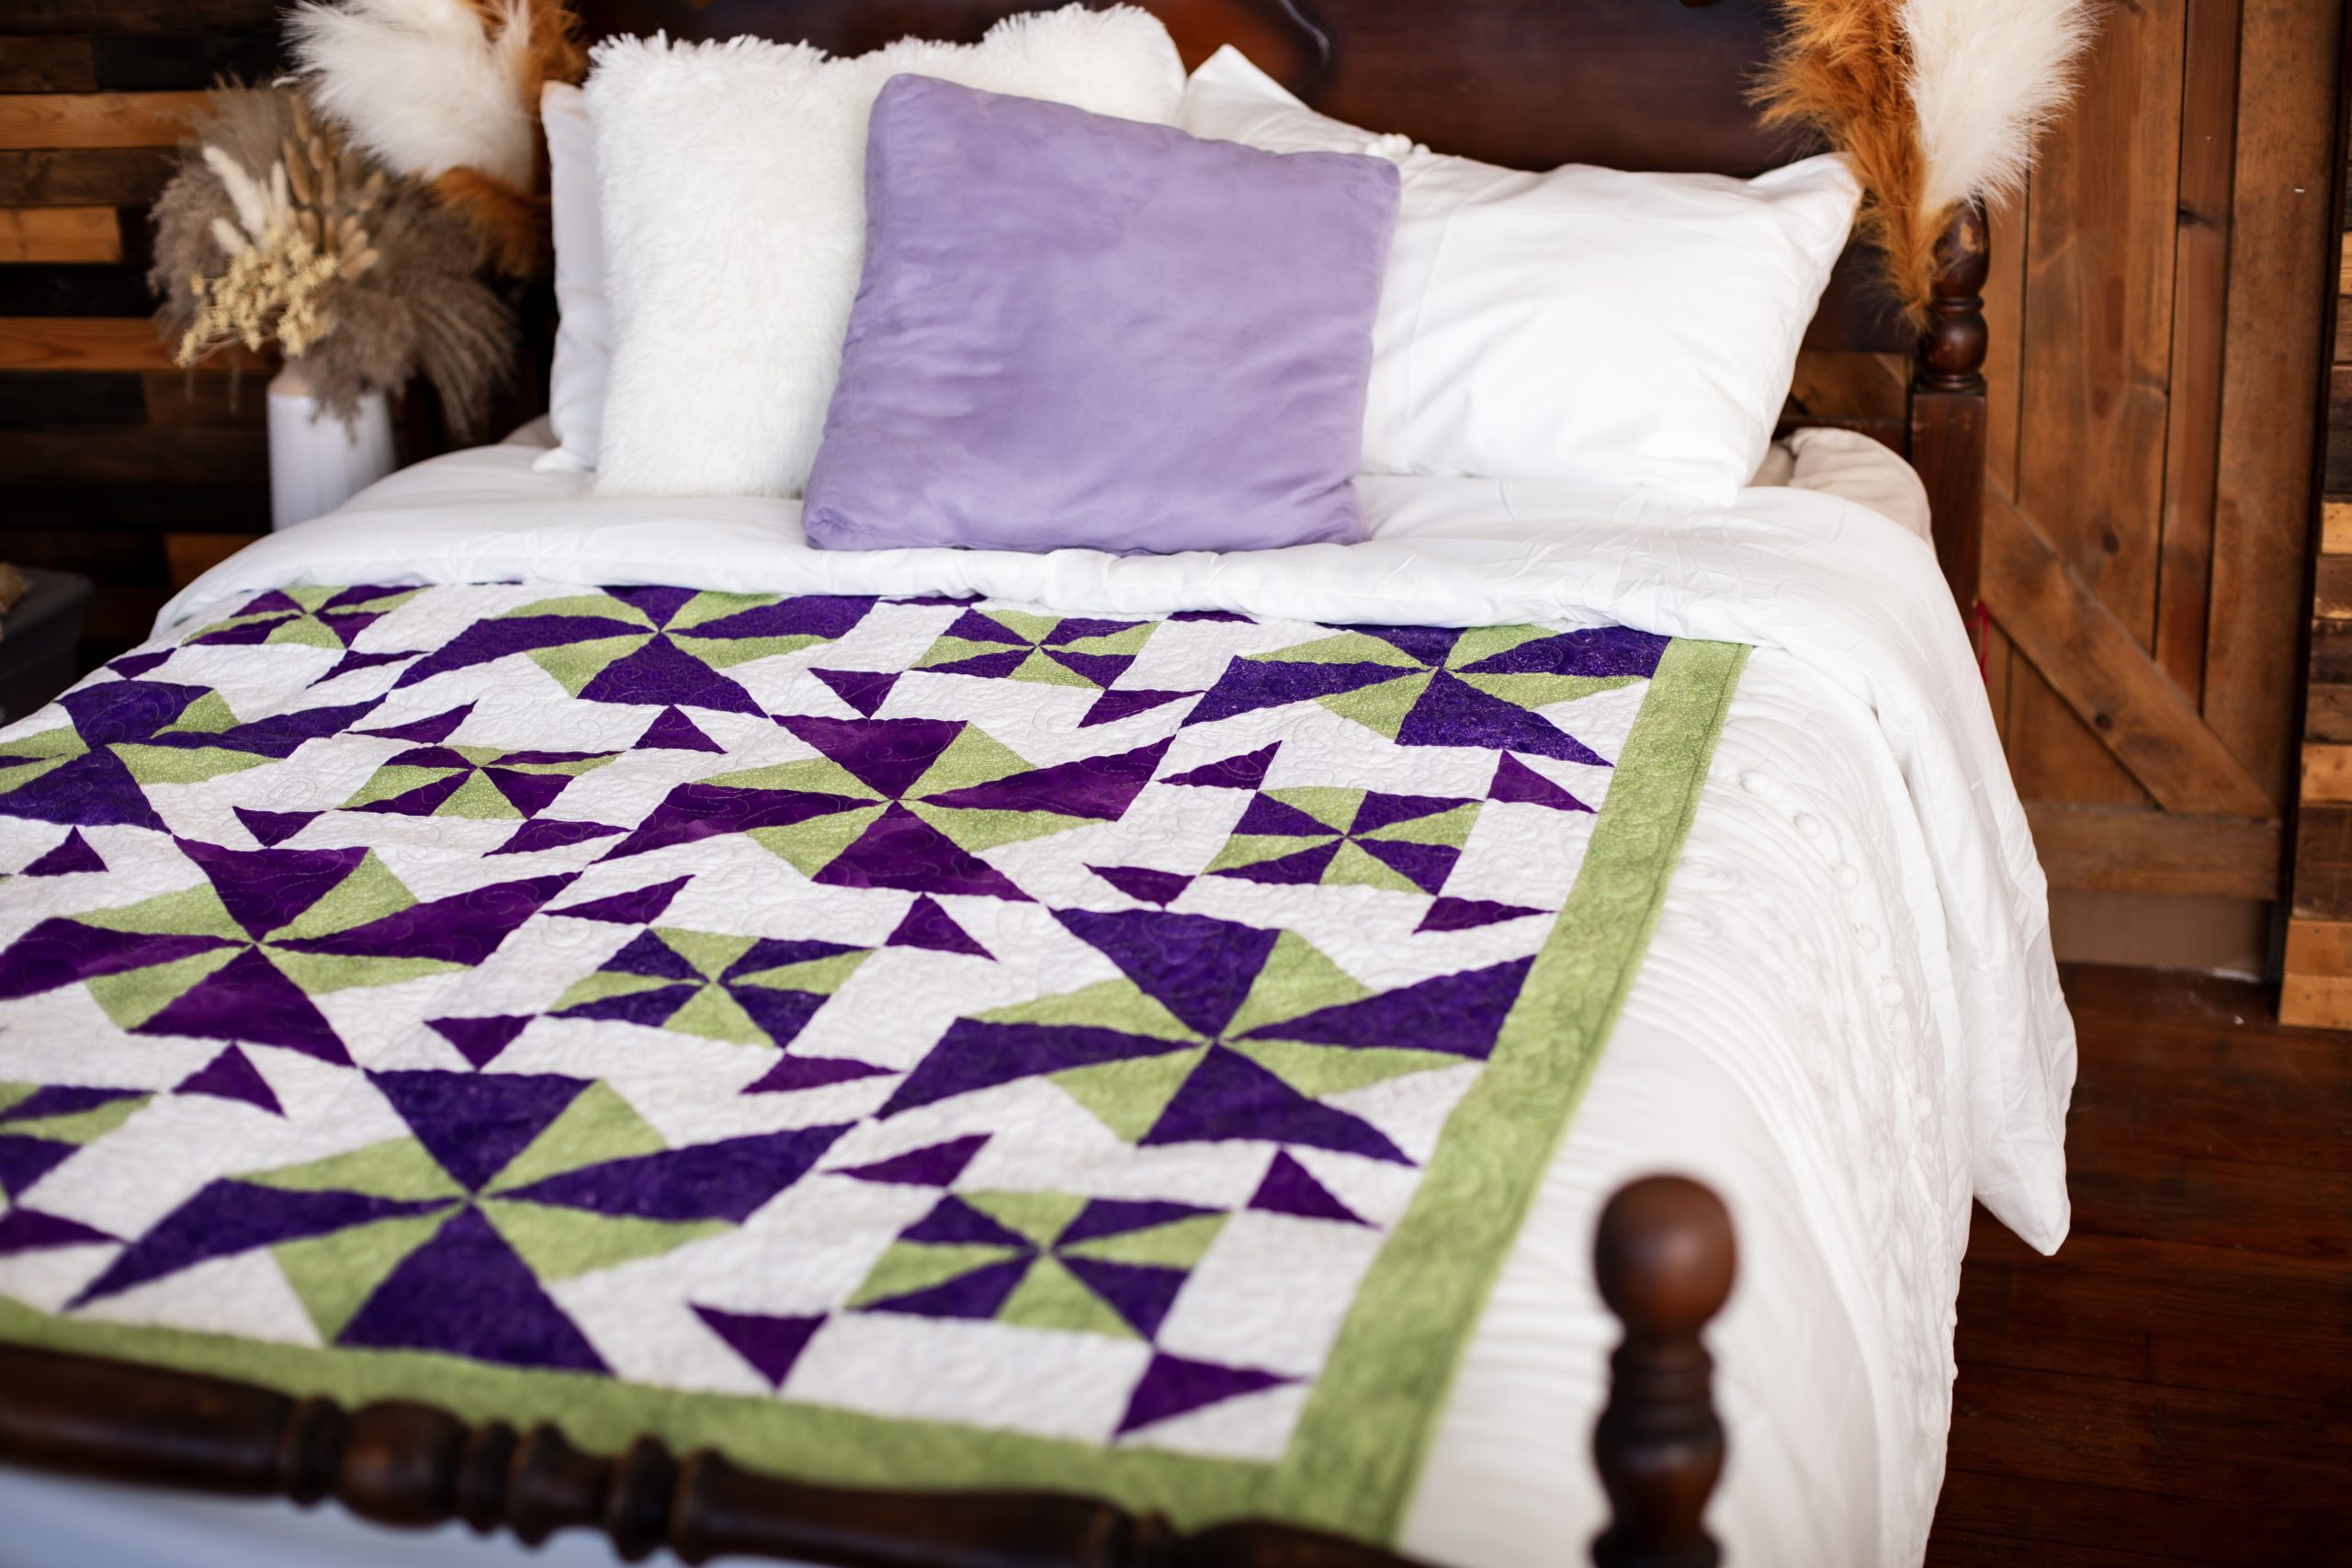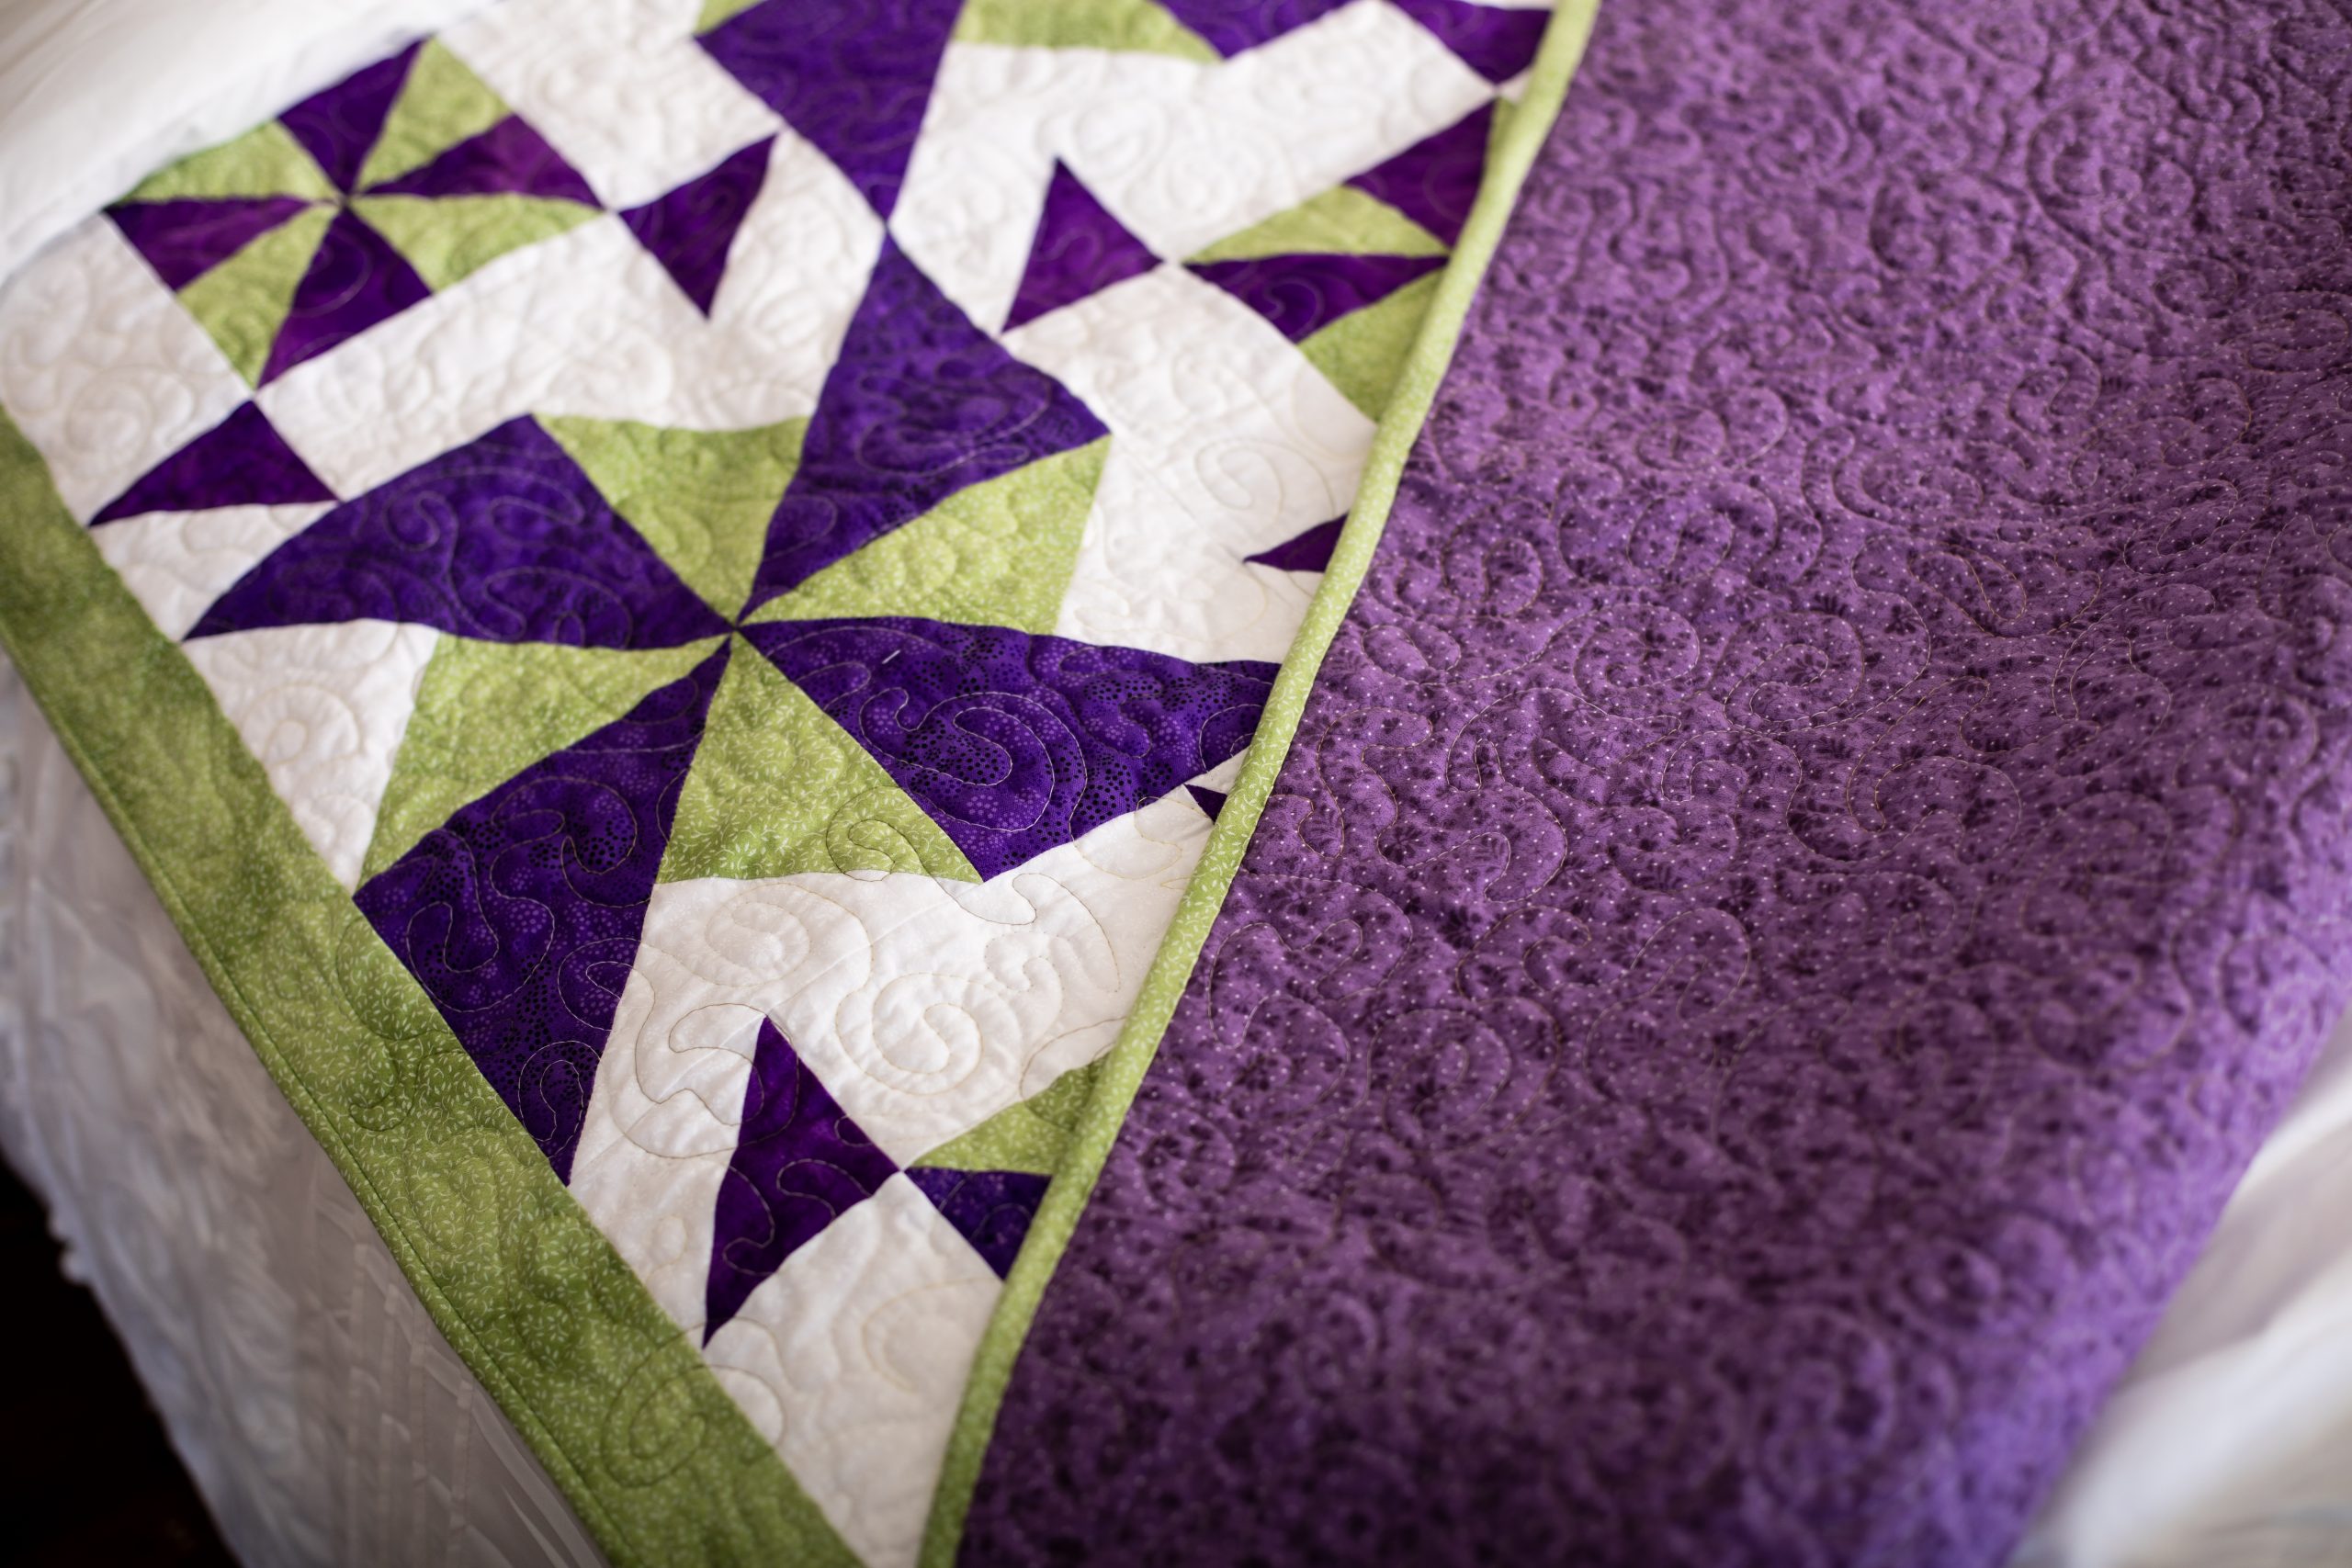
Don’t be afraid to mix things up with this lovely pinwheel quilt pattern from Joy Heimark. Finishing at a 52-inch square, this throw quilt pattern is made in rich spring shades of lilac and mint and is fat quarter friendly. Our favorite aspect of this spring quilt pattern is its combination of small and large pinwheel blocks, which gives this classic pattern a fresh modern look.
Skill Level: Confident beginner
Finished Size: 52″ x 52”
Seam Allowances: 1/4″
Designer Notes: Read all instructions before beginning this project. Stitch right sides together using a 1/4″ seam allowance unless otherwise specified. Materials and cutting lists assume 40″ of usable fabric width.
Editor Note: All diagrams are located at the bottom of this pattern.
Abbreviations:
- WOF – Width of Fabric
- HST – Half Square Triangle
- RST – Right Side Together
- WS – Wrong Side
- FQ – Fat Quarter
Materials:
Note: This quilt can be made with just three fabrics, or you may choose a scrappier look using fat quarters. The designer used five different purple fat quarters, but only one green fabric.
- Fabrics:
- Purple: 1 1/4 yard (or 5 FQ)
- Green: 1 yard (or 3 FQ plus 3/8 yard)
- White: 1 1/4 yard
- Binding: 1/2 yard
- Batting: 1 3/4 yard
- Backing: 60” x 60” (actual quilt top is 52” x 52”) depending on whether you bring it to a long arm quilter
Cutting Instructions:
From Purple:
- If using yardage:
- Cut (3) 4” WOF strips; subcut (30) 4” squares.
- Cut (4) 7 1/2” WOF strips; subcut (16) 7 1/2” squares and (2) 4” squares.
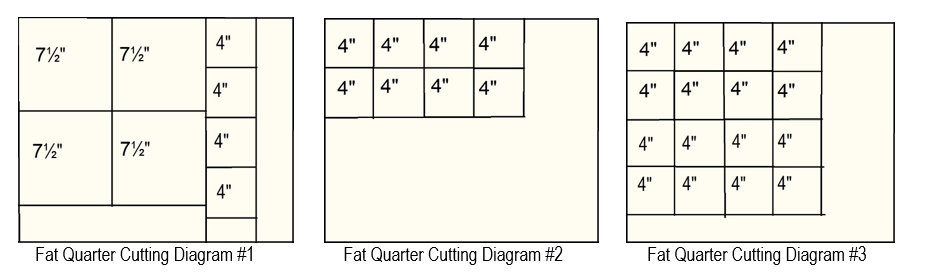
- If using FQ’s:
- Follow FQ cutting diagrams. Cut 4 Diagram #1 and 1 Diagram #3.
From Green:
- All methods:
- Cut (5) 2 1/2 WOF strips. Set aside for outer border.
- If using yardage:
- Cut (2) 4” WOF strips; subcut (16) 4” squares.
- Cut (2) 7 1/2” WOF strips; subcut (8) 7 1/2 ” squares.
- If using FQ’s:
- Follow FQ cutting diagrams. Cut 2 Diagram #1 and 1 Diagram #2.
From White:
- Cut (2) 4” WOF strips; subcut (16) 4” squares.
- Cut (2) 7 1/2” WOF strips; subcut (8) 7 1/2” squares.
- Cut (3) 6 1/2” WOF strips; subcut (32) 3 1/2” x 6 1/2” rectangles.
Piecing Instructions:
LARGE PINWHEEL BLOCK – MAKE 8:
- Cut the purple 7 1/2” squares once diagonally. ⍁
- Cut the white and green 7 1/2” squares twice diagonally. ⊠
- Sew white and green triangles into pairs, handling bias edges carefully so they don’t stretch.

- Sew a large purple triangle to each green and white pair. Note: The purple triangles are slightly larger than the white and green units. Also, if you are doing a scrappy look with both the purple and/or green fabrics, you will need to decide if you want totally random or “organized scrappy”. Press to purple. Trim square to 6 1/2”. (Tip: A rotating cutting mat helps to keep fabric from shifting while trimming.)
- Sew four of these units together to complete a Large Pinwheel Block. Press each pair seam toward purple and final block seams open.
- Trim block to 12 1/2” if necessary. Make 8.
SMALL PINWHEEL BLOCK – MAKE 8:
- Draw diagonal lines on the WS of the white 4” squares and the green 4” squares.
- Place each of these squares RST with a purple 4” square. Sew a scant 1/4” away on both sides of the drawn line. Cut apart on the drawn line. Press toward darker fabric. Trim each of these HST’s to 3 1/2”.
- Sew the green and purple HST’s into a four-patch. Press each pair seam toward purple and the final seams open.
- Sew a white 3 1/2” x 6 1/2” rectangle to each side of these units. Press toward white.
- Sew a white and purple HST to each end of a 3 1/2” x 6 1/2” rectangle. Press away from HST.
- Using Small Pinwheel Block diagram as a guide to placement and orientation, sew the units from Steps 4 and 5 together to complete the block. Press seams away from center unit.
- Trim block to 12 1/2” if necessary. Make 8.
COMPLETING THE QUILT:
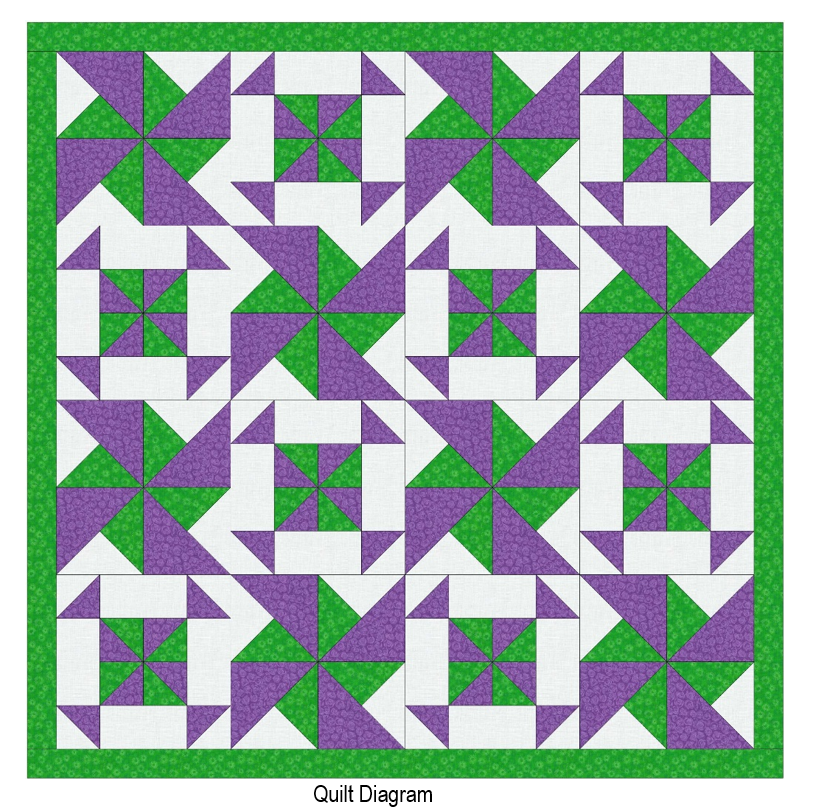
- On a design wall or other flat surface, lay all the blocks out to match the Quilt Diagram.
- Sew blocks together into rows. Press seams toward Large Pinwheel Blocks.
- Sew the rows together to complete the quilt. Press row seams down.
- Join the green 2 1/2” border strips together at ends.
- Measure your quilt’s height. Cut two border strips to this length and sew to the sides of your quilt. Press out toward border.
- Measure your quilt’s width. Cut two border strips to this length and sew to the top and bottom of your quilt. Press out toward border.
Layer, quilt, and bind your quilt.