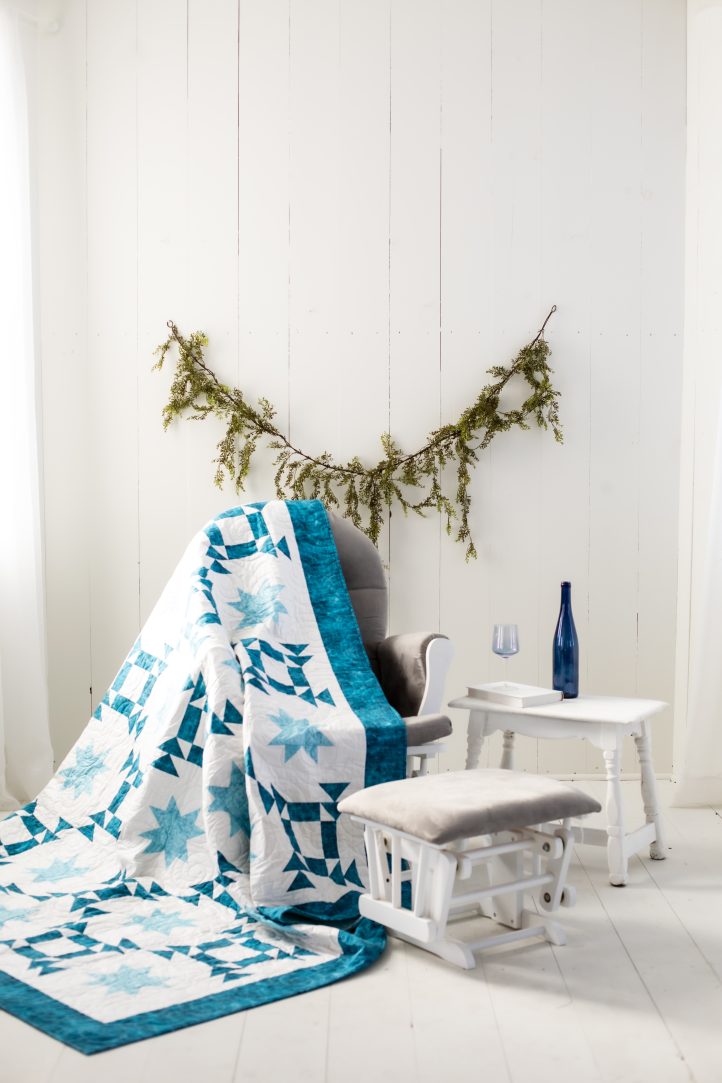
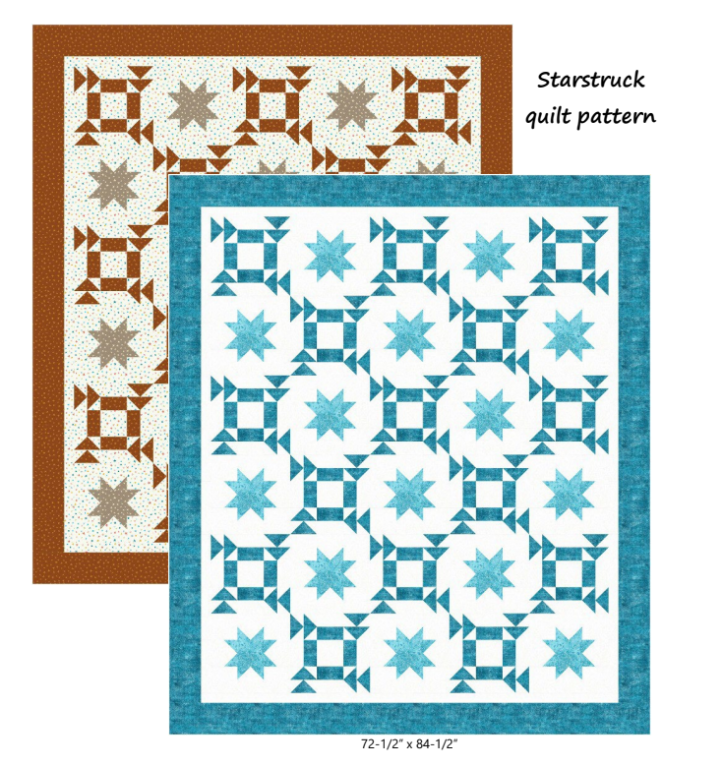
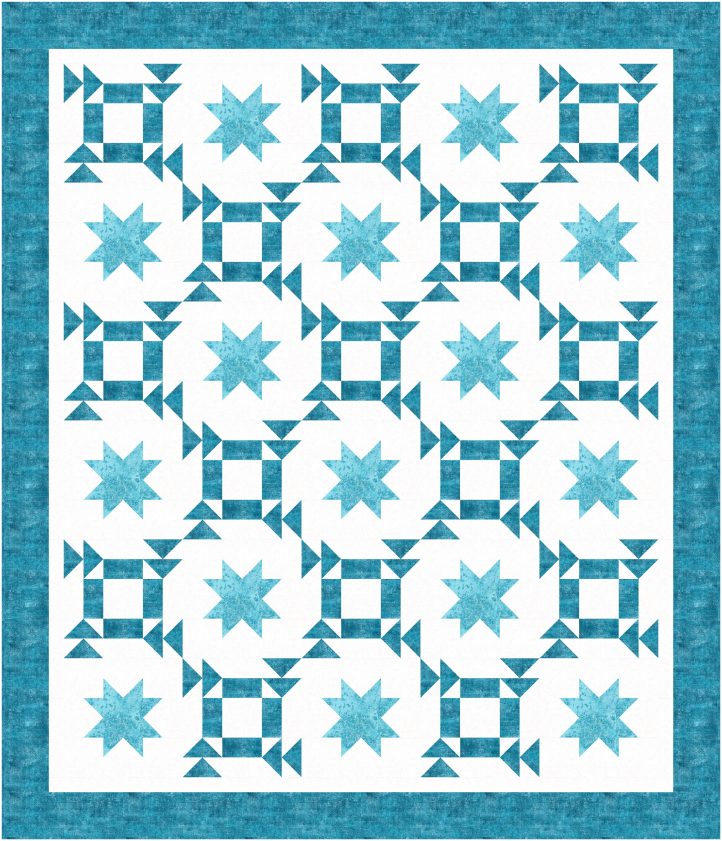
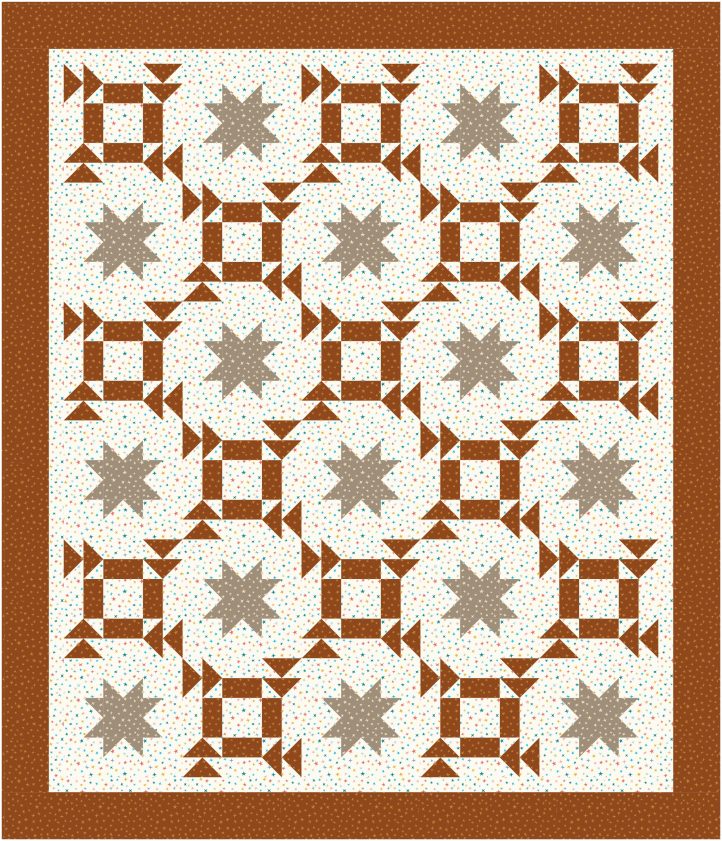
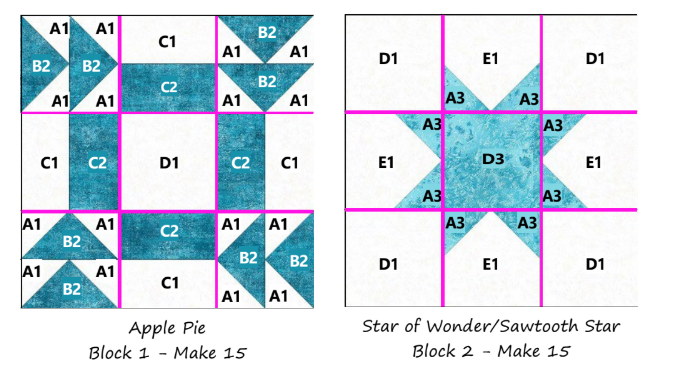
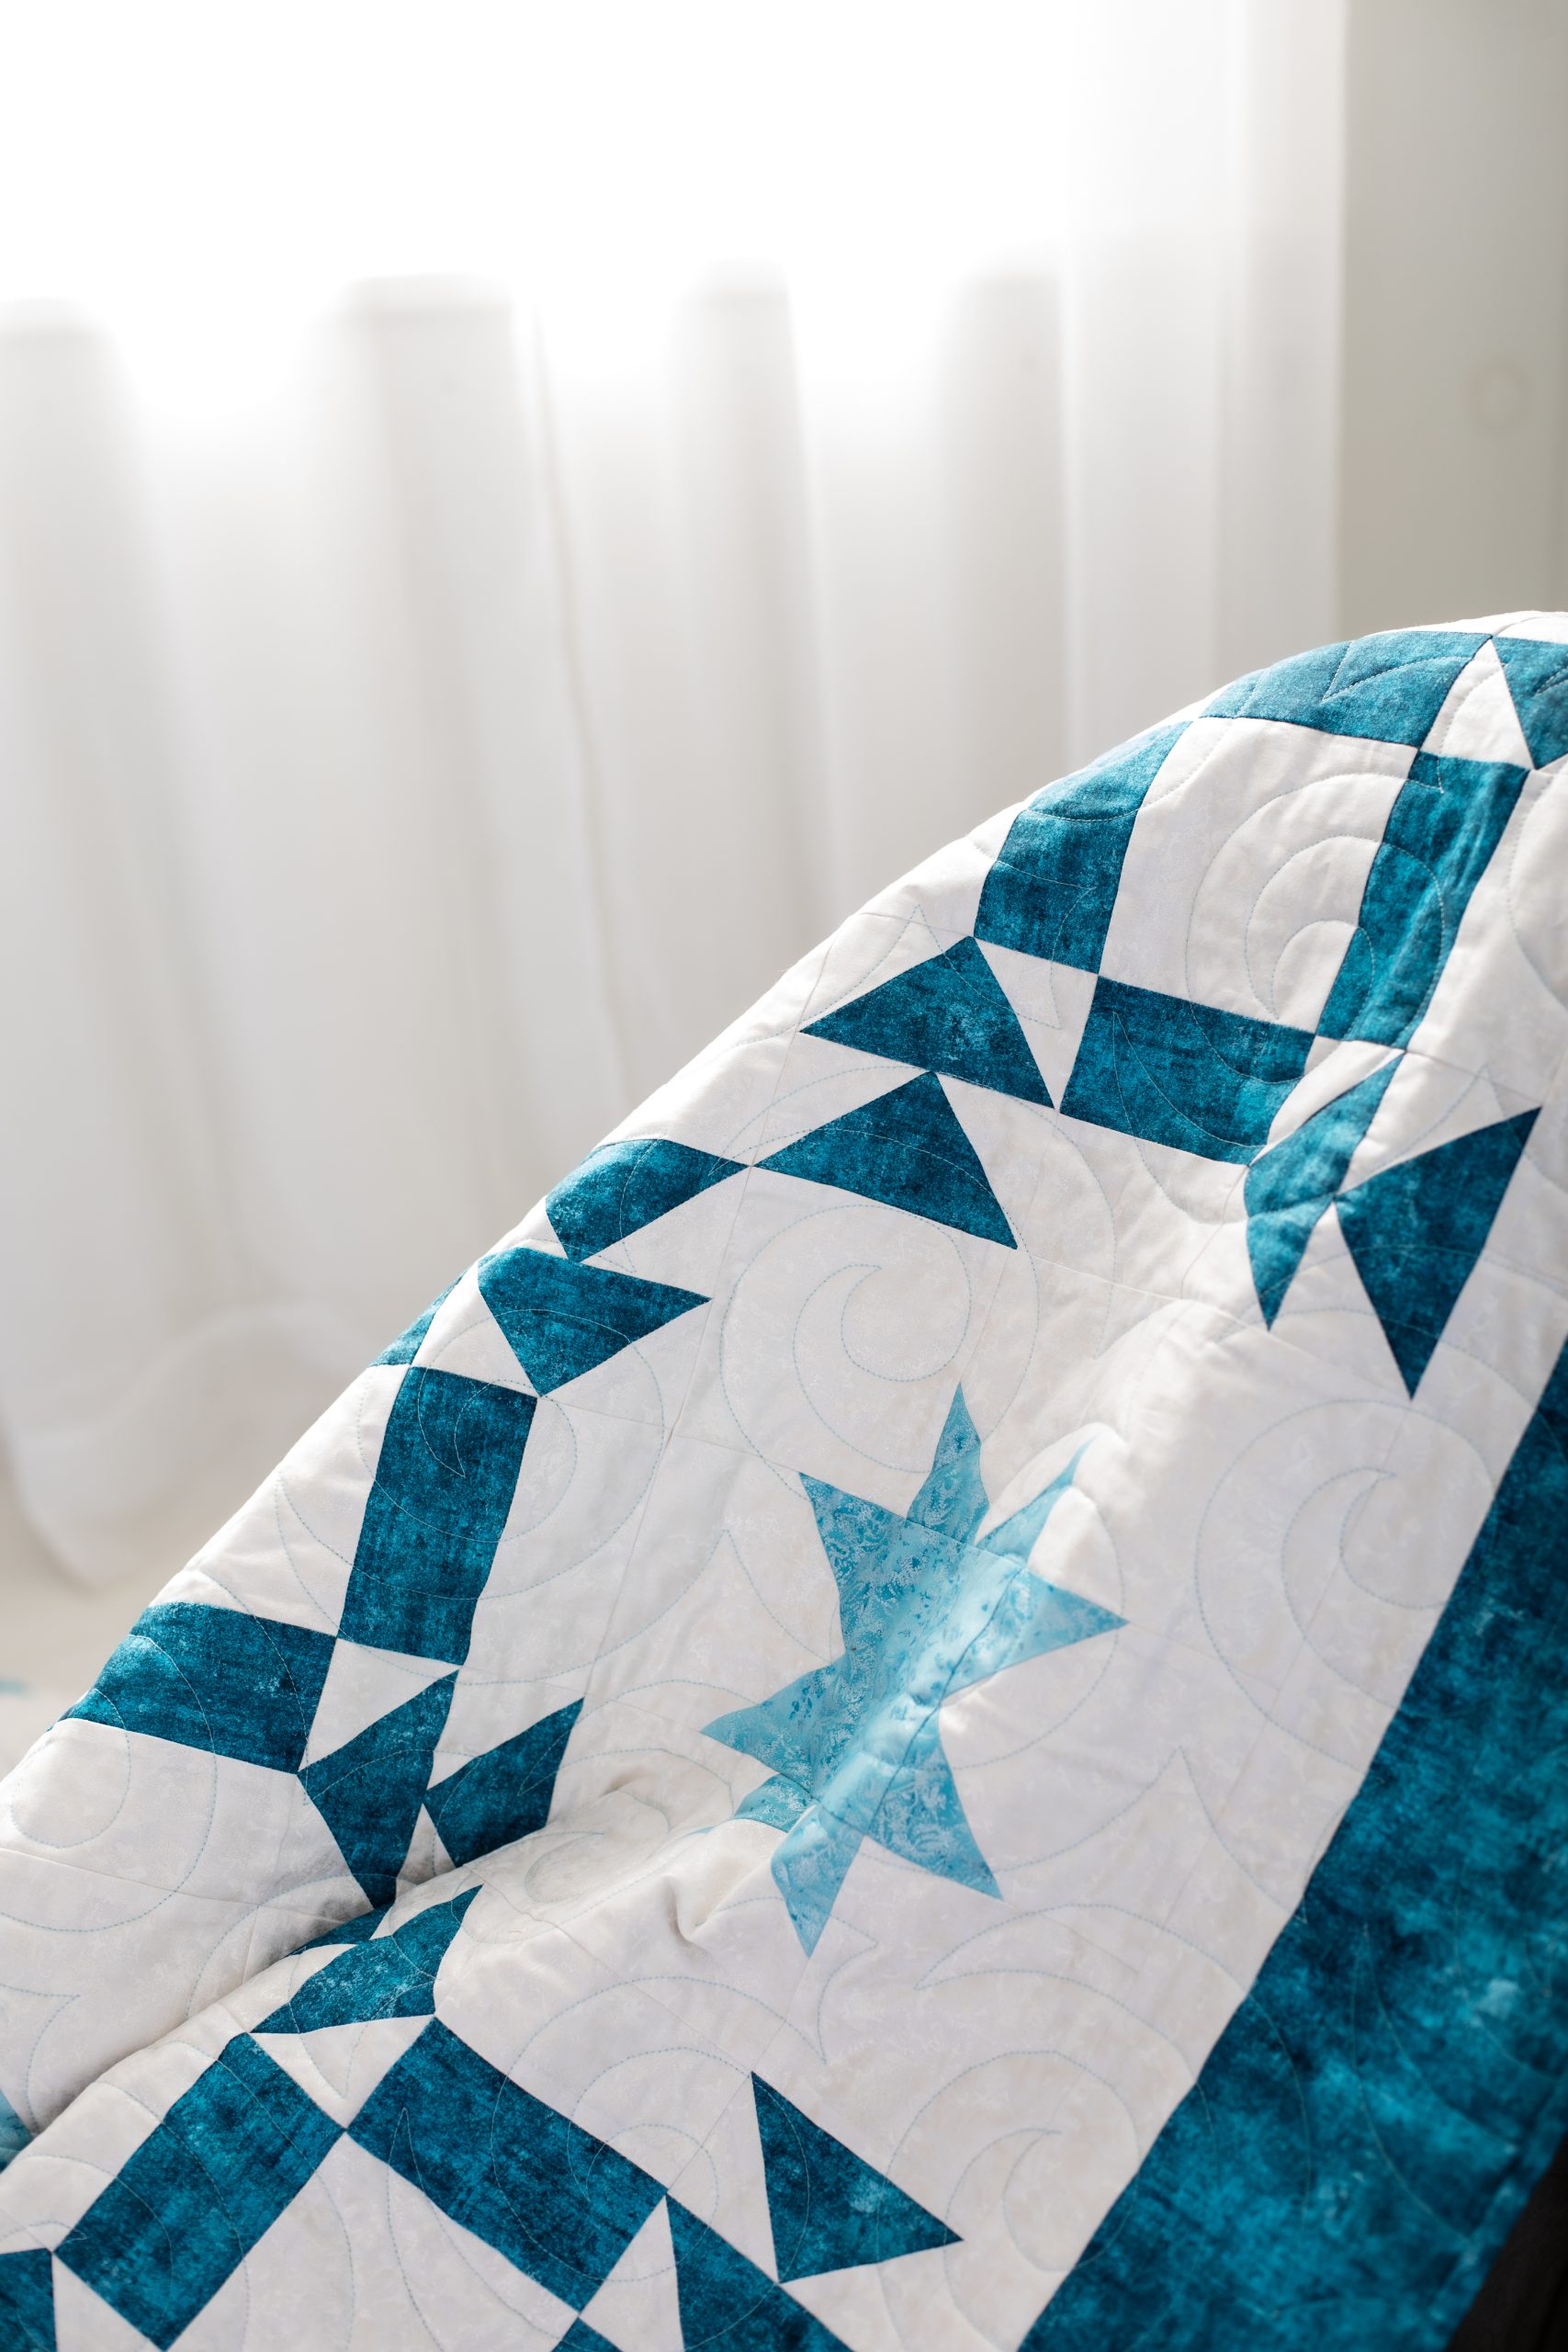
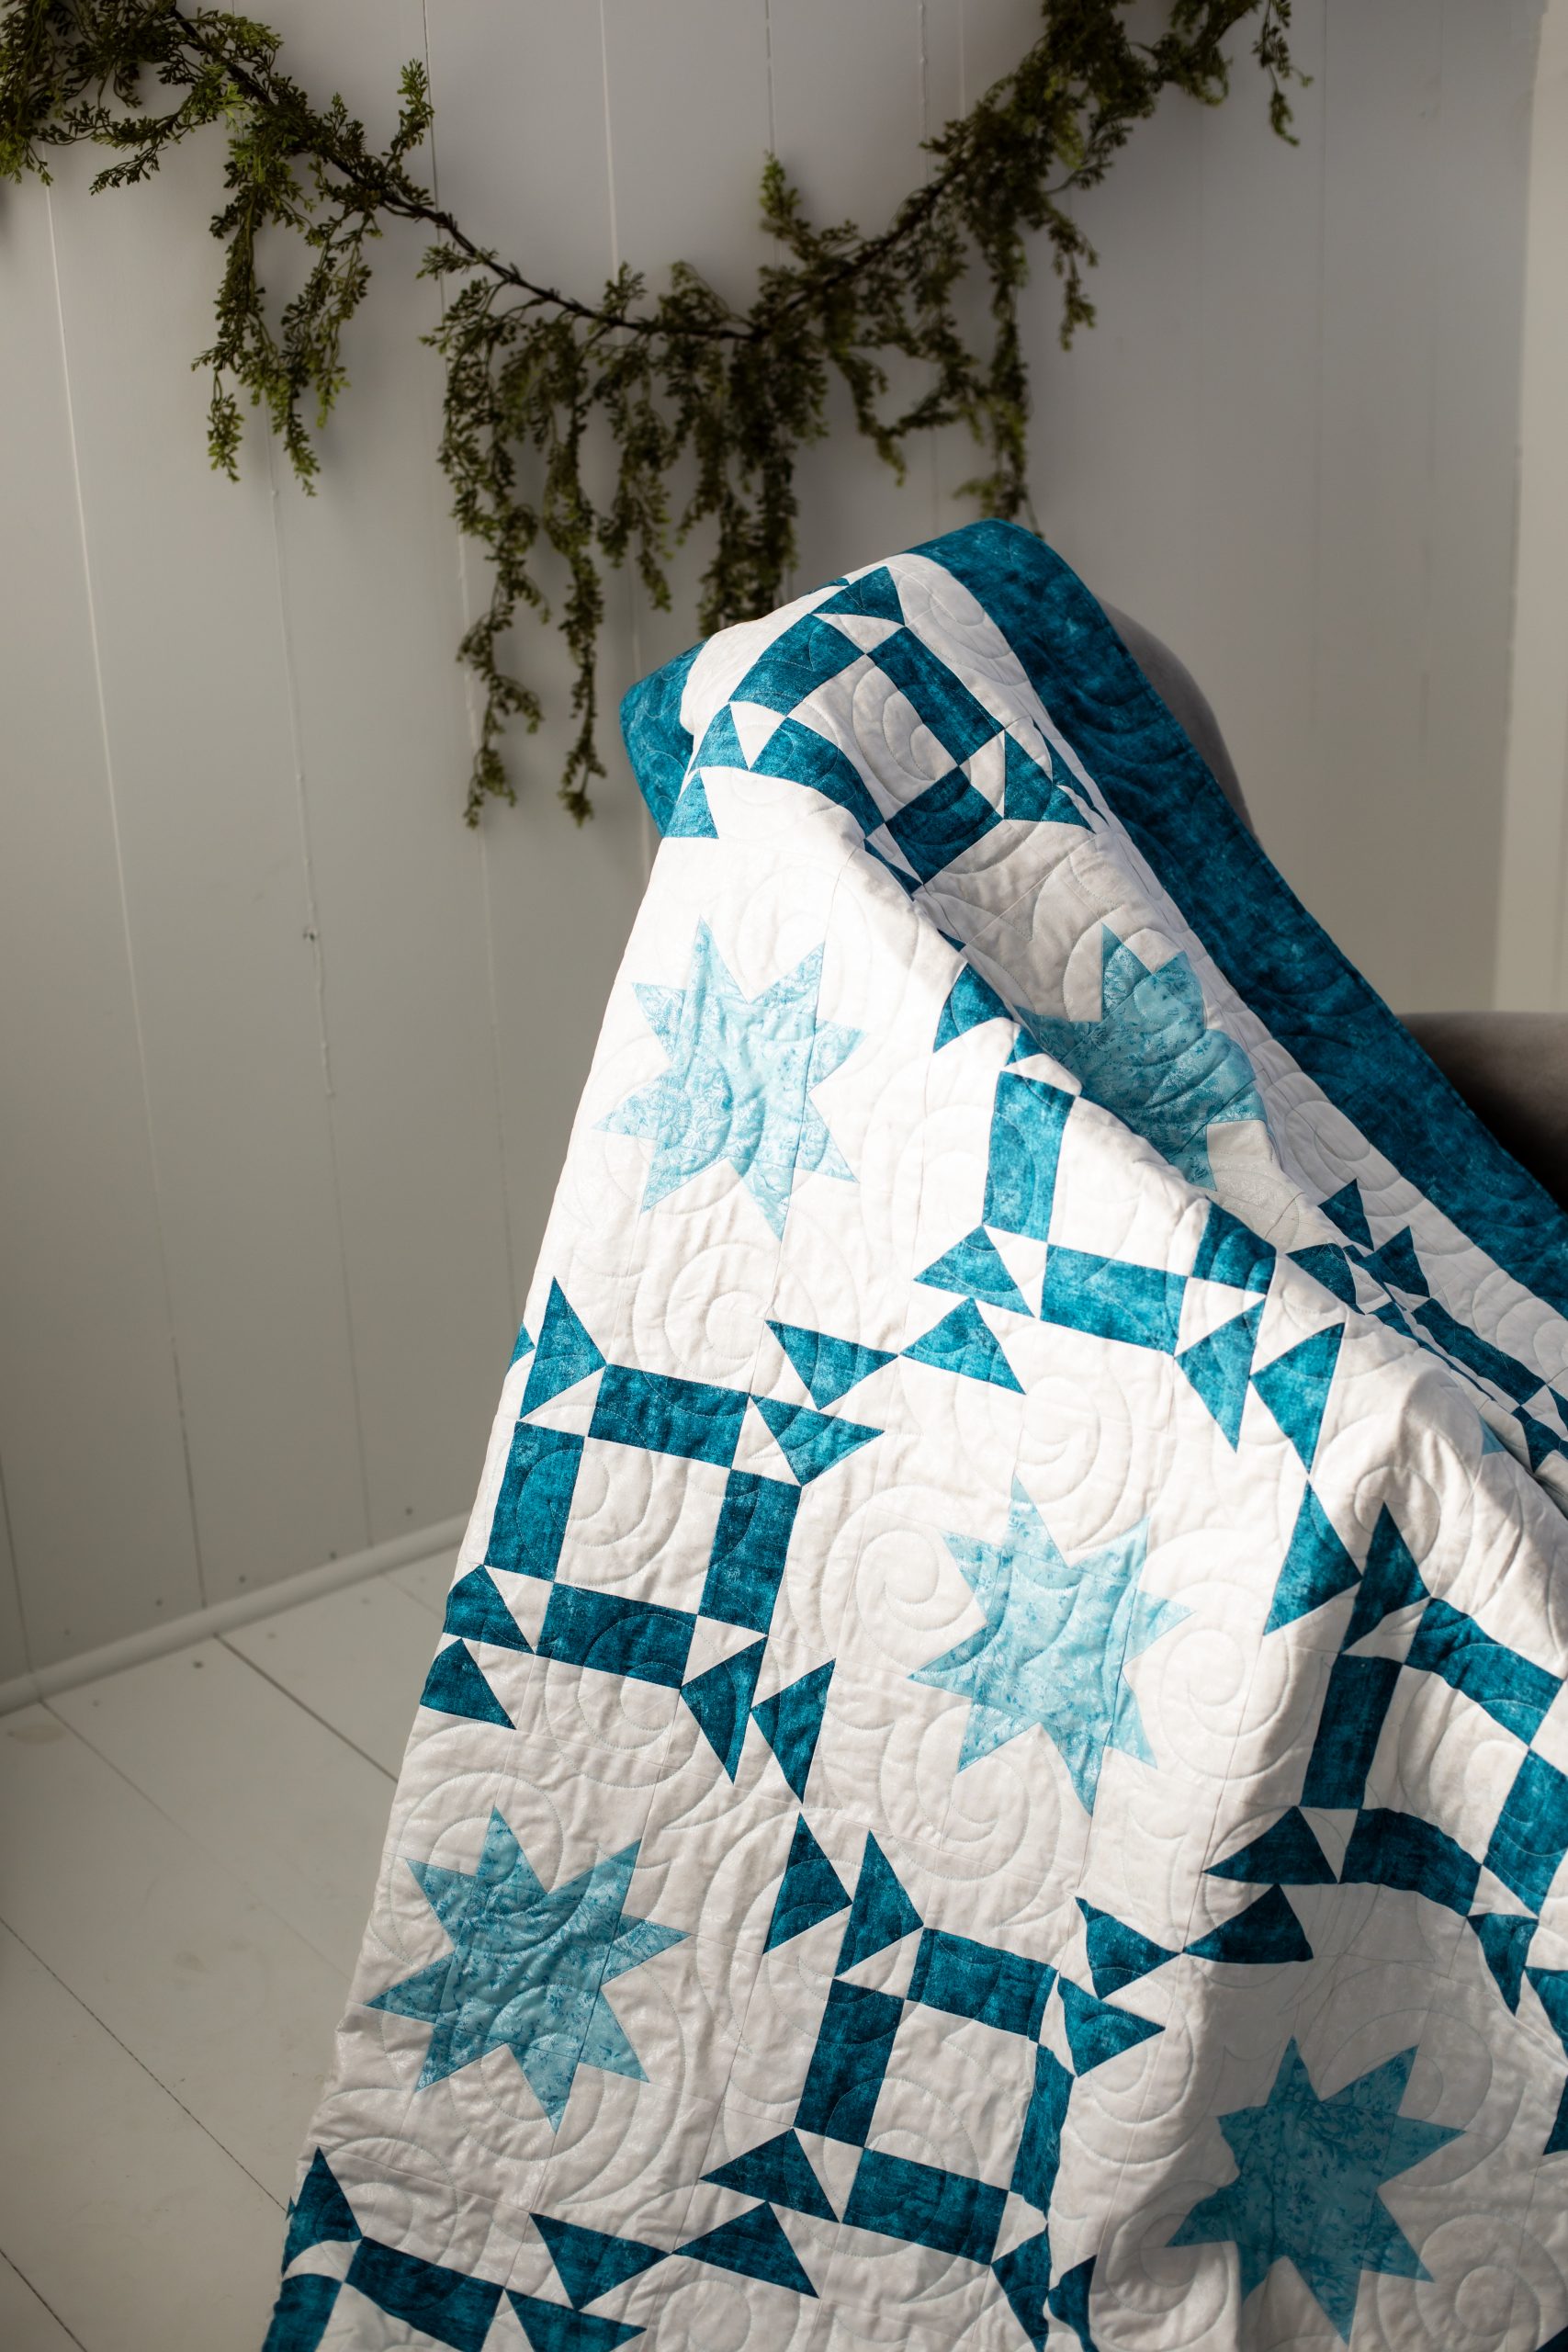
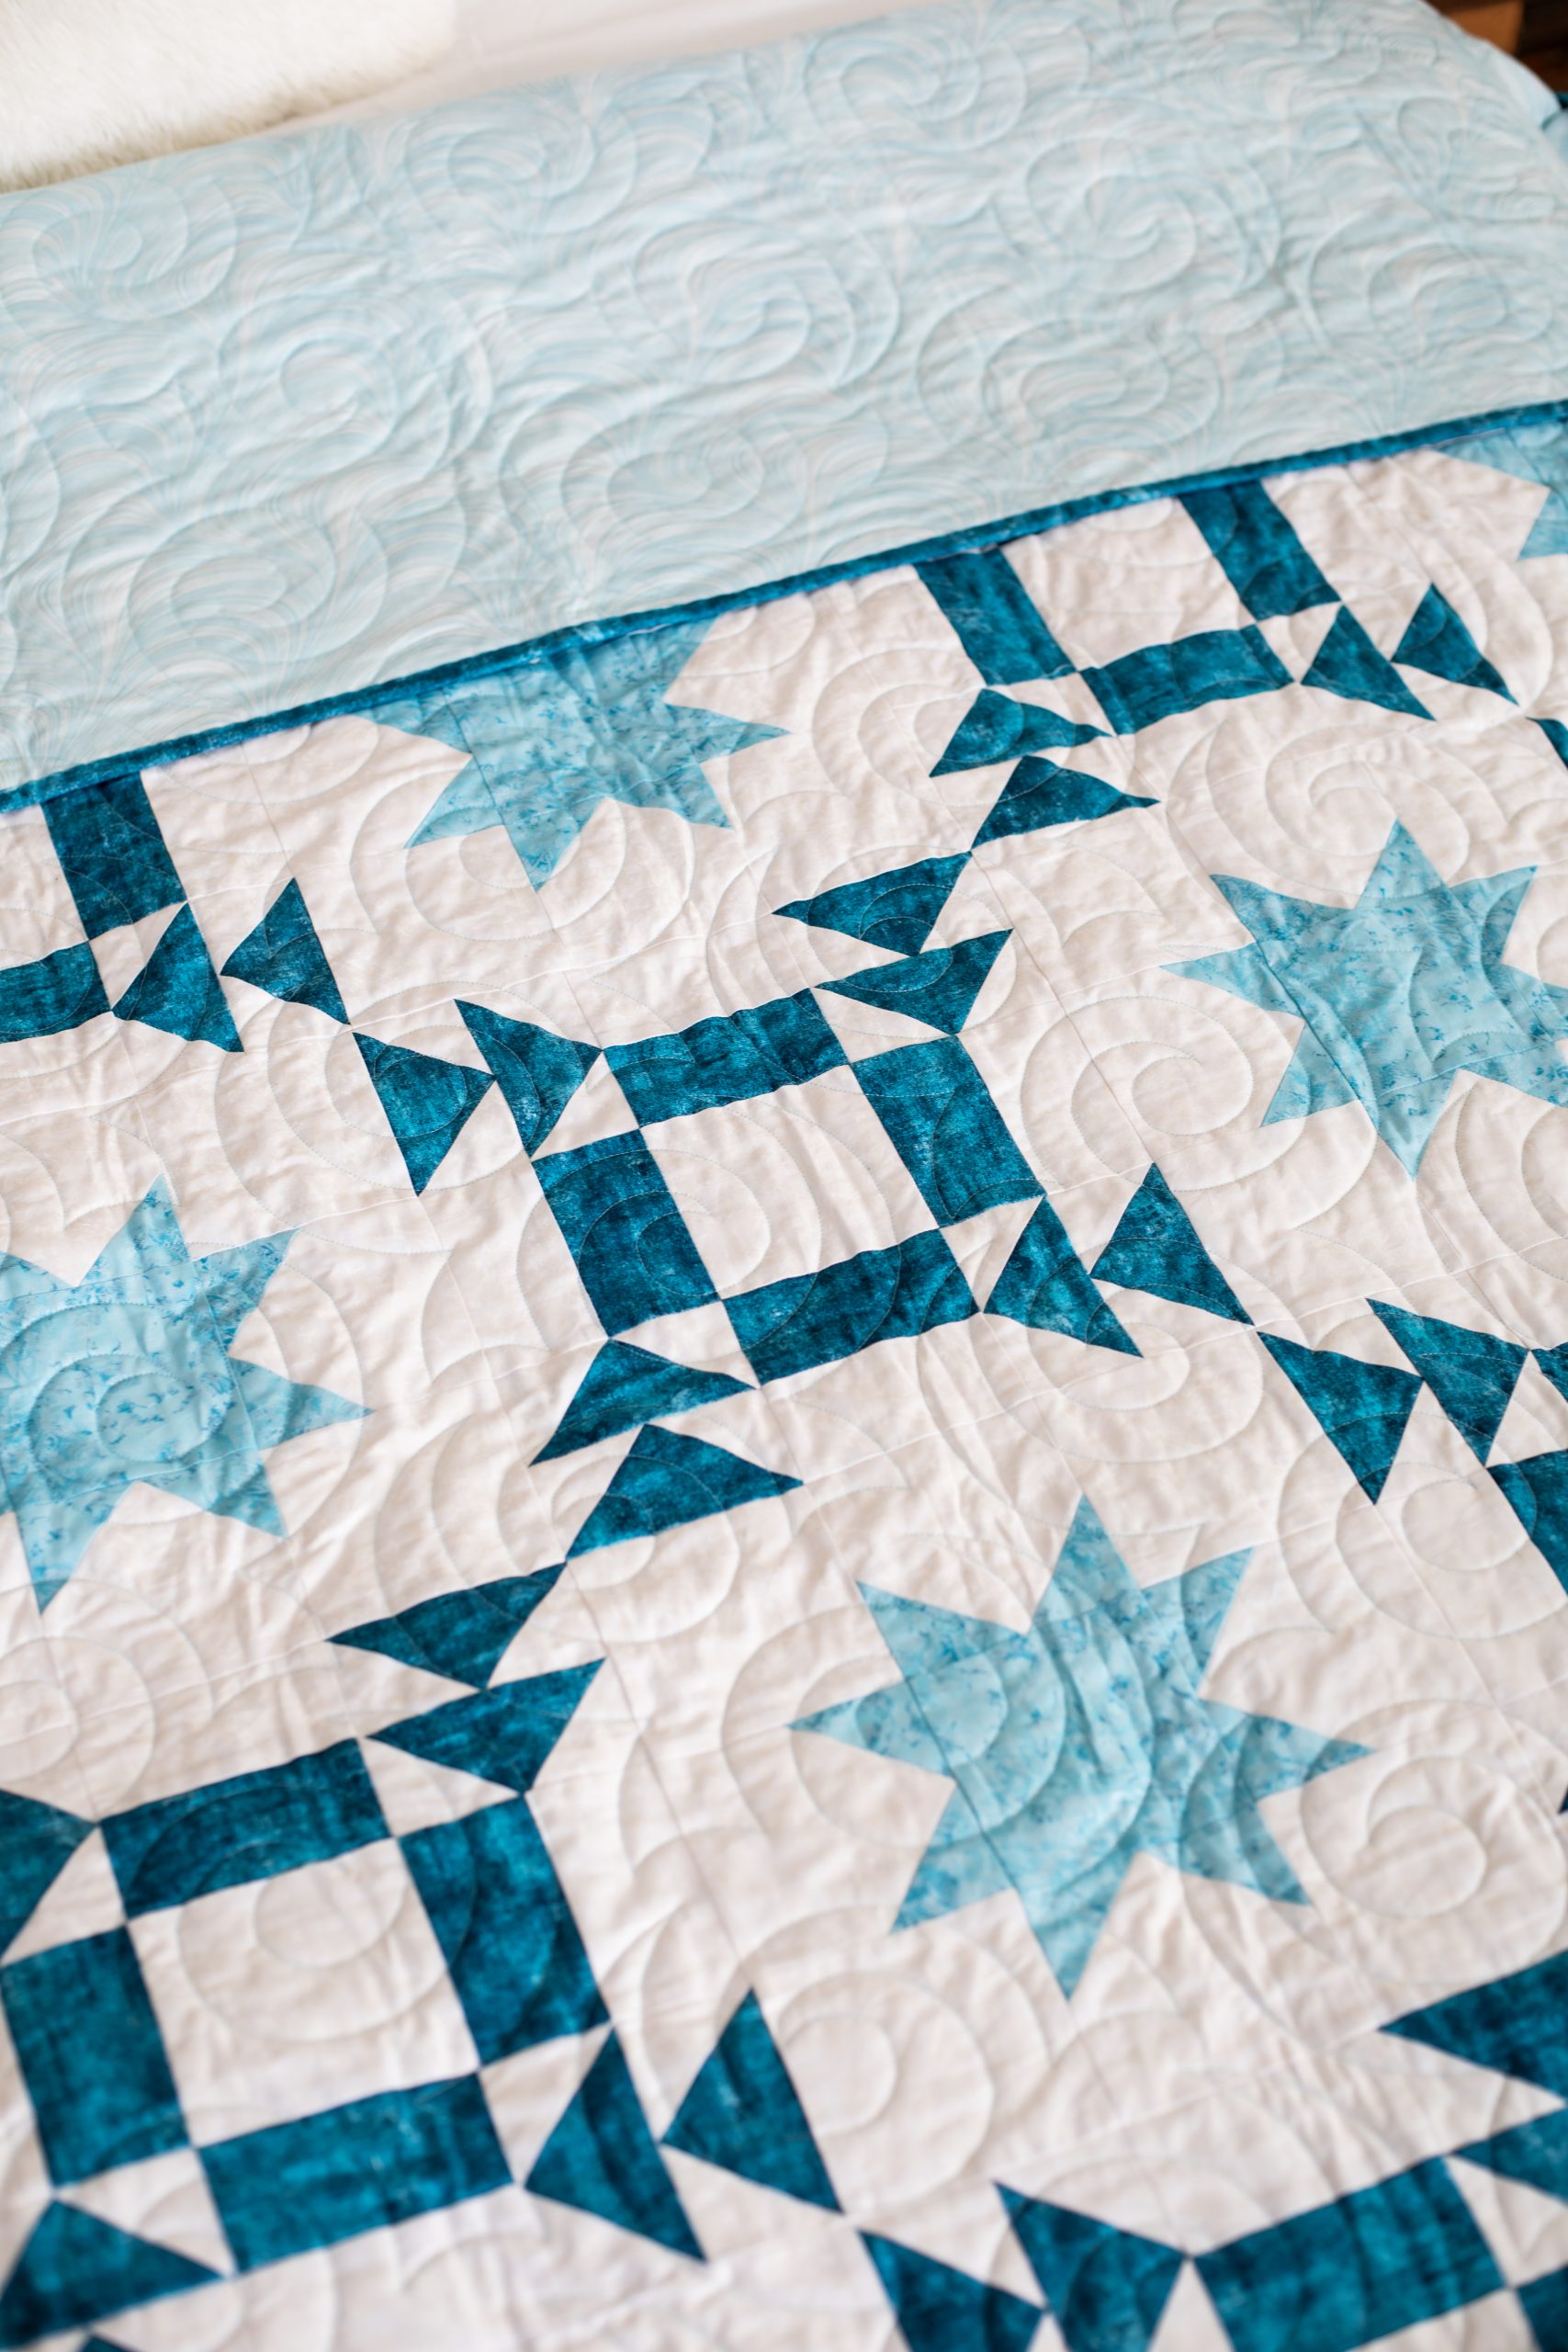
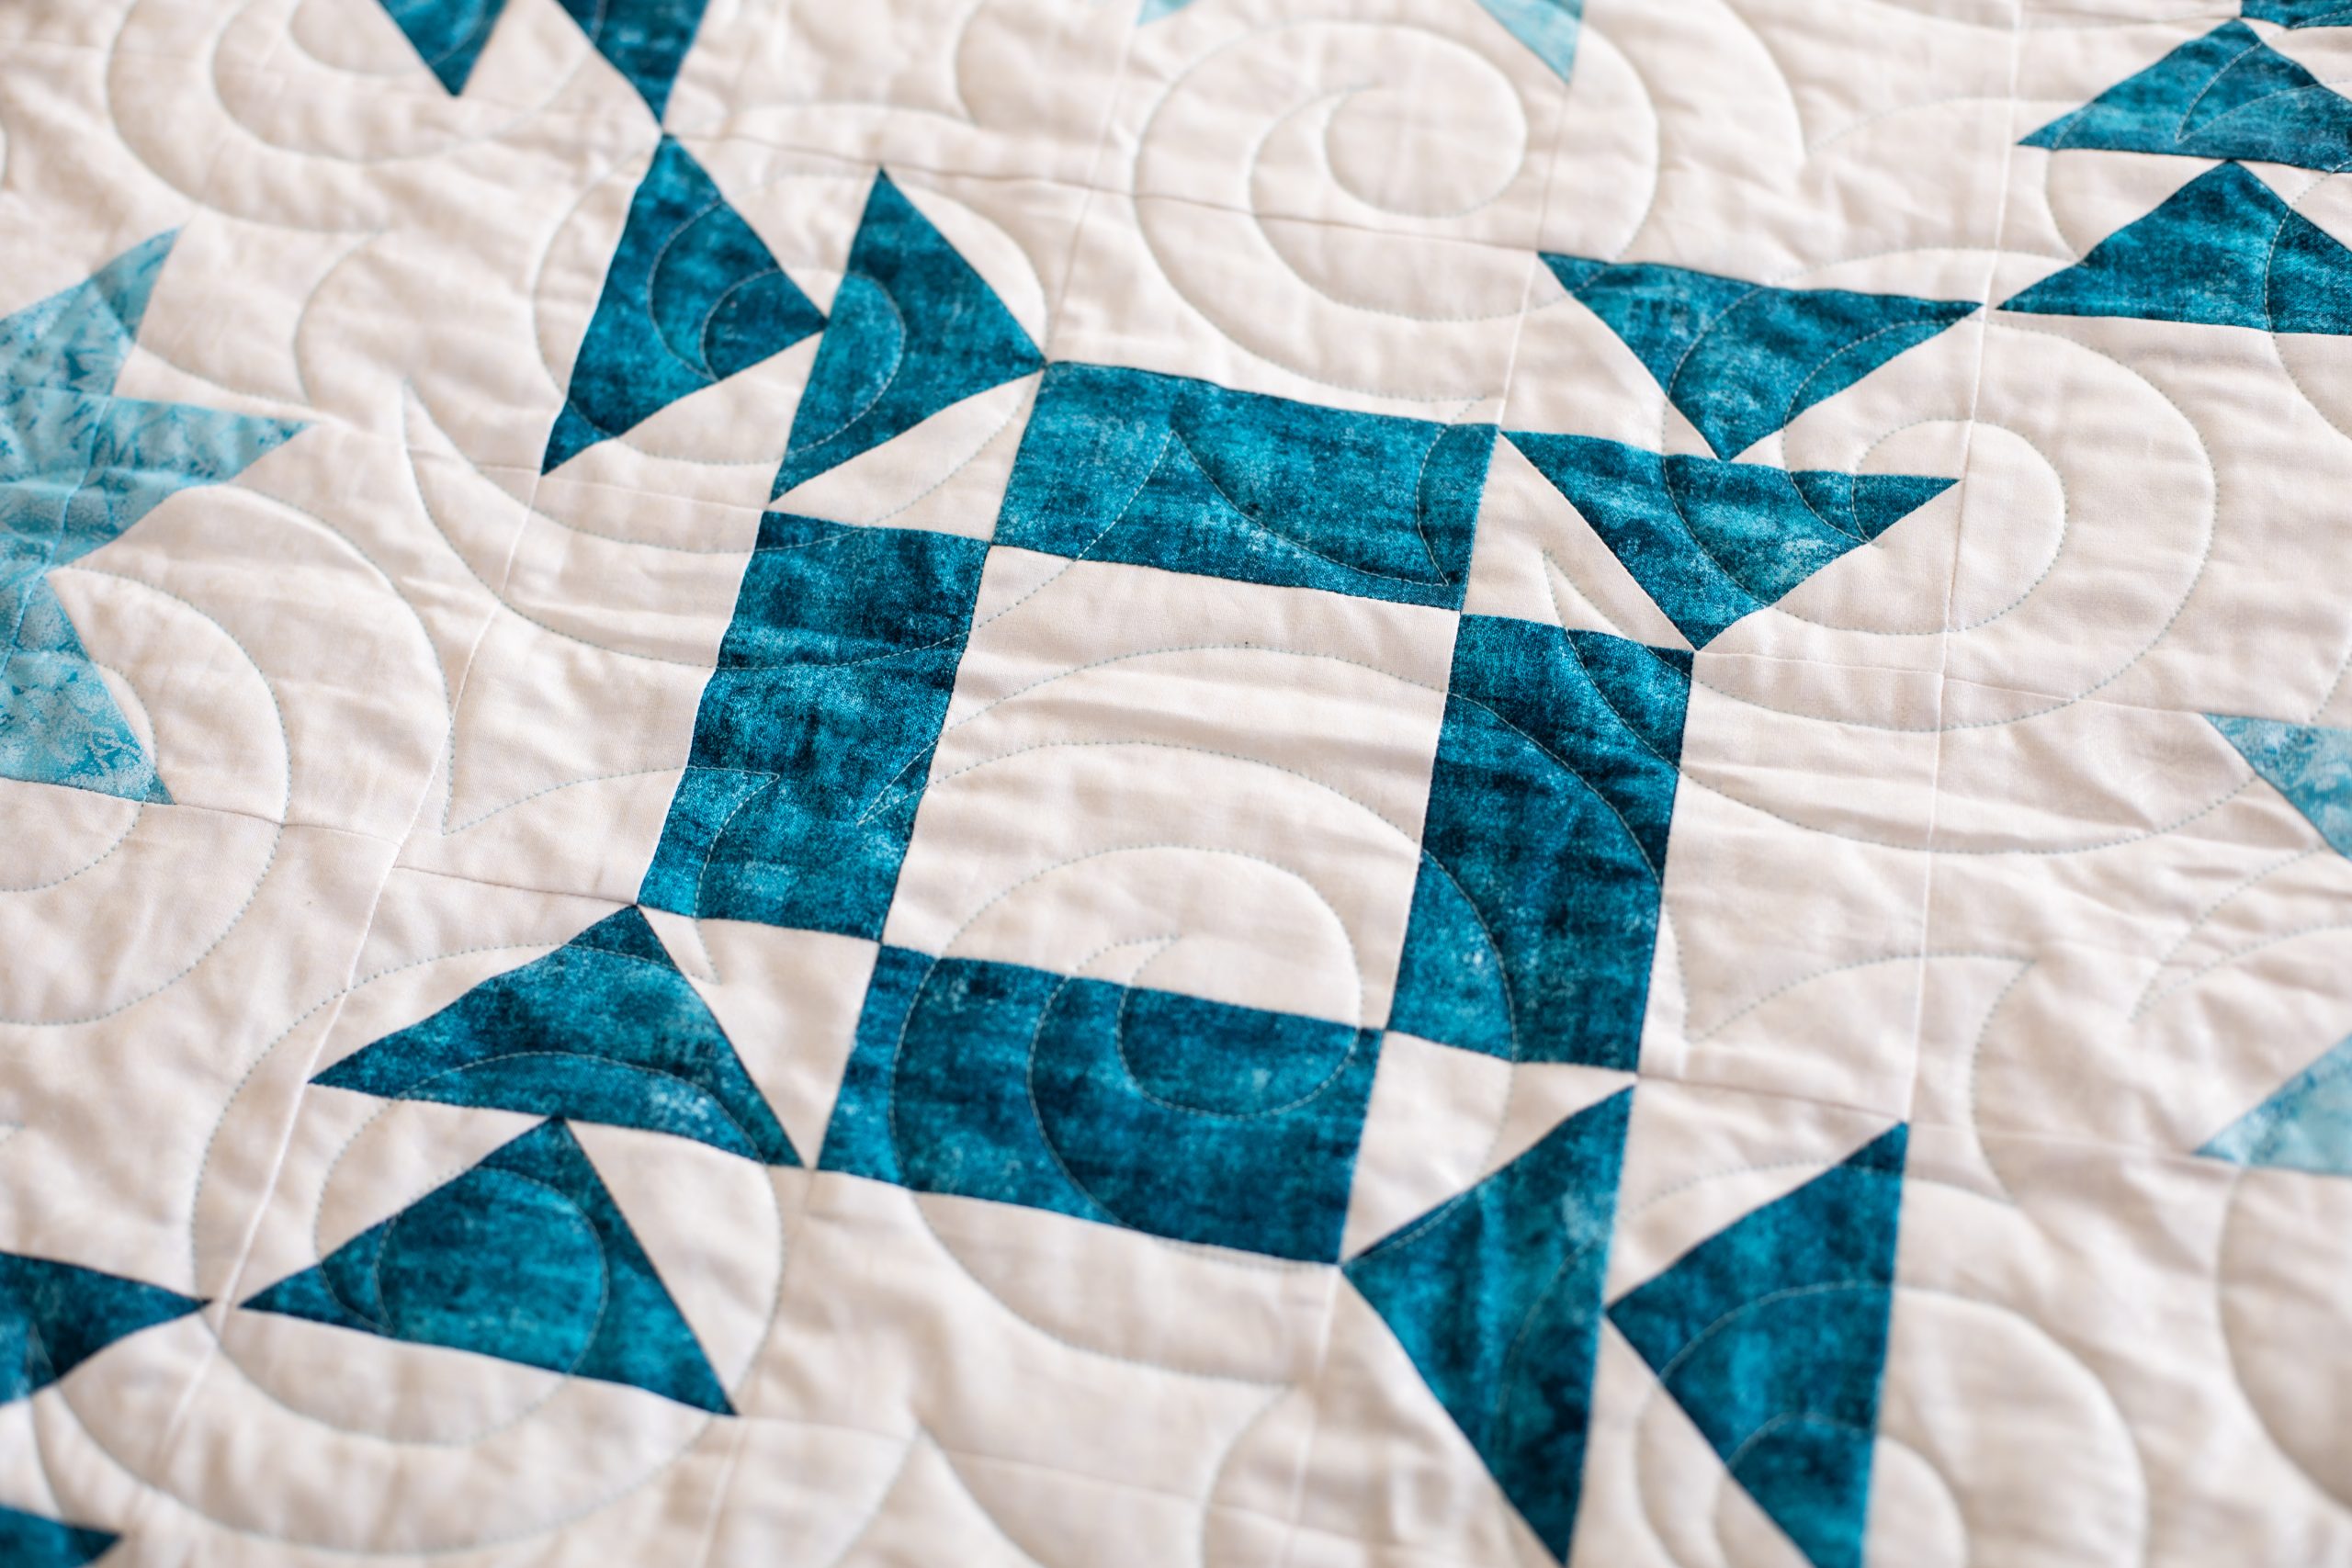
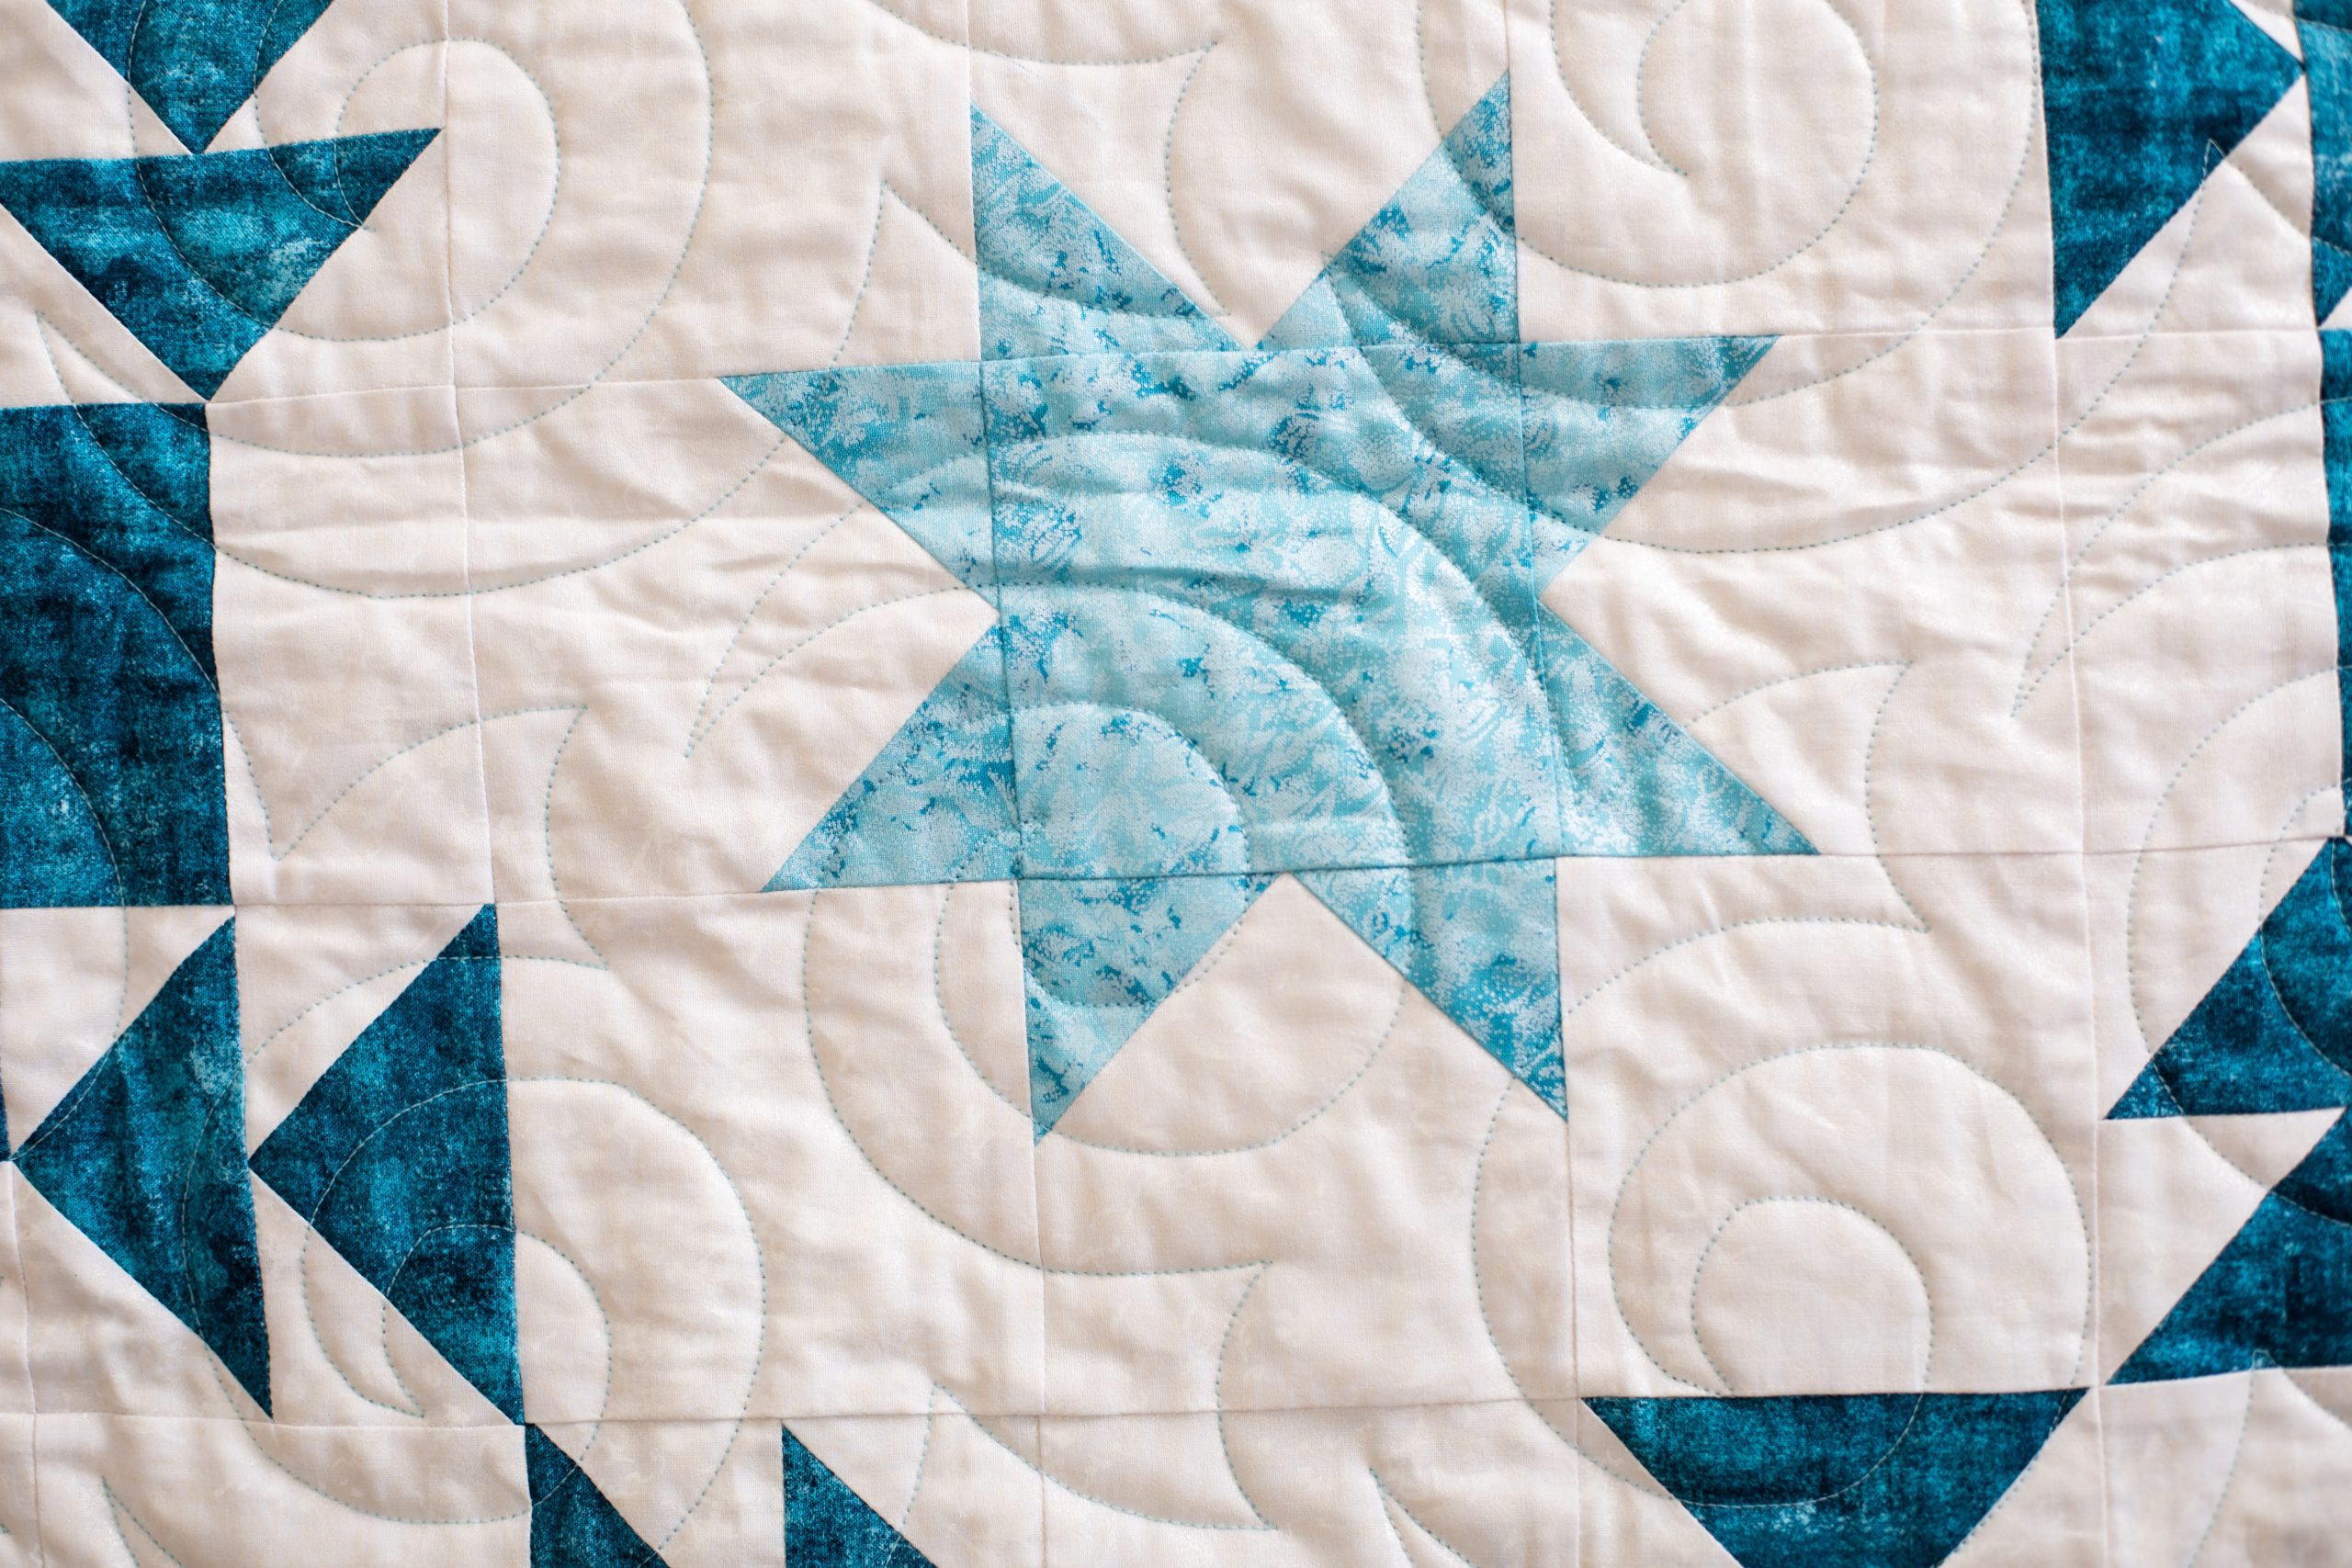
Spend March tackling an eye-catching spring quilt with this beautiful design from Brenda Plaster. Measuring at 72 1/2 x 84 1/2 inches, this star quilt pattern is made in elegant aquamarine tones and is a combo of two interesting block patterns: the Apple Pie block and the Star of Wonder or Sawtooth Star block. Finish your spring quilt pattern with a color coordinating border and delicate free motion details.
Finished Size: 72-1/2” x 84-1/2”
Designer Notes:
- Show off those beautiful solid/tonal fabrics in this lively design. Quilts are illustrated in fabric from Michael Miller’s Basics collections.
- Please read pattern before starting your project.
- This pattern was tested by Carol Sebald and Jean Smith. The quilt was made by Carol Sebald and quilted by Sheila Doege. Thank you!
ADDITIONAL COLORWAYS:
The designer has provided fabric information for the sample shown, as well as additional colorways as inspiration for our readers!
Pattern instructions are illustrated in fabric from the Fairy Frost and Fresco collections by Michael Miller.
The alternate quilt coloring is illustrated in fabric from the Stargazer collection by Michael Miller.
PATCH SUMMARY:
Note: Do not cut from this summary; see Fabric Requirements and Cuts. Patch descriptions refer to fabric pieces cut to construct patches, not the finished patch sizes.
A: 2-1/2” square: 240 A1, 120 A3
B: 4-1/2 x 2-1/2” rectangle: 120 B2
C: 4-1/2” x 2-1/2” rectangle: 60 C1, 60 C2
D: 4-1/2” square: 75 D1, 15 D3
E: 4-1/2” square: 60 E1
Fabric estimates are based on useable fabric width (selvage to selvage) of at least 42”. Add yardage if you prewash your fabrics or are fussy-cutting.
Cuts across the fabric width are indicated as WOF (width of fabric). Some cuts are lengthwise (parallel to selvage) to enable lengthwise border cuts. This avoids distorted/wavy borders, as fabric does not stretch on the lengthwise grain.
In the patch labels (see Patch Summary), the letter refers to the patch. The number refers to the fabric from which it is cut. For example, A1 is an A patch cut from Fabric 1.
Fabric Requirements and Cuts:
Fabric 1: 4-1/8 yards
- D1: Cut WOF [9] 4-1/2” strips. From these, cut [75] 4-1/2” x 4-1/2” squares.
- C1: Cut WOF [7] 2-1/2” strips.
- A1: Cut WOF [15] 2-1/2” strips. From these, cut [240] 2-1/2” x 2-1/2” squares.
- From remaining fabric, cut:
- E1: Cut lengthwise of fabric [6] 4-1/2” strips. From these, cut [60] 4-1/2” x 4-1/2” squares.
- Inner border: Cut lengthwise of fabric [6] 2” strips.
Fabric 2: 3-1/2 yards
- Cut fabric into 2-3/4 yards and 3/4 yard.
- From 2-3/4 yards, cut:
- B2: Cut WOF [14] 2-1/2” strips.
- From these, cut [120] 2-1/2” x 4-1/2” rectangles.
- C2: Cut WOF [7] 2-1/2” strips.
- Outer border: After making above cuts, cut lengthwise of fabric [7] 5” strips if sewing straight border seams or [8] 5” strips if sewing bias border seams.
- B2: Cut WOF [14] 2-1/2” strips.
- From 3/4 yard, cut:
- Binding: Cut enough 2-1/4” or 2-1/2” (your preference) bias or straight of grain strips to join and make about 324” binding.
Fabric 3: 1 yard
- D3: Cut WOF [2] 4-1/2” strips. From these, cut [15] 4-1/2” x 4-1/2” squares.
- A3: Cut WOF [8] 2-1/2” strips. From these, cut [120] 2-1/2” x 2-1/2” squares.
Backing: 5-1/4 yards
- Backing 4” larger on all sides than the quilt top is recommended for longarm quilting (80-1/2” x 92-1/2”). Cut fabric into two equal lengths, join to make a 83-1/2” x 94-1/2” backing. (Width will be more if fabric is wider than 42”.)
Piecing Instructions:
All seams are 1/4”. Press seams as indicated in instructions or illustrations. Or there’s the option of pressing seams open.
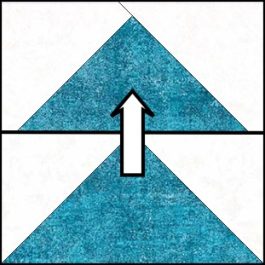
- Draw a diagonal line on wrong side of 2-1/2” A1 squares. Place right sides down on sides of 4-1/2” x 2-1/2” B2 rectangles, aligning outer edges and orienting stitch lines as shown. Stitch on drawn line. Cut away excess fabric, leaving a 1/4” seam. Sew 120.

- Combine units as shown to make [60] 4-1/2” x 4-1/2” squares.
- Combine units as shown to make [60] 4-1/2” x 4-1/2” squares.
- Join 2-1/2” Fabrics 1 and 2 strips. Sew 7 strip sets. Cut across strip sets at 4-1/2” intervals to make [60] 4-1/2” x 4-1/2” squares.

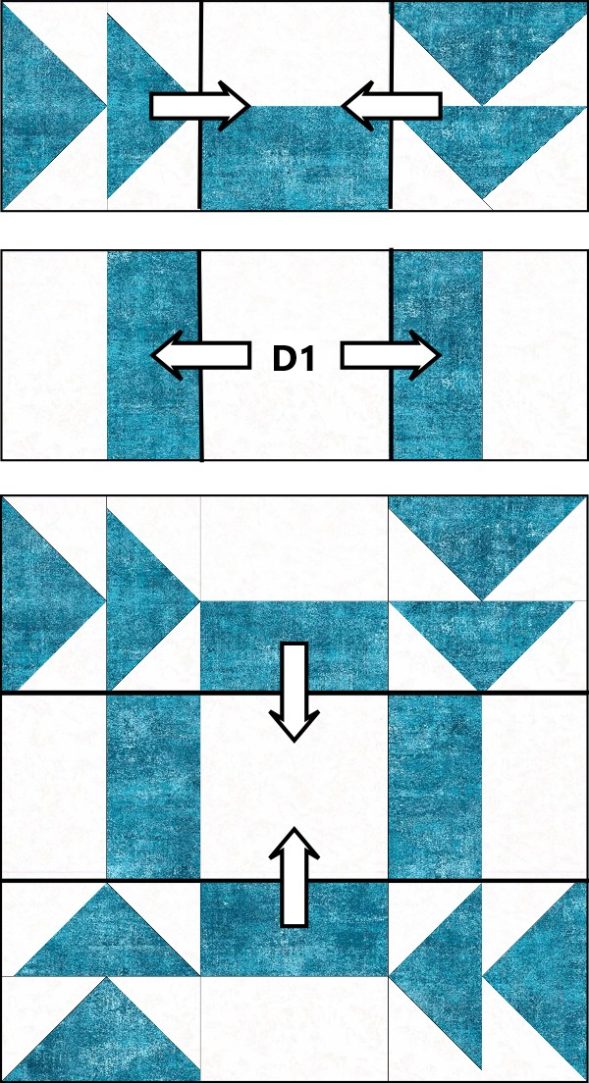
- Combine units made in Steps 1 and 2 as shown to make [30] 12-1/2” x 4-1/2” rectangles, Block 1 top and bottom rows.
- Combine remaining Step 2 units and D1 as shown to make [15] 12-1/2” x 4-1/2” rectangles, Block 1 center rows.
- Join these units as shown at right to complete [15] 12-1/2” x 12-1/2” Block 1 blocks.
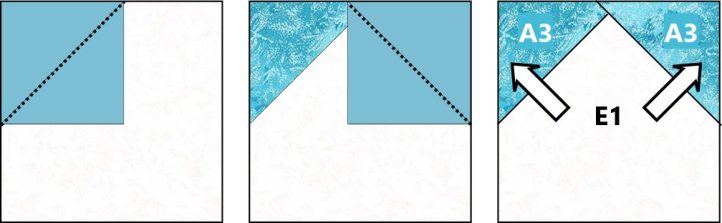
- In the same way you made the flying geese in Step 1, sew A3 to E1 as shown below to make [60] 4-1/2” x 4-1/2” squares.
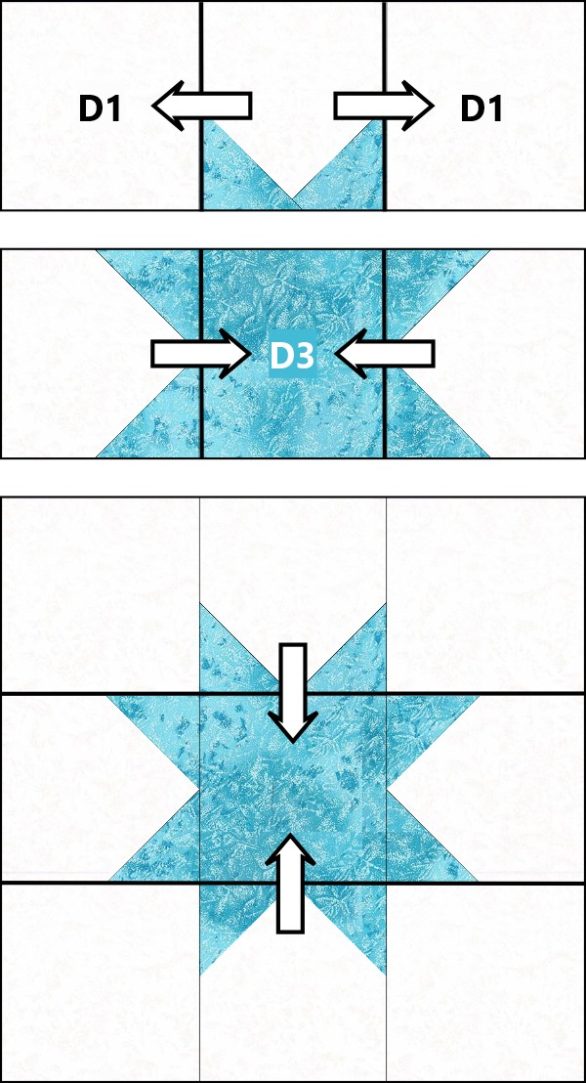
- Sew D1 to sides of half the units made in Step 4 to make [30] 12-1/2” x 4-1/2” rectangles, Block 2 top and bottom rows.
- Combine remaining Step 4 units and D3 as shown to make[15] 12-1/2” x 4-1/2” rectangles, Block 2 middle rows.
- Join these units as shown at right to complete [15] 12-1/2” x 12-1/2” Block 2 blocks.
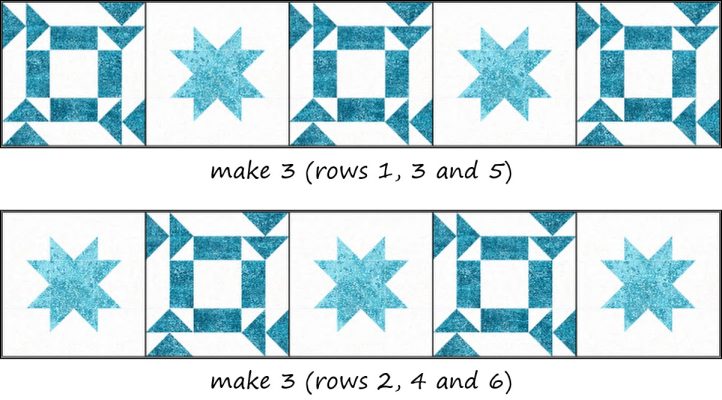
- Alternating blocks, join blocks in 6 rows of 5 blocks each. Press seams toward Block 2.
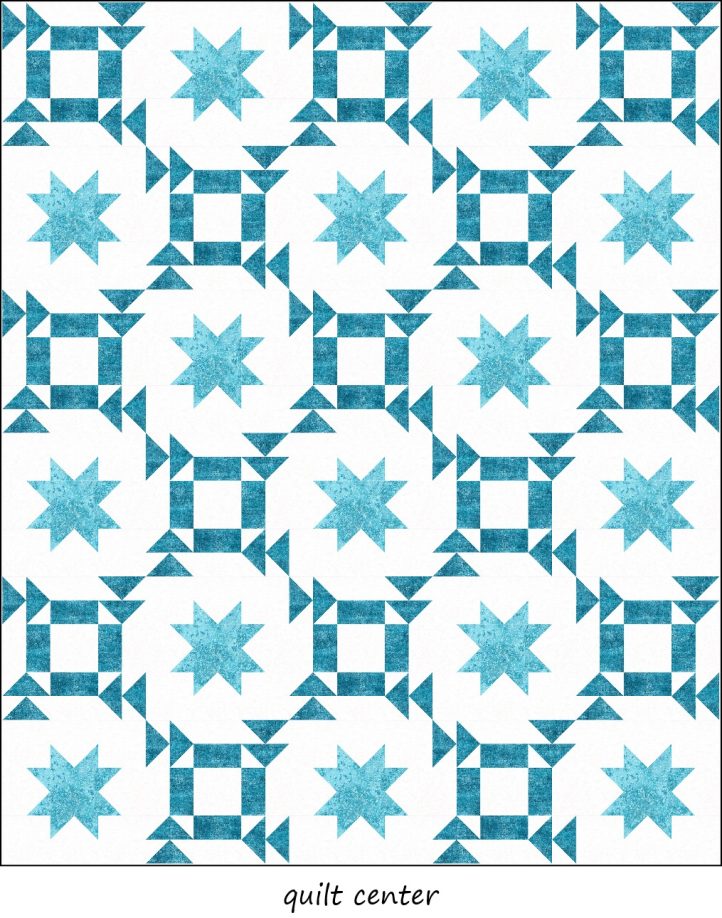
- Join rows made in Step 6 to complete quilt center.
- Measure length of quilt. Cut 2 inner border strips to this length. Sew to sides of quilt. Measure width of quilt. Cut 2 inner border strips to this length. Sew to top and bottom of quilt.
- Add outer border in the same way. Press seams toward borders.
- Layer top, batting and backing. Quilt as desired. Bind with Fabric 2 binding strip.
Pattern Testers: Carol Sebald and Jean Smith
Quilt Sample for Photography Created By: Carol Sebald
Quilt Sample for Photography Quilted By: Sheila Doege


Beautiful pattern and colors!
Thank you so much for your kind comment, Sujata! Have a great day 🙂 – Ashley, We Like Quilting