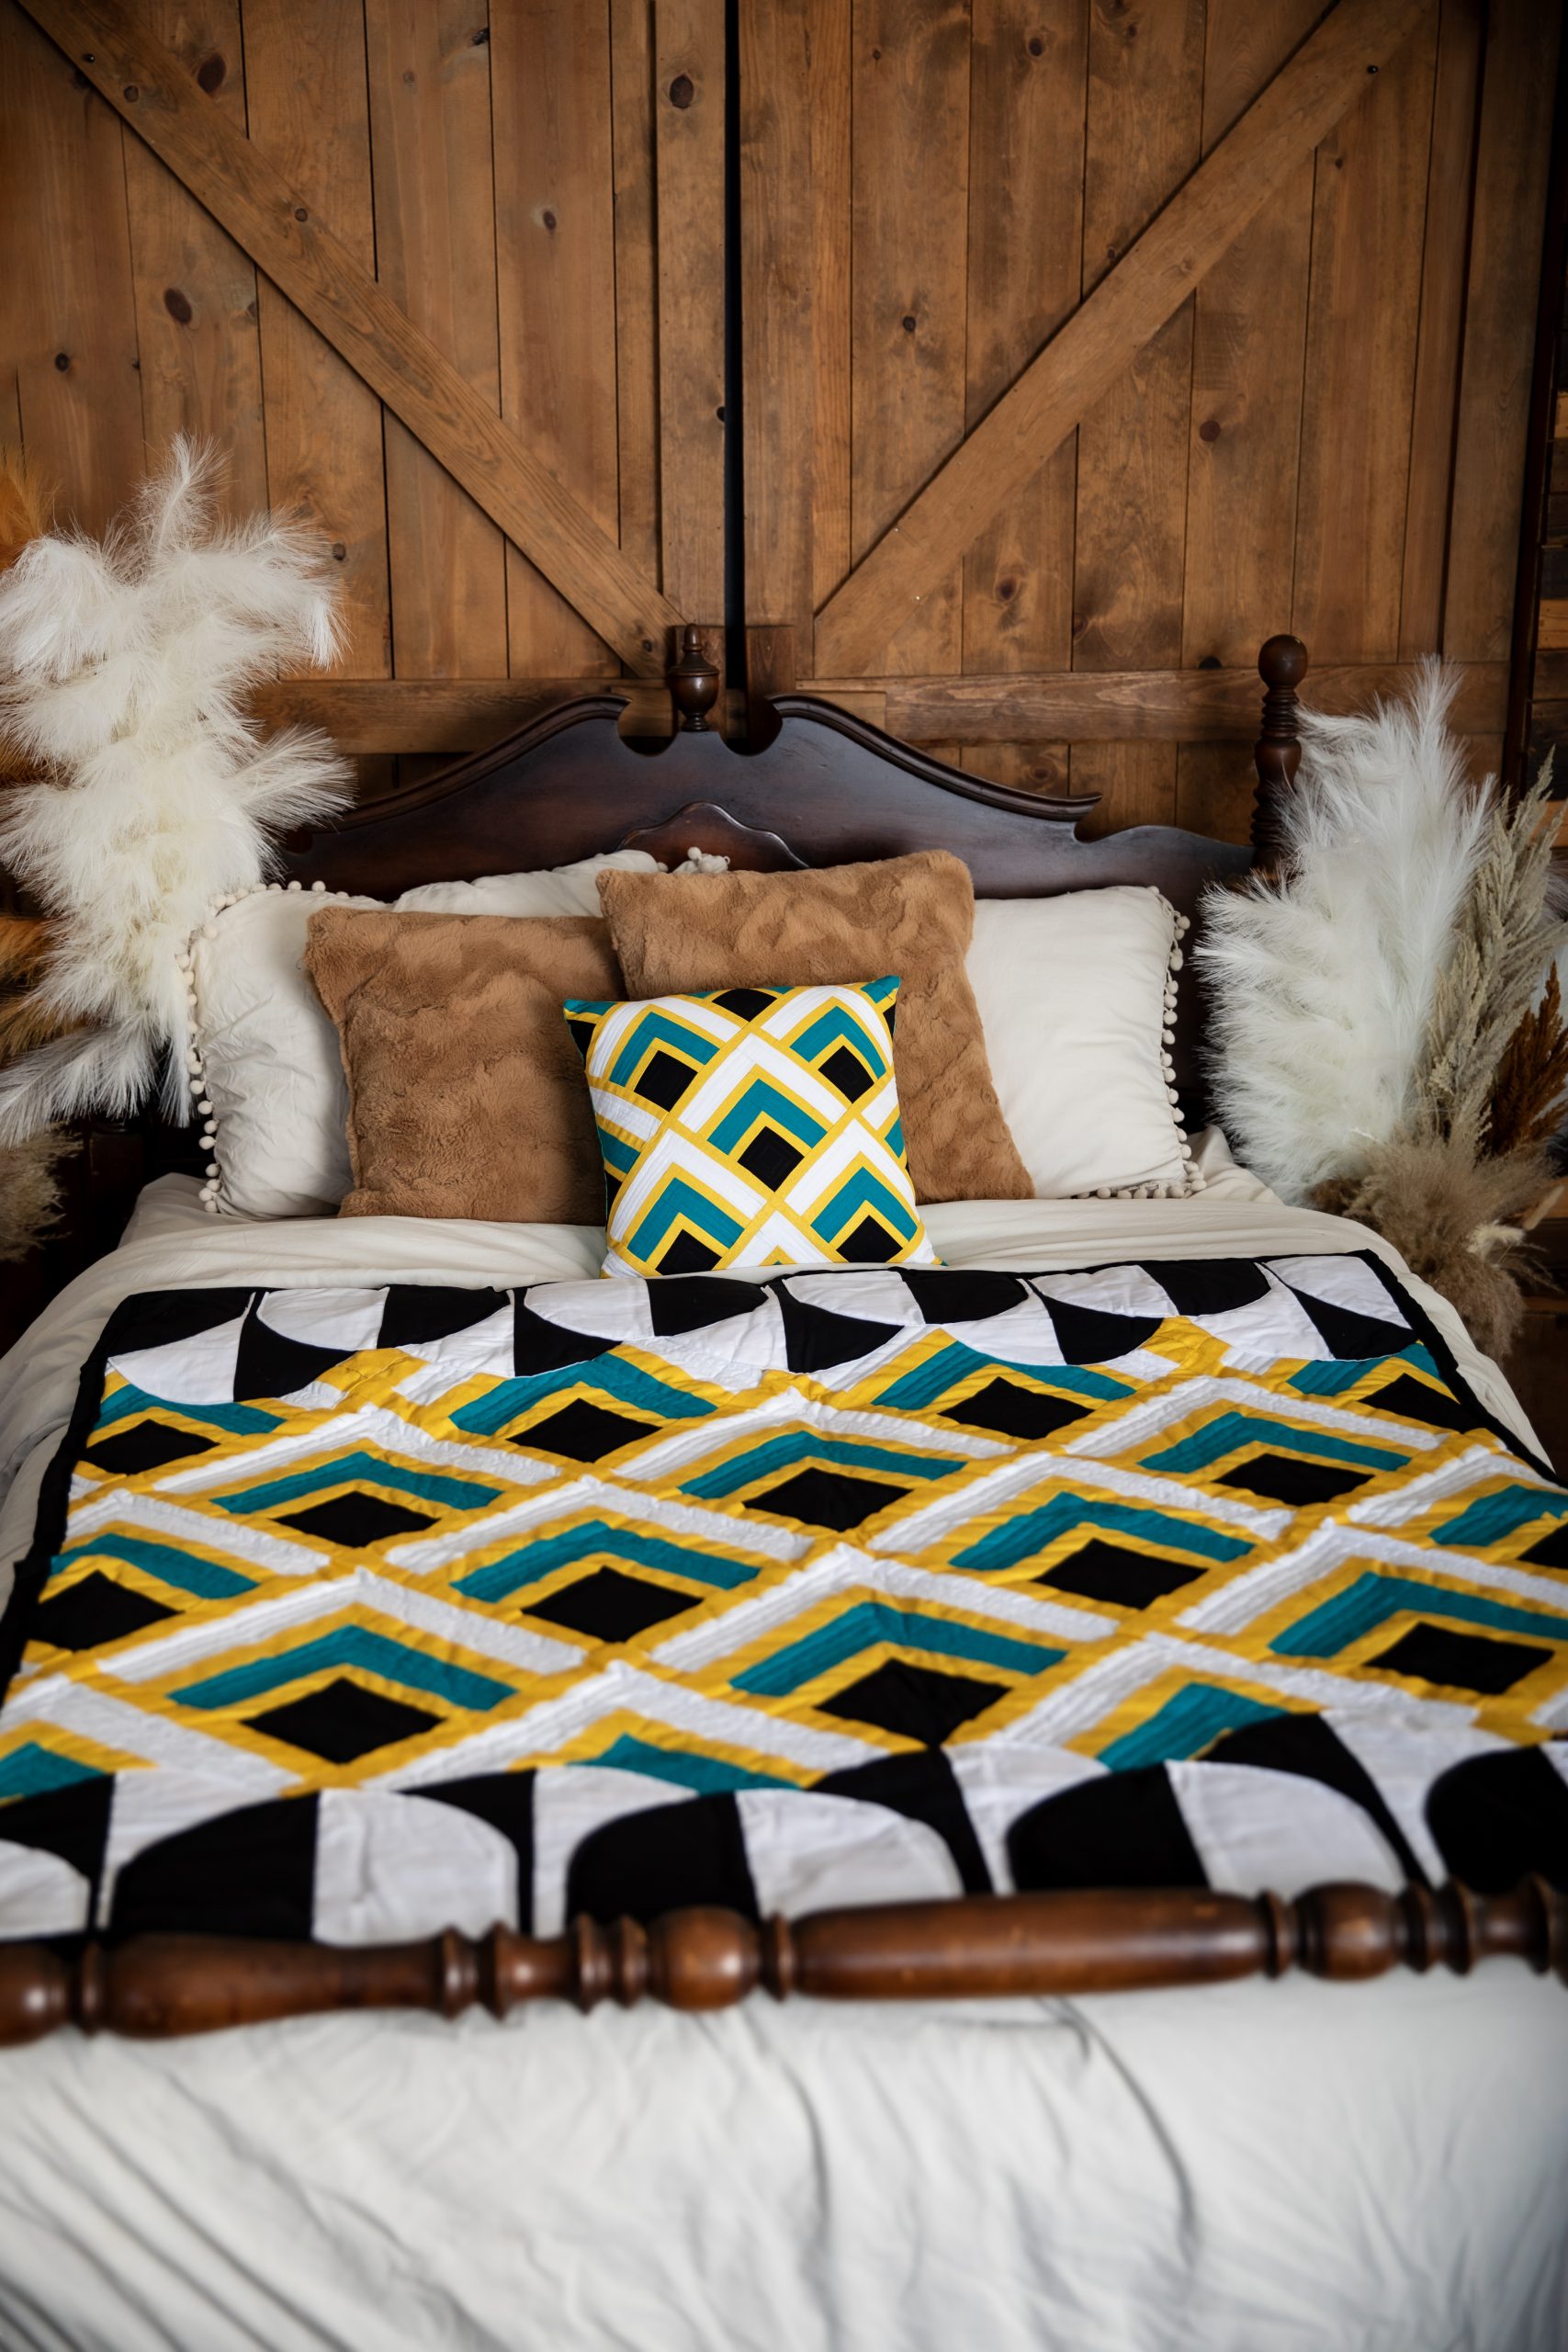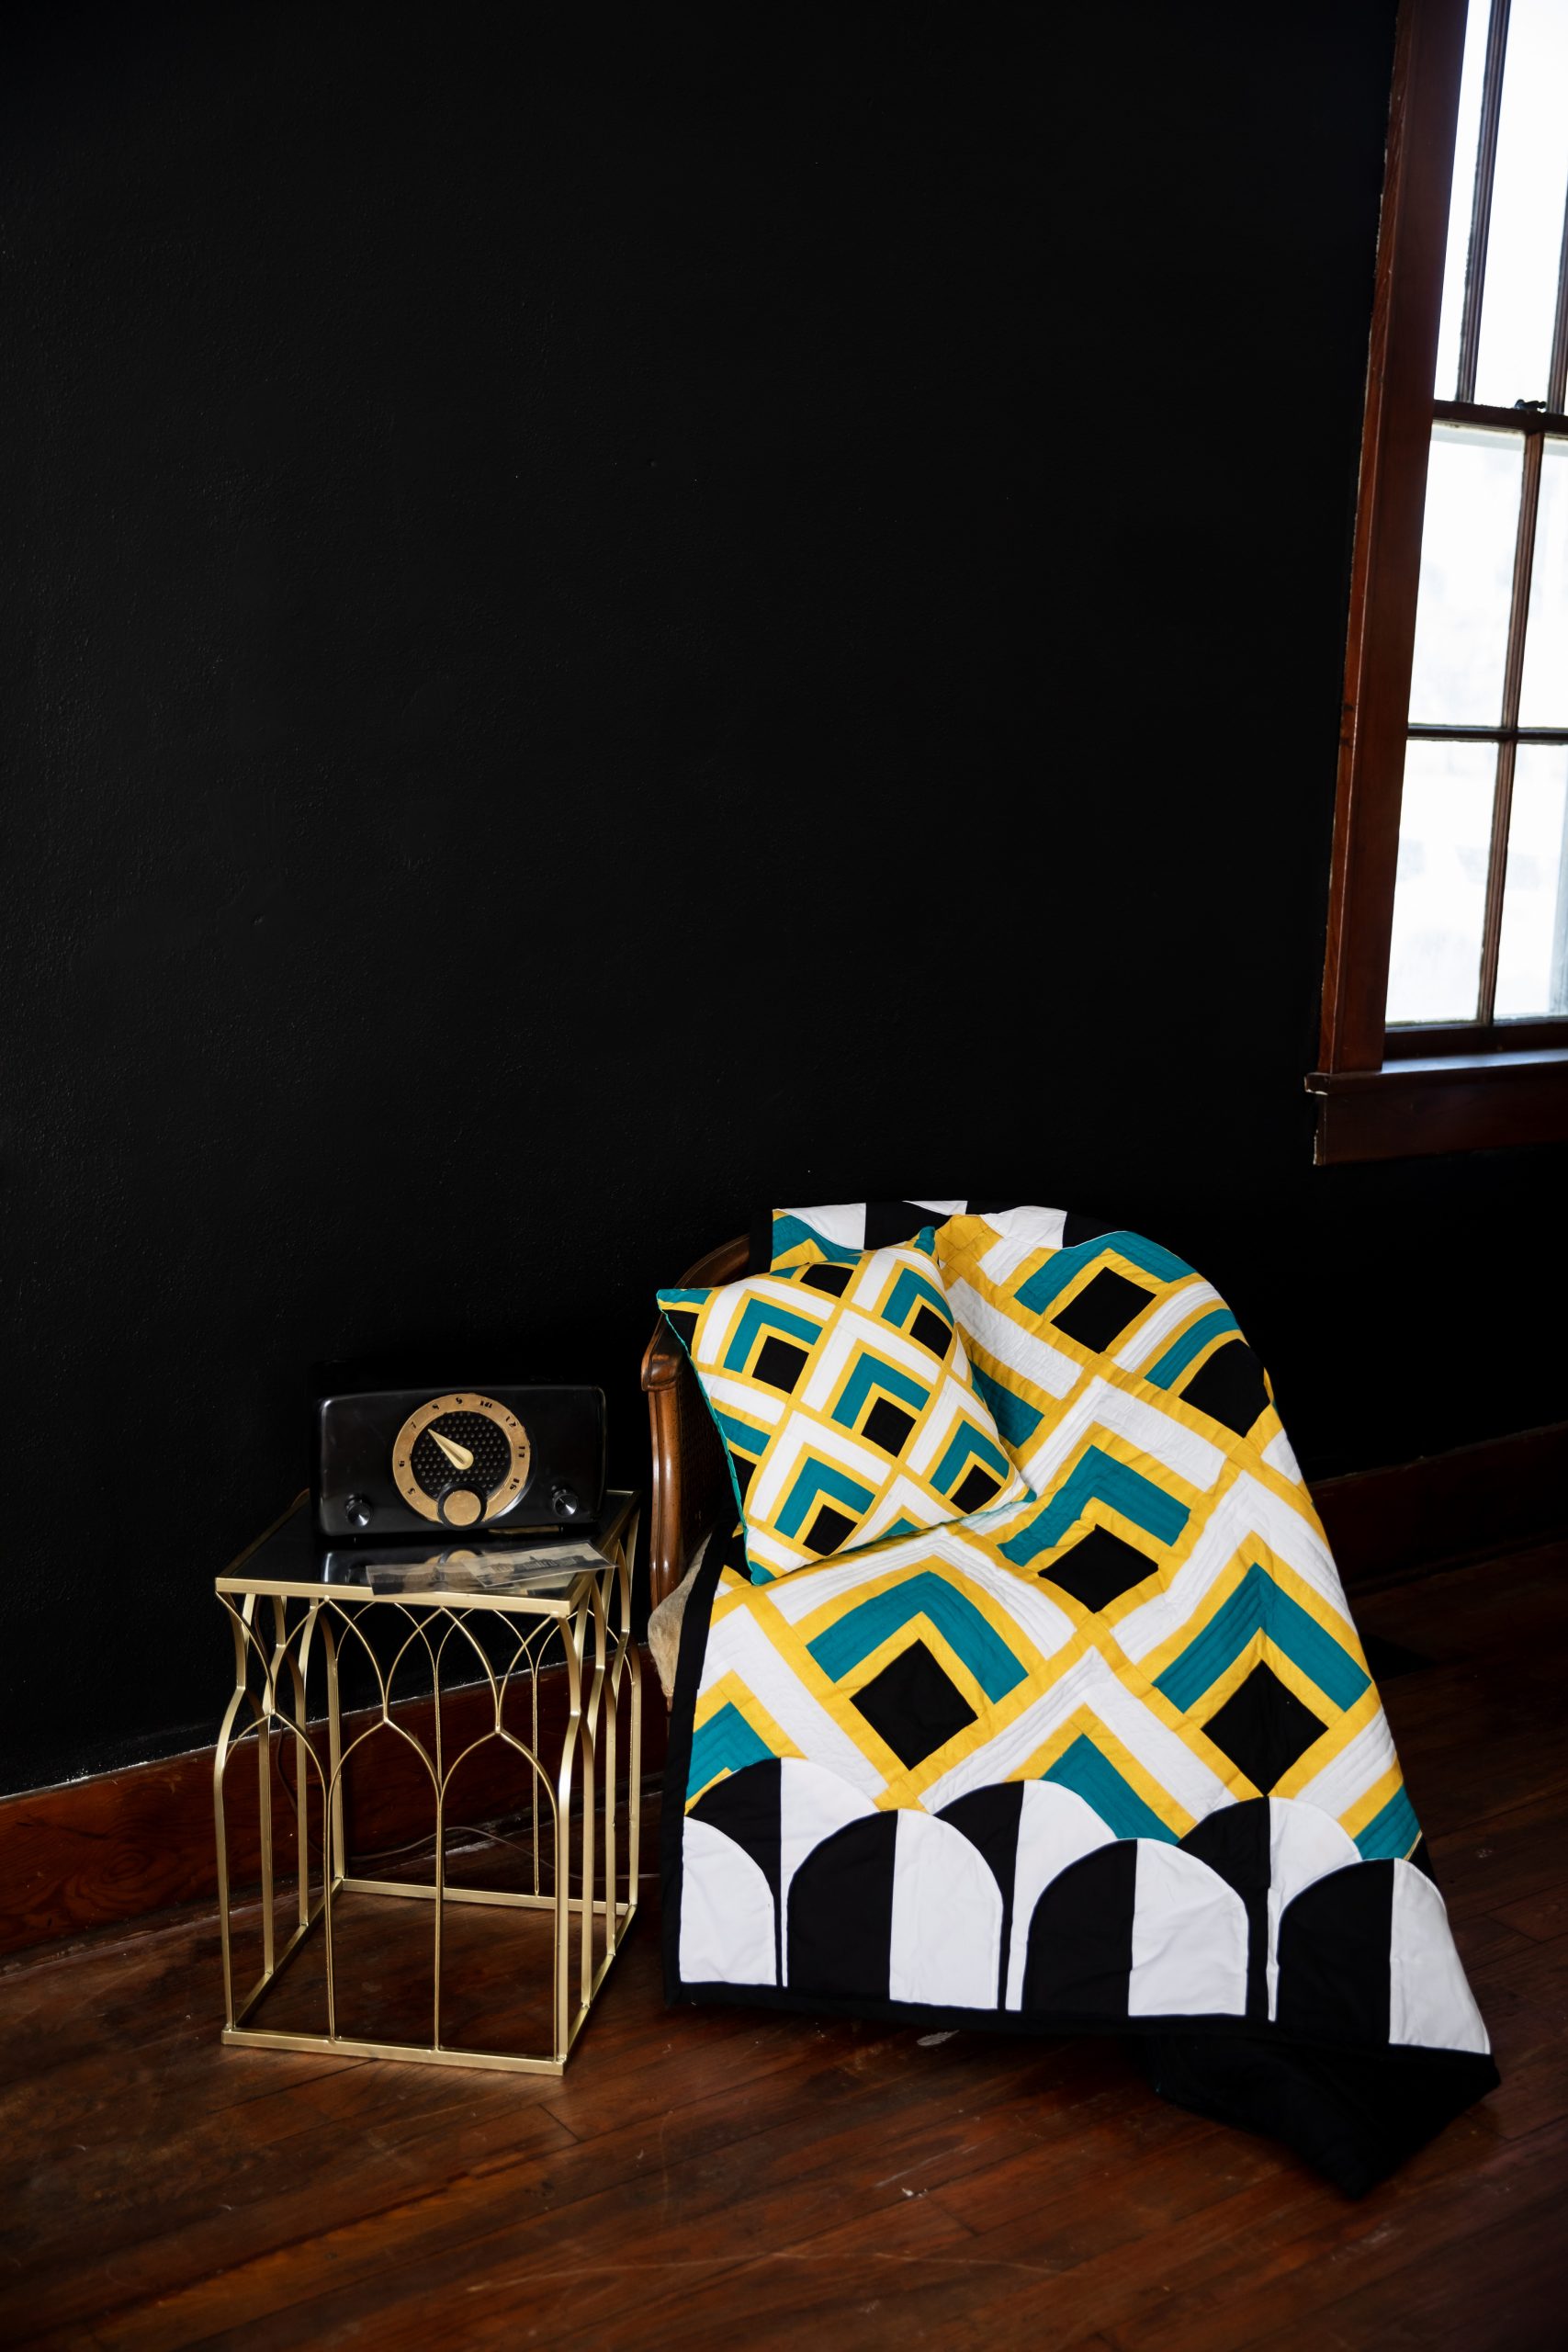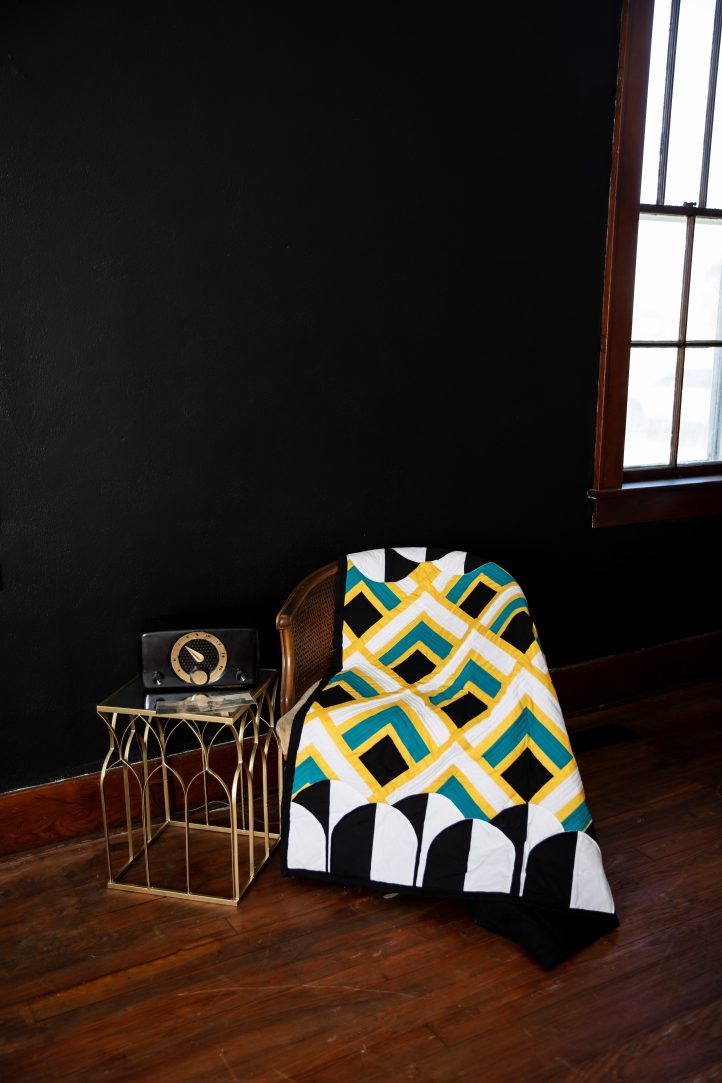
If you loved Sophie Tarrant’s Art Deco-inspired pillow from our October 2025 issue, then you’ll love this matching throw quilt pattern. Made using quarter log cabin blocks, find inspiration from the 1920s with this quilt’s elegant color palette and geometric design. Sharp black and white clamshell edging and neat mitered corners complete the quilt pattern, giving it a glamourous, striking look.
Skill Level: Intermediate
Designer Note: Perfect Angles: Before you start cutting, give your fabric a good press with steam to remove any creases and help ensure accurate measurements. It’s also worth starching it lightly – this will help prevent fraying and make your pieces crisper and easier to sew, especially when working with larger panels.
Materials:
- Fabric:
- Cotton, teal, one yard
- Gold glitter and white, two yards of each
- Black, six yards
- Quilt batting, 50” square
- Thread: White, teal, black
- PDF Template – This is located at the bottom of this page. See printing instructions below.
Tools:
- Rotary cutter and cutting mat
- Quilting ruler
- Dressmaker’s chalk
- Pins
- Clips
- Sewing machine
- Iron
PRINTING INSTRUCTIONS:
To download the PDF templates, click on the download button at the bottom of the page. We recommend opening your download using Adobe Acrobat.
Cutting Instructions:
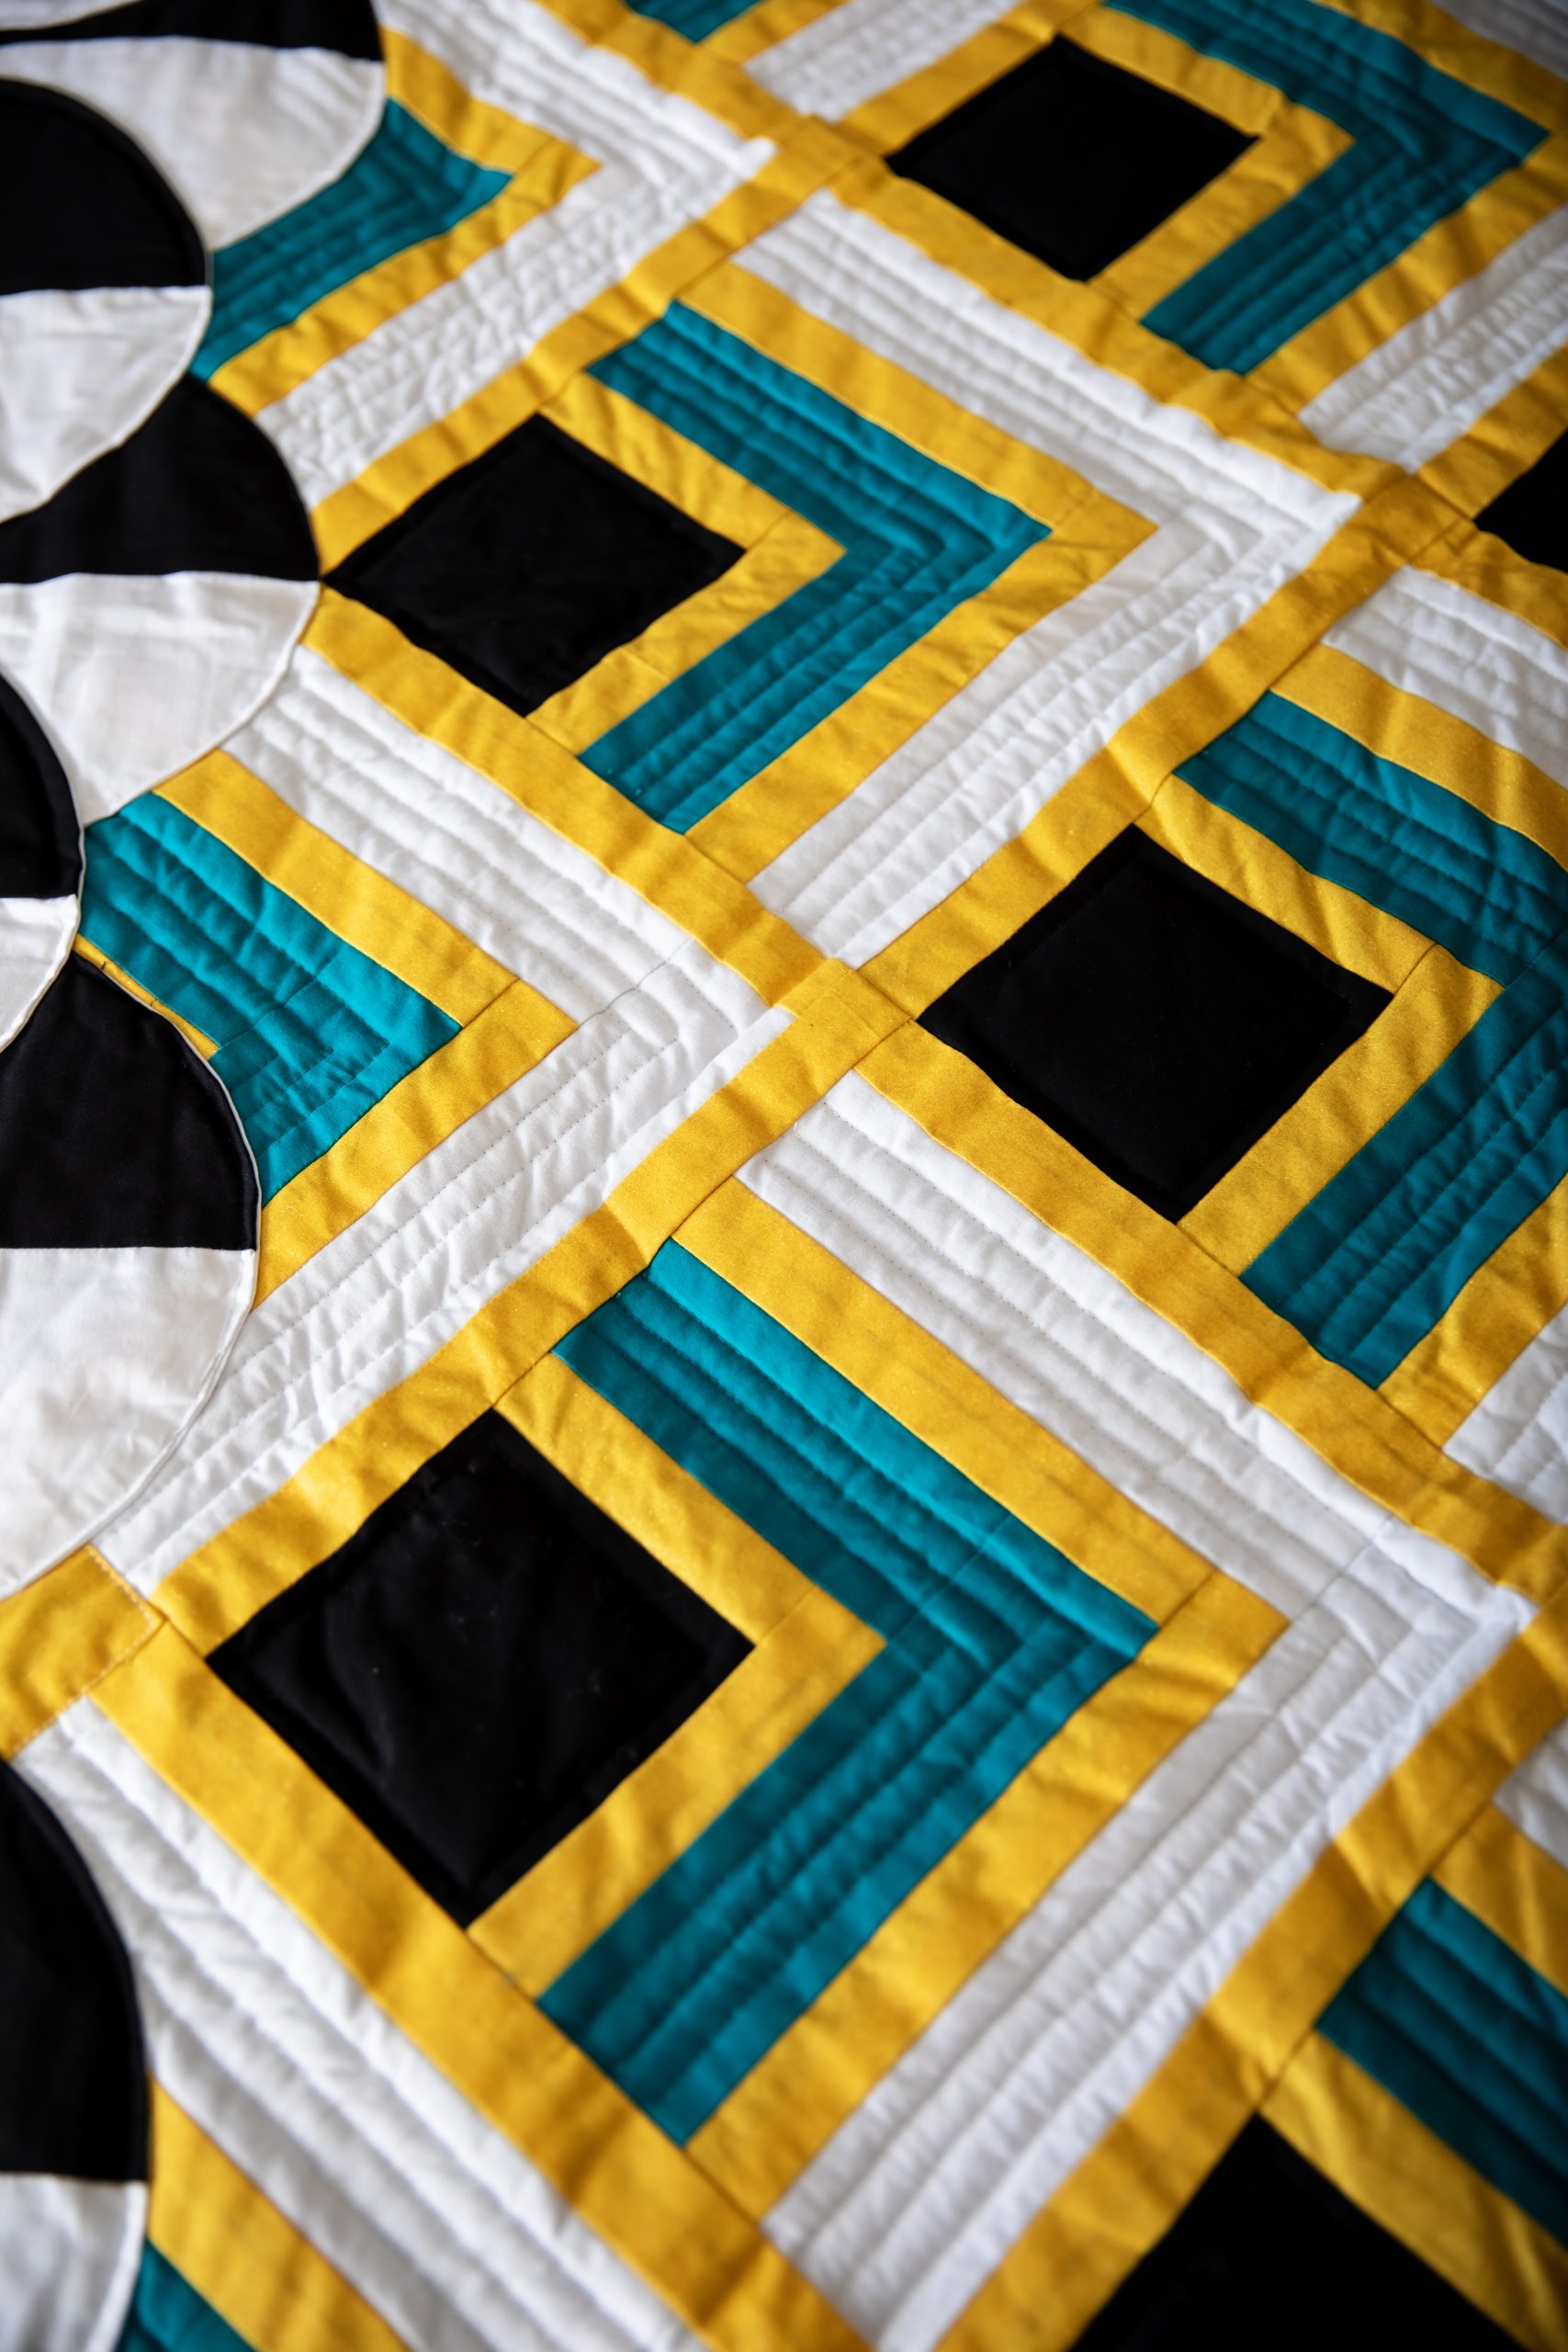
Begin by preparing all the pieces for the main quilt design. You’ll be making 20 quarter log cabin blocks. Unlike a traditional log cabin block – which builds out from the center on all four sides – these blocks grow outwards on just two adjacent sides, forming a stepped effect. From your colored cotton fabrics, cut the following 20 pieces of each size:
Black:
- 5”(inches) x 5”(inches) squares (center of each block)
Gold:
- 2” x 5”
- 2” x 6”
- 2” x 8”
- 2” x 9”
- 2” x 11”
- 2” x 12”
Teal:
- 3” x 6”
- 3” x 8”
White:
- 3” x 9”
- 3” x 11”
Piecing Instructions:
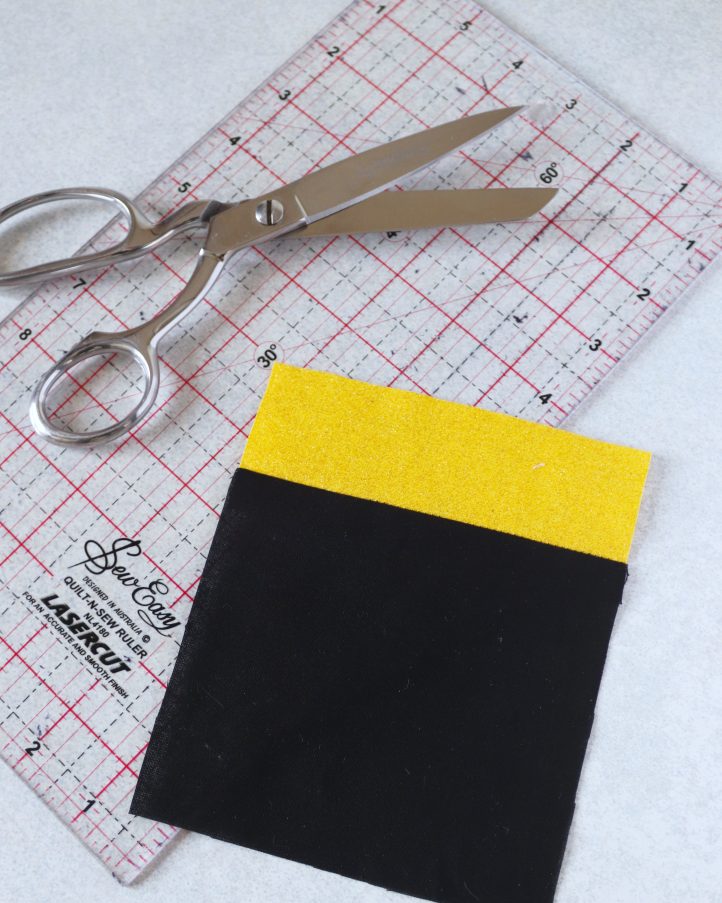
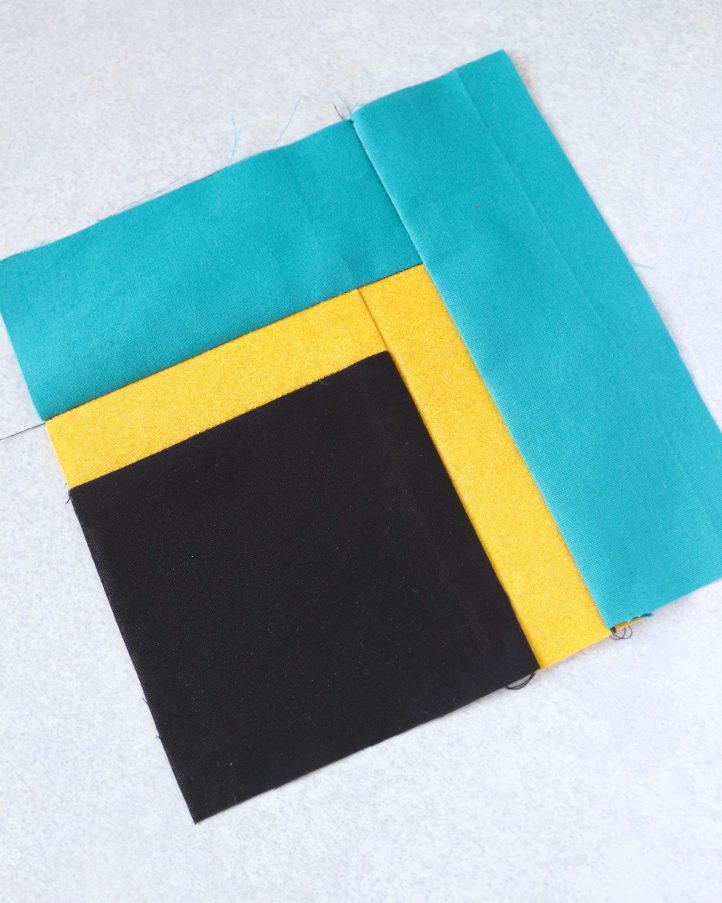
- Once you’ve cut all your fabric strips, you can begin sewing. Start by attaching a 2” x 5” gold strip to one edge of a black square, with the right sides together. Use a 1/2” seam allowance (this will be used throughout unless otherwise stated). Open out the strip and press the seam allowance towards the black fabric.
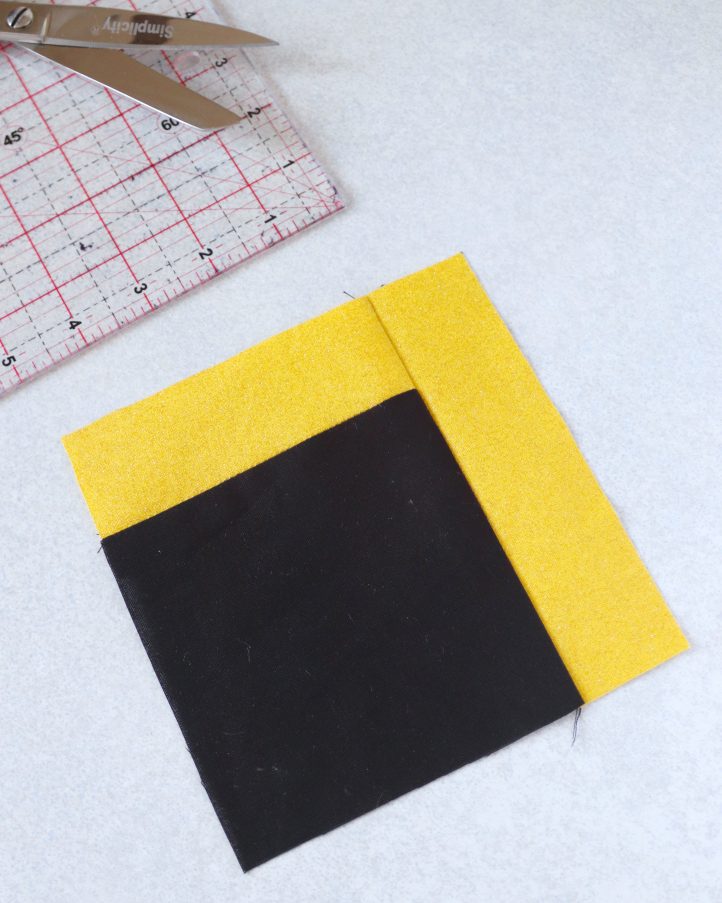
- Rotate the block so that the gold strip is now on the left-hand side of the black square. Sew a 2” x 6” gold strip to the top edge, with the right sides together. Open out the fabric and press the seam towards the black square. Repeat this process to build all 20 blocks in the same way.
- Add the teal layer next. Sew a 3” x 6” teal strip along the left-hand edge of each block, followed by a 3” x 8” teal strip across the top. After stitching each strip, press the seams towards the darker teal fabric for a smooth, professional finish.
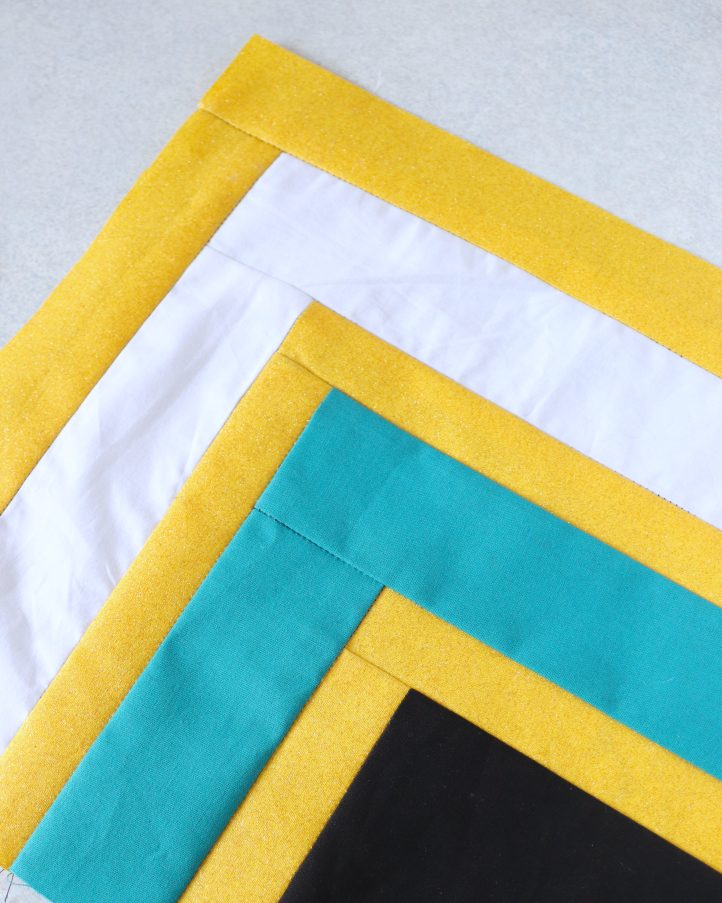
- Continue constructing the blocks by adding the next two gold strips: a 2” x 8” strip on the left and a 2” x 9” strip on the top. Then sew a 3” x 9” white strip to the left-hand edge and a 3” x 11” white strip across the top. Finish each block with a 2” x 11” gold strip on the left and a 2” x 12” gold strip along the top. You should now have 20 finished quarter log cabin blocks.
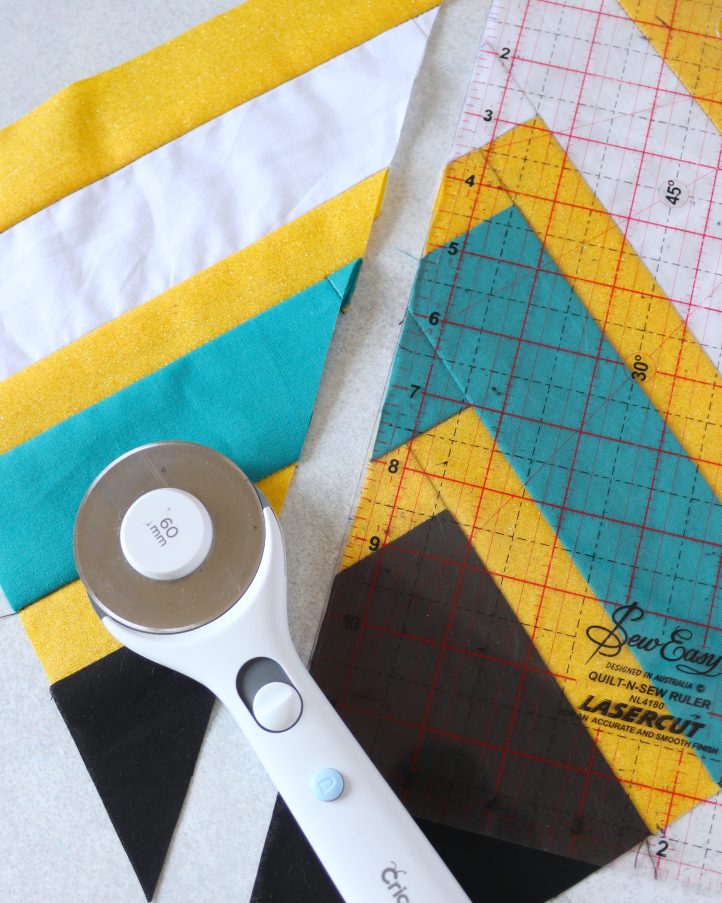
- To achieve the diagonal layout, you’ll need to trim some of the blocks. Place one on your cutting mat at a diagonal and align your quilting ruler from corner to corner. Shift the ruler 1” to the right and trim. Do the same for another block. Then, trim two more blocks 1” to the left of the diagonal center. For the next eight blocks, cut them in half horizontally, offsetting four of them 1” above center and four 1” below. Set these trimmed pieces aside for now. Note: If you’re unsure which blocks to cut down, skip Step 5 for now and move on to Step 6 instructions for further details.
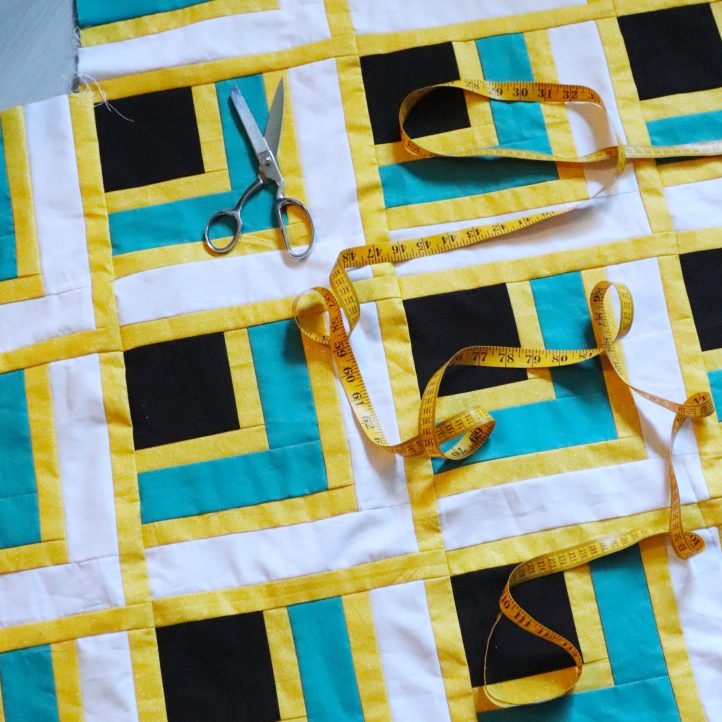
- Begin assembling the quilt top by arranging and sewing the blocks together in diagonal rows, using the images as a guide. As you go, some pieces may overhang the edge – these can be trimmed later. If you’re unsure which blocks to cut down, it’s best to wait until all rows are pieced, then trim the quilt top to a neat rectangle in one go. Keep each block facing the same direction for a consistent, cohesive layout.
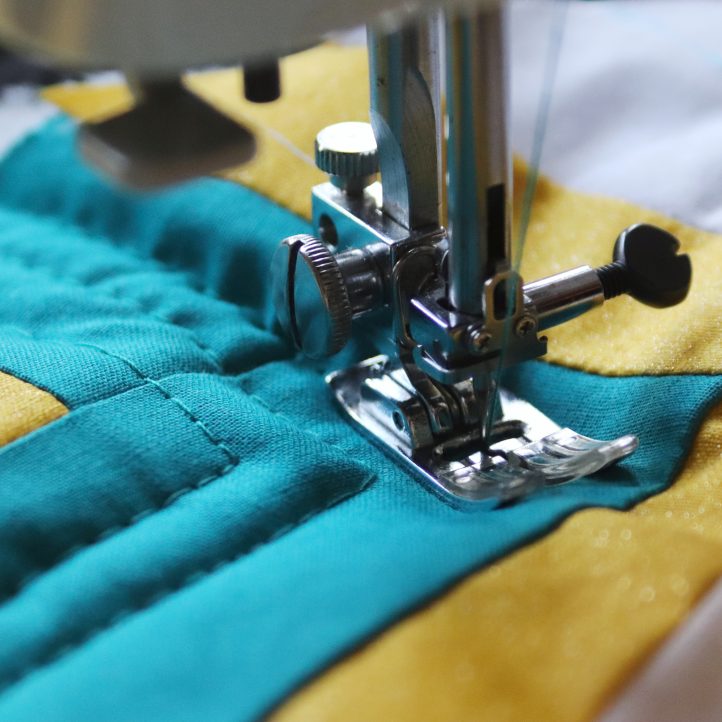
- With your quilt top assembled, it’s time to layer the quilt. Lay the pieced top over a 50” square of quilt wadding, centering it carefully. Place these two pieces on top of a 52” square of black backing fabric (you can piece the backing if needed). Pin all the layers together. Mark quilting lines 1/2” apart across the teal and white strips, and draw a square 1/2” inside each black square. Quilt along these lines using a 3.2mm/ 1/8 inch straight stitch, matching your thread colors to the fabric.
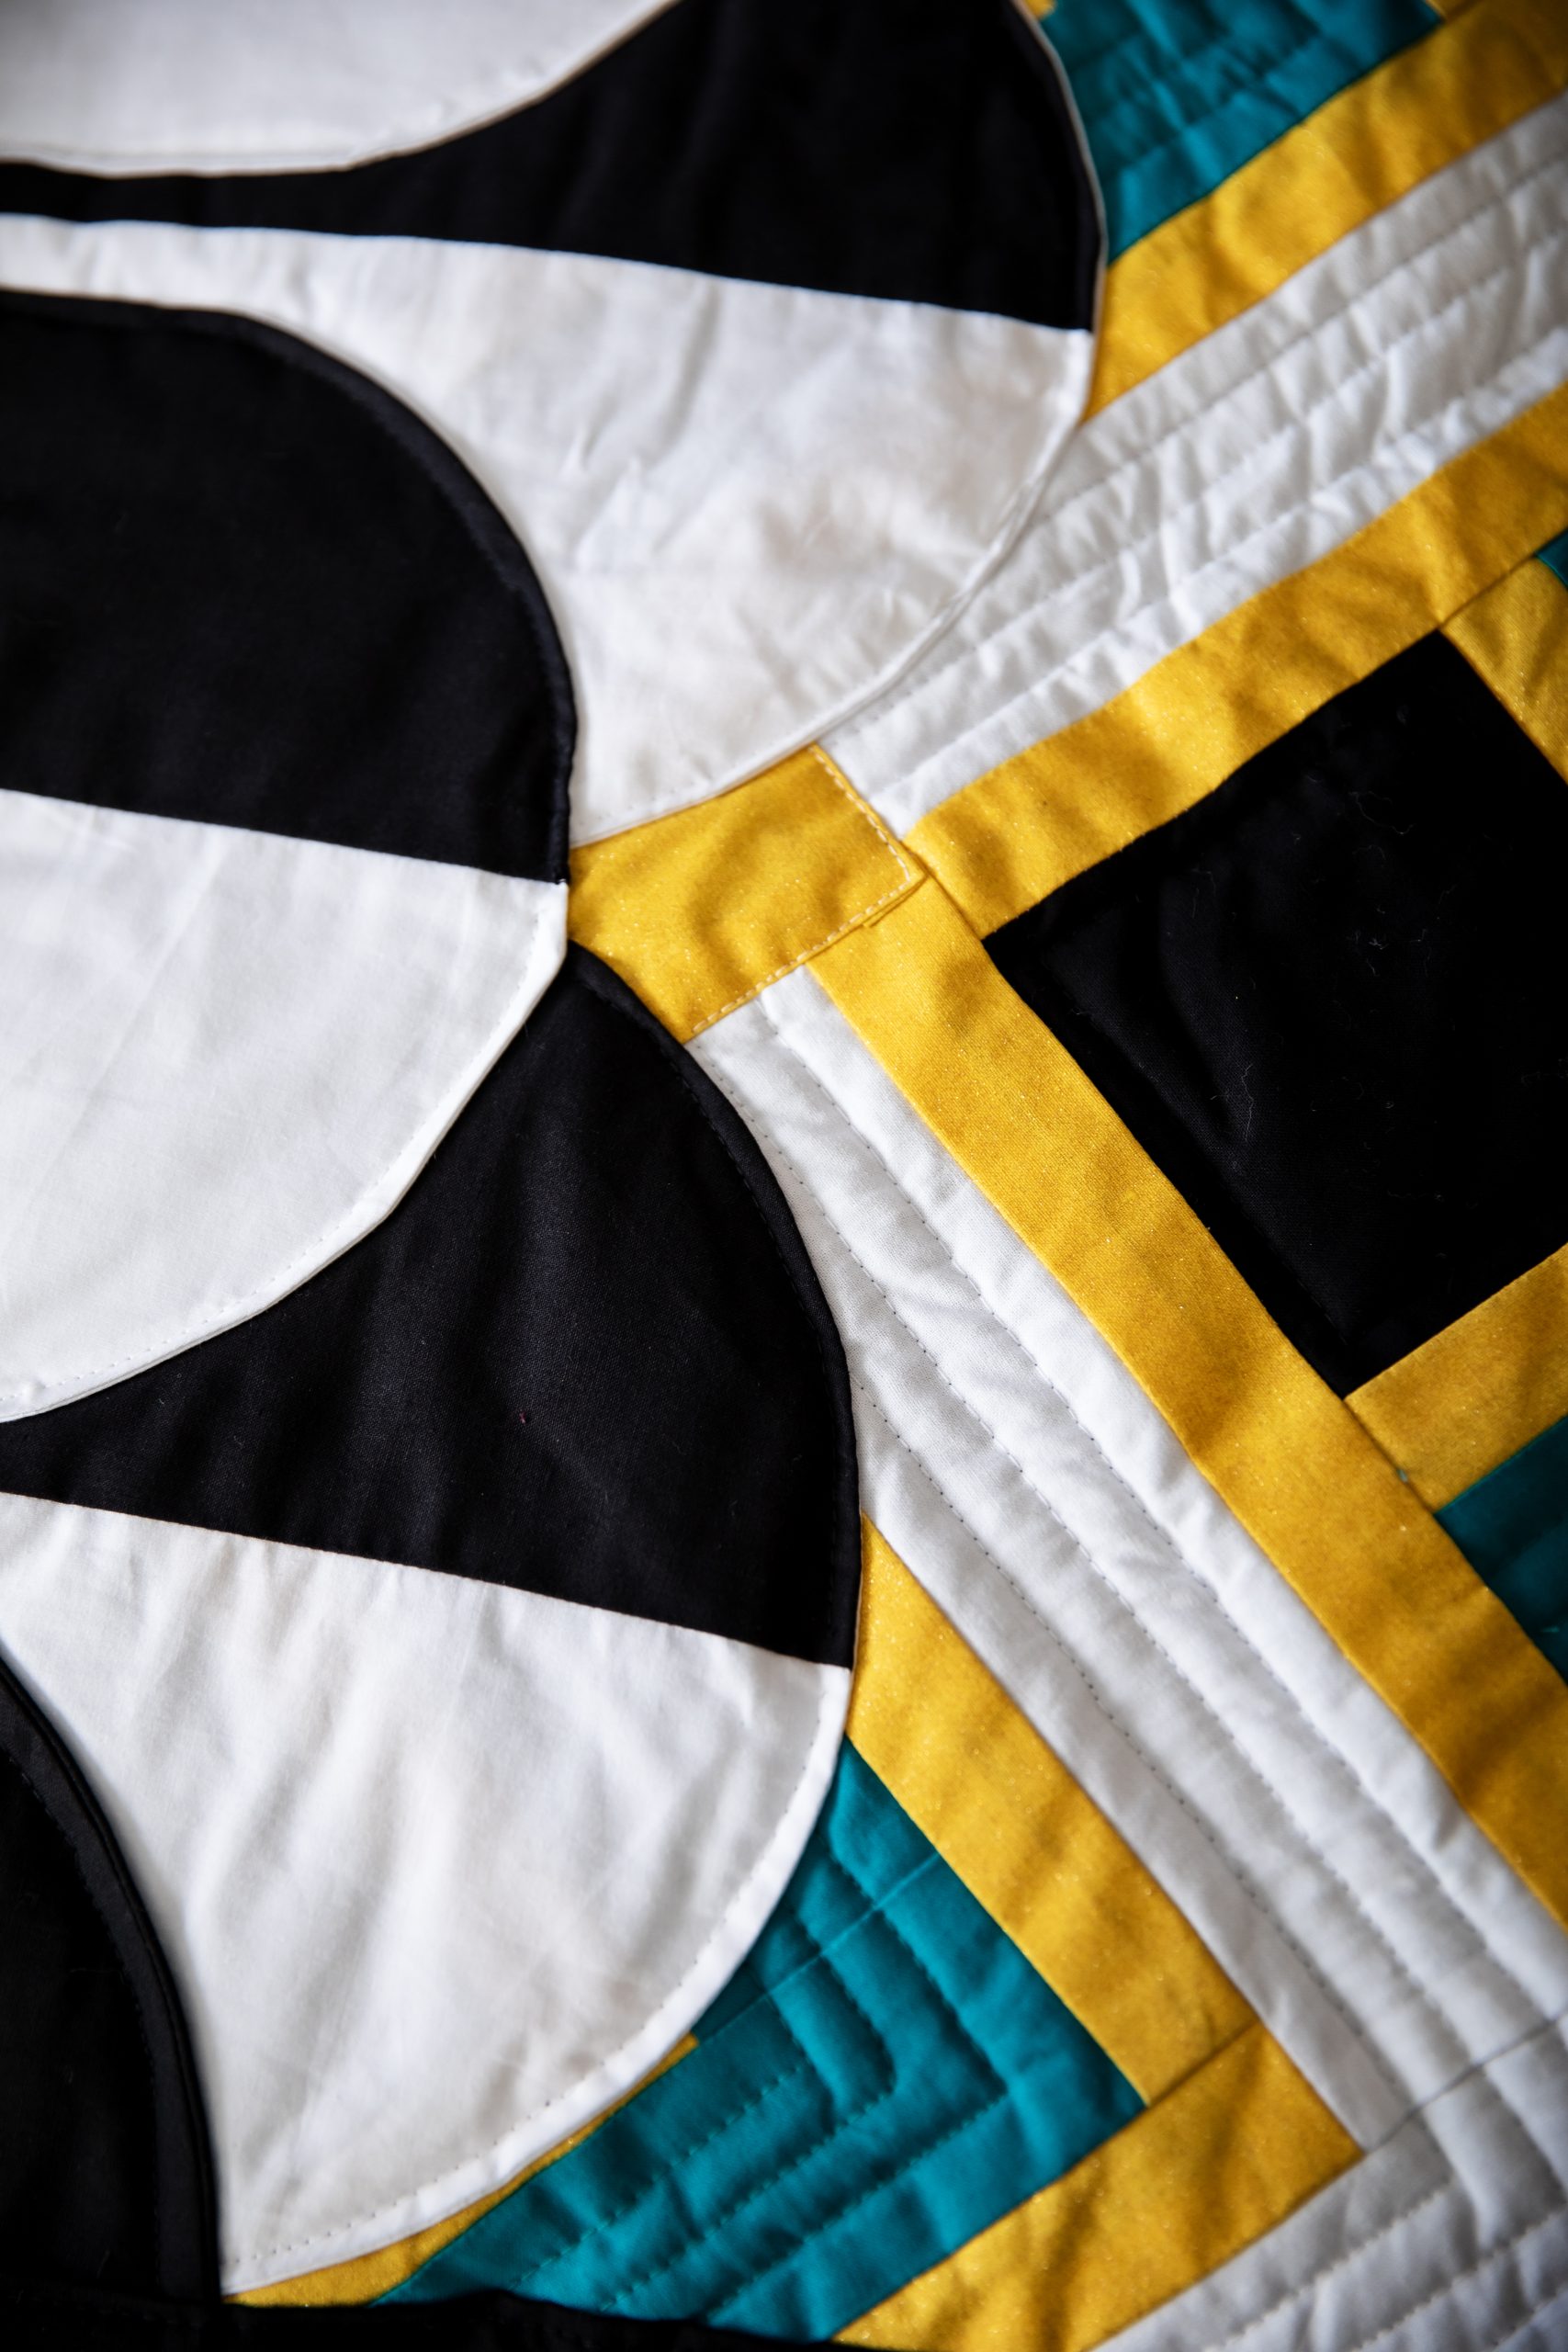
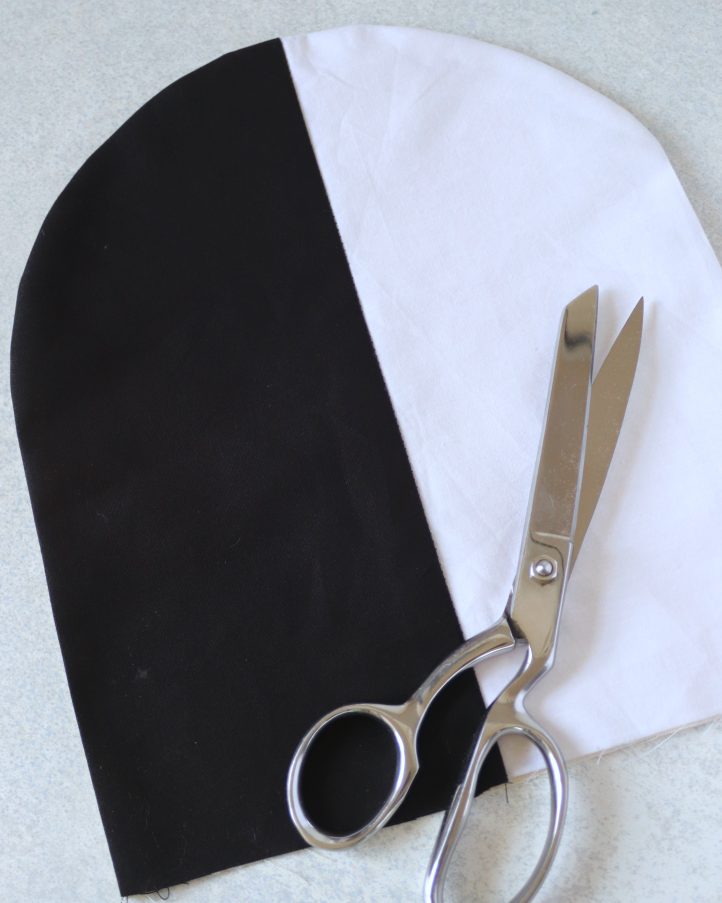
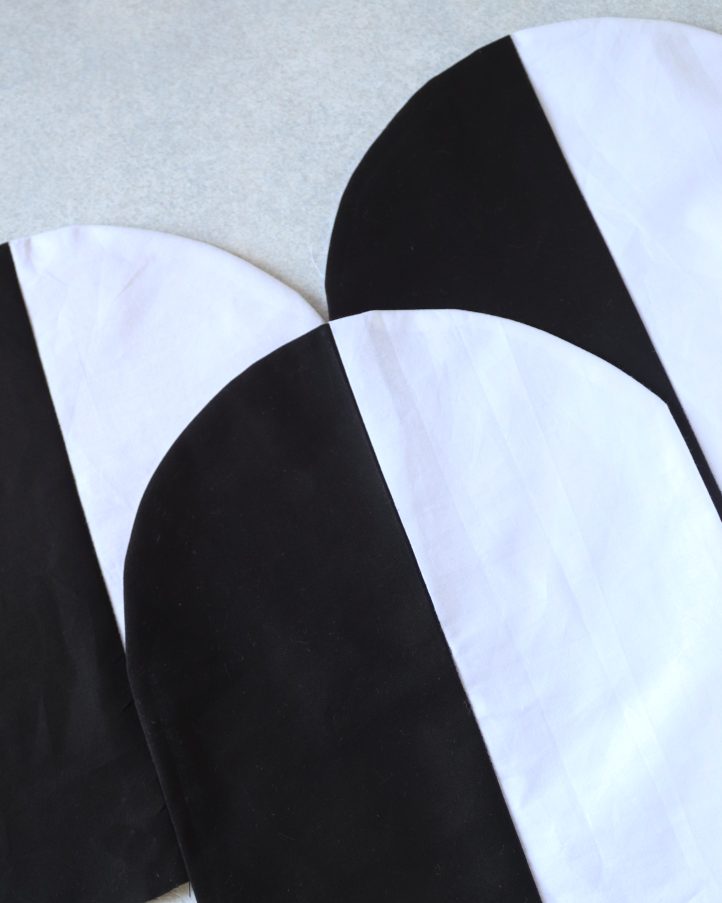
- To create the half clamshell edge panels, start by cutting one 5-1/2” x 11” piece each from black and white cotton. Sew the two together along one long edge, right sides facing, with a 1/2” seam allowance. Press the seam toward the black. Place the panel on top of a 10” x 11” rectangle of black backing fabric. Align template with the top edge of your fabric, draw, then trim along the curve. Sew the curved edge with a 1/4” seam, then turn the piece right side out and press. Repeat to make 20 curved black/white clamshell panels in total.
- Arrange the clamshell panels along one side of the quilt, overlapping each row to form a layered effect. Start with five panels in the top row, then overlap with four more in the second row, centering each one over the black/white divide of the piece above. Cut one panel in half at the seam between black and white and place each half at either end of the second row. Top-stitch just inside the curved edges to secure each panel, stitching one at a time and adding them as you go. Repeat this process to mirror the look on the opposite edge of the quilt.
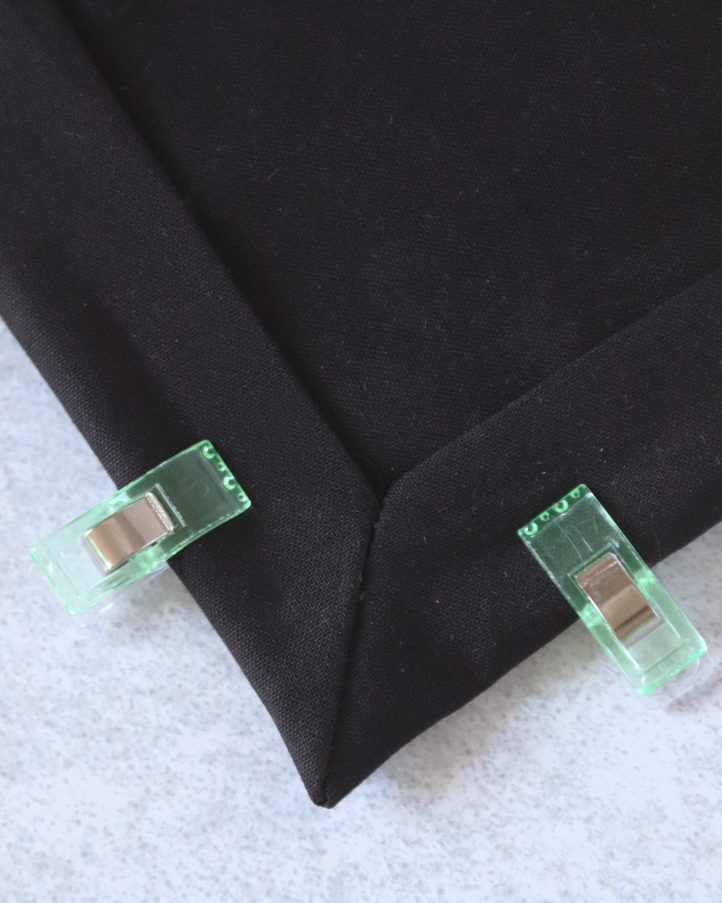
- To finish, trim the wadding so it sits flush with the quilt top, being careful not to cut into the backing. Fold the backing fabric over the raw edge by 1/2”, then fold again by 1” to create a clean border on the front. Pin in place around all four sides. At each corner, unfold the second fold and mark 2” out from the corner on each side, drawing a diagonal line between the marks. Fold the corner right sides together along the line, stitch, and trim to leave a 1/4” seam. Turn the right side out, press, and shape the corner. Finally, top-stitch all the way around the quilt along the inner folded edge, pivoting neatly at each corner.