All photos in this article are provided by the designer.
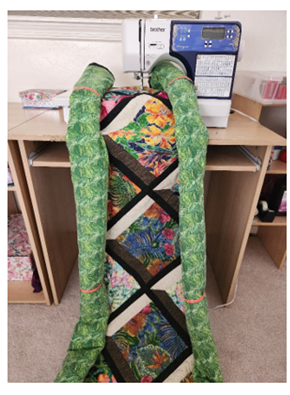
Many quiltmakers enjoy piecing the quilt top together since the sewing is manageable, even for piecing a king-size top. But after layering such large creations with batting and backing fabric, it can be daunting to quilt it using a domestic sewing machine.
Even rolling up the quilt to make it fit in the small “throat space” of the machine can cause heavy drag from the weight of the quilt, making the quilting uncomfortable. Quilters often resort to hiring a longarm quilter to finish their projects.
Quilt As You Go (QAYG) methods enable a quiltmaker to perform every aspect of making the quilt by working in smaller sections and joining the sections nearly invisibly.
Here are two methods for QAYG, each helpful for working with the quilt in smaller sections.
Add a Block, Then Quilt It
This method is useful for creating a straight-line row or column of blocks for a quilt, or a single row making up something smaller like a table runner. It can also be used to add borders to the main part of the quilt.
Starting with a quilt sandwich of top, batting and backing for one block, this section is quilted completely first. The top could be pieced together using a block pattern or it could be a single piece of fabric.
The example below shows a single piece of fabric.
The quilting motif could be created with the walking foot on or by free-motion quilting. Quilting can go all the way up to the edges of the top fabric.
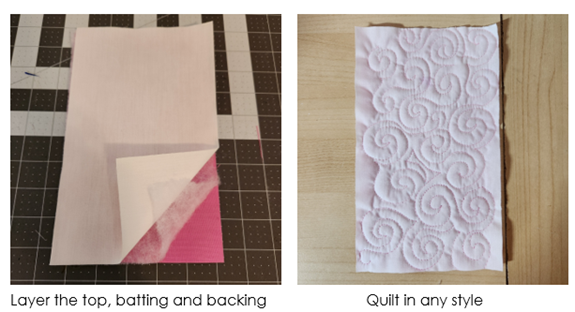
This first block is now done.
TO ADD THE NEXT BLOCK (OR A BORDER):
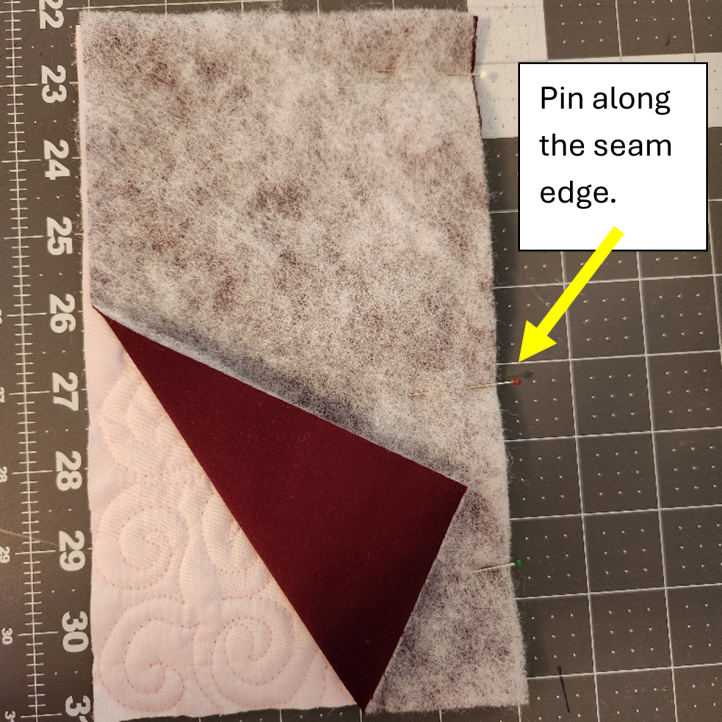
Layer the top and batting for the second block. Do not include the backing.
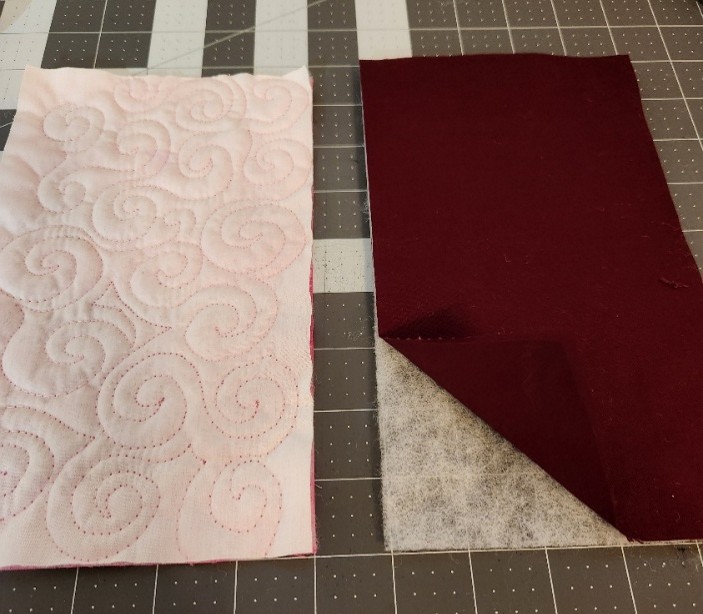
Place the top and batting of the second block (the burgundy fabric) right sides together with the top of the first block, pinning along the seam edge.
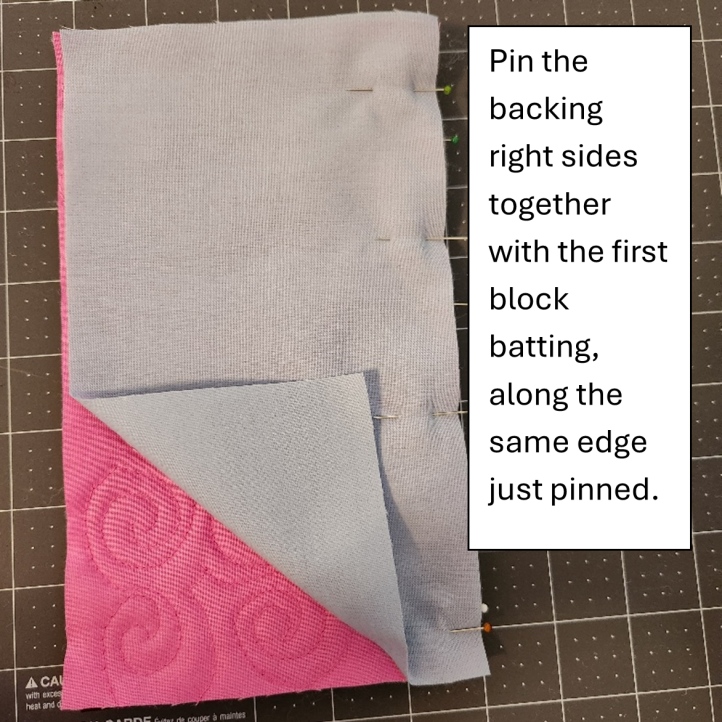
Place the backing of the second block right sides together with the batting of the first block, pinning along the same edge just pinned.
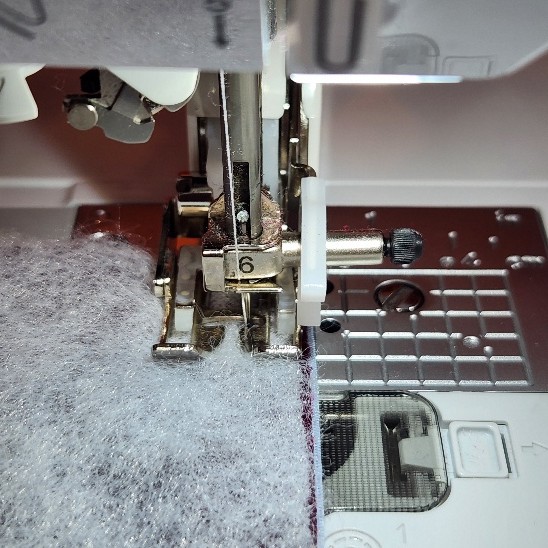
Stitch through all thicknesses, stitching carefully to maintain an accurate 1/4 inch seam. Use a walking foot if possible.
Remove the pins and smooth the top/batting and backing of the second block away from the first block. The seams are finished when viewed from either the top or the back and the second block is ready for quilting!

This procedure is repeated for each new block added in the row or column.
Use this same method for adding borders to a quilt top. The long seams are finished from the top and back sides simultaneously and the border is ready for quilting!
For multiple rows, columns or borders, use the second method, described below.
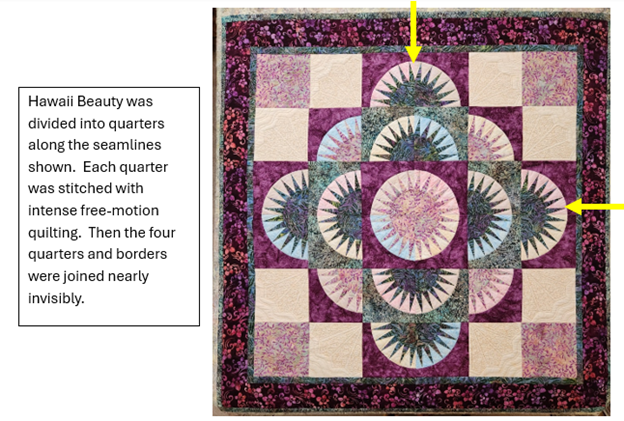
Quilt Sections of the Quilt, Then Join Them Nearly Invisibly
Before beginning the quilt top, consider some logical lines for dividing the quilt into easier to manage sections.
If the quilt top consists of rows and columns, dividing the top in the middle of the rows and/or columns is a natural place to have a seam.
Wherever borders are added, these seams can also function as natural places to join sections together.
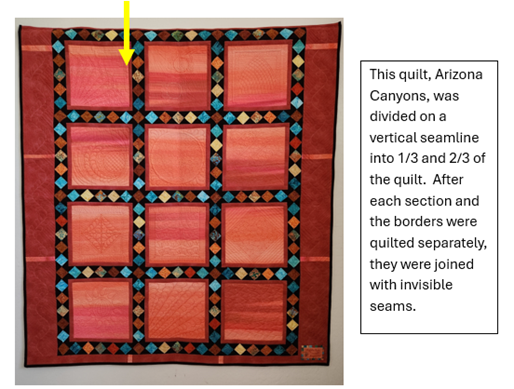
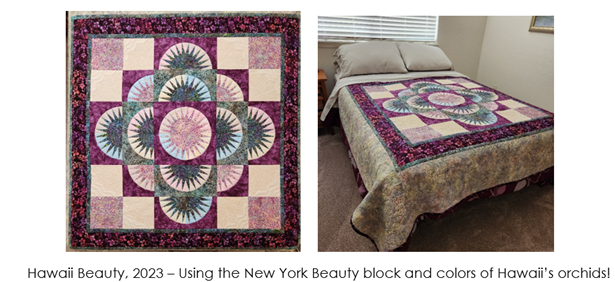
Here are two examples of how the quilts were divided for Quilt As You Go before the stitching began:
Consider the maximum width you feel comfortable moving through your domestic sewing machine. For example, making the typical width of fabric, about 40 inches, your limit is helpful so you can work on sections using the backing fabric width, without piecing the backing together.
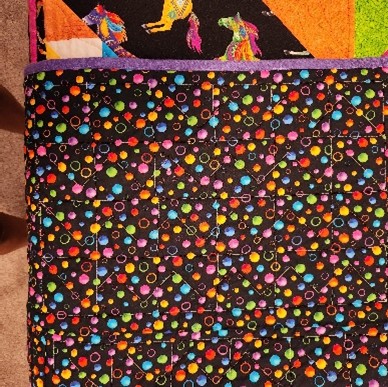
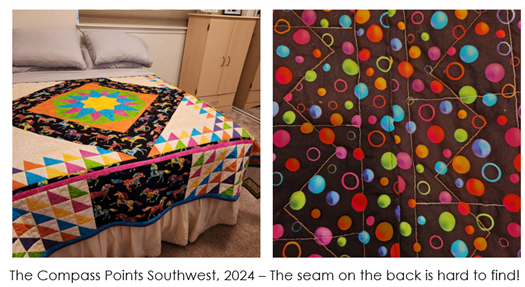
Choose a “busy” backing fabric for your quilt, if possible.
The busy print will help camouflage the seam where joining the sections is done.
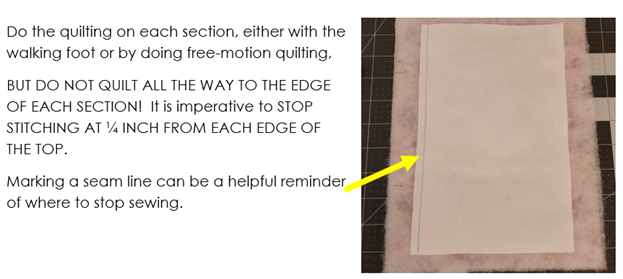
Prepare the quilt top for the sections you have determined, using 1/4 inch seam allowances as usual.
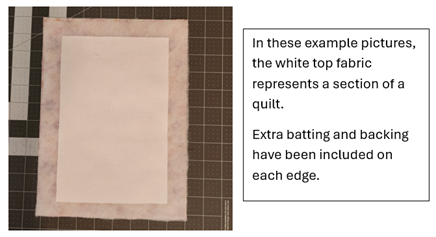
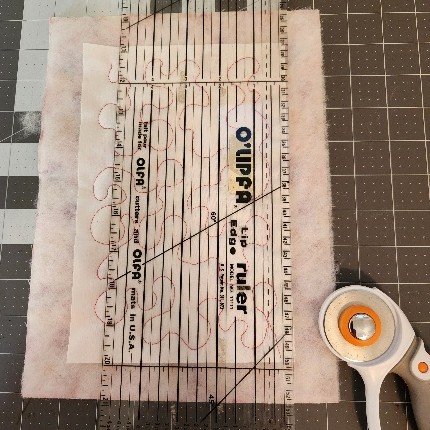
When layering each section for quilting, include at least 1-1/2 to 2 inches of batting and backing fabric extra on each side. Most of this will be trimmed away later. While it is unfortunate to have to waste some materials, the trade-off is that each section can be managed easier for quilting on a home sewing machine.
When ready to join the sections and/or borders, here is the procedure:
- Trim the backing and batting on ONE SIDE of the seam exactly along the edge of the quilt top.
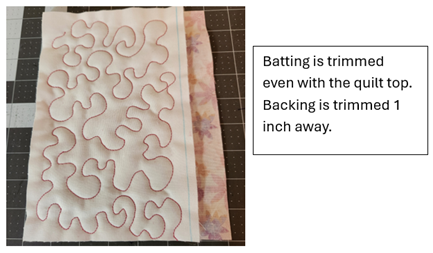
- Trim THE BATTING ONLY of the MATCHING section even with the quilt top edge.
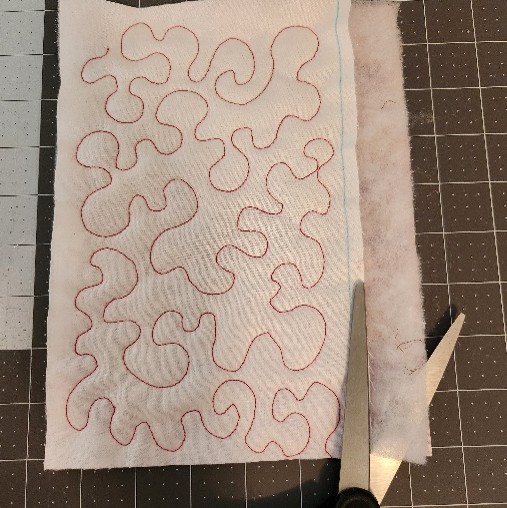
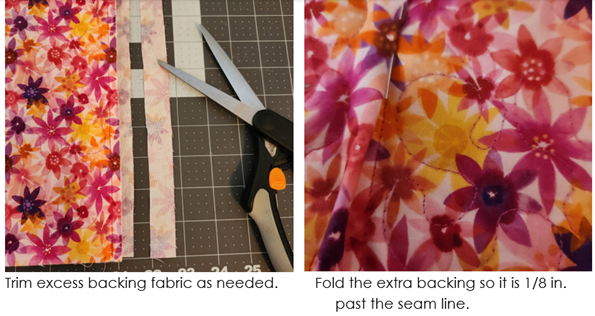
- Trim THE BACKING of the matching section 1 inch away from the quilt top edge.
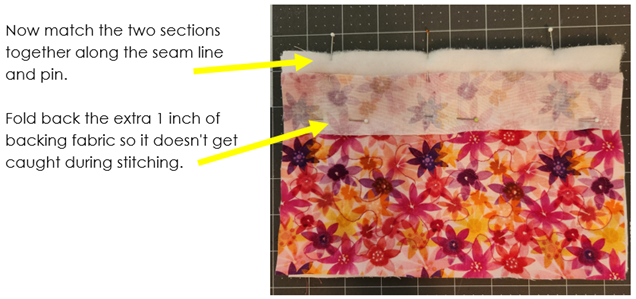
- Stitch this seam in a careful 1/4 inch seam. You will be including the quilt top and batting from one side and the quilt top and batting from the matching side, so stitching slowly and carefully through the 4 thicknesses is important. Maintain the 1/4 inch seam allowance by checking progress of the seam as you sew.

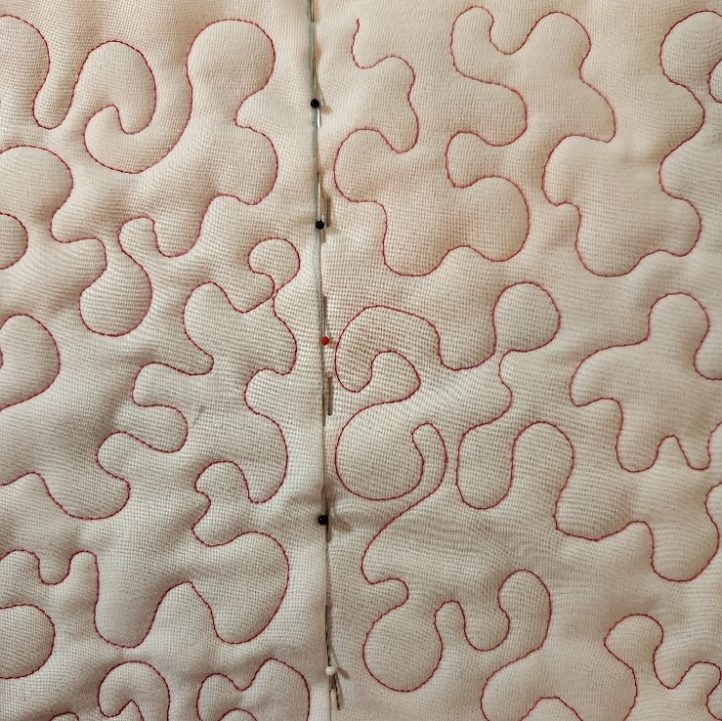
- From the back, press the seam toward the side with extra backing fabric, pressing only the seam area and not flattening the quilt.
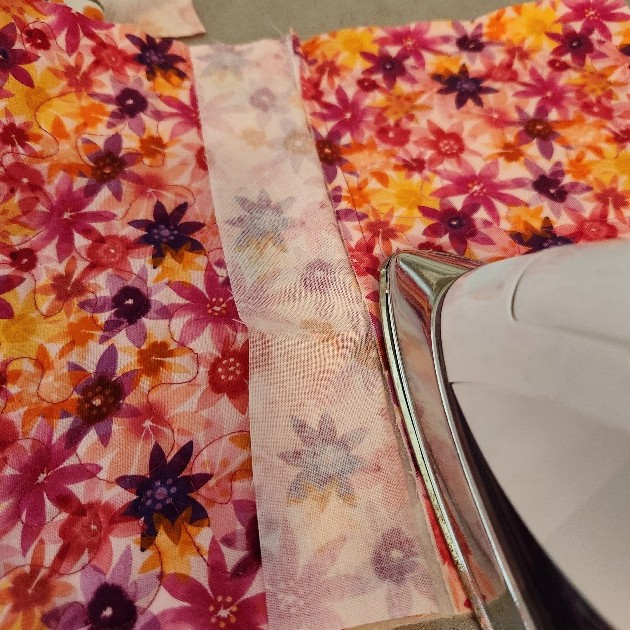
- Smooth out the new seam, with the backing side of the quilt facing up. Take the extra 1 inch of backing and carefully fold it so the foldline extends just 1/8 inch past the seamline. Trim the backing as necessary (possibly to just 1/2 inch beyond the seam) to make it fit while folding. Pin securely in place as you go.
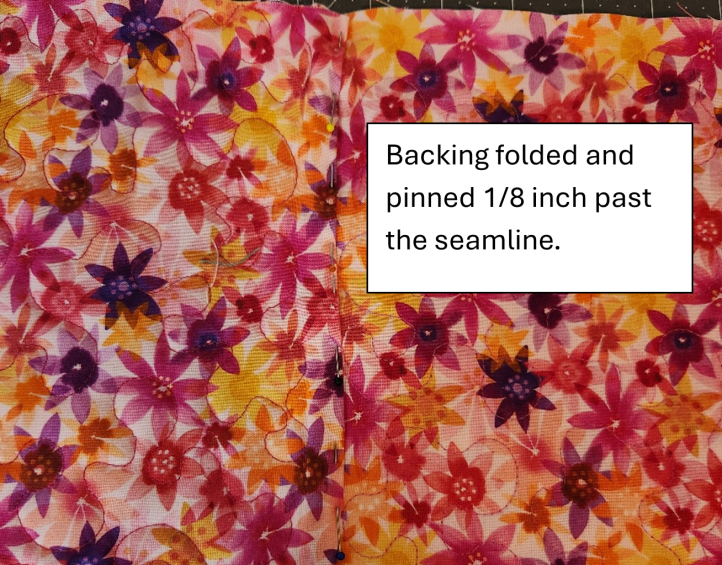
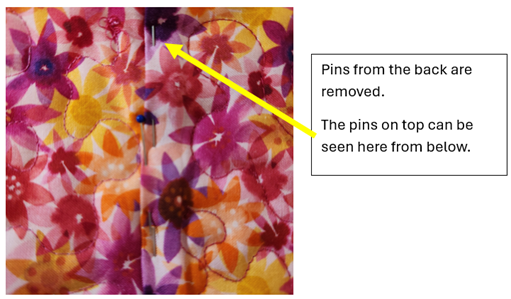
- Turn the quilt over so you are now viewing it from the top side. You should see the edges of the pins you just placed.
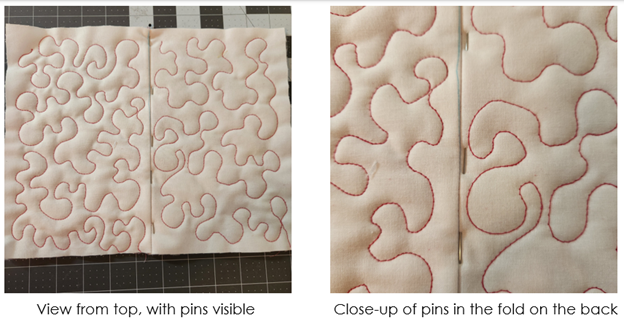
- Pin from the top side along the ditch of the seam, using many pins to ensure that the folded edge stays correctly in place below and making sure the pins catch the top, batting and backing.
- Turn the quilt over again to the back and remove the pins from the back side.
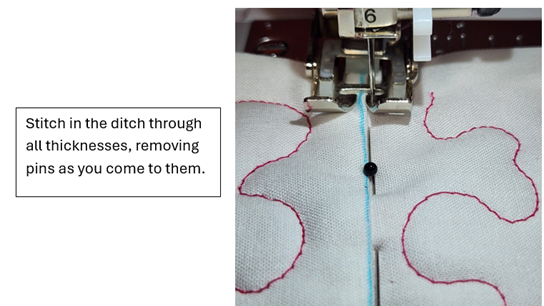
- Turn the quilt back to the front one last time. Use thread that matches the quilt top in the top thread and thread that matches the backing for the bobbin thread. Stitch in the ditch carefully, removing pins as you come to them.
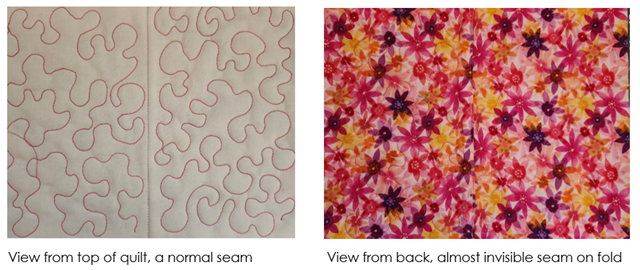
- The joining seam is now finished! From the top, it should look like a regular seam. From the back, there will be a line of stitching along the foldline of the backing. If matching thread and a busy print fabric were used, the line of stitching will be virtually unnoticeable!
Continue joining each section of the quilt in this manner.
In Conclusion
While the QAYG process takes a little extra time to match and stitch sections of a quilt, the advantage is it allows the quilting to be done much more easily in smaller sections, without the cumbersome weight and size of the entire quilt!
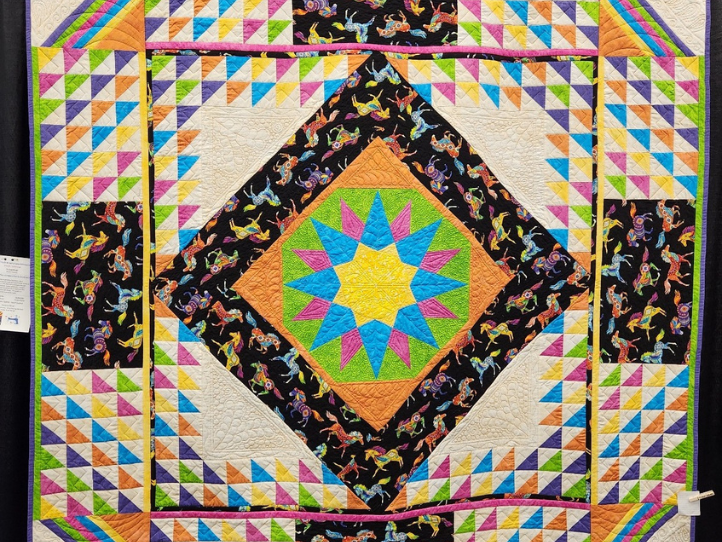
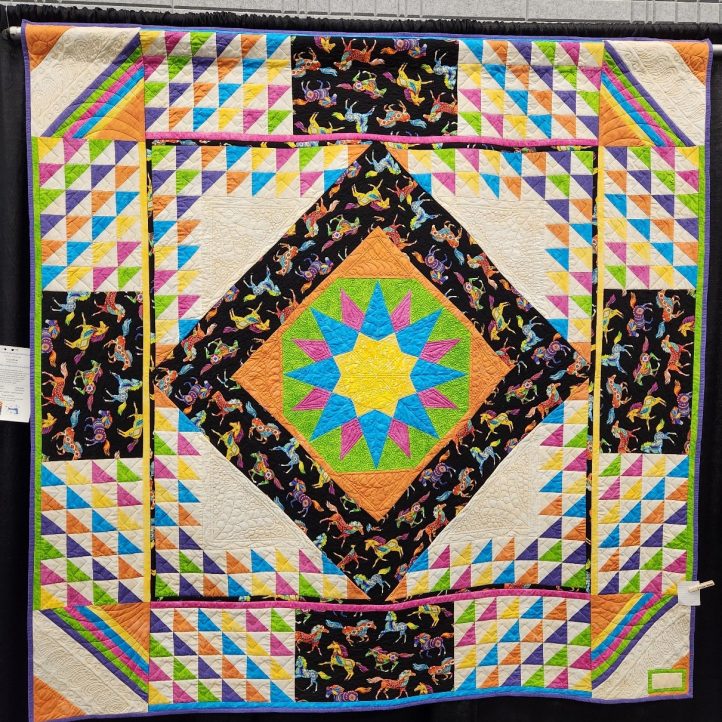
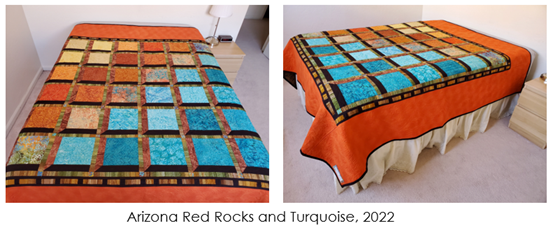
It makes it possible to make large, bed-size quilts in manageable sections with the finished quilt looking no different than if it had been quilted all in one piece!
Here are some examples of some queen-size quilts done by dividing the top into quarters and quilting each quarter separately, then doing the quilting on each border separately. Then all sections were joined together using nearly invisible seams!
Quilt as You Go methods enable the quilter to embrace every aspect of the quilt construction, from piecing the top to quilting each section in motifs of the quilter’s choosing. Not only does this method save money (since a longarm quilter’s services are not needed), it increases the joy, pride and satisfaction the quilter feels in unveiling a finished quilt done completely on their own!