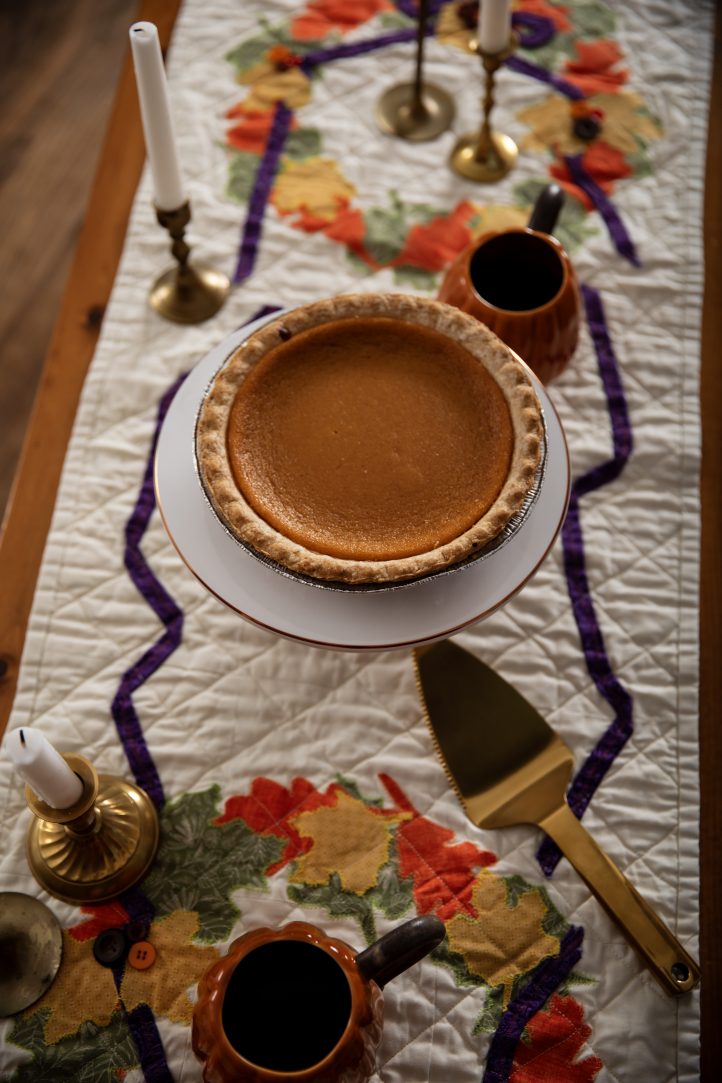
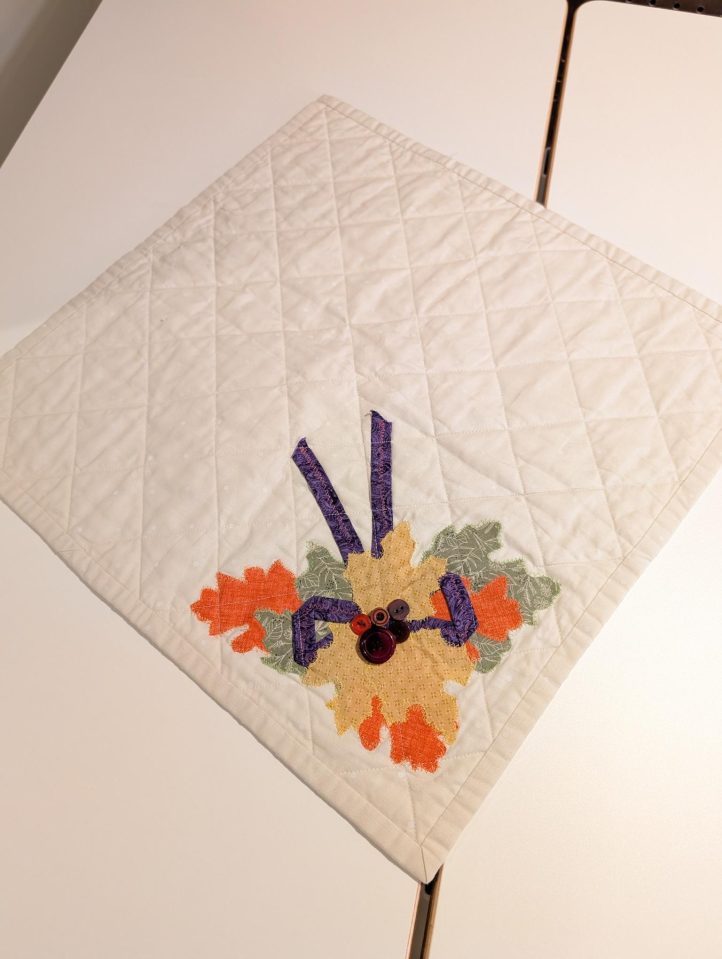
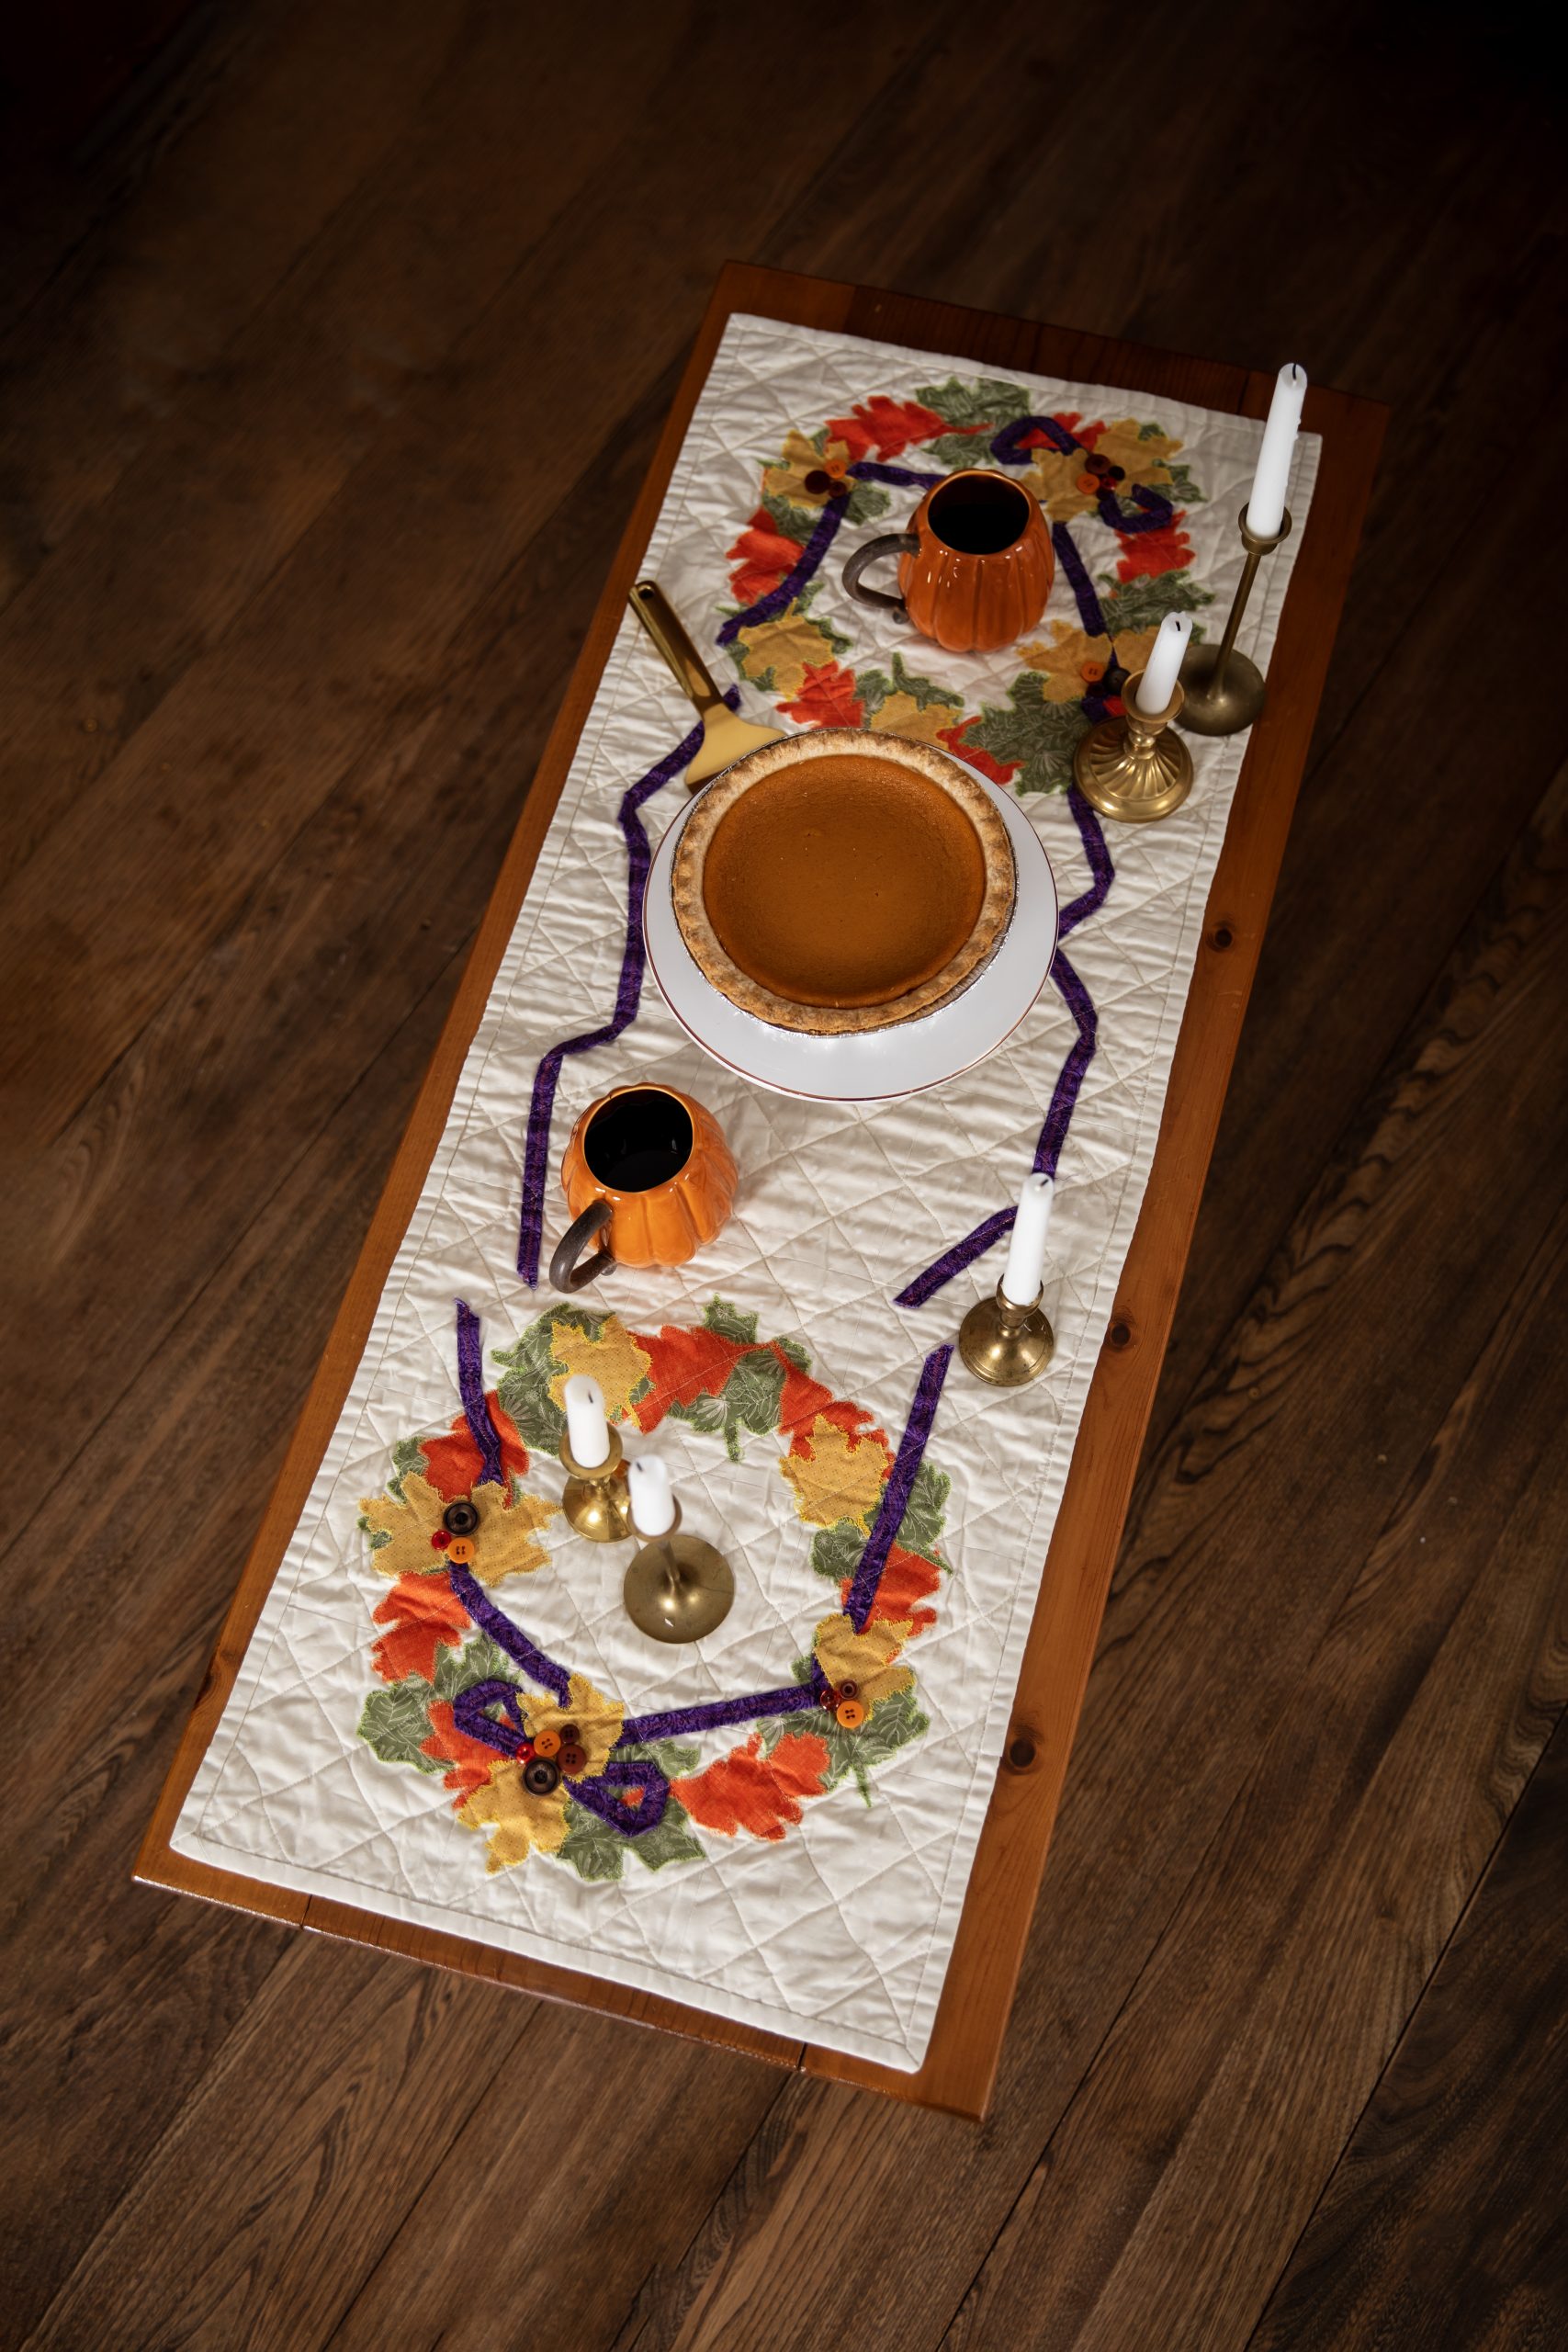
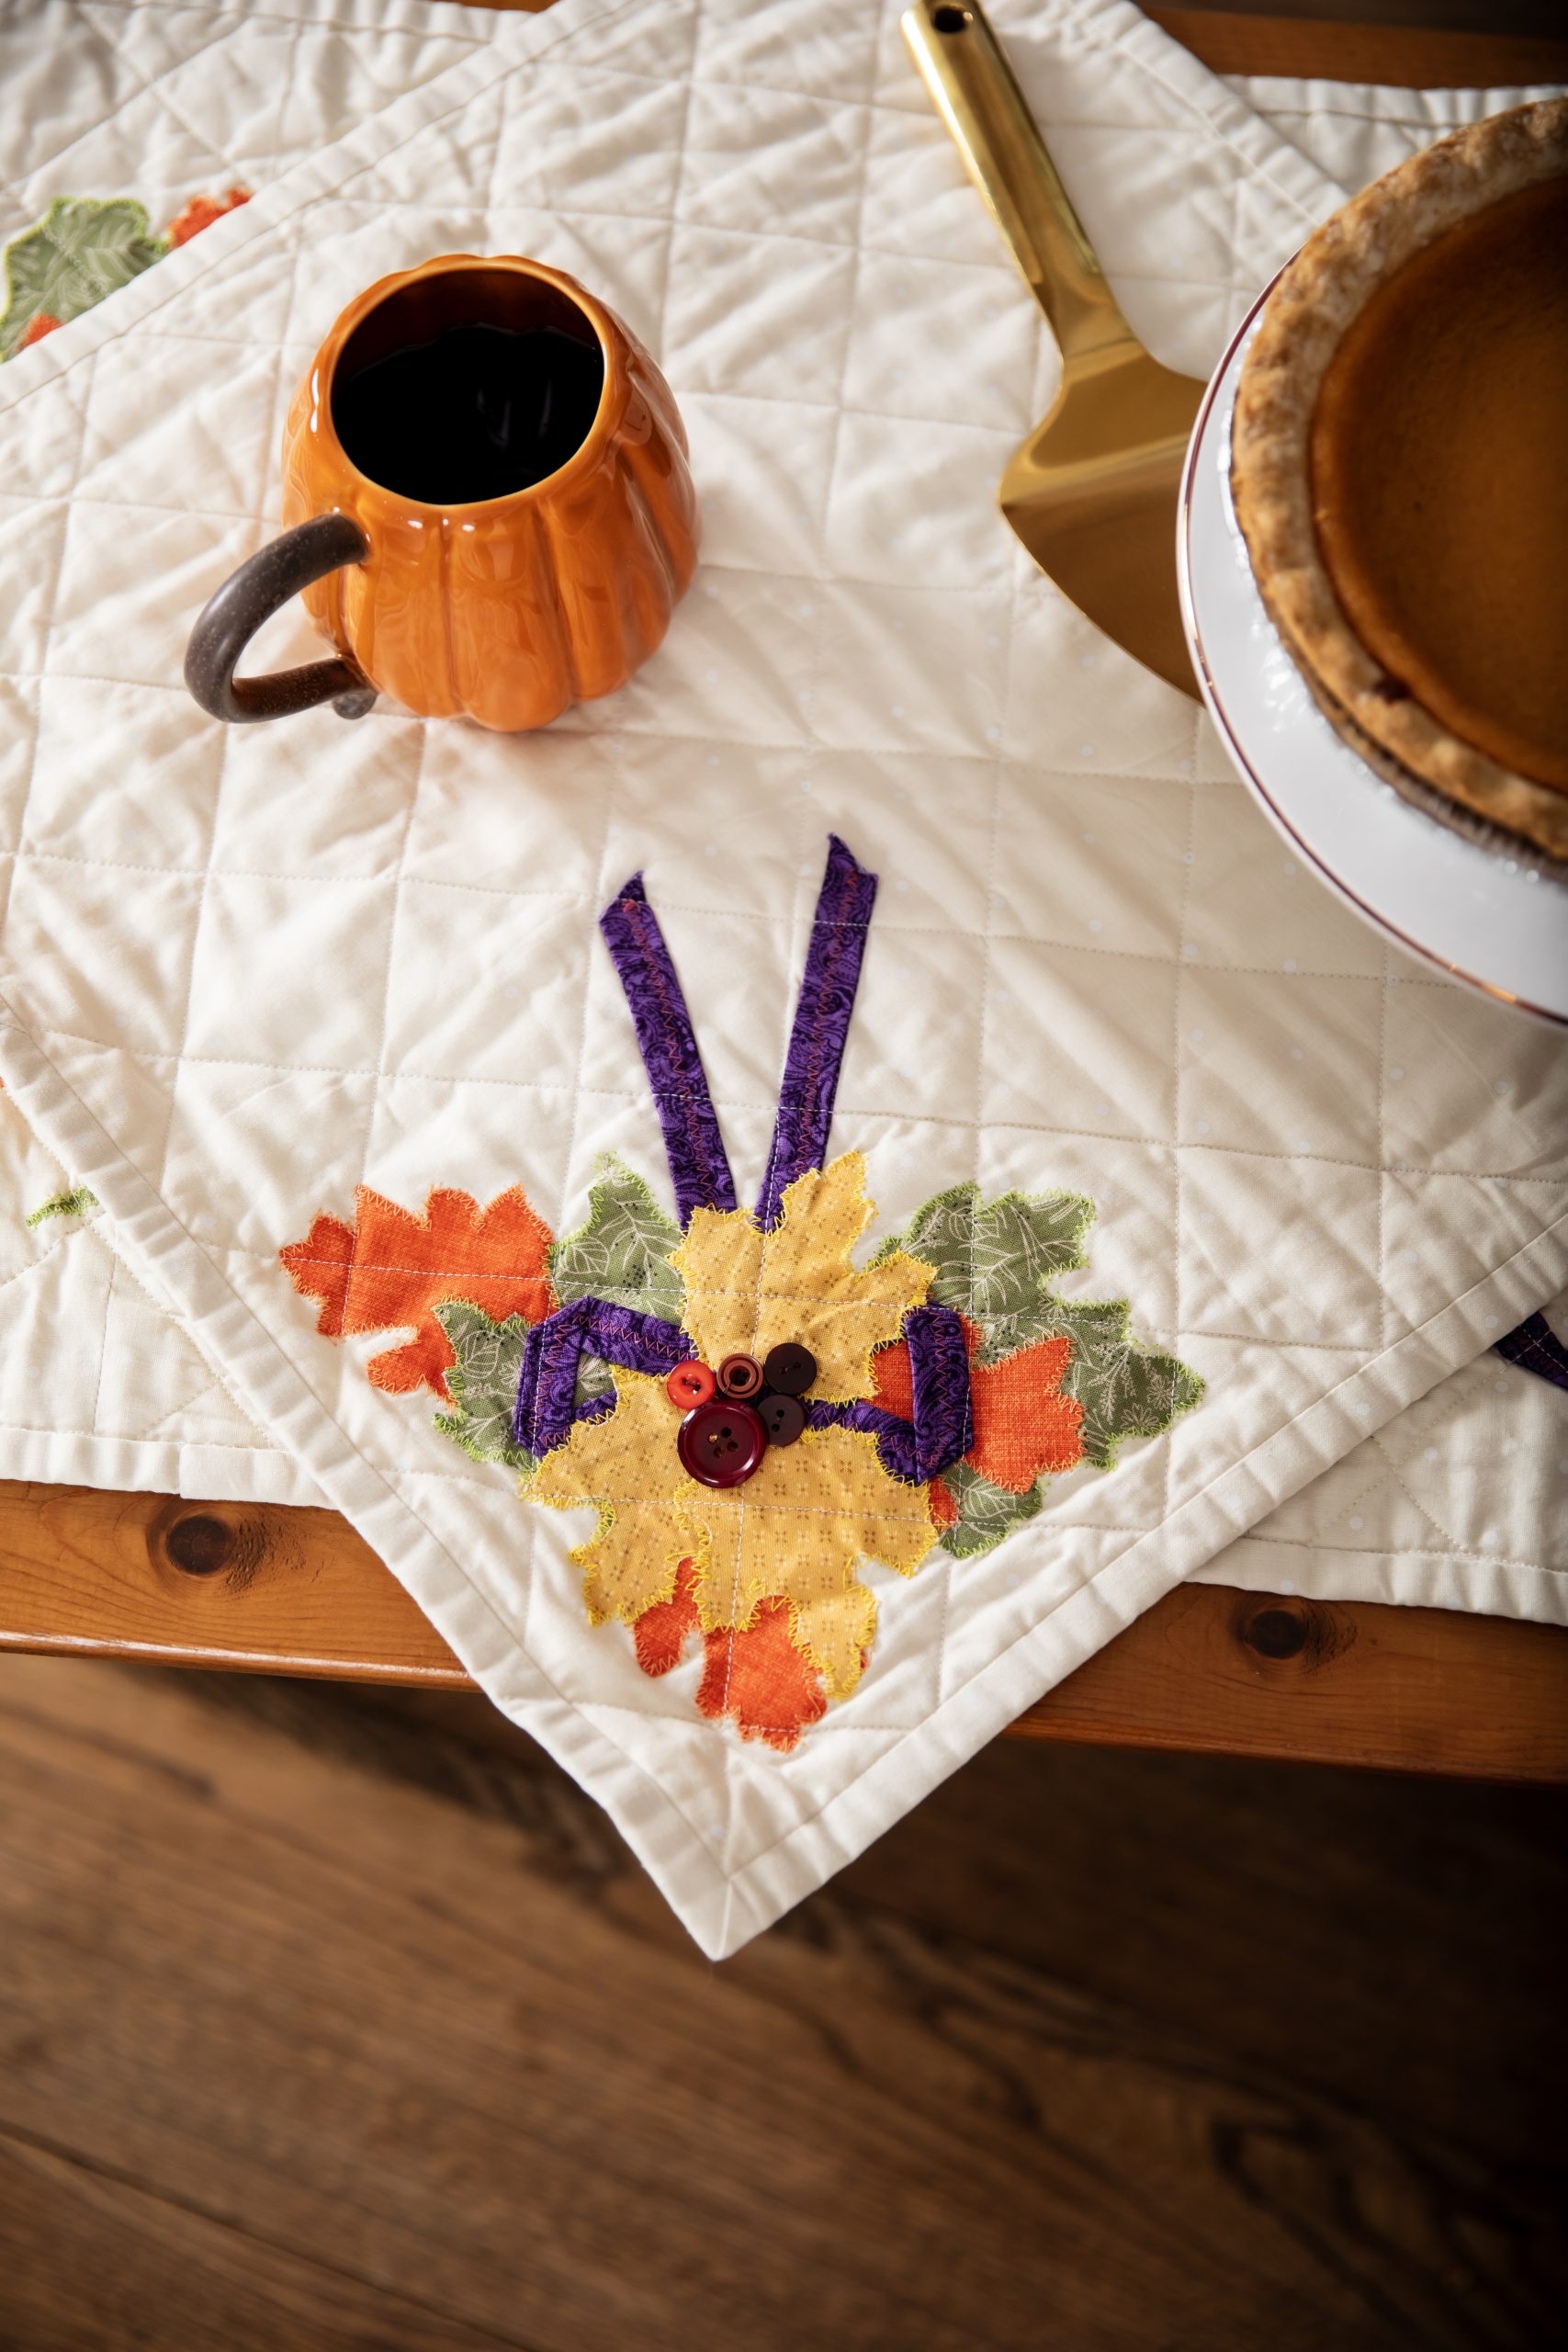
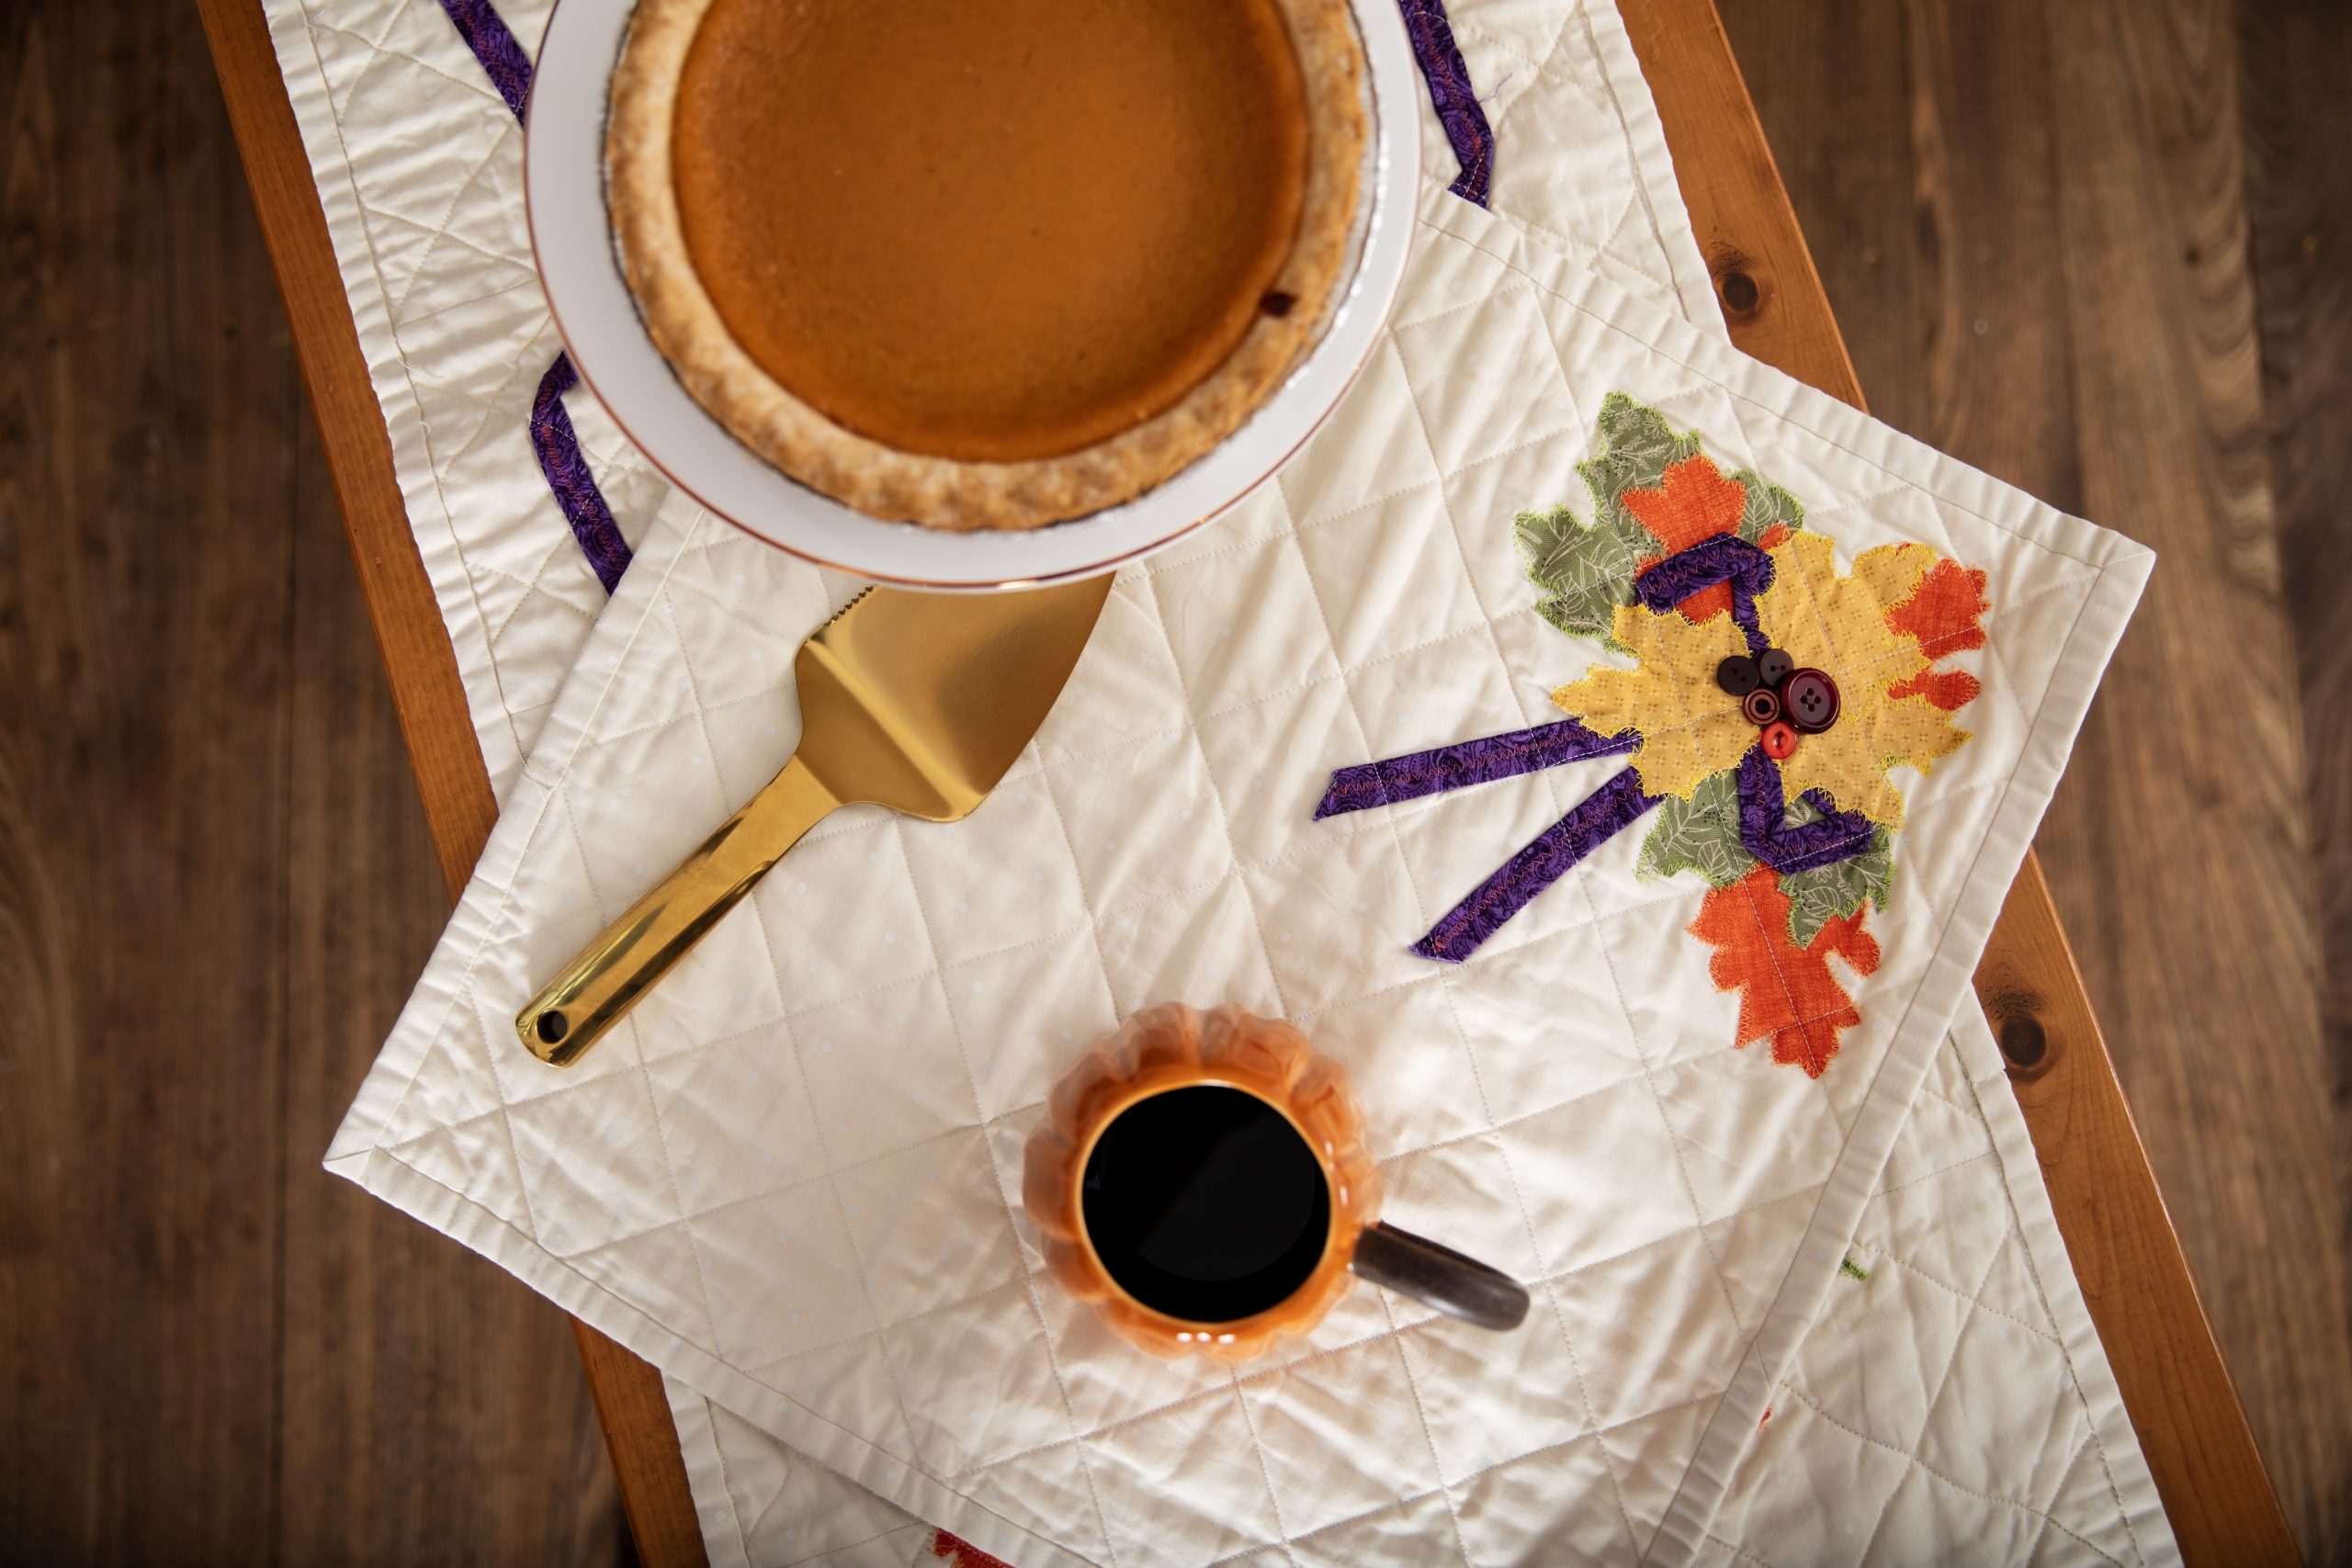
Set a beautiful, elegant table for Thanksgiving with this table runner and placemat pattern set from Debi Schmitz. Finishing at 18 inches x 48 inches, this table runner pattern features wreaths of colorful fall leaves intertwined with a sleek plum fabric ribbon. The matching Thanksgiving placemat pattern coordinates with a bouquet of fall foliage and is accented with button details.
Finished Size: 18” x 48” (Table Runner); 18” x 18”(Placemat)
Designer Note: All seams are 1/4″.
Editor Note: These instructions are for one table runner and one placemat, as seen in our photographed sample. If making multiple placemats, please adjust materials as needed.

Materials:
- Fabric A: 2 1/2 yard ivory background print
- Fabric B: 1/2 yard gold print
- Fabric C: 1/2 yard olive green print
- Fabric D: 1/3 yard burnt orange print
- Fabric E: 1/2 yard plum print
- Thread: Orange, gold, green, plum, and ivory
- Safety pins: Optional (To secure the quilt sandwich while quilting.)
- Cotton needled batting:
- 18” x 48” table runner
- 18” x 18” placemat
- Iron-on adhesive: 18” x 72”
- (24) Coordinating buttons: 1/2” to 1” diameter
- PDF Templates – These are located at the bottom of this page. See printing instructions below.
Tools:
- Scissors
- Iron
- Sewing machine
- Sewing needles
- Marking pen or pencil
- Pins
- Rotary cutter
- Acrylic ruler
- Cutting mat
PRINTING INSTRUCTIONS:
To download the PDF templates, click on the download button at the bottom of the page. We recommend opening your download using Adobe Acrobat.
Cutting Instructions:
Fabric A:
- (24) 6 1/2” x 6 1/2″ squares
- (2) 18 1/2” x 18” (Back Panel)
- (1) 6 1/2” x 18” (Back Panel)
- (2) 18” x 18” placemat
- (6) 2” x 36” strips (Four strips for table banner and two for the placemat.)
Fabric B:
- (1) 24” x 18” with Iron-on Adhesive on back- trace and cut (10) each using Pattern A and B equally.
- (2) 1 1/2” x 18” strips (Back Panel)
Fabric C:
- (1) 12” x 18” with Iron-on Adhesive on back- trace and cut (16) using Pattern C.
- (2) 1 1/2” x 18” strips (Back Panel)
Fabric D:
- (1) 12” x 18” with Iron-on Adhesive on back- trace and cut (17) using Pattern D.
- (2) 1 1/2” x 18” strips (Back Panel)
Fabric E:
- (4) 2” x 44” strips (Three strips for the table runner and 1 for the placemat.)
Piecing Instructions:
- With right sides together, stitch (3) 6 1/2” x 6 1/2” squares of Fabric A together side by side for a row. Stitch 2 more (3) square rows.
- Stitch the (3) 3-square rows together to complete an 18” x 18” section of the runner.
- Repeat Steps 1-2 for another 18” x 18” section. These will be top and bottom sections of the runner.
- Lay (1) 9-square sections of the runner on the work surface.
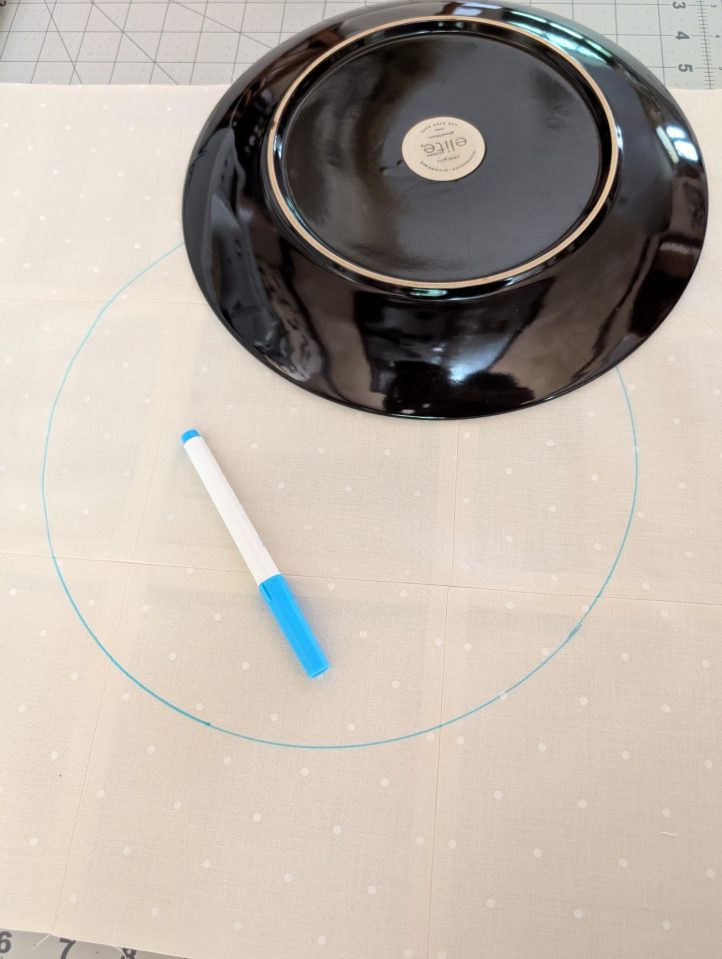
- Draw a circle around an 11” or 12” dinner plate or another large round object with a quilting water-soluble marker. It should be located 3” from the bottom edge and 3 1/4” from each side.
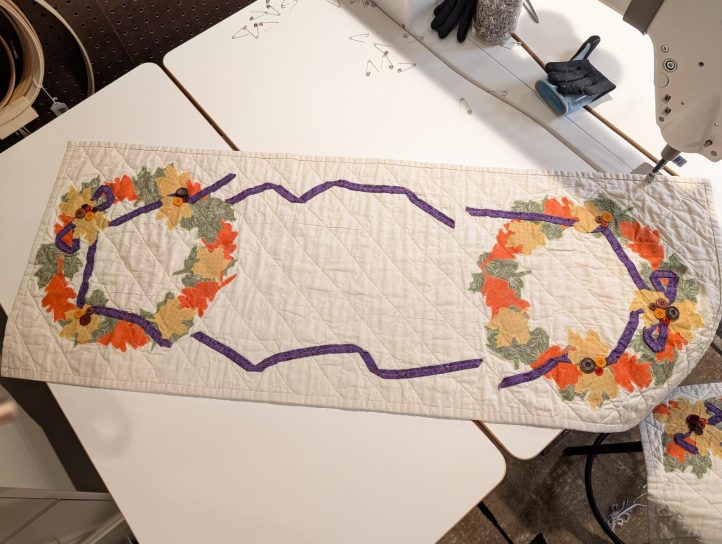
- Press (7 to 9) orange leaves around the circle.
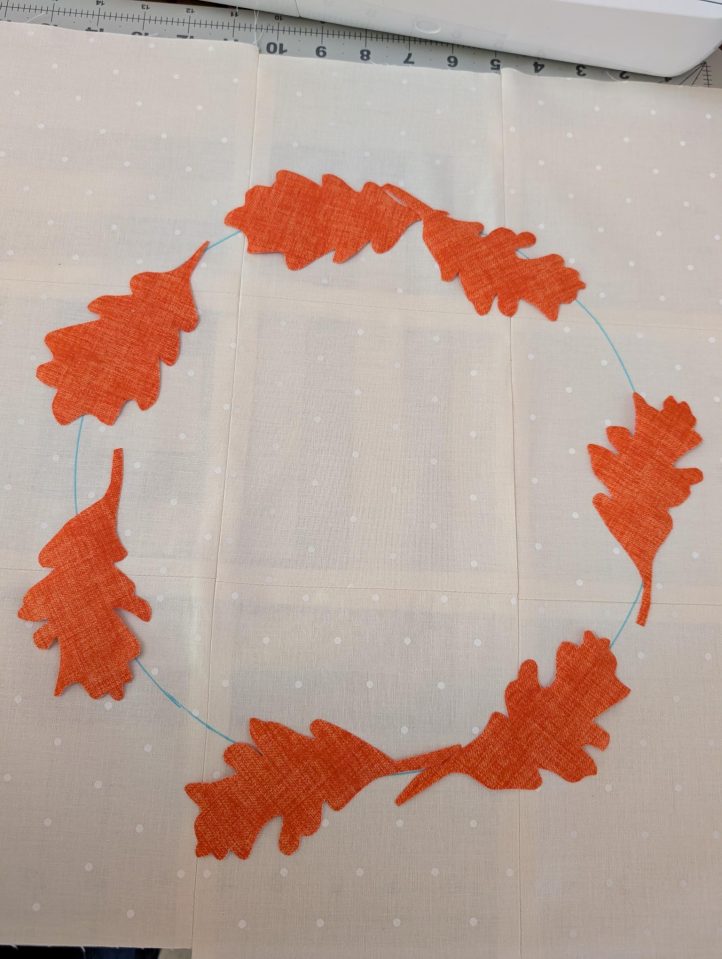
- Press (7) green leaves around the circle as shown in the photo below. Make sure the leaves don’t all overlap in the same direction for a natural look.
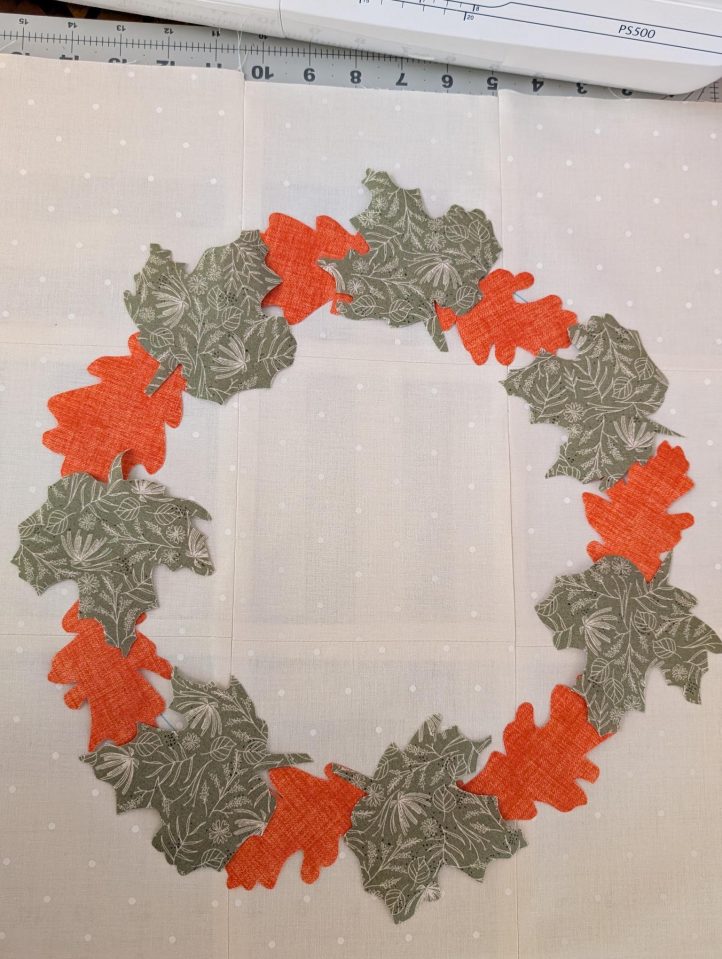
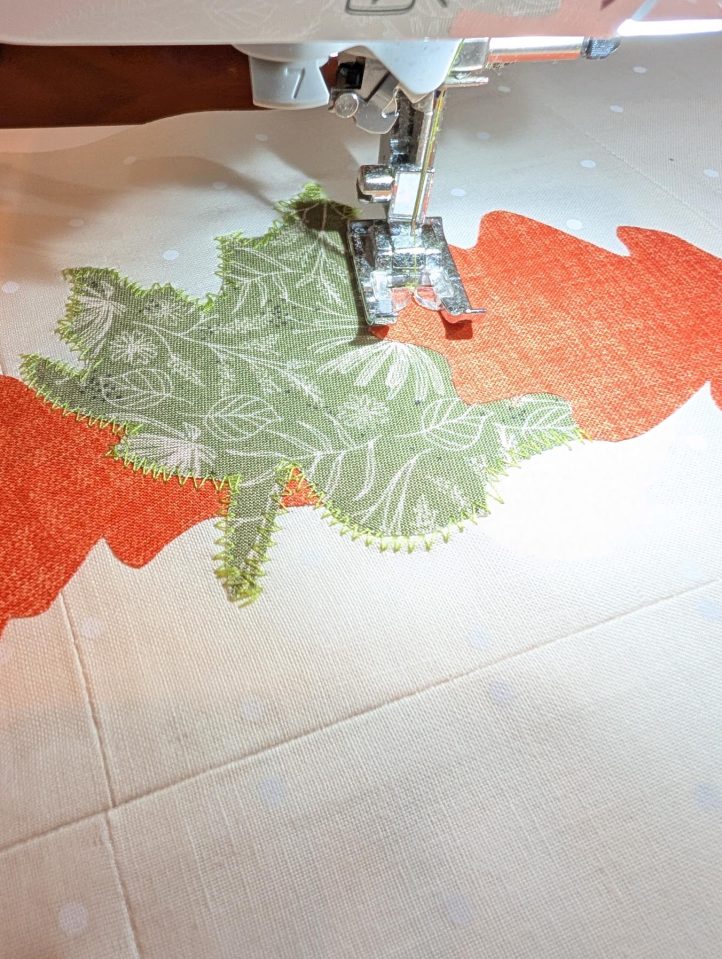
- Zig zag stitch around the green leaves with green thread. Zig zag stitch around the orange leaves with orange thread.
- Fold (1) 2” x 44” Fabric E strip in half lengthwise and press the fold. Open the strip and fold each outside edge to the center fold. Press the folds. Fold the two folded edges together to complete double-fold bias tape. This will be used for the ribbons. Repeat for (3) more ribbons.
- Stitch the ribbons to the top and bottom segments of the runner in the wreaths.
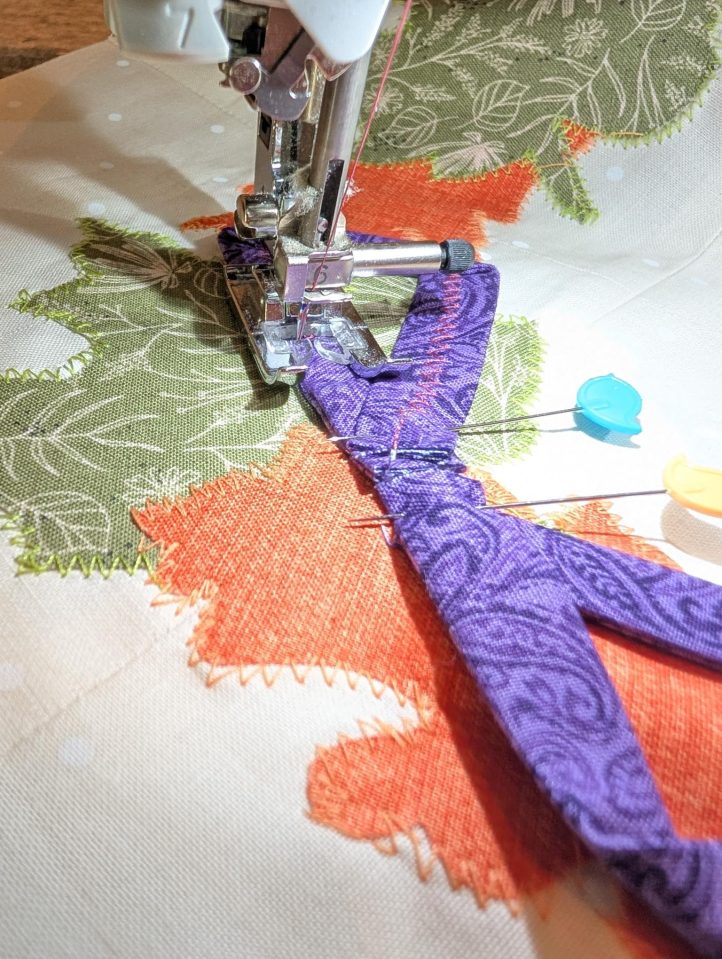
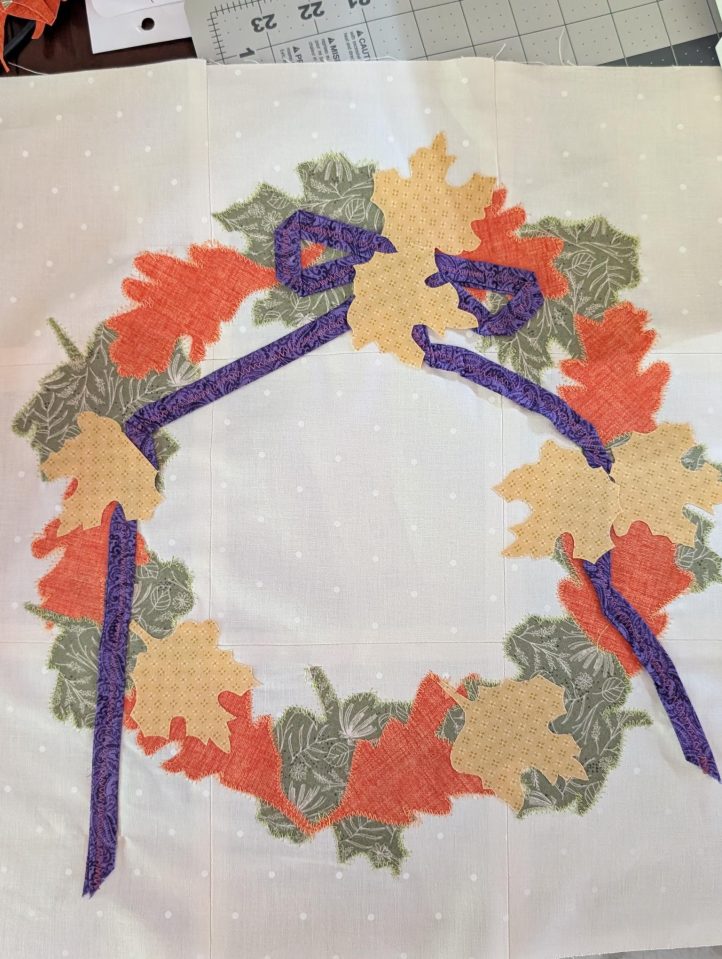
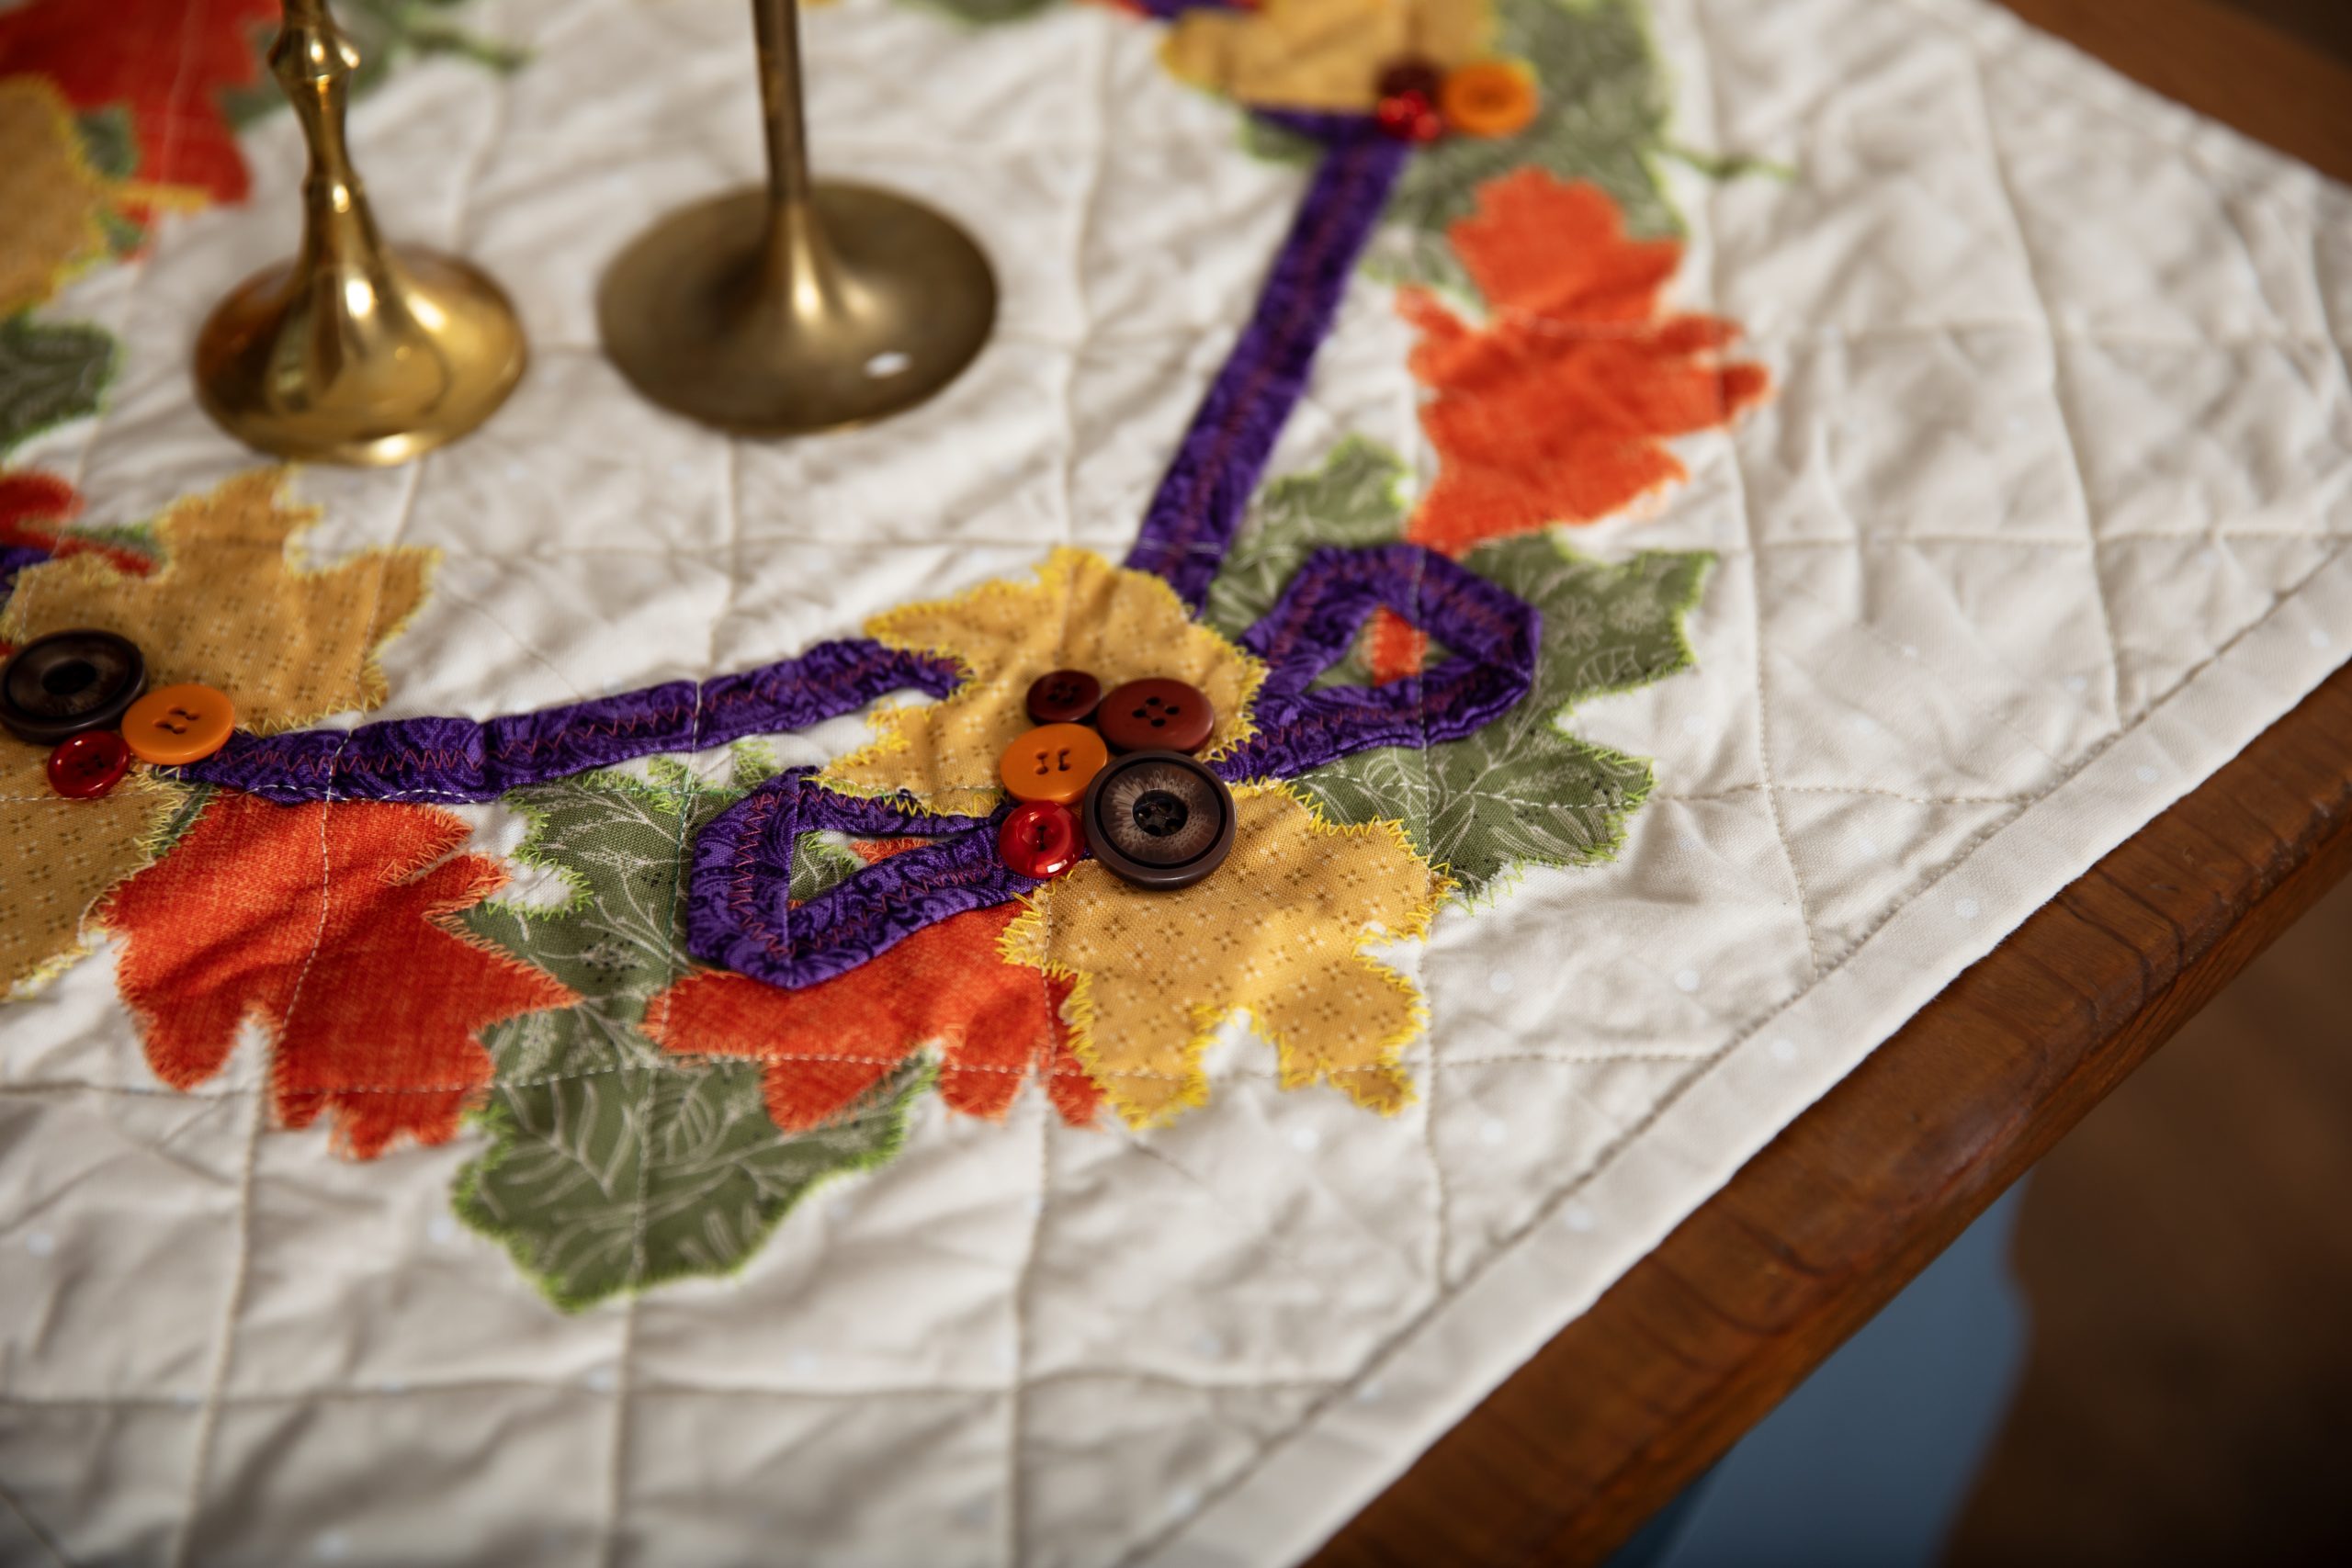
- Weave the ribbon ends around the wreath. Press and zig zag stitch the (7) gold leaves, Fabric D, with gold thread around the wreath and around the ribbon folds.
- Stitch (3) 6 1/2” x 6 1/2” squares of Fabric A together side by side for a row. Stitch another row of (3) 6 1/2” x 6 1/2” Fabric A squares. Stitch these two rows together matching the seam for a center segment of the table runner.
- Stitch one end of the runner to the center segment just formed. Stitch the other end segment to the opposite runner.
- Attach the remaining ribbons to the wreath as shown in the finished project image at the top of the page.
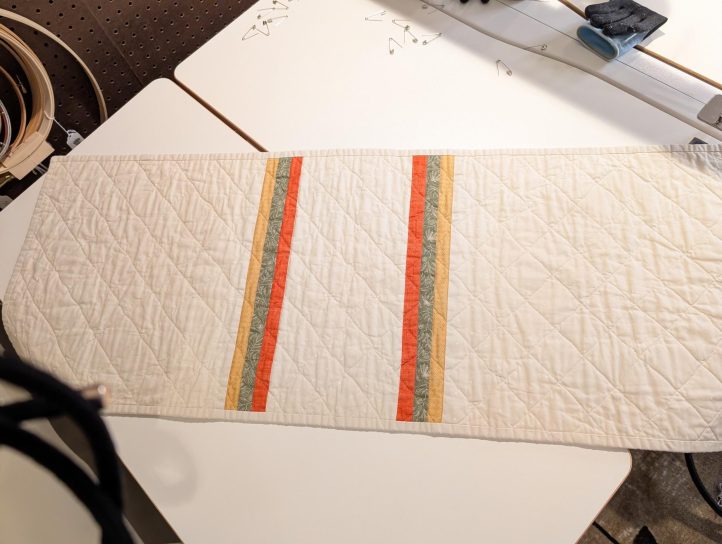
- The back of the table runner consists of the following:
- (1) 18 1/2” x 18” Fabric A (Ivory)
- (1) 1 1/2” x 18” Fabric D (Gold)
- (1) 1 1/2” x 18” Fabric C (Green)
- (1) 1 1/2” x 18” Fabric B (Orange)
- (1) 6 1/2” x 18” Fabric A (Ivory)
- (1) 1 1/2” x 18” Fabric B (Orange)
- (1) 1 1/2” x 18” Fabric C (Green)
- (1) 1 1/2” x 18” Fabric D (Gold)
- (1) 18 1/2” x 18” Fabric A (Ivory)
- Sandwich the 18” x 48” quilt batting between the front and back of the table runner, matching sides, and seams. Trim off excess batting. Square the table runner as needed.
- Draw out your quilting pattern onto the table runner front with a washout fabric marker. Use safety pins or baste the three layers together to hold while quilting. Quilt the table runner as desired. The sample was quilted with a Basket Weave Pattern using a Handi Quilter Amara ST, using ivory thread. The quilting of this table runner can also be completed on a standard sewing machine using a quilting foot and disengaging the feed dogs.
- Stitch (4) 2” x 36” strips of Fabric A together, end to end for the bias tape. Fold and press as in Step 9 to complete 4 yards of double fold bias tape.
- Stitch the bias around the table runner perimeter.
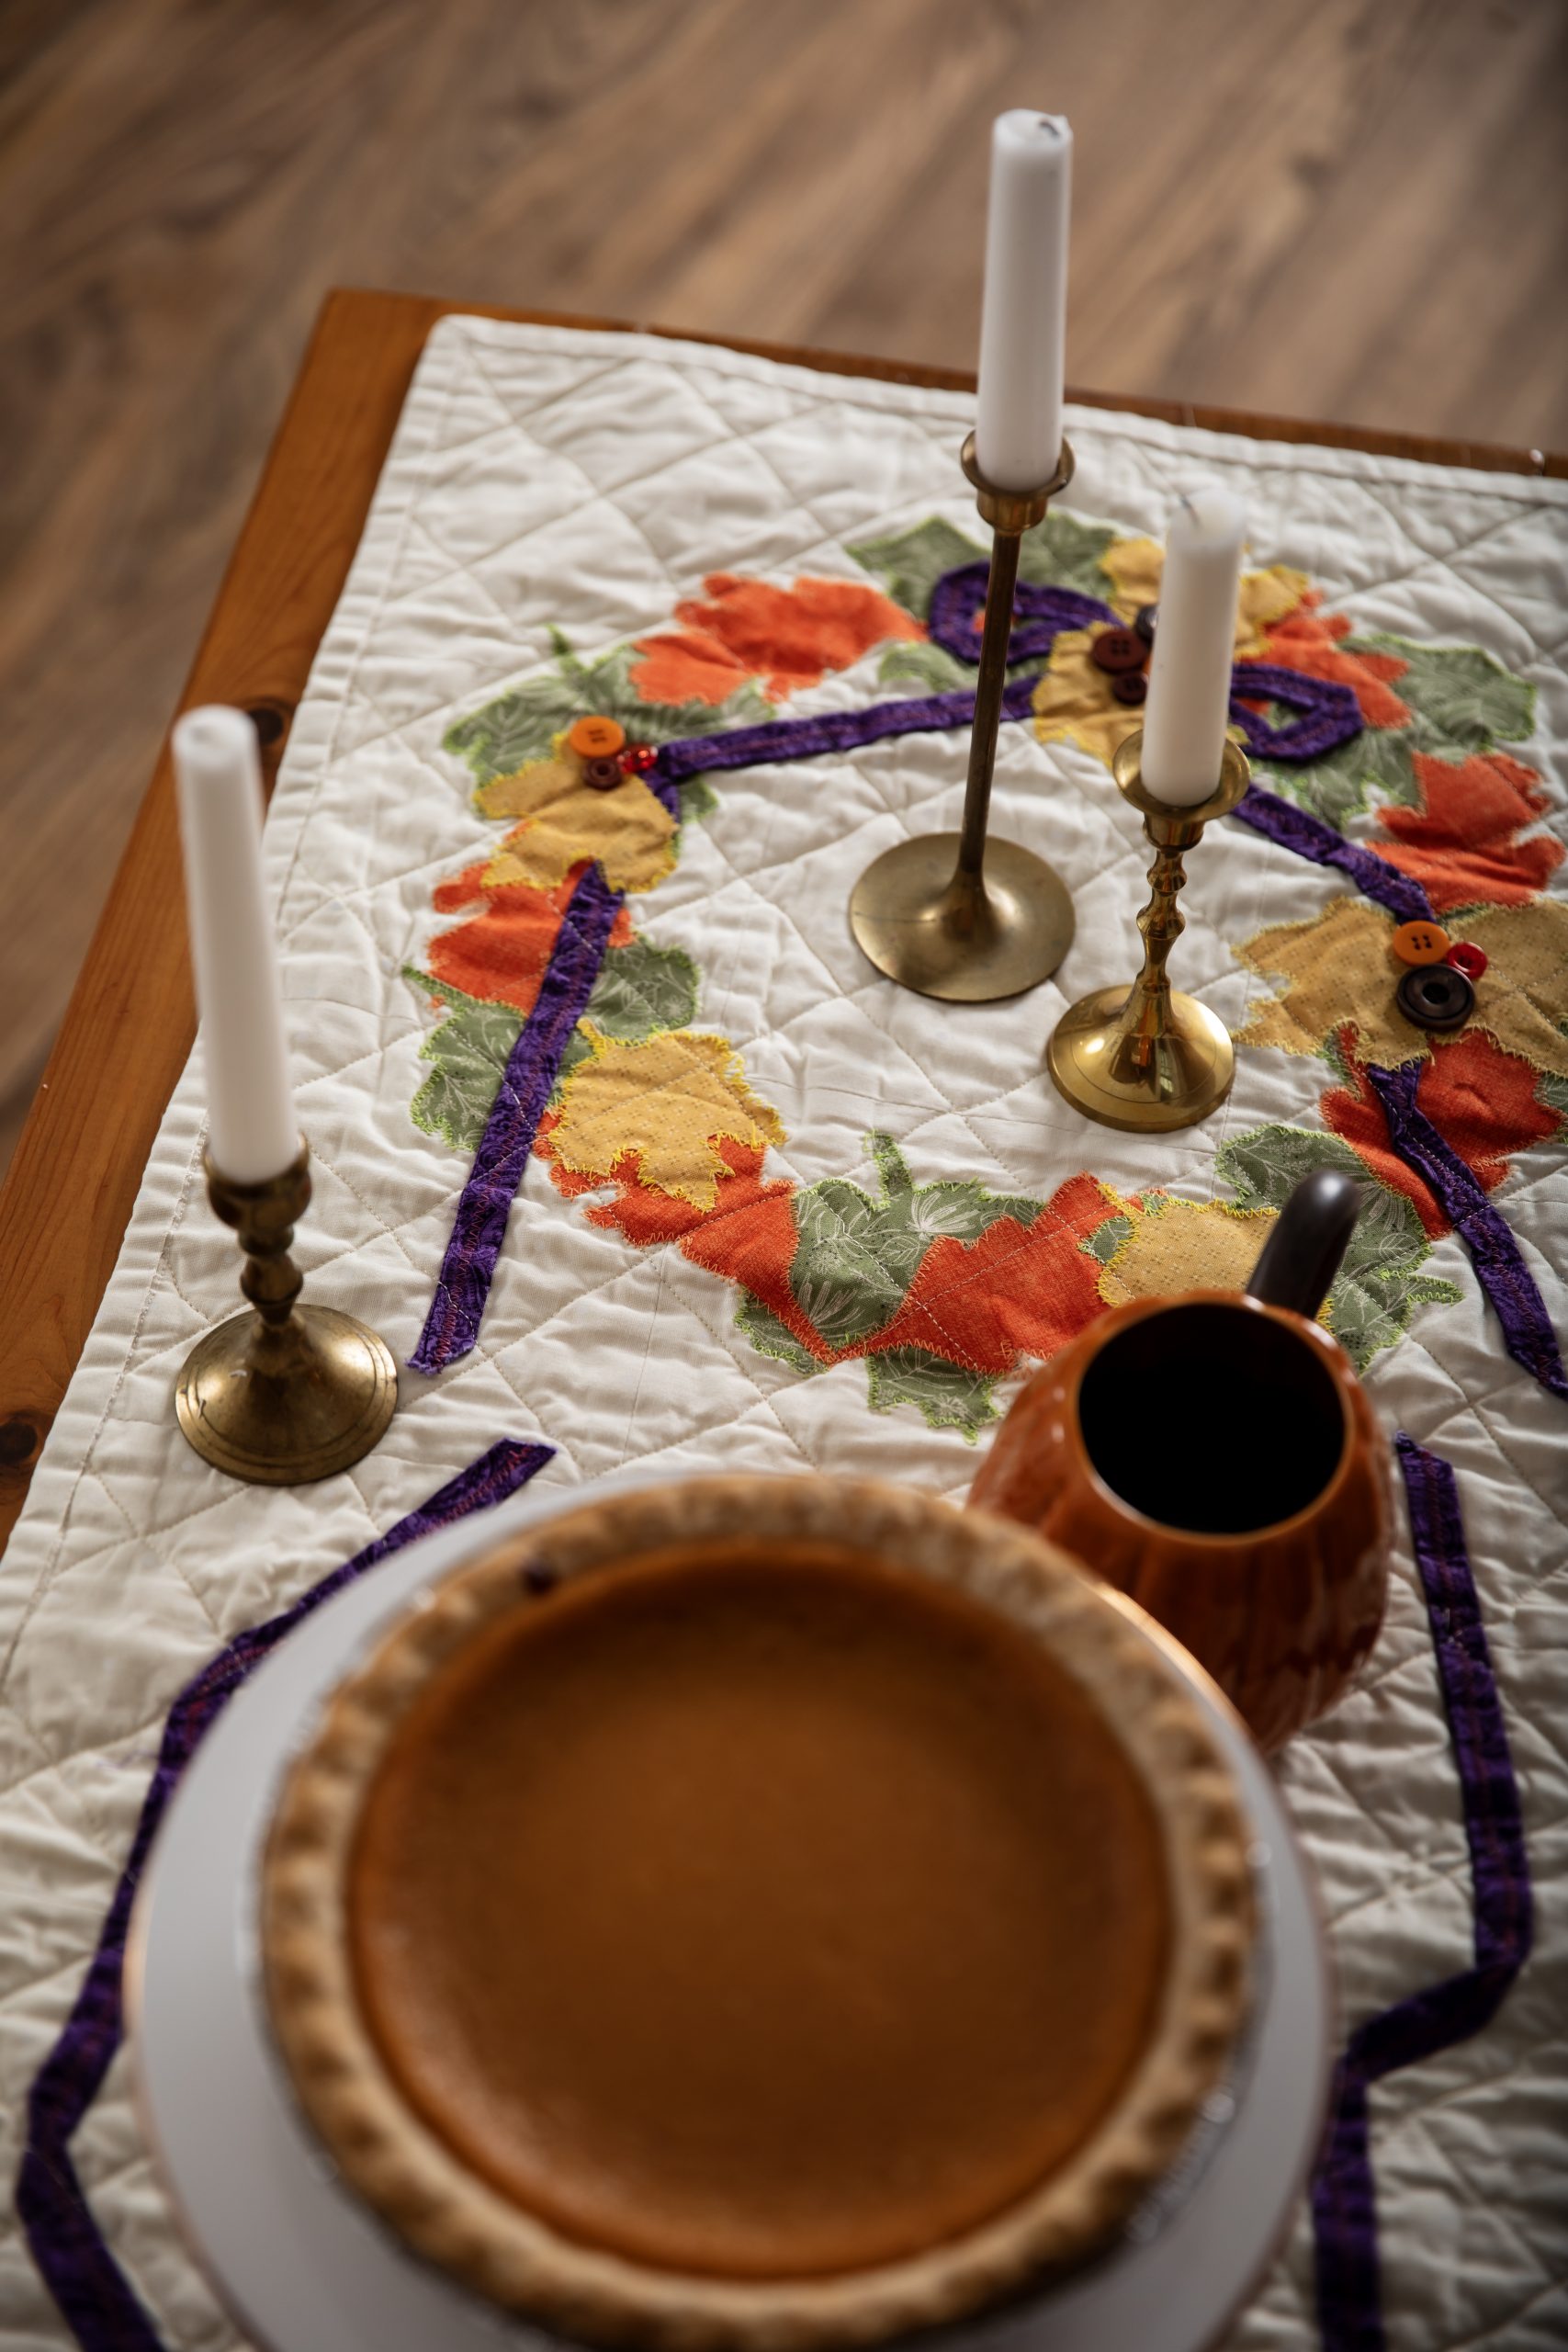
- Stitch the buttons into the wreaths at the bows and on the ribbons as shown on the finished project image at the top of the page. Be sure to stitch between the layers of the runner so the thread doesn’t show on the back.
- Placemat: Complete the same way as the table runner using (2) 18” x 18” Fabric A, ivory pieces. The bias on the placemat is 2 1/4 yards of Fabric A.
Can’t wait to get started A little different with te wreath