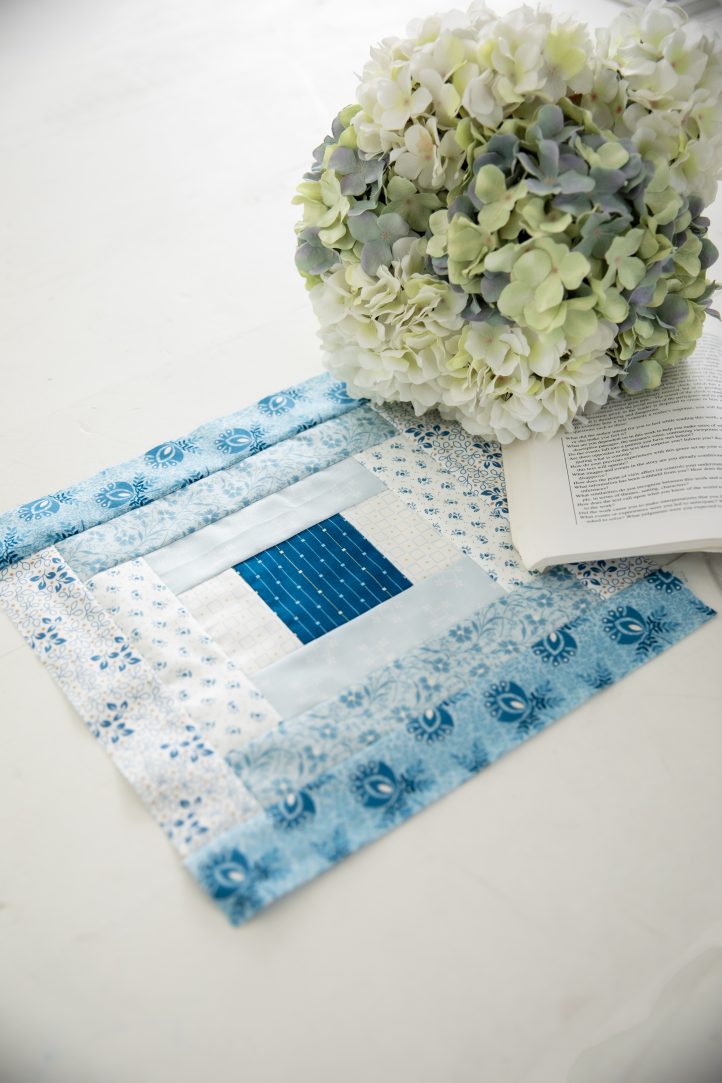
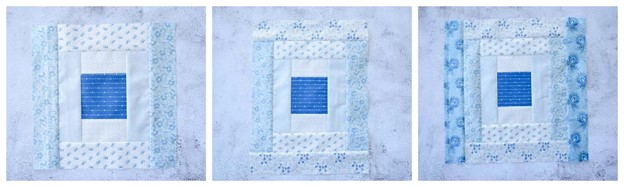
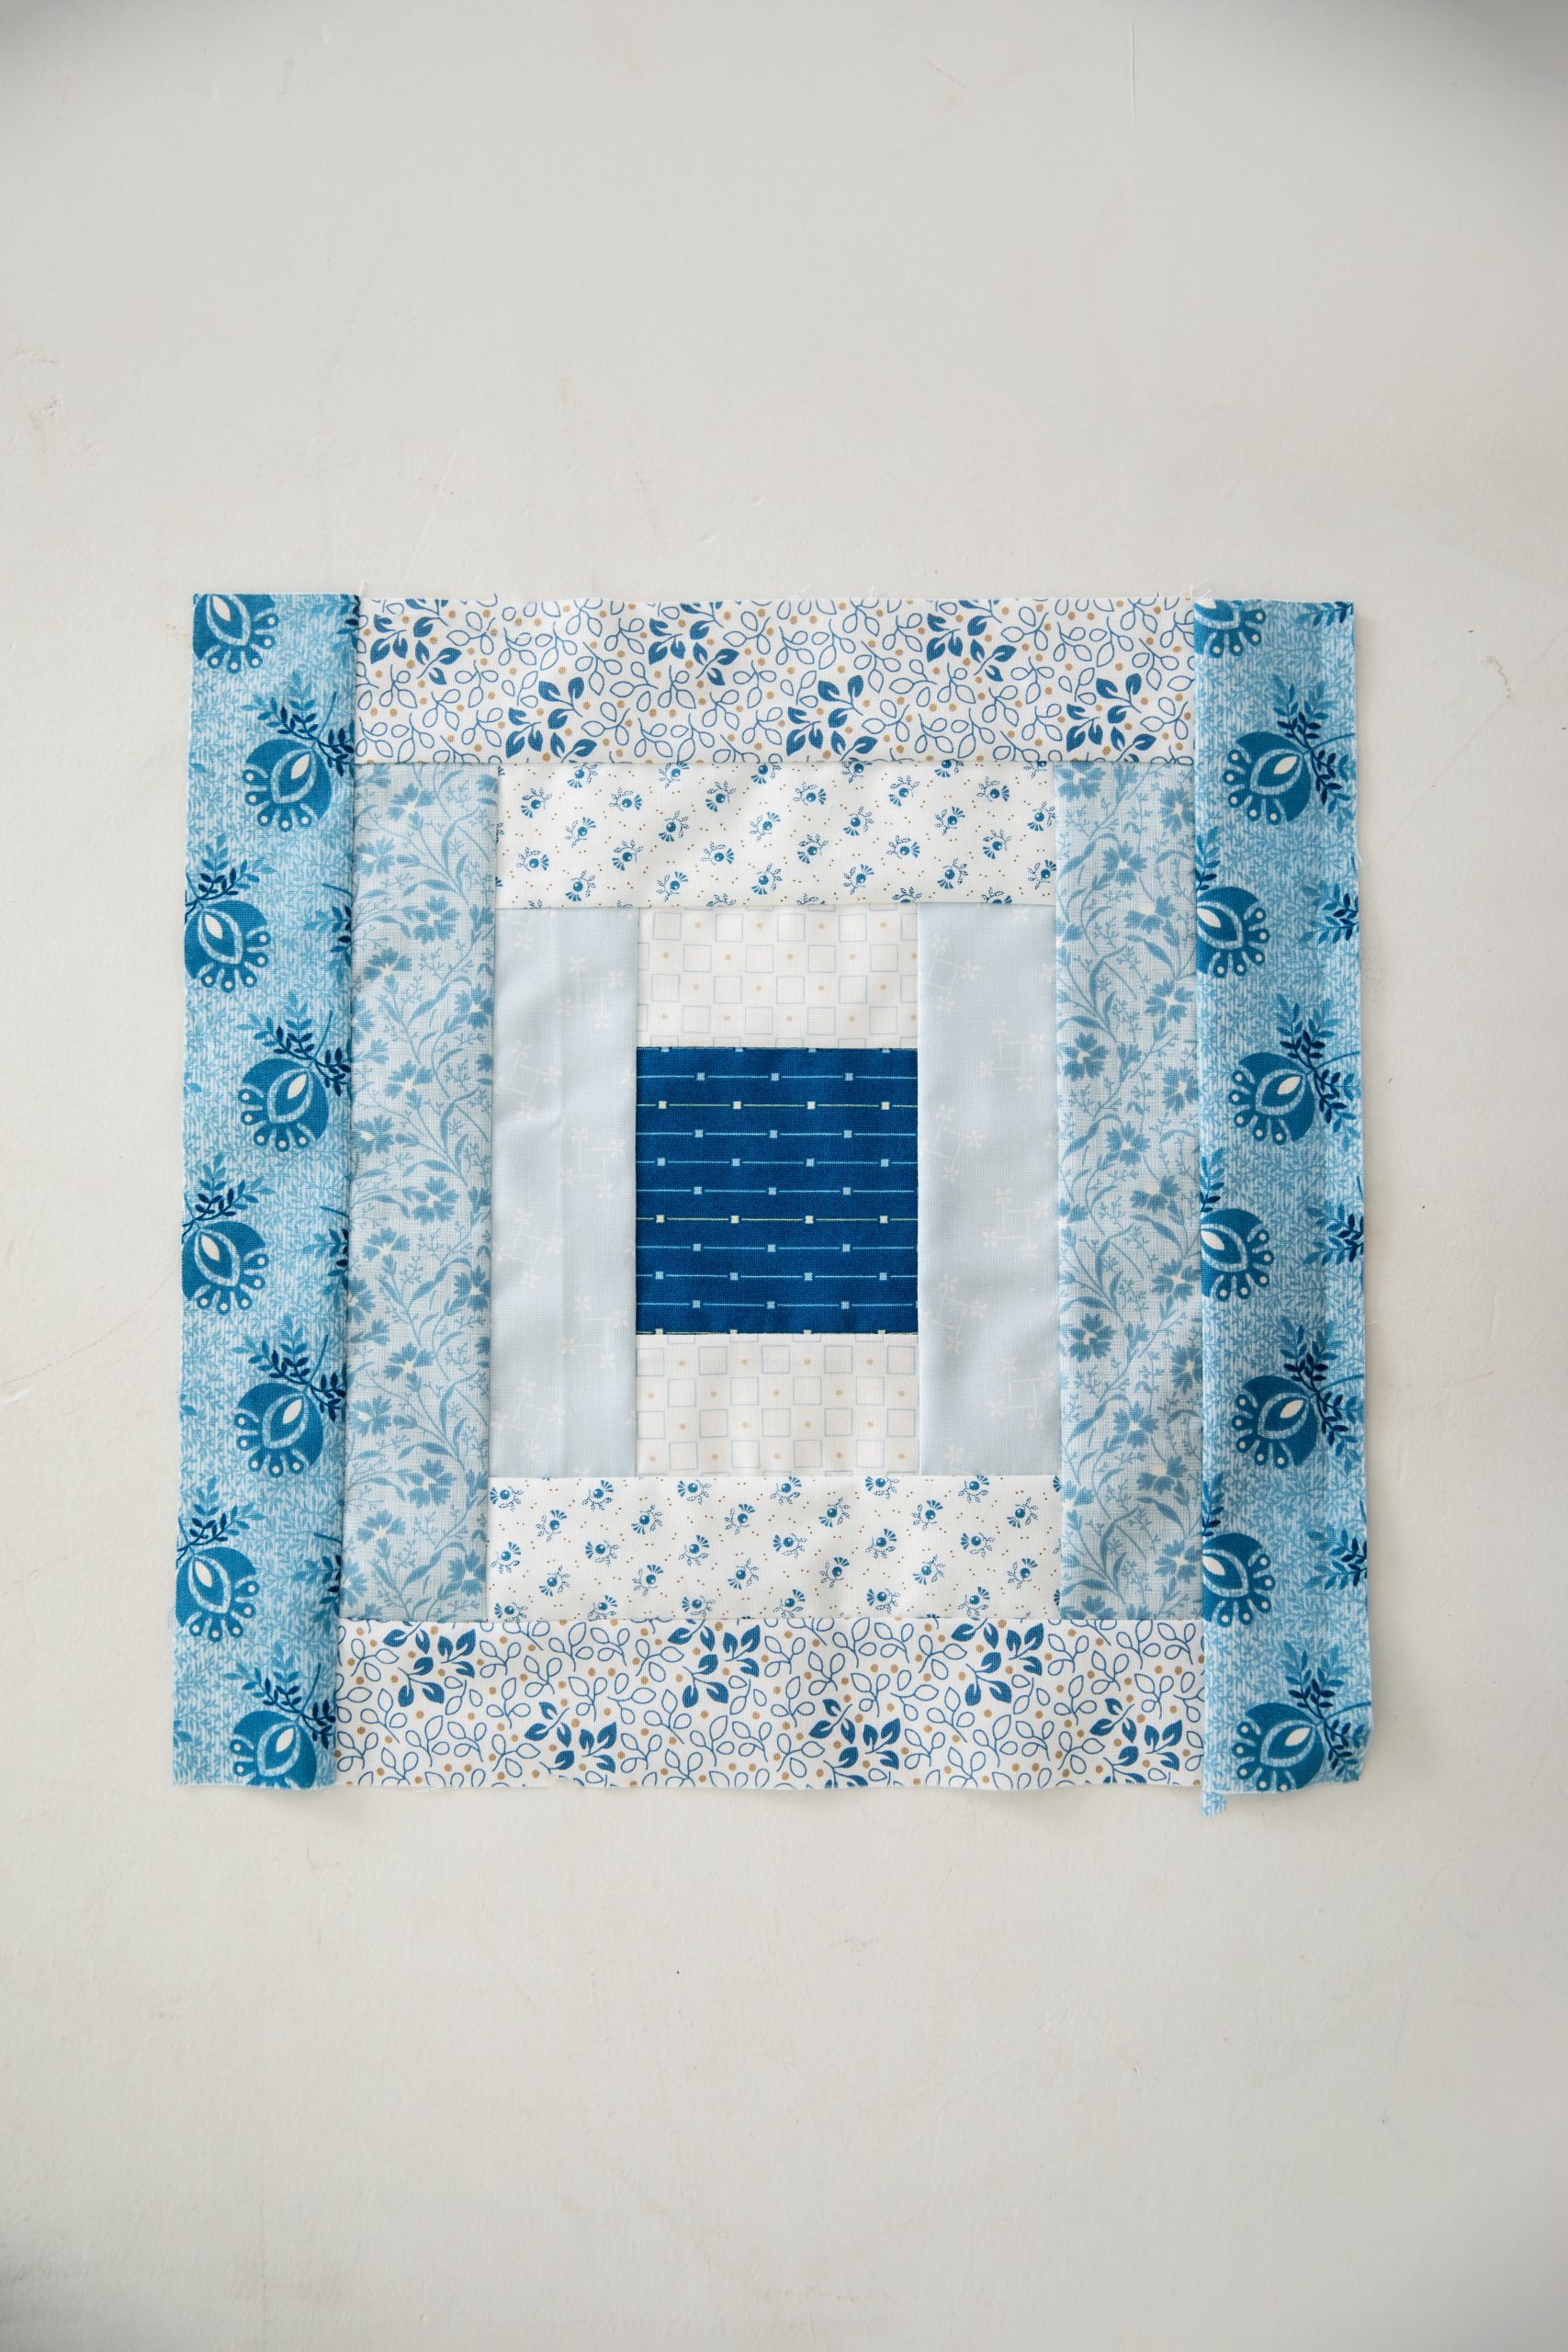
Our readers can’t resist a classic quilt block, which is why we know you’ll love this courthouse steps block from Rachel Nielsen. This variation of the traditional log cabin quilt block uses color placement and fabric strips to create its instantly recognizable design. Rachel has provided instructions for both 6-inch and 12-inch blocks, so that you can create the best block to fit your next quilting project.
Designer Notes: Please read all instructions before beginning. Use 1/4 inch seam allowance. All seams are pressed outward toward the edge of the block.
Materials:
- Fabric (See Cutting Instructions below)
- Fabric used in the shown sample is Perfect Union by Edita Sitar of Laundry Basket Quilts.
- Sewing machine
- Thread
- Scissors
- Pencil
- Iron/Ironing board or mat
- Cutting board/Rotary cutter/Straight edge ruler
Cutting Instructions:
FABRIC CUT LIST FOR 6-INCH BLOCK:
Darks:
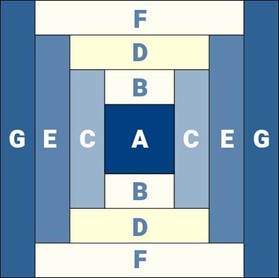
- 1) 2” X 2” (A)
- 2) 1 1/4” X 3 1/2” (C)
- 2) 1 1/4” X 5” (E)
- 2) 1 1/4” X 6 1/2” (G)
Lights:
- 2) 1 1/4” X 2” (B)
- 2) 1 1/4” X 3 1/2” (D)
- 2) 1 1/4” X 5” (F)
FABRIC CUT LIST FOR 12-INCH BLOCK:
Darks:
- 1) 3 1/2” X 3 1/2” (A)
- 2) 2” X 6 1/2” (C)
- 2) 2” X 9 1/2” (E)
- 2) 2” X 12 1/2” (G)
Lights:
- 2) 2” X 3 1/2” (B)
- 2) 2” X 6 1/2” (D)
- 2) 2” X 9 1/2” (F)
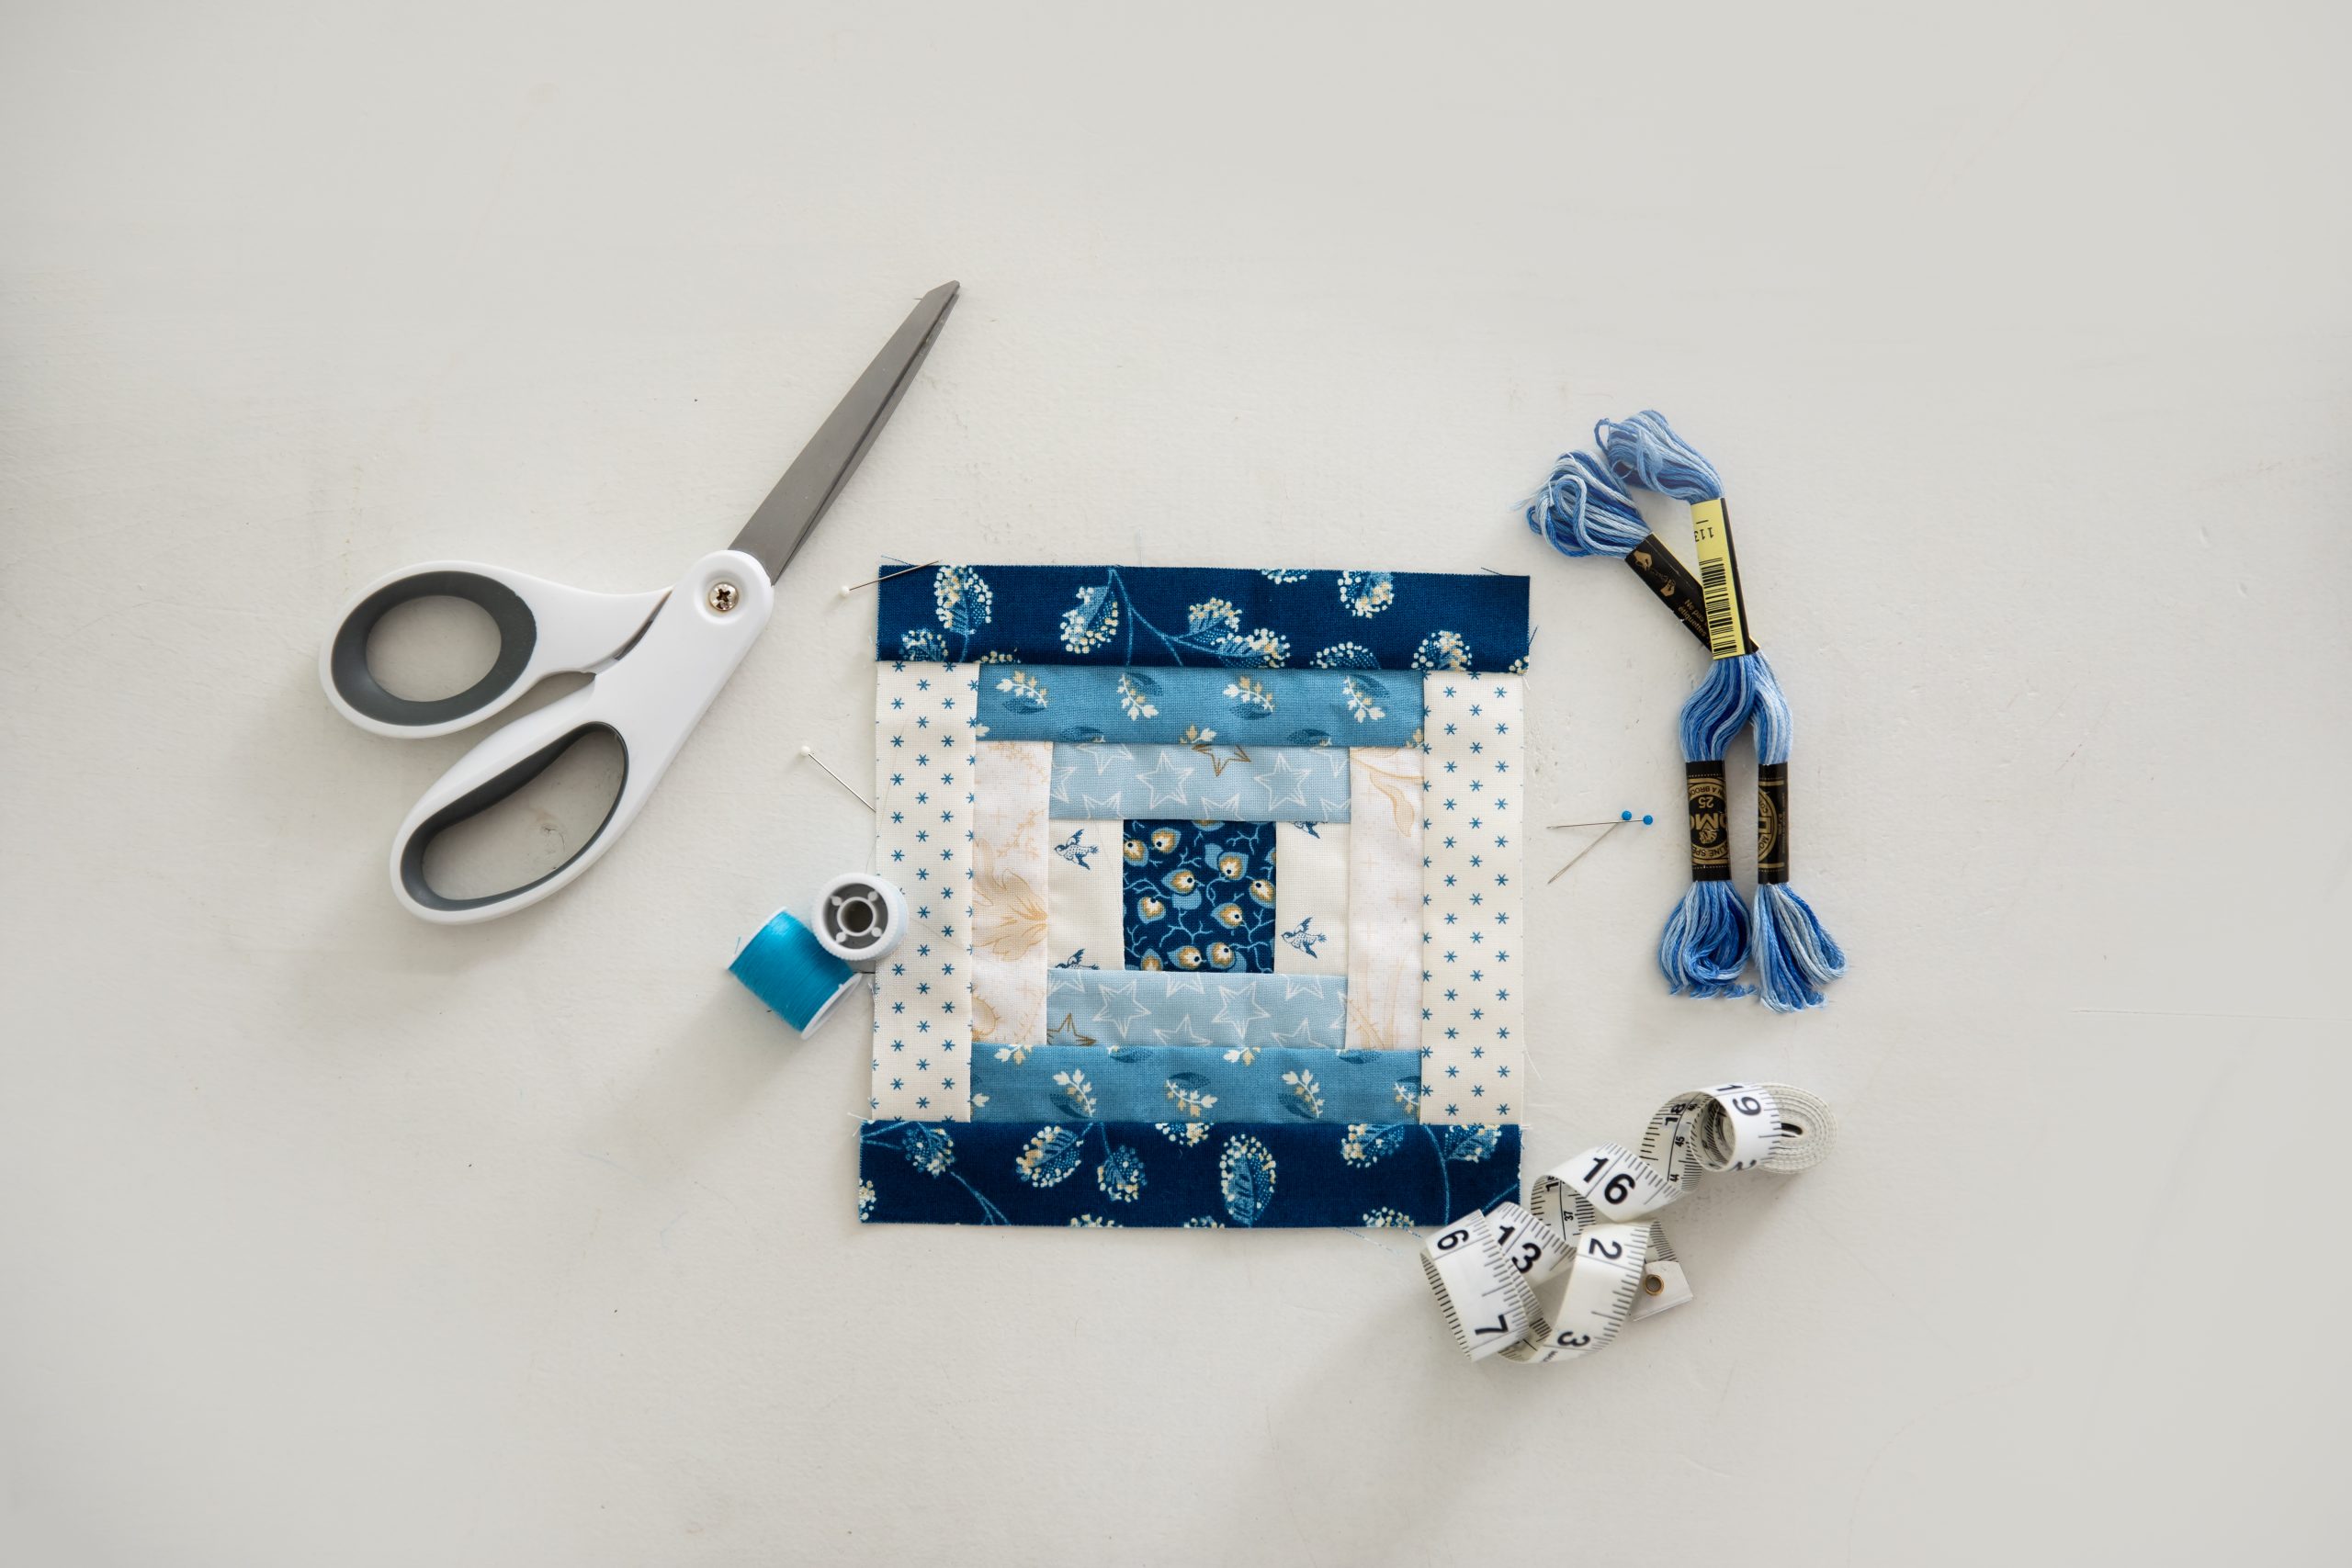
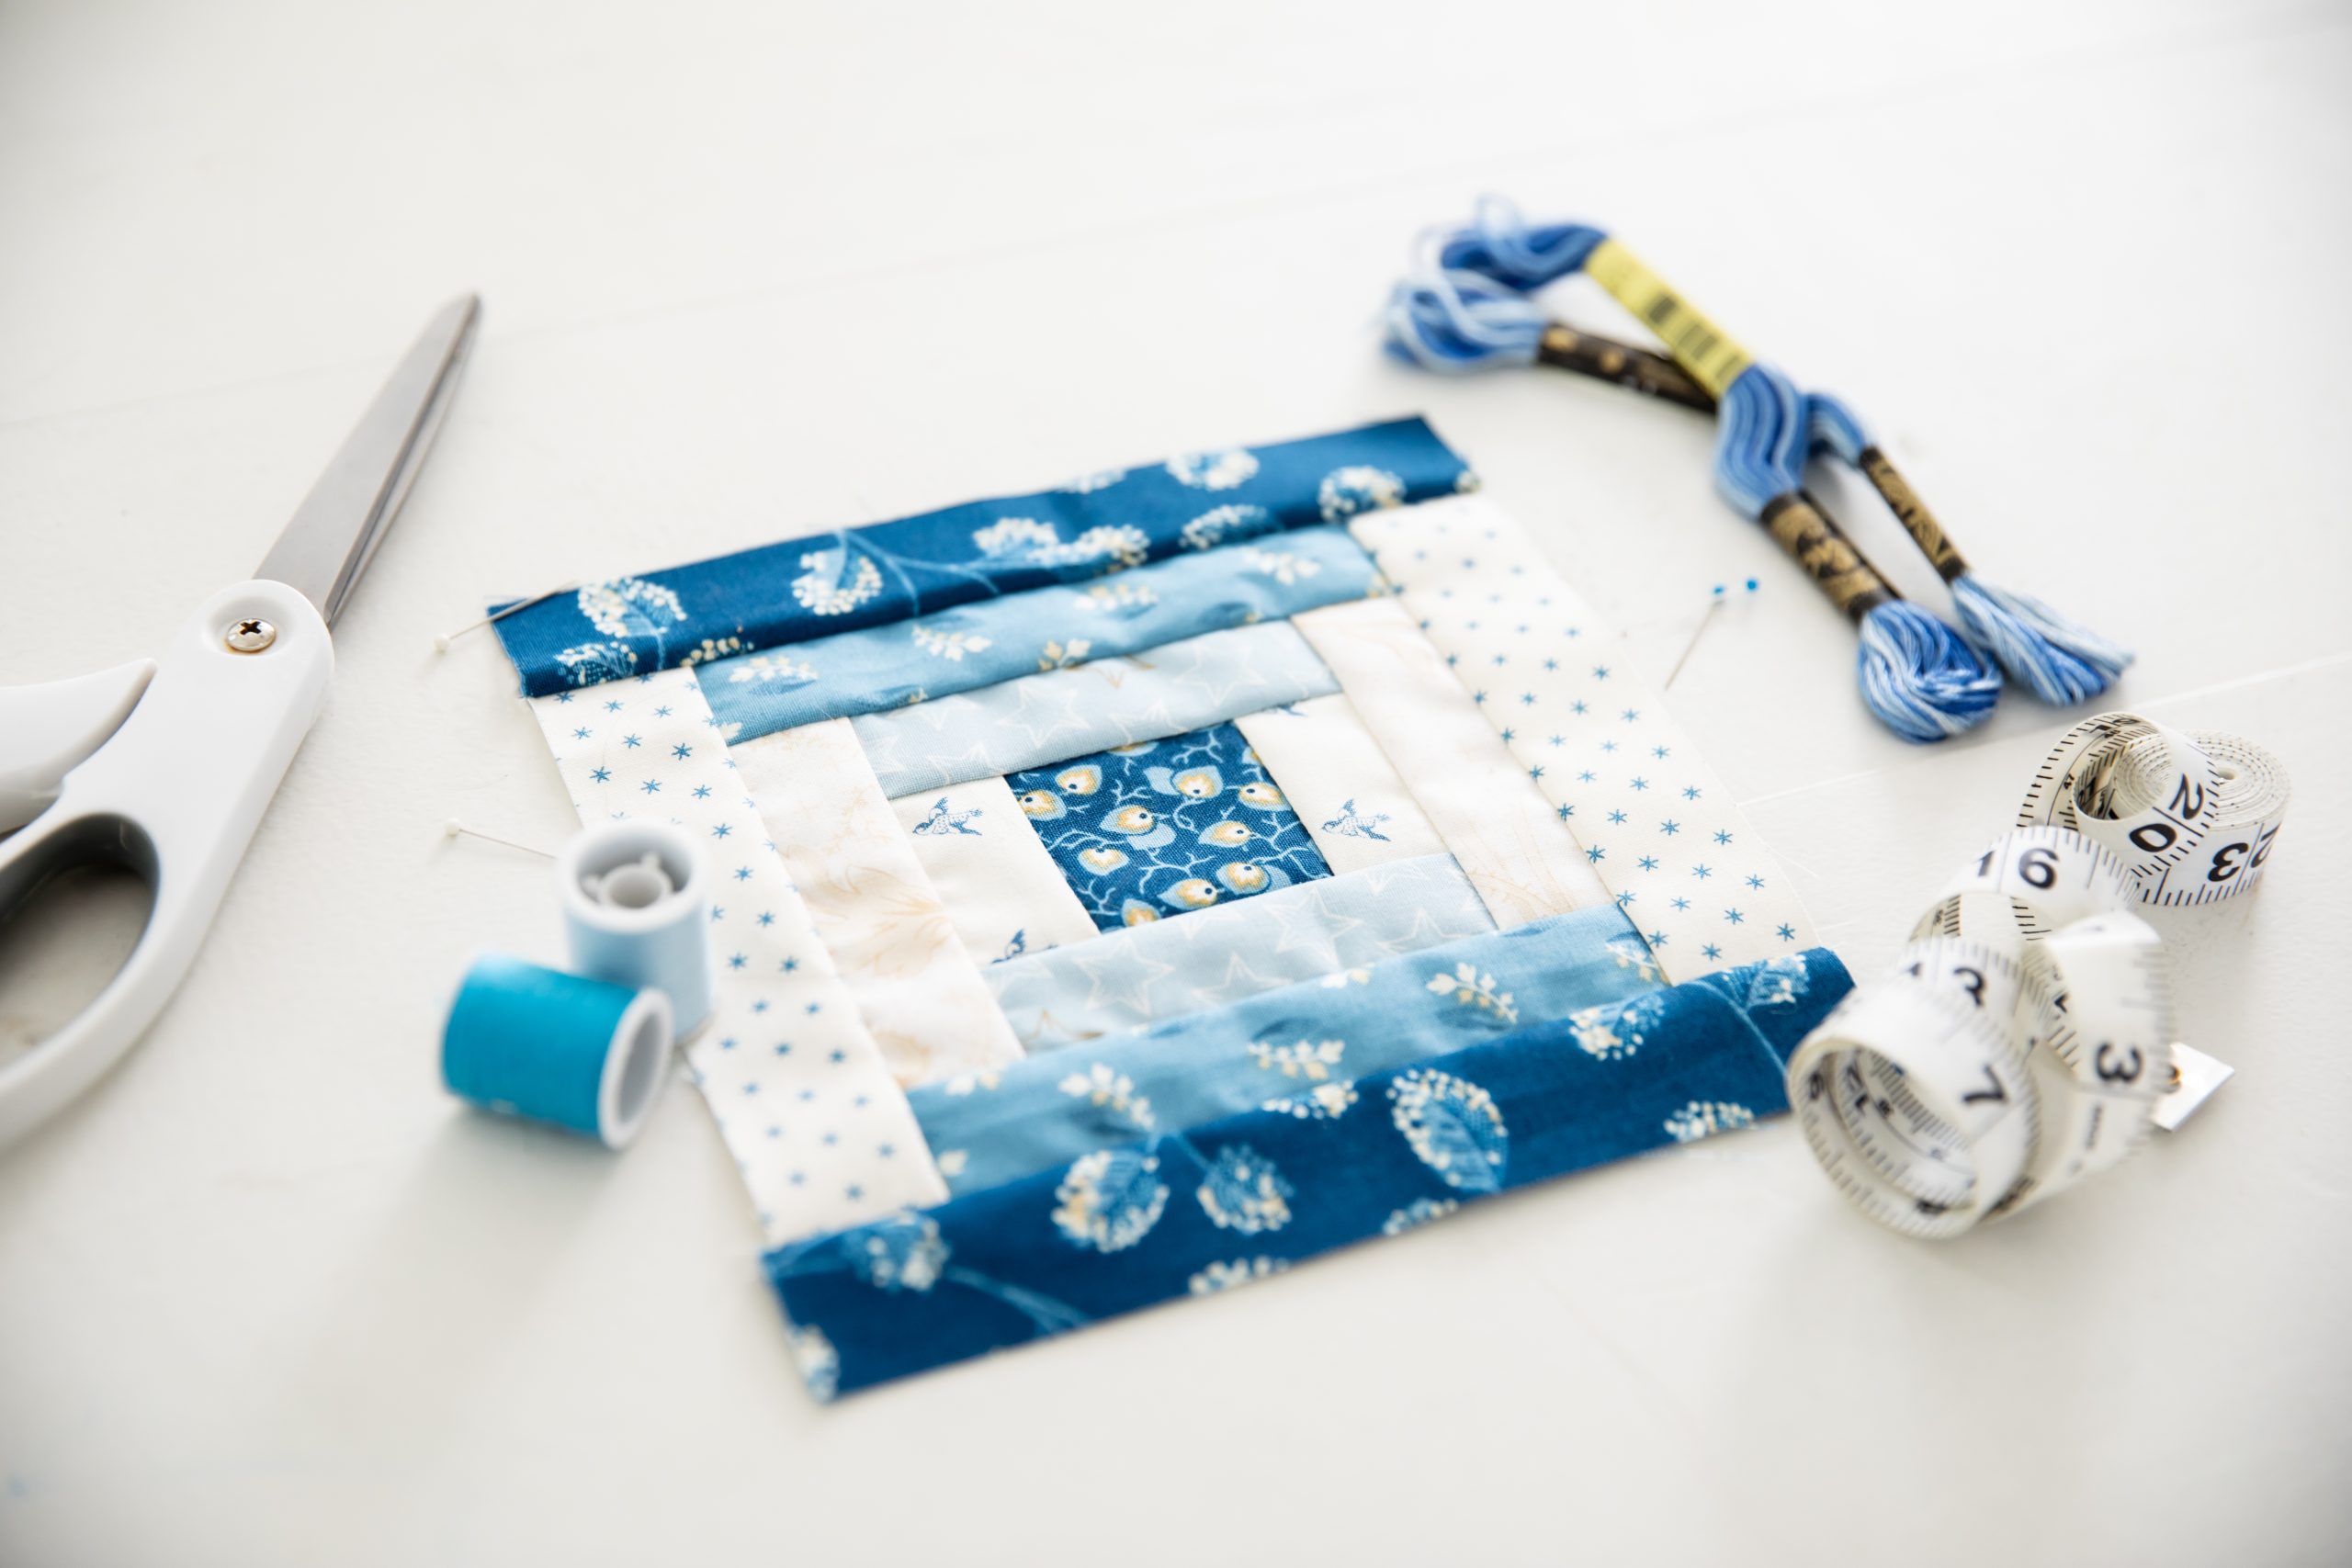
Piecing Instructions:
MAKING THE COURTHOUSE STEPS BLOCK:
This is an easy block, but it requires precision. There are three vital aspects to creating the perfect block.
- Cut the pieces accurately.
- Use exactly 1/4 inch seam allowance.
- Press the seams after each pair of strips is sewn onto the block.
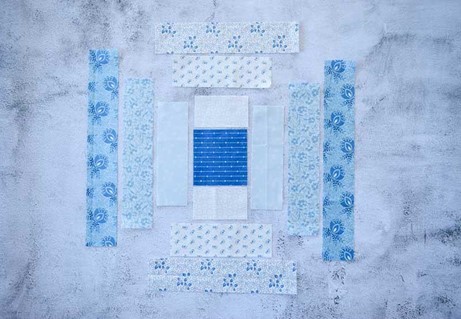
Build the block from the center outward. Lay out the block pieces to easily keep track of the order to sew the pieces in.
- Select the center square (A) and the B pieces.
- With right sides together, sew a B piece to the bottom side of the square (A). Sew the other B piece to the opposite side of the square (A). Press the seam outward.
- The C pieces should be the same length as the long side of the newly formed unit. Sew the C pieces to the left and right of the unit formed in Step 1. Press the seam outward.
- Sew the D pieces to the top and bottom of the unit formed in Step 2. Press the seam outward.
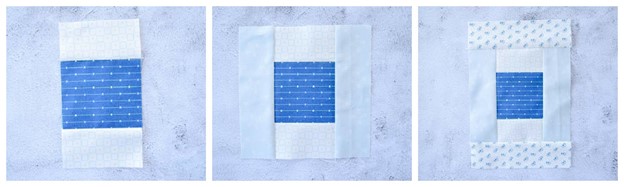
From left to right: Step 1, Step 2, Step 3
- Sew the E pieces to the left and right of the unit. Press the seam outward.
- Sew the F pieces to the top and bottom of the unit. Press the seam outward.
- Sew the G pieces to the left and right of the unit. Press the seam outward.
From left to right: Step 4, Step 5, Step 6

I also am having problems with the photos printing. Only the photos on pages 1 and 2 printed. Have you figured out what the problem is yet?
Hi again, Marge! Our editors were unable to replicate this issue. Is it the project images (in the step by step instructions) that are not printing or the additional photos at the bottom of the page? For the additional photos, you will need to save them to your device to print. Any additional details you can provide will help us troubleshoot potential issues. Thanks so much! – Ashley, We Like Quilting
I am having the same problem with the photos. I get the 1st 3 or 4 pages and then no more photos. I was worried it was my printer, but now that I know someone else is experiencing this, the problem may be on your end?
Hi Darlene! We’ll reach out to our development team to see if they can troubleshoot the issue. Have a great day! – Ashley, We Like Quilting
I’m having a problem with printing out these patterns. Only the first few photo illustrations are printing, the remainder are just blank spaces, but the step-by-step instructions are clear under each blank space. The print preview also show blank spaces, so I don’t think it’s something wrong with my printer. Thank you for the help.
Hi Veron! All of the step photos are jpgs, so I’m unsure why only some are showing up. I would recommend right clicking the photos, opening them in a new tab, and seeing if you are able to print them that way. You can also try right clicking the photos and saving them, and try printing them from your photos. Hope this helps! – Ashley, We Like Quilting