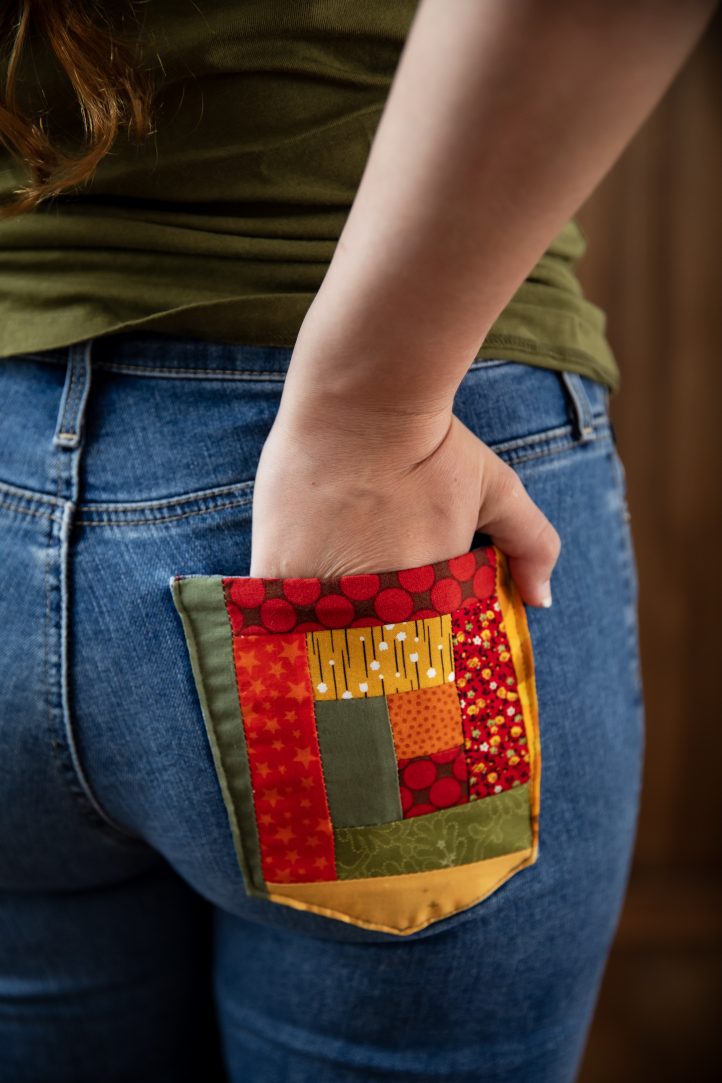
Our editors can’t resist a fun upcycling project, and this pocket makeover idea from Mallory Hill is next on our to-make list. Transform a pair of thrifted jeans by adding colorful log cabin blocks to your back pockets. Design your back pocket blocks in a cheerful autumnal palette like our sample or a trendy pastel color scheme with this easy upcycling pattern.
Designer Notes:
- Your construction may vary depending on the size of your pocket and the size of strips you would like on your quilt block. The block in the sample uses 1 1/2” strips to have a finished size of 1” strips, using a 1/4” seam allowance. Feel free to adjust your measurements to get the look you love.
- RST = Right Sides Together
Materials:
- 1 pair of jeans
- Hand sewing needle
- 1 spool of coordinating thread
- Scraps of fabric in coordinating colors – at least 1 1/2” wide by 7” long (or 1” longer than the longest side of your pocket)
- Scrap piece of paper
- Optional: Lightweight fusible interfacing
Tools:
- Iron/ironing board
- Fabric scissors
- Rotary cutter and mat
- Sewing machine with denim needle attached
- Hand sewing needle
- Paper scissors
- Pencil
Piecing Instructions:
- Press fabric scraps and trim all pieces into 1 1/2” strips, and two 1 1/2” squares for the center.
- Layout your fabrics so you have an idea of where each piece will go.
- Start with a 1 1/2” square that will be the center of your block, attach a second 1 1/2” square next to the first, sew RST using 1/4” seam allowance. Press open.
- Take your next strip of fabric and lay it, RST, along the long edge of the two squares from Step 3. Sew and press open. Trim any additional length from the strip as needed.
- Continue working your way around the center square with additional strips of fabric. Press and trim as you go.
- Measure the widest and tallest length on your pocket, continue sewing strips to your log cabin block until the block is at least 1” larger than your longest measurements. For example, my pocket was approximately 5” across the top and 5” tall through the center of the pocket. Mallory made her log cabin block approximately 6” wide and 6” tall.
- Optional: Fuse a layer of lightweight interfacing to the back of your block to add more stability to your block.
- Use a scrap piece of paper to make a template of your pocket – lay the paper on top of your pocket and trace around the edges. Cut the pocket template out and trim as needed to get an accurate stencil of your pocket.
- With your finished log cabin block wrong side up on your ironing board, center your pocket template on top. Press the edges of your pocket towards the wrong side of your block wrapping around your template. Once you have the shape pressed, remove the template and give your block a final press to crease the folded edges.
- Lay your quilt block, right side up, on top of your jeans pocket, and line up the pressed folded edges along the pocket edges. If any adjustments need to be made, take your block back to your ironing board to make adjustments until it matches the edges of your pocket. When you have a good match, pin your block in place on top of the pocket.
- Edge stitch the block to the pocket along the sides and bottom edges, backstitch at the beginning and end. Do not sew with your machine along the top edge.
- Once your block is sewn in place, hand sew the top edge of your block to the top edge of your pocket using a slip stitch.
- Repeat steps for your second pocket.
- Put on your jeans and get ready to show them off!


