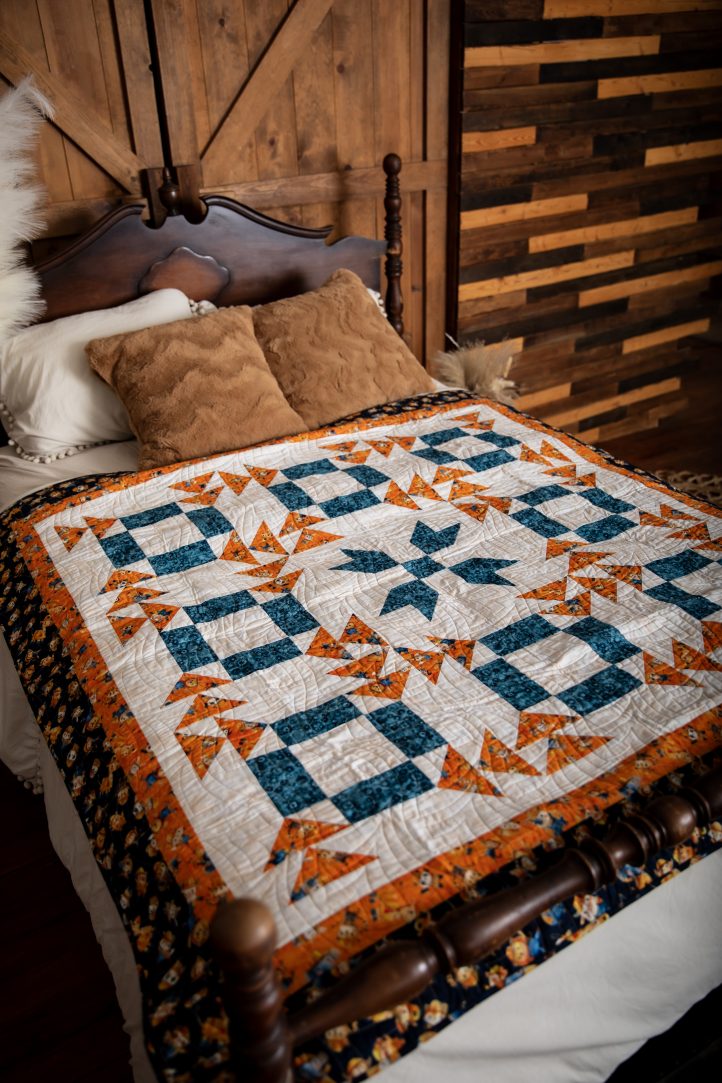
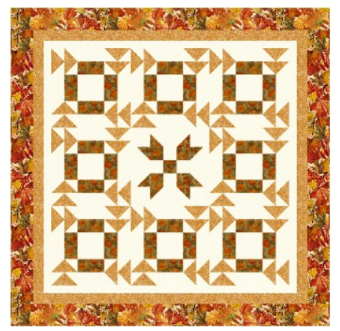
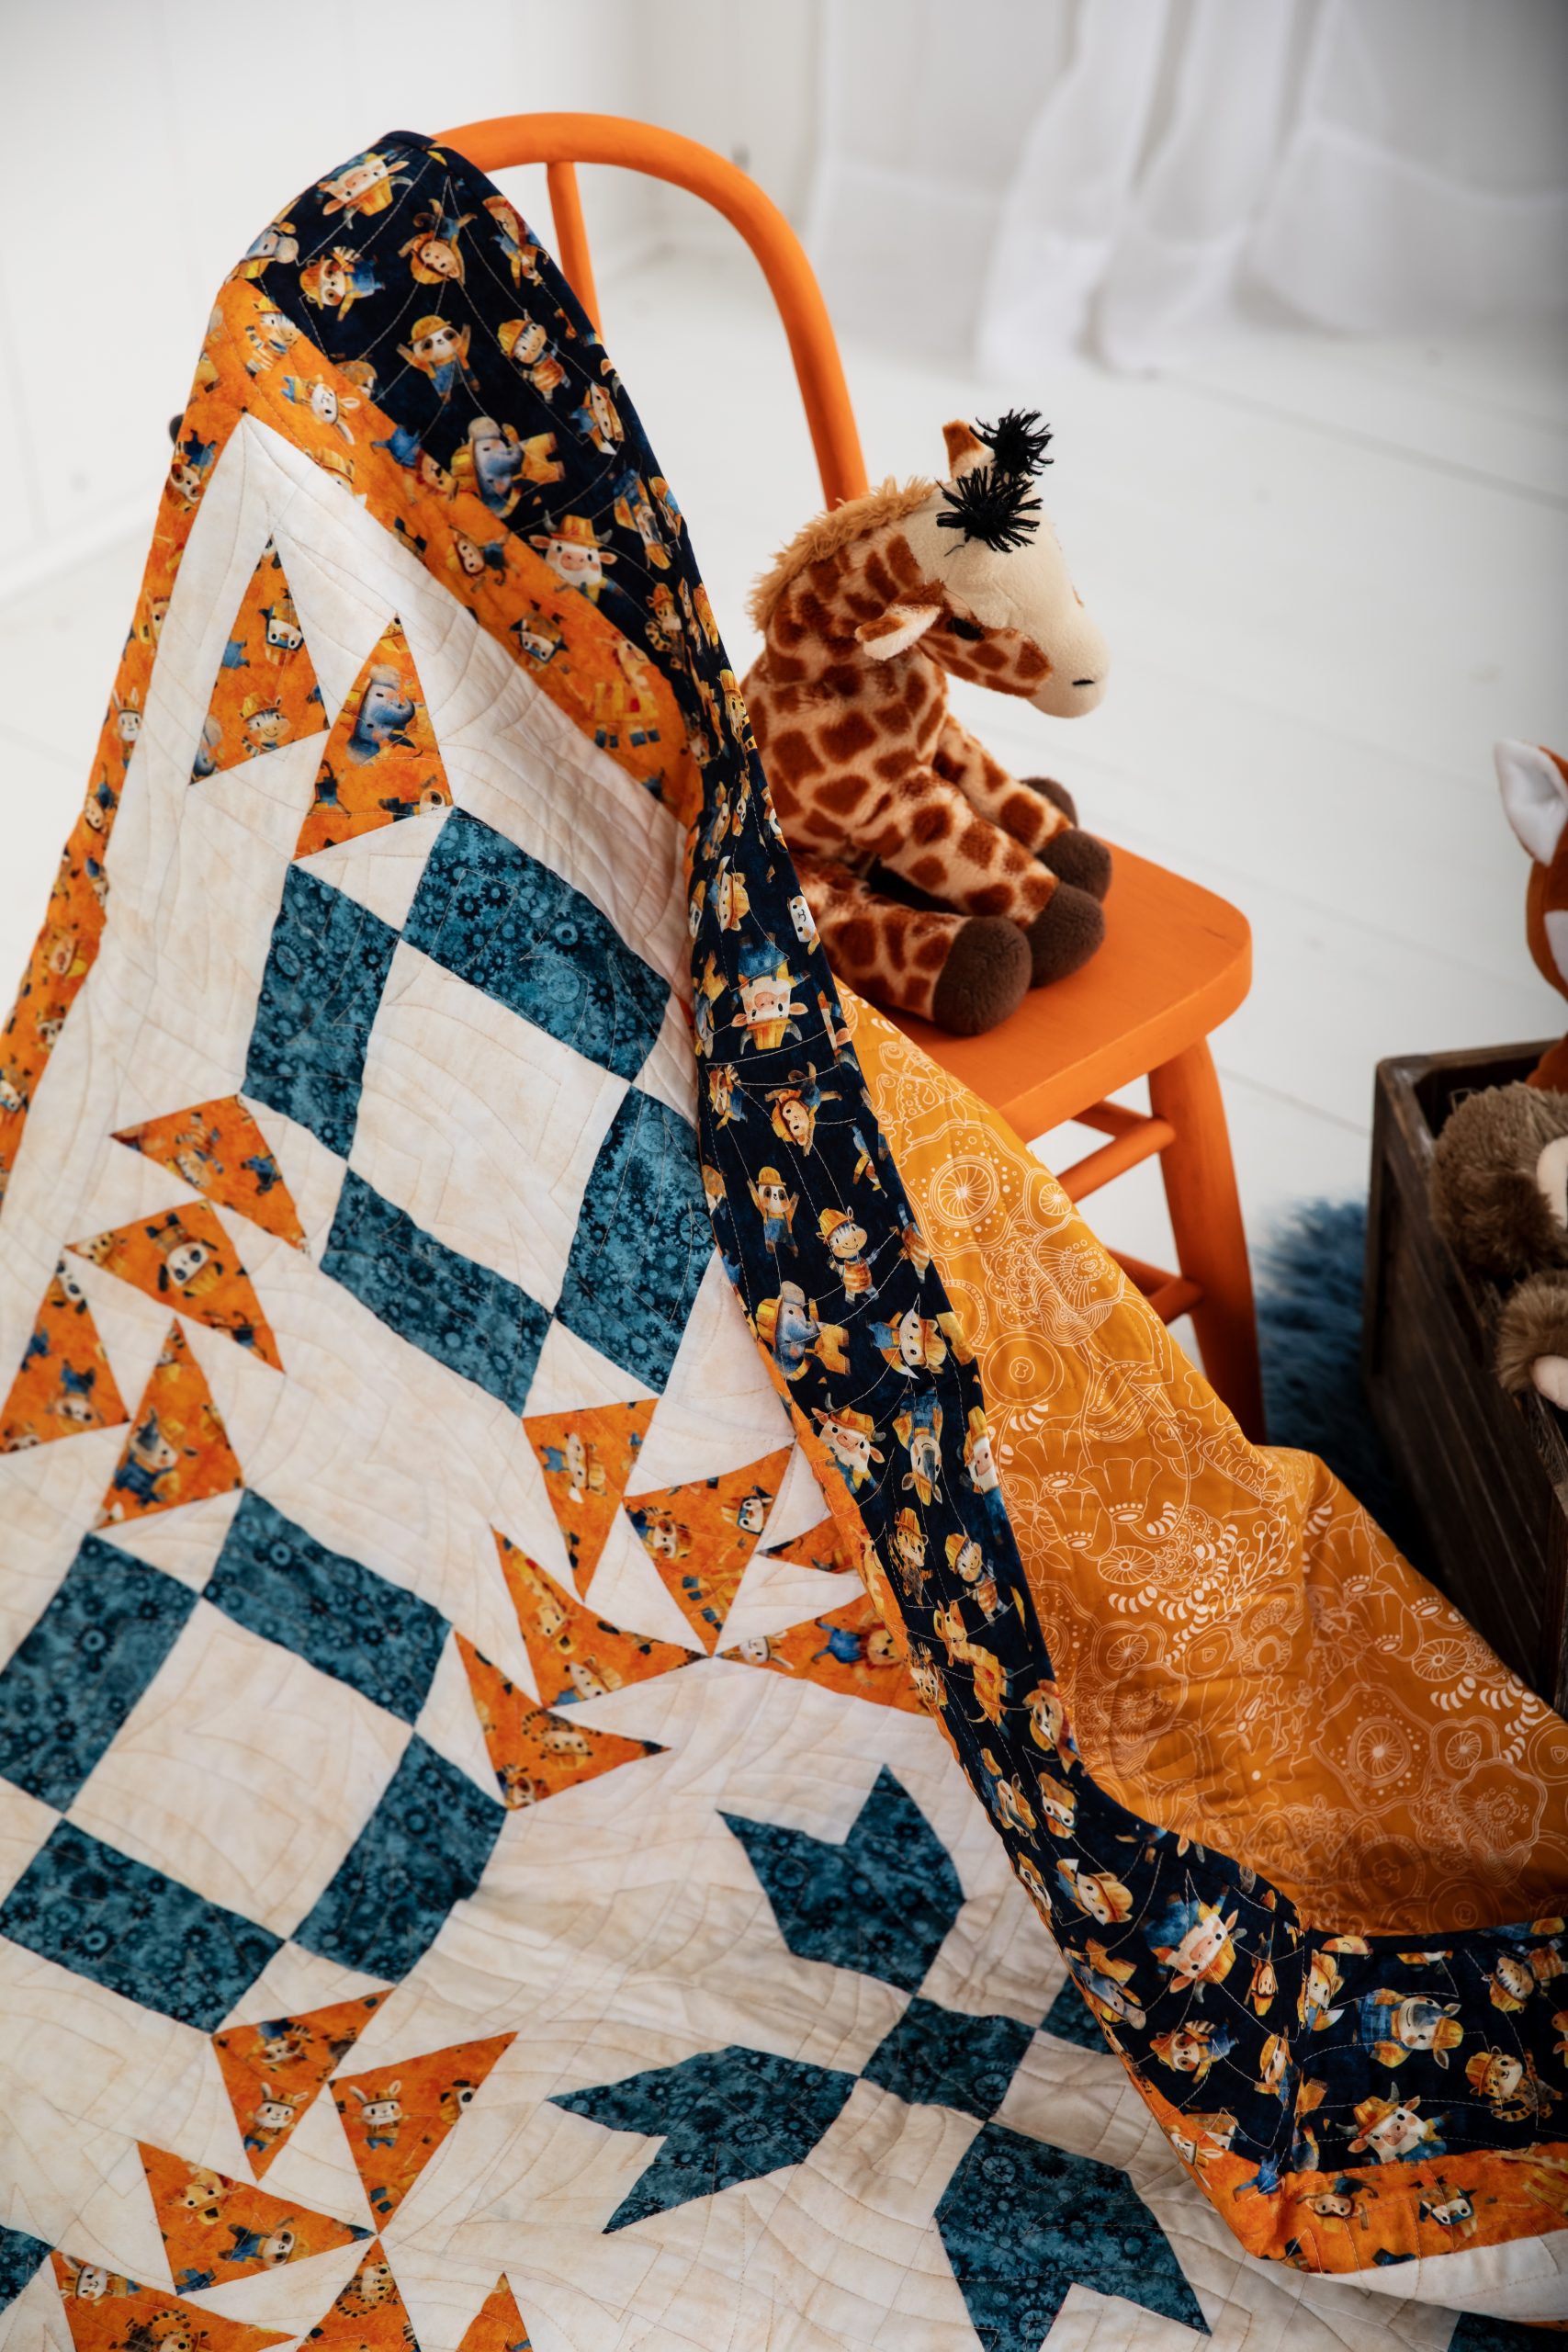
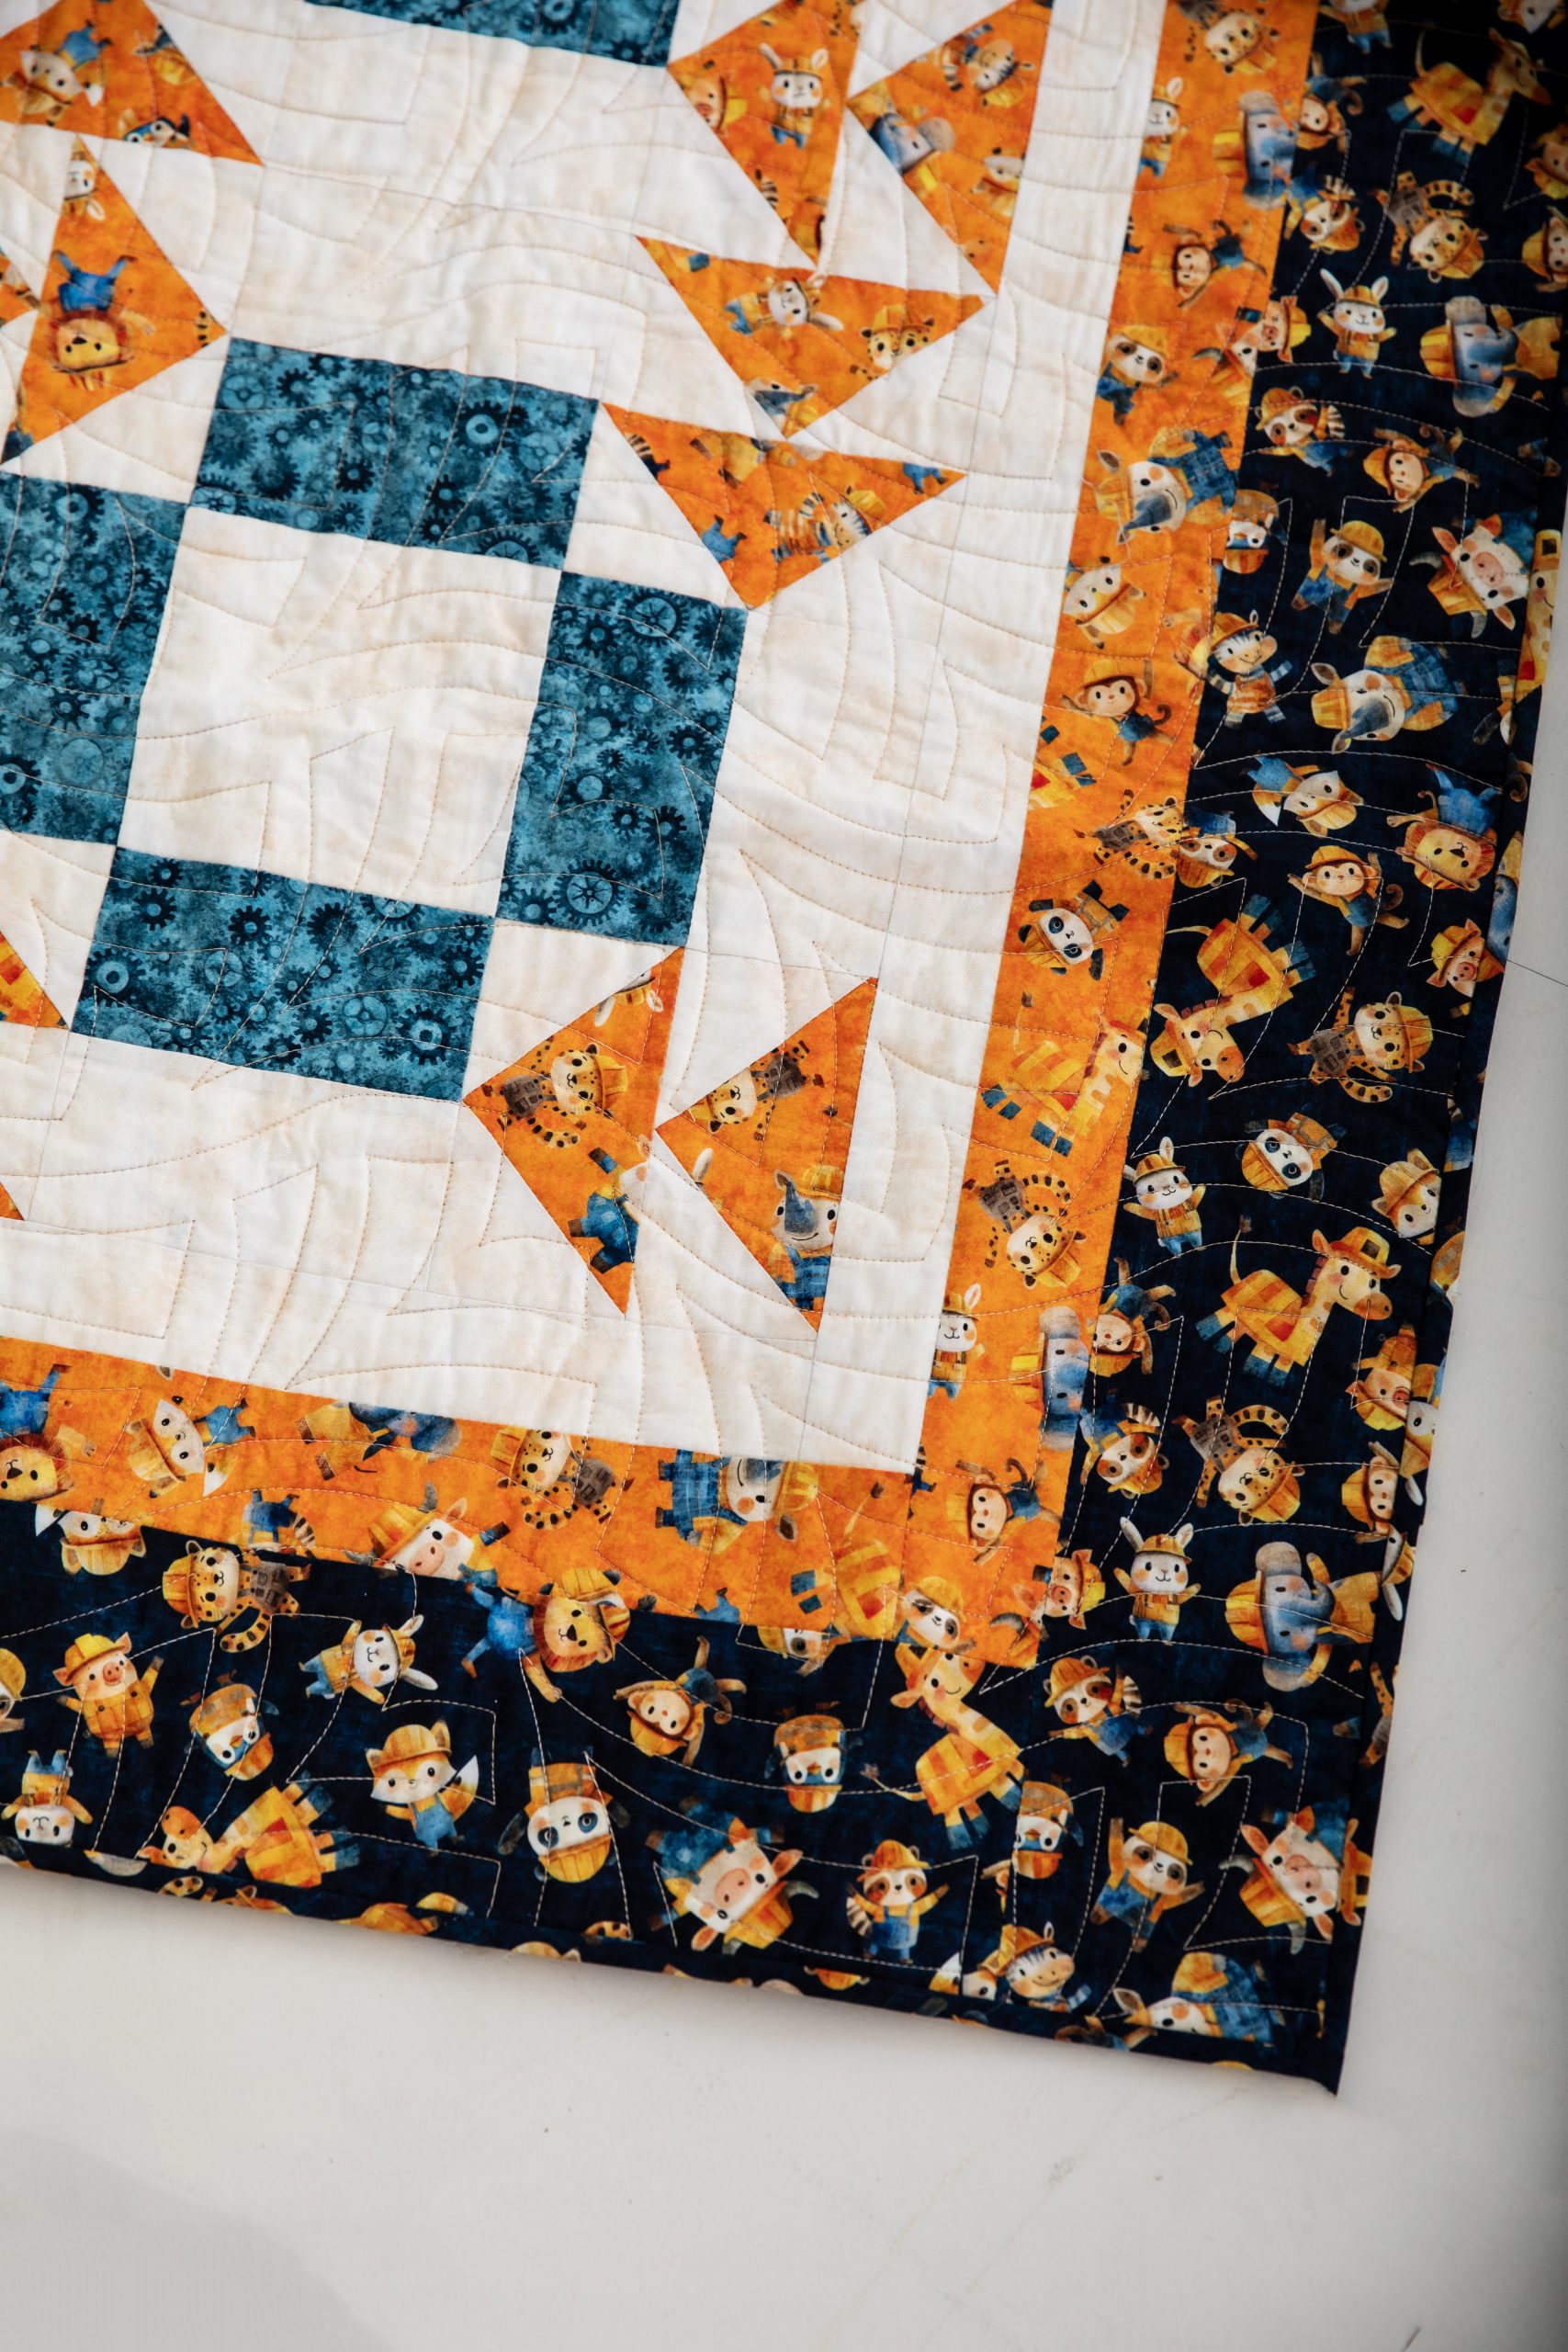
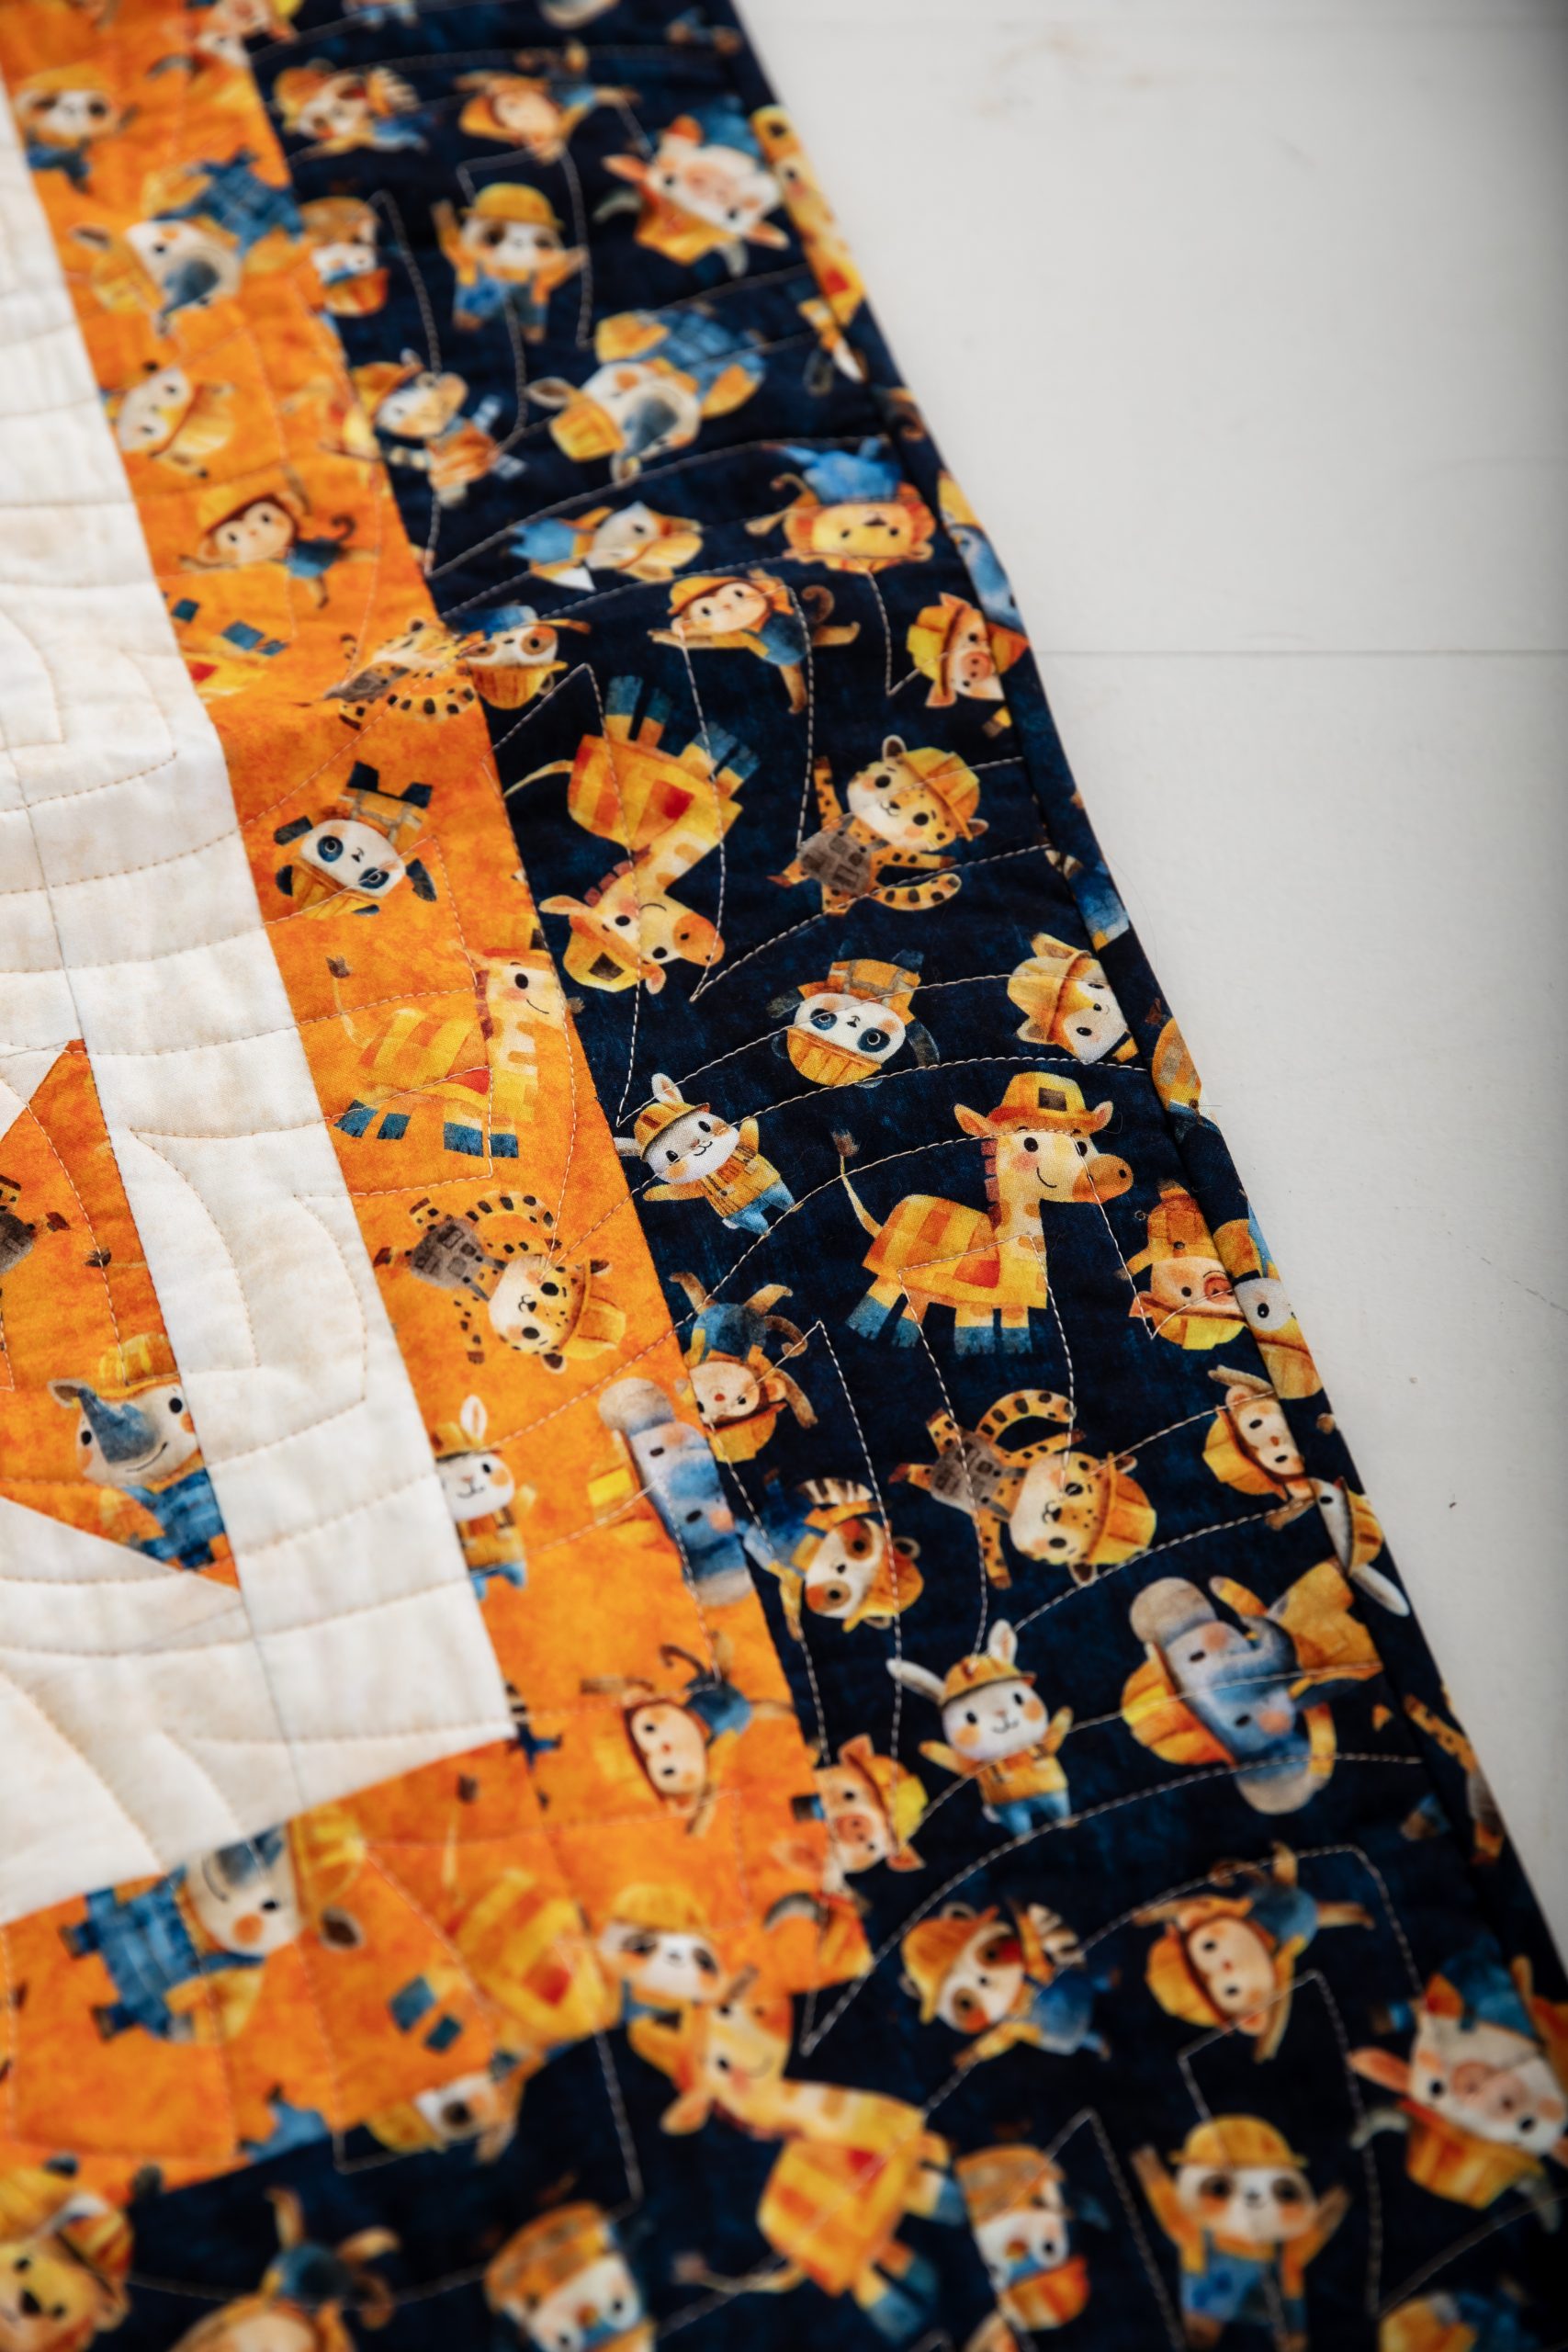
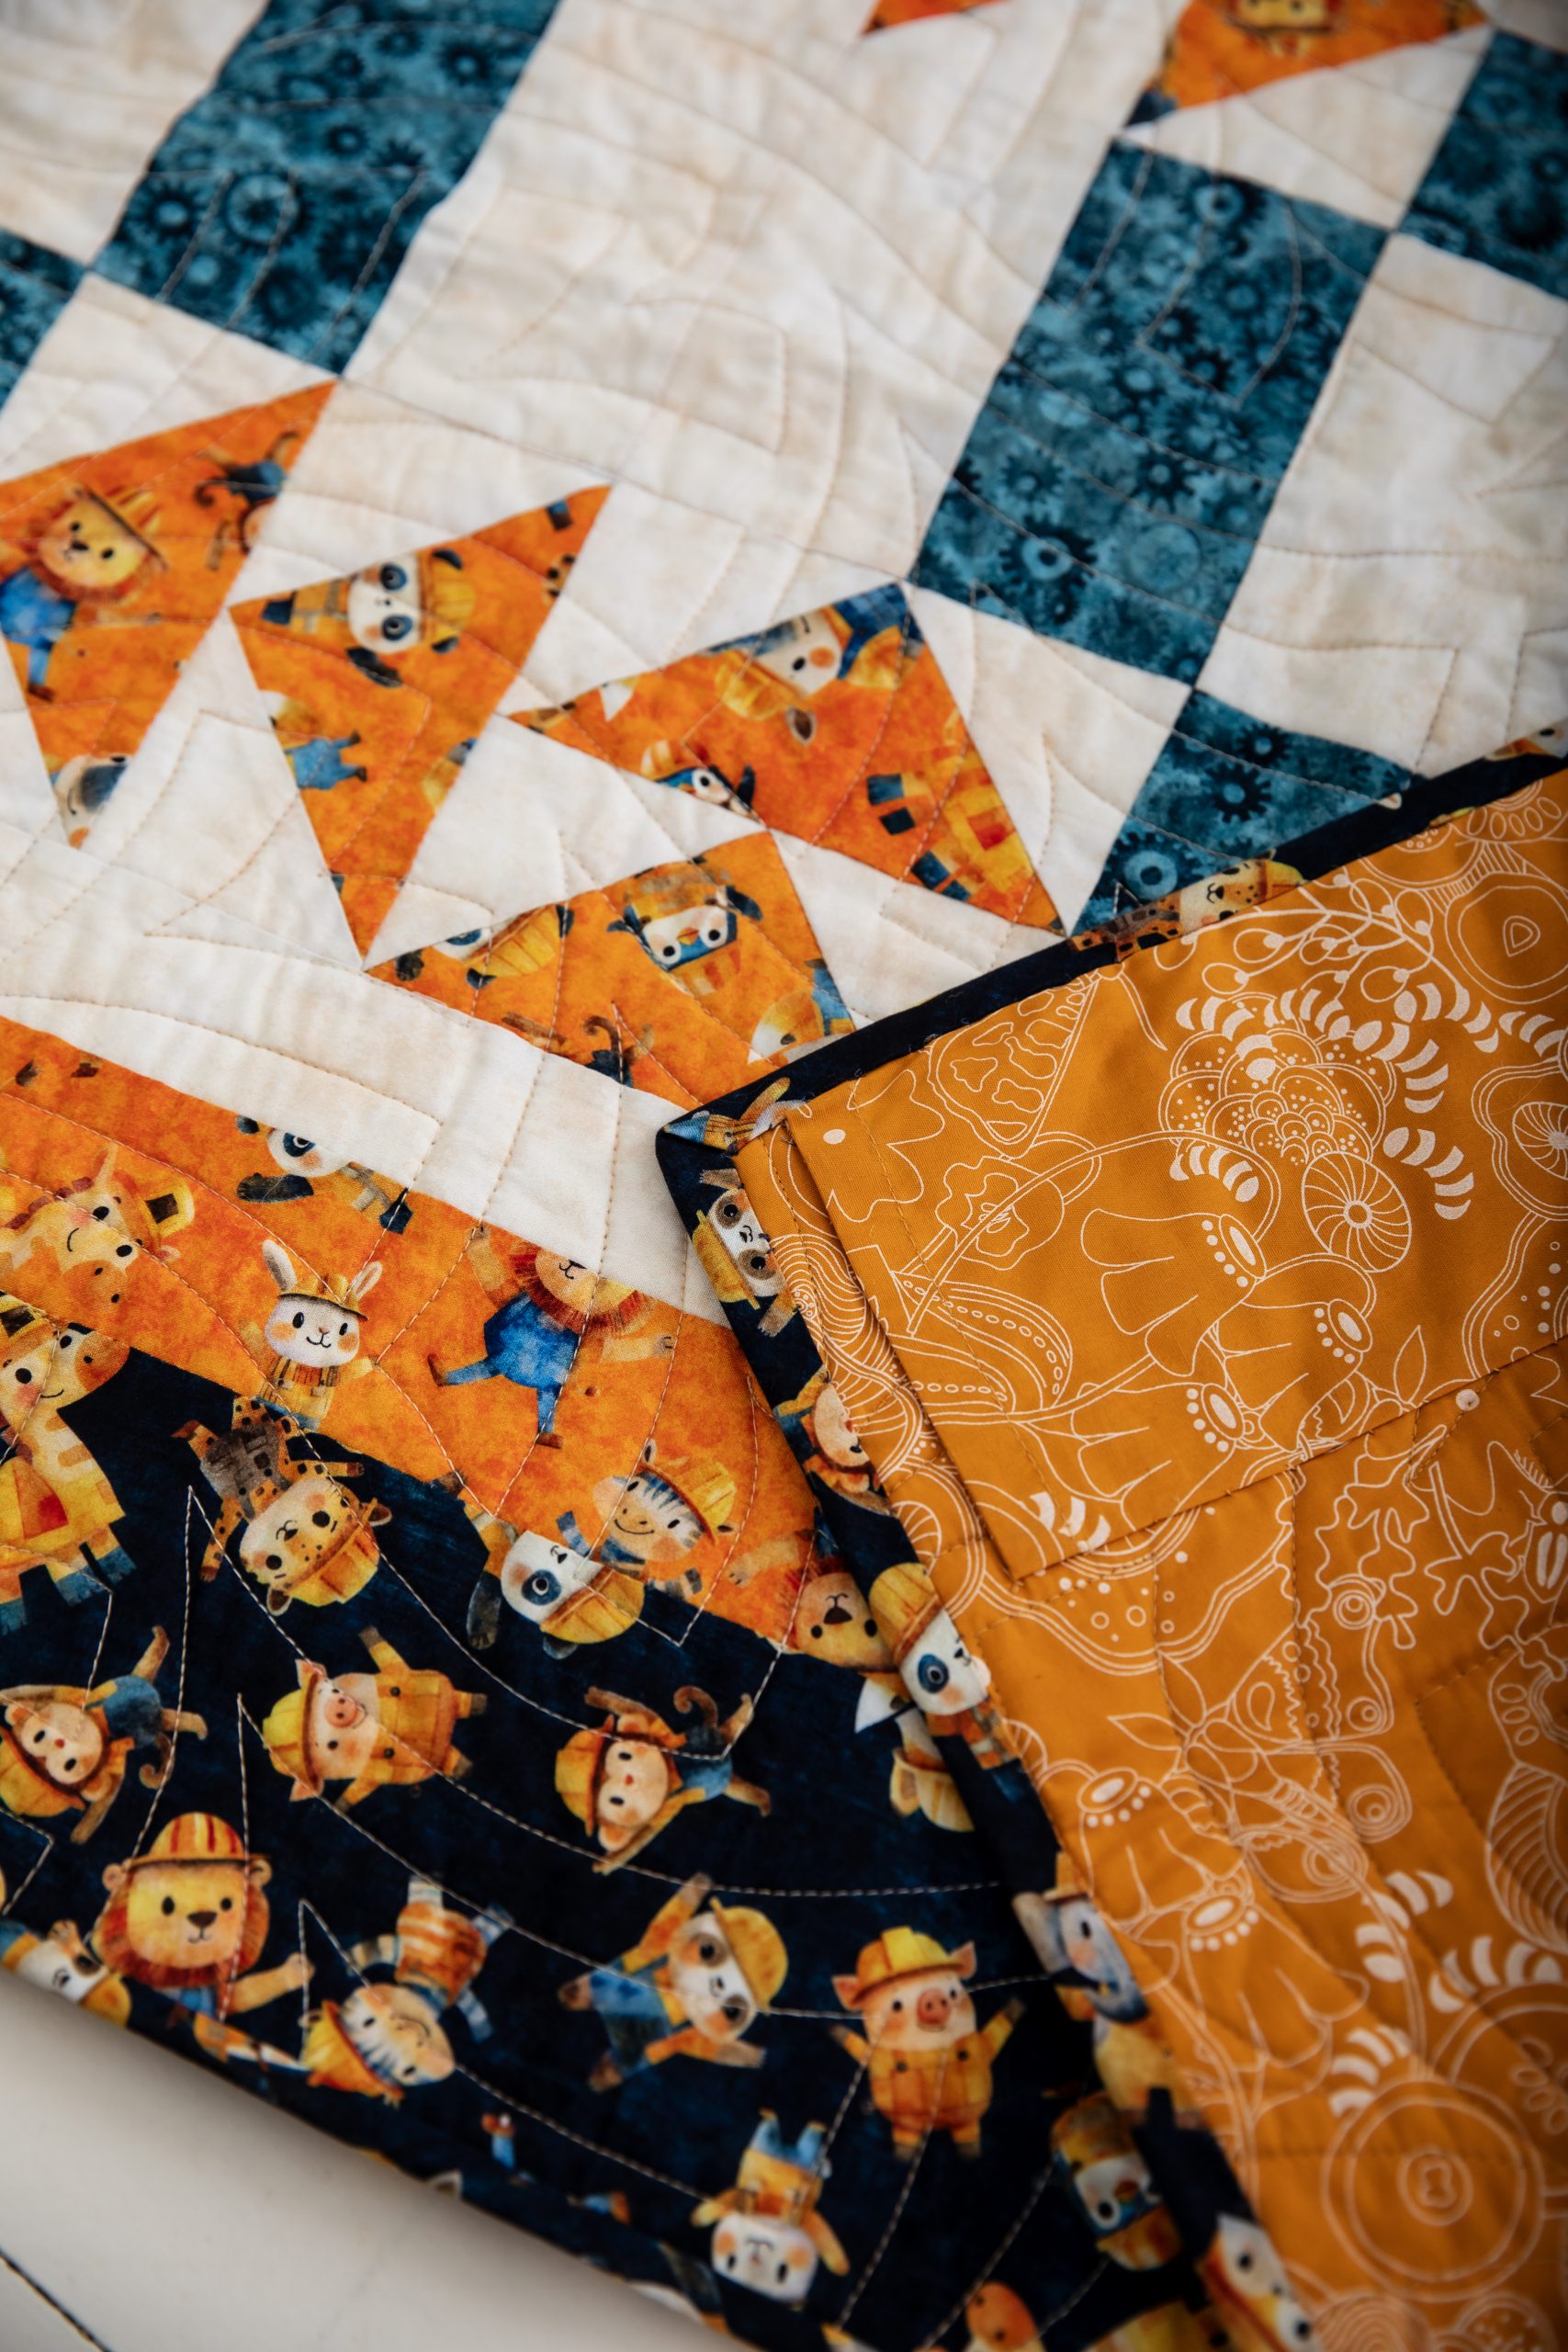
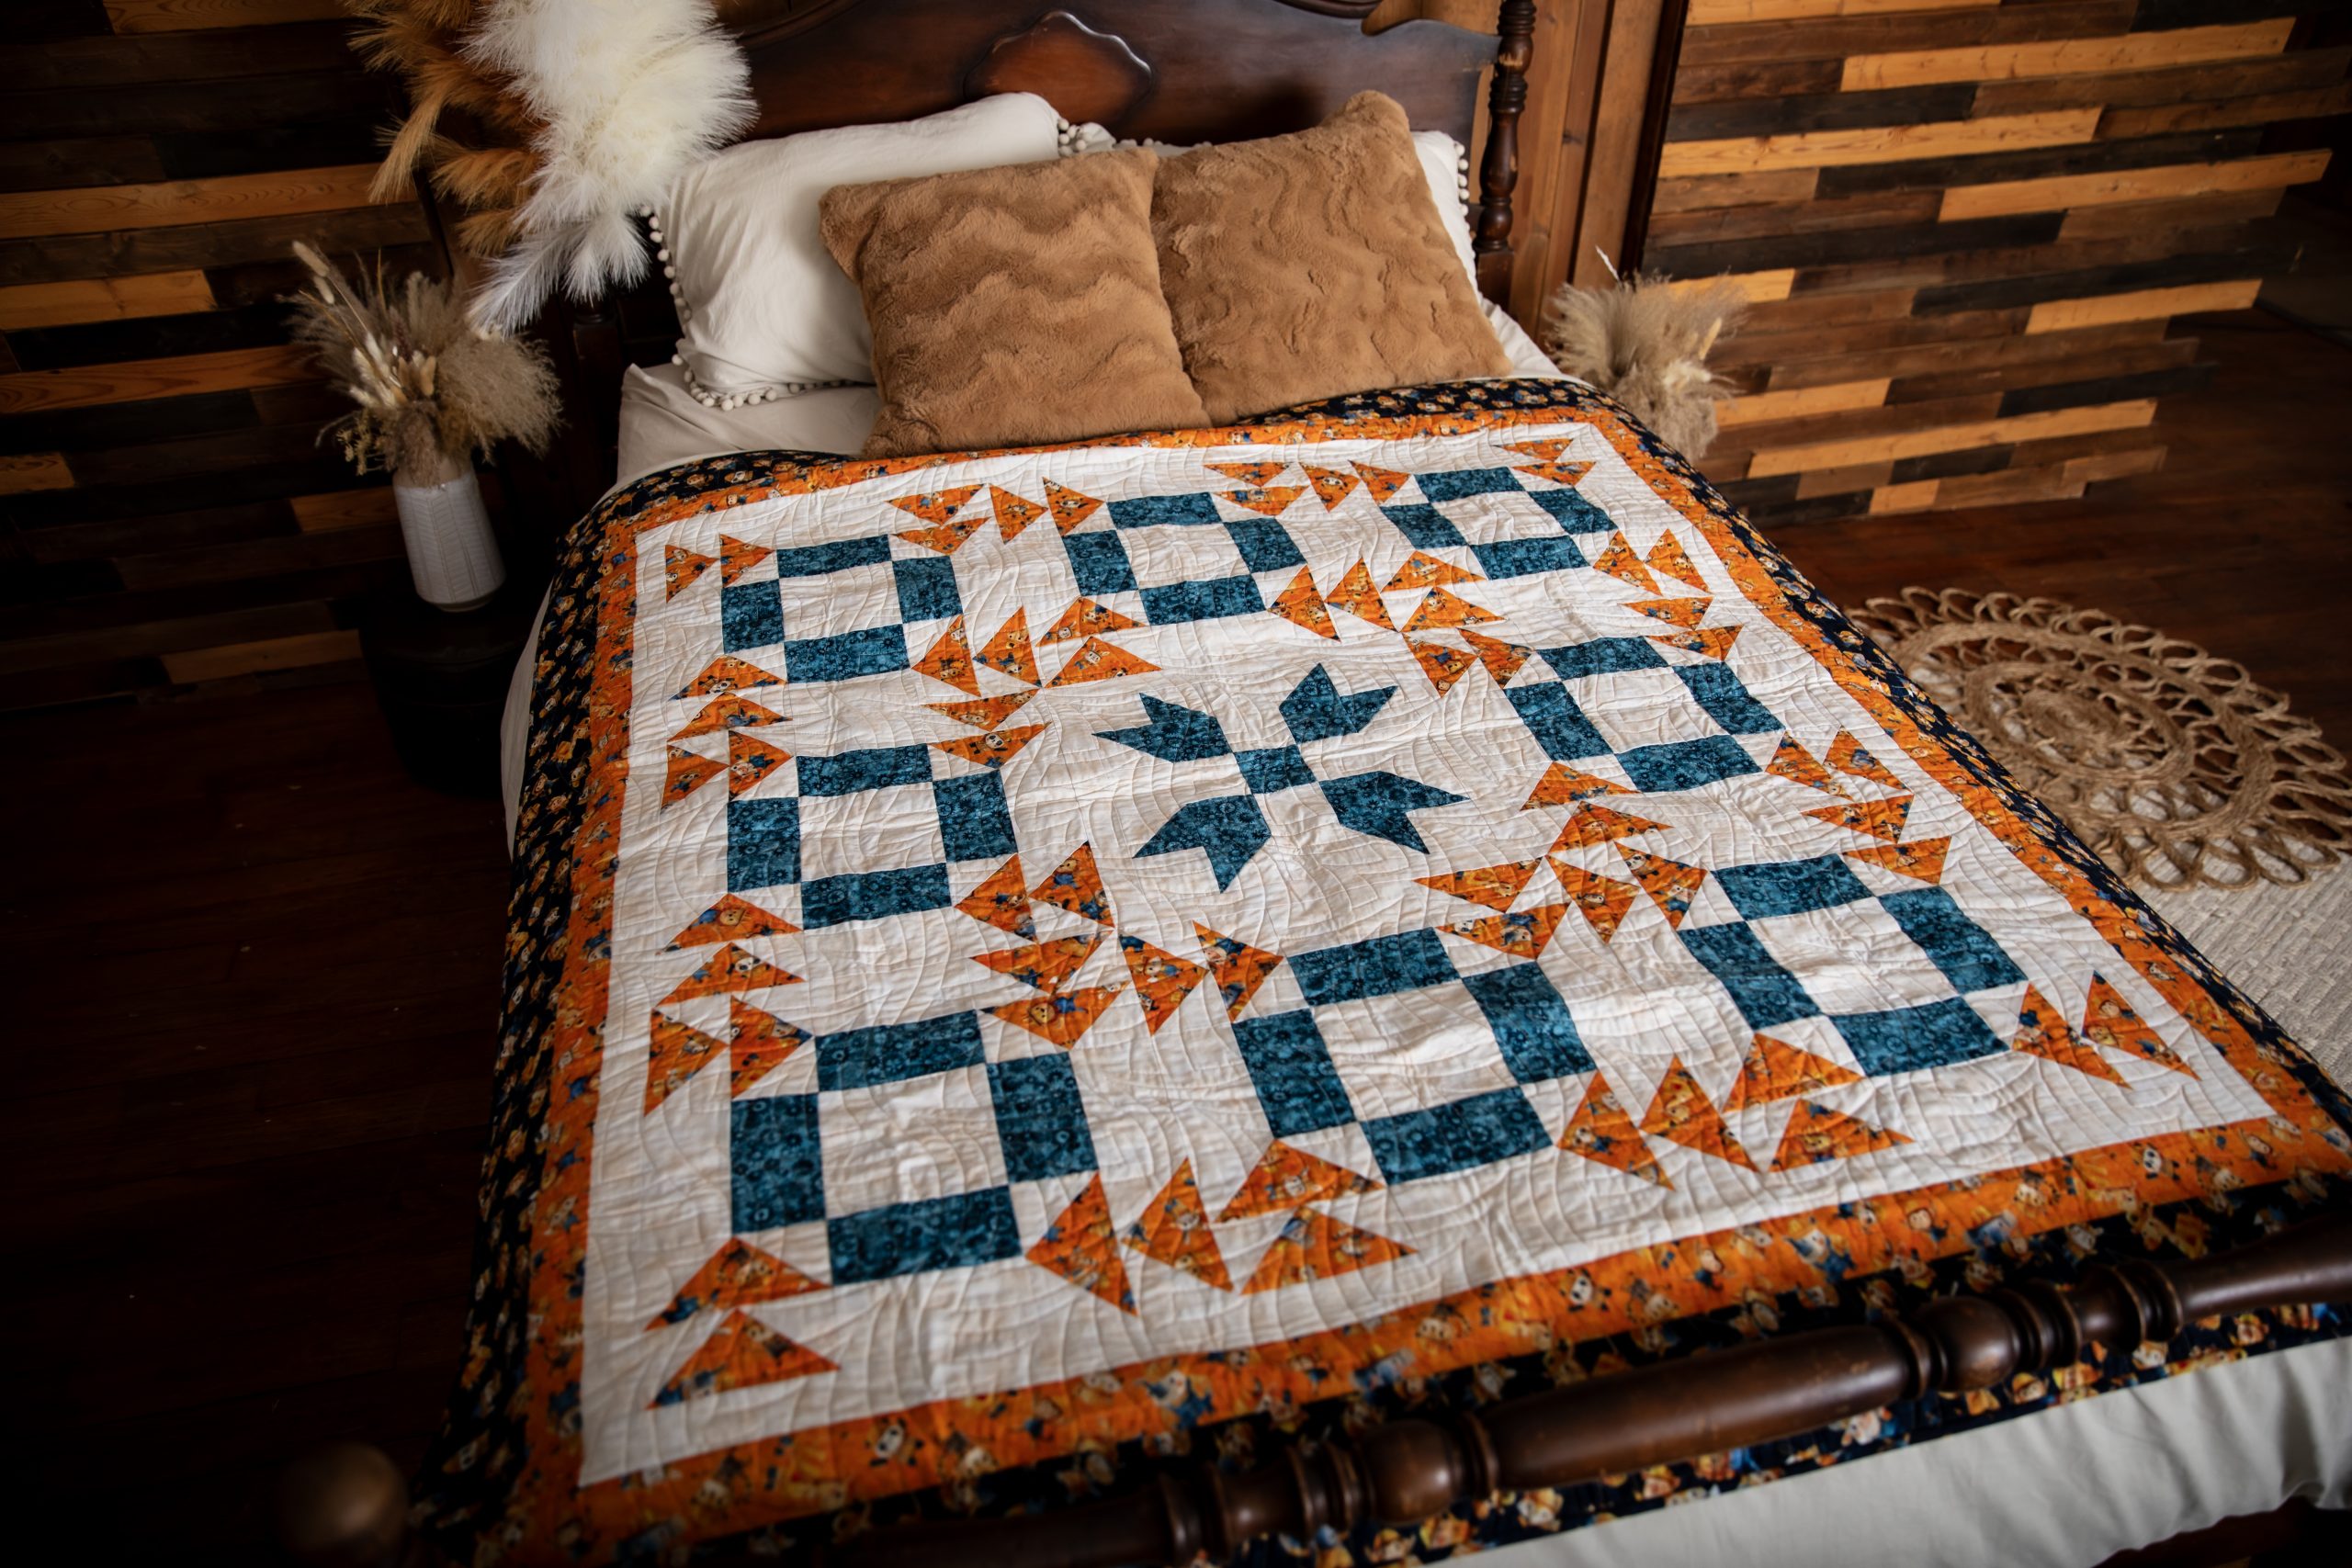
Kick off cozy fall weather with a striking lap quilt pattern! This new throw quilt pattern from Brenda Plaster combines two traditional quilt blocks, the apple pie block and the farmer’s daughter block, to create its unique design. We love all of the gorgeous colorways suggested by the designer, such as our sample in blue and orange, and we can’t wait to see what color palettes our readers choose for this design.
Finished Size: 60-1/2” x 60-1/2”
Designer Note: Please read pattern before starting your project.
ADDITIONAL COLORWAYS:
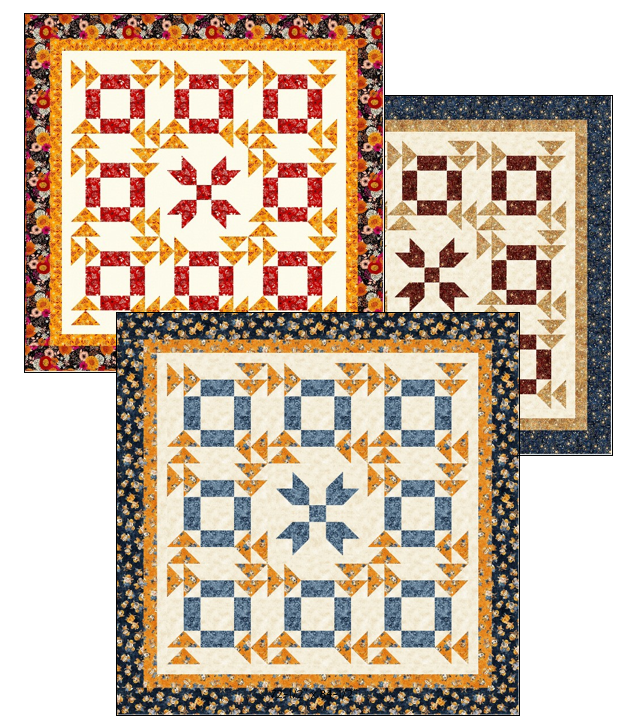
The designer has provided fabric information for the samples shown!
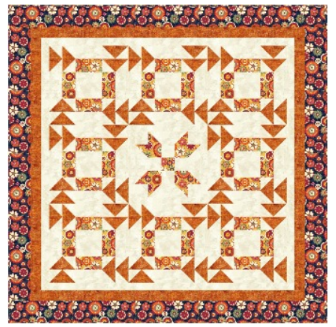
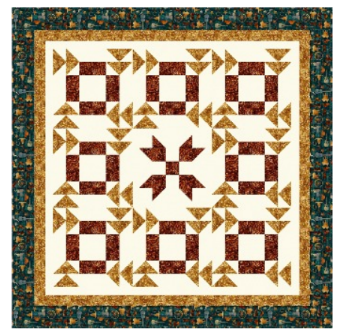
Pattern instructions are illustrated in fabric from the Build It Collection by QT Fabrics. The alternate quilt colorings are illustrated in fabric from the Blooms of Joy and 1776 collections by QT Fabrics. Below are additional colorings of the design.
Fabric from Feelin’ Groovy collection by Michael Miller Fabrics
Fabric from Born to Run collection by QT Fabrics
Fabric from Autumn Celebration collection by In the Beginning Fabrics
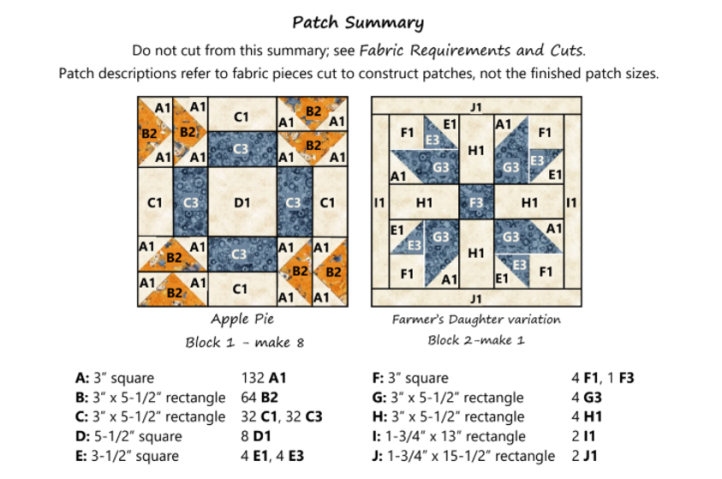
PATCH SUMMARY:
Fabric estimates are based on useable fabric width (selvage to selvage) of at least 42”. Add yardage if you prewash your fabrics or are fussy-cutting.
Cuts across the fabric width are indicated as WOF (width of fabric). Some cuts are lengthwise (parallel to selvage) to enable lengthwise border cuts. This avoids distorted/wavy borders, as fabric does not stretch on the lengthwise grain.
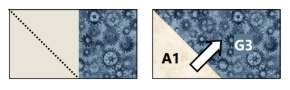
In the patch labels (see Patch Summary), the letter refers to the patch. The number refers to the fabric from which it is cut. For example, A1 is an A patch cut from Fabric 1.
Fabric Requirements and Cuts:
Fabric 1: 2-1/8yards
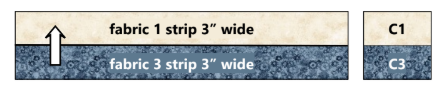
- C1: Cut WOF [5] 3” strips.
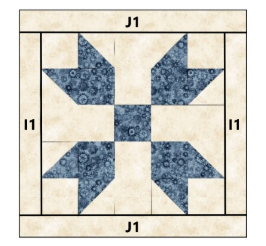
- E1 and H1: Cut WOF [1] 3-1/2” strip. From this, cut [2] 3-1/2” x 3-1/2” E1 squares. Cut remainder of strip to 3” wide. From this, cut [4] 3” x 5-1/2” H1 rectangles.
- I1 and J1: Cut WOF [2] 1-3/4” strips.
- From these, cut [2] 1-3/4” x 15-1/2” J1 and [2] 1-3/4” x 13” I1 rectangles.
- From remaining fabric, cut:
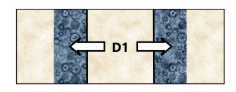
- D1: Cut lengthwise of fabric [1] 5-1/2” strip.
- From this, cut [8] 5-1/2” x 5-1/2” squares.
- A1 and F1: Cut lengthwise of fabric [8] 3” strips. From these, cut [132] 3” x 3” A1 squares and [4] 3” x 3” F1 squares.
- Inner border: Cut lengthwise of fabric [4] 2” strips.
- D1: Cut lengthwise of fabric [1] 5-1/2” strip.
Fabric 2: 1-1/4 yards
- B2: Cut lengthwise of fabric [8] 3” strips. From these, cut [64] 3” x 5-1/2” rectangles.
- Middle border: Cut lengthwise of fabric [5] 2-1/2” strips.
Fabric 3: 3/4 yard
- E3, G3 and F3: Cut WOF [1] 3-1/2” strip. From this, cut [2] 3-1/2” x 3-1/2” E3 squares. Cut remainder of strip to 3” wide. From this, cut [4] 3” x 5-1/2” G3 rectangles and [1] 3” x 3” F3 square.
- C3: Cut WOF [5] 3” strips.
Fabric 4: 1-1/2 yards
- Outer border: Cut lengthwise of fabric [5] 4-1/2” strips.
- Binding: From remaining fabric, cut enough 2-1/4” or 2-1/2” (your preference) bias or straight of grain strips to join and make about 250” binding.
Backing: 3-7/8 yards
- Backing 4” larger on all sides than the quilt top is recommended for longarm quilting (68-1/2” x 68-1/2”). Cut fabric into two equal lengths, join to make a 69-3/4” x 83-1/2” backing. (Length will be more if fabric is wider than 42”.)
Piecing Instructions:
All seams are 1/4”. Press seams as indicated in instructions or illustrations. Or there’s the option of pressing seams open.
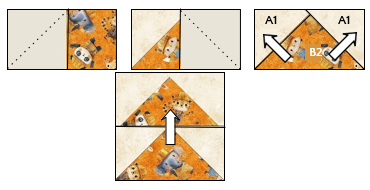
- Draw a diagonal line on wrong side of 3” A1 squares. Place right sides down on sides of 5-1/2” x 3” B2 rectangles, aligning outer edges and orienting stitch lines as shown. Stitch on drawn line. Cut away excess fabric, leaving a 1/4” seam. Sew 64.
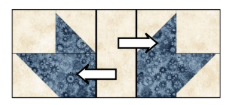
- Combine units as shown to make [32] 5-1/2” x 5-1/2” squares.
- Combine units as shown to make [32] 5-1/2” x 5-1/2” squares.
- Join 3” Fabrics 1 and 3 strips. Sew strip sets. Cut across strip sets at 5-1/2” intervals to make [32] 5-1/2” x 5-1/2” squares.
- Combine units made in Steps 1 and 2 as shown to make [16] 15-1/2” x 5-1/2” rectangles, Block 1 top and bottom rows.

- Combine remaining Step 2 units and D1 as shown to make [8] 15-1/2” x 5-1/2” rectangles, Block 1 center rows.
- Join these units as shown at right to complete [8] 15-1/2” x 15-1/2” Block 1 blocks.
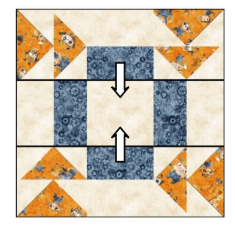
- Combine remaining Step 2 units and D1 as shown to make [8] 15-1/2” x 5-1/2” rectangles, Block 1 center rows.
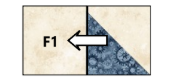
- Draw a diagonal line on wrong side of 3-1/2” E1 squares. Place right sides down on 3-1/2” E3 squares. Sew a 1/4” seam on each side of the drawn line. Cut on the designated line. Cut away excess fabric, leaving a 1/4” seam. Trim to 3” square. Sew 2 to make 4 HST squares.


- Add 3” F1 squares to units made in Step 4 as shown to make [4] 5-1/2” x 3” rectangles.
- In the same way HST squares were made in Step 4, sew 3” A1 squares to 5-1/2” x 3” G3 rectangles. Make 4.
- Combine units as shown to make [4] 5-1/2” squares.
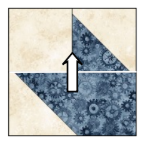
- In the same way HST squares were made in Step 4, sew 3” A1 squares to 5-1/2” x 3” G3 rectangles. Make 4.
- Join half the H1 rectangles and half the units made in Step 5 as shown to make [2] 13” x 5-1/2” rectangles, Block 2 top and bottom rows.
- Join the 3” F3 square and remaining 2 H1 rectangles as shown to make [1] 13” x 3” rectangle, Block 1 middle row. Press seams toward center.

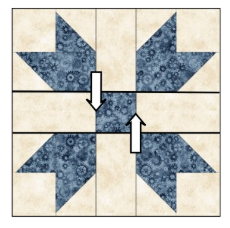
- Join units as shown at right to make [1] 13” x 13” square.
- Sew I1 then J1 to sides of unit to complete [1] 15-1/2” x 15-1/2” Block 2 block. Press seams outward.
- Join the 3” F3 square and remaining 2 H1 rectangles as shown to make [1] 13” x 3” rectangle, Block 1 middle row. Press seams toward center.
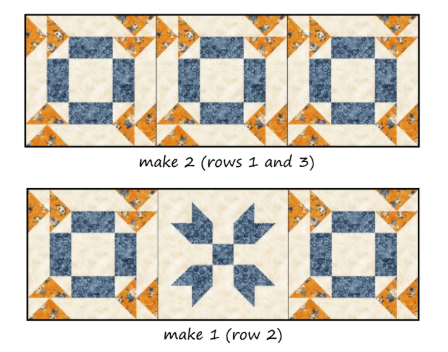
- Join blocks as shown in 3 rows of 3 blocks each. Press seams in either direction or open. Join rows to complete quilt center.
- Measure length of quilt. Cut 2 inner border strips to this length. Sew to sides of quilt. Measure width of quilt. Cut 2 inner border strips to this length. Sew to top and bottom of quilt. Add remaining borders in the same way. Press seams toward borders.
- Layer top, batting and backing. Quilt as desired. Bind with Fabric 4 binding strip.
This pattern was tested by Carol Sebald, Becky Van Fleet and Dorothy McPherson. Thank you! The quilting design is Arrowful by Naomi Hynes.
How can I print from my phone or should I email it to myself and then print it. Thanks
Hi Barbara! If you have a wireless printer, you may be able to connect it to your phone. If not, then we would recommend emailing it to yourself and printing from a desktop computer. You can also open our site in your browser on desktop and print directly. Have a great day! – Ashley, We Like Quilting
how can I download and print the instructions and fabric requirements.
Hi Kirsten! The pattern has been updated to include the fabric requirements. If you would like to print off the instructions, please click on the print icon or hit Control + P. Please let us know if you have any questions. Have a great day 🙂 – Ashley, We Like Quilting
What is yardage requirement for this quilt
Hi Sheila! We’ve updated this section of the pattern, so that the fabric requirement is now included. Please let us know if you have any questions. Have a great day 🙂 – Ashley, We Like Quilting
I do not see anywhere the fabric yardage amounts. I only see the cutting & sewing instructions
Hi there! Thank you for catching this error. We’ve added this information to the pattern. Please let us know if you have any other questions. – Ashley, We Like Quilting
Will we receive a magazine in the mail or is the membership all on your phone Please reply
Hi Carole! We Like Quilting is a digital-only magazine. Please let us know if you have any other questions. Have a great day 🙂 – Ashley, We Like Quilting