Tulips have long been heralded as a symbol of spring, and if you love these colorful blossoms, you won’t be able to resist this pretty floral block pattern. Joy Heimark has designed two versions of her spring tulip quilt block, one featuring an on-point diagonal tulip and the other centered around a straight-on, smaller tulip. Both versions of this quilt block finish at 12-inch squares and would look stunning in a spring mini quilt or throw pillow.
Skill Level: Confident beginner
Finished Block Size: 12 inches x 12 inches (12 1/2 inches unfinished)
Seam Allowances: 1/4 inch
Abbreviations:
- WOF – Width of Fabric
- RST – Right Side Together
- WS – Wrong Side
- FQ – Fat Quarter
Designer Notes:
- These are directions to make one 12 inch square tulip block. The tulip is “on point”, which means it is diagonal to the block. Following the 12 inch block directions are alternate directions to make a tulip that is not “on point” but rather straight up and down. That uses a smaller tulip, 8 inch square, surrounded by four setting triangles for the corners. That block also trims to 12 inch square but has a smaller tulip in its center.
- Read all instructions before beginning this project. Stitch right sides together using a 1/4 inch seam allowance unless otherwise specified. Materials and cutting lists assume 40 inches of usable fabric width. Check the provided diagrams for the orientation and position of pieces.
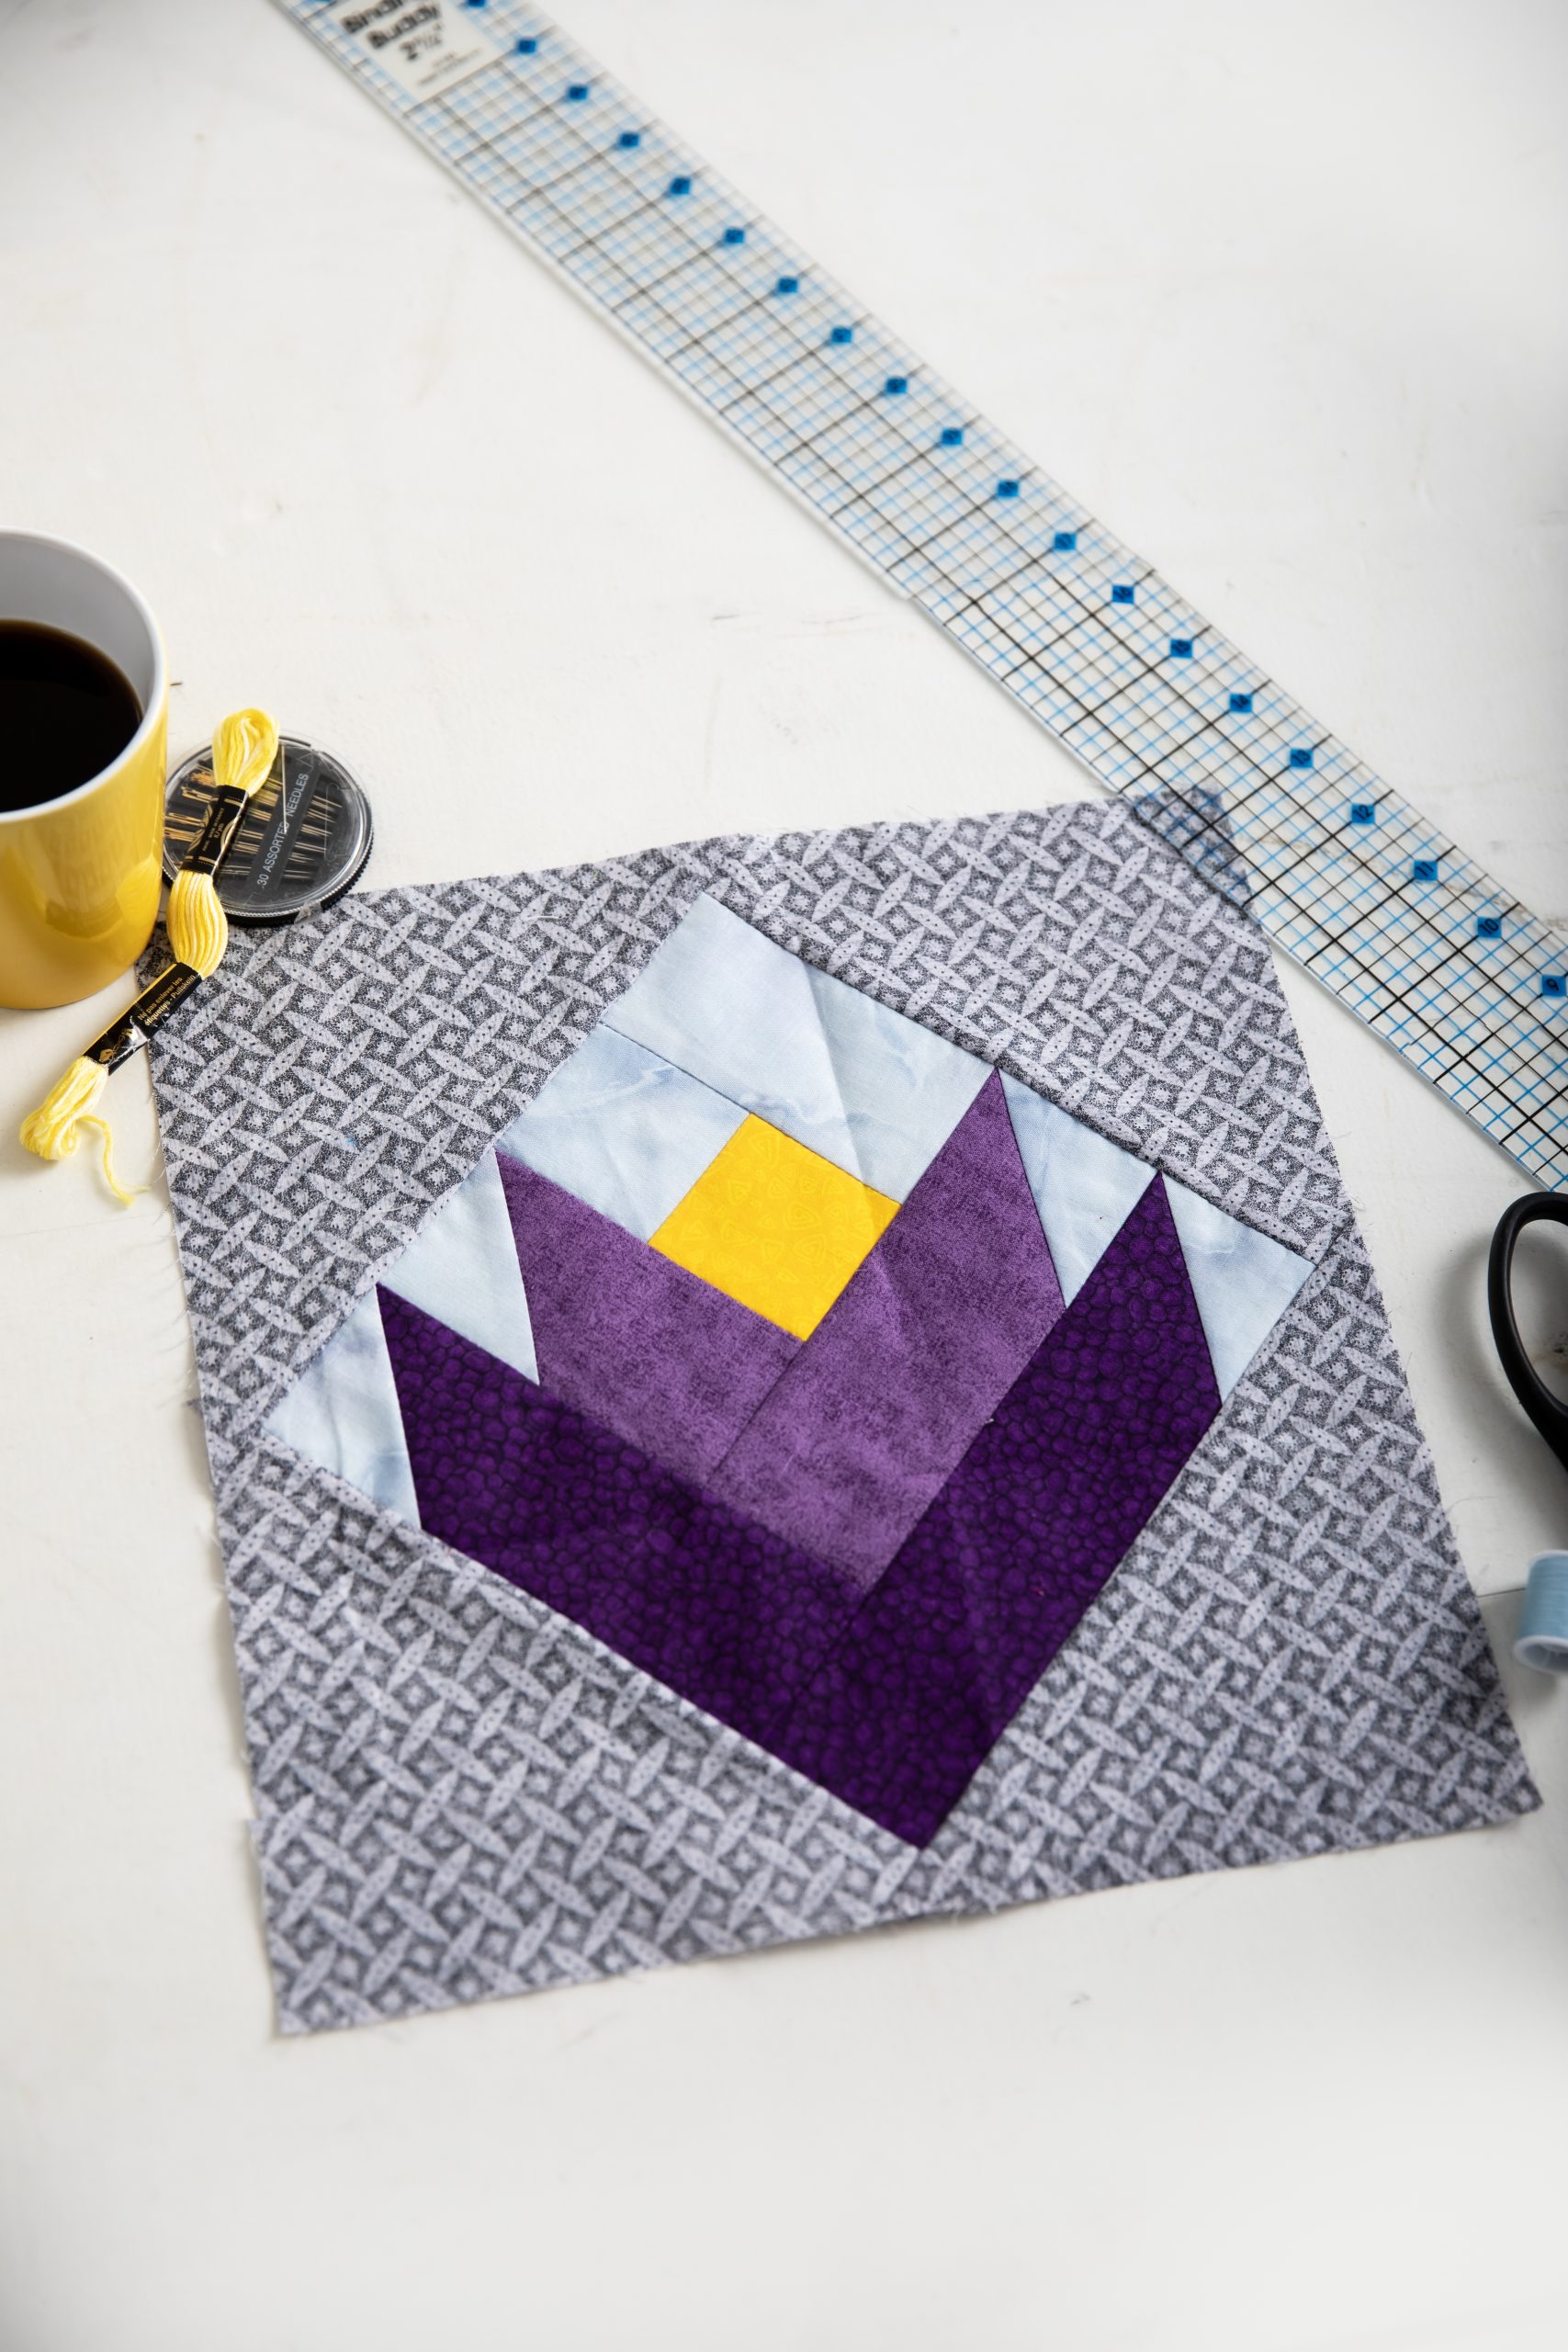
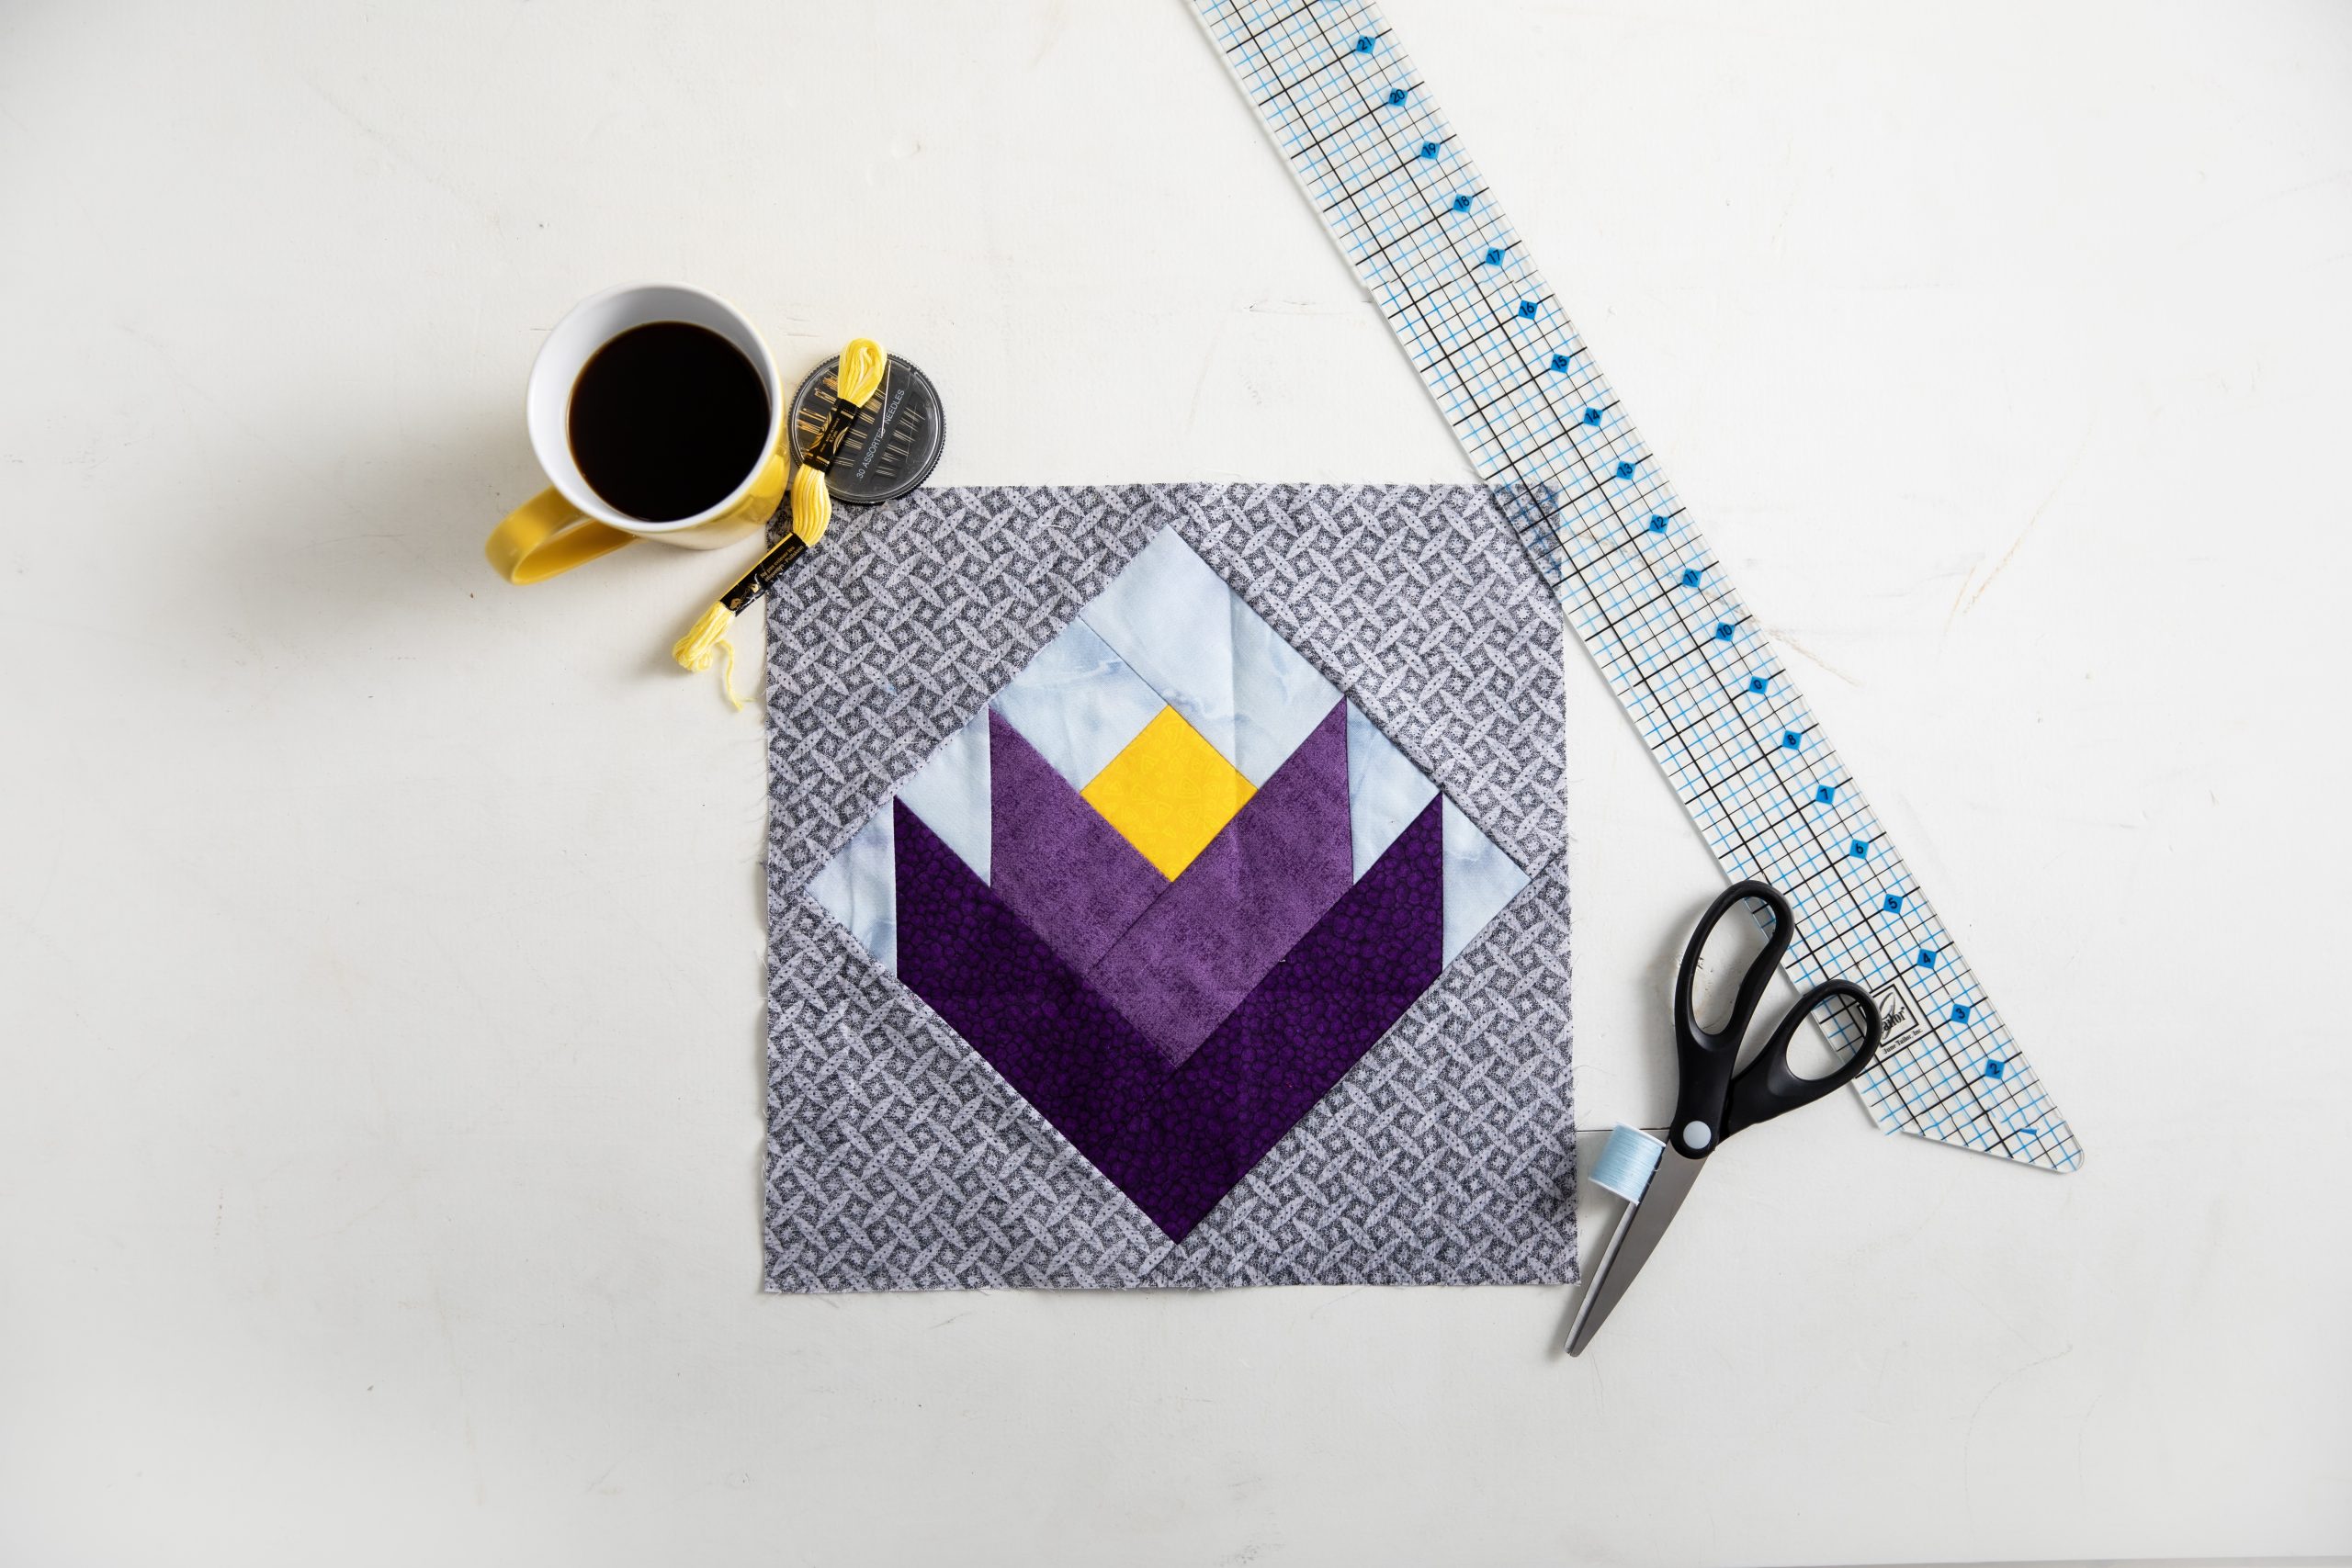
12 Inch On Point Block
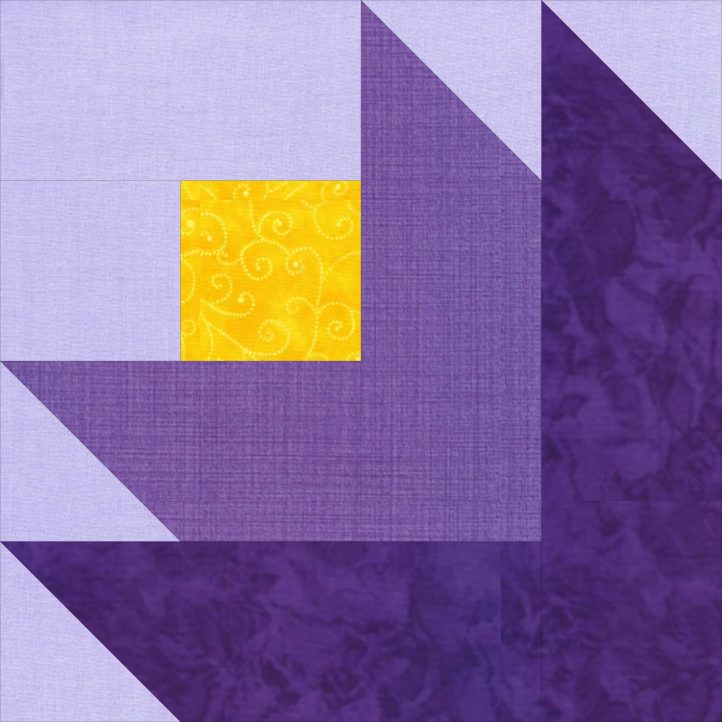
Finished On Point Block Layout
Finished On Point Block
Materials:
- Fabrics:
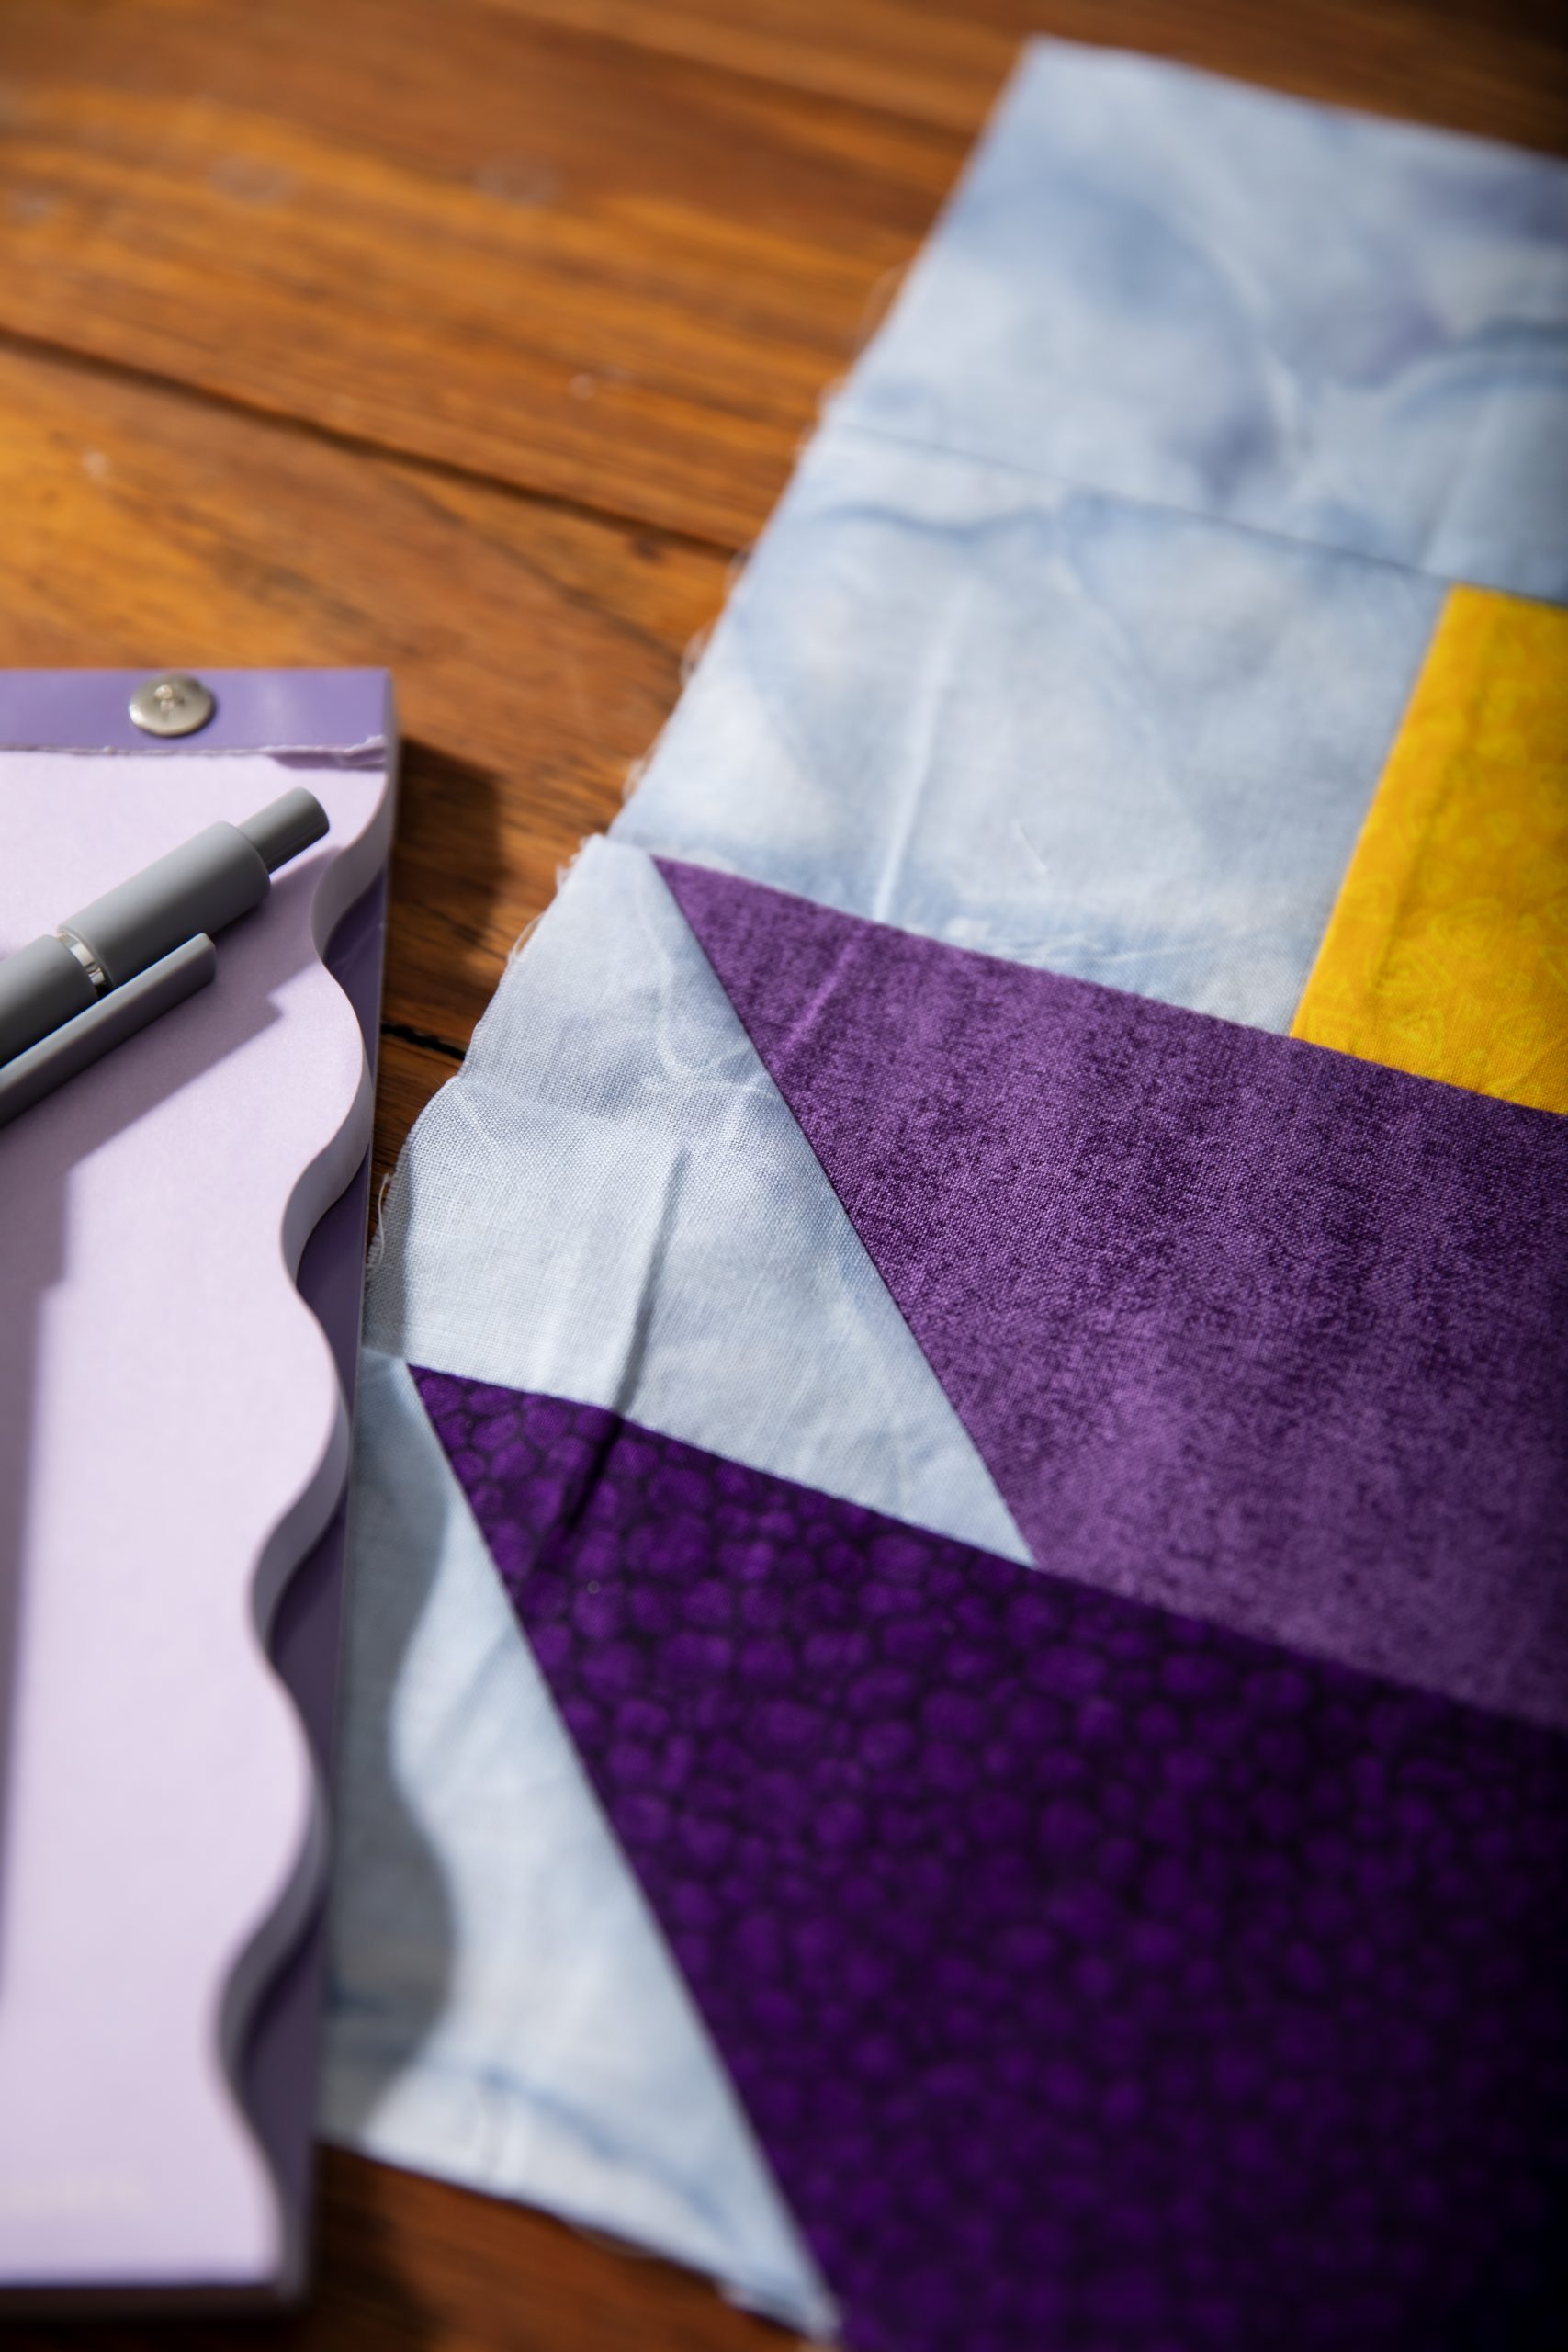
- Yellow: Scrap (3 1/2 inch square)
- Light Blue: 1/4 yard or FQ
- Medium Purple: 1/4 yard or FQ
- Dark Purple: 1/4 yard or FQ
Cutting Instructions:
From Yellow, cut: (1) 3 1/2 inch square
From Light Blue, cut:
- (5) 3 1/2 inch squares
- (1) 3 1/2 inch x 6 1/2 inch rectangle
From Medium Purple, cut:
- (1) 3 1/2 inch x 6 1/2 inch rectangle
- (1) 3 1/2 inch x 9 1/2 inch rectangle
From Dark Purple, cut:
- (1) 3 1/2 inch x 9 1/2 inch rectangle
- (1) 3 1/2 inch x 12 1/2 inch rectangle
Piecing Instructions:
- Sew the Yellow 3 1/2 inch square to the Light Blue 3 1/2 inch square. Press toward Yellow.
- Using Diagram 1 as a guide, sew a Light Blue 3 1/2 inch x 6 1/2 inch rectangle to the unit from Step 1. Press toward the rectangle.
- Draw a diagonal line across the WS of (4) Light Blue 3 1/2 inch squares.
- Using Diagram 2 as a guide, place a Light Blue 3 1/2 inch square RST on top of the Medium Purple 3 1/2 inch x 6 1/2 inch rectangle.
- Sew on the drawn diagonal line. Trim off excess of Light Blue and Medium Purple fabrics 1/4 inch from the sewn line. Press to Light Blue. Trim unit to 3 1/2 inches x 6 1/2 inches if necessary (Unit A).
- Using Diagram 2 as a guide, place a Light Blue 3 1/2 inch square RST on top of the Medium Purple 3 1/2 inch x 9 1/2 inch rectangle.
- Sew on the drawn diagonal line. Trim off excess of Light Blue and Medium Purple fabrics 1/4 inch from the sewn line. Press to Light Blue. Trim unit to 3 1/2 inches x 9 1/2 inches if necessary (Unit B).
- Place a Light Blue 3 1/2 inch square RST on top of the Dark Purple 3 1/2 inch x 9 1/2 inch rectangle.
- Sew on the drawn diagonal line. Trim off excess of Light Blue and Dark Purple fabrics 1/4 inch from the sewn line. Press to Light Blue. Trim unit to 3 1/2 inches x 9 1/2 inches if necessary (Unit C).
- Place a Light Blue 3 1/2 inch square RST on top of the Dark Purple 3 1/2 inch x 12 1/2 inch rectangle.
- Sew on the drawn diagonal line. Trim off excess of Light Blue and Dark Purple fabrics 1/4 inch from the sewn line. Press to Light Blue. Trim unit to 3 1/2 inches x 12 1/2 inches if necessary (Unit D).
- Using the Block Diagram as a guide to placement and orientation, sew Unit A to the bottom of the block center. Press toward Unit A.
- Sew Unit B to the right side of your block. Press toward Unit B.
- Sew Unit C to the bottom of your block. Press toward Unit C.
- Sew Unit D to the right side of your block. Press toward Unit D.
- Trim block to 12 1/2 inches if necessary.
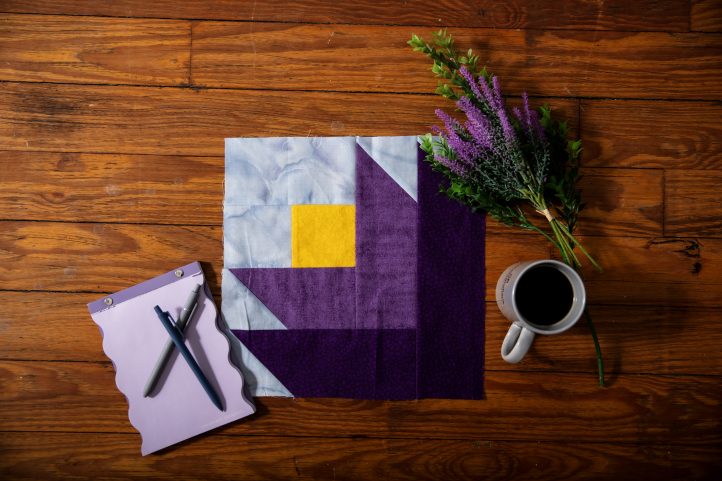
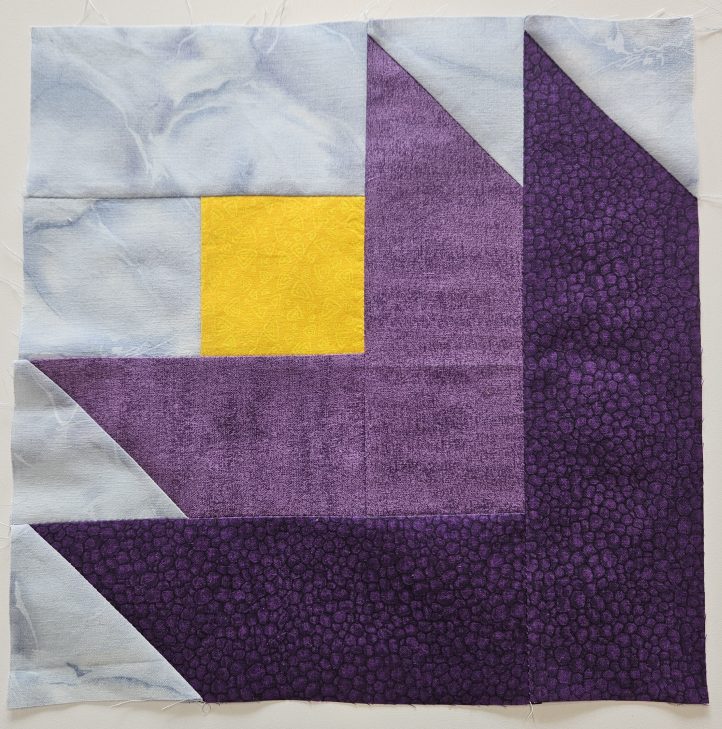
12 Inch Straight Tulip Block (with 8 Inch Tulip Center)

Finished Straight Block Layout
Finished Straight Block
Materials:
- Fabric:
- Yellow: Scrap (2 1/2 inch square)
- Light Blue: 1/8 yard or FQ
- Medium Purple: 1/8 yard or FQ
- Dark Purple: 1/8 yard or FQ
- Light Gray: 1/4 yard or FQ
Cutting Instructions:
From Yellow, cut: (1) 2 1/2 inch square
From Light Blue, cut:
- (5) 2 1/2 inch squares
- (1) 2 1/2 inch x 4 1/2 inch rectangle
From Medium Purple, cut:
- (1) 2 1/2 inch x 4 1/2 inch rectangle
- (1) 2 1/2 inch x 6 1/2 inch rectangle
From Dark Purple, cut:
- (1) 2 1/2 inch x 6 1/2 inch rectangle
- (1) 2 1/2 inch x 8 1/2 inch rectangle
From Light Gray, cut: (2) 7 1/2 inch squares
Piecing Instructions:
- Sew the Yellow 2 1/2 inch square to the Light Blue 2 1/2 inch square. Press toward Yellow.
- Using Diagram 1 as a guide, sew Light Blue 2 1/2 inch x 4 1/2 inch rectangle to the unit from Step 1. Press toward the rectangle.
- Draw a diagonal line across the WS of (4) Light Blue 2 1/2 inch squares.
- Using Diagram 2 as a guide, place a Light Blue 2 1/2 inch square RST on top of the Medium Purple 2 1/2 inch x 4 1/2 inch rectangle.
- Sew on the drawn diagonal line. Trim off excess of Light Blue and Medium Purple fabrics 1/4 inch from the sewn line. Press to Light Blue. Trim unit to 2 1/2 inches x 4 1/2 inches if necessary (Unit A).
- Place a Light Blue 2 1/2 inch square RST on top of the Medium Purple 2 1/2 inch x 6 1/2 inch rectangle.
- Sew on the drawn diagonal line. Trim off excess of Light Blue and Medium Purple fabrics 1/4 inch from the sewn line. Press to Light Blue. Trim unit to 2 1/2 inches x 6 1/2 inches if necessary (Unit B).
- Place a Light Blue 2 1/2 inch square RST on top of the Dark Purple 2 1/2 inch x 6 1/2 inch rectangle.
- Sew on the drawn diagonal line. Trim off excess of Light Blue and Dark Purple fabrics 1/4 inch from the sewn line. Press to Light Blue. Trim unit to 2 1/2 inches x 6 1/2 inches if necessary (Unit C).
- Place a Light Blue 3 1/2 inch square RST on top of the Dark Purple 2 1/2 inch x 8 1/2 inch rectangle.
- Sew on the drawn diagonal line. Trim off excess of Light Blue and Dark Purple fabrics 1/4 inch from the sewn line. Press to Light Blue. Trim unit to 2 1/2 inches x 8 1/2 inches if necessary (Unit D).
- Using the Block Diagram as a guide to placement and orientation, sew Unit A to the bottom of the block center. Press toward Unit A.
- Sew Unit B to the right side of your block. Press toward Unit B.
- Sew Unit C to the bottom of your block. Press toward Unit C.
- Sew Unit D to the right side of your block. Press toward Unit D.
- Trim block to 8 1/2 inches if necessary.
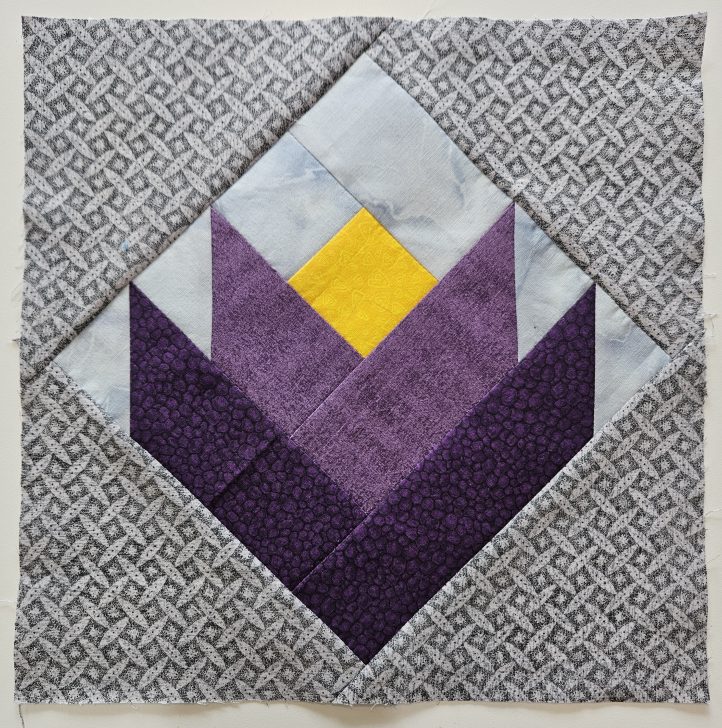
- Cut the Light Gray 7 1/2 inch squares each diagonally one time. ⍁
- Sew a Light Gray triangle to one side of the tulip block center. Press toward Light Gray.
- Sew a Light Gray triangle to the opposite side of the tulip block center. Press toward Light Gray.
- Sew a Light Gray triangle to each of the two remaining sides of the tulip block center. Press toward Light Gray.
- These Light Gray setting triangles are over-sized. Center and trim your finished block to 12 1/2 inches.
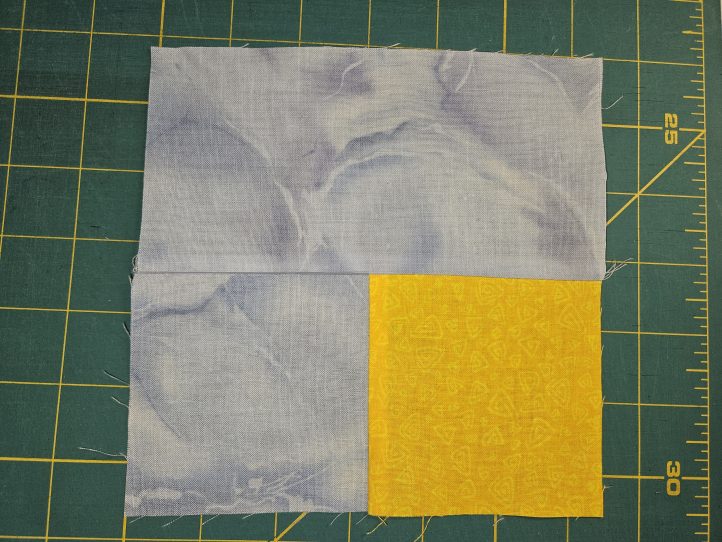
Diagram 1
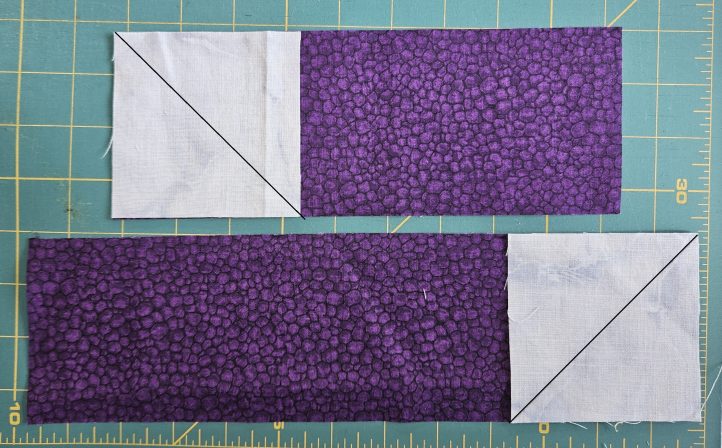
Diagram 2
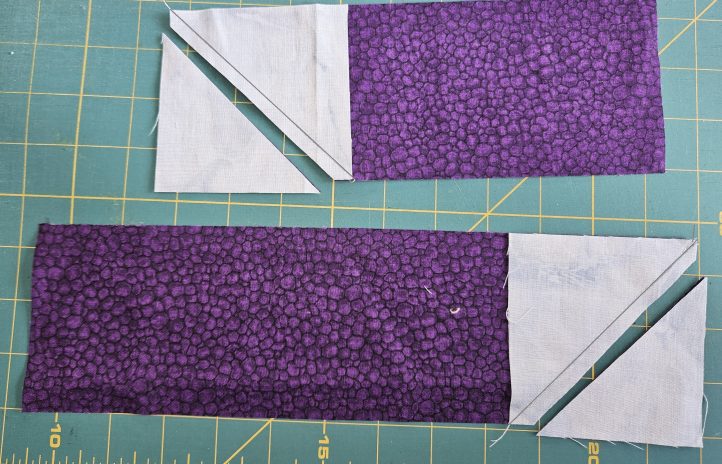
Diagram 3
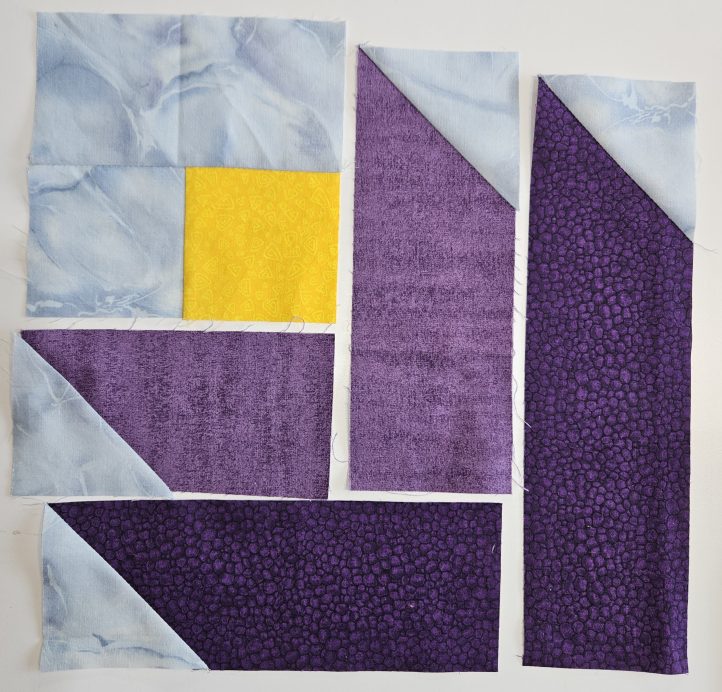
Block Diagram