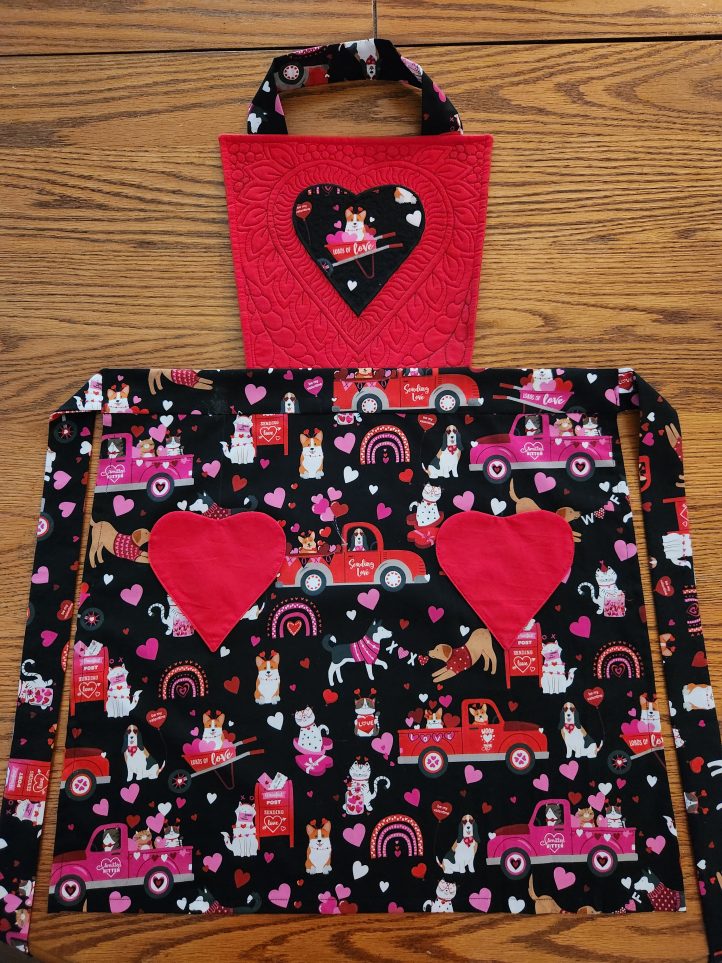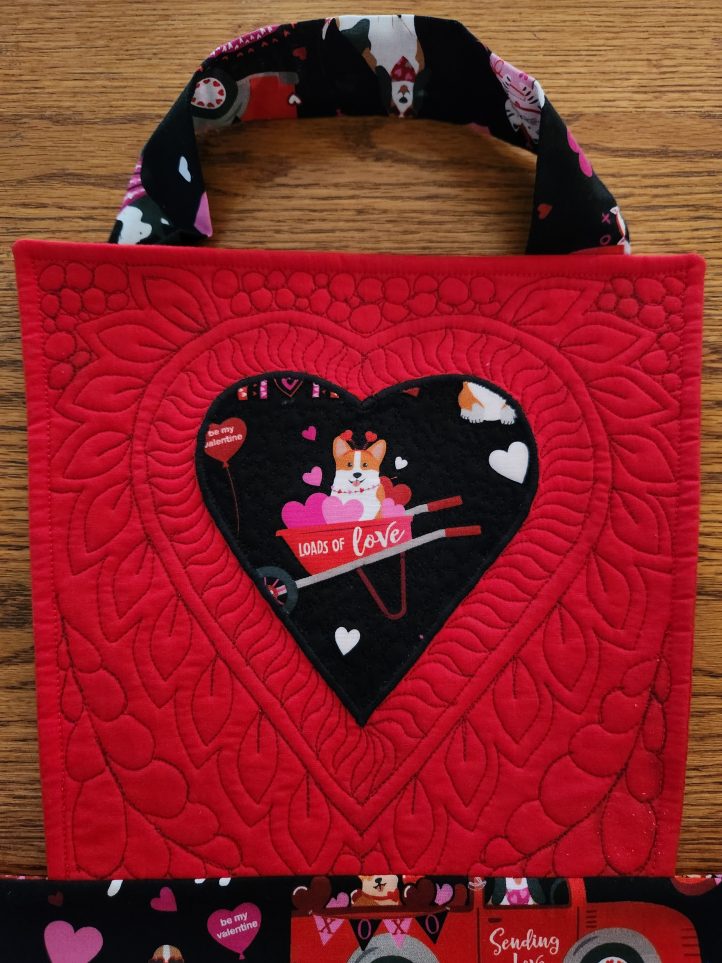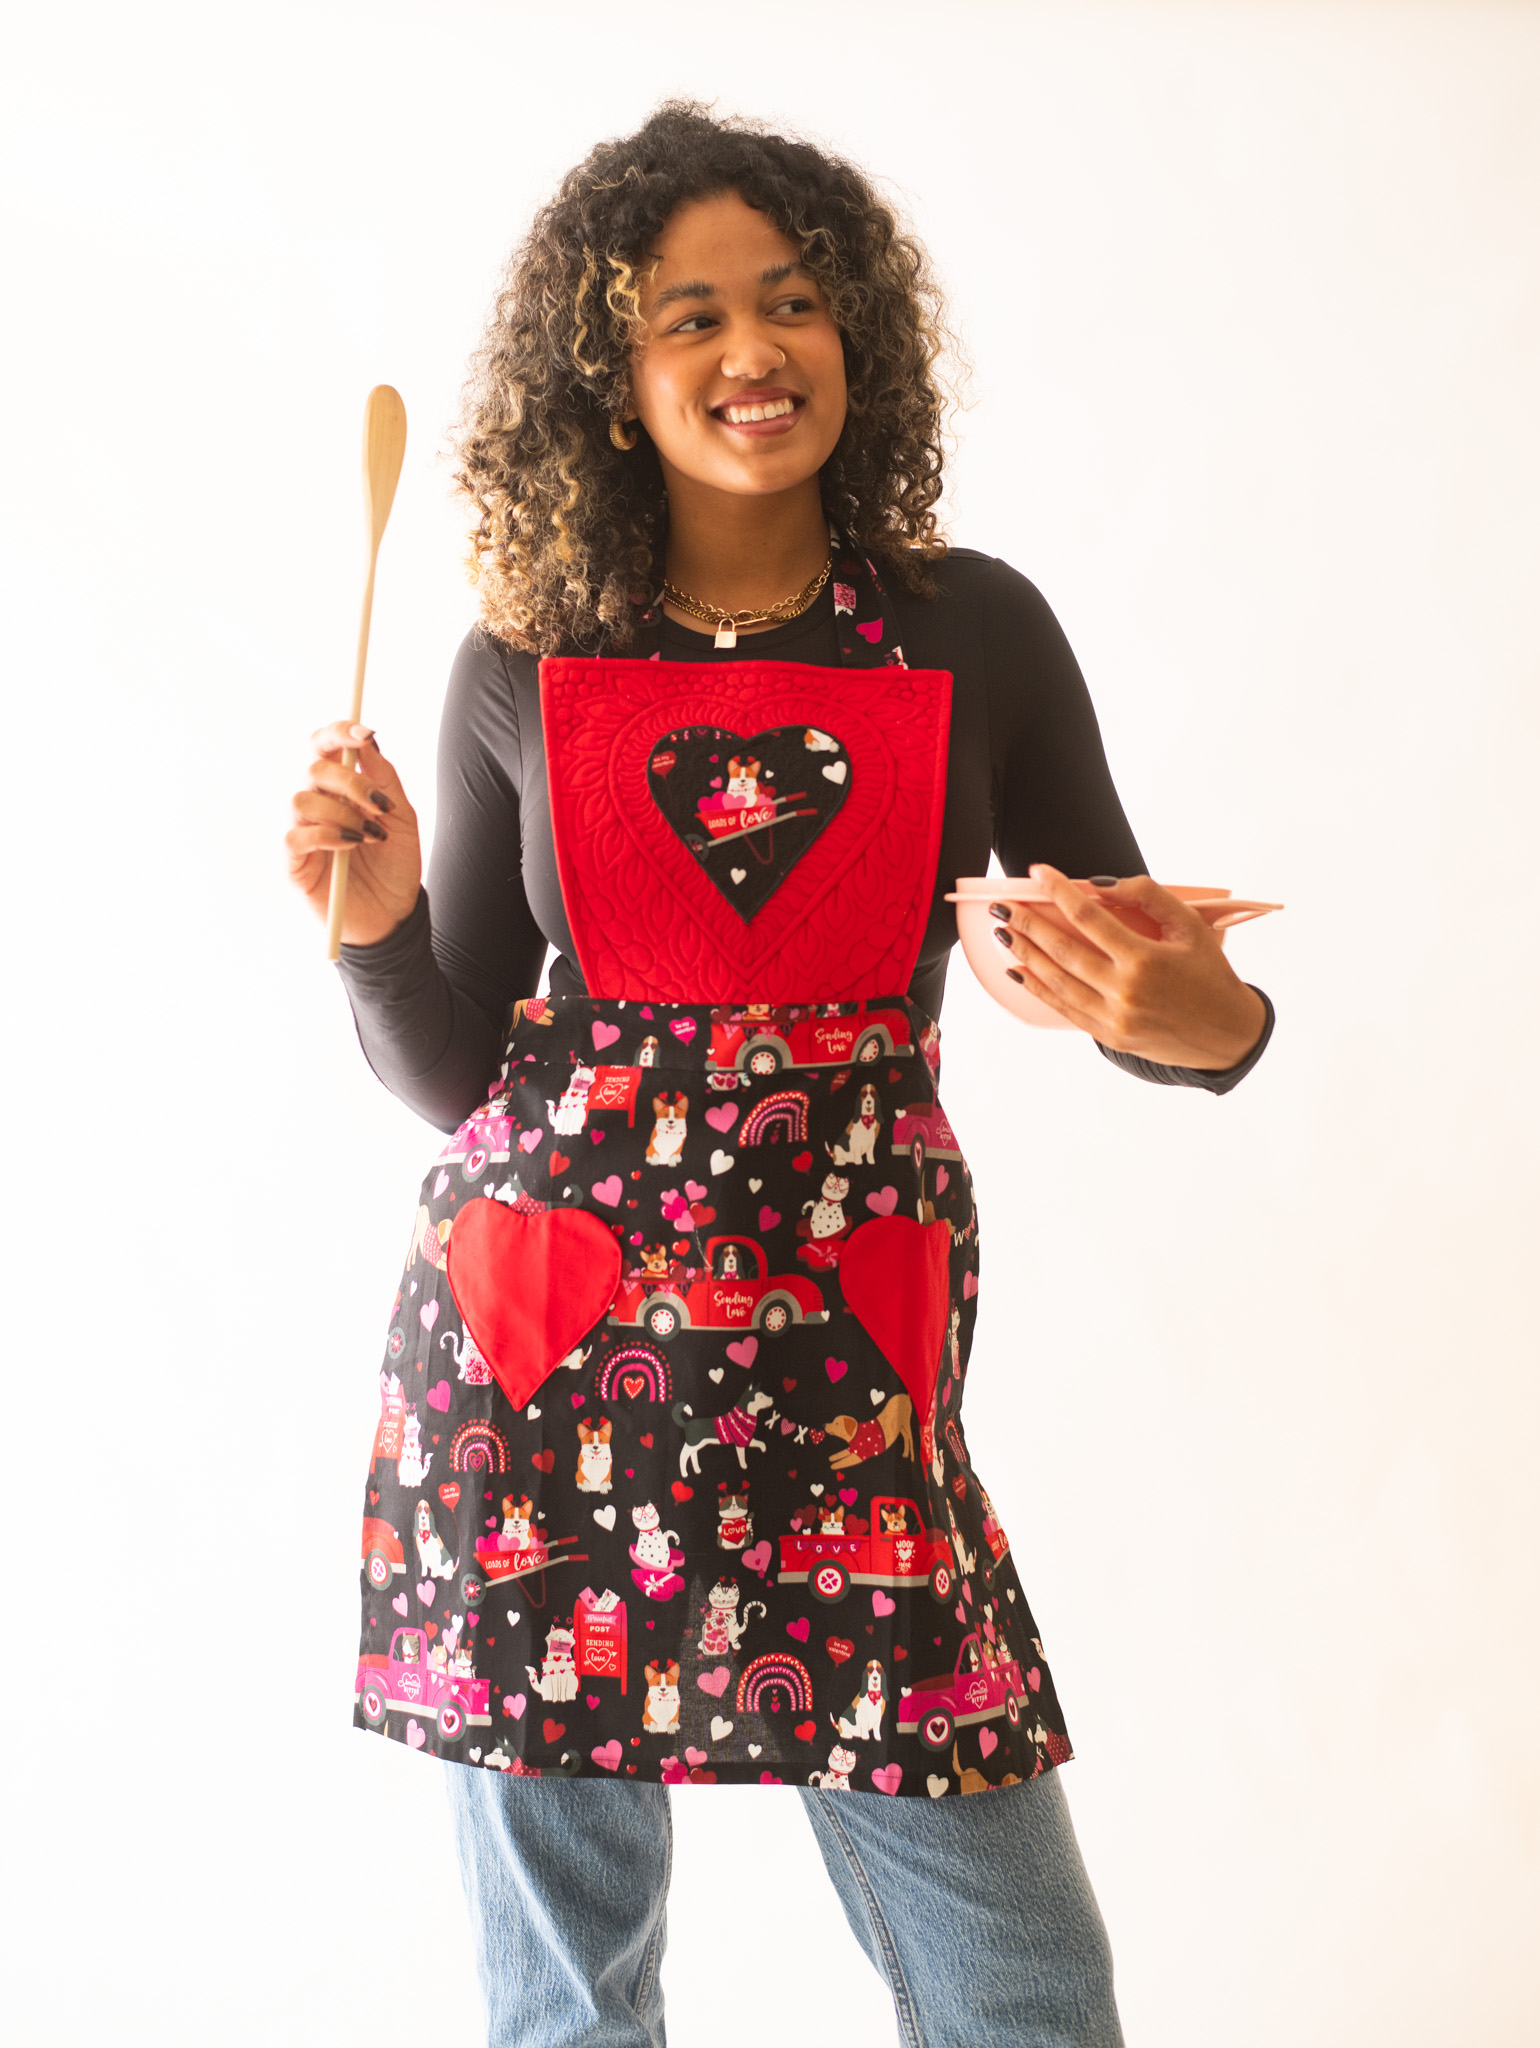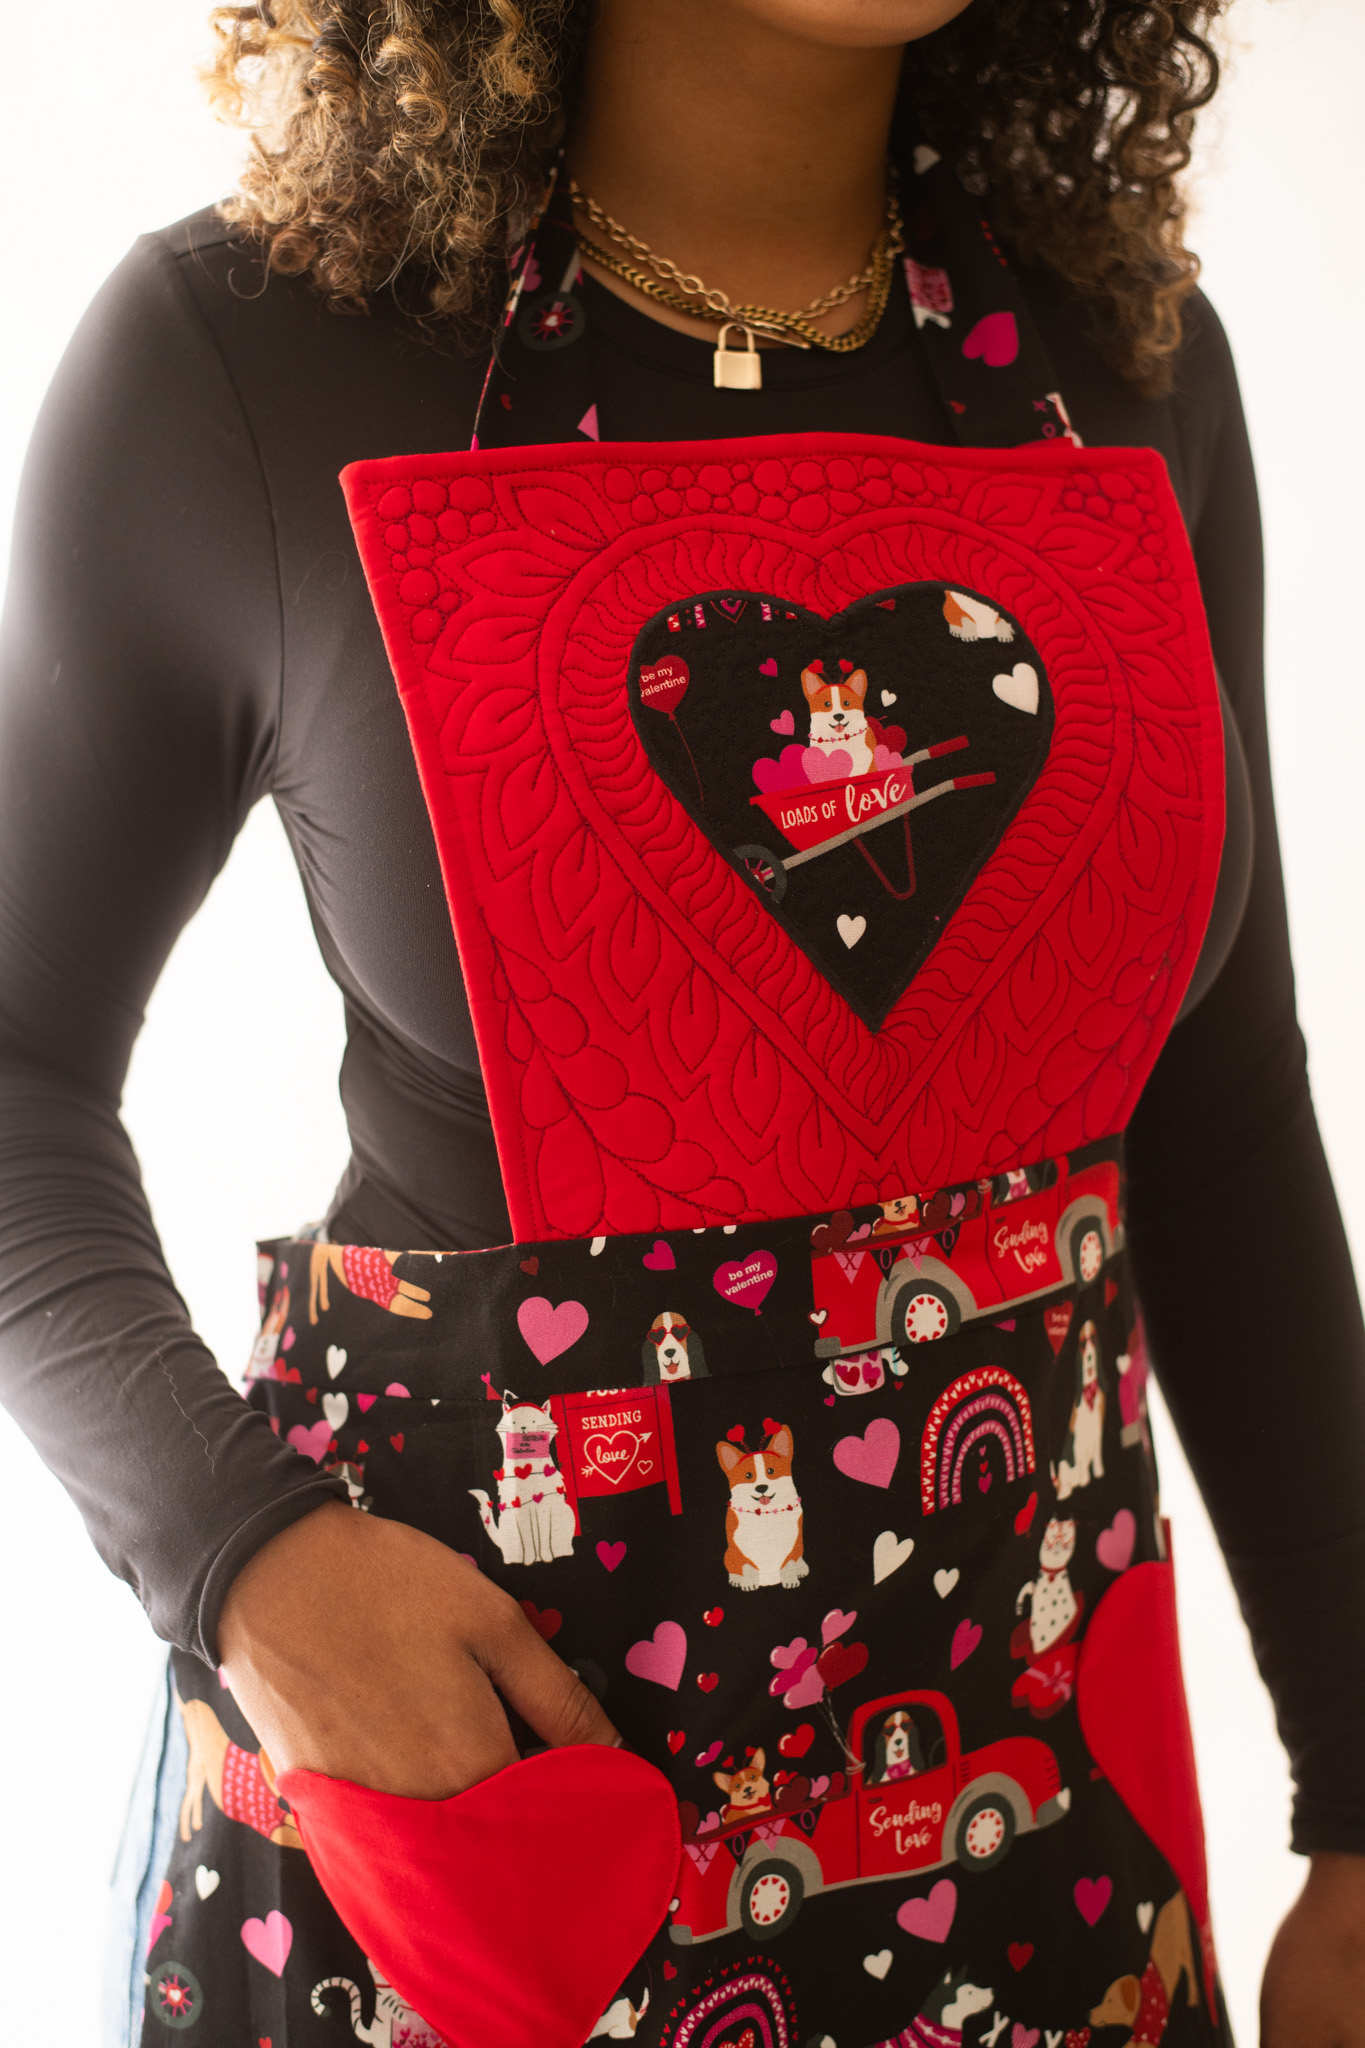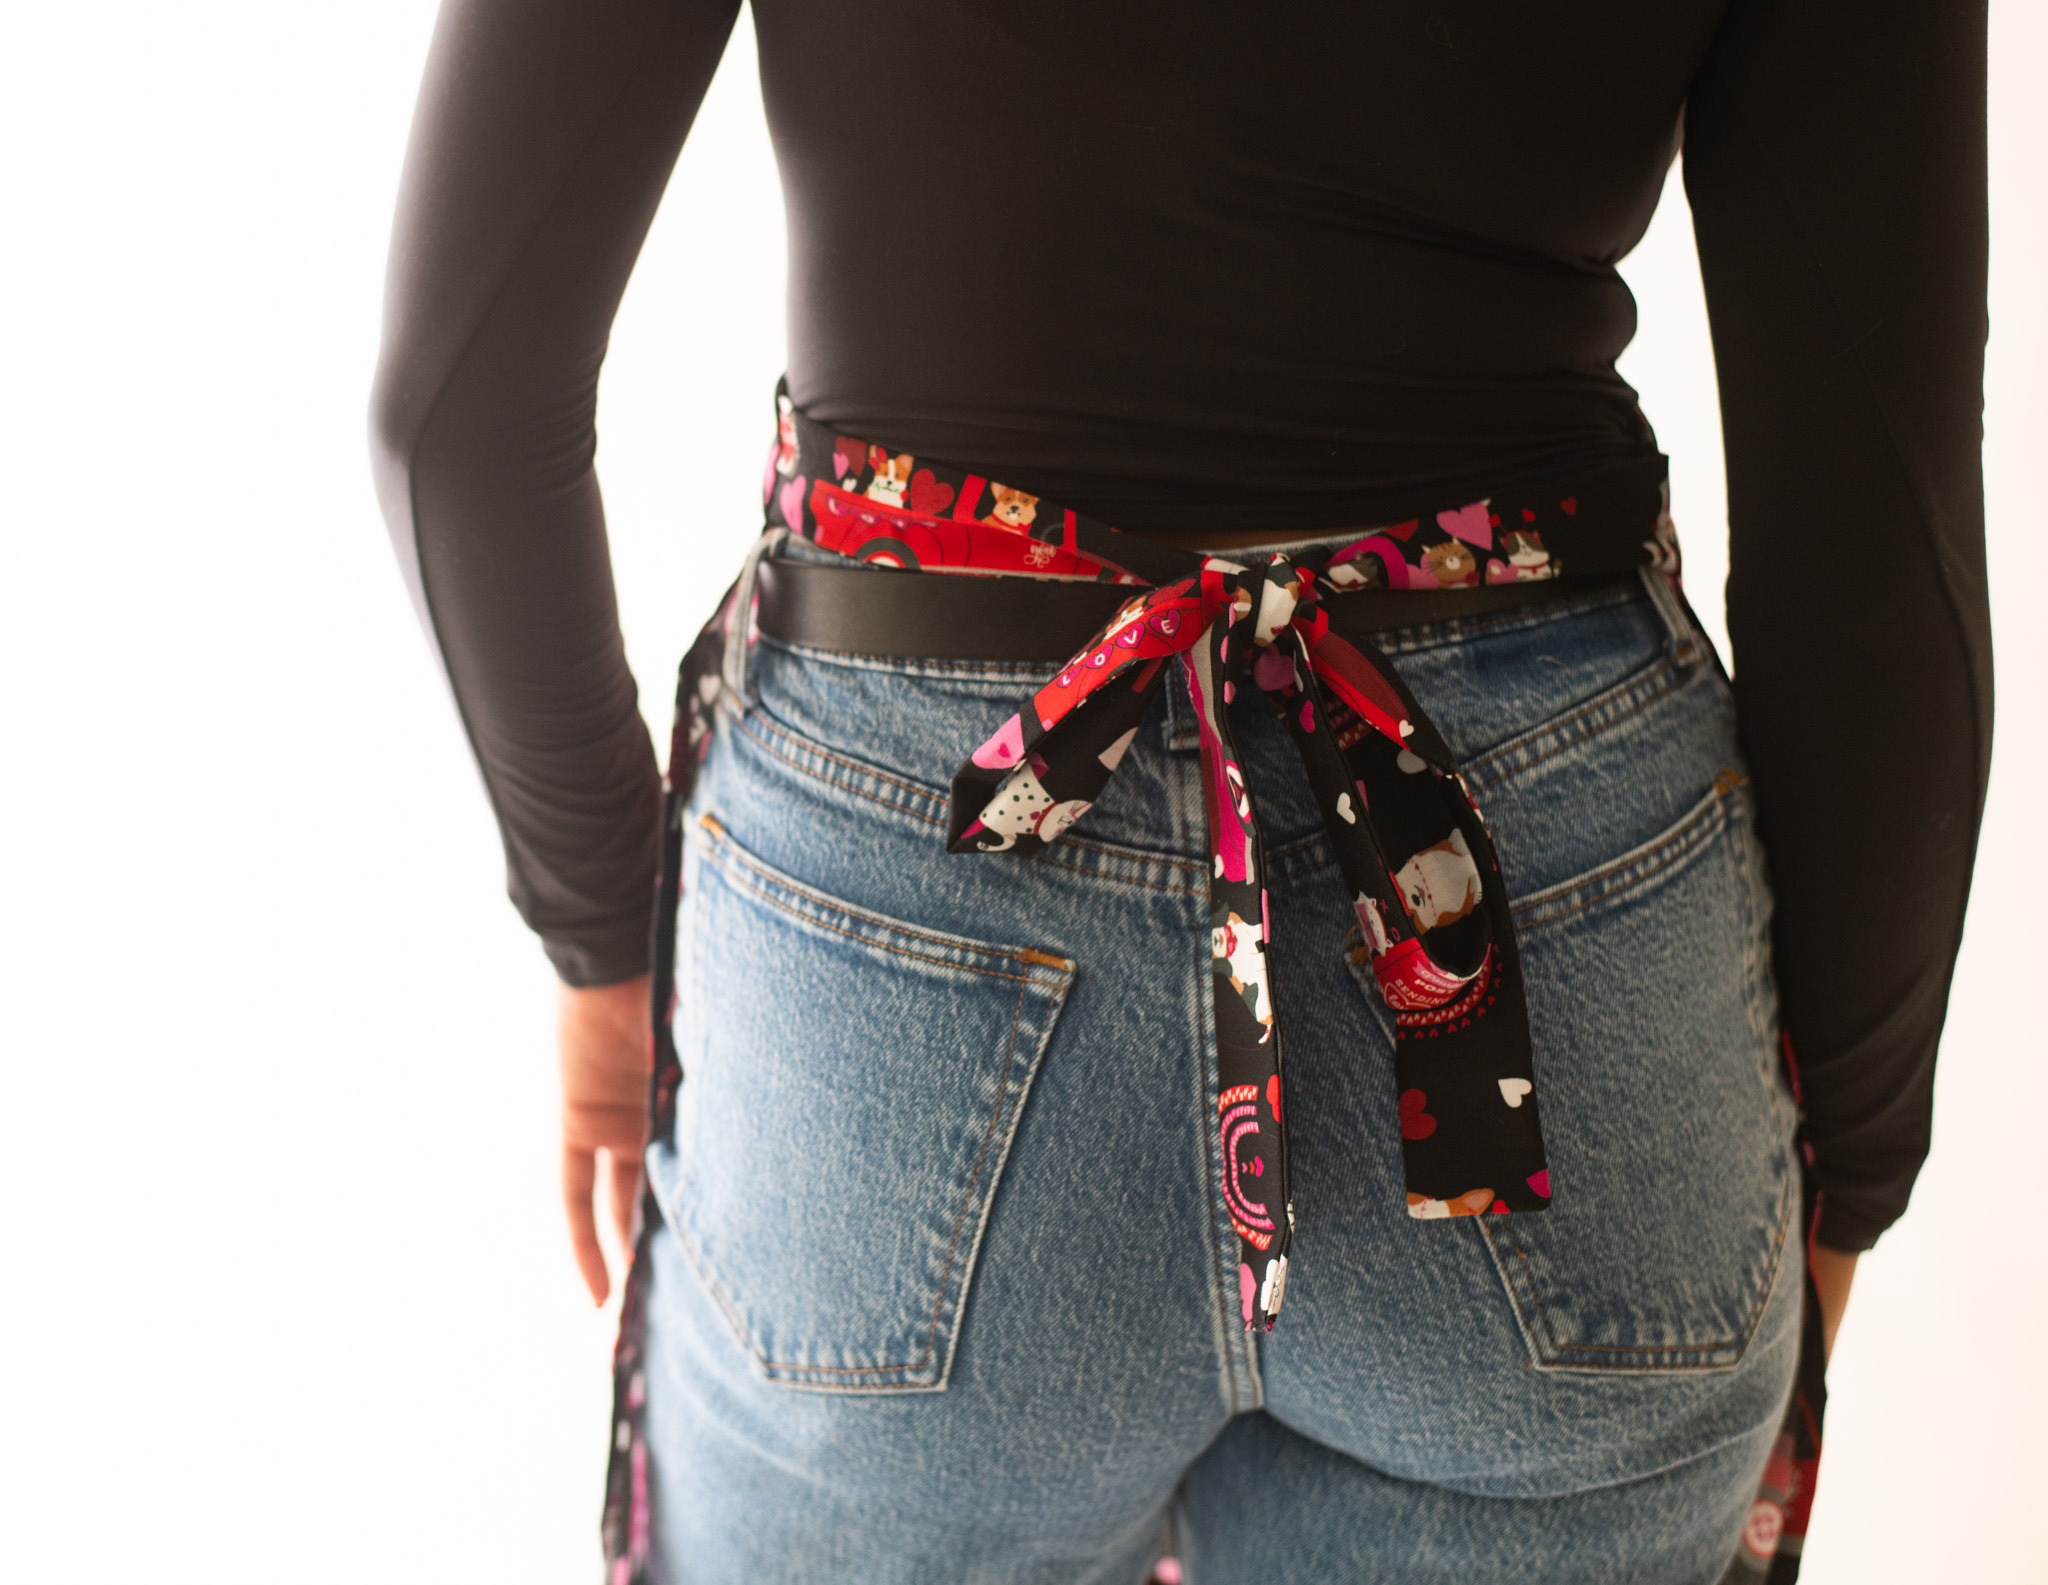
Say “Happy Valentine’s Day!” to your mom, sister, or bestie with a pretty and playful quilted apron. Designed by Sujata Ryan, this apron sewing pattern features a quilted bib and heart-shaped pockets, and ties at the waist while featuring a Velcro closure at the neck. This delightful quilted gift idea begs to be made in fun prints, like the puppy print shown on our sample, so hit up your local fabric store for whimsical Valentine’s Day designs.
Skill Level: Intermediate
Time: 4 hours (longer for more elaborate quilting)
Finished Size: Apron bib – 10-1/2 in wide x 9 in long, apron skirt – 23 in wide x 18 in long
Seam Allowances: 1/4 inch, unless otherwise specified
Materials:
- Valentine print cotton fabric – 1-1/4 yards
- Red cotton fabric – 1/3 yard
- Velcro – 3/4-inch wide x 1-1/2 inch long piece
- Fusible web (like Wonder Under) – 7 in x 7 in
- Tear-away stabilizer – 9 in x 8 in
- Quilt batting – 14 in x 14 in piece
- Optional: Open-toe applique foot, darning foot (for free-motion quilting), walking foot
- PDF Pattern Templates and Diagrams – This is located at the bottom of this page. See printing instructions below.
PRINTING INSTRUCTIONS:
To download the PDF patterns, click on the download button at the bottom of the page. We recommend opening your download using Adobe Acrobat.
Piecing Instructions:
The apron consists of a quilted bib attached to a skirt featuring heart-shaped pockets, waist sashes and a neck strap with Velcro closure.
- Cut out the apron skirt, sashes and neck strap from Valentine fabric as shown in the pattern cutting diagram. Cut out the heart applique from the leftover piece of Valentine fabric.
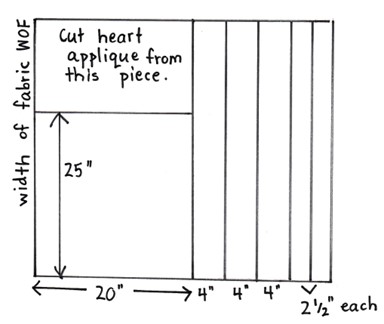
- Cut 1 rectangle for skirt, 25 inches wide x 20 inches long.
- Cut 3 strips 4 inches x WOF for the sashes and neck strap.
- Cut 2 strips 2-1/2 inches x WOF for the waistband front and back.
- Cut 1 heart from leftover piece, for applique.
- Cut out the apron bib and pockets from the pattern download in the red fabric.
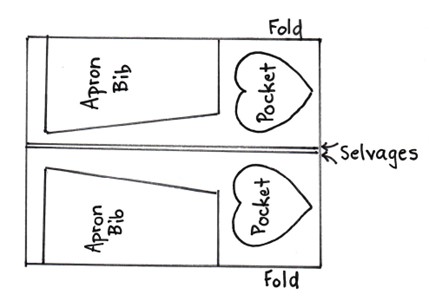
- Cut out a piece of batting using the bib pattern.
- Apron sashes and neck strap – Cut each sash strip to a length of 32 inches. Cut the neck strap to a length of 25 inches.
- Fold each strip lengthwise. Stitch one short side and the long side with a 1/4-inch seam allowance, leaving the other short side open for turning. Trim the stitched corner on the diagonal to reduce bulk.

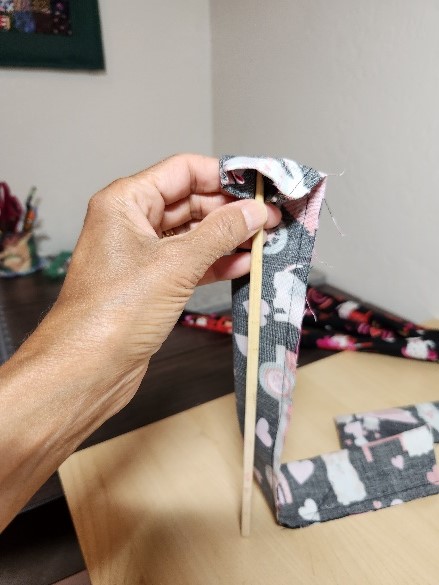
- For a quick way to turn the sashes, insert an unsharpened pencil or chopstick gently into the stitched short end.
- Begin pulling the sash down over the pencil. Continue until the turned end emerges and the rest of the strap can be pulled through, right side out.
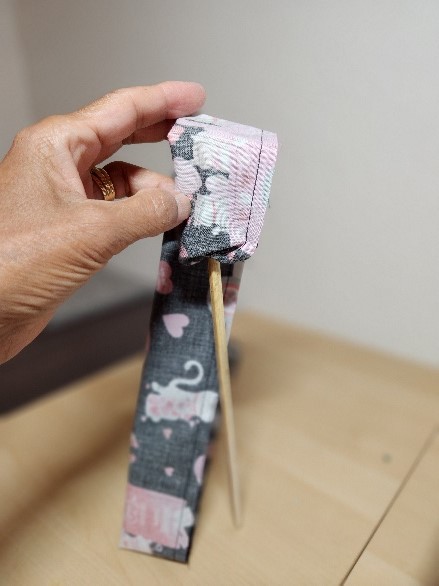

- Fold each strip lengthwise. Stitch one short side and the long side with a 1/4-inch seam allowance, leaving the other short side open for turning. Trim the stitched corner on the diagonal to reduce bulk.
- Apron skirt – Mark 1-1/2 inches in from the top left and top right sides of the skirt, as in the diagram below. Connect the top left point to the lower left corner, and the top right point to the lower right corner. Cut on the diagonal lines.

- Turn under 1/2 inch on the skirt sides and bottom edge. Press. Turn under once more and press again, forming a hem. Topstitch near the edge of the fold along side seams and hem.

- Turn under 1/2 inch on the skirt sides and bottom edge. Press. Turn under once more and press again, forming a hem. Topstitch near the edge of the fold along side seams and hem.
- Heart pockets – Stitch two heart pocket pieces together along the seam edge, leaving an opening for turning right side out, as indicated on the pattern piece. Repeat for the second heart pocket.
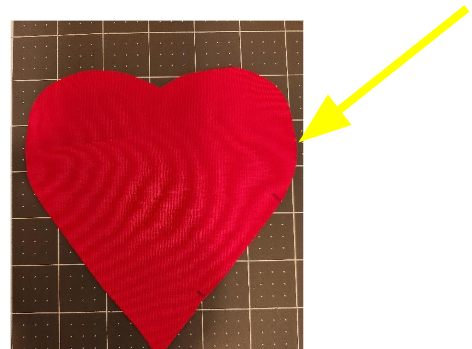
- Cut small notches on the outward curves to reduce bulk and trim the point at the bottom.
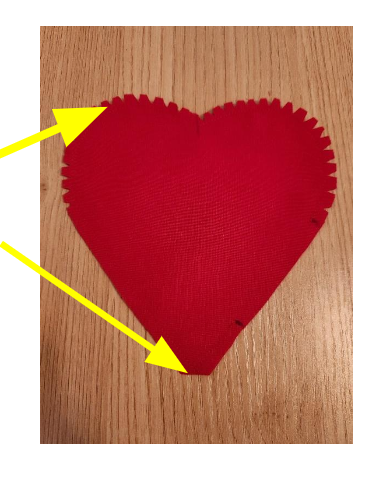
- Turn the pocket right side out. Press the pocket to obtain smooth, curved edges. Press the opening closed.
- Insert a pin to keep the opening closed.

- Cut small notches on the outward curves to reduce bulk and trim the point at the bottom.
- Stitch the pockets to the apron skirt – Mark a point 5 inches to the left and right of the center of the skirt top edge. Measure down 4 inches from each point. Place the center of the top of the heart at this point. Pin in place.
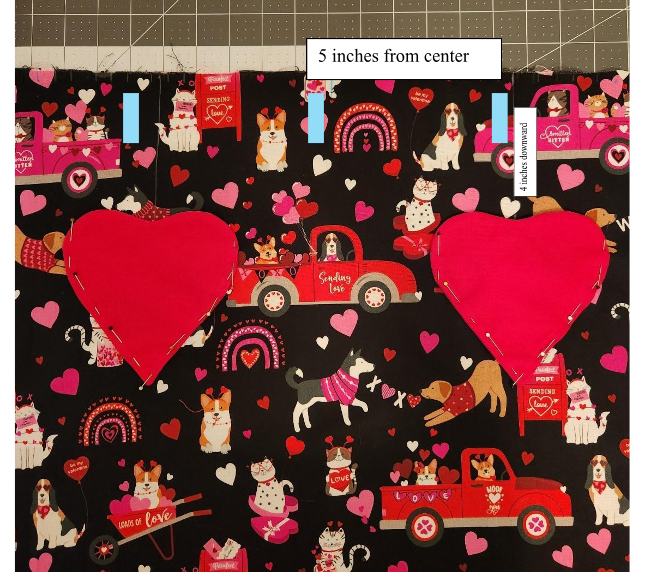
- Hold up the apron skirt to test pocket placement. Adjust as needed.
- Pin the pockets in place using the stitching line from the Apron Bib pattern piece as a guide for where to begin and end stitching.
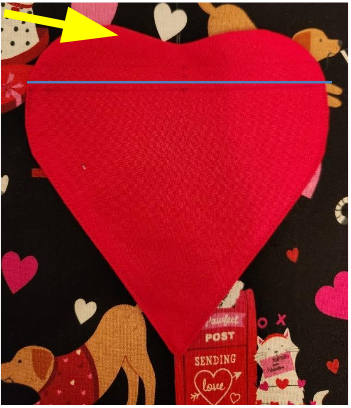
- Topstitch in place using matching thread.
- Applique the heart onto the bib – Follow the manufacturer’s directions for attaching fusible web to the wrong side of the heart applique fabric piece.
- Trace the heart pocket as your applique shape on the right side of your fabric. Cut out the heart shape on your Apron Bib.
- If desired, center a motif within the heart by tracing the applique shape around it.
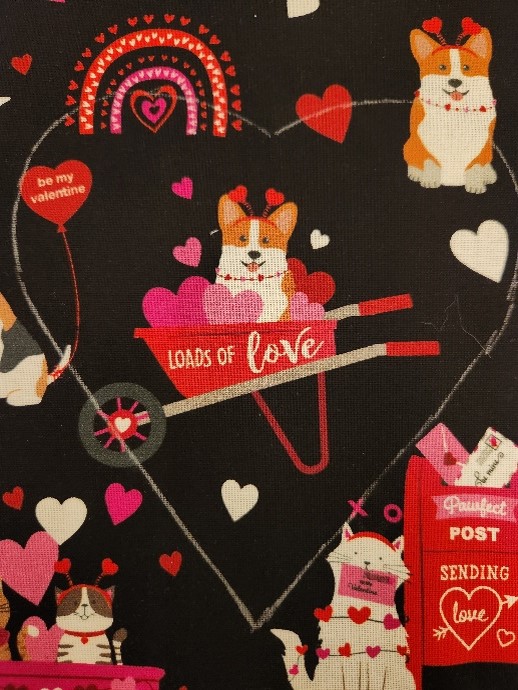
- Fuse the heart-traced fabric to the bib using the lines for placement on the bib pattern piece as a guide.
- Place tear-away stabilizer under the bib. Safety pin into place from the top side.
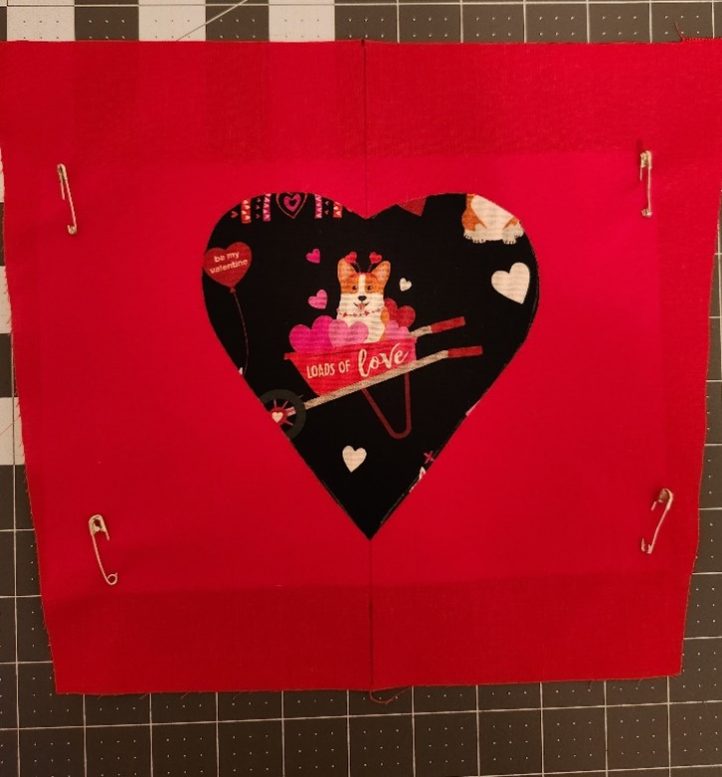
- Using a zigzag stitch set for a width of 3.5 mm (1/8-inch) and a length of 0.1 mm (butted), stitch the outline of the applique heart, pivoting on the outside swing of the needle. Pivot frequently along curves to obtain the smoothest stitched curve possible.
- An open-toe applique foot is useful for this machine satin-stitching as it provides a better view of the fabric edge.
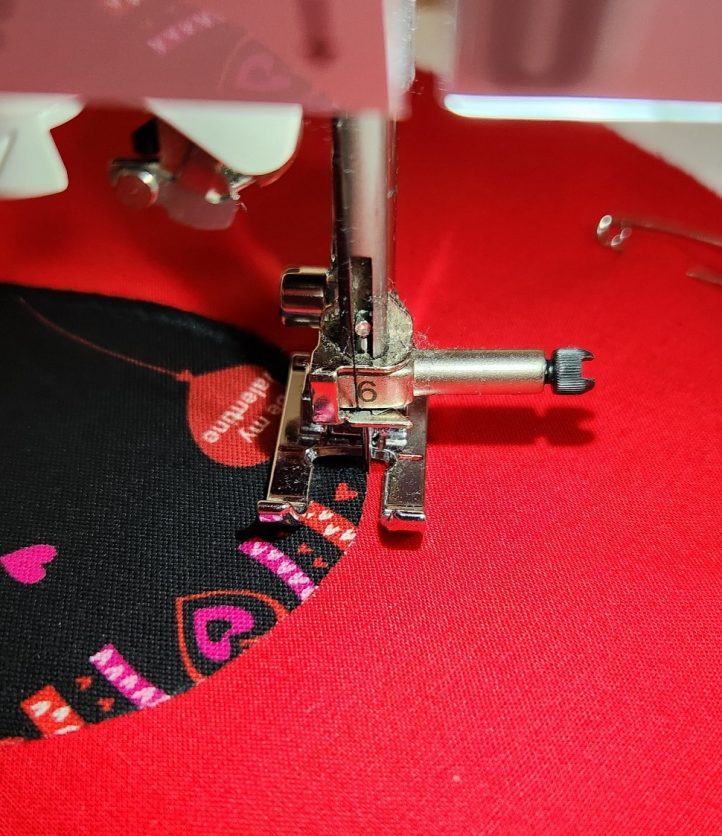
- After stitching, gently tear away the stabilizer from the wrong side of the bib.
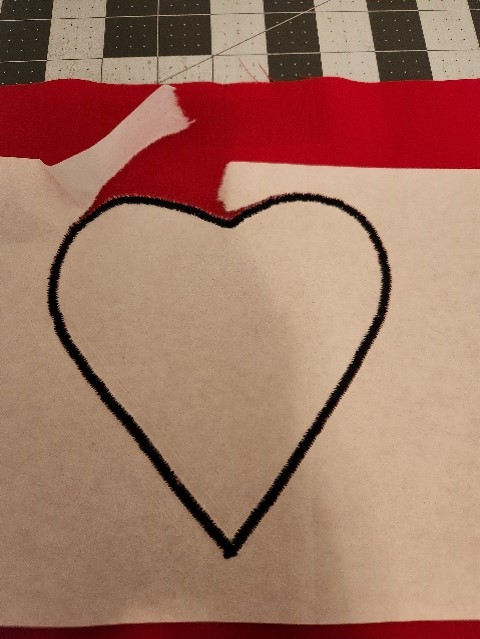
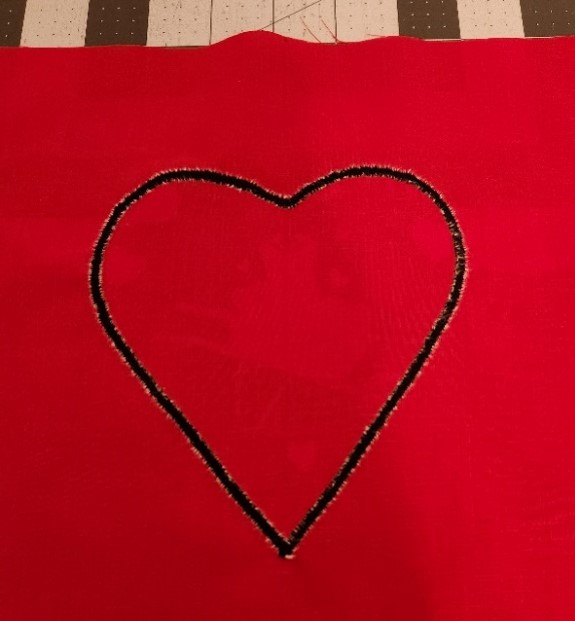
- Construct the bib – Stitch the unfinished edge of the neck strap to the right top edge of the bib front, 1-1/2 inches in from the edge.
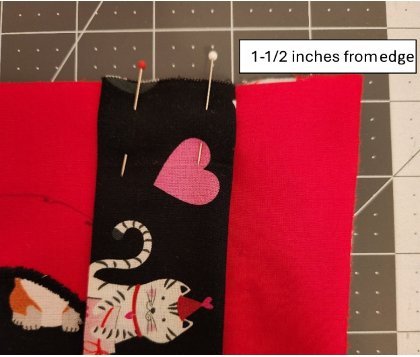
- Stitch one piece of the Velcro to the top right edge of the bib back, 1-1/2 inches from the edge.
- Place the bib front over the piece of batting. Treat them as one unit from hereon.
- Place the bib back to the bib front + batting, right sides together.
- Stitch the bib sides and top, catching the neck strap edge in the seam and leaving the bottom open for turning. Trim corners diagonally, turn the bib right side out, press the edges gently and topstitch 1/4 inch from the edges.
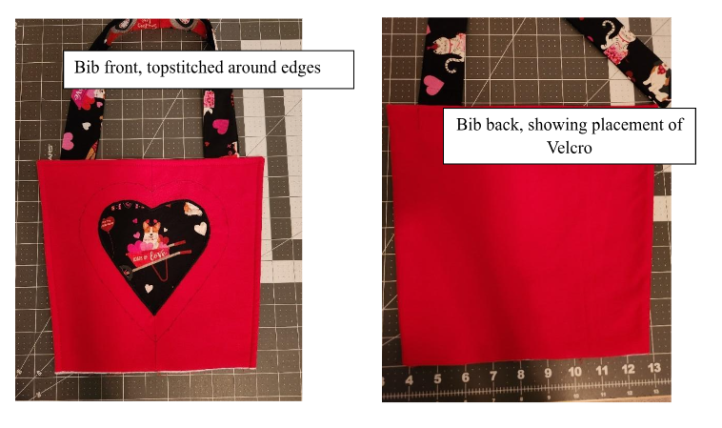
- Quilt the bib as desired. Use a darning foot to create free-motion quilting motifs or stitch with the presser foot (or walking foot).
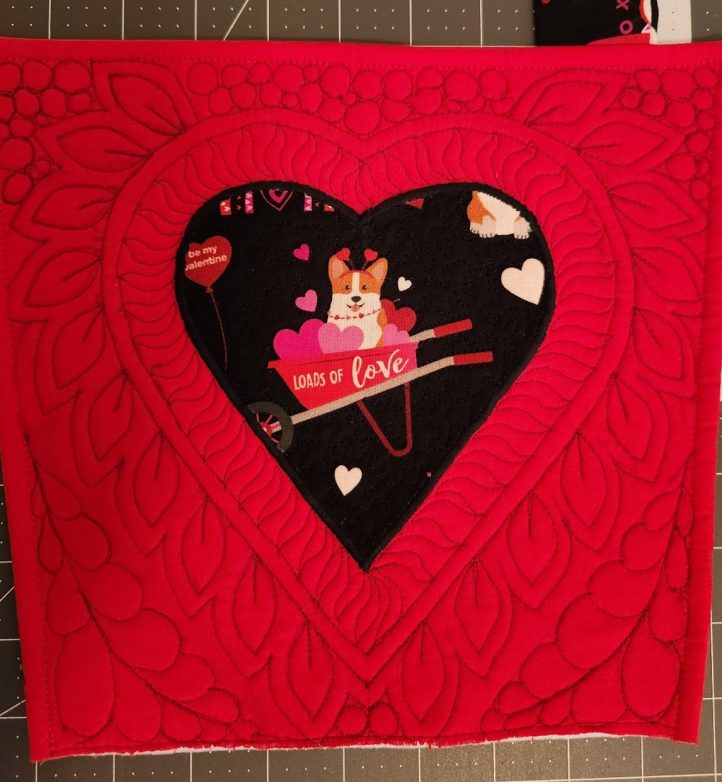
- Attach the waistband to the bib – Cut each 2-1/2 inch wide waistband strip to a length of 21 inches.
- Find the center of the front waistband and fold each in half and marking them with a fabric marker.
- Pin the waistband front to the bottom edge of the bib front, right sides together.
- Pin the waistband back to the bottom edge of the bib back, right sides together.
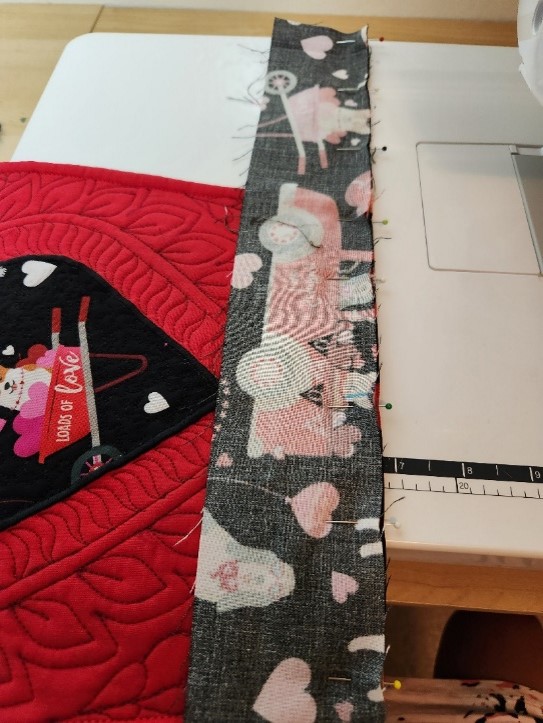
- Stitch through all thicknesses.
- Press each waistband down, away from the bib.
- Attach the apron skirt to the front waistband – Fold the apron skirt top edge in half, and mark the center with a pin. Pin the top edge of the skirt to the bottom of the waistband front, matching the center front points.
- Stitch using a 1/2 inch seam allowance. Press the seam up, toward the waistband.
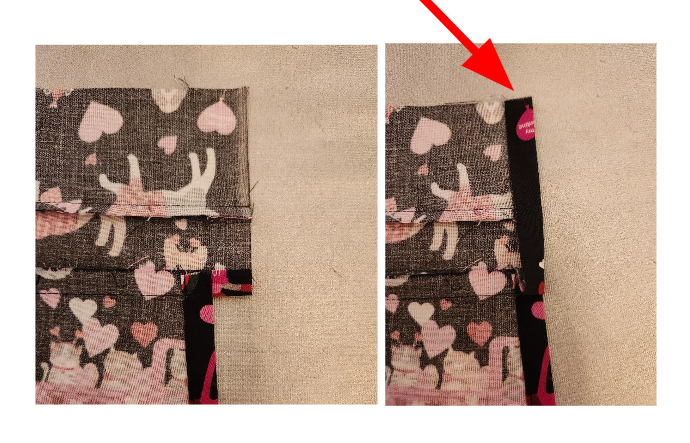
- The edges of the waistband should be about 1/2 inch longer than the skirt at each edge. (If longer than 1/2 inch, trim the excess off but leave 1/2 inch for finishing the raw edges.)
- Fold the edges in 1/4 inch, then fold 1/4 inch once more. Press. The sashes will be inserted here later.
- To finish the bottom edge of the waistband back, do one of the following options:
- Press the bottom edge of the waistband back under 1/2 inch. Pin the folded edge in place along the edge of the waistband seam. Hand-sew the back waistband edge in place. OR
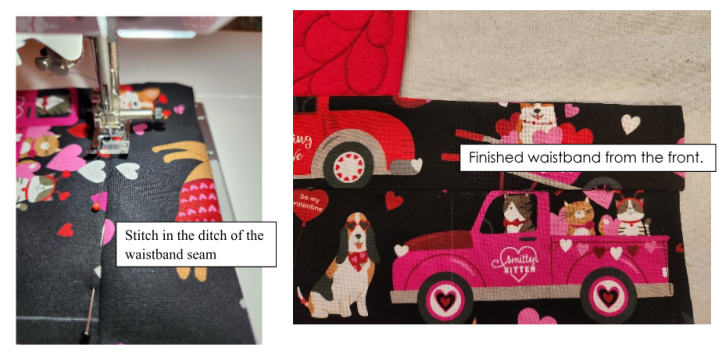
- Press the bottom edge of the back waistband under by 3/8 inch. Pin in place, going a little past the waistband front seam. Pin again from the front, then remove the pins from the back. Stitch in the ditch of the waistband front seam to catch the bottom edge of the back waistband or hand sew the bottom edge of the waistband to the waistband seam..

- Insert and sew the sashes to the waistband – Place the unfinished short edge of each sash into the folded edge opening at the end of each side of the waistband. Stitch in place.
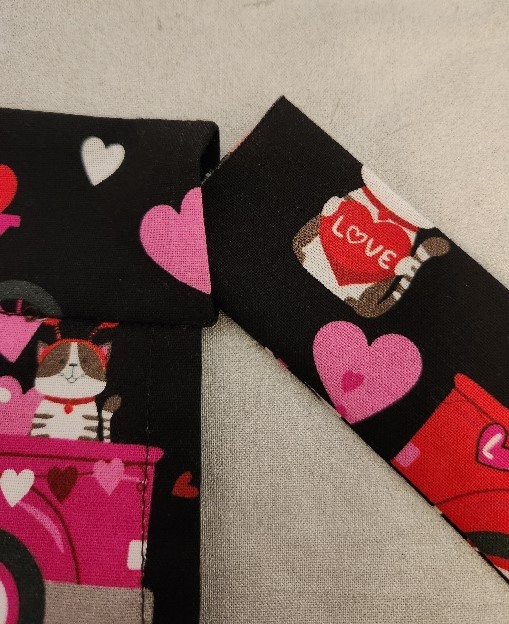

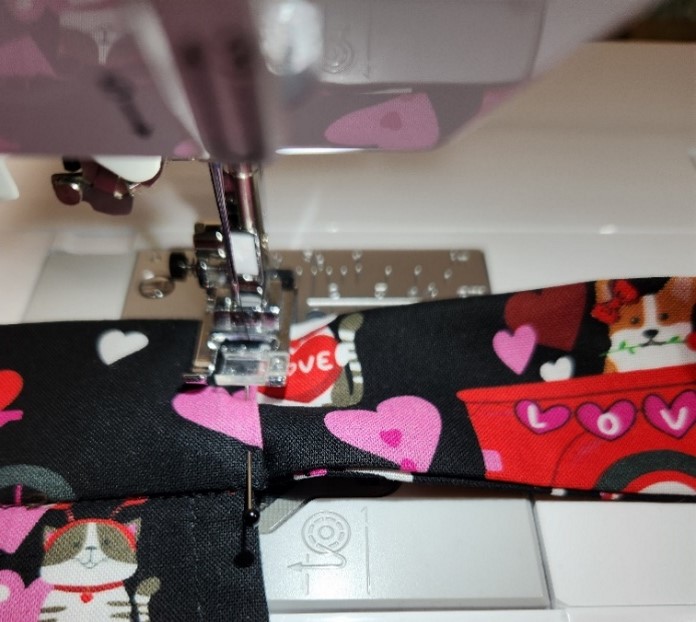
- Adjust the neck strap – Try on the apron, position the neck strap and mark with a pin where to place the other half of the Velcro piece, once the neck strap is comfortable. Stitch the Velcro piece in place on the neck strap pinned location.
- Sew on a name label – If desired, create a patch with your name, place and date of completion. Sew onto the back of the bib.

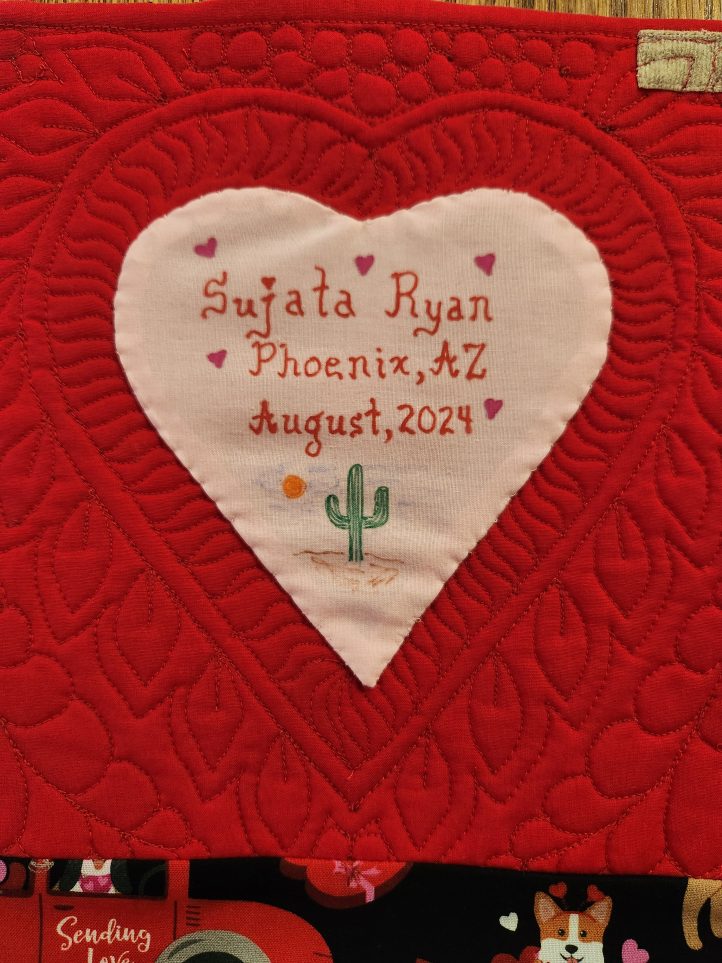
- The Valentine’s Day apron is now finished!
