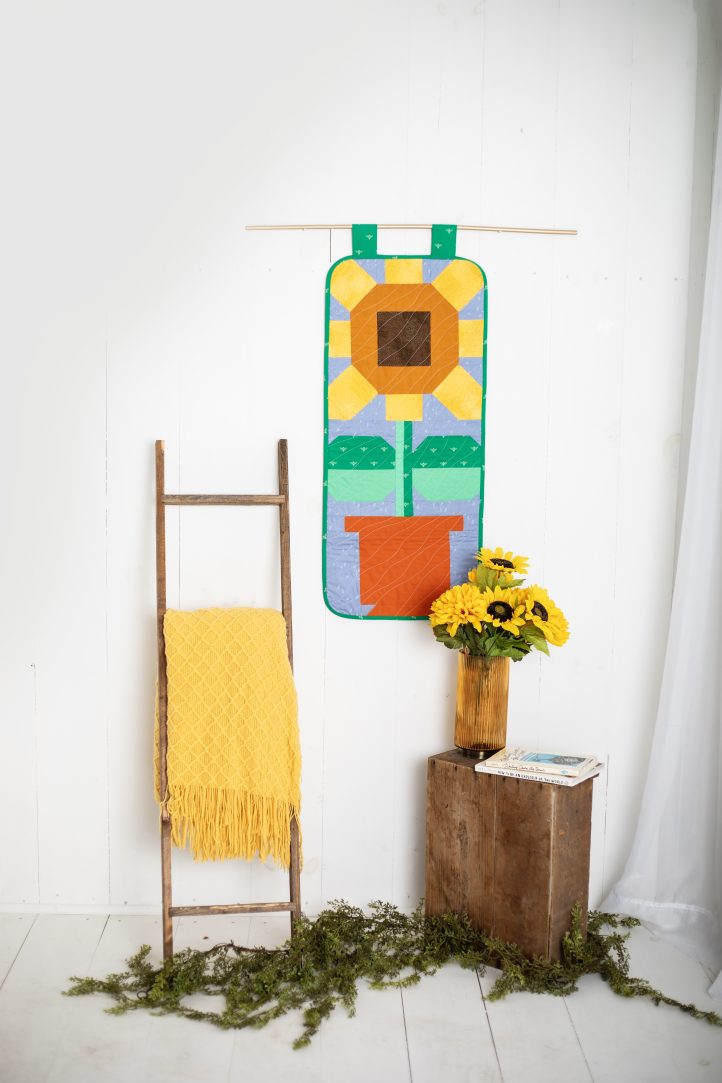
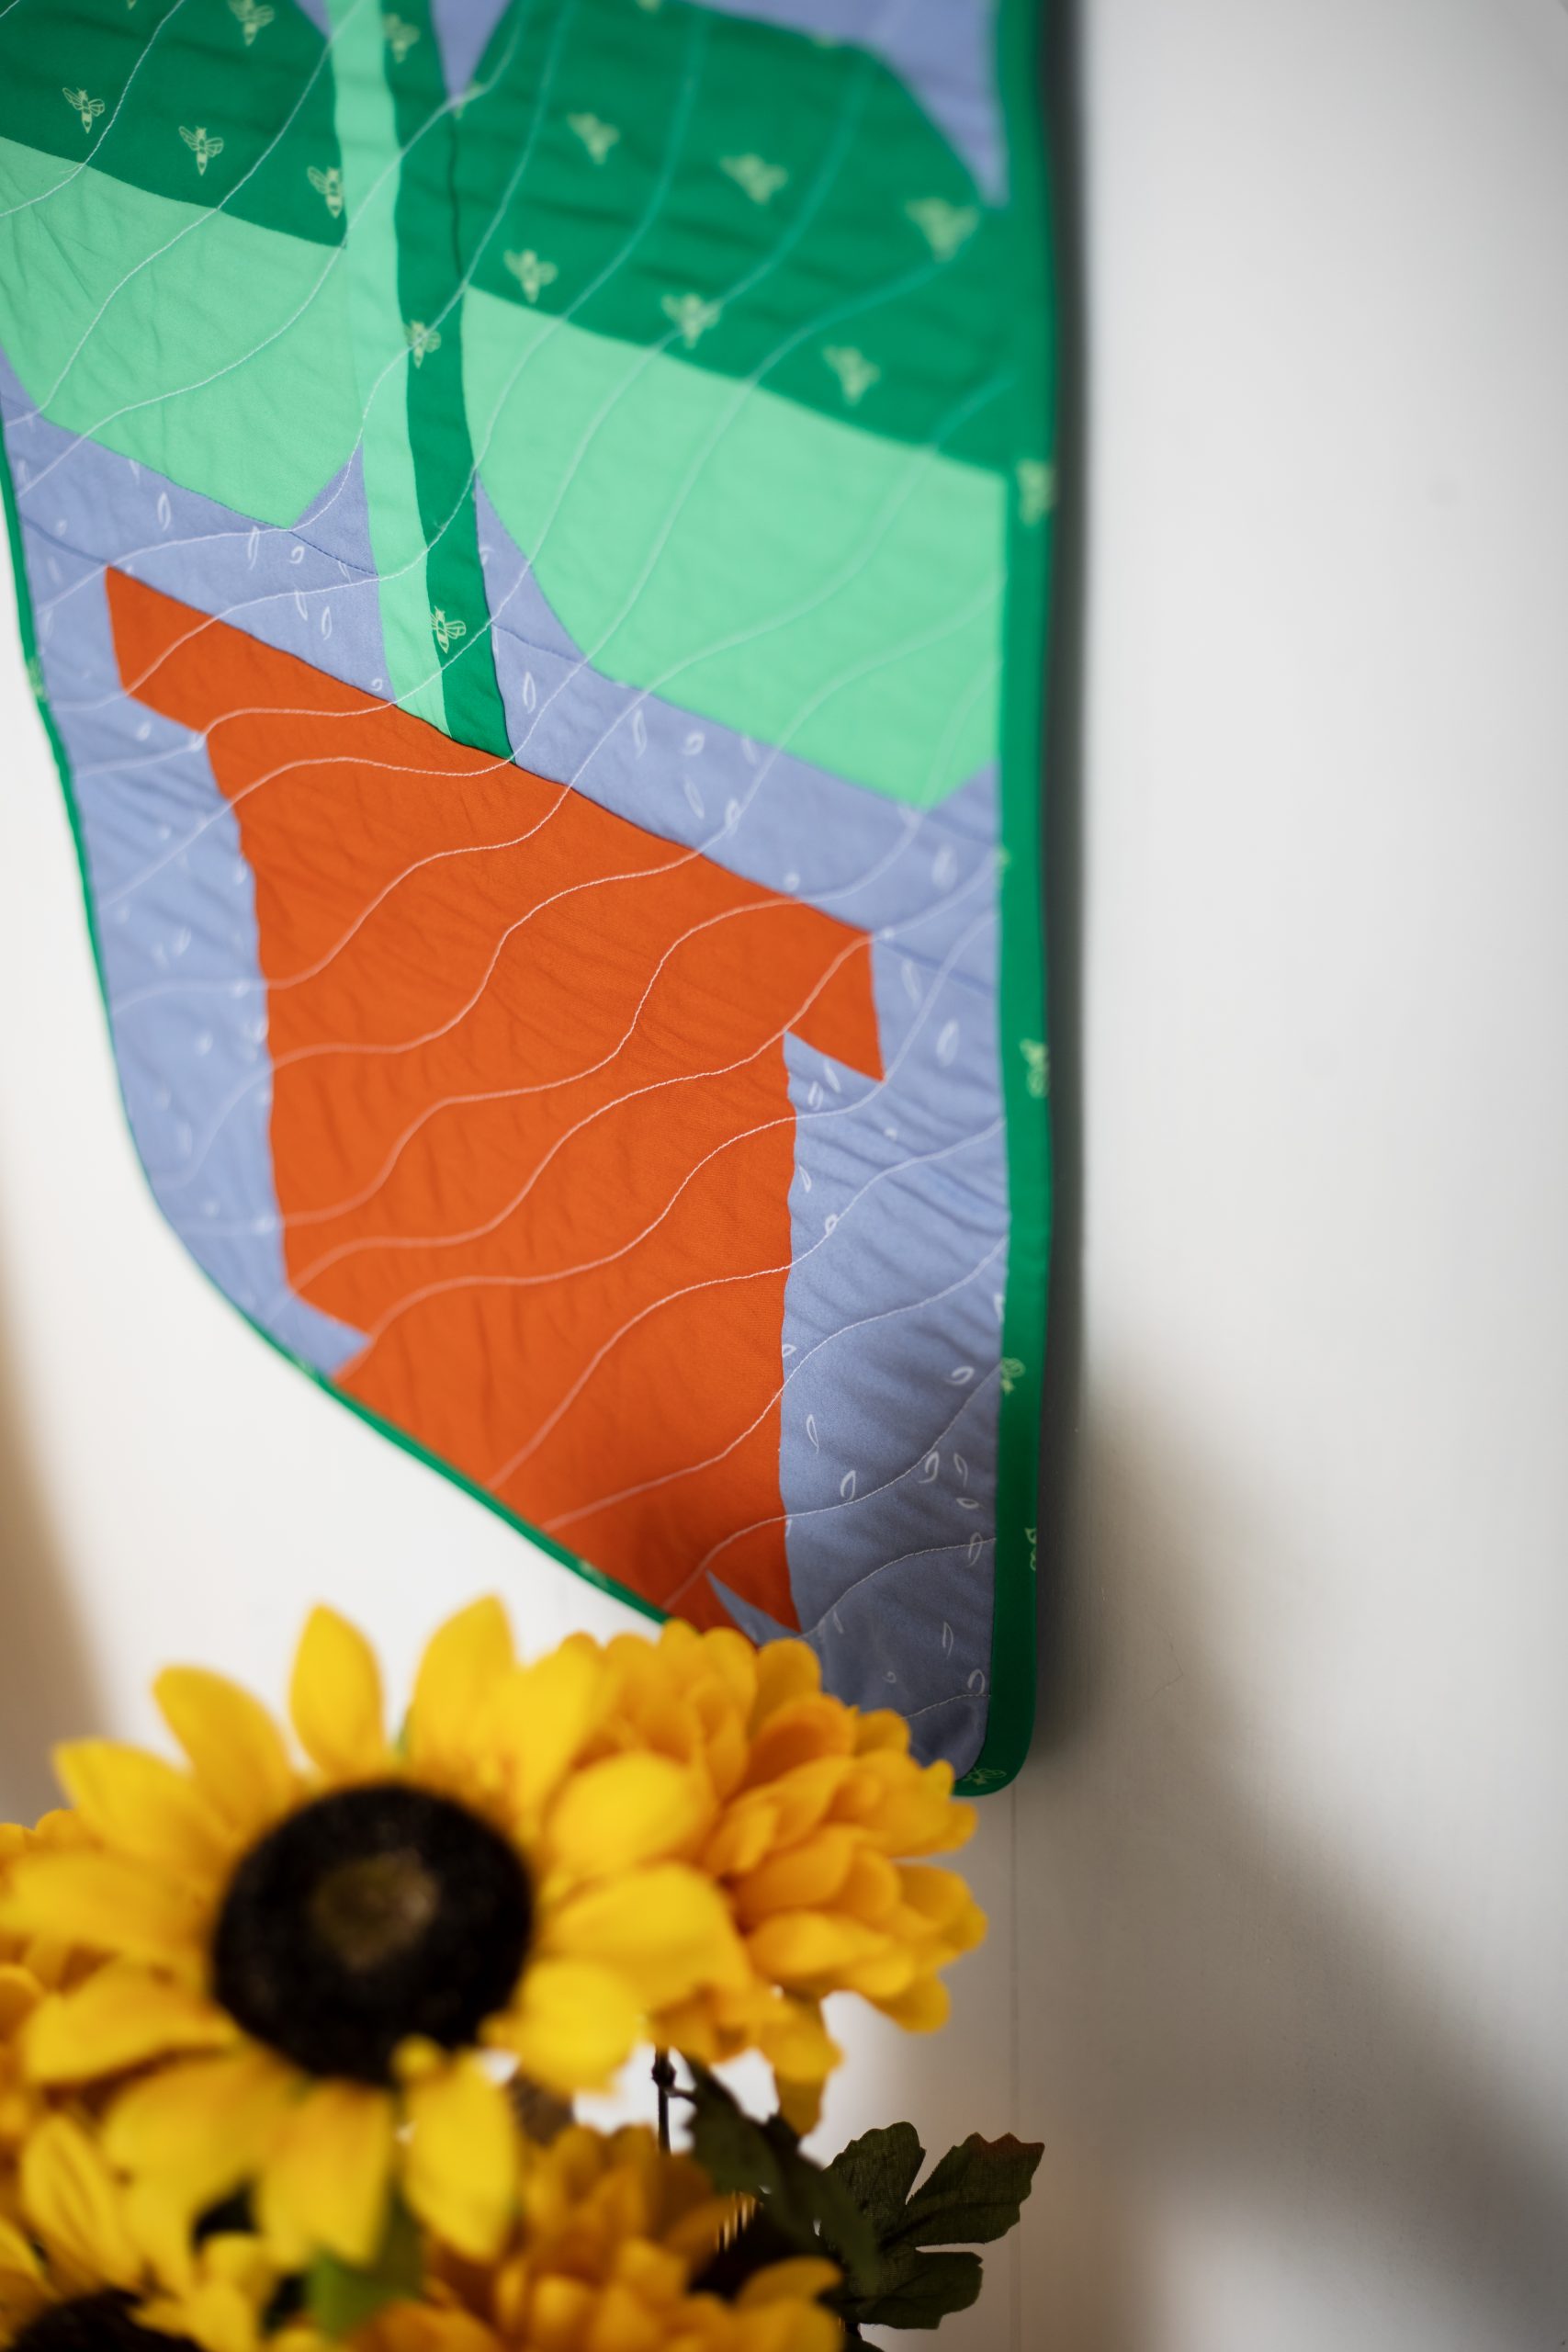
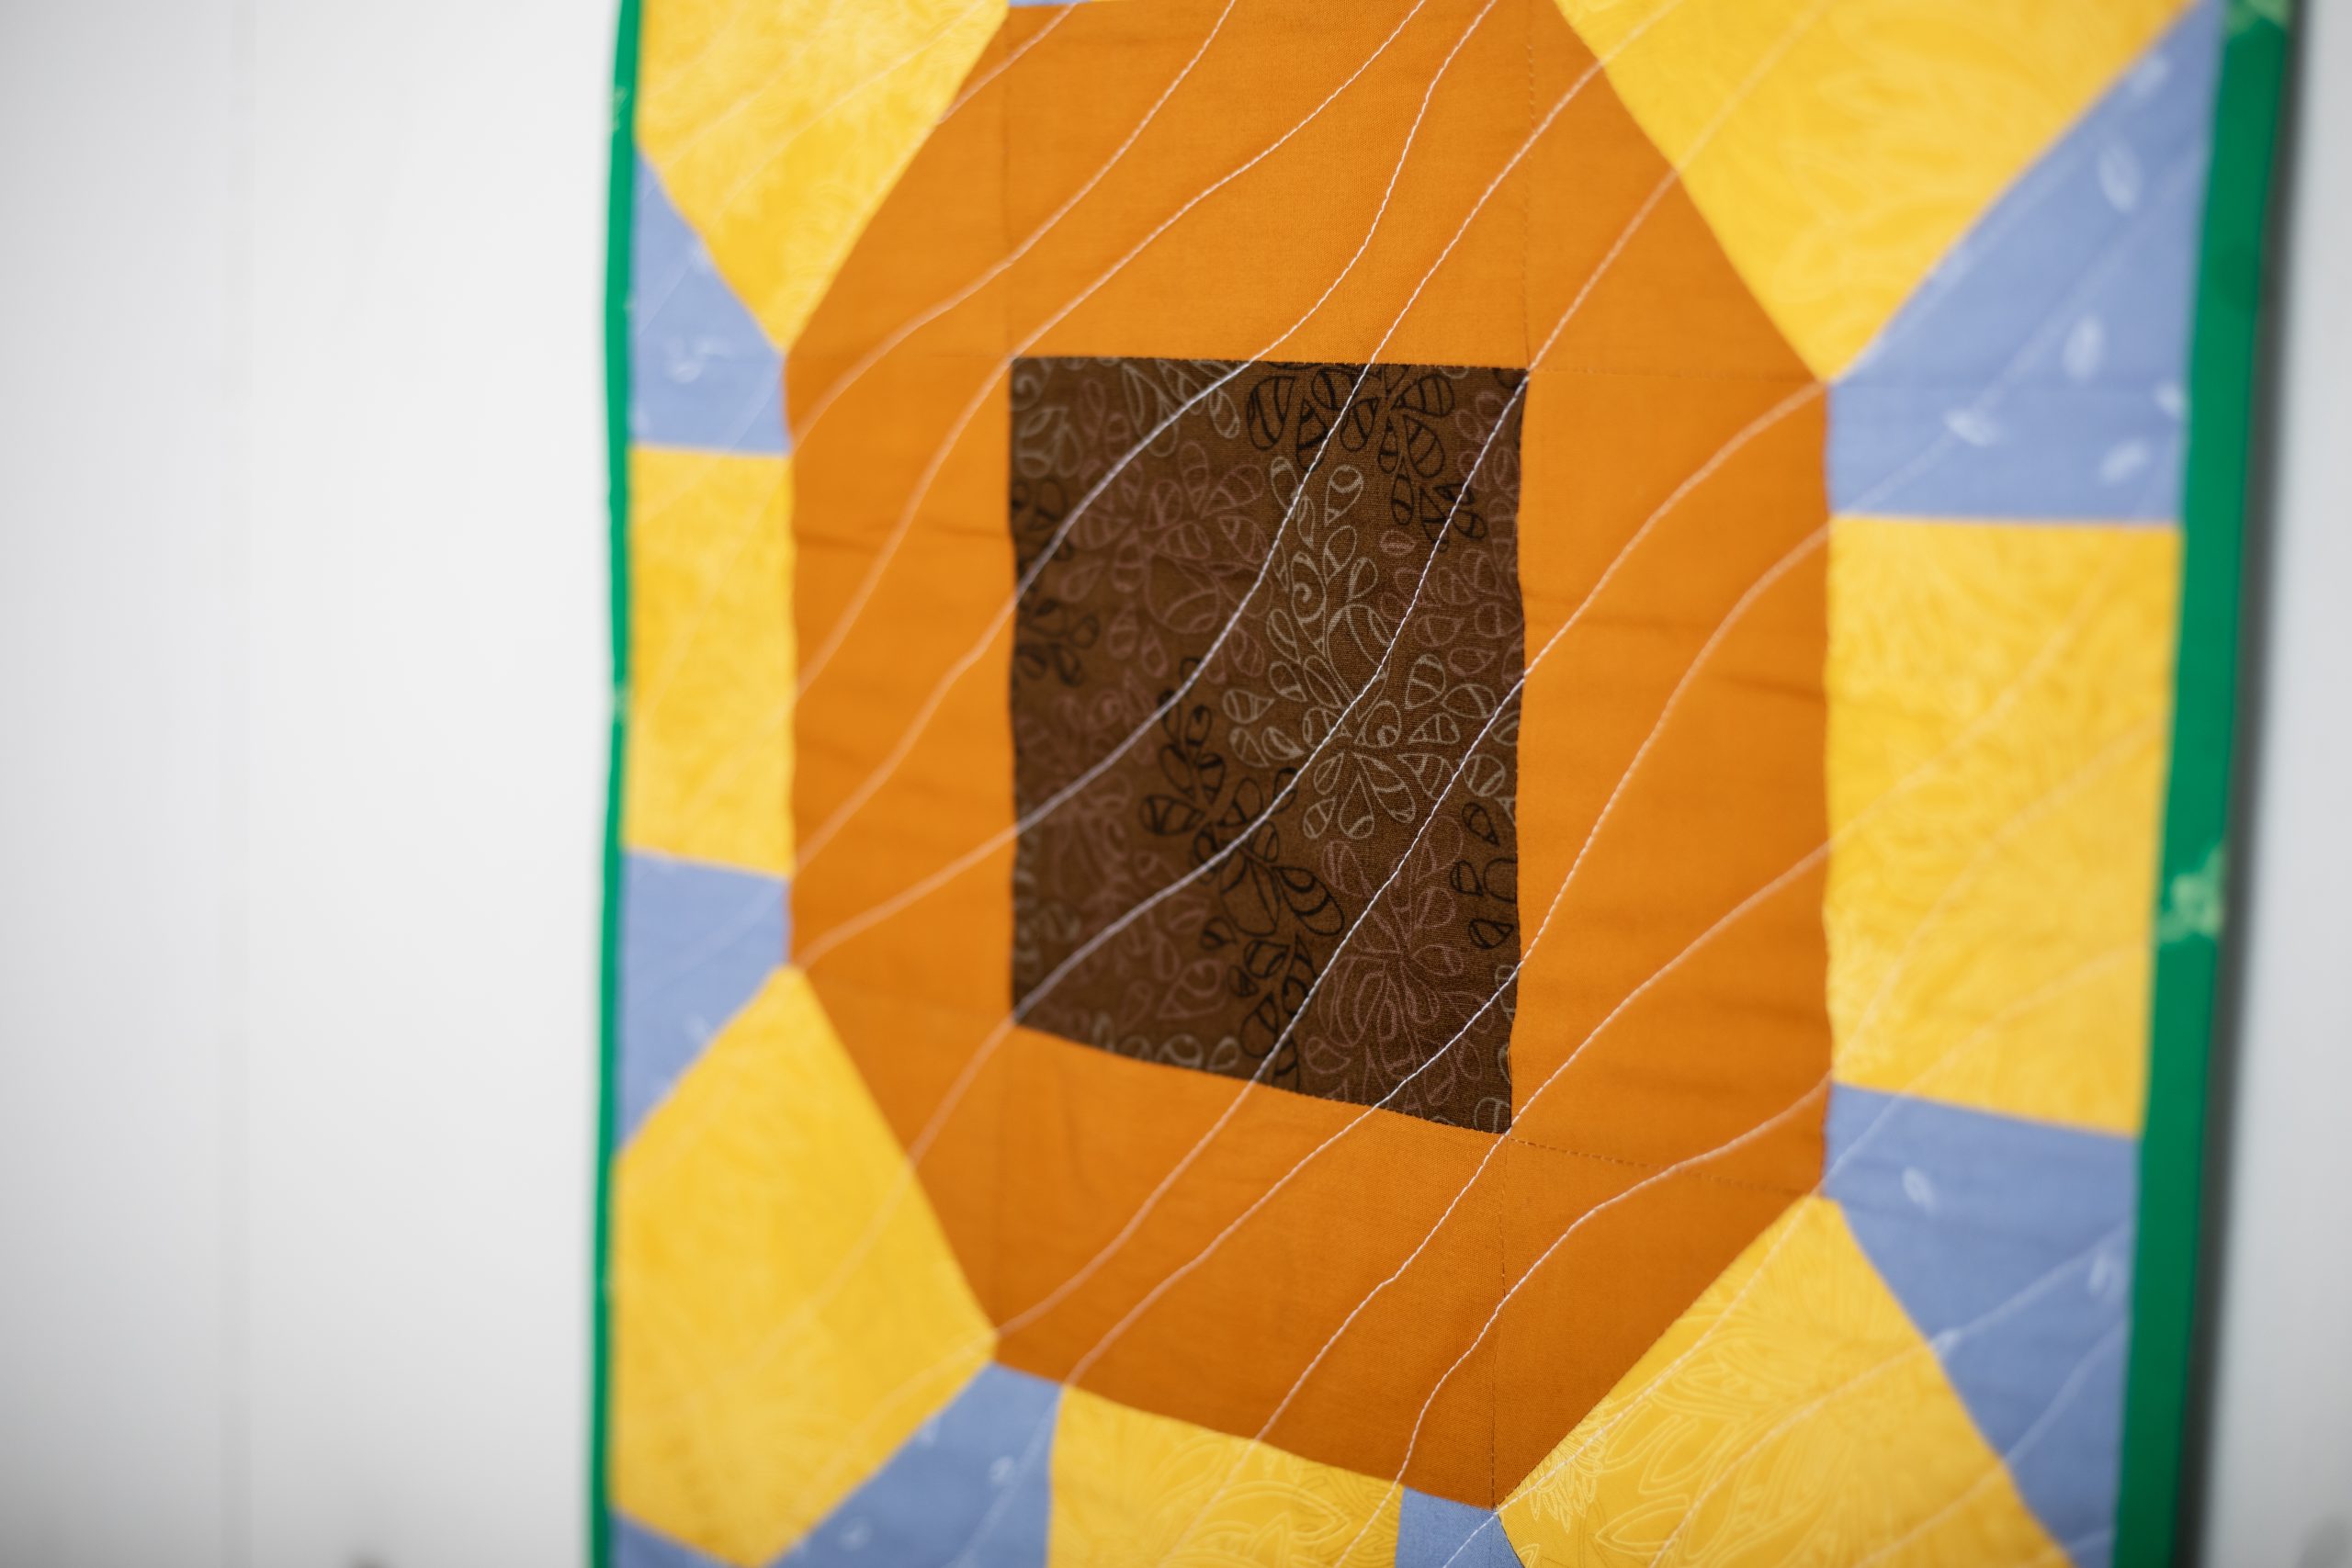
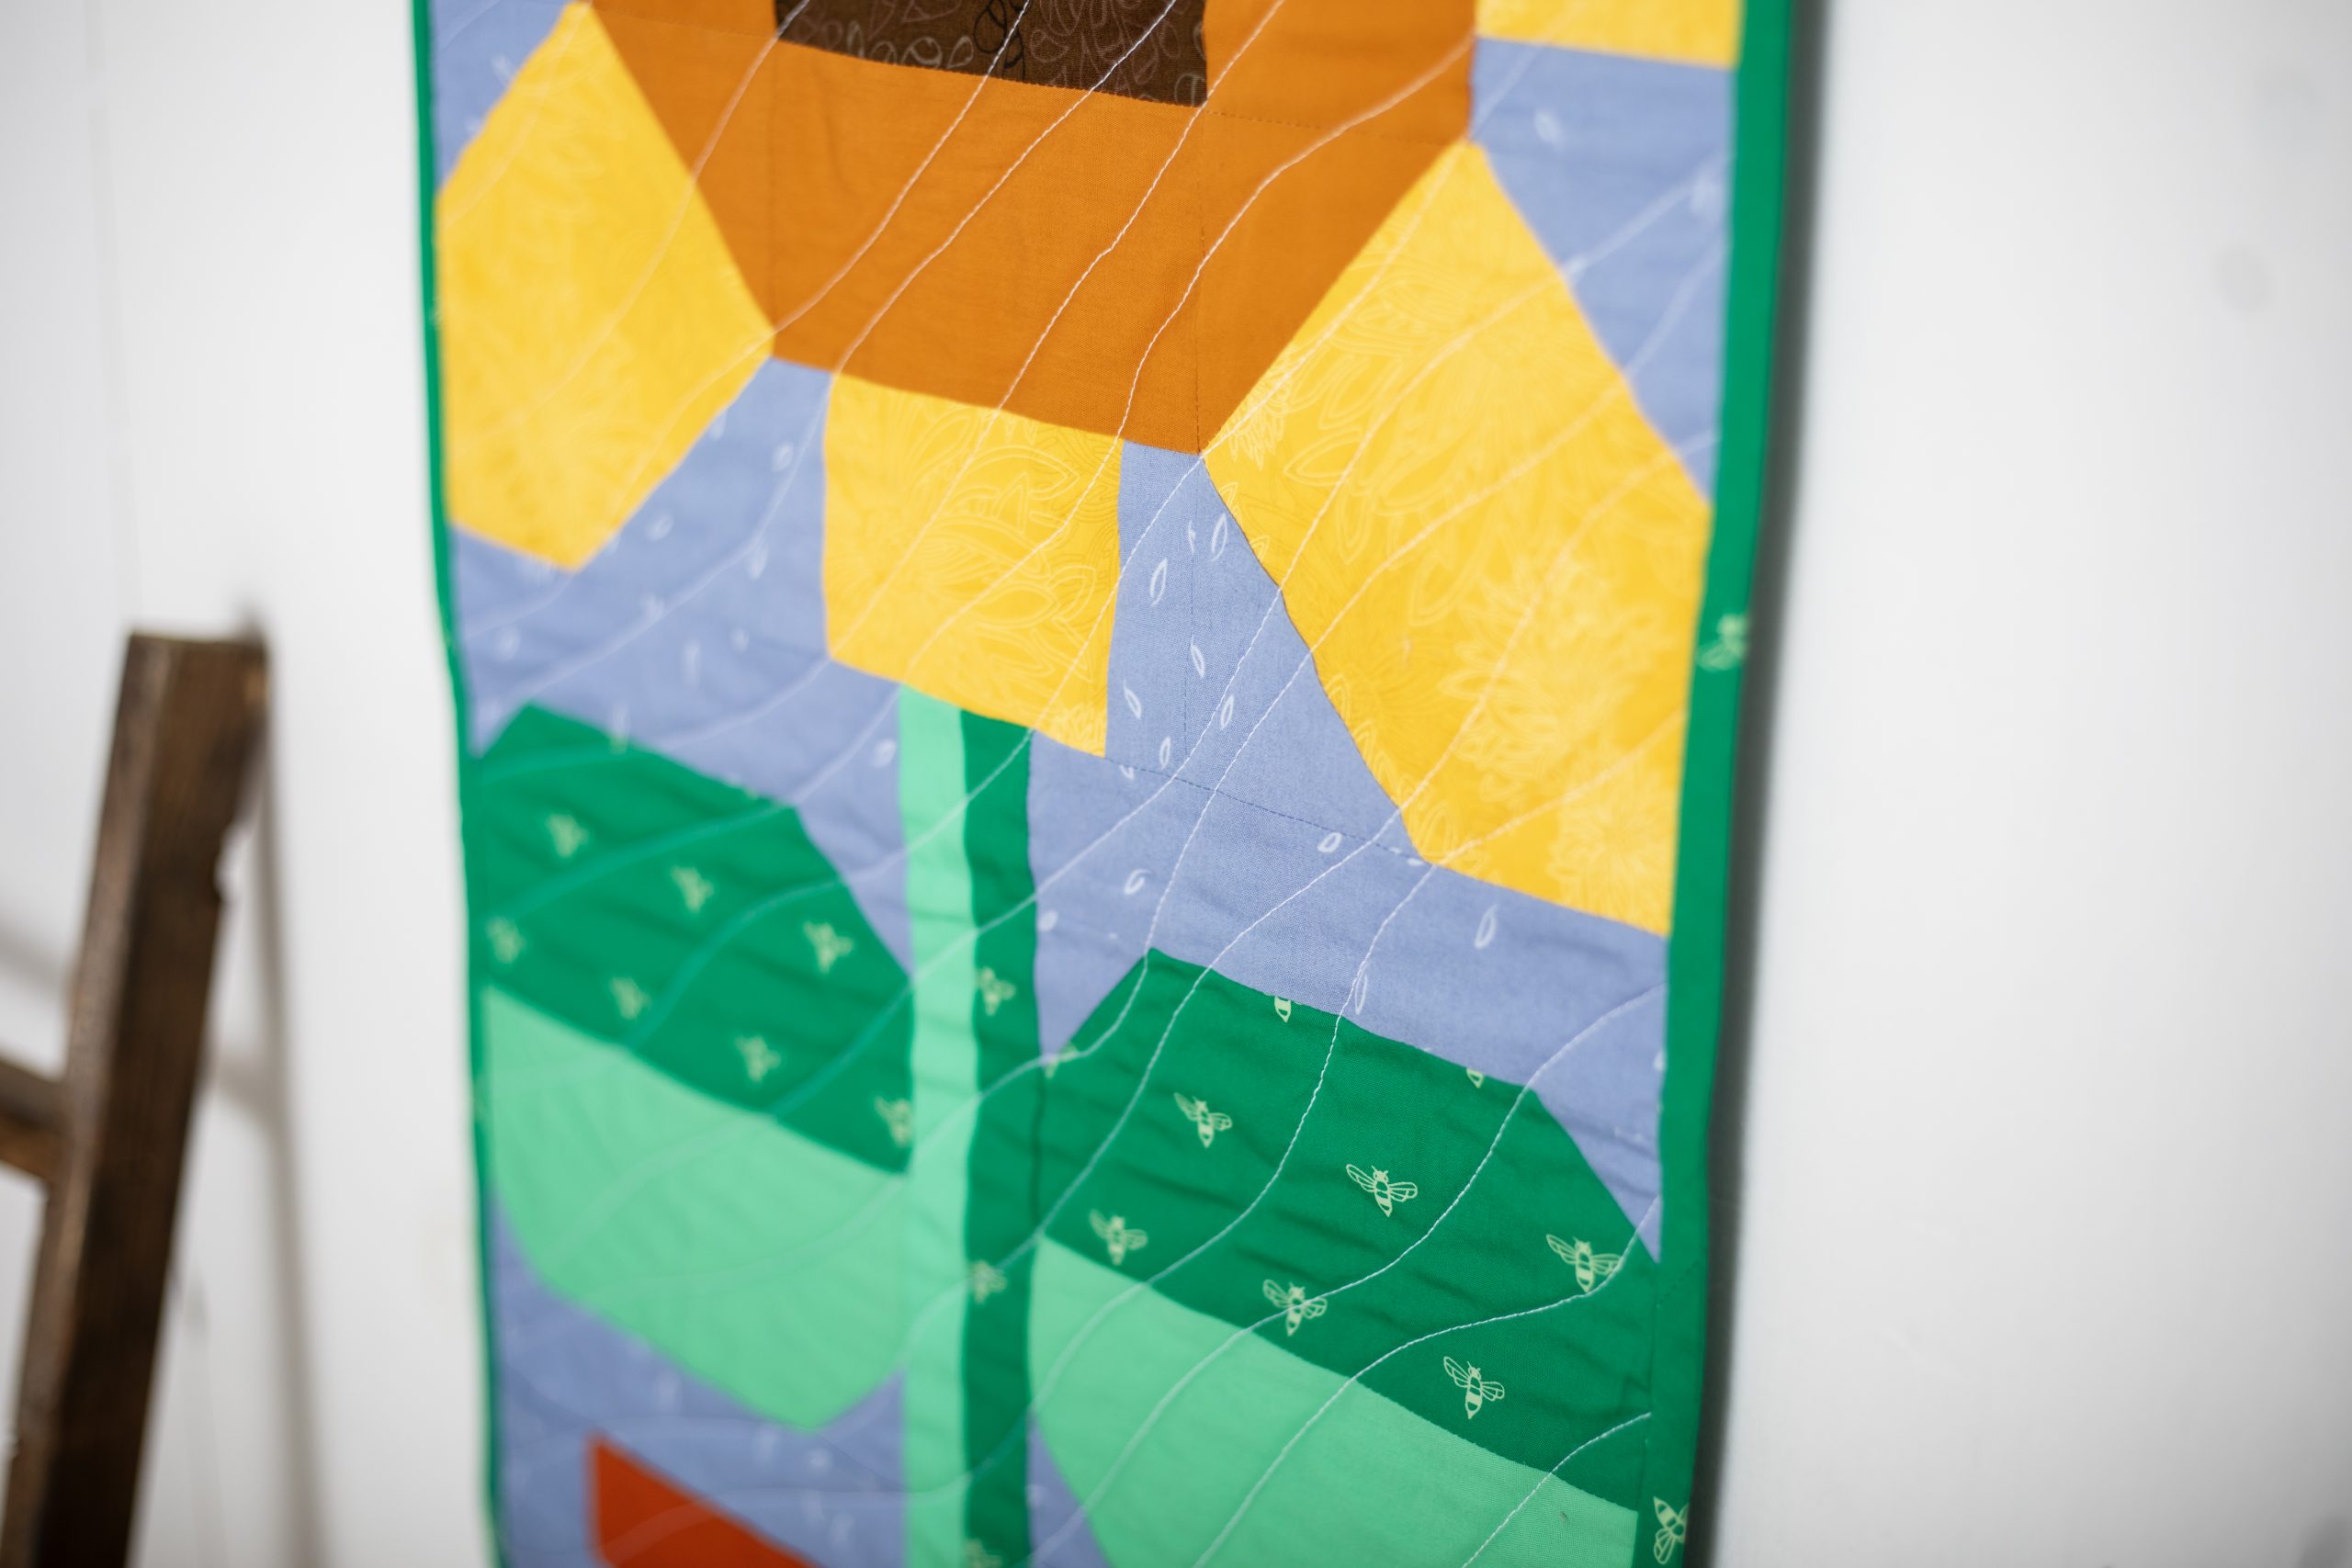
Sunflowers symbolize positivity and happiness, and this door quilt pattern is a wonderful project to welcome your visitors to your home with good vibes and joy. Designed by Debbie von Grabler-Crozier, this sunflower quilt pattern is fat quarter friendly and features a large, potted sunflower against a summery blue sky. Finish your door quilt with coordinating green binding and hanging loops, so that you can display your floral quilt on your front door or as a late summer wall hanging.
Designer Notes:
- FQ=Fat Quarters
- Seam allowances are all 1/4” and have already been added.
Materials:
Note: All fabrics are by Art Gallery Fabrics.
- 1 1/2 yds. blue blender fabric for the background and the backing. Debbie loves Dancing Leaves Lilac from the Trouvaille collection by AGF Studio.
- Solid fabrics:
- FQ lighter green solid. Jade Cream from the Pure Solids collection by AGF.
- FQ terracotta solid. Apple Cider from the Pure Solids collection by AGF.
- FQ dark gold solid. Raw Gold from the Pure Solids collection by AGF.
- Blender fabrics:
- FQ yellow blender. The designer used Sunflower from the Floral Elements collection by AGF.
- 7” sq. dark brown blender. Debbie loves Coffee Liqueur from the Nature Elements collection by AGF.
- 1/2 yd. darker green blender. Honeybee Lane from the Daisy collection by Maureen Cracknell for AGF.
- Interfacing: 3/4 yd. #279 80/ 20 cotton mix wadding (Vlieseline)
- Piece of dowel or a rustic stick about as thick as your thumb and about 15”- 16” long.
- Coordinating threads for all fabrics and trims
- Scissors
- Fabric markers
- Extra feet for your sewing machine (walking [dual feed] foot for example)
Cutting Instructions:
From the blue background fabric:
- The sunflower head section:
- 4 squares 3 3/8” sq., sub-cut diagonally into 8 triangles for the corner petal side triangles
- 8 strips 1 1/4” wide x 3” long for the center petal side bars
- The leaf section:
- 4 strips 7 1/2” wide x 2” tall for the bars top and bottom in the leaf section
- 8 pieces 2” sq. for the snowball corners on the leaves
- The pot section:
- 2 pieces 2 5/8” wide x 2” tall for the small sections either side of the pot rim
- 2 pieces 4” wide x 9” tall for the pieces either side of the pot body
- 2 pieces 2” sq., for the snowball sections either side of the pot body
For the backing:
- 1 piece 20” wide x 39” tall for the quilt backing
From the yellow blender (the sunflower petals):
- 2 squares 3 3/8” sq. sub-cut diagonally into four triangles for the corner petal outer points
- 4 squares, 4 1/8” sq. for the corner petal centers
- 4 pieces 3 7/8” wide x 3” tall for the center petals
From the dark gold solid (the outer part of the sunflower center):
- 4 pieces 5 1/2” wide x 3” tall
- 2 squares 3 3/8” sq. sub-cut diagonally into four triangles for the corner petal base/ outer flower center
From the dark brown blender (the center of the sunflower head):
- 1 piece 5 1/2” sq.
From the darker green (leaf and stalk):
- 2 pieces 7 1/2” wide x 3 1/2” tall for the leaf tops
- 1 piece 1” wide x 9 1/2” tall for the shaded side of the stalk
- Bias tape cut at 1 1/2” wide and joined to make a continuous strip 105” long
- 1 piece 5” wide x 15” long for the hanging tabs
From the lighter green solid (leaf and stalk):
- 2 pieces 7 1/2” wide x 3 1/2” tall for the leaf bottoms
- 1 piece 1” wide x 9 1/2” tall for the lighter side of the stalk
From the terracotta (the pot):
- 1 piece 11 1/2” wide x 2” tall for the pot rim
- 1 piece 9” wide x 7 1/2” tall for the pot body
- 1 piece 9” wide x 2” tall for the pot base
From the batting:
- 1 piece 18” wide x 37” tall
Piecing Instructions:
PREPARATION:
The Sunflower Head:
- The sunflower head is built on a system of nine blocks arranged into a square. There are four economy blocks (one in each corner), four center blocks on the outer edge to complete the petals and the outer rim of the center and then a dark brown block, which forms the center of the sunflower.
- To make an economy block, you need one of the sub-cut yellow triangles, a yellow square, two sub-cut blue triangles and a dark gold sub-cut triangle. Attach the yellow and dark gold triangles to opposite sides of the square.
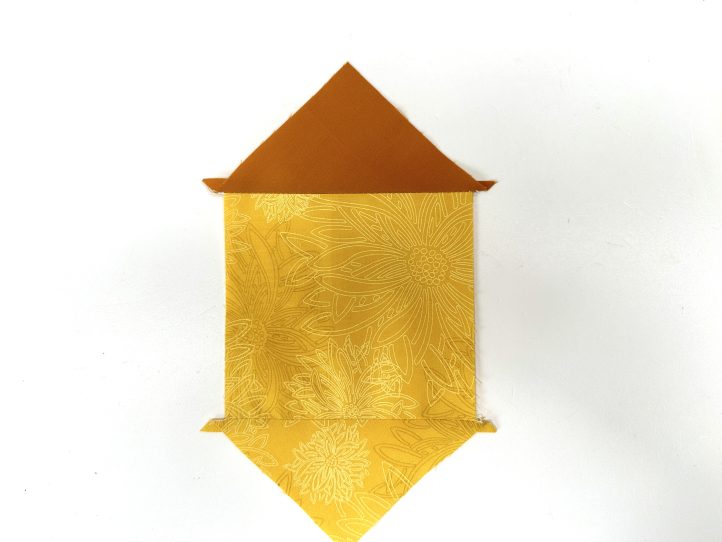
- Attach the two blue pieces to the remaining two sides of the square.
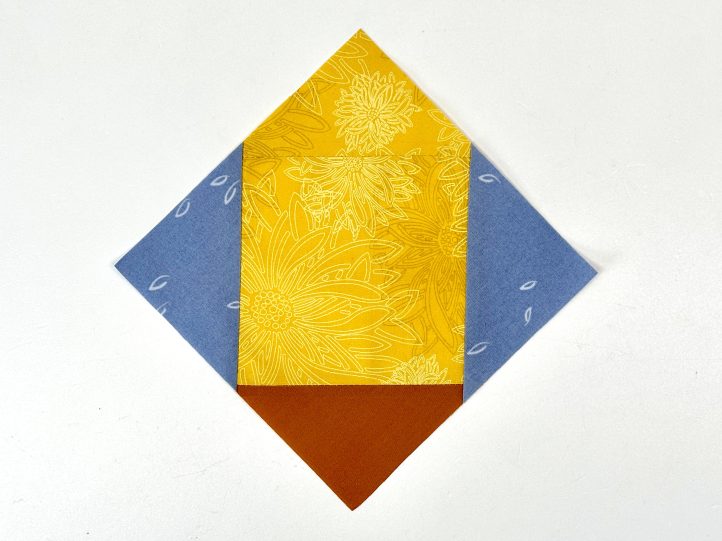
- Press and trim to 5 1/2” sq. Make another three of these.
- To make the center petal blocks, join a blue strip to either side of the central yellow piece.
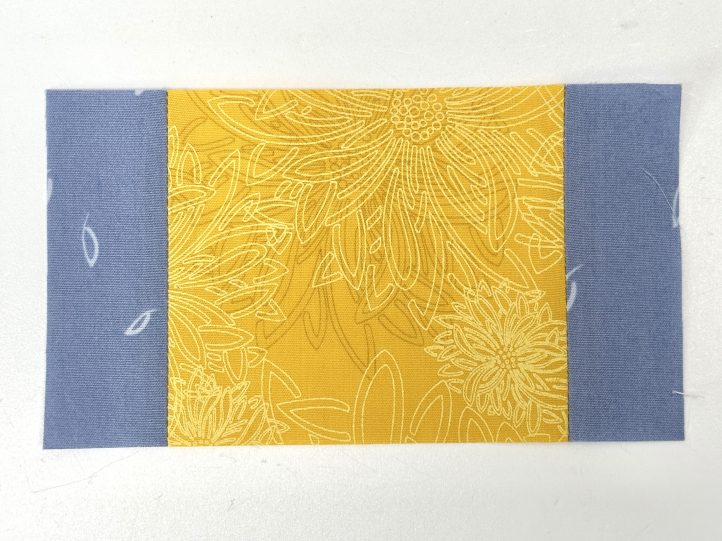
- Press and attach the dark gold strip to the bottom.
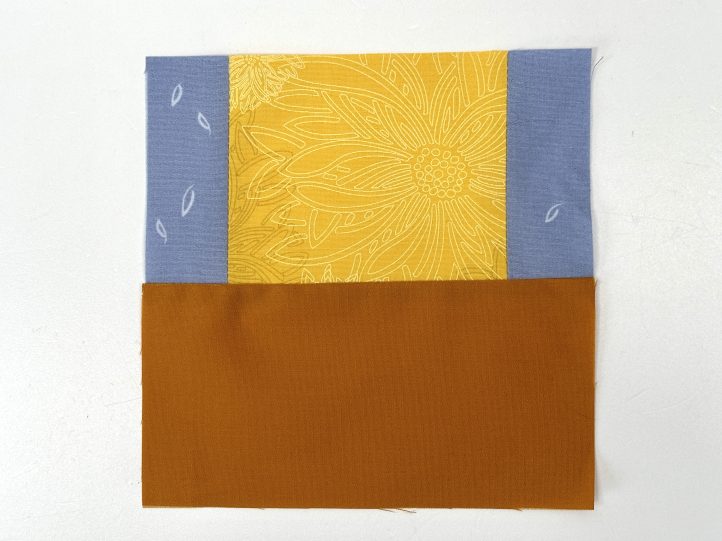
- Make another three of these and trim all of them to 5 1/2” sq.
- Make the top row with an economy block, a center petal block and another economy block.
- TIP: Make sure that you align the blocks properly. In each row, the dark gold component points inwards and on the economy blocks, the yellow corner triangle points out.
- Row two is a center petal block, the dark brown square and then another center petal block. Press everything well and join the second row to the first.
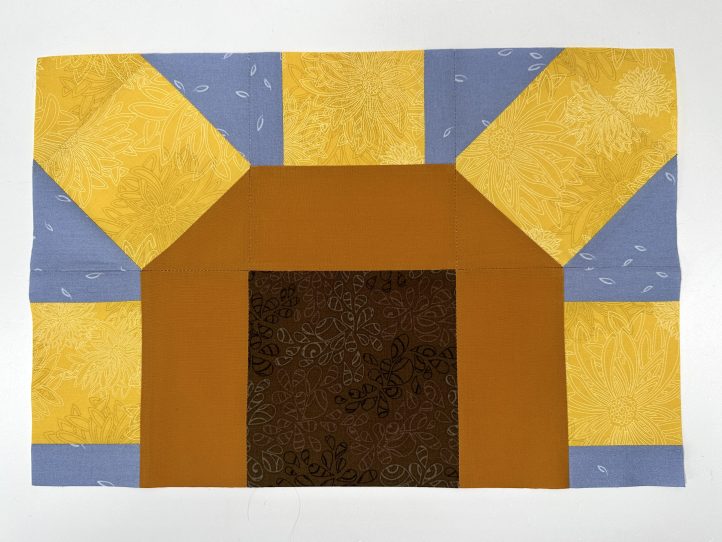
- The third row is the same as the first but inverted.
The Leaf Section:
- Sew a light green piece to a dark green and press. Snowball the corners with four blue squares.
- TIP: To snowball, place the square in the corner and draw a diagonal line from corner to corner.
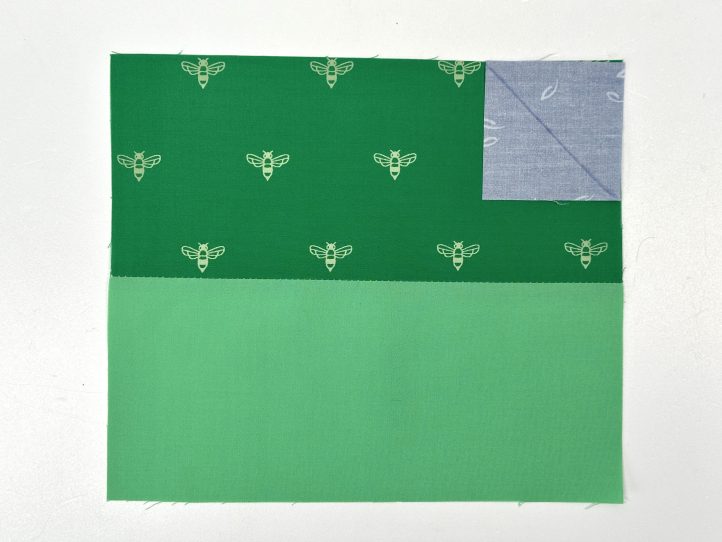
- Sew along the line that you drew and trim 1/4” out from the seam.
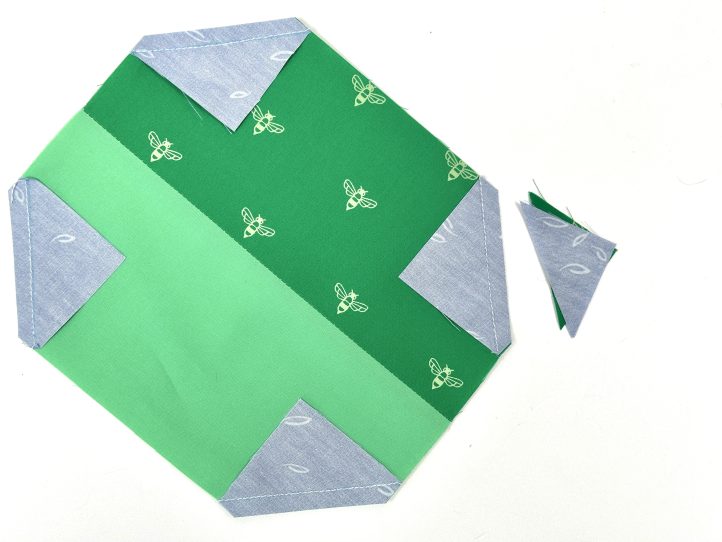
- Open the snowball out and press.
- Repeat all of this to make the other leaf.
- Attach a blue background strip to the bottom and top of both leaves.
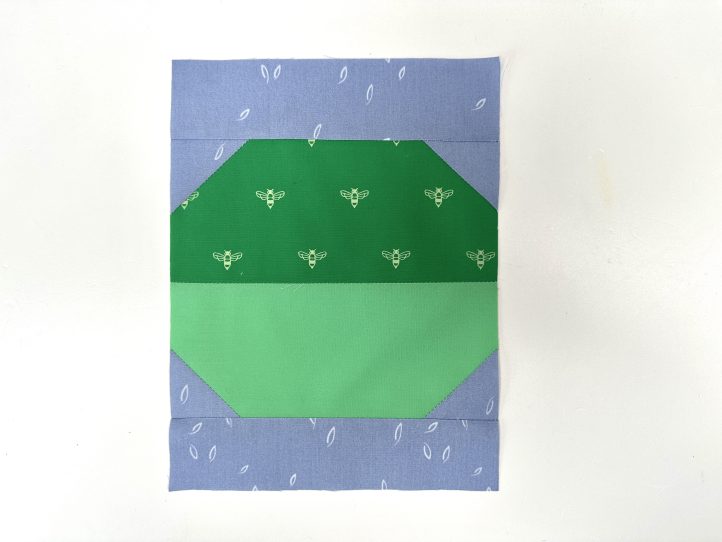
- Sew the dark and light parts of the stem together, too.
- Assemble this section by adding a leaf section to each side of the stem and pressing well. Attach this leaf section to the sunflower head.
The Pot Section:
- The pot rim consists of a long strip of terracotta with a blue background piece on each end of it. Put that aside.
- Snowball the strip that makes the base of the pot with two blue squares as described above. Press this section and attach it to the body of the pot.
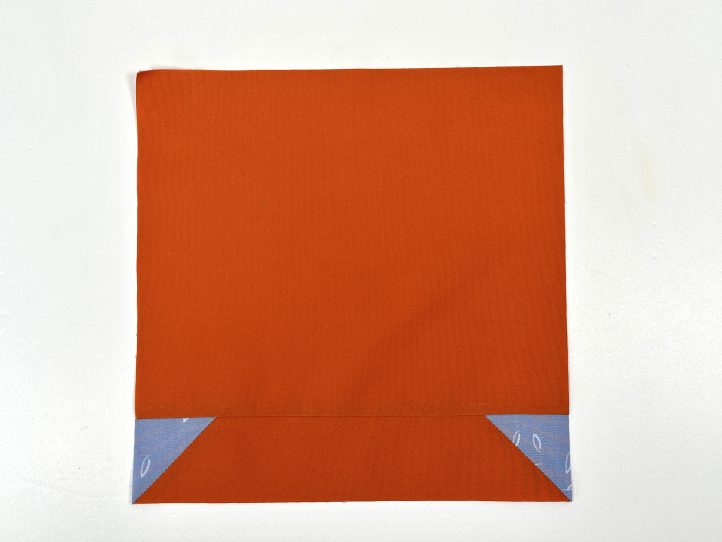
- Join the two blue sections on either side of the pot next.
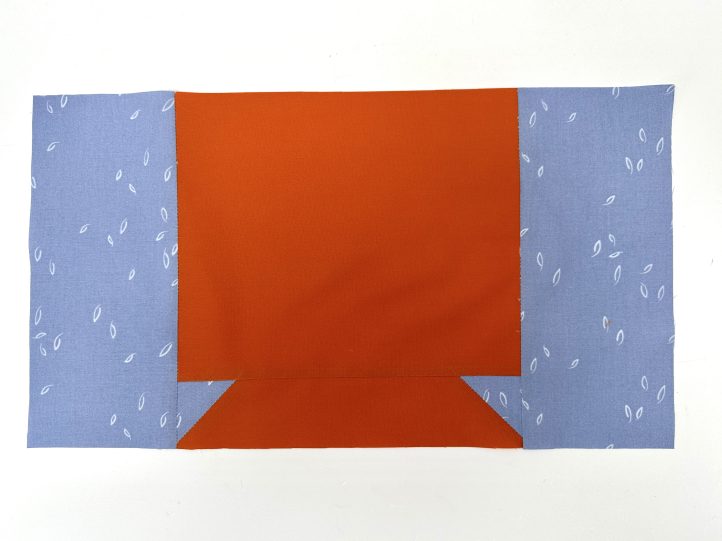
- Finally, add the rim to the top of the pot.
- Attach the pot to the bottom of the leaf section.
- Press the pieced top.
Make the Tabs:
- Fold the tab strip in half lengthways with the right sides facing. Sew the long seam and turn the tab strip the right way out. Press so that the seam is in the center back.
- Cut the strip in half to make two tabs.
Make the Binding:
- Fold the long strip of binding in half lengthways with the wrong sides facing and press to obtain a center crease.
- Open the strip out and re-fold the long raw edges to the center crease and press again.
- Re-fold along all of the creases, enclosing the raw side edges. Roll until it is needed.
MAKING:
- Lay the pressed backing fabric face down and center the batting on top of it. Lay the pressed quilt top on top of the batting with the right side facing up. Pin well.
- Quilt with your favorite pattern.
- TIP: Debbie’s favorite is a random diagonal wave. It is really easy to do and very difficult to get ‘wrong’.
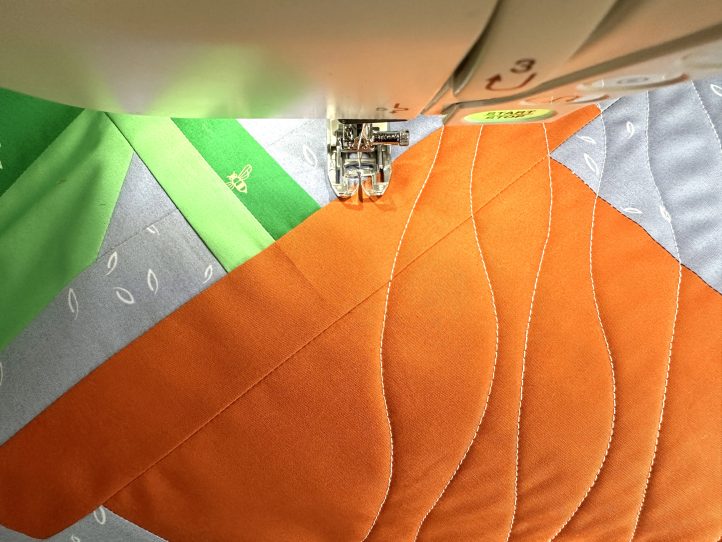
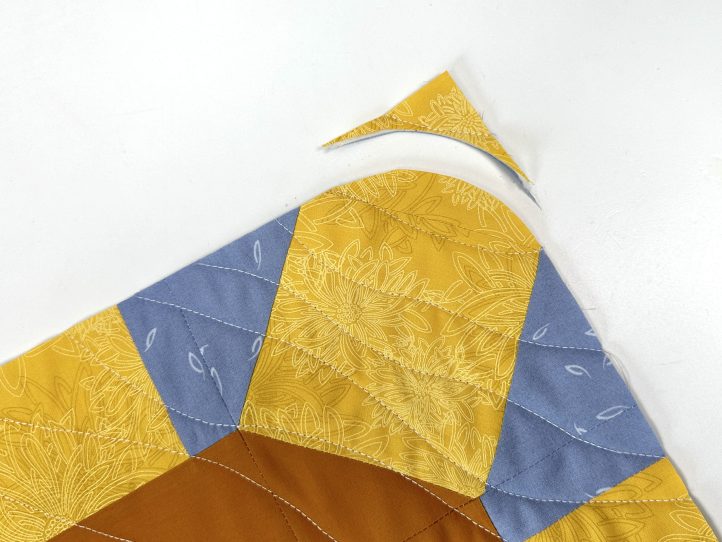
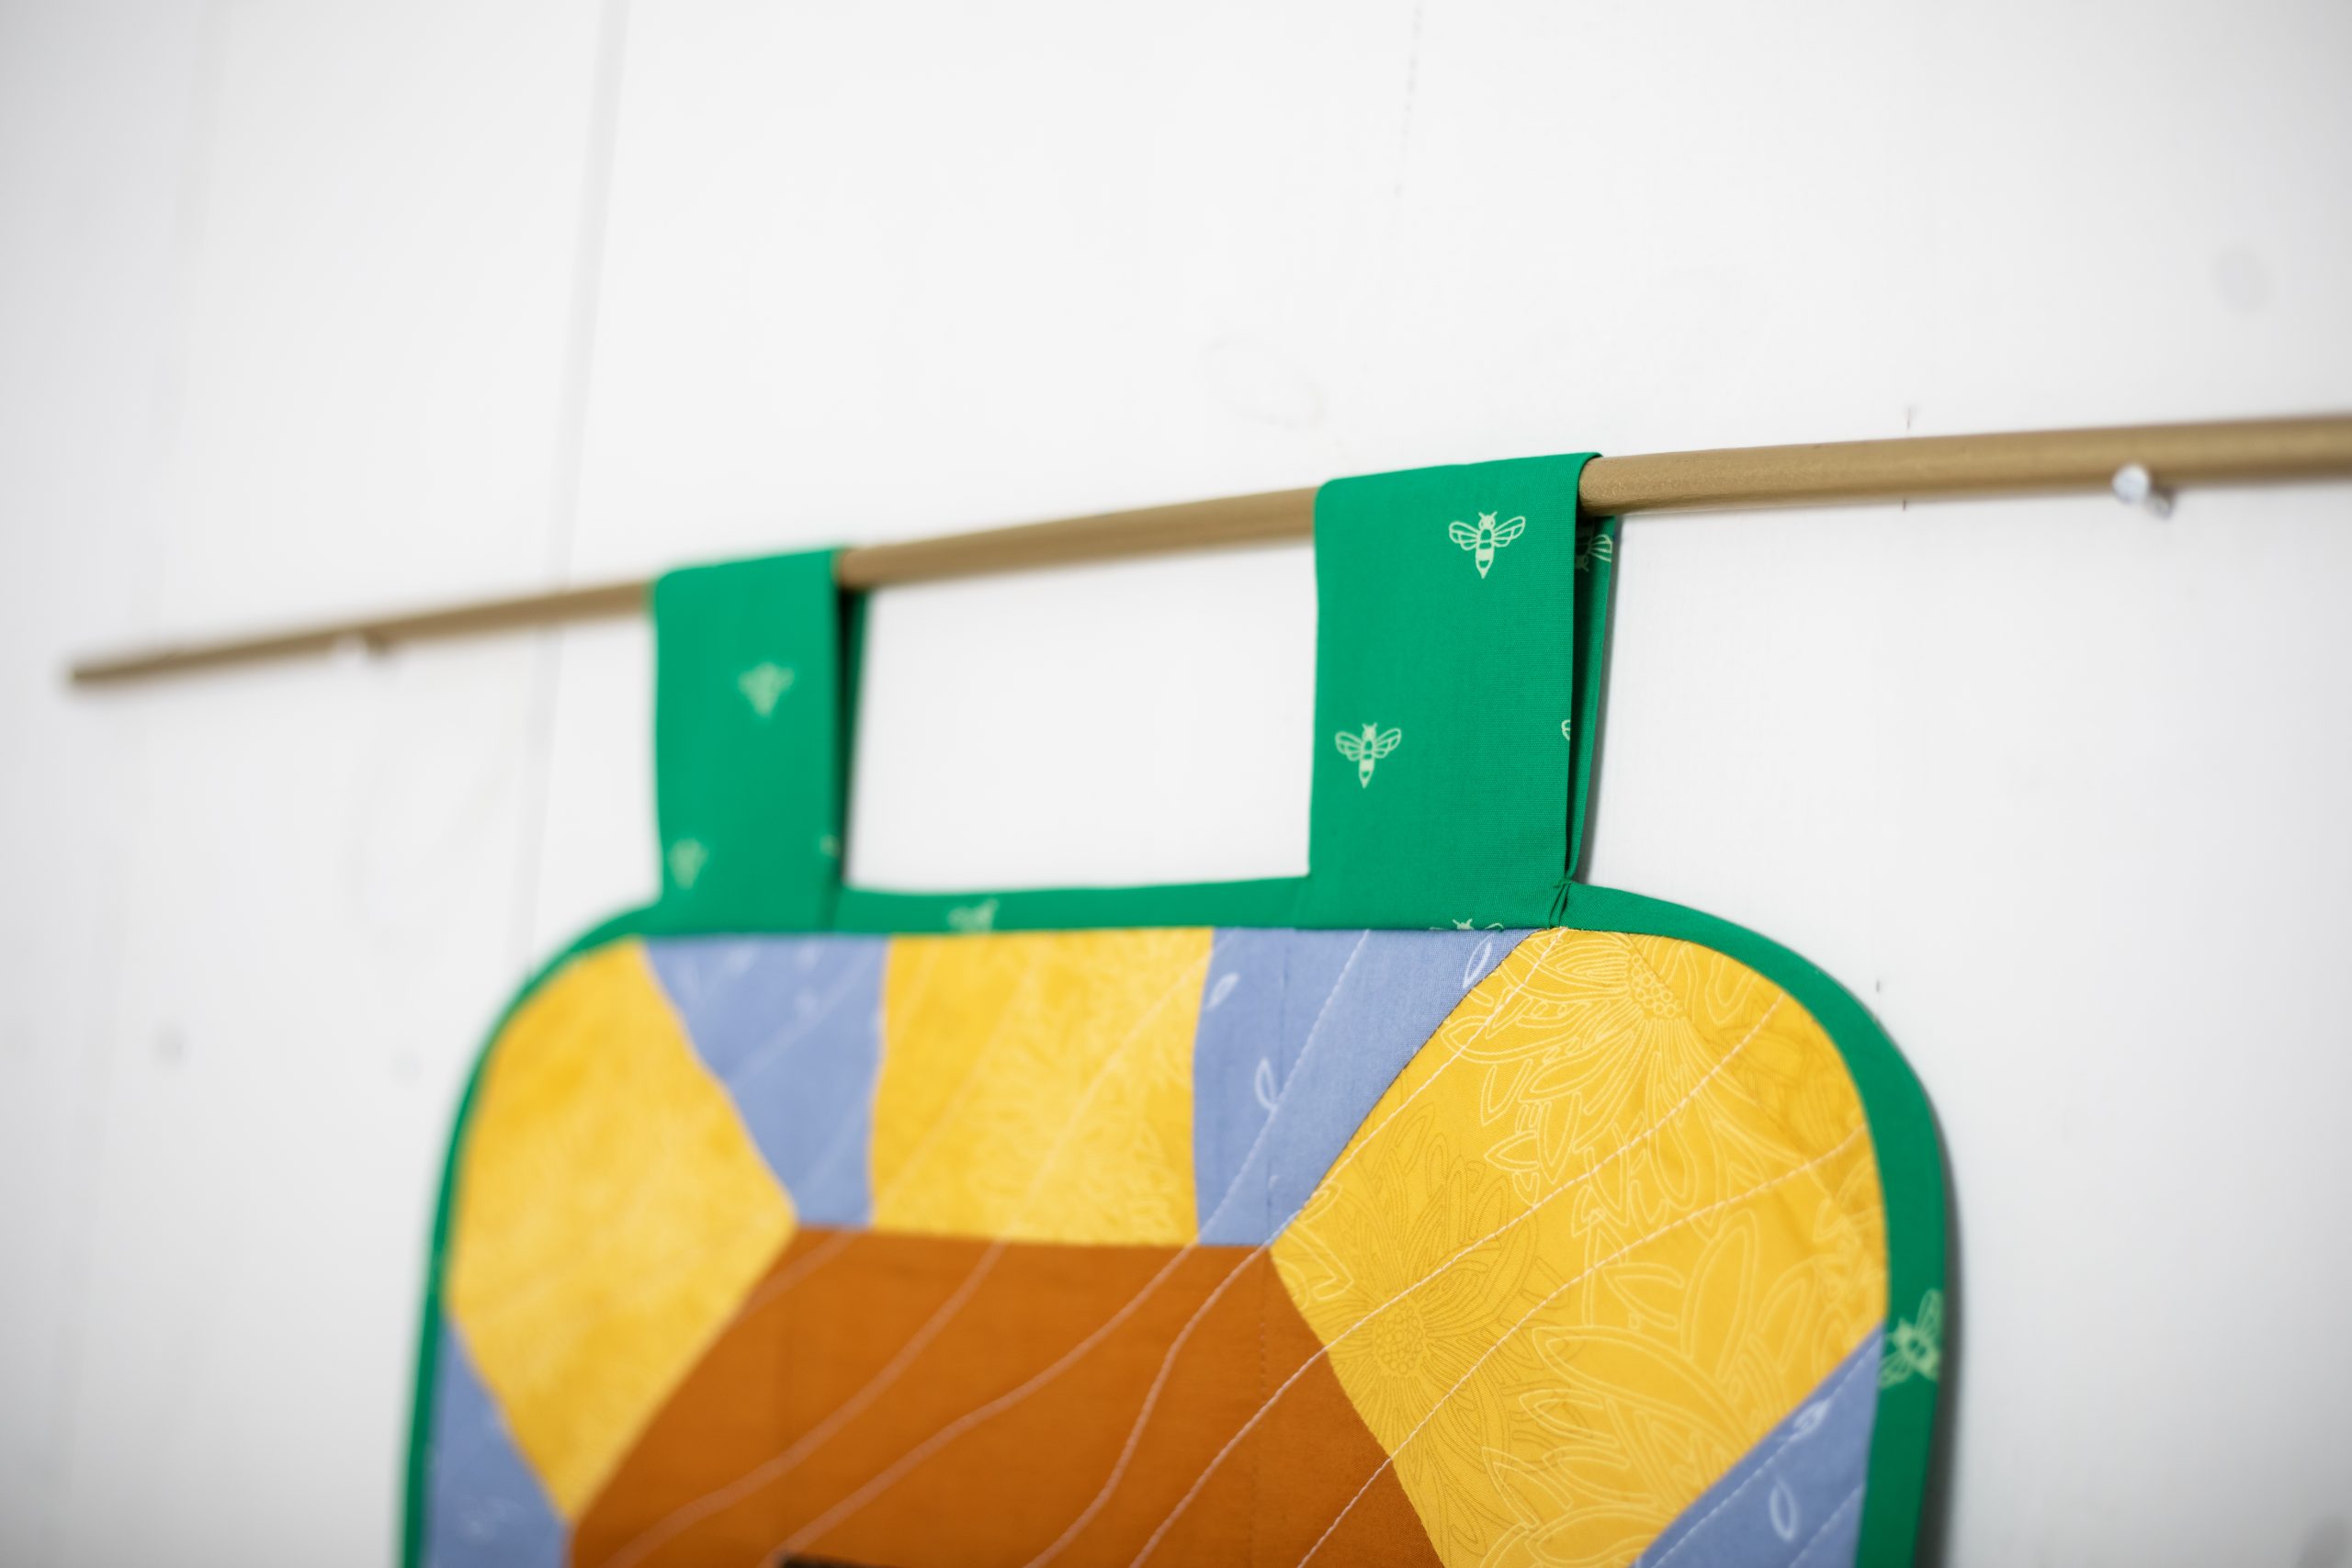
- Trim and square the quilt and round the four corners. Simply turn a coffee cup upside down, trace around it on the corner and then cut out to achieve this.
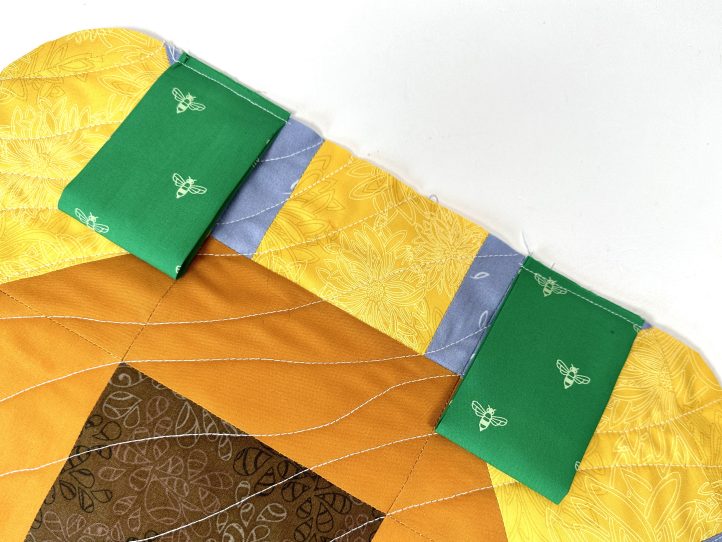
- Fold the tabs in half with the seam inside. Measure in 3” from each side on the top edge and attach a tab.
- Bind with your bias tape on the front.
- Bind the back of the quilt.
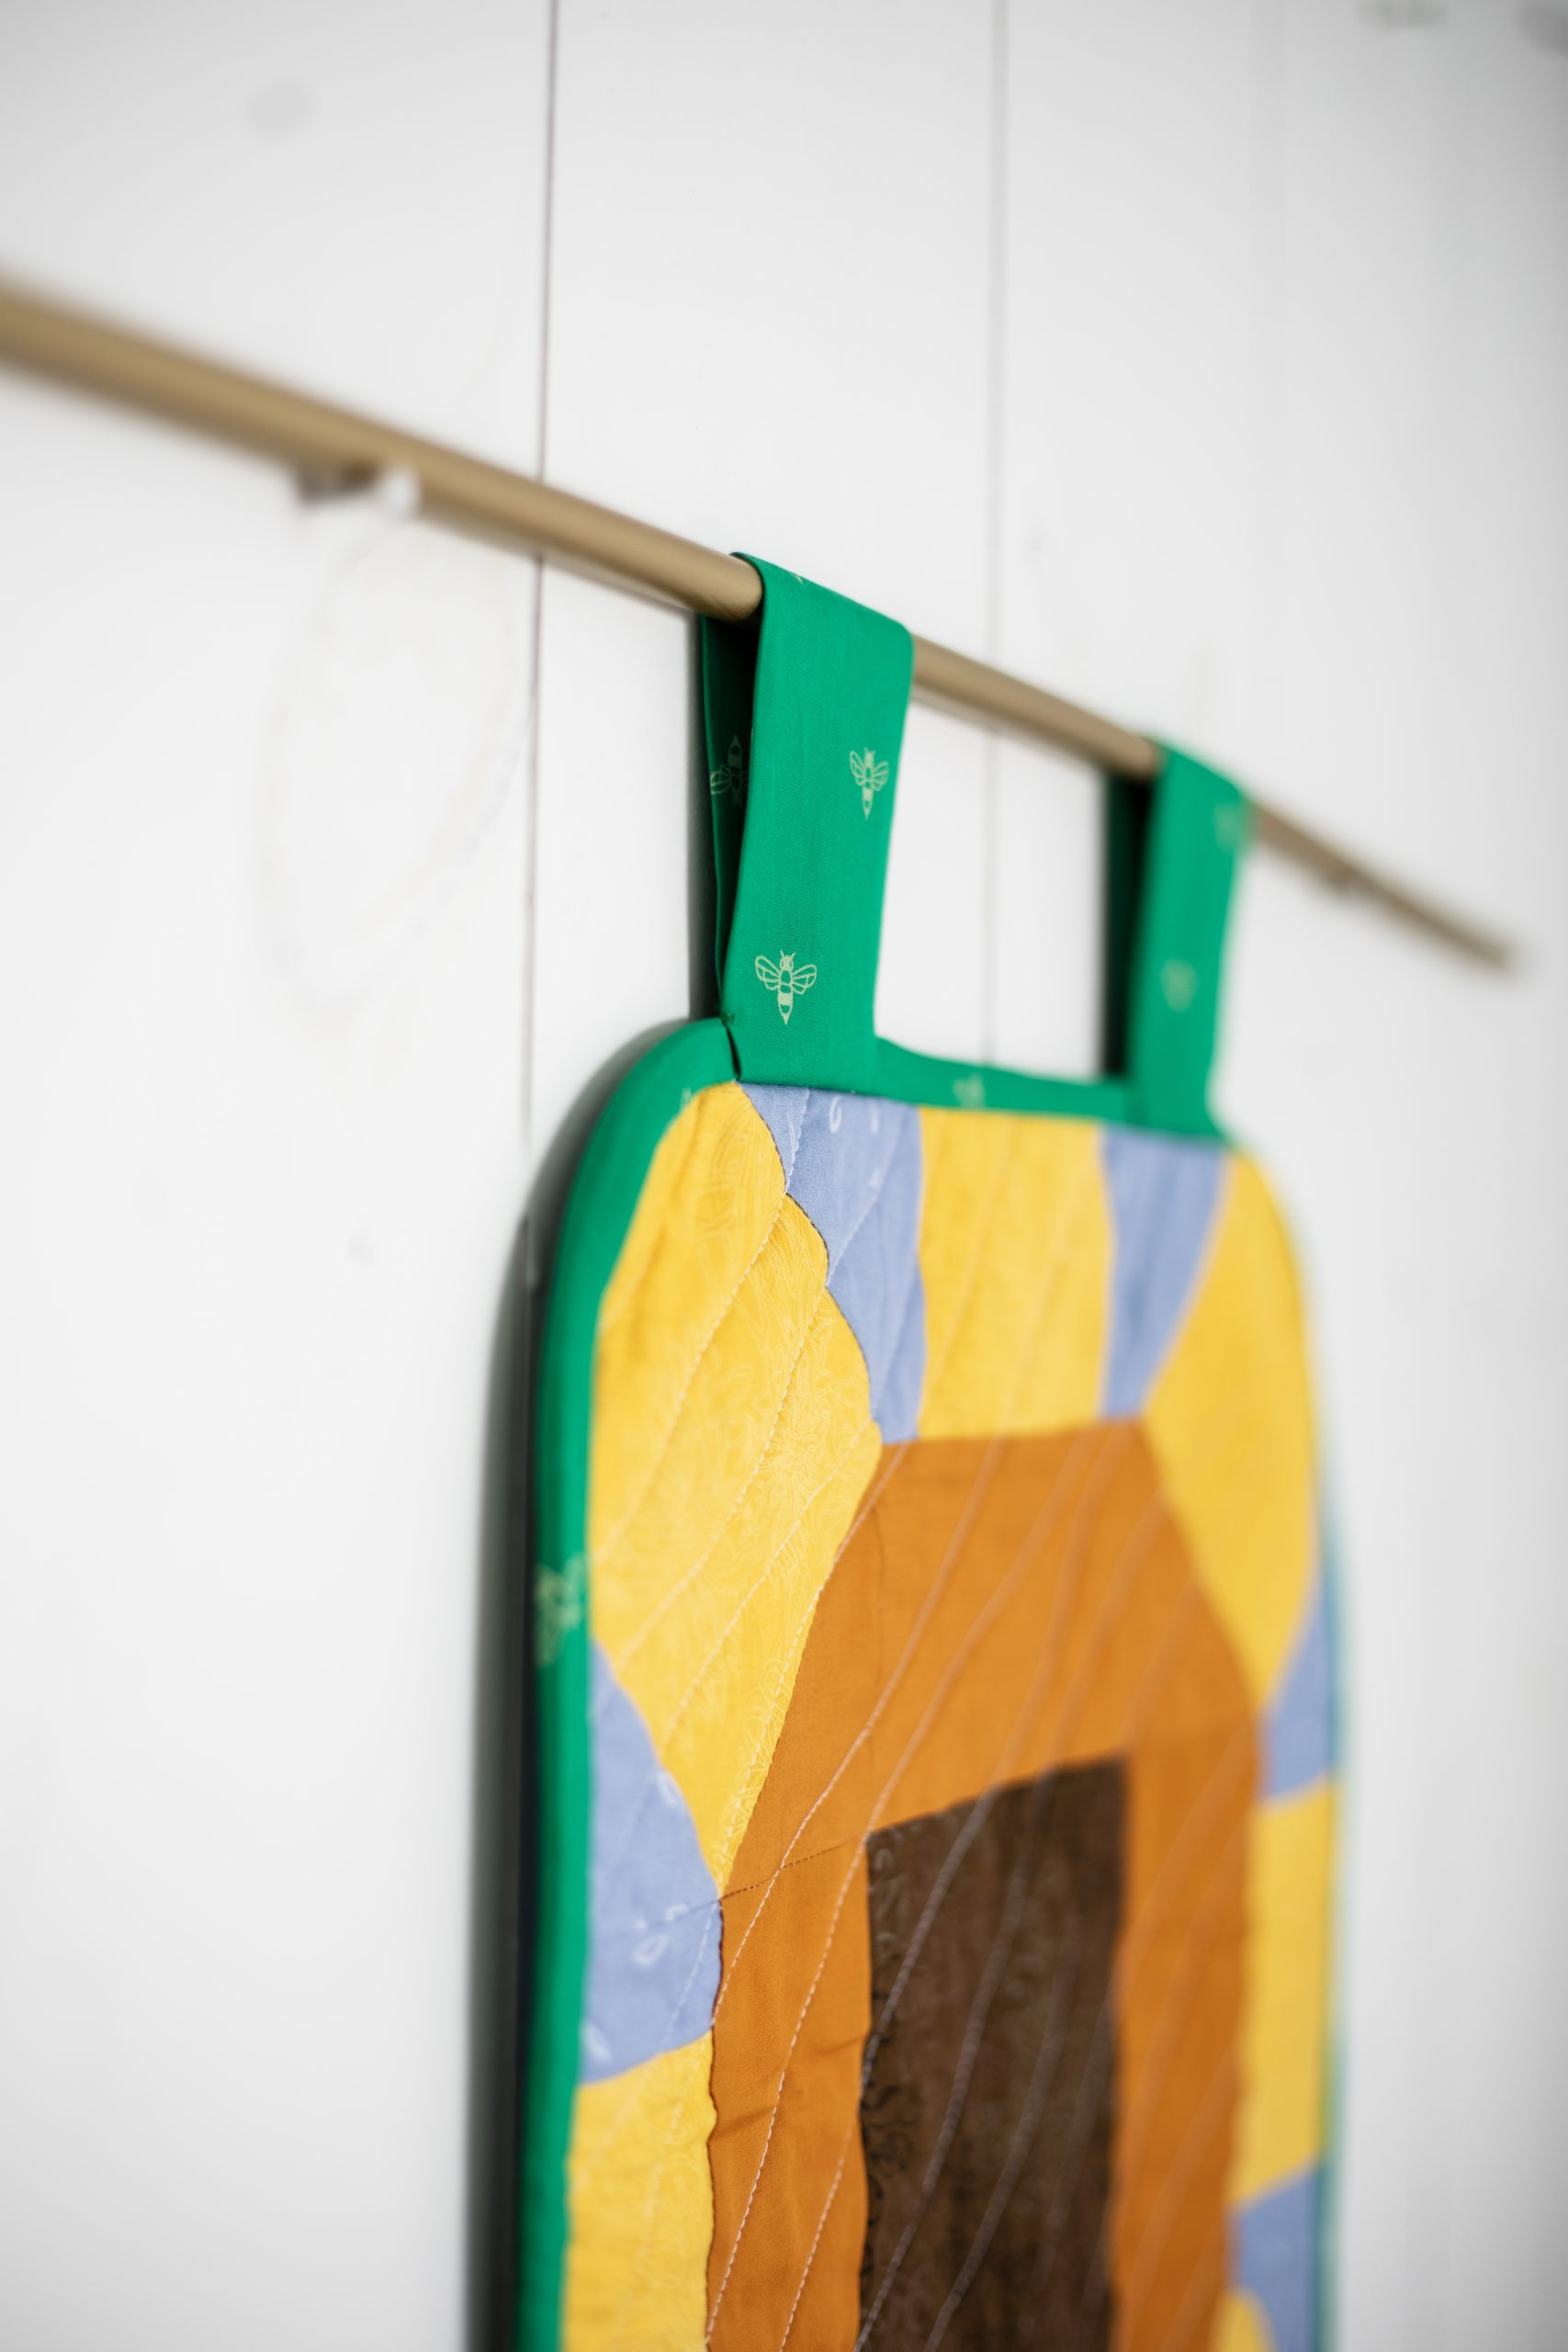
- Hang the quilt by inserting the dowel or your chosen stick through the hanging loops.

Lovely pattern – a really cheerful welcome to a home!
I’ve also found that if you print and choose “Save as PDF” for the destination, it will save it to your computer as a PDF. Then you should be able to print it out on regular paper.
How do I put this in a format to print
Camille N – I don’t know if anyone answered your question. There is no option to print from this page, but here’s one method: Highlight the entire set of instructions, then right click and a pop up menu will offer the option to print. However, this will give you many pages, because the illustrations are large. If you know how to copy and paste, do that first, saving it to word or whatever document processing program you use. From there, you can reduce the size of the pictures or diagrams and bring it down to a reasonable document length. I hope this makes sense to you.
You can also just click on the Favorites option, and the pattern will be saved on this website for you to view whenever you want.
-Carol