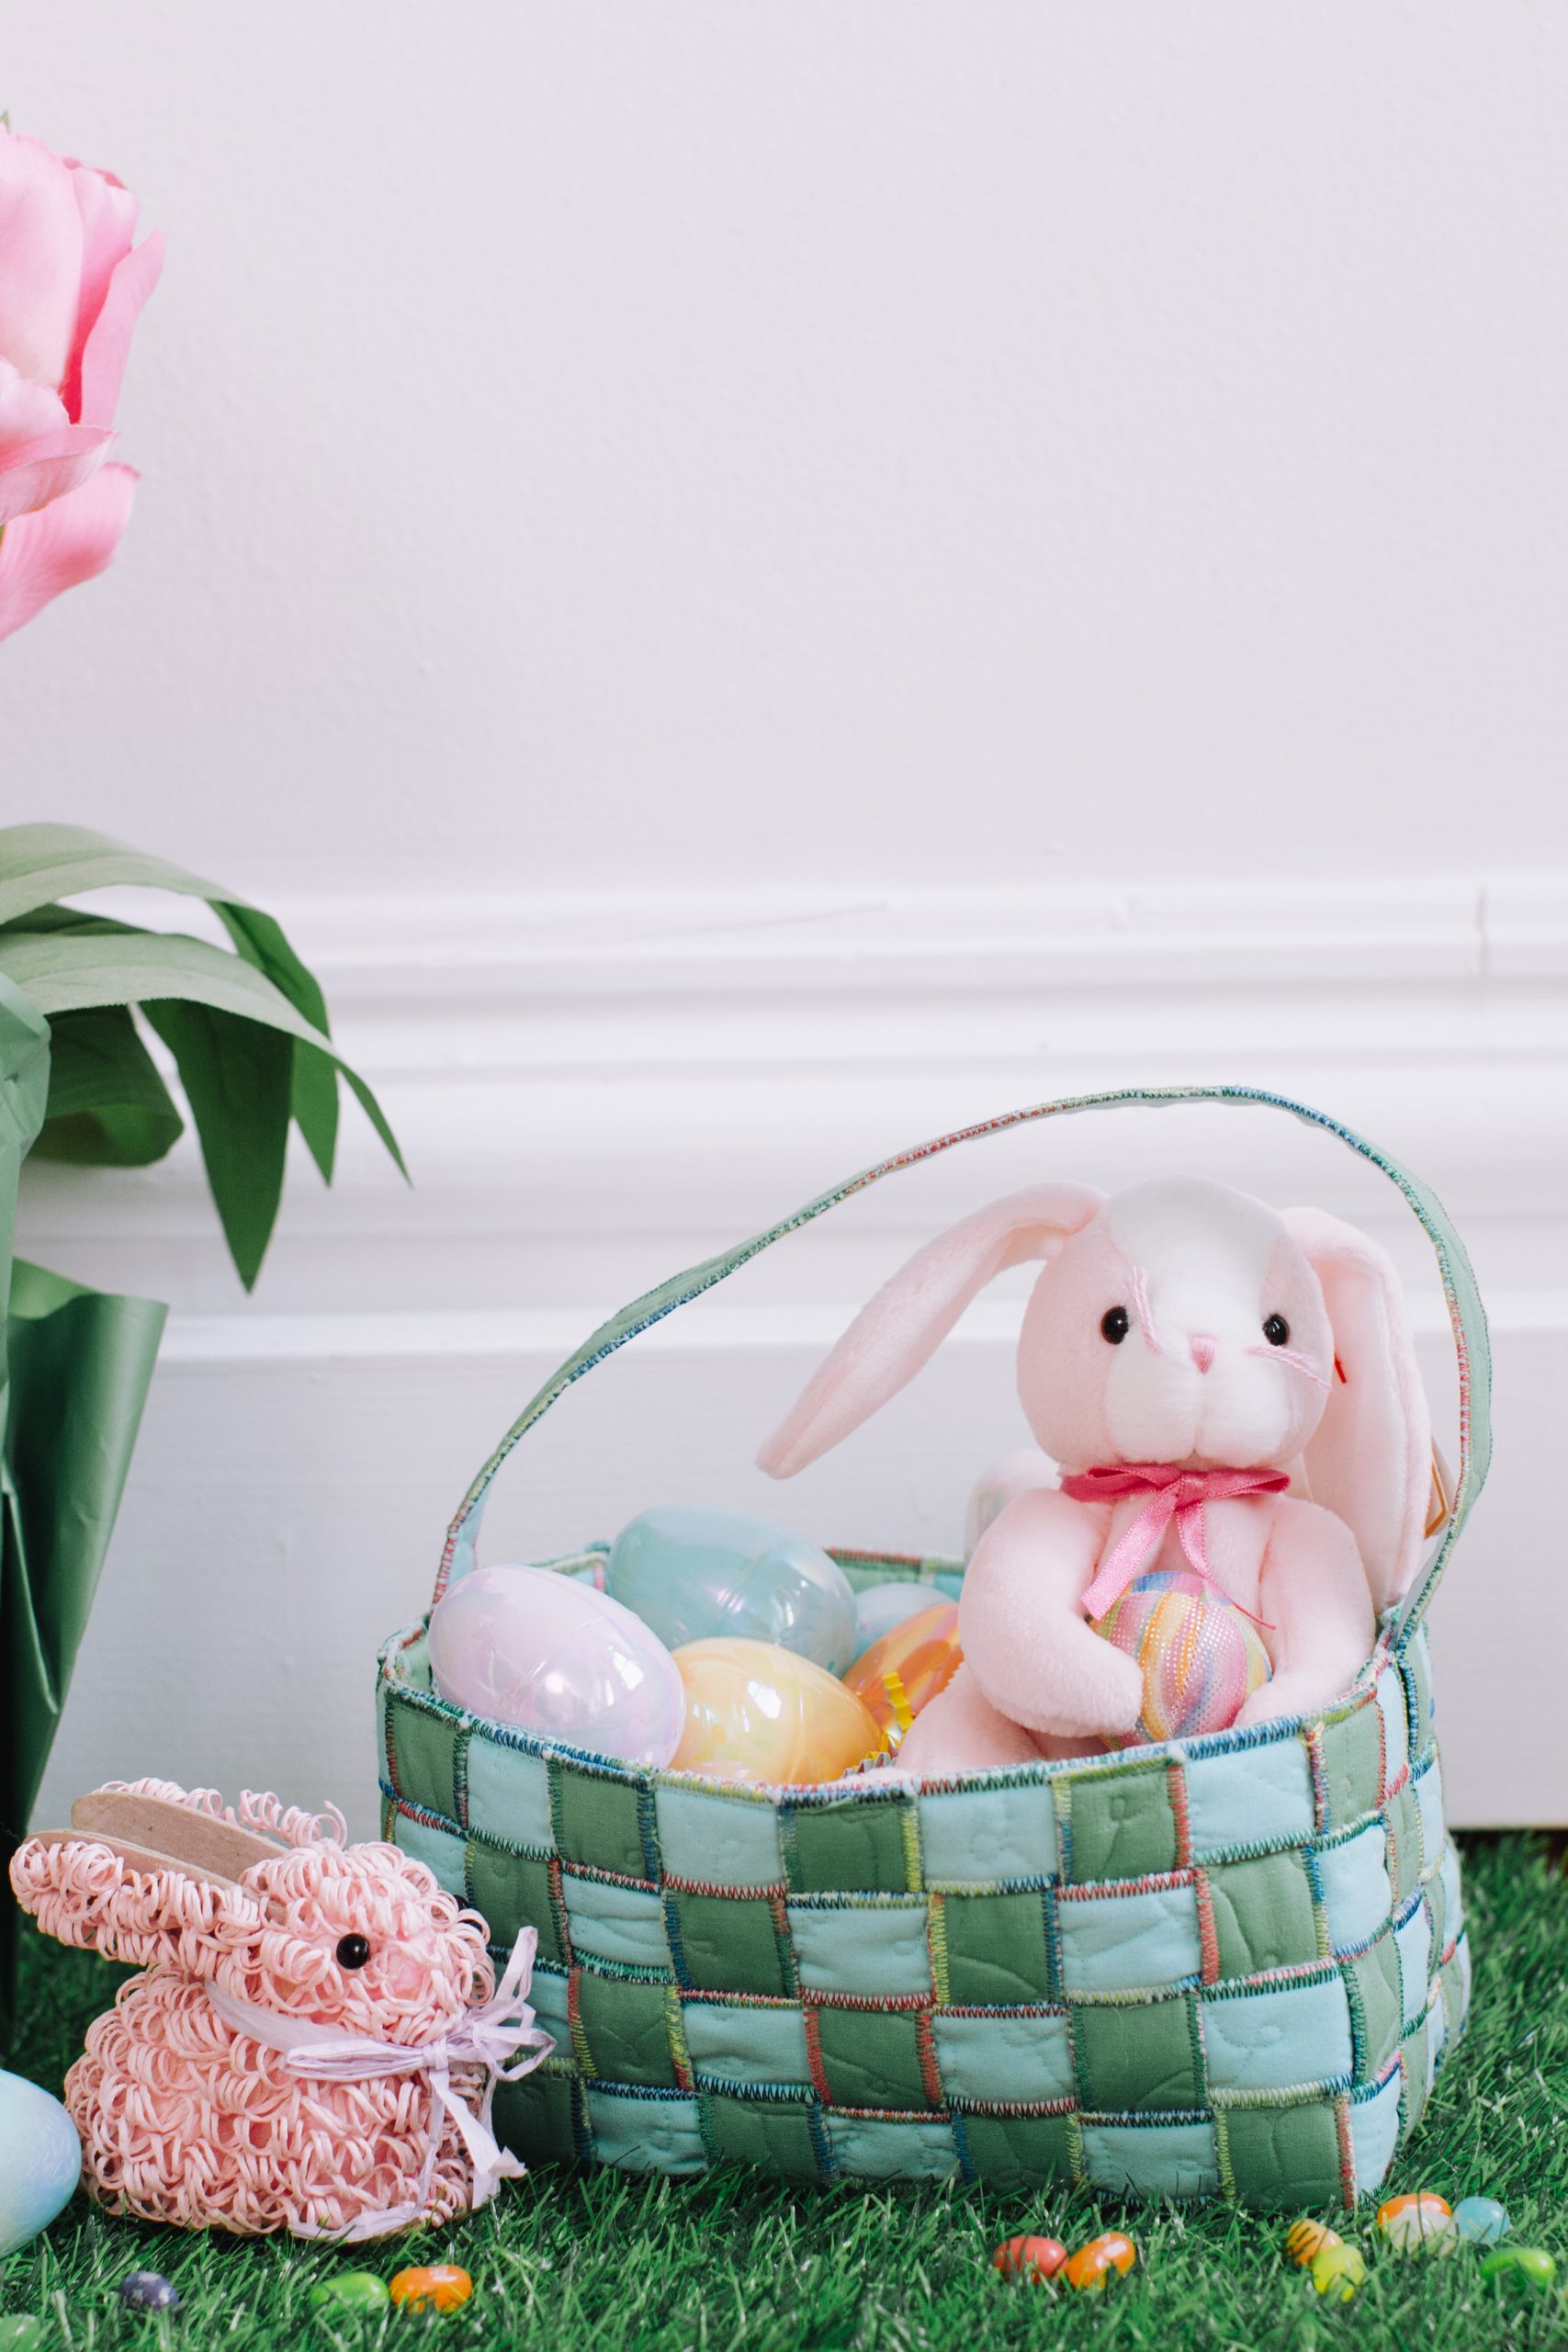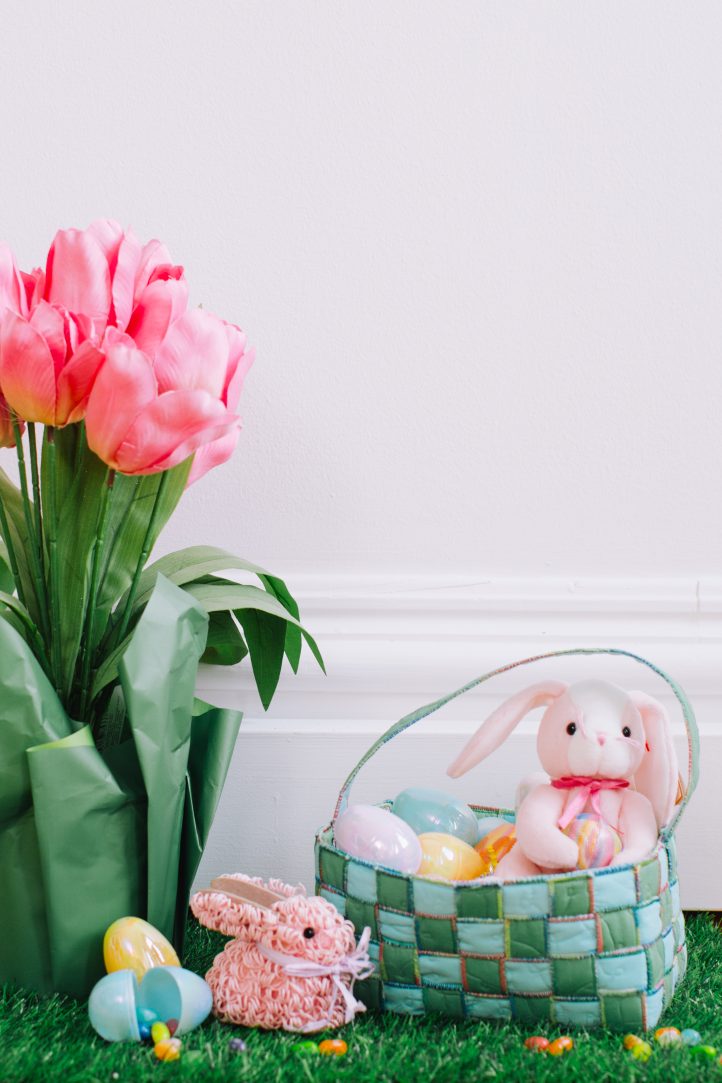
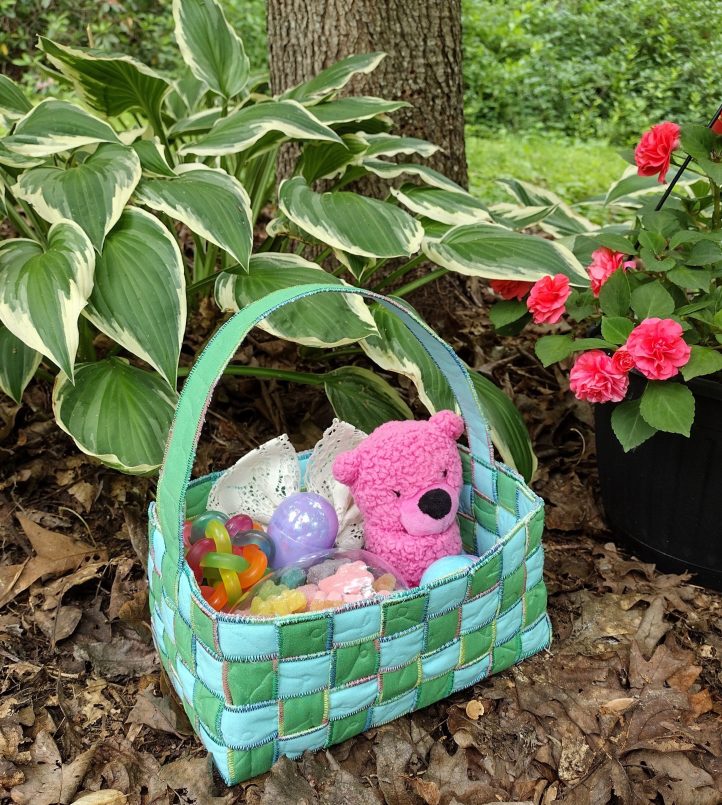
Get your little ones excited for the arrival of the Easter Bunny with a thoughtful handmade Easter basket. This quilted Easter basket pattern is perfect for using up bright, colorful fabric scraps and is easy to personalize for each child in the family. Make your Easter baskets ahead of your annual egg hunt with this fun Easter quilting project from Jessie Agnew.
Materials:
Designer Note: The designer suggests using a variegated thread for overcasting the edges, particularly if the chosen fabrics are solid colors. If the basket is being made with printed fabrics, a solid-colored thread may be a better choice. This is a great project to use kid-friendly bright colors and eye-catching patterns!
- Quilting cotton in 2 different complementary colors
- 1/8” polyester batting
- Thread for quilting (the example uses monofilament nylon)
- Thread for overcasting edges (the example uses variegated rayon)
- Size 14 sharp sewing machine needle
Cutting Instructions:
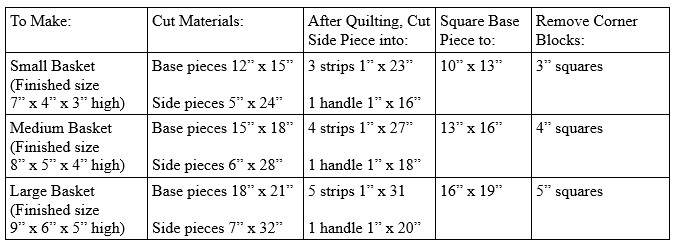
- Cut 1 piece of each fabric, 2 pieces of batting, and 1 piece of interfacing to the sizes indicated on the chart. Tearing the fabric is acceptable, as the pieces will be squared up after they are quilted.
- A medium basket was created for the example, so the materials to make the base were cut as follows:
- 1 piece of pastel green fabric 15” x 18”
- 1 piece of pastel blue fabric 15” x 18”
- 2 pieces of 1/8” polyester batting 15” x 18”
- 1 piece of heavyweight sew-in interfacing 15” x 18”
- To make the side piece, the materials were cut as follows:
- 1 piece of pastel green fabric 6” x 28”
- 1 piece of pastel blue fabric 6” x 28”
- 2 pieces of 1/8” polyester batting 6” x 28”
- 1 piece of heavyweight sew-in interfacing 6” x 28”
Sewing Instructions:
QUILT AND TRIM PIECES:
- Layer pieces of the same size on top of each other. Start with 1 piece of fabric, right side down. Add a layer of batting, then the interfacing, then the second piece of batting, and finish with the second piece of fabric, right side up.
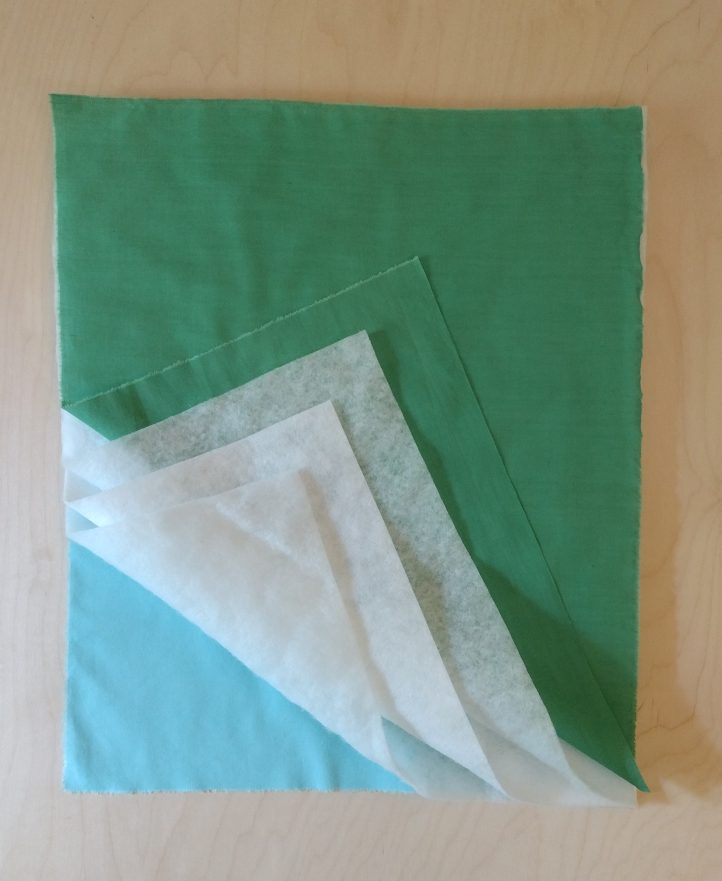
- There should now be two stacks of material. One stack should be nearly square (this stack will be quilted together to become the base piece). The other stack should be long and thin (this stack will be quilted together to become the side piece). Pin layers together every 3 inches.
- Quilt each stack as desired, no more than one inch apart. The designer chose a freehand design with small loops that resemble leaves on a trailing vine. Since the pieces will be cut after they are quilted, an elaborate design will be lost in the finished project. Simple stippling, freehand shapes, or even random intersecting lines are all good choices. If the fabric is patterned, outlining the printed fabric design with thread will produce an interesting result. Begin and end lines of quilting at the edges of each piece, as they will be squared off in the next step. Quilt the center of the pieces early on, and quilt out from the center to minimize shifting.

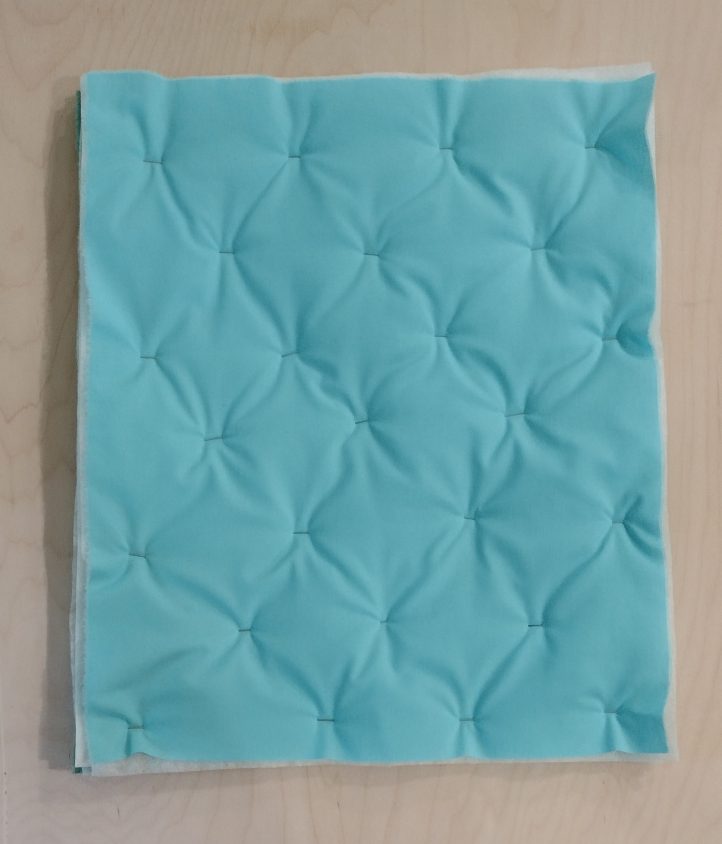
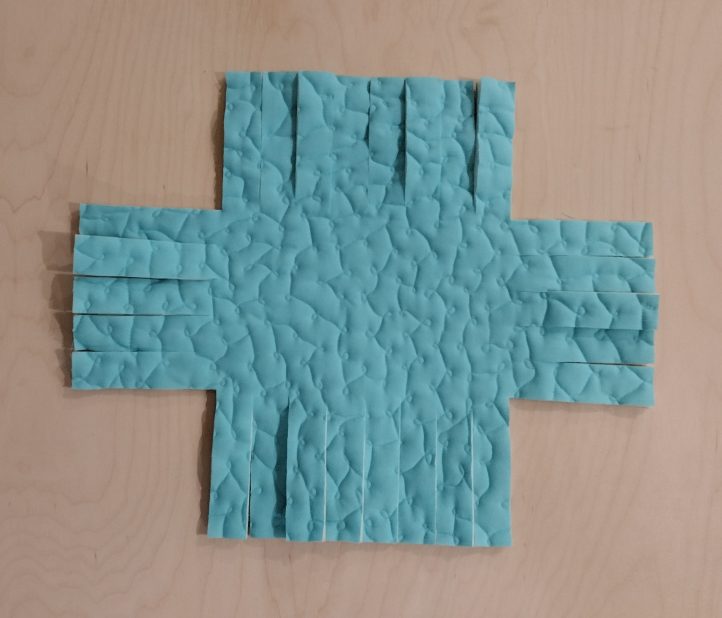
- After both pieces are quilted, square the edges of the base piece to match the dimensions indicated on the chart. Following the chart, cut out squares from each corner of the base piece. Since the example is creating a medium basket, 4” squares were removed from each corner of the base piece.
- Cut the side piece into strips according to the chart. This will result in several long strips that will be woven into the sides of the basket, and one shorter strip that will become the handle.

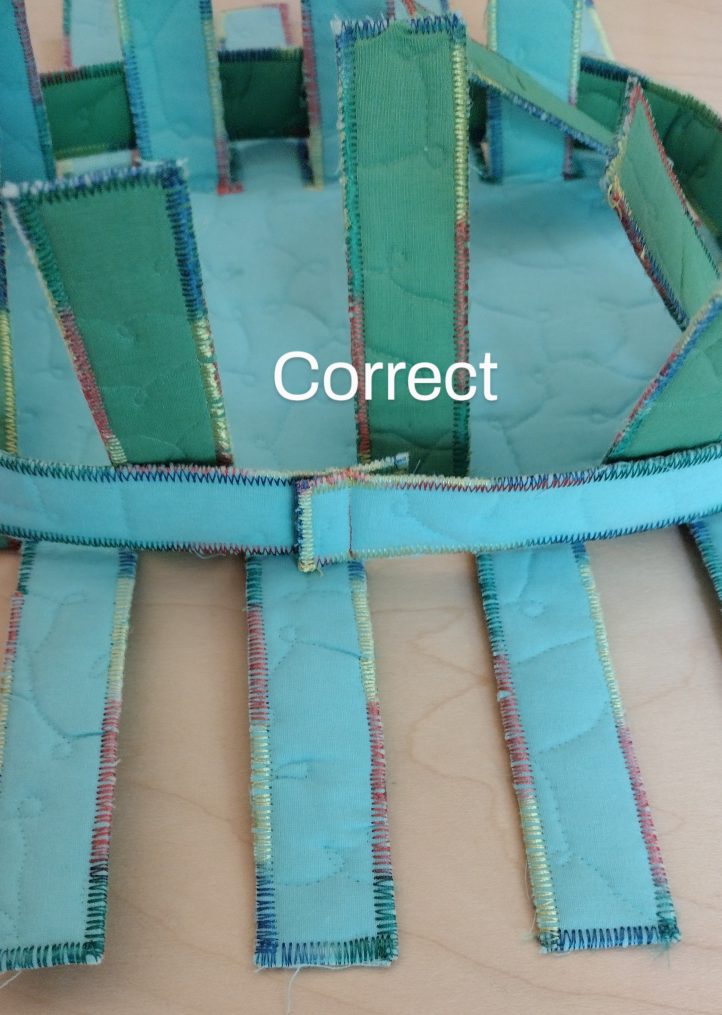
- Removing the corners of the base piece has created 4 flaps, one on each edge of the base piece. Cut the flaps on the base piece into strips that are 1” wide. Begin each cut at the edge, and cut a straight slash towards the center of the base piece. The cuts should be the same length as the squares that were removed from the corners. When the piece is cut correctly, it should resemble a rectangle that is the same size as the finished length and width of the basket, with strips of fabric protruding from each side that are as long as the finished height of the basket. See photo below for clarity.
ASSEMBLE BASKET:
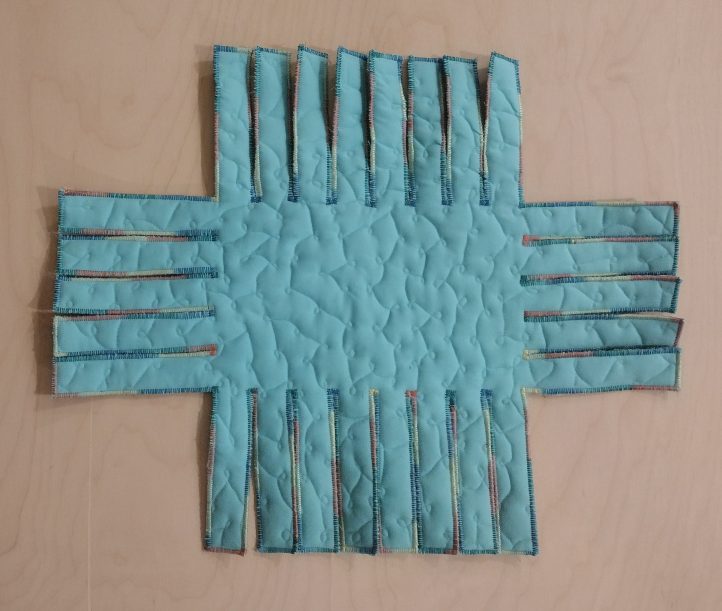
- Zigzag over every raw edge, using a 3mm (1/8in) wide zigzag stitch set at 0.7 mm (36 stitches per inch). Ensure that the needle goes into the fabric as the needle swings left, and just barely clears the edge of the material as it swings to the right. Hold extra strips out of the way as each strip is sewn, to make sure that strips are not sewn together.

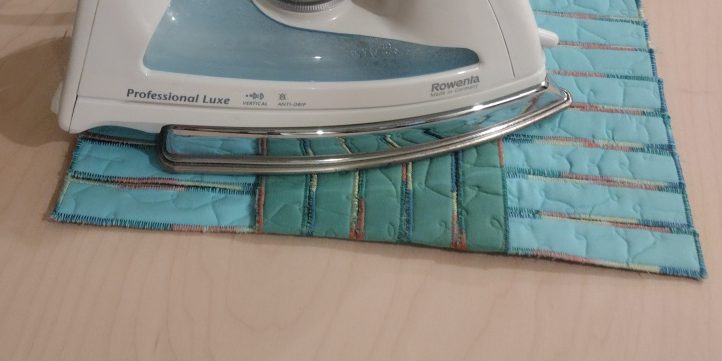
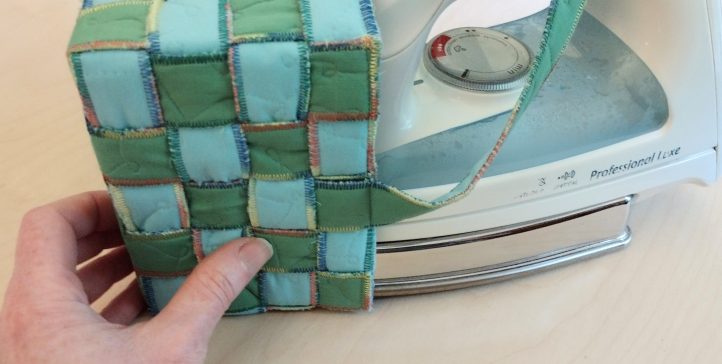
- Press all pieces flat, using steam.
- Decide which color will be on the inside bottom of the basket, and place the base piece on the table with this color facing up. Press the strips on the base piece towards the center, to form a crease where the strips will fold up to create the walls of the basket.

- Form each of the long side strips into a loop, overlapping the ends by exactly 1” (25mm). Ensure that the strips are not twisted. Using a straight stitch, sew 1/2” (13 mm) from the ends to secure each strip into a loop. Flip the loops, if necessary, so that the side that is facing out is the same color as the inside bottom of the basket.
- Place one long side strip on its edge around the perimeter of the basket bottom, where the base piece strips are connected to the bottom of the basket. Make sure that the ends of the long strip are tucked underneath two of the base piece’s strips, so that they are not visible on the finished basket. Shift the side strip an inch to either side, if necessary, to hide the ends under the strips of the base piece.
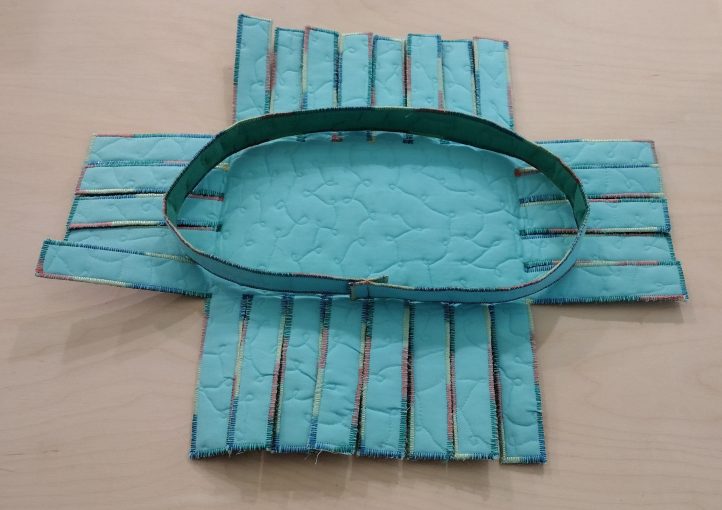

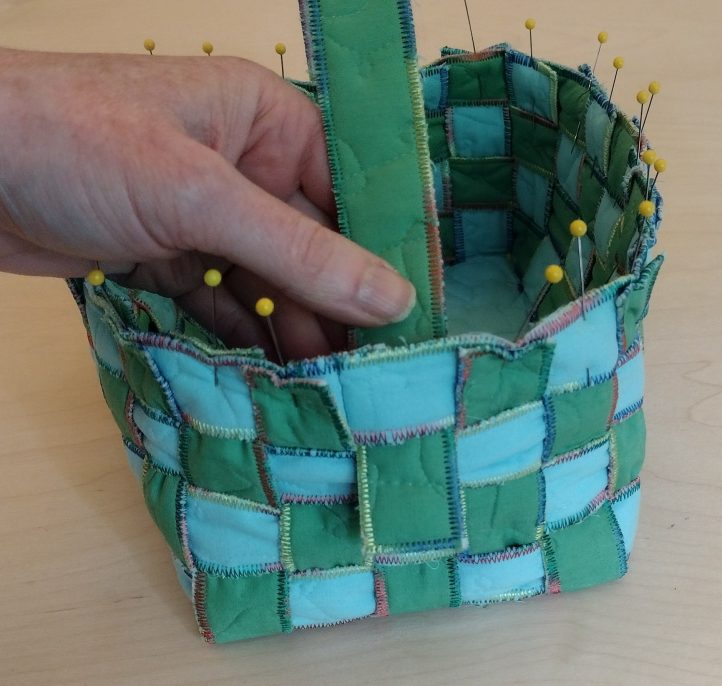
- Fold every other strip on the base piece to the inside of the basket, weaving them under the long looped piece. Slide the looped piece all the way down, so that it is snug against the bottom of the basket. Pin in place.
- Repeat the process for the next long looped piece, adding it above the first looped piece. Ensure that every base piece strip that was on the inside of the first looped piece is on the outside of the second looped piece, and vice versa.
- Add the rest of the looped pieces in the same way, folding each inside strip to the outside and vice versa as each new looped piece is added. This will create a woven pattern that locks each lower looped piece in place. Snug up the lower loops if necessary, so that the edge of the fourth looped piece matches up with the top edges of the base strips. Pin in place.


- Take the handle strip (the only strip that should be left) and choose a color to be facing outward. One side of the base piece will have an odd number of strips. Tuck the ends of the handle into the basket along the center strip on the odd-numbered sides. Hide the ends behind the long looped strips so that the ends of the handle are not visible on the finished basket.
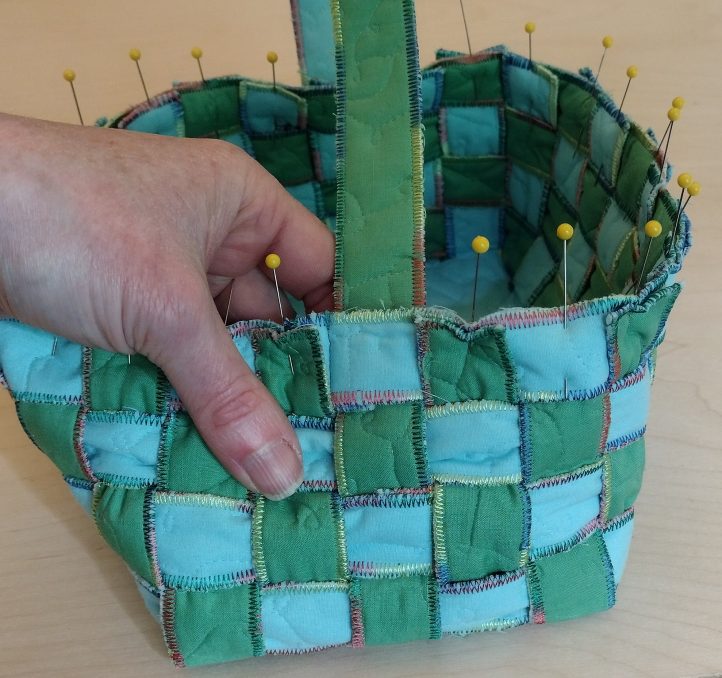
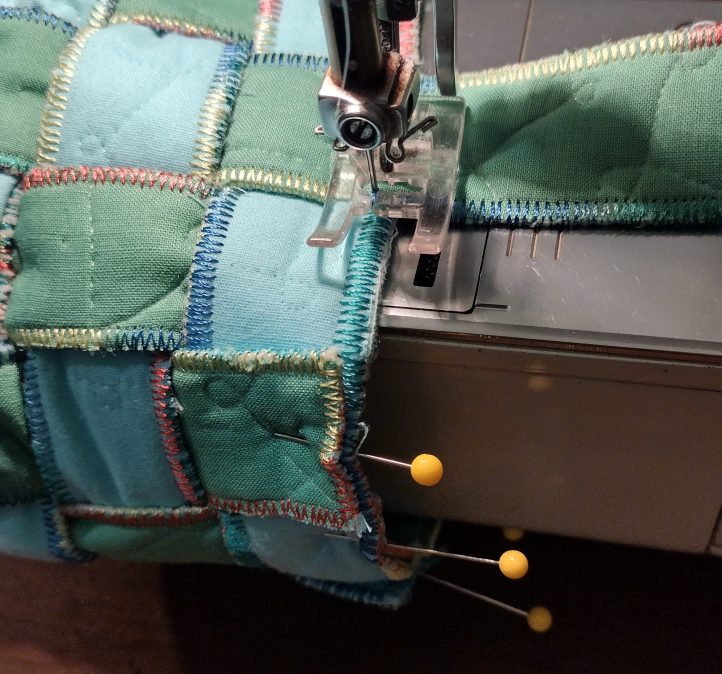
- Sew around the entire top edge of the basket, securing the handle and all base strips to the top edge of the uppermost looped strip. Remove pins as you come to them.
- Give the basket a final press, creasing the edges of basket in order to create a boxy shape.
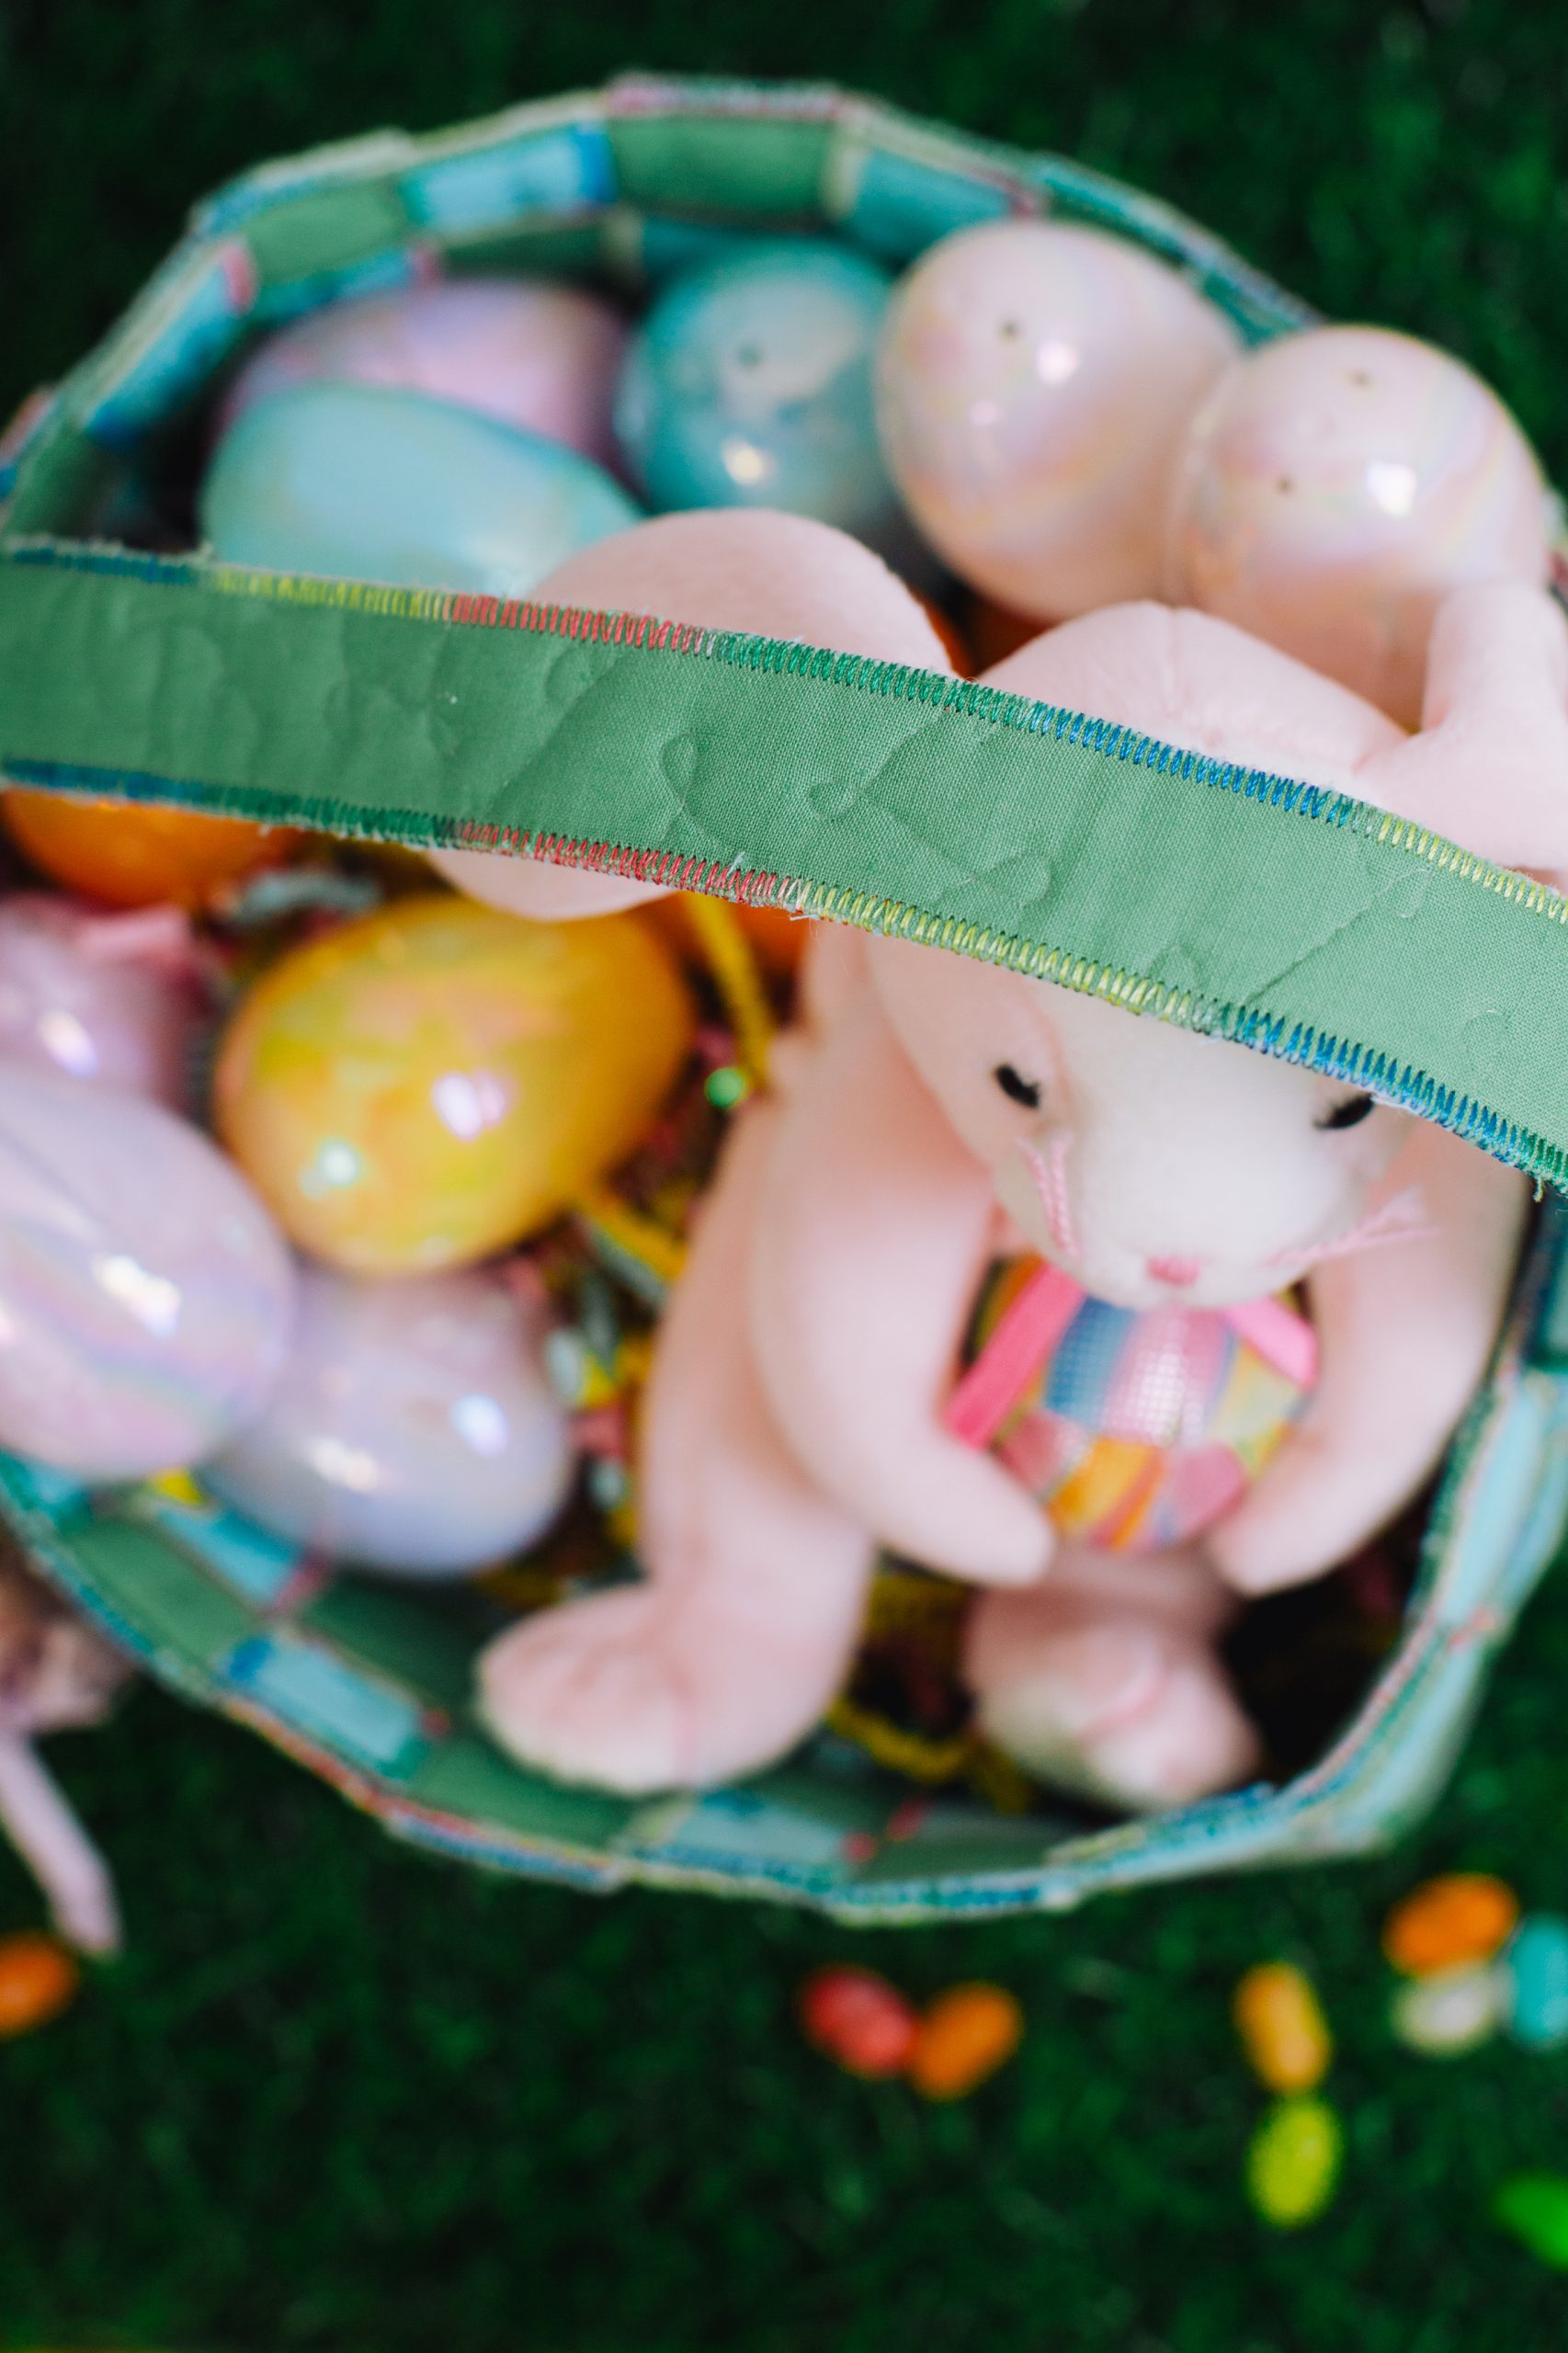
- Fill the basket with candy and toys, and present it to a special child!