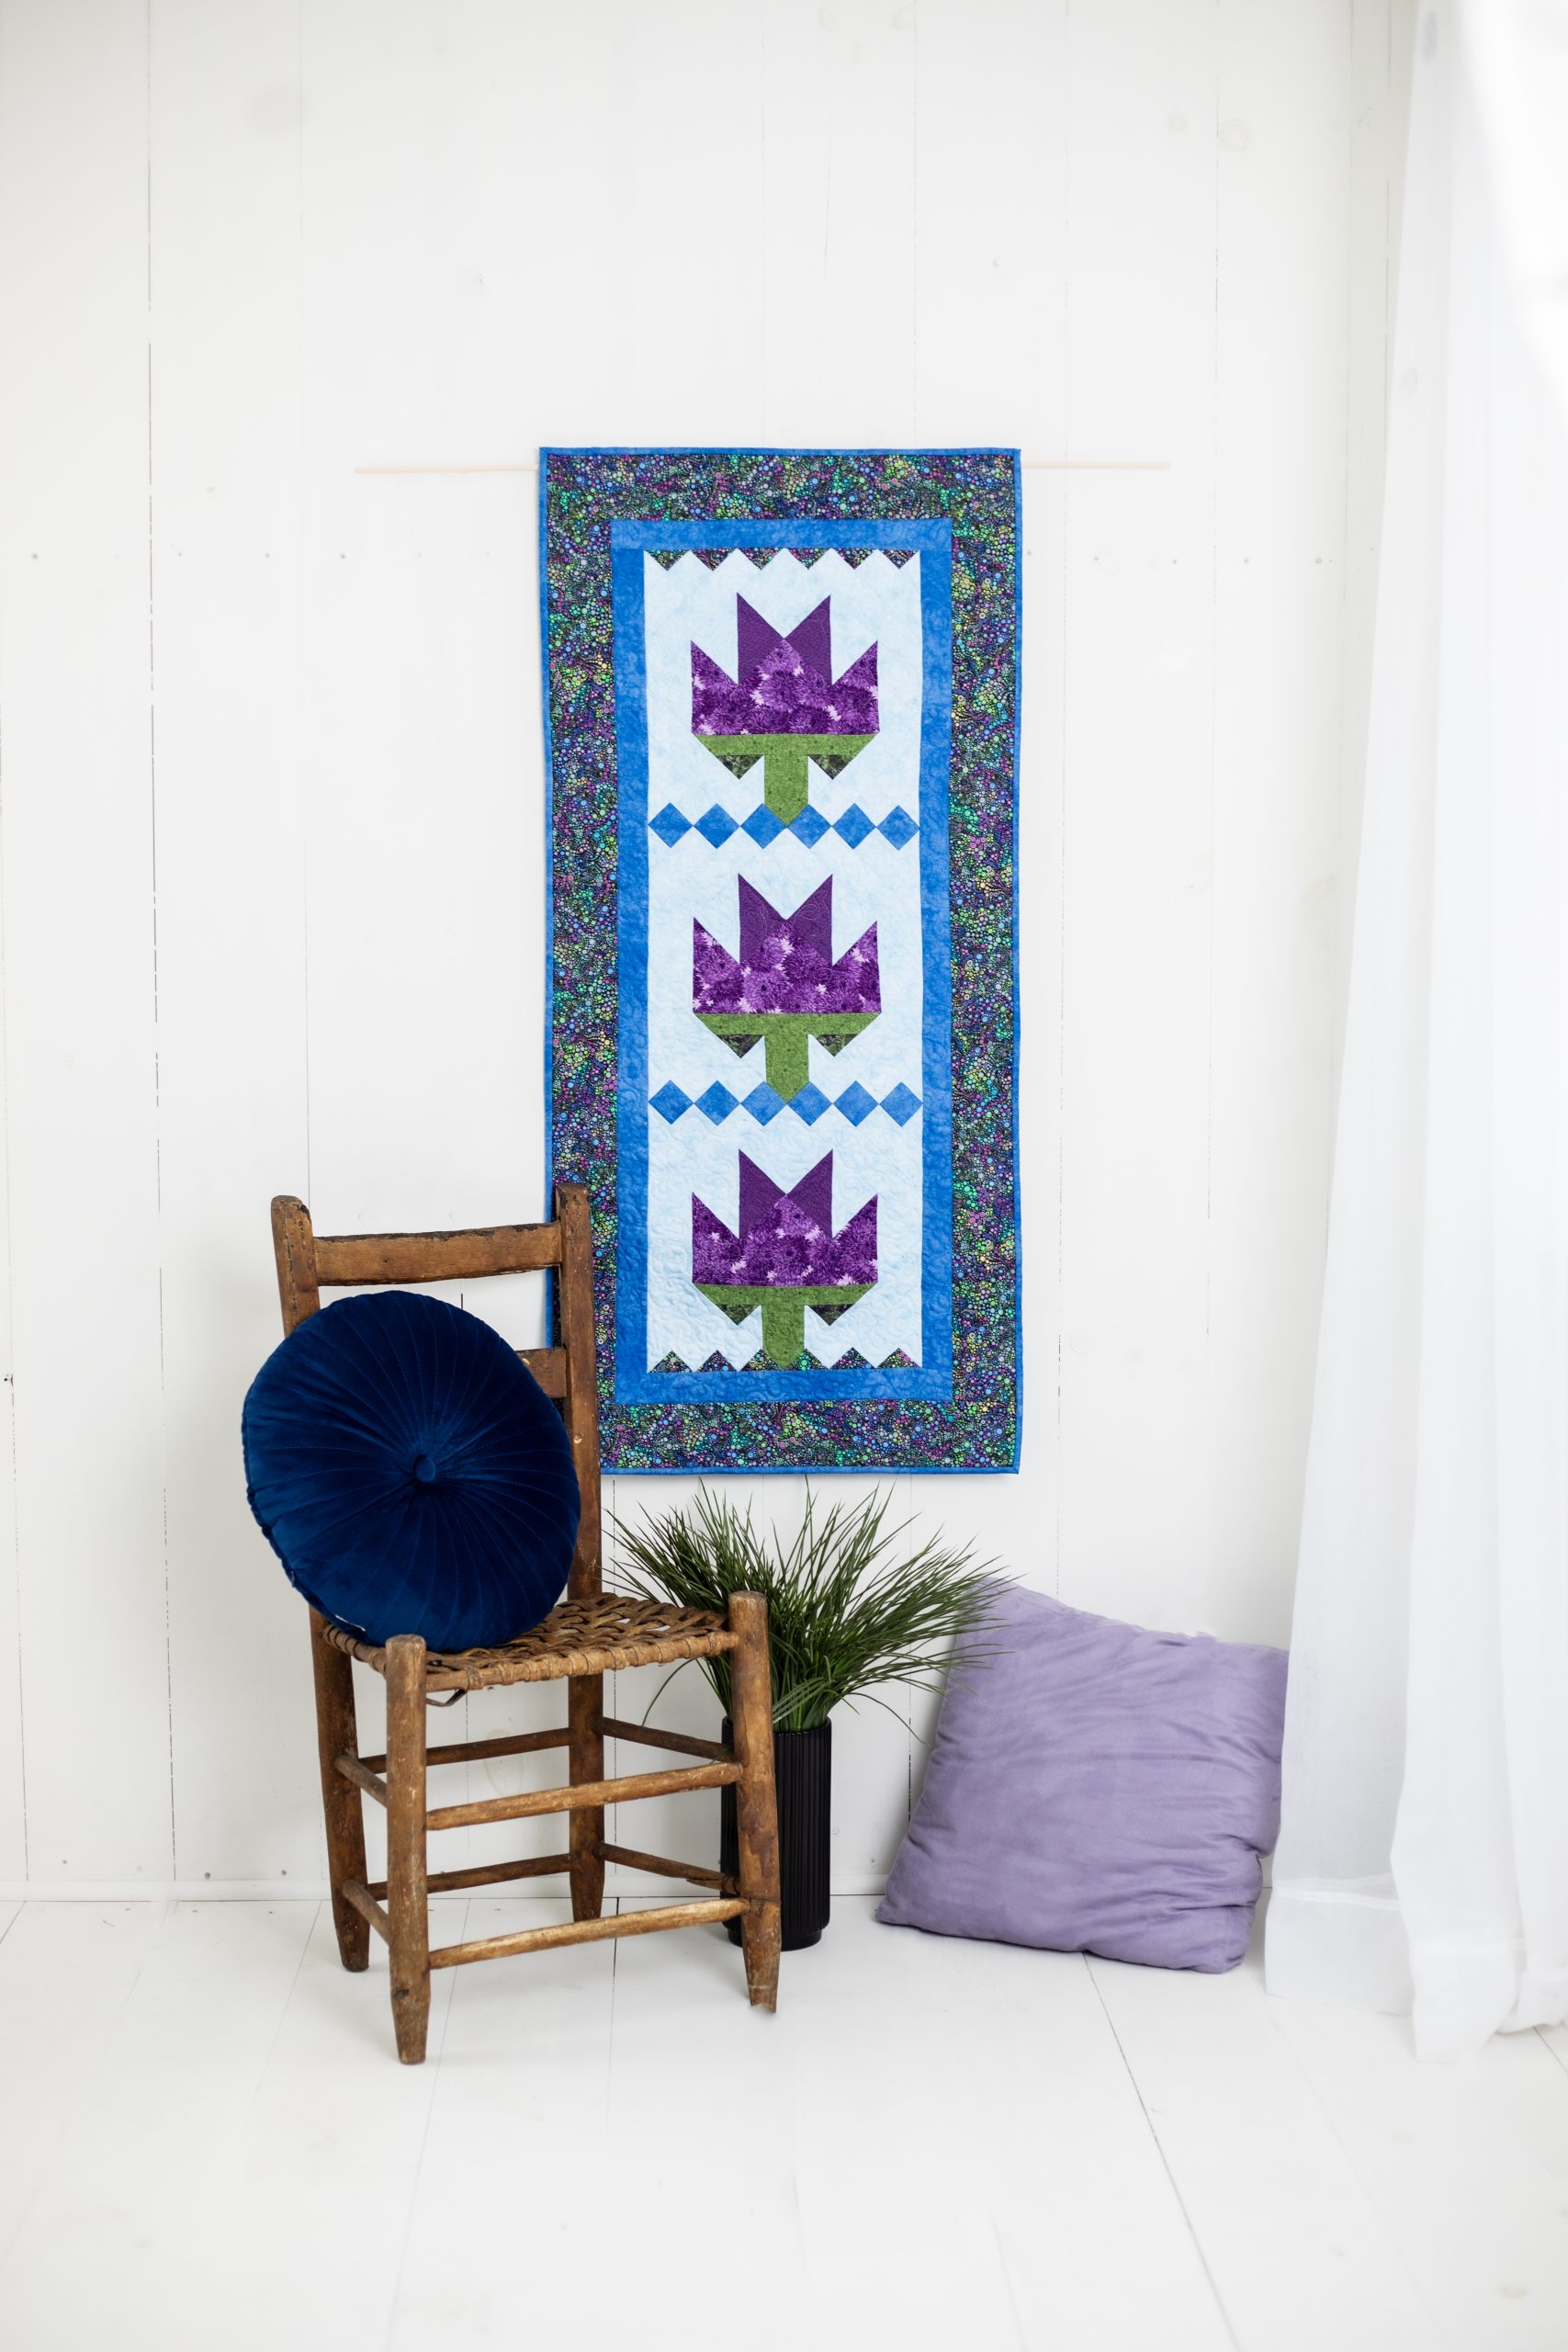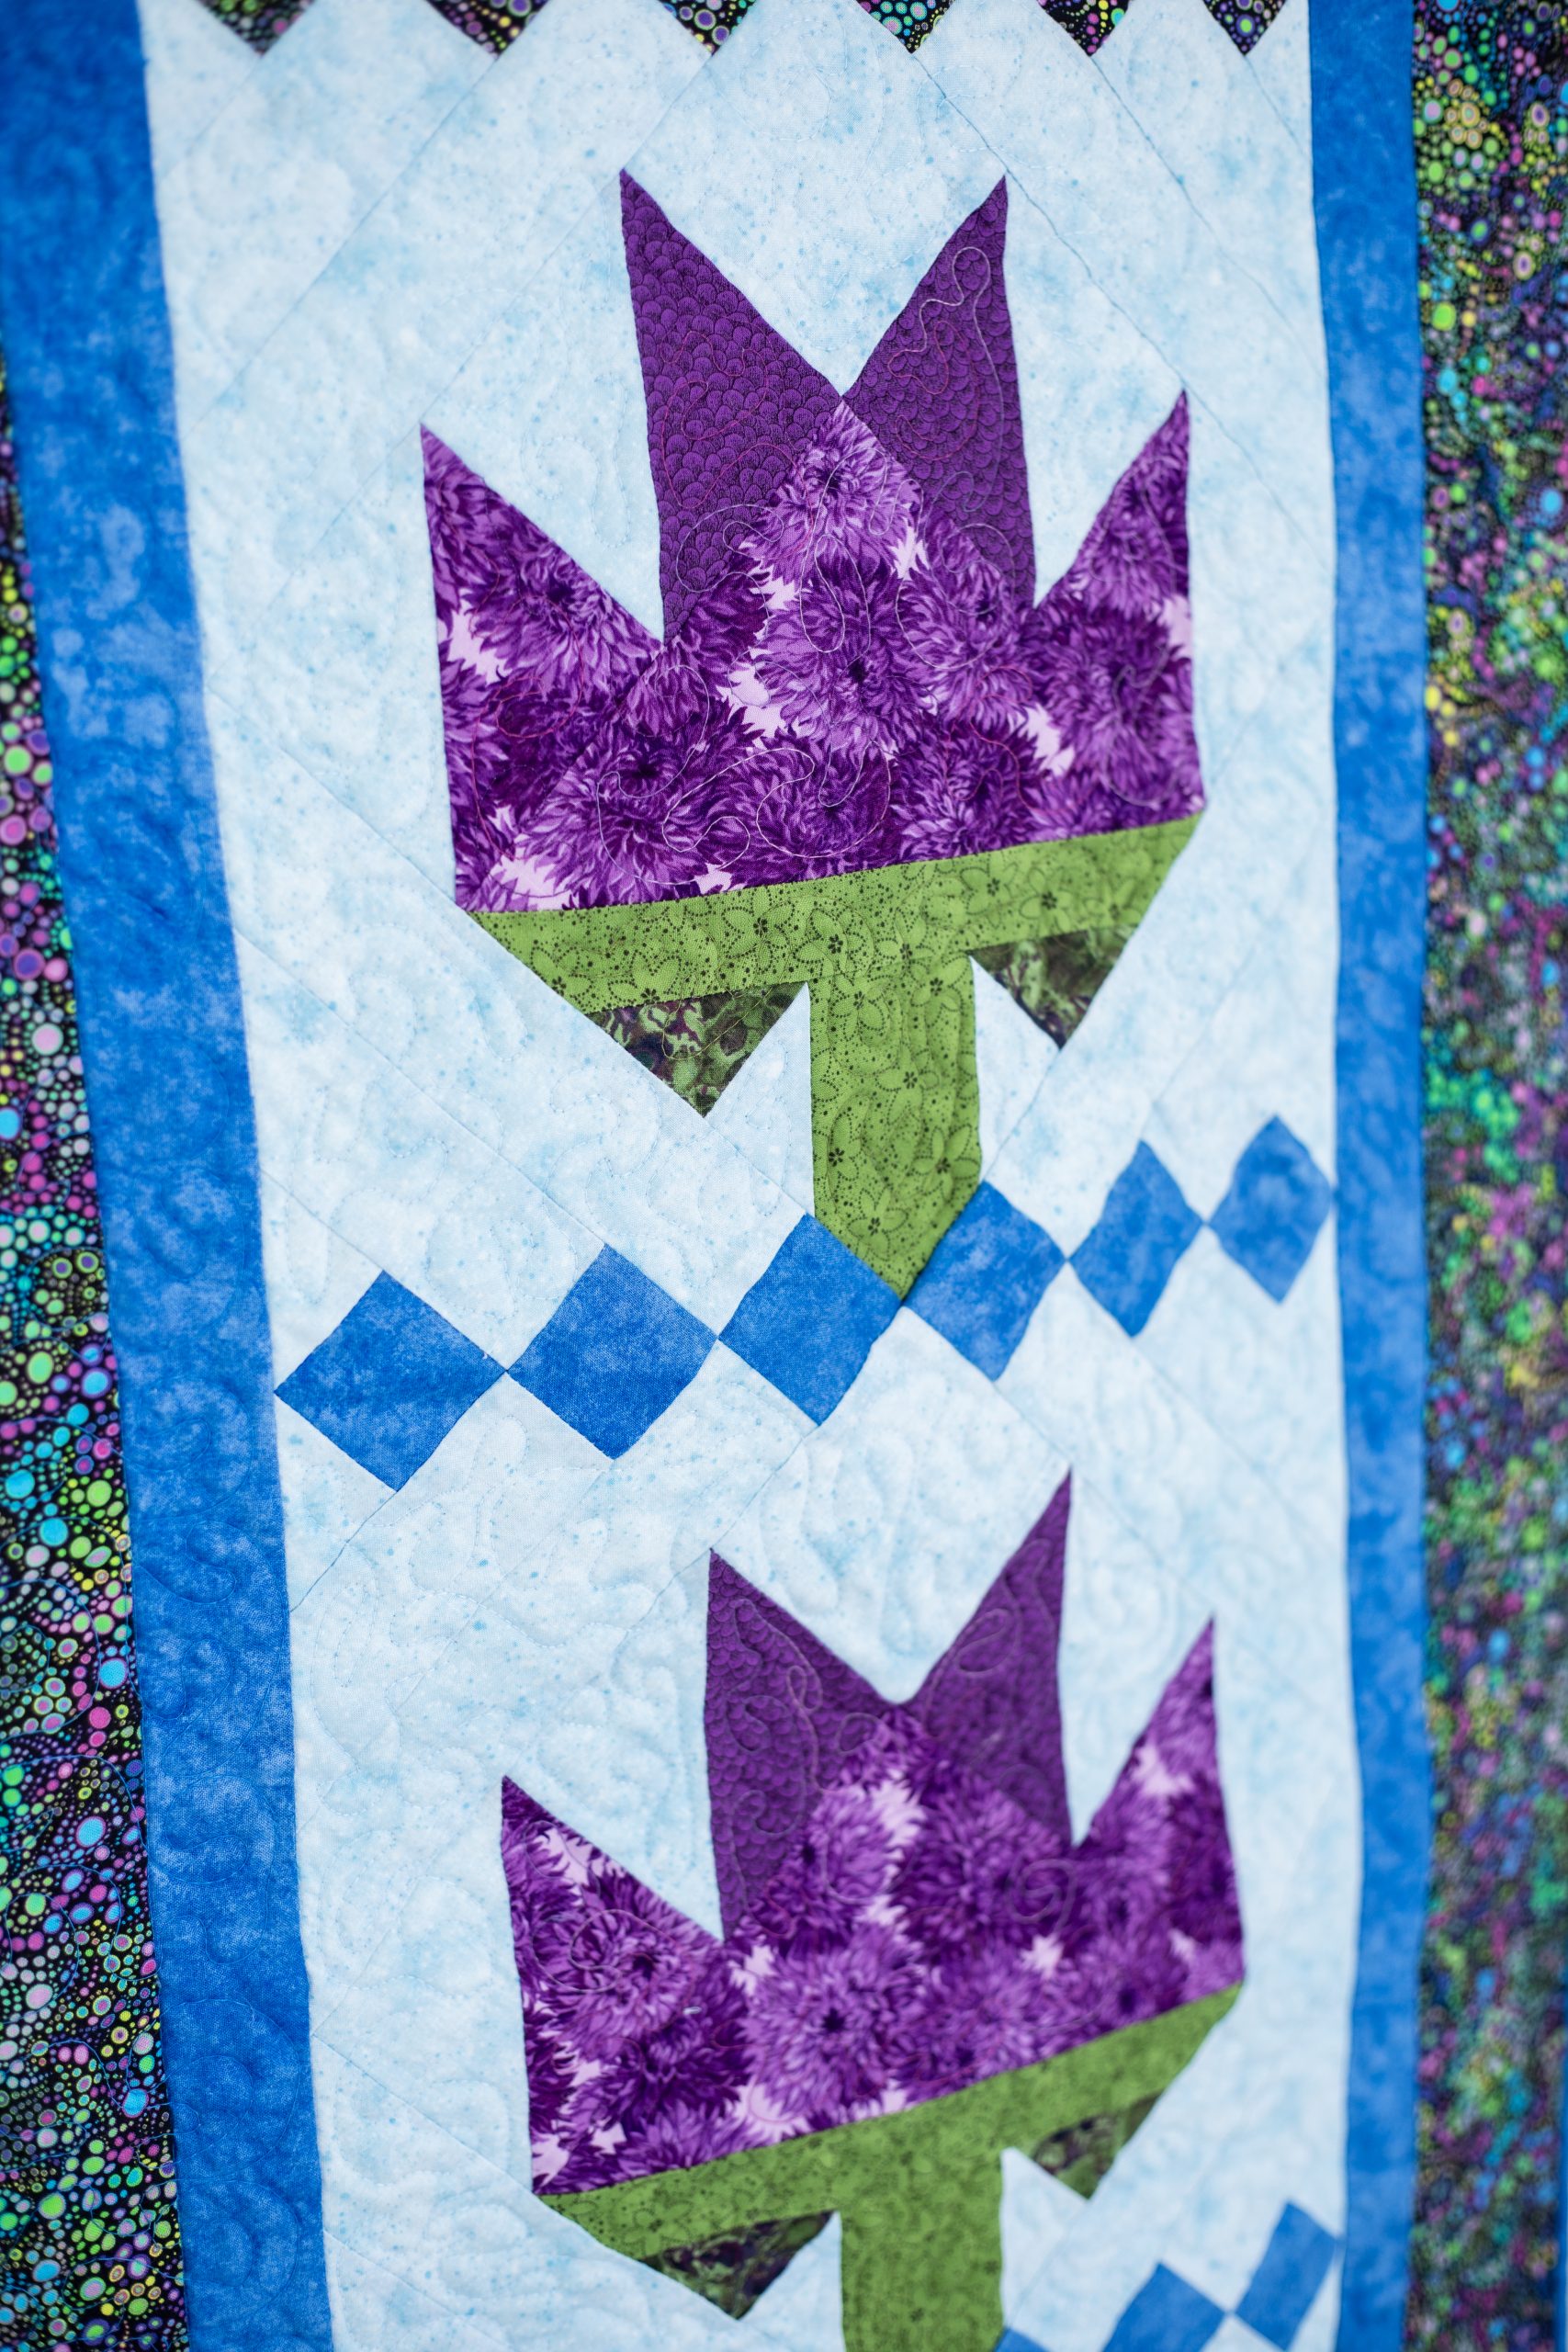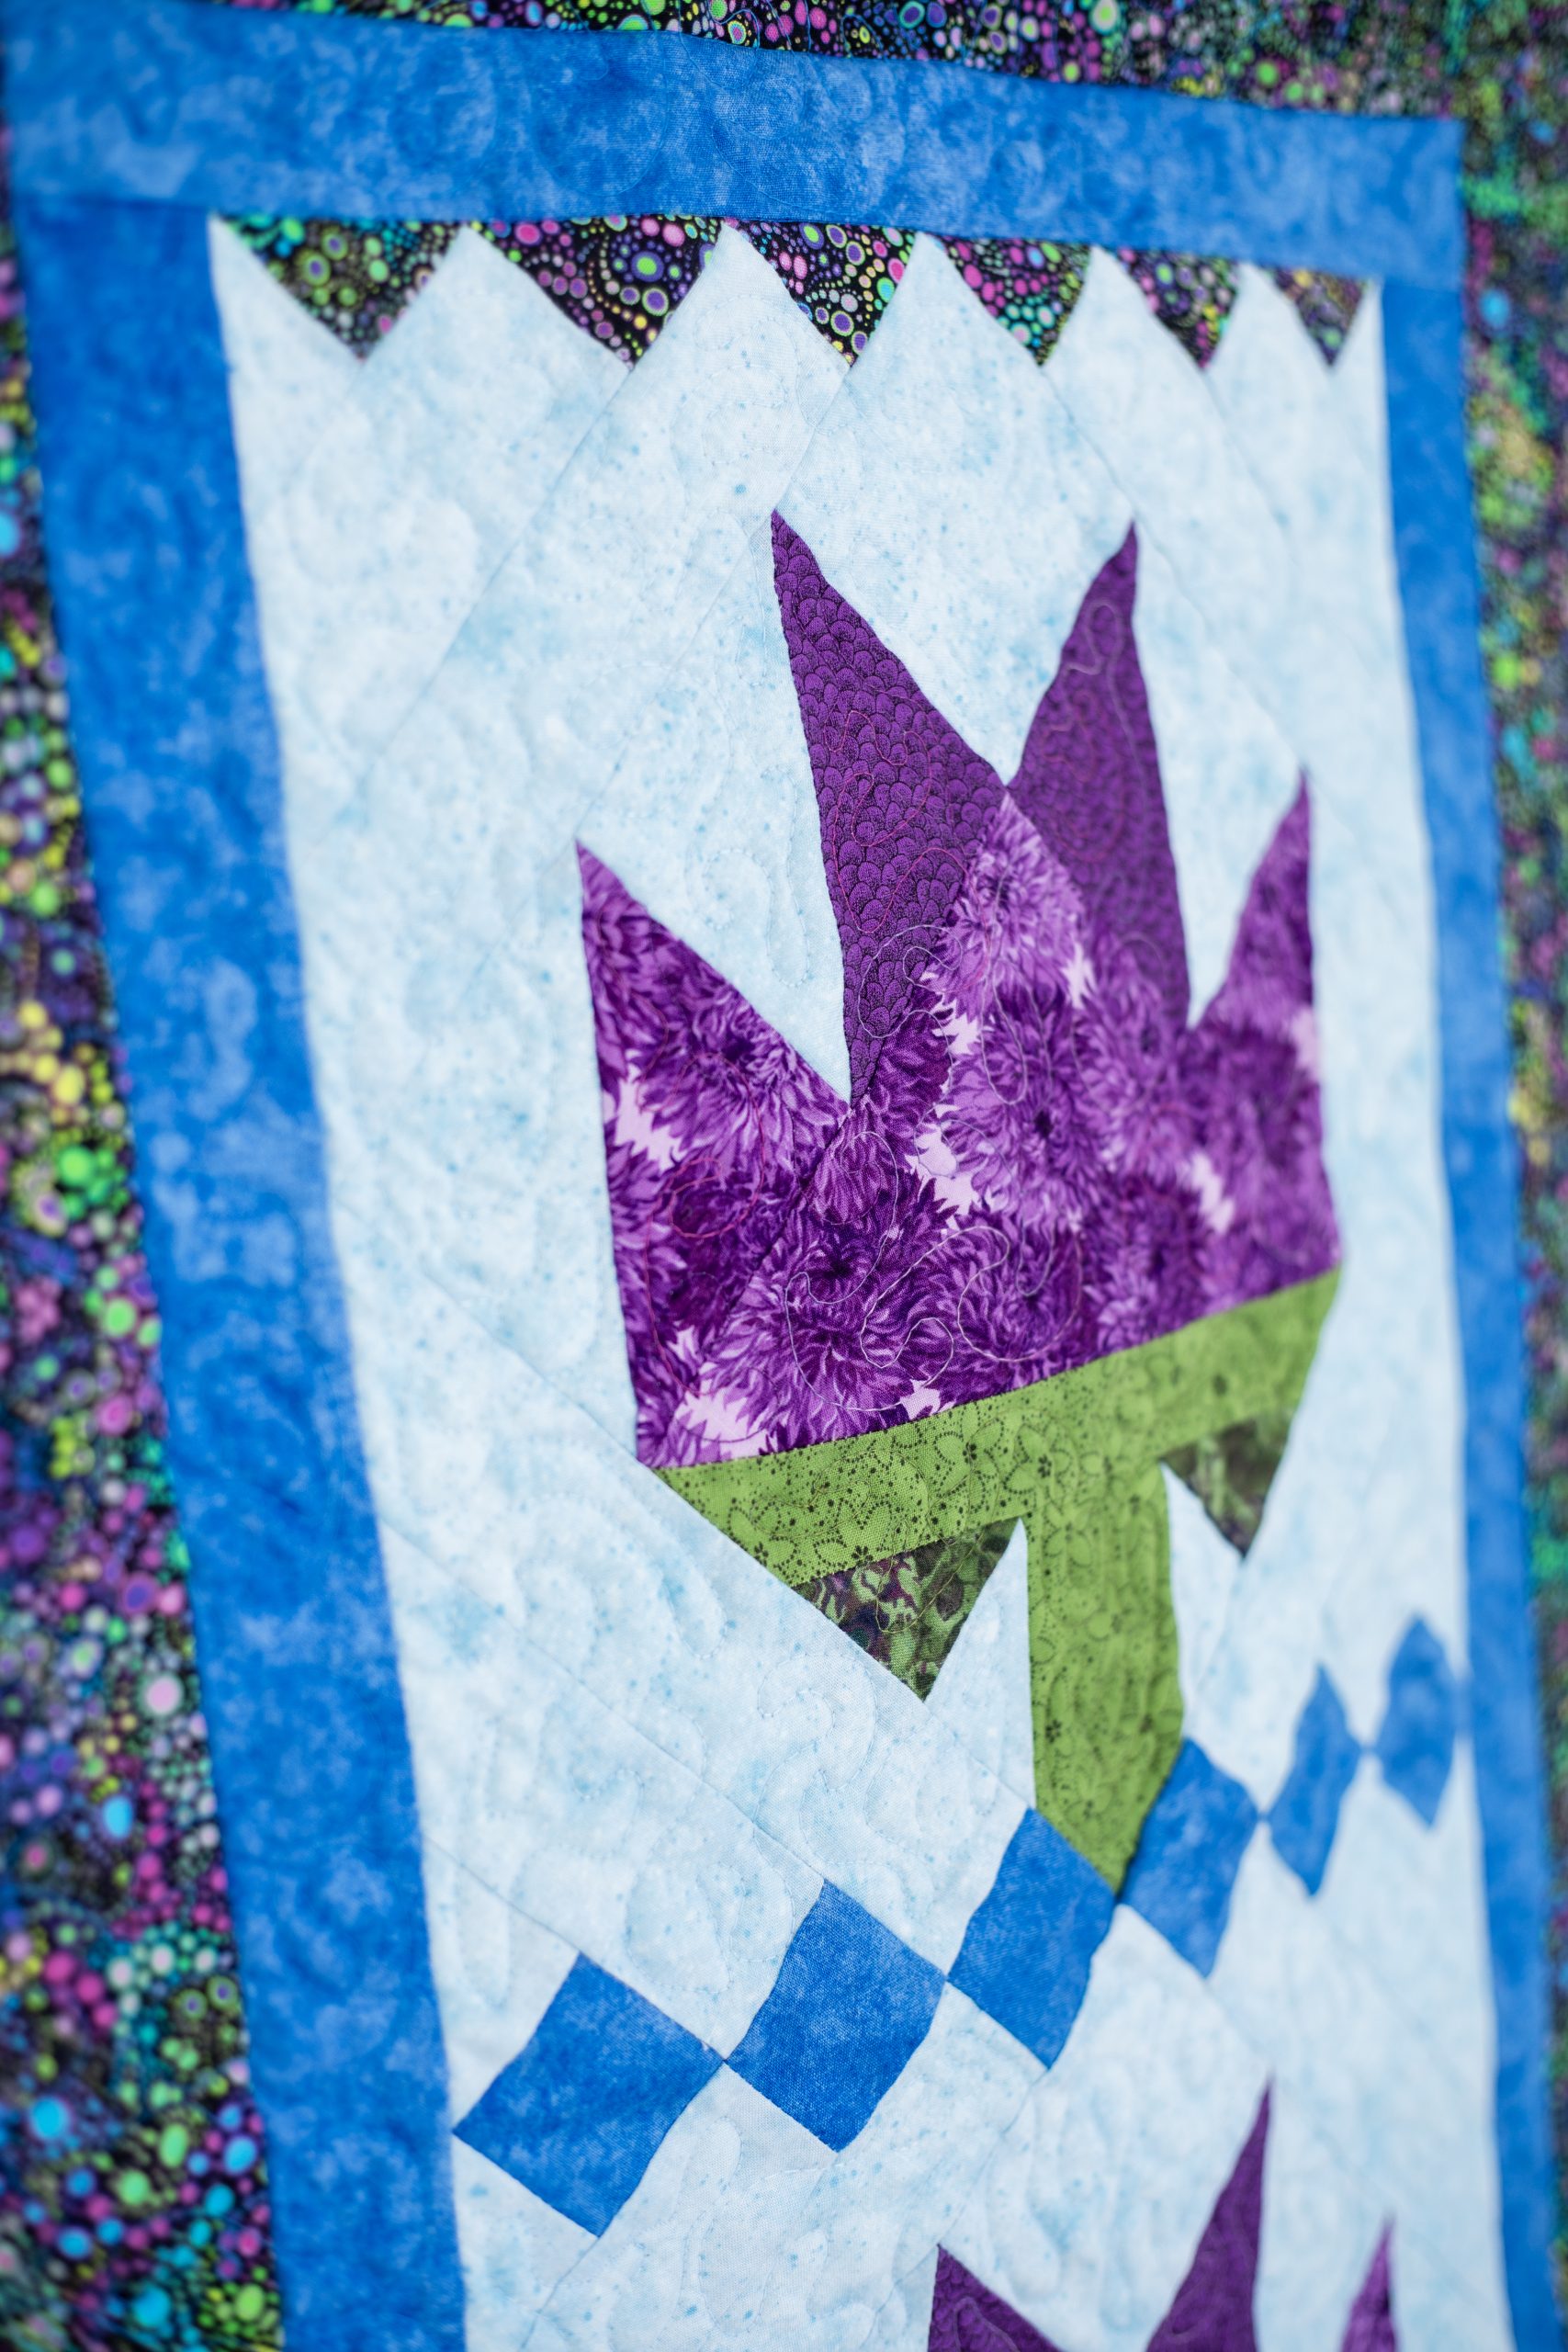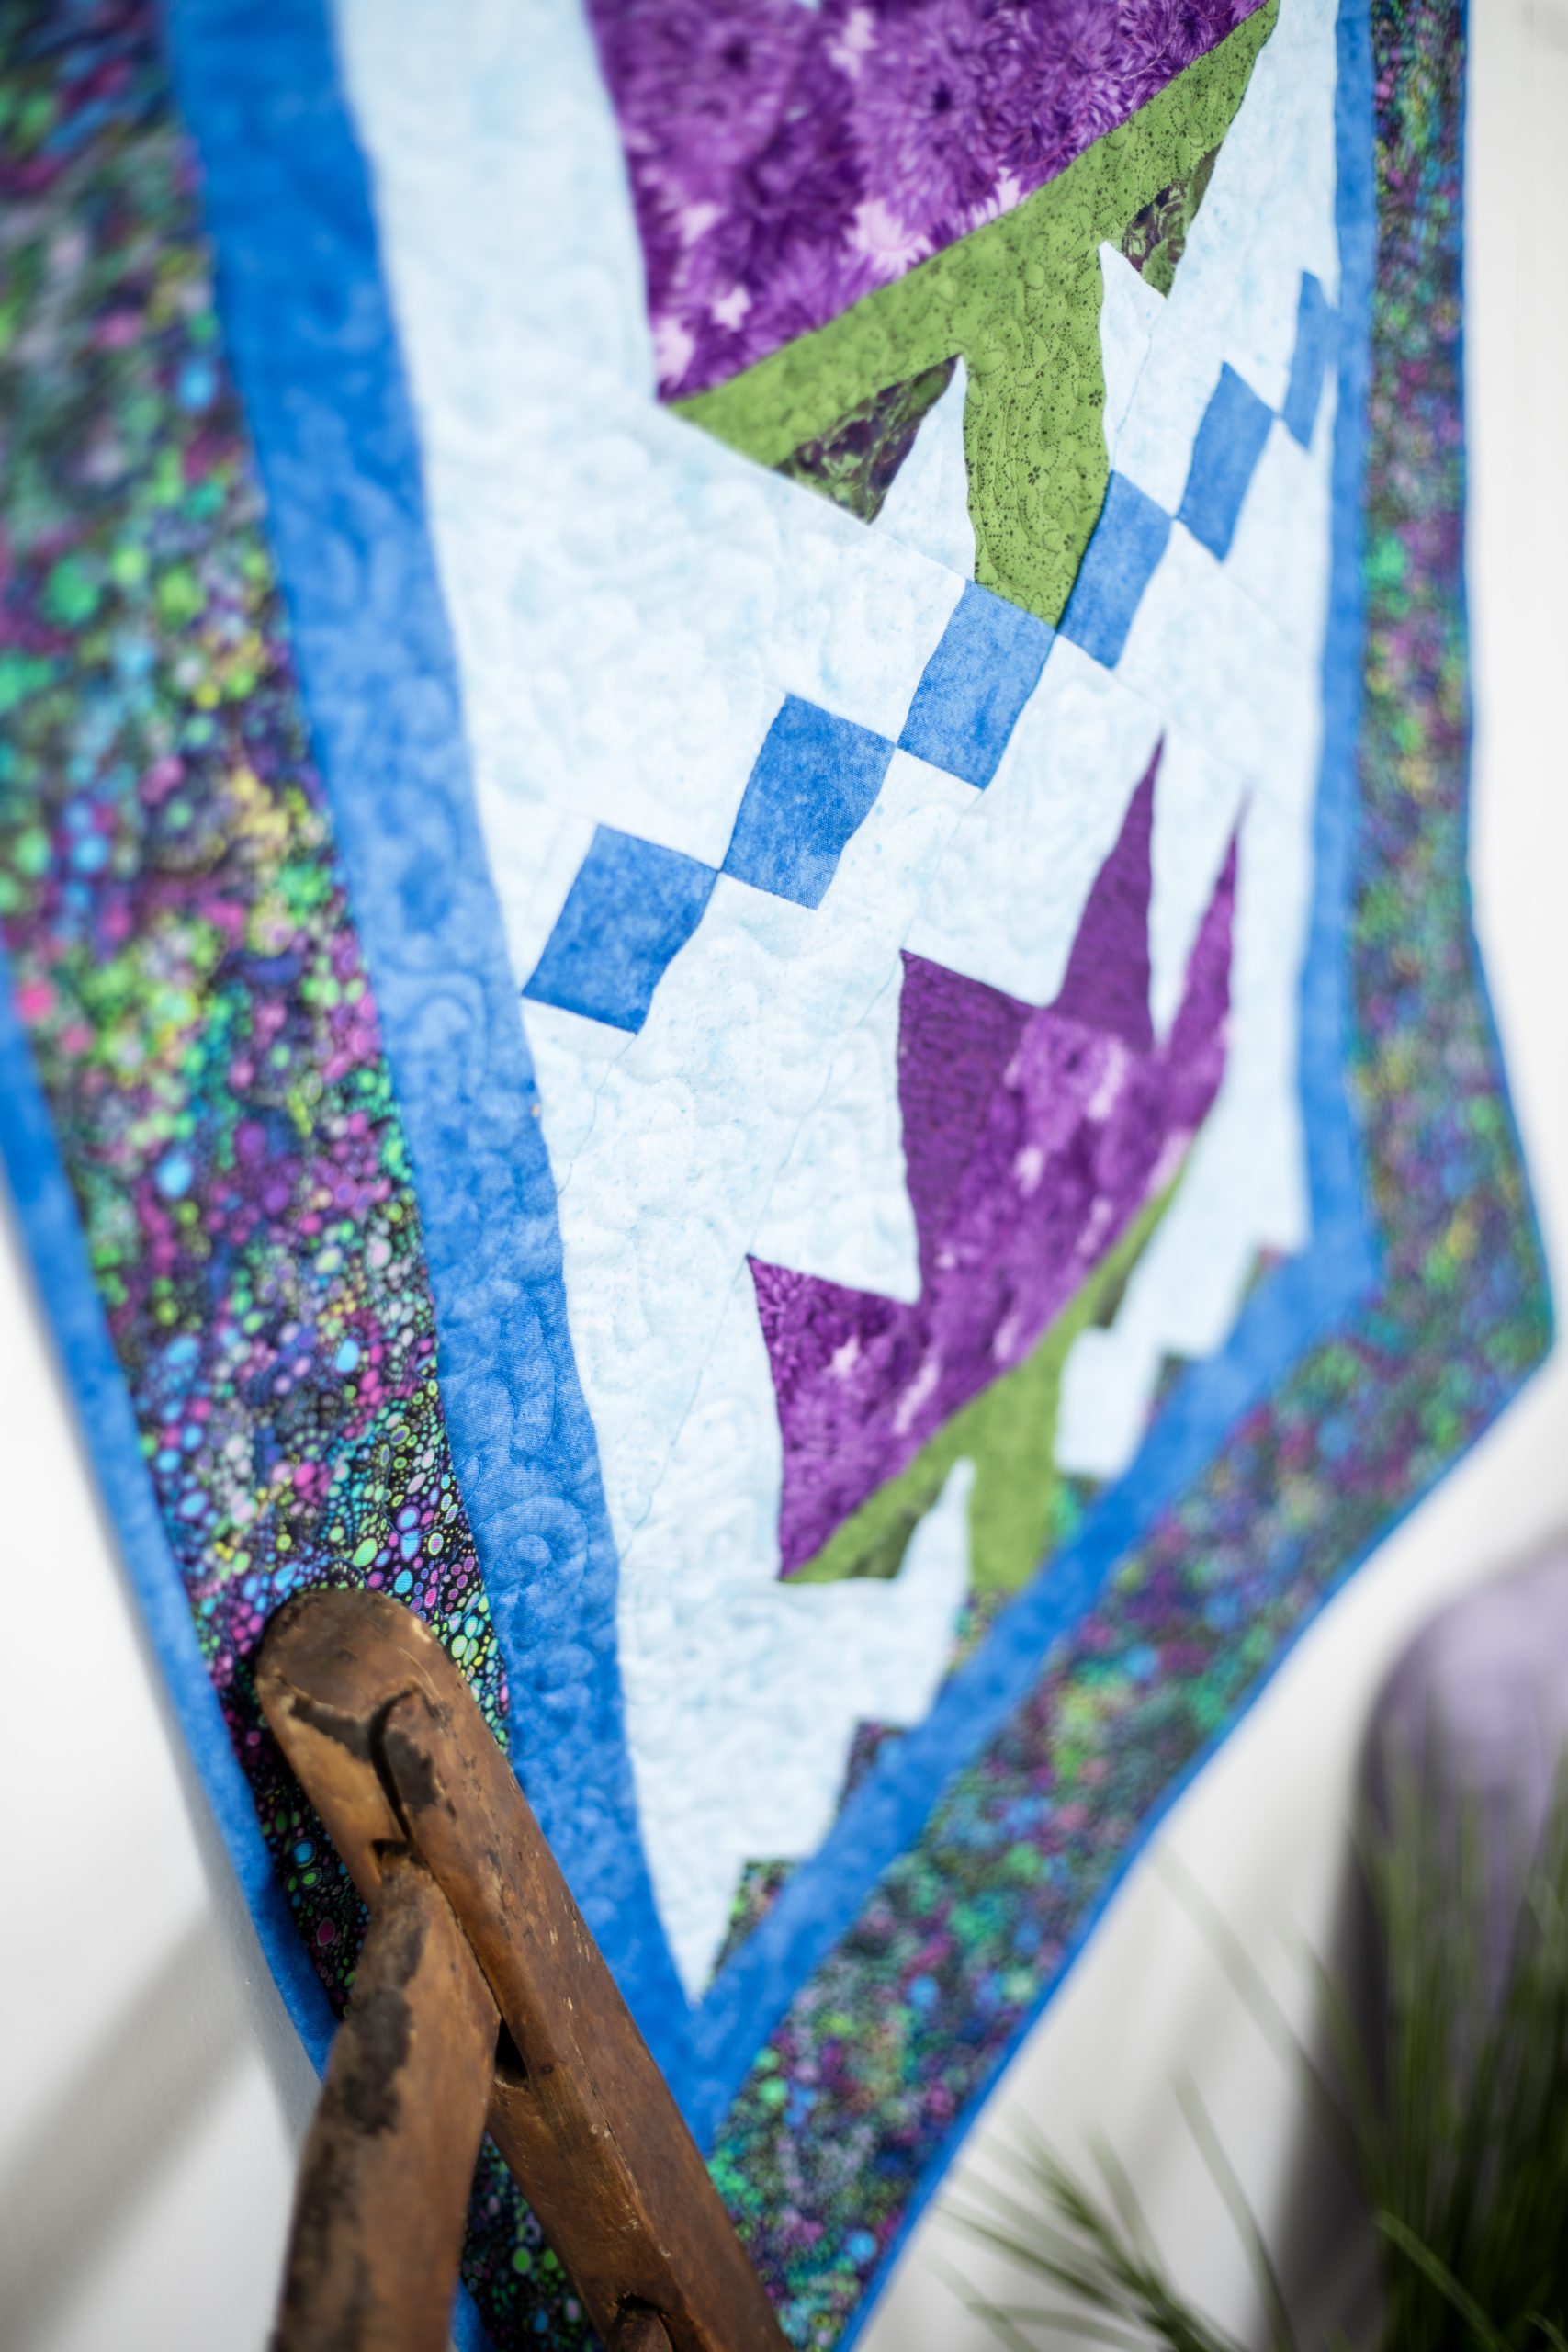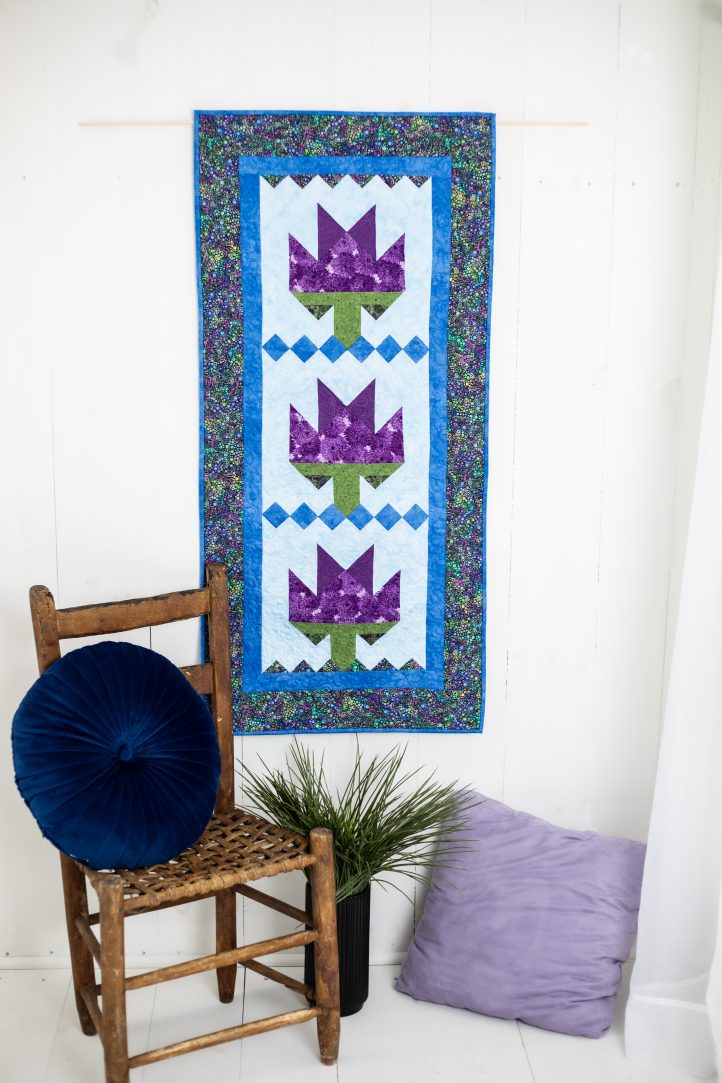
Symbolizing deep love and resurrection, tulips have long remained a sign of the end of winter and the arrival of spring. Welcome cheerful spring blossoms by quilting a colorful wall hanging from Joy Heimark. Featuring three purple tulips, this wall hanging pattern includes a sleeve for hanging, so that you can easily display your wall hanging all season long. This fat quarter friendly pattern is designed for confident beginners, so stretch your beginner quilting skills with this delightful project.
Skill Level: Confident beginner
Finished Size: 22 x 47”
Seam Allowances: 1/4”
Designer Notes:
- Read all instructions before beginning this project.
- Stitch right sides together using a 1/4″ seam allowance unless otherwise specified.
- Materials and cutting lists assume 40″ of usable fabric width.
- Abbreviations used in this pattern:
- WOF – Width of Fabric
- HST – Half Square Triangle
- RST – Right Side Together
Materials:
- Fabric:
- Light Blue: 5/8 yard
- Dark Blue: 1/4 yard
- Border Print: 1/2 yard
- Medium Purple: 1/4 yard
- Purple Print: 1/4 yard or FQ
- Light Green: 1/8 yard or FQ
- Dark Green: 1/8 yard or FQ
- Binding: 3/8 yard
- Hanging Sleeve (Optional): 22” x 5” strip
- Batting
- Backing
Cutting Instructions:
From Light Blue, cut:
- (1) 4” x WOF strip. Sub-cut (6) 4” squares and (3) 3 1/2” squares
- (6) 2” x WOF strips. Sub-cut (12) 2 x 8 1/2” rectangles, (8) 2” x 6 1/2” rectangles, (4) 2 x 5 1/2” rectangles, and (12) 2 x 2 1/2” rectangles
- (1) 2 1/8” x WOF strip. Sub-cut (6) 2 1/8” squares
From Dark Blue, cut: (4) 2” x WOF strips. Sub-cut (12) 2” squares. Set rest aside for inner border.
From Border Print, cut: (4) 3 1/2” x WOF strips. From one, sub-cut (12) 2” squares. Set remainder aside for outer border.
From Medium Purple, cut: (1) 4” x WOF strip. Sub-cut (3) 4” squares.
From Purple Print, cut: (1) 7” x WOF strip. Sub-cut (2) 7” squares and (3) 4” squares.
From Light Green, cut: (1) 3 1/2” x WOF strip. Sub-cut (3) 3 1/2” squares and (3) 9 1/2” x 1 1/2” rectangles.
From Dark Green, cut: (1) 2 3/8” x WOF strip. Sub-cut (3) 2 3/8” squares.
Piecing Instructions:
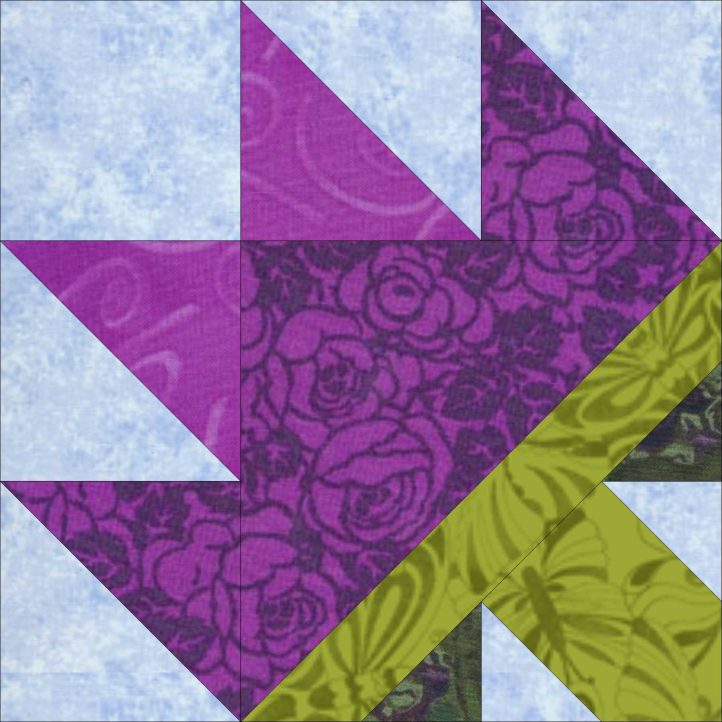
TULIP BLOCK INSTRUCTIONS (SEE TULIP BLOCK DIAGRAM) – MAKE 3:
- To make a HST, draw a diagonal line on the wrong side of the light blue 4” squares.
- Place a light blue square and a purple print 4” square RST. Sew a scant 1/4” away on both sides of the drawn line. Cut apart on the drawn line. Press toward darker fabric. Trim each of these HST’s to 3 1/2”. Make 6 total HST’s. (See photo below)
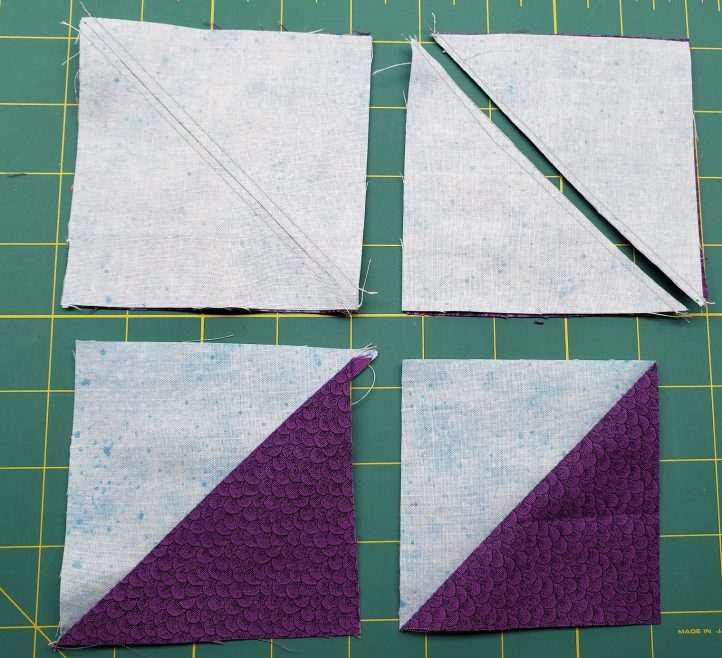
- Repeat Steps 1 and 2 with light blue and medium purple 4” squares. Make 6 total HST’s.
- Cut the purple print 7” squares in half diagonally to make two triangles each. You will only need 3 total.
- Lay out a purple print triangle, a light blue 3 1/2” square and the HST’s from Steps 2 and 3 to match the Tulip Block as shown in the photo below.
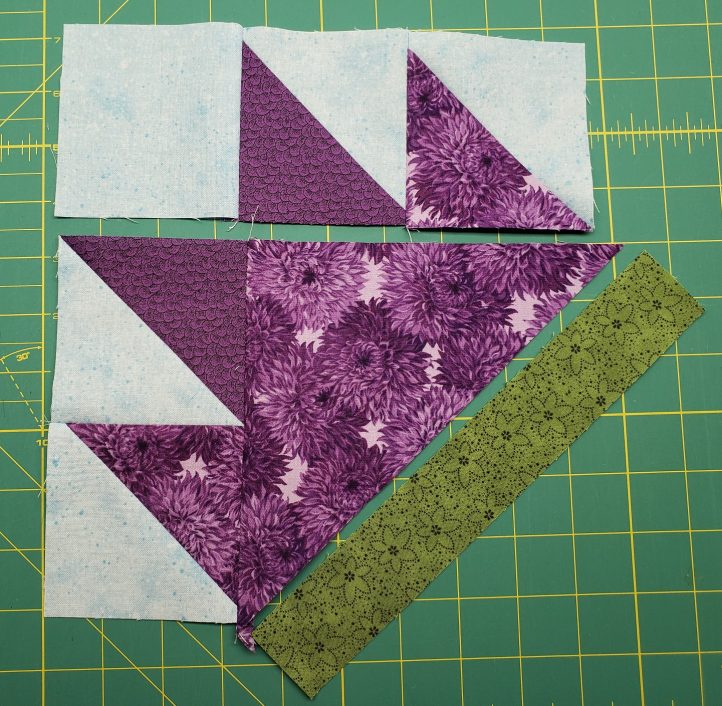
- Sew the two HST’s from top row together. Press toward darker fabric.
- Sew the light blue 3 1/2” square to the left side of this pair.
- Sew the two HST’s on the left side of the block together. (Note: These two HST’s are not in the same orientation as the pair from Step 6.) Press toward darker fabric.
- Sew the purple print triangle to the unit from Step 8.
- Add the top row from Step 7 to this unit. Press seam down toward large triangle.
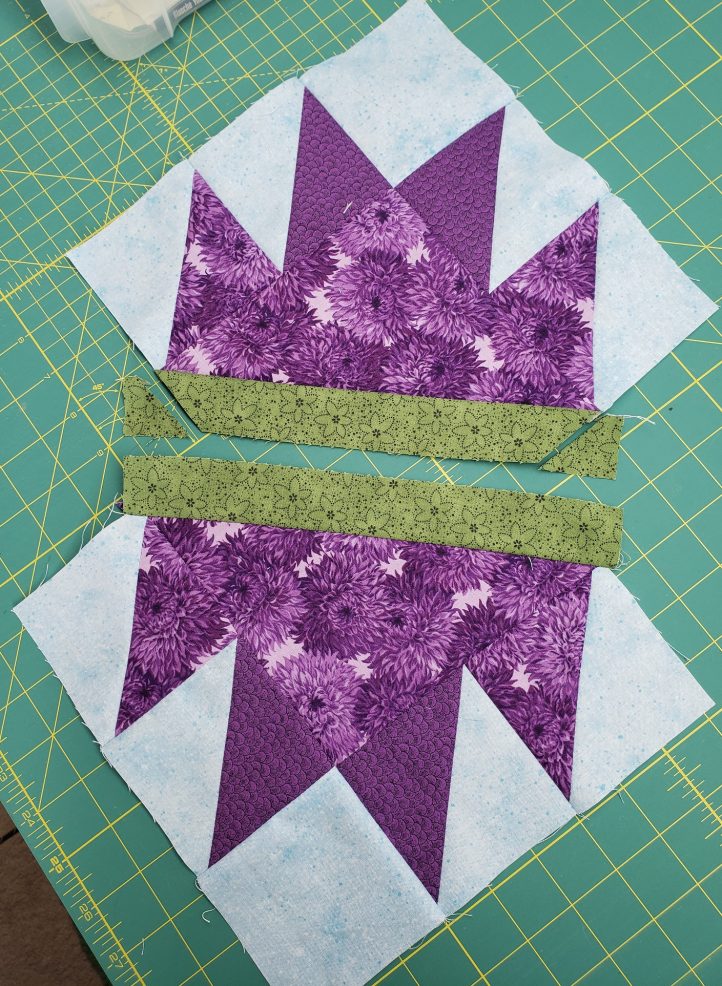
- Sew a light green 9 1/2” x 1 1/2” rectangle to the bottom of your block unit as shown in photo 2 above. Press toward green.
- Trim corners of the green strip off to line up with the light blue edges. (See photo below)
- Draw a diagonal line on the wrong side of the light blue 2 1/8” squares.
- Lay two of these squares right side down on opposite corners of a light green 3 1/2” square. (See photo below)
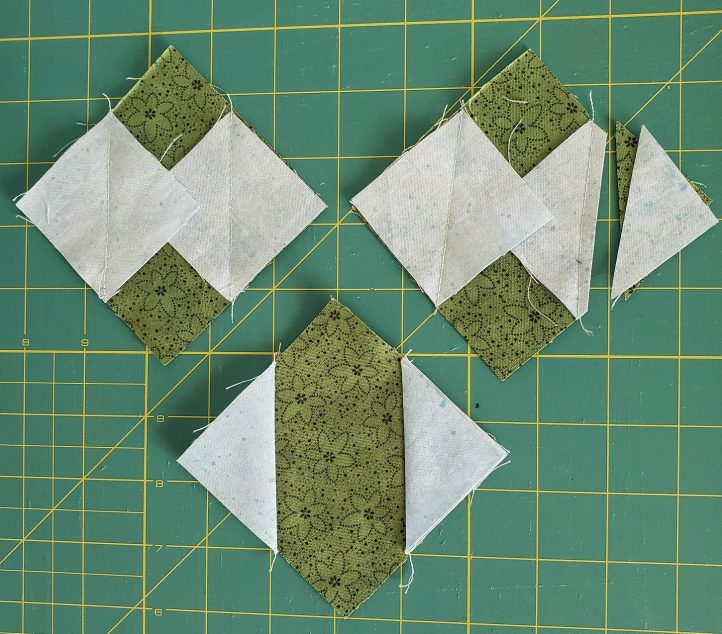
- Stitch on the drawn lines. Trim away both layers of excess corner fabrics 1/4” away from the sewn line. Using the stitch and flip method, fold the light blue corner over and press seam toward green fabric. Trim to 3 1/2”.
- Cut each of the dark green 2 3/8” squares in half diagonally.
- Sew the side of the a dark green triangle to the light blue edge of the square made in Step 15, so that the dark green HSTs are pointing upward. (See photo 5 below) Press toward dark green triangles.
- Trim this block along the dark green edges, cutting off excess light green. (See photo 5 below)
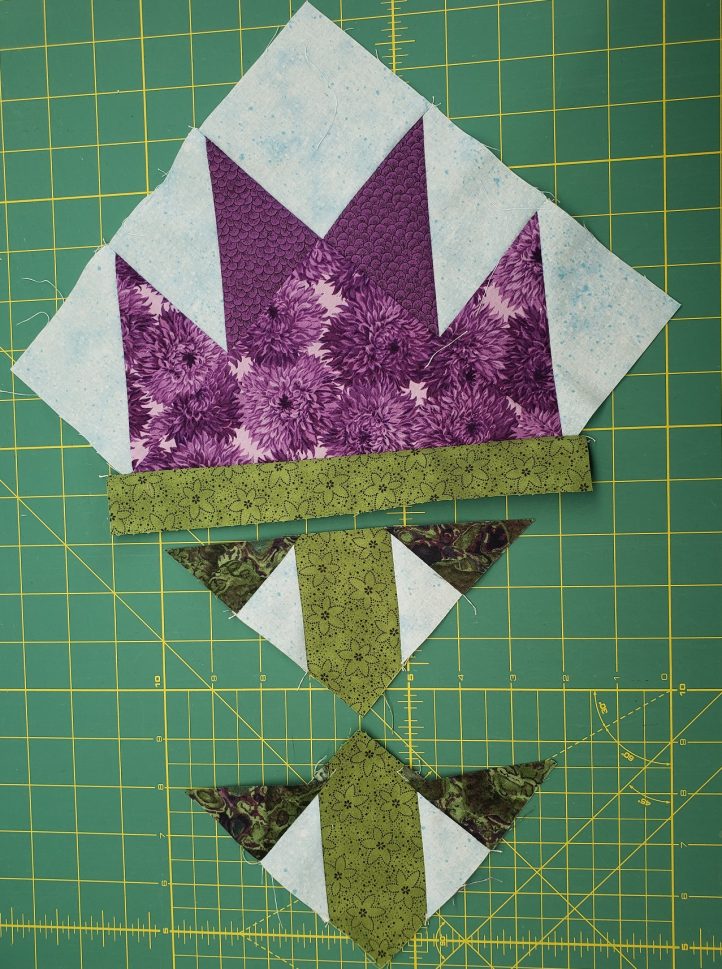
- To complete your tulip block, sew this stem unit to the rest of the flower from Step 12. Press seam toward narrow light green strip. Trim block to 9 1/2” if necessary.
HALF LOG CABIN BLOCK INSTRUCTIONS (MAKE 4):
- Sew a dark blue square to one end of a light blue 2” x 2 1/2” rectangle. Press to light blue.
- Sew another light blue 2” x 2 1/2” rectangle to the right side of the dark blue square. (See photo below) Press to light blue.
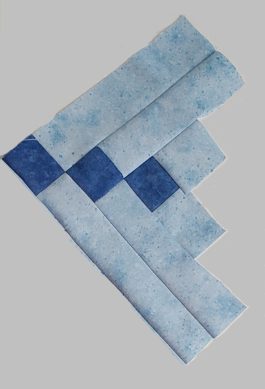
- Sew a light blue 2” x 6 1/2” rectangle to the left side of the block. Press to light blue.
- Sew a dark blue square to one end of a 2” X 6 1/2” rectangle. Press to light blue. Sew this unit to the top of your block unit. Press toward center of block.
- Sew a 2” x 8” rectangle to the left side of the block.
- Sew a dark blue square to one end of a 2” x 8” rectangle. Press to dark blue square. Sew this unit to the top of your block. Press toward center of block.
QUARTER LOG CABIN BLOCK INSTRUCTIONS (MAKE 4):
- Sew a border print 2” square to one end of each of the remaining 2 1/2”, 5 1/2” and 8” light blue rectangles. Press each toward border fabric.
- Sew these into sets of three, making sure you have half in each direction. (See photo below). Each 2” square of border print fabric should extend 1/4” past the seam line of the adjoining strip.
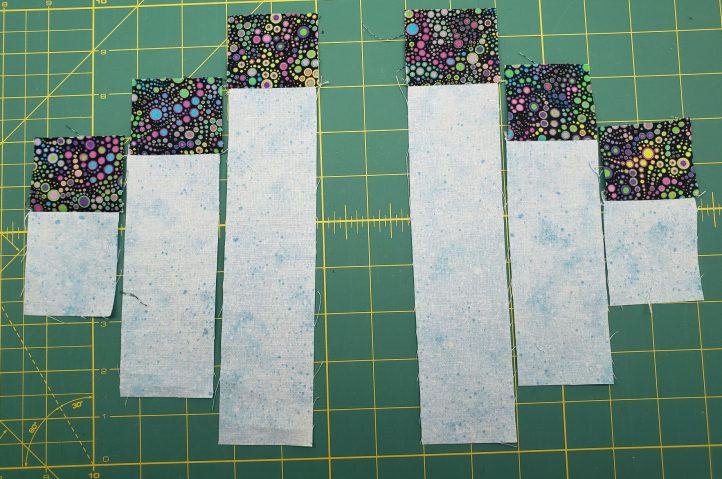
- Press all seams toward the shorter strips.
COMPLETING THE QUILT:
- On a design wall or other flat surface, lay all the sections out to match the Quilt Diagram. (See photo below)
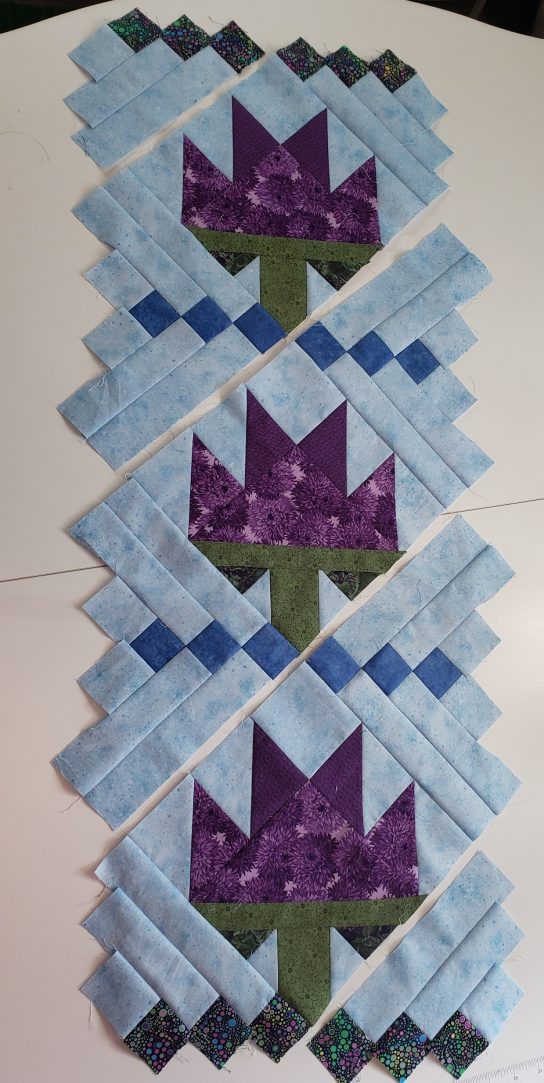
- Sew sections together in diagonal rows. Press seams away from flower blocks.
- Sew rows together to complete the quilt. Press row seams down.
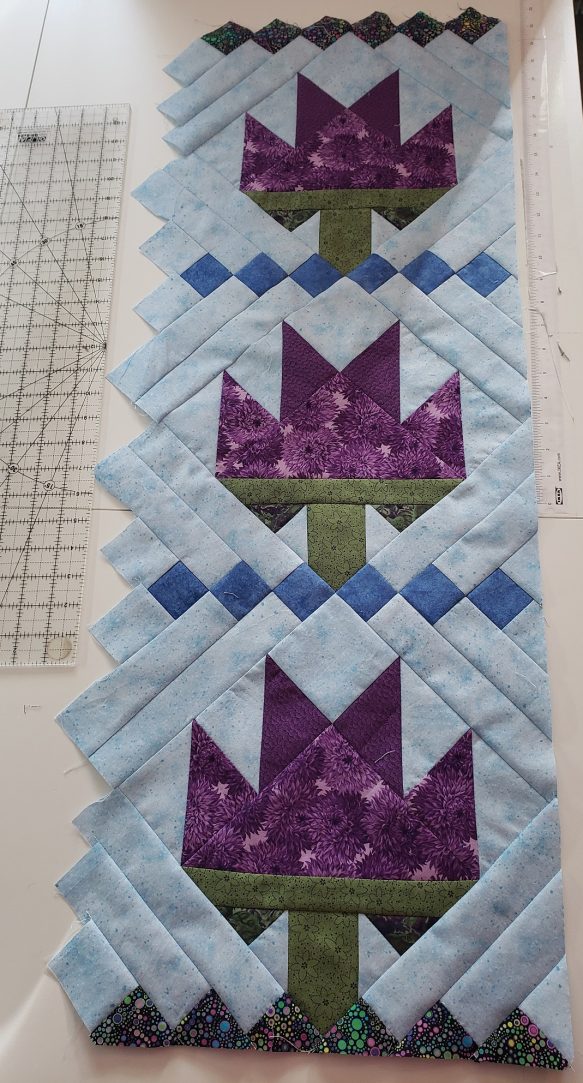
- Using a straight edge, trim all four sides of the quilt to square it up, leaving a 1/4” seam allowance outside of small colored square intersections. (See photo below)
BORDERS:
- Measure your quilt’s length. Cut two inner border strips to this length and sew to the sides of your quilt. Press out toward border.
- Measure your quilt’s height. Cut two inner border strips to this length and sew to the top and bottom of your quilt. Press out toward border.
- Repeat Steps 1 and 2 with outer border strips.
- Layer, quilt and bind your quilt.
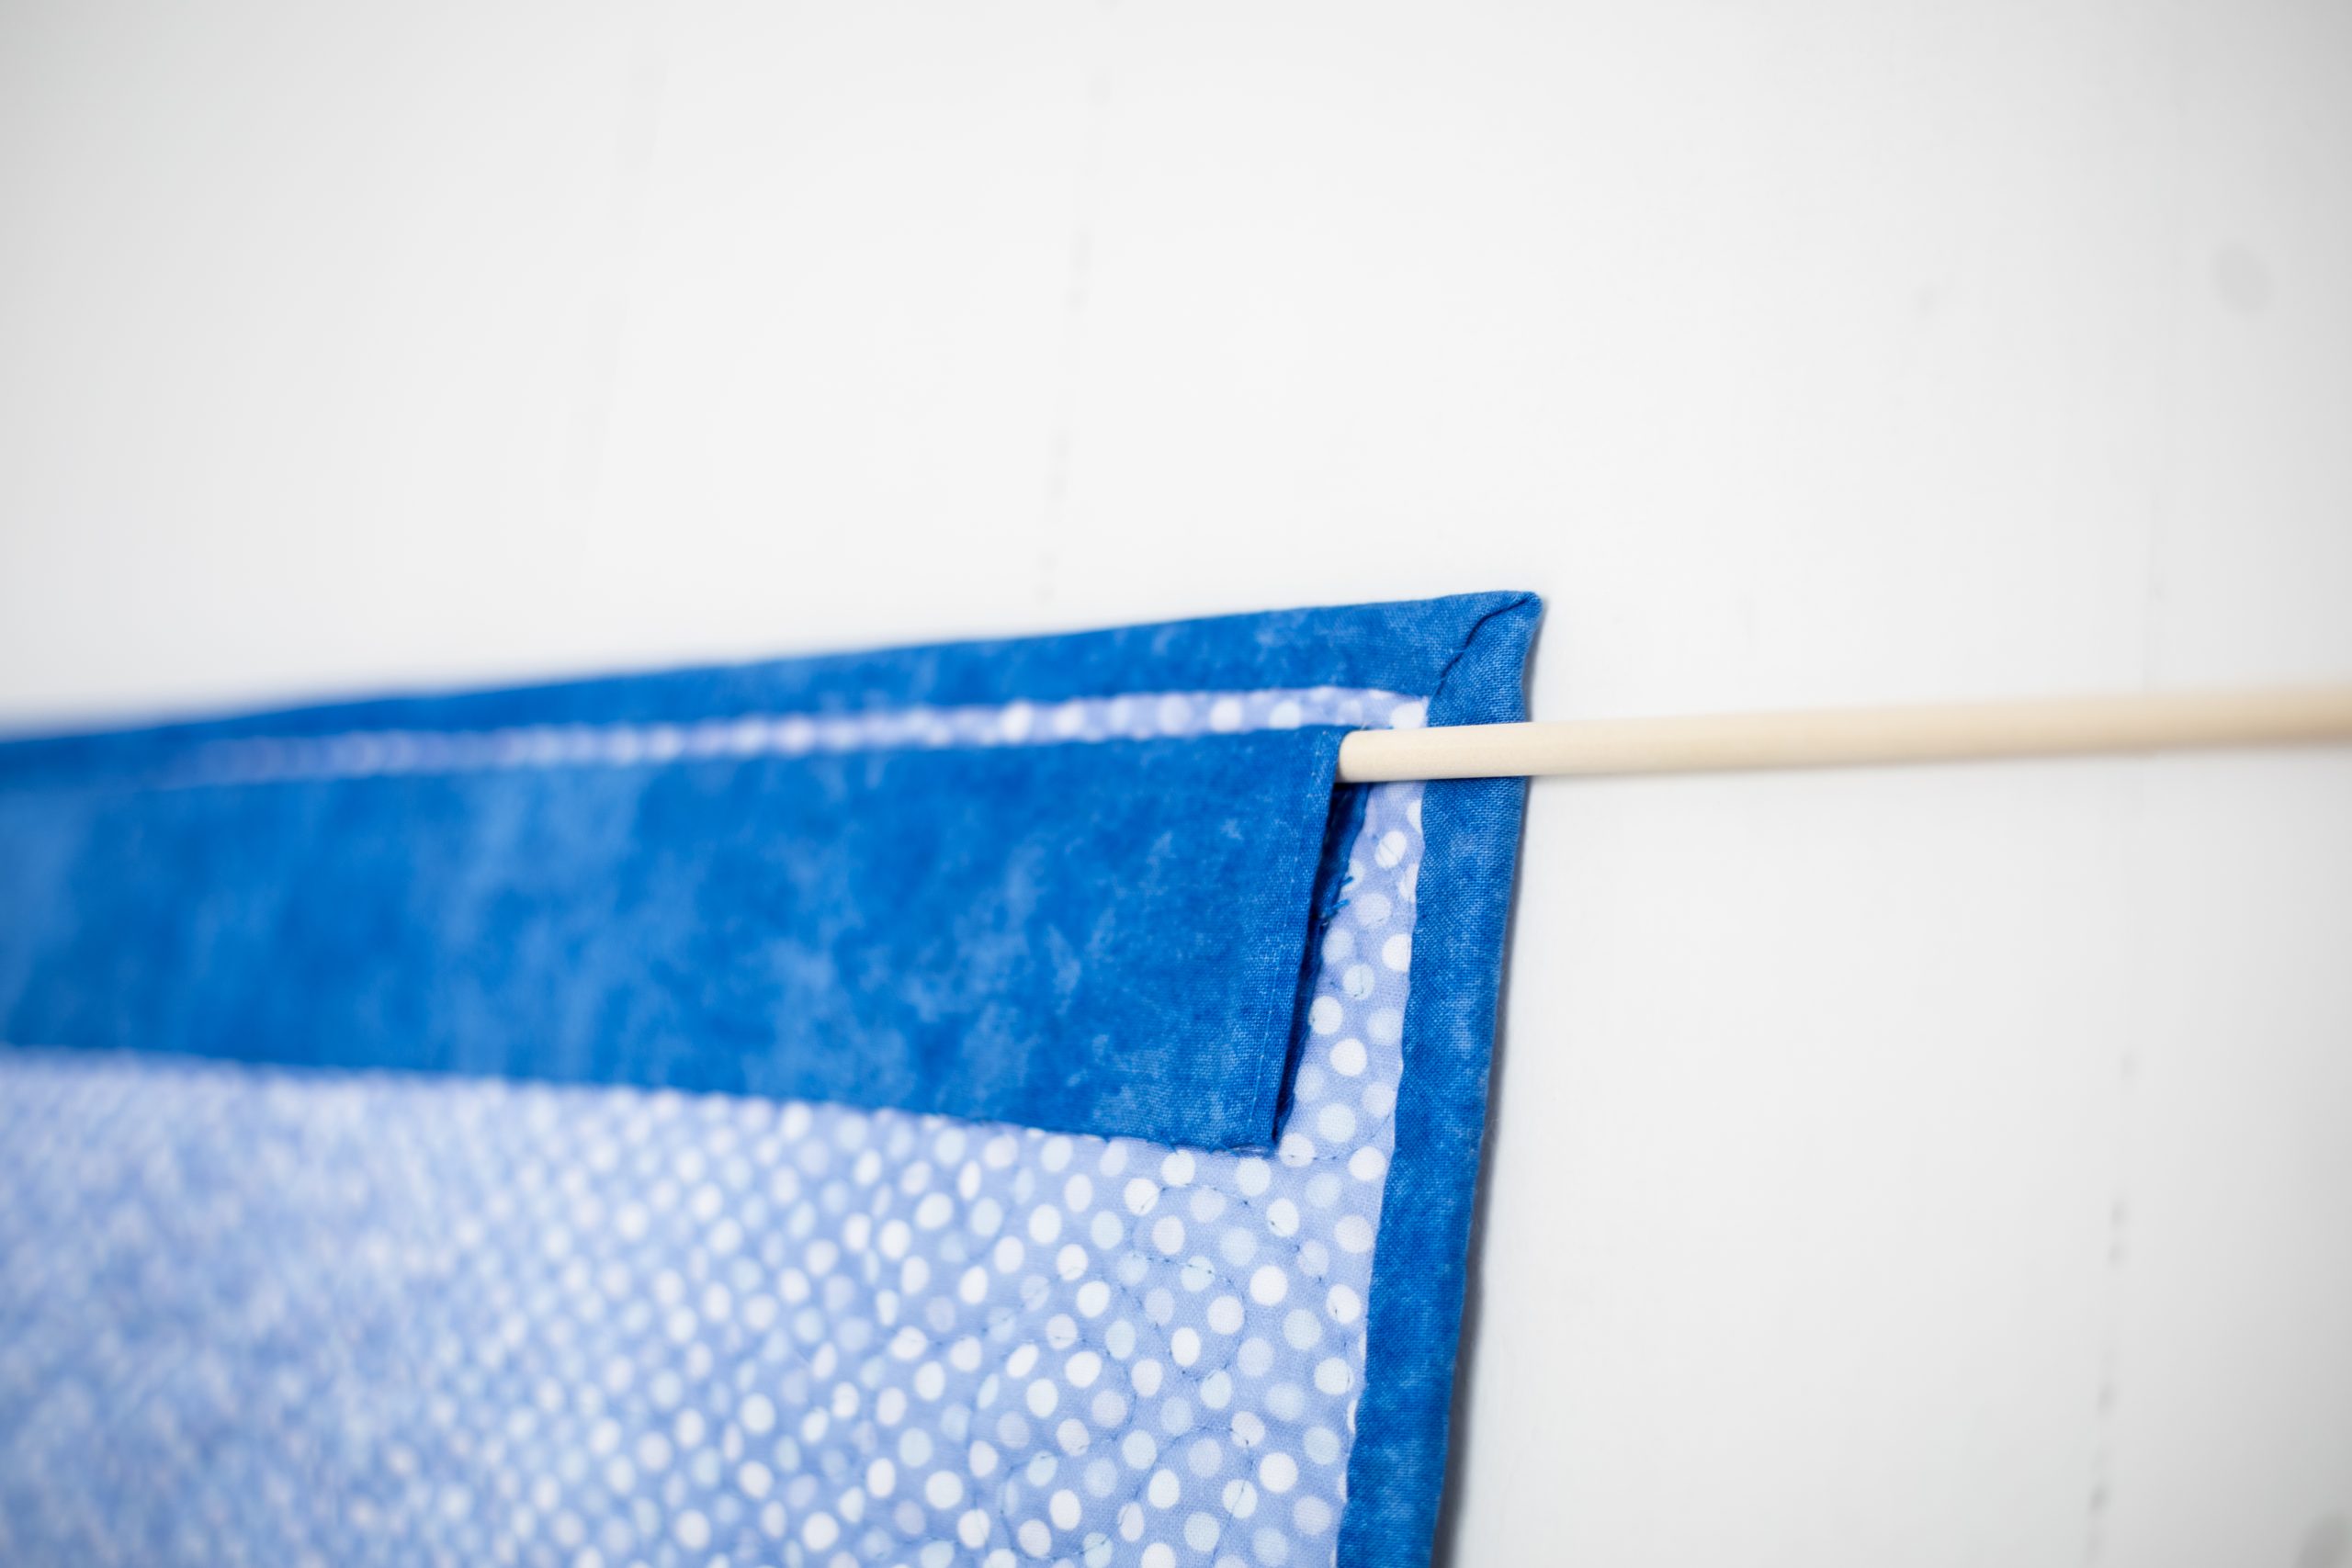
OPTIONAL HANGING SLEEVE:
- Cut a 5” x 22” strip from your binding or backing fabric.
- Fold both of the short ends under toward the wrong side of the fabric 1/4″ and press. Fold under again so that you have no raw edges on the short ends showing. Stitch down using matching thread.
- Fold the strip in half lengthwise with wrong sides together (right sides out.) Sew along the long raw edges, using a 1/4″ seam allowance.
- Press the seam OPEN, centering the seam down the middle of the strip.
- Pin the tube to the back of the quilt, about 1/2″ from the top of the quilt, so that the seam faces the quilt backing. Hand stitch the top edge of the sleeve to the quilt, using a whipstitch or blind stitch. Hand stitch the bottom edge and the short side edges to the back of the quilt.

